| |
| |||||||
 |
| | LinkBack | Thread Tools | Display Modes |
 05-18-2007, 12:10 AM
| #41 | |
| I wanna be Dave Join Date: Sep 2005 Location: USA
Posts: 11,196
| Quote:
| |

|  |
| Sponsored Links | |
| | |
|
05-18-2007, 05:19 AM
| #42 |
| Quarry Creeper Join Date: Jan 2006 Location: Atlanta GA
Posts: 387
|
thats the coolest chassis ive seen on here, nice work.
|
|
| |
|
05-18-2007, 10:35 AM
| #43 |
| I wanna be Dave  Join Date: Feb 2006 Location: Campbell, CA 4 hrs 2Rubicon !
Posts: 2,044
|
That Rig is SIK ! Great job on the frame design  Where's the batteries? The Only Thing Missing FLEX PICTURES ? |
|
| |
|
05-18-2007, 05:04 PM
| #44 | |
| Rock Crawler Join Date: Jul 2006 Location: Olympia
Posts: 836
| Quote:
Reason for links on lower side. More stable and better rigidity than both sets of links on top side of axle. Portals give me the room to set the 4link and rear up proper rather than specifically for clearance. Reversed axle. I'm still heavily contemplating this. If I can run a good BTA set up I will reverse it. IE: steering and motor on backside of rig Realistically I want a smooth transition from chassis to bottom of axle housing. So this should be fine with motor clocked and a smooth skid. | |
|
| |
|
05-18-2007, 05:08 PM
| #45 | |
| Rock Crawler Join Date: Jul 2006 Location: Olympia
Posts: 836
| Quote:
FLEX is overrated. Batteries will be in the belly of chassis. Maybe on axle's These things will be better determined once I get that far. I'm pulling it back apart to clock rear axle and wait for another stainless brace for front servo(mount it same as rear) Then I'll decide were all the electronics and batteries will end up. Something will be in the belly and the rest as low as possible on the axles. even though this build seems a little bling it's all about comp ability. | |
|
| |
|
05-20-2007, 02:05 PM
| #46 |
| Rock Crawler Join Date: Jul 2006 Location: Olympia
Posts: 836
|
Ok,Ok, here's a flex pic and also a couple shots of narrowing the rims. I'm still waiting on parts. Yes there total poser shots but it still has some work to run. 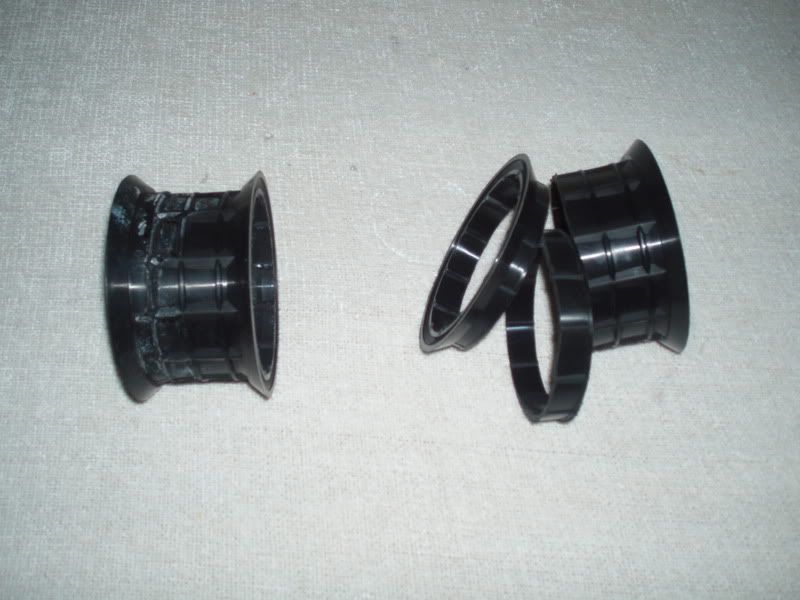 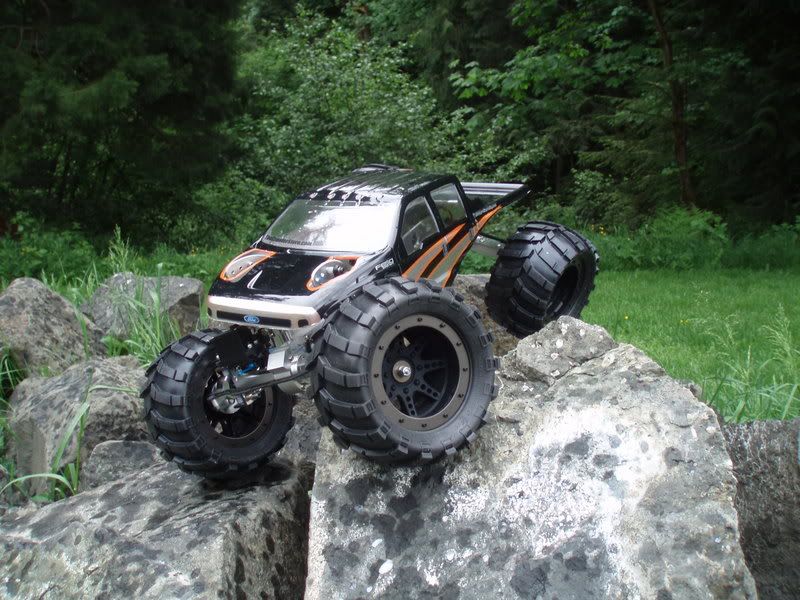 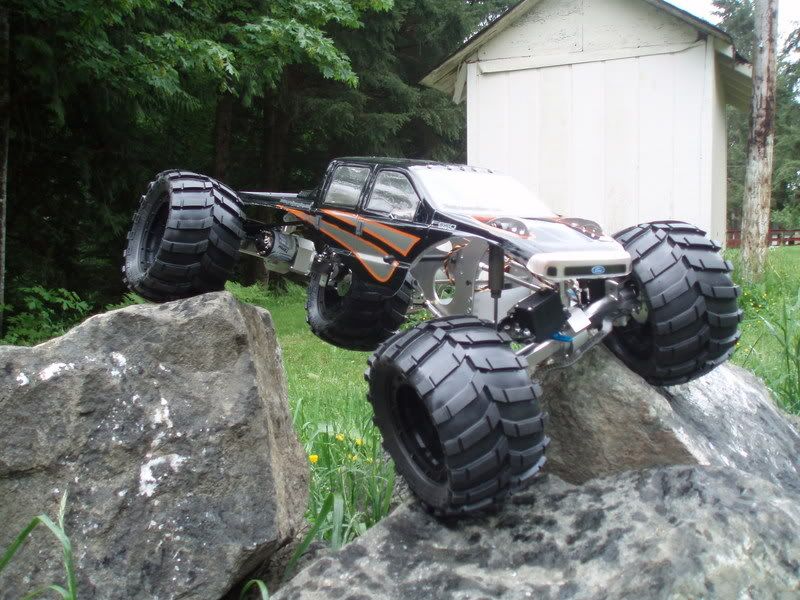 |
|
| |
|
05-20-2007, 03:14 PM
| #47 |
| Quarry Creeper Join Date: Jun 2006 Location: Aurora, CO
Posts: 442
|
That looks absolutely mean! I vote that second shot should be your avatar.
|
|
| |
|
05-20-2007, 06:58 PM
| #48 | |
| Rock Crawler  Join Date: Jan 2006 Location: PNW!!!
Posts: 747
| Quote:
Jason. Great job incorporating the lines of the chassis with the paint and cutout of the body. The rig is looking good. Can't wait to compete against it next month. | |
|
| |
|
05-21-2007, 08:36 PM
| #49 |
| Newbie Join Date: Mar 2007 Location: Blue Ridge, GA
Posts: 46
|
This thing is sick! Want to sale it? |
|
| |
|
05-21-2007, 08:50 PM
| #50 |
| Rock Crawler Join Date: Jan 2005 Location: Tumwater
Posts: 910
|
Jason if you clock the front gear box can you mount the TTR BTA under the steering arms to clear the bottom of the case? Chad- |
|
| |
|
05-21-2007, 09:37 PM
| #51 | |
| Rock Crawler Join Date: Jul 2006 Location: Olympia
Posts: 836
| Quote:
It would definitailly work better than what we talked about when you were over today though. | |
|
| |
|
05-21-2007, 10:32 PM
| #52 |
| Pebble Pounder Join Date: Sep 2006 Location: Olympia WA
Posts: 179
|
the more i look at it the more I want one....
|
|
| |
|
05-22-2007, 08:36 AM
| #53 |
| Rock Crawler Join Date: Jul 2006 Location: Olympia
Posts: 836
|
Clocked the rear axle last night. Had to move the servo to the other side and do some more mods to make it fit LOW on axle. The worst part was getting the pins out of the axle. It's one peice so they have to be removed to get the case apart. I still have to get them pressed all the way back in. Once the case is apart it's pretty easy, I just bolted the 2 sides together so the holes would match and started drilling. I also had to notch the center part of the case to clear the bolts the bolts that hold the tubes on. This was specifically cause I went 45 instead of 90 or 180. You can see the black marked area in case before i clearance it. Marked for new holes to be drilled 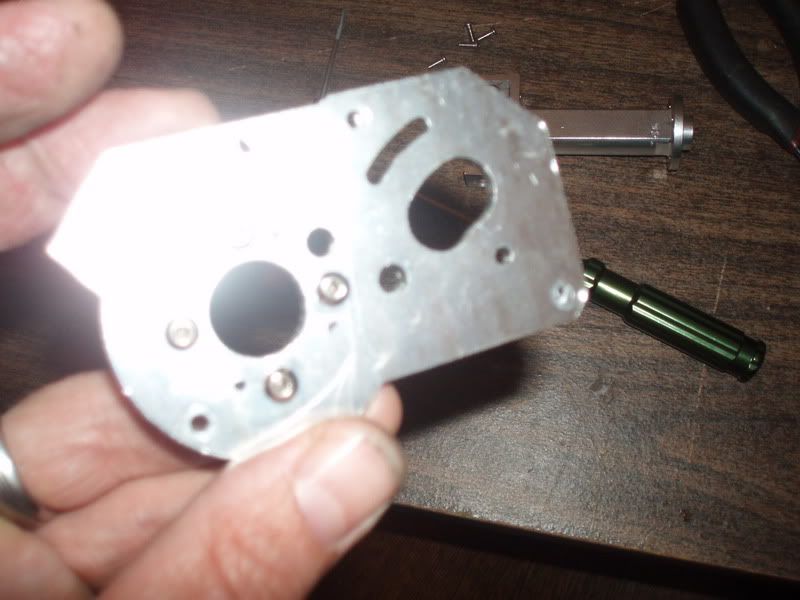 Bolt plates together to make sure tubes match. 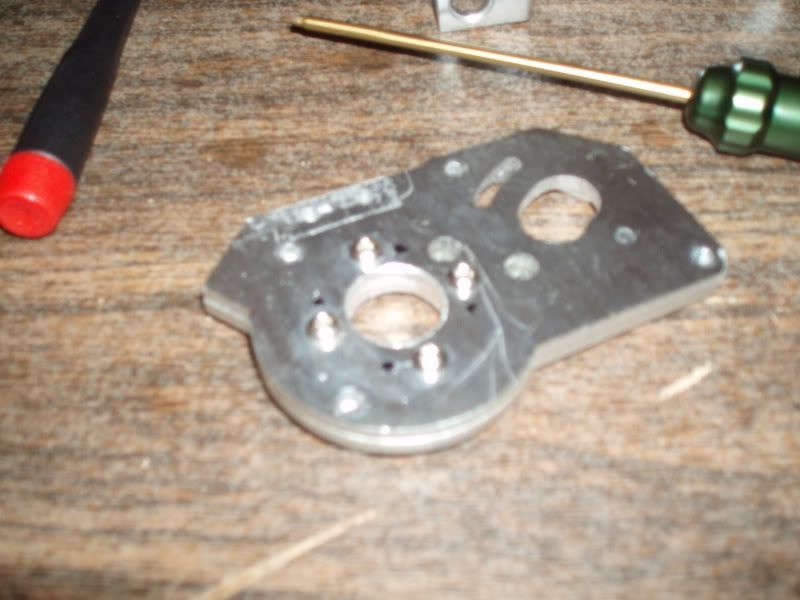 Black markes need to be shaved for bolt clearance 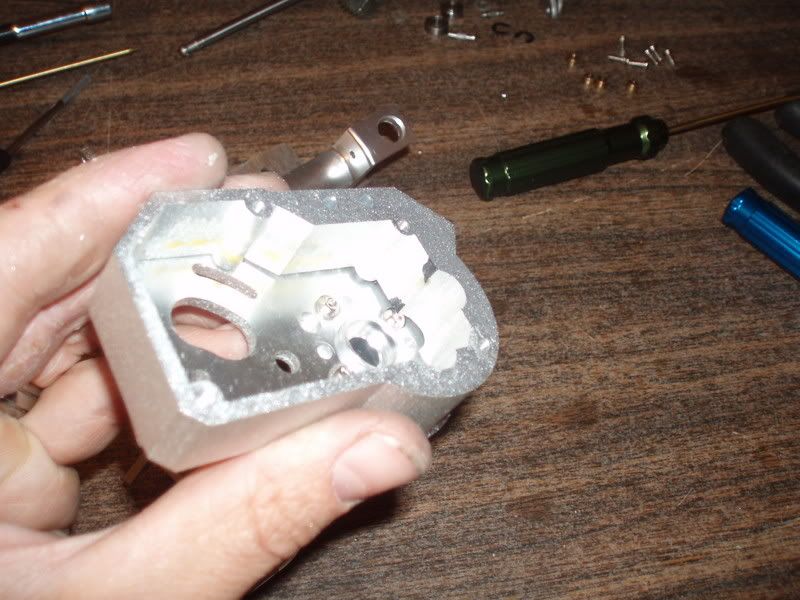 After clearance, Sorry ****ty pics. 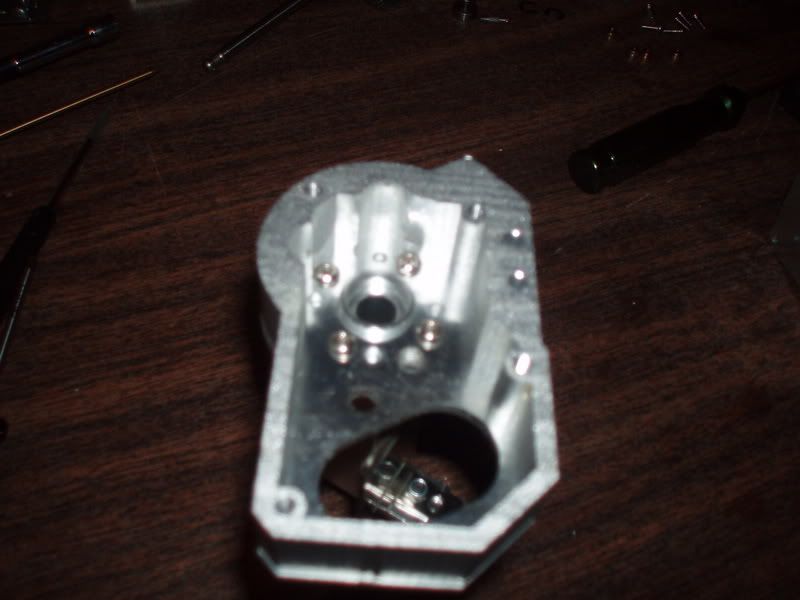 Make sure you get the gears back together right. 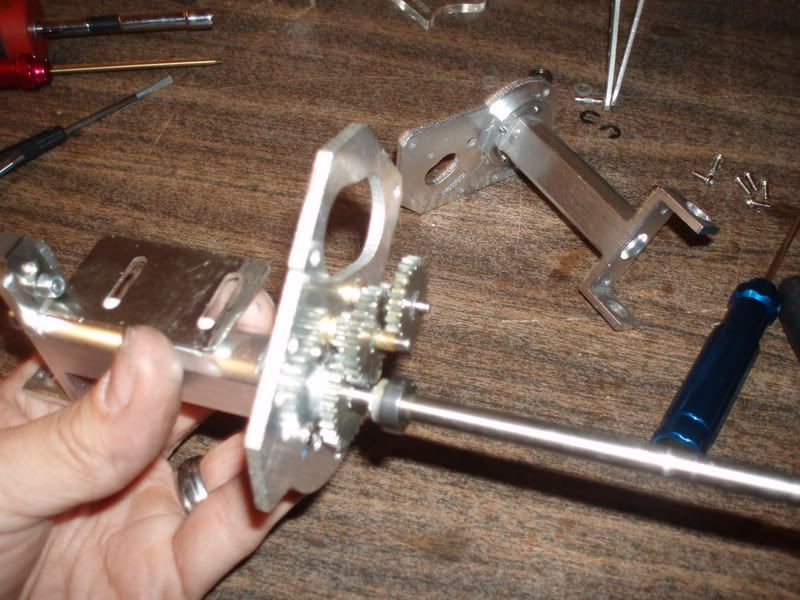 Clocked 45degrees and back together and waiting for finish work and reinstall. 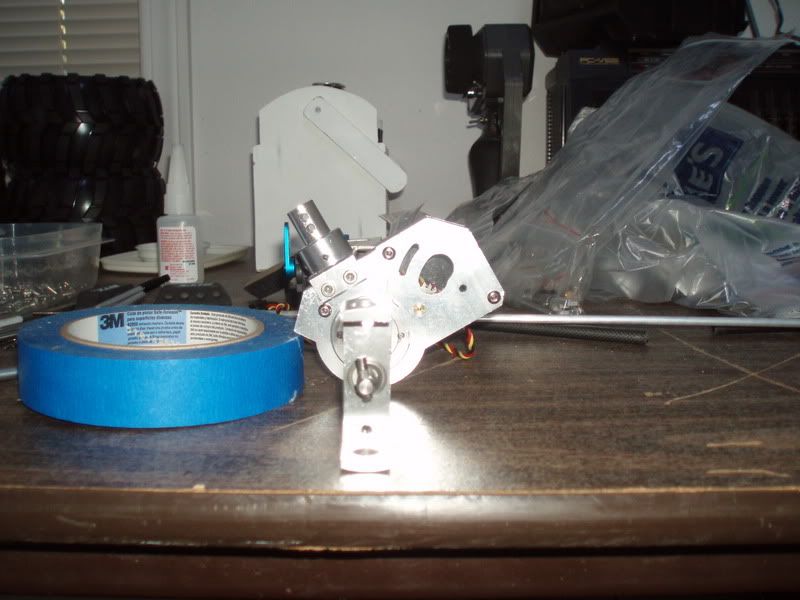 |
|
| |
|
05-24-2007, 01:15 AM
| #54 |
| Rock Crawler Join Date: Jul 2006 Location: Olympia
Posts: 836
|
Here's a couple pics of the axle mocked up since I clocked it. I need to drill new holes for the upper links still(I want to wait till a tear down so i can bolt chassis plates together for correct drilling) For those with Raptor axle's...I had to slightly shave the motor side axle tube for motor clearance. It is shaved from rc4wd i just had to shave for new angle. Also some pics from the steering setup(rear). I really had to work it to get full turn and keep the links on the top side of the arms. i got it though. It's very tight with the servo so low. 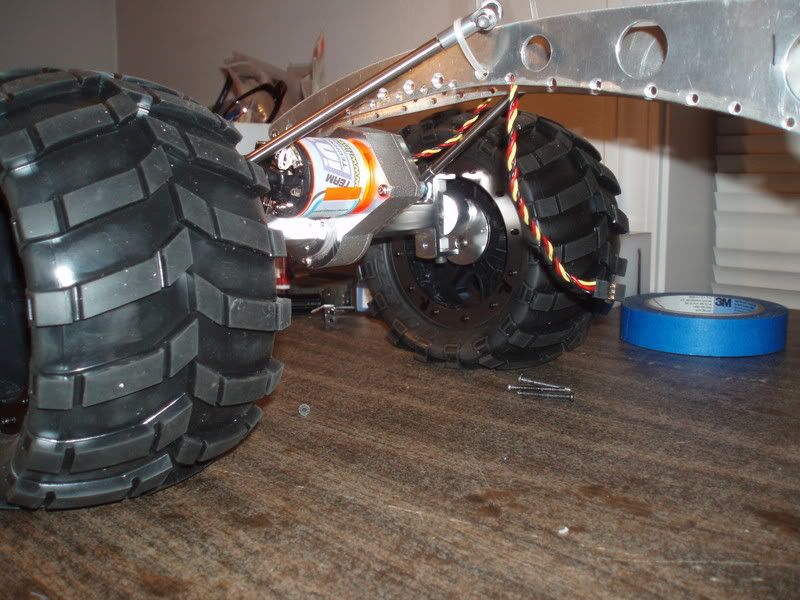 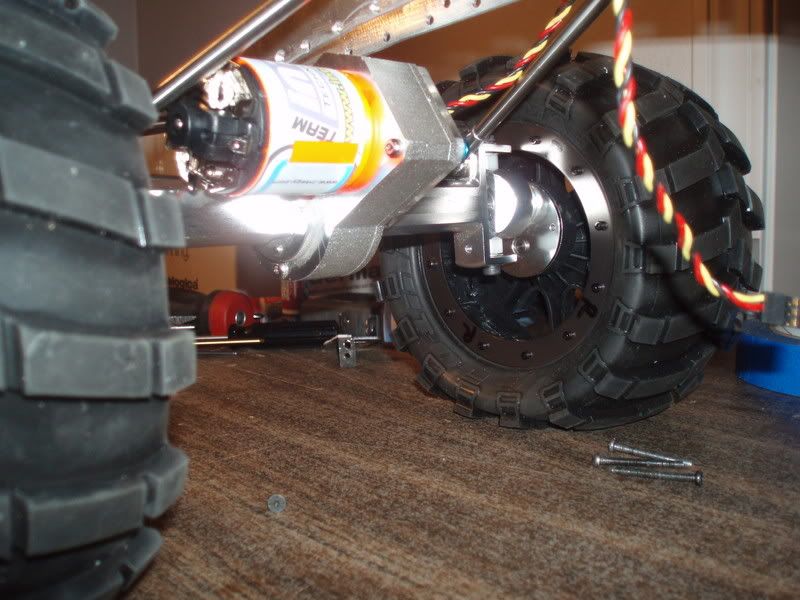 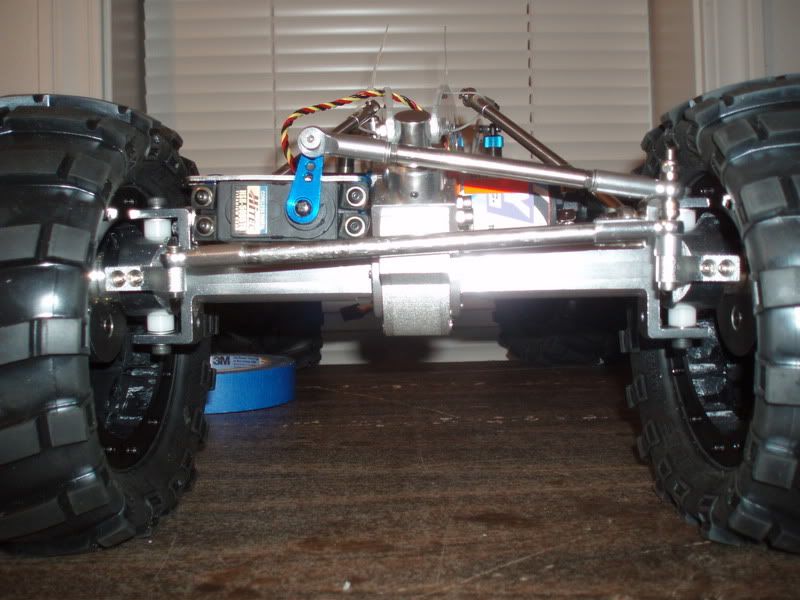 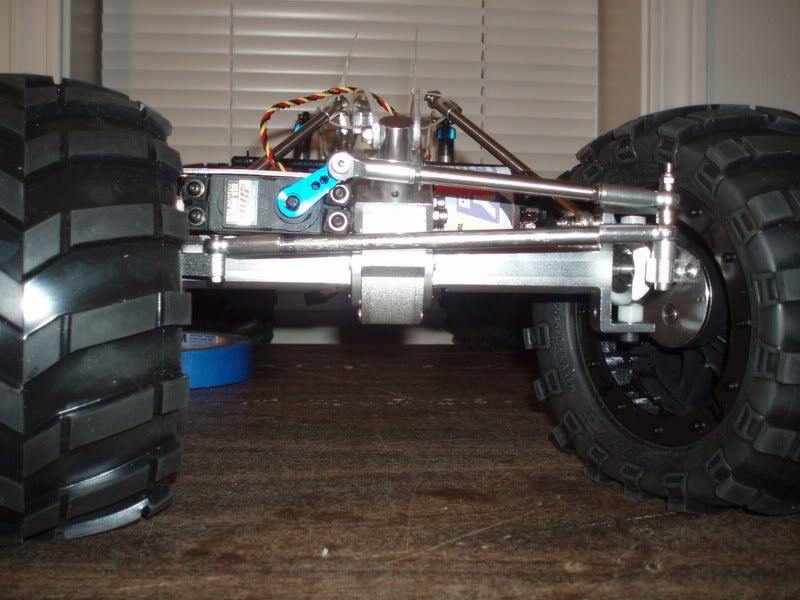 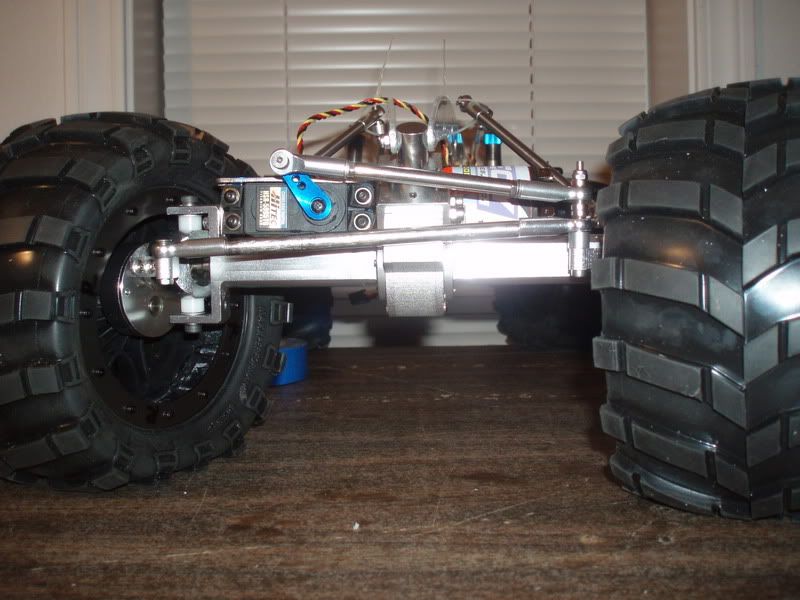 |
|
| |
|
05-24-2007, 01:21 AM
| #55 |
| I wanna be Dave Join Date: Sep 2005 Location: USA
Posts: 11,196
|
Damn everytime I look in here it just keeps getting better. Do you have any Video of it yet?
|
|
| |
|
05-24-2007, 06:24 AM
| #56 | |
| Rock Crawler Join Date: Jul 2006 Location: Olympia
Posts: 836
| Quote:
Do you know the best thing to take the anodizing off the posts(Axial's post come green anodized.) I've heard using oven cleaner, if yes what's the best brand. Thanks again. | |
|
| |
|
05-27-2007, 11:52 PM
| #57 |
| Rock Crawler Join Date: Jul 2006 Location: Olympia
Posts: 836
|
Front steering is done. It's time for wiring. Was able to mount tie rod on top side of knuckles with servo mounted on flush on axle tube by using a BTA tie-rod. 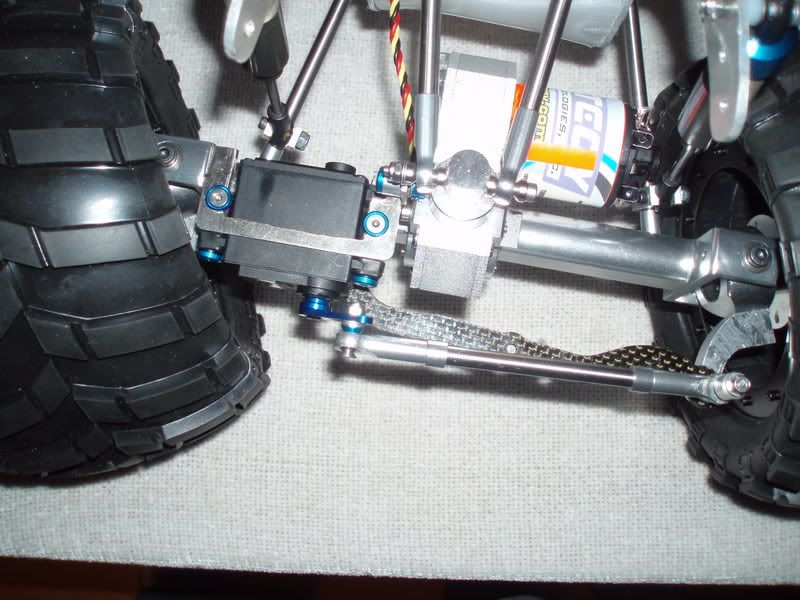 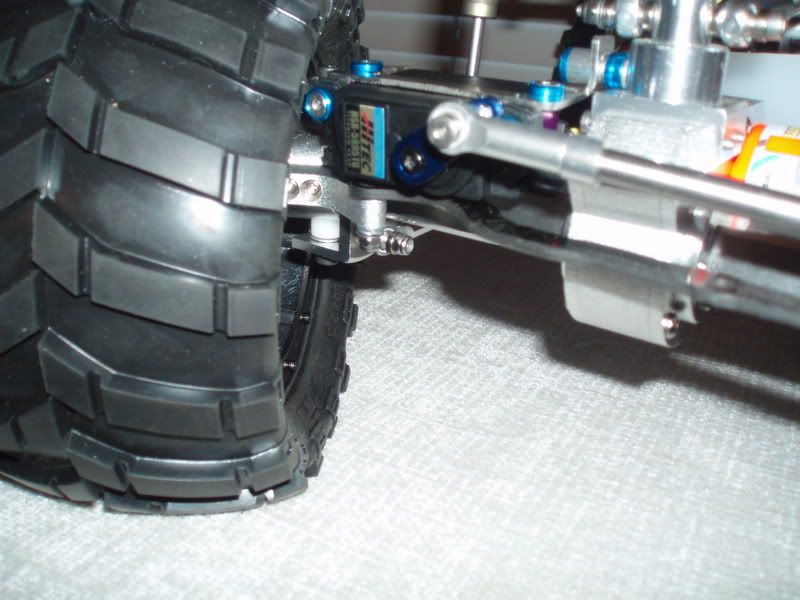 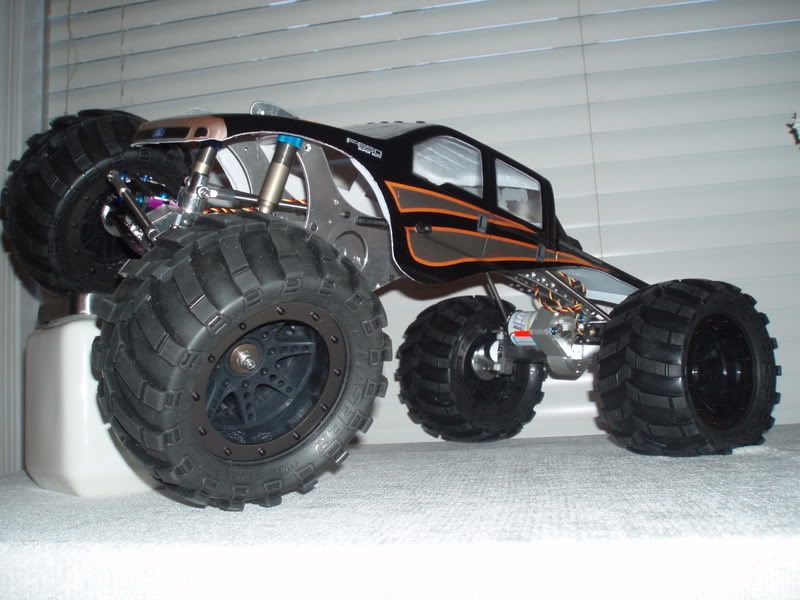 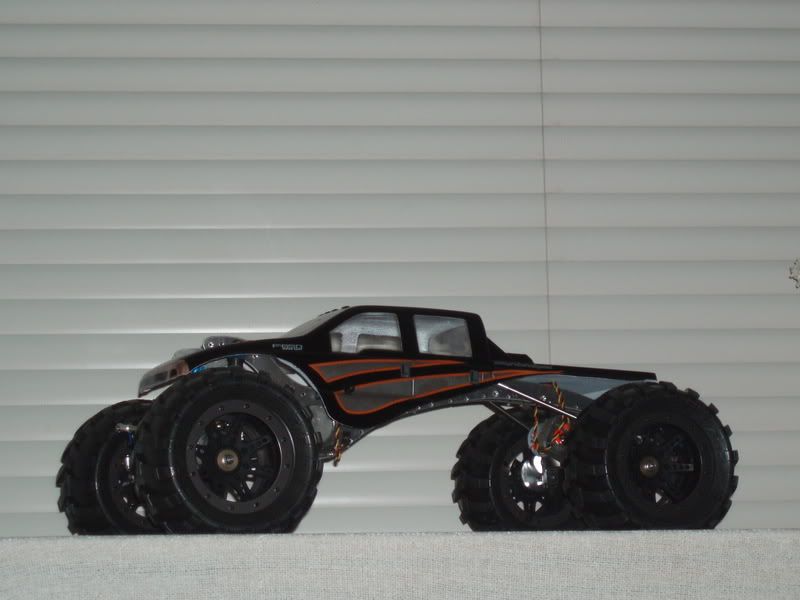 |
|
| |
|
05-27-2007, 11:58 PM
| #58 |
| I wanna be Dave Join Date: Jan 2004 Location: Austin Texas
Posts: 3,866
|
Freakin ' Beutiful! |
|
| |
|
05-28-2007, 12:03 AM
| #59 | |
| I wanna be Dave Join Date: Sep 2005 Location: USA
Posts: 11,196
| Quote:
| |
|
| |
|
05-28-2007, 12:10 AM
| #60 |
| Rock Crawler Join Date: Jul 2006 Location: Olympia
Posts: 836
|
Thanks guys!
|
|
| |
|
| |


 Linear Mode


