| |
 11-19-2011, 02:18 AM
| #1 |
| Pebble Pounder Join Date: May 2006 Location: Chico, California
Posts: 194
|
Before I get started, I'd like to say thanks to the following members for posting these threads and sooo many others who have given suggestions and tips. This is where I got the Ideas, inspiration, and all the answers I needed. Sidehill Improvement On the Cheap? Rubba's TLR Comp Crawler Prototype Okay some of this will be a copy of my previous thread but I wanted a build thread since I have done far more than I thought I was going to. I started with a new stock Losi Night Crawler, it did pretty good right out of the box, but of course it can't stay stock (I think its a forum rule written somewhere in fine print) 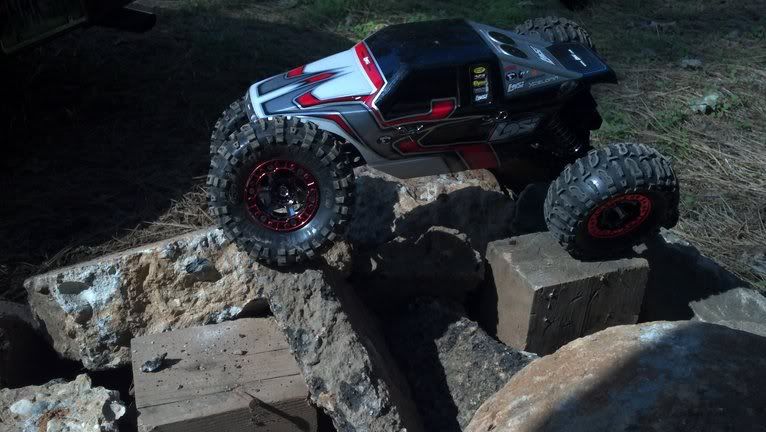 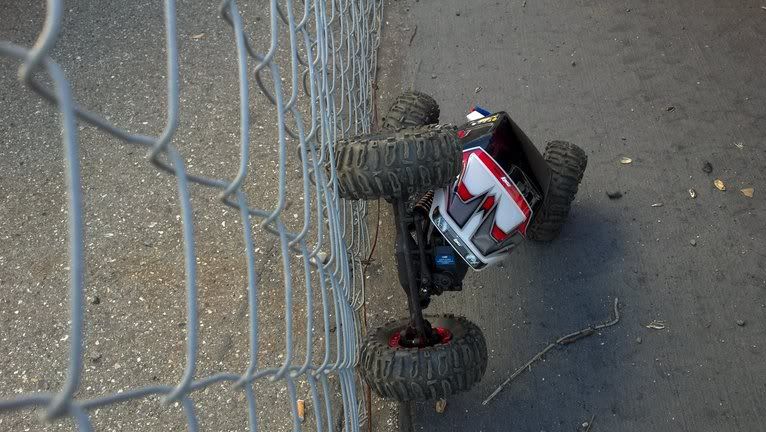 First thing done was a quick trim of the body as it was dragging often on the rocks. 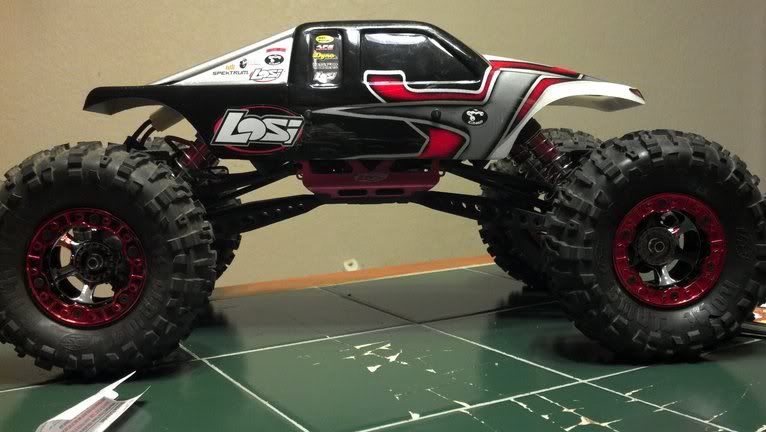 Then it was time to swap the stock rock claws with the slightly softer and stickier Comp Claw tires, during which time I put 5oz of stick on wheel weights in the front and three in the rear. Rocks and stiff foams on the left and the Comp Claw with memory foam on the right. 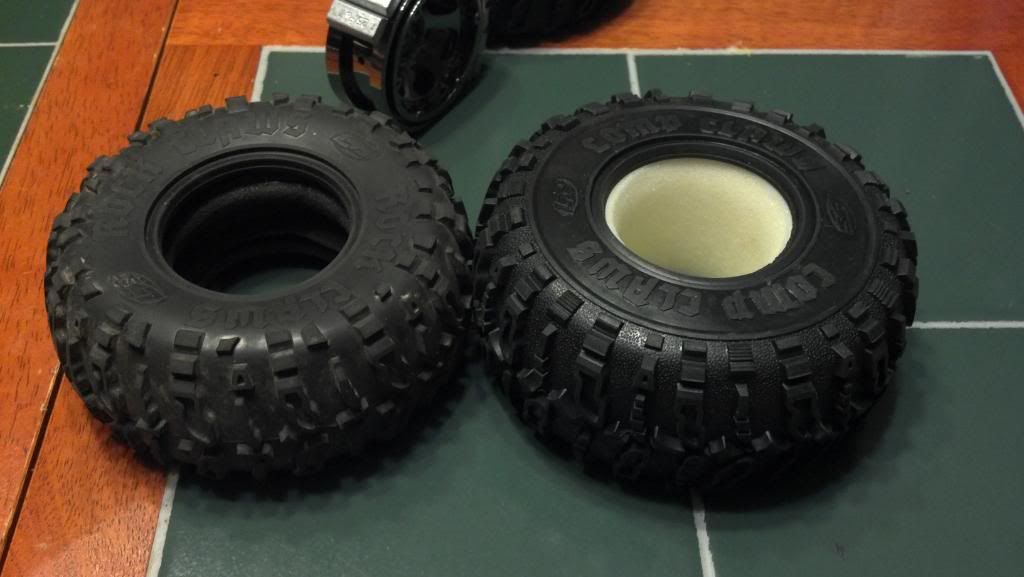 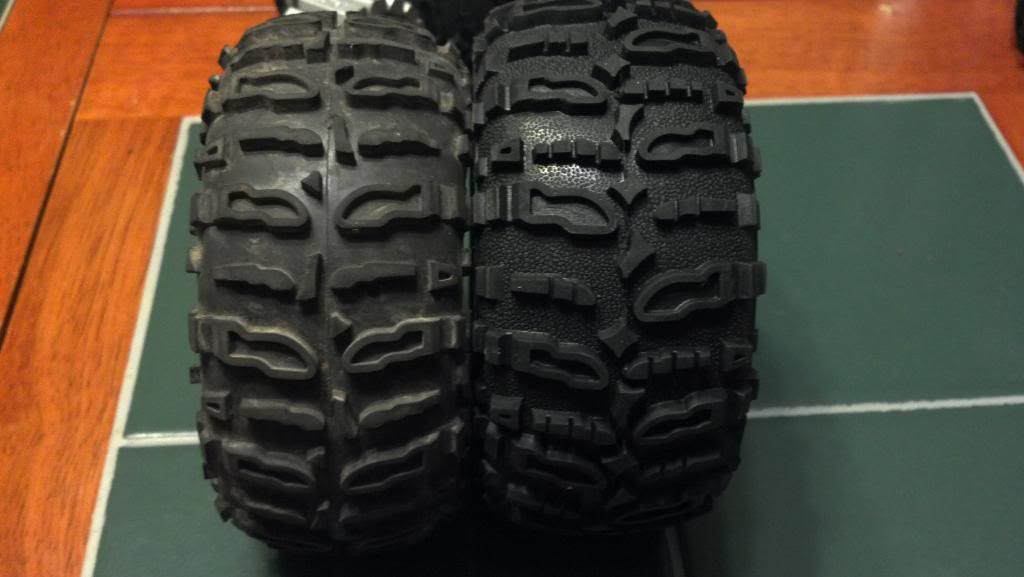 This is how the .25oz weight sit on the inside of the rim, looks unsecure but they stick very well and the foams won't allow them to move at all anyway. 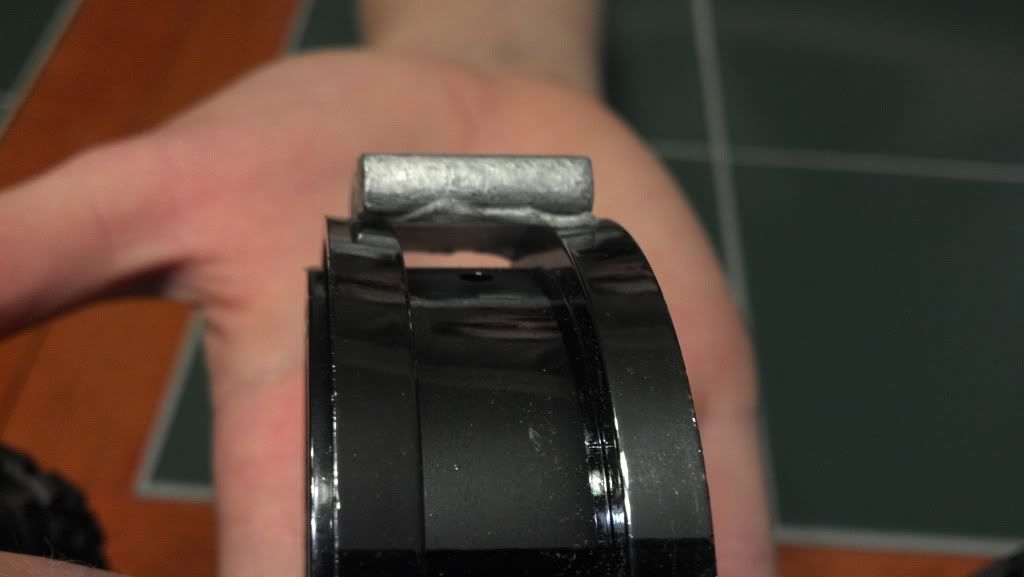 Here is 5oz around front wheel 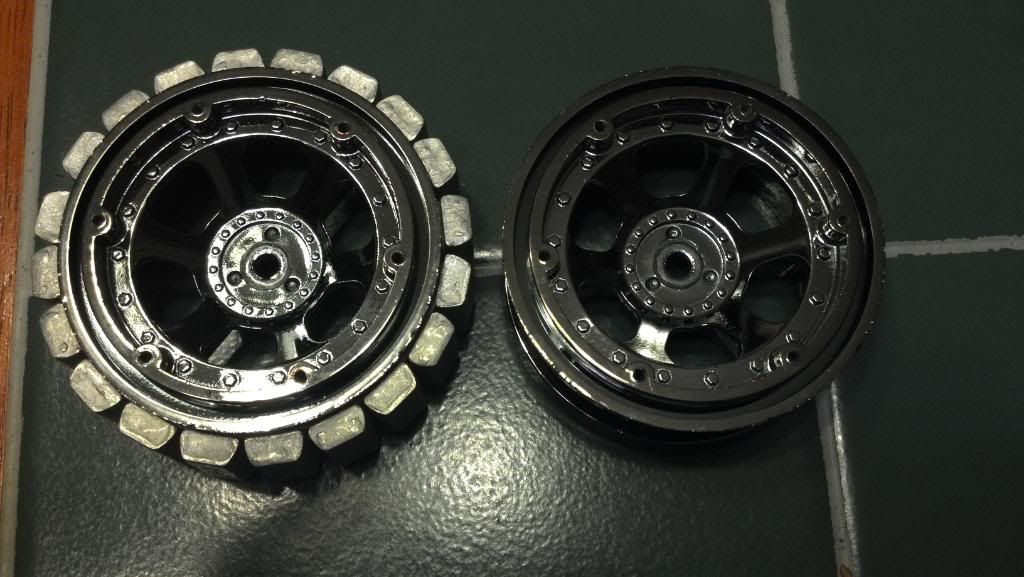 And 3oz around the rear 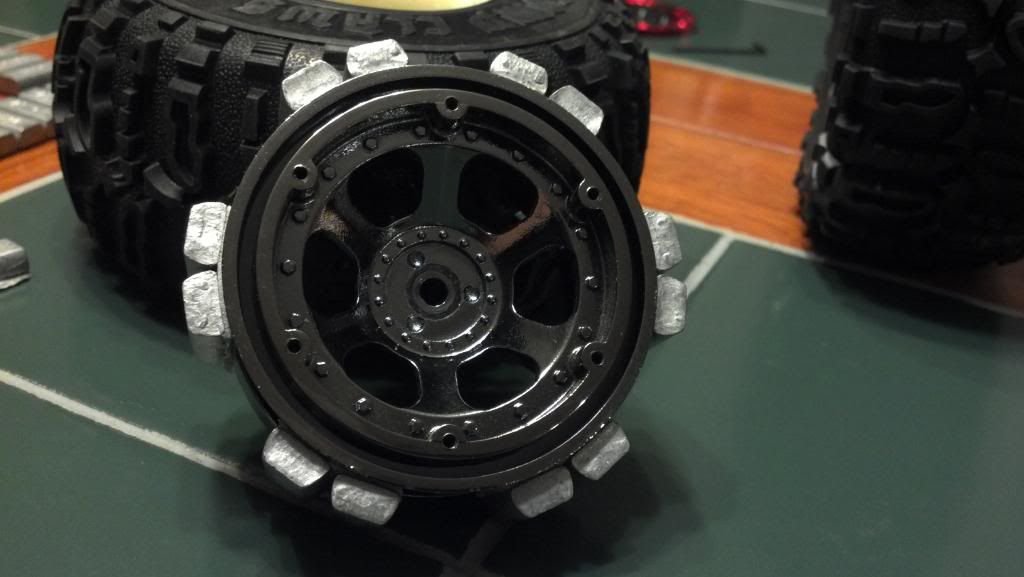 The Comp Claws squat nicely on flat ground and really wrap around rocks and objects and pull the rig pretty well. Last edited by -BIGMAXX-; 11-23-2011 at 03:55 AM. |

|  |
| Sponsored Links | |
| | |
|
11-19-2011, 03:09 AM
| #2 |
| Pebble Pounder Join Date: May 2006 Location: Chico, California
Posts: 194
|
Here I have removed the lights and battery tray to lower the CG and work on rotating the gearbox 180*.  Played with relocating the rx to the rear of the front servo....didn't work, the lower links hit it so I trashed that idea, but heres a pic anyway. 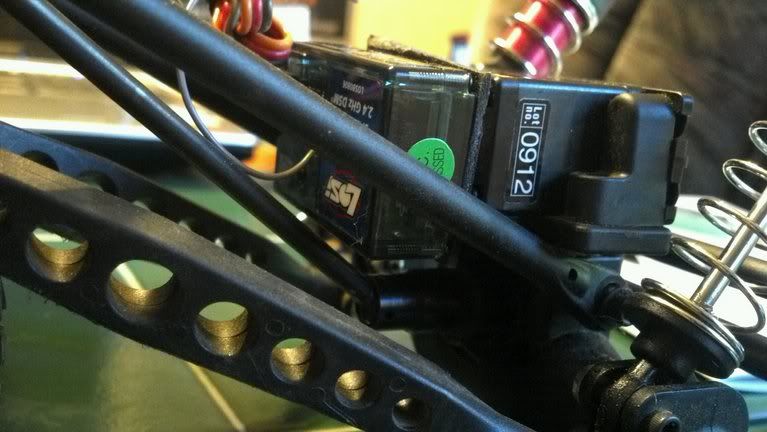 I flipped and outboarded all shocks by using the spacers that were on top, I have a set of LCC shock arms in the mail right now on the way to me to mount the top of the shocks to, if I get any binding Ill make a small spacer and mount the top of the shock out a bit to fix it. 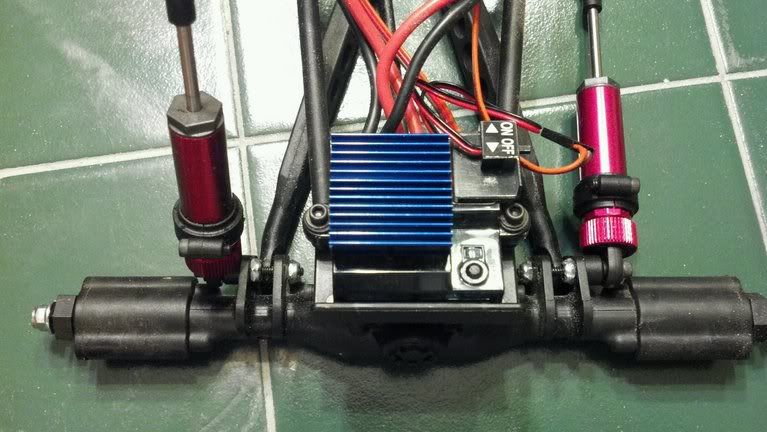 After playing with the shocks I removed the gearbox and motor to start the process of spinning them around to straighten the drive shafts and create more room for the links to occupy during flex, I will evenually get bent metal lower links so theres even more ground clearance. With the gear box out I started trimming the chassis to make room for the motor to hang half way out once reinstalled in opposite direction. 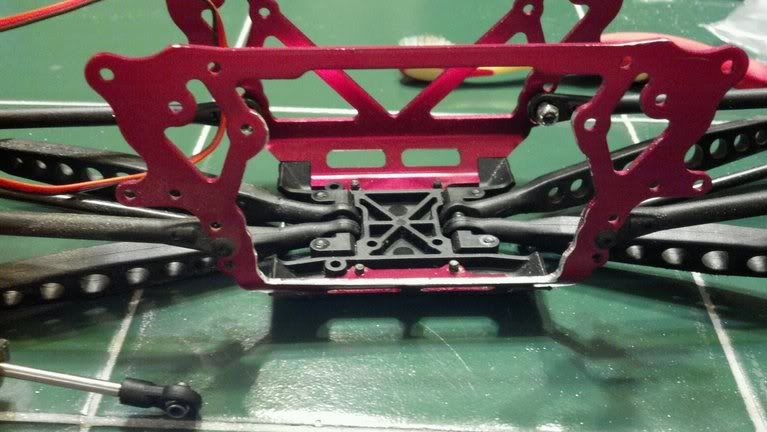 Other members have used a 1/8th spacer to make room for the gearbox brace mount on the motor plate, I decided to just trim off that mounting ear and hope it doesn't come back to bite me later. Heres what I cut off. 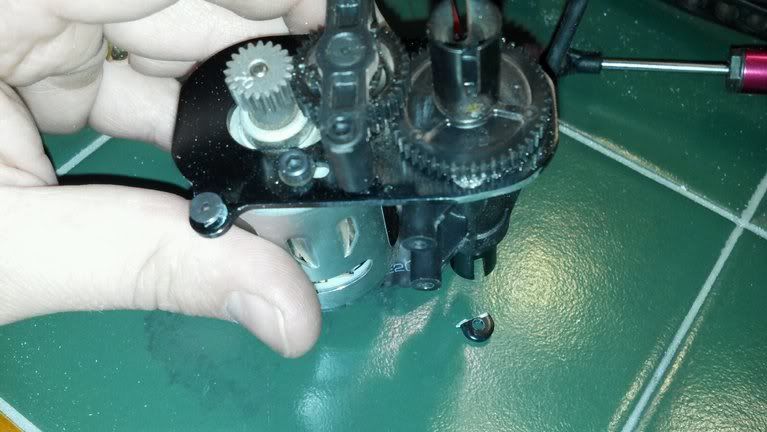 With a bit more trimming and filling some details on the chassis side I got the gearbox/motor turned around and mounted using only the two inline mounts on the bottom of the gearbox and using the original two screw holes on the bottom of the chassis. 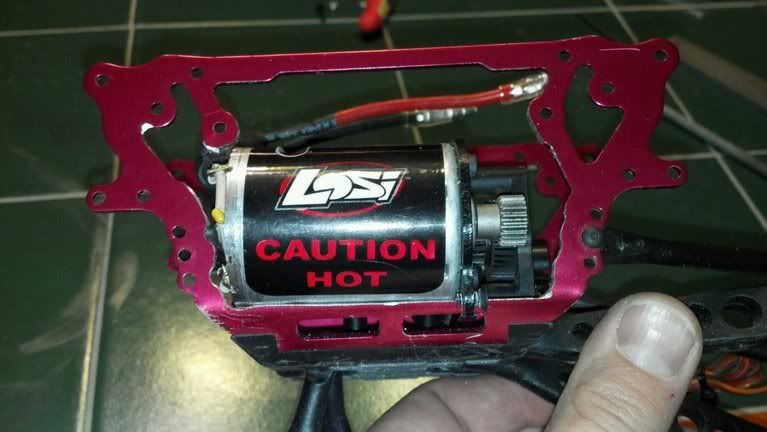 I have read that with just the two screws holding in the gearbox that it will wiggle a bit and something needs to be in place to hold it stable. I found that without using the 1/8th spacers mentioned above the unit it very stable and even though it is close the motor is not sitting on the chassis. Here is a pic of the gearbox mounts without a spacer and the clearance between the gear and the lower links, its all pretty close but looks like there will be no issues, only time will tell. 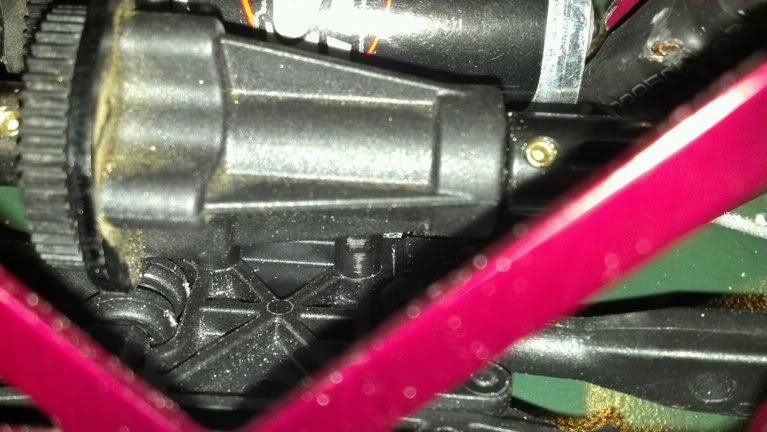 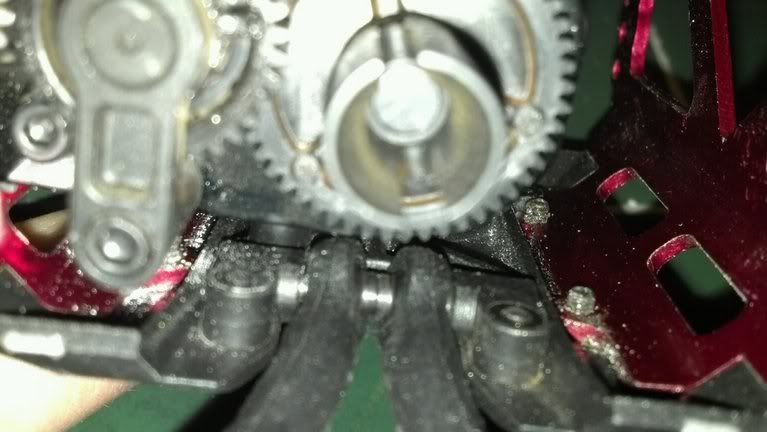 Here is a pic of it mounted in its new location and the drive shafts are right in line. 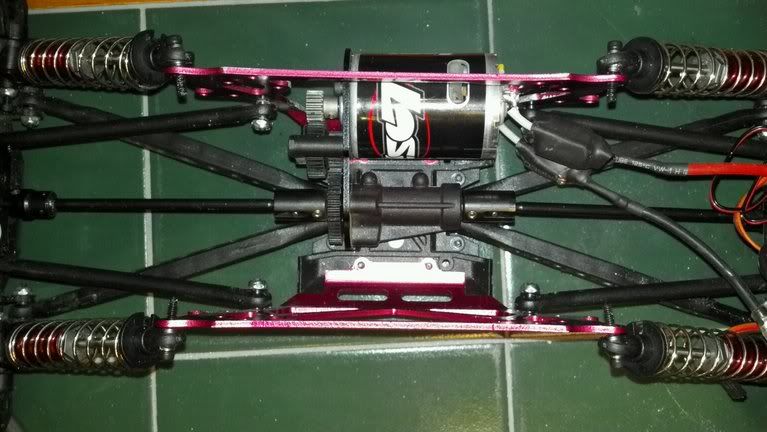 Without the battery tray you will need some support for inside the chassis at the top so it isn't flimsy, here is a pic of my Super Custom C4 (Coyas Custom Crawler Creations) Chassis supports and wire rack. In this picture you can also see the 2oz of weights I used to help compensate for the weight of the motor hanging off the side of the rig, those along with the rx actually even it out pretty close, I can balance it on the middle under the chassis at it just barely leans to the motor side. 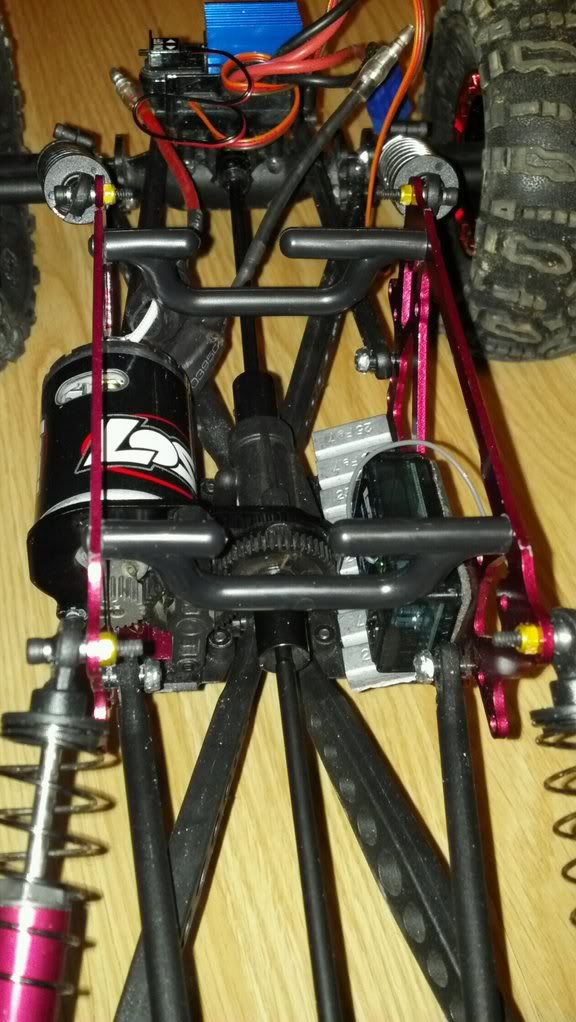 Now I just need to decide which battery pack to use and where to mount it (its going up front but I just need to fit it in somewhere where it wont interfere with chassis movement). I'll update as I go...... Feel free to toss out any questions or comments or criticism! Last edited by -BIGMAXX-; 11-19-2011 at 03:16 AM. |
|
| |
|
11-23-2011, 03:30 AM
| #3 |
| Pebble Pounder Join Date: May 2006 Location: Chico, California
Posts: 194
|
I had to rethink my shock mounting due to a huge loss in flexability and after some shock discussion here.. limited travel after adding shock arms..HELP PLEASE! I decided to correct the shocks back right side up and mount a set of LCC shock arms in the higher arched position. This has increased my flex about 1.5" before the rear lifts. Here are the pics of my current shock set up and of course a flexin' pic. 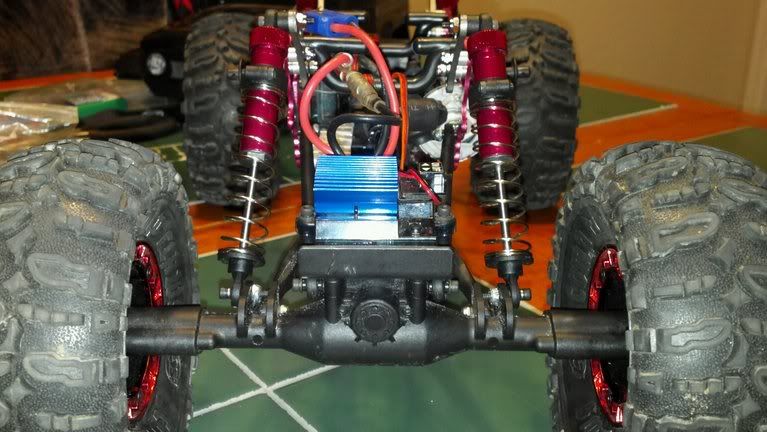  |
|
| |
|
11-23-2011, 07:44 AM
| #4 |
| Rock Crawler  Join Date: Oct 2010 Location: triad
Posts: 634
|
are you running the LNC driveshafts? Check that the lower link is not hitting the cup on the driveshaft and cutting into your links.
|
|
| |
|
11-23-2011, 11:46 AM
| #5 |
| Pebble Pounder Join Date: May 2006 Location: Chico, California
Posts: 194
|
This is the LNC and I am running the stock "skinny" drive shafts. The shafts are completely clear of everything and my travel is limited only by the lower links contacting the uppers at what looks to be exactly 90* of articulation. Looking in to bent lower links today but am thinking of possibly bending the tops as well to keep them clear of eachother. Anyone try bent uppers yet, any pros or cons???
|
|
| |
|
11-23-2011, 12:04 PM
| #6 |
| Rock Crawler Join Date: Oct 2009 Location: Brussels
Posts: 616
|
Why do you want that much flex? Bending the lower will help you with clearance and break over. But I think that the upper are not neededtoo much flex is more bad thing IMO
|
|
| |
|
11-23-2011, 01:15 PM
| #7 |
| Gold Star Baby!   Join Date: Jan 2011 Location: SOUTH JORDAN, UT
Posts: 1,245
|
I agree with Alex on this one.... You can have too much flex almost to the point to where it will hinder your performance. However.... Getting bent lowers with help out great deal when it comes to clearance, I did mine and I don't contact my uppers. But the trick is. Don't line up the rod ends, keep it right at the bend facing out-word by about an 1/8 of an inch. This gives you just enough clearance for the lowers from making contact. Go take a really close look at my thread on page 4 or 5. The most important thing to take from all of this, is utilize everyone's opinion, but build your rig as you see fit and how it suites you best. |
|
| |
|
11-23-2011, 03:33 PM
| #8 |
| Pebble Pounder Join Date: May 2006 Location: Chico, California
Posts: 194
|
I realize that too much is a bad thing but i want all i can get then fine tune it with shock limiters. I think its about perfect now but once install the bend links i think they may hit sooner.
|
|
| |
|
11-23-2011, 06:01 PM
| #9 | |
| Gold Star Baby! Join Date: Jan 2011 Location: SOUTH JORDAN, UT
Posts: 1,245
| Quote:
| |
|
| |
|
11-23-2011, 08:00 PM
| #10 |
| Pebble Pounder Join Date: May 2006 Location: Chico, California
Posts: 194
|
I read through the first 5 pgs of your thread...great info! Pull the links out??? You mean angle them away from the uppers? Gotta pic? thank you very much for all your help with my rig. |
|
| |
|
11-23-2011, 10:44 PM
| #11 |
| Pebble Pounder Join Date: May 2006 Location: Chico, California
Posts: 194
|
I slapped this all back together now that I have fixed a few things and went to see how it does. I think I need to tune my shocks in a bit because it still seems to lift the tire much sooner than I would like. I am very happy with the COG check out these pics...This thing would have flipped over long before this in its previous set up. 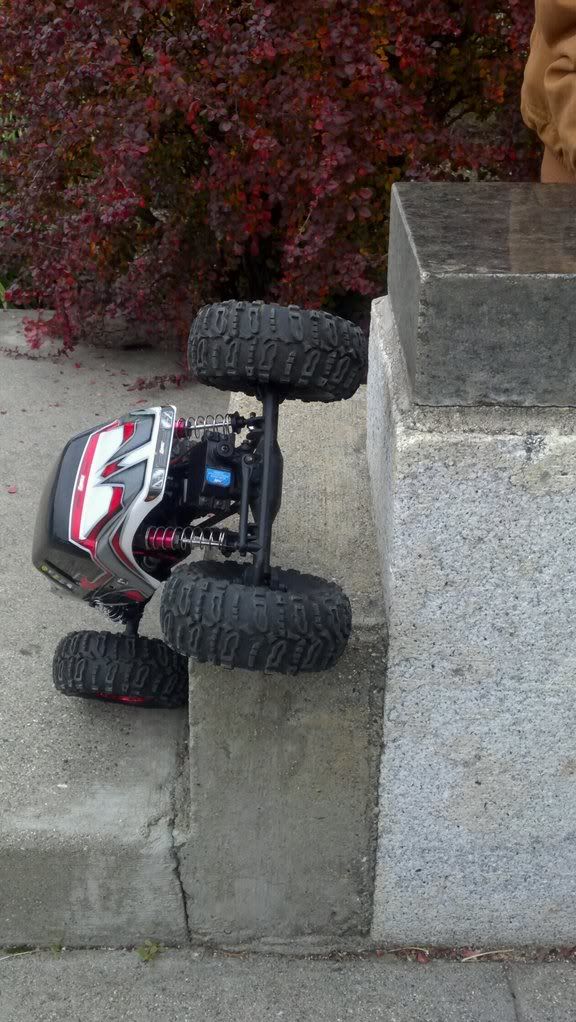  I still need to add the rear bent links and maybe be a bit longer in the rear than the front. I also want to get some wheel extenders to winden the stance a bit and then maybe clock the axles. Ans as always trying to find that perfect balance between weight lose and enough weight to get amazing grip. |
|
| |
|
11-24-2011, 12:44 AM
| #12 |
| Gold Star Baby! Join Date: Jan 2011 Location: SOUTH JORDAN, UT
Posts: 1,245
|
This is the best illustration I can think of. BEFORE-HITS UPPERS. 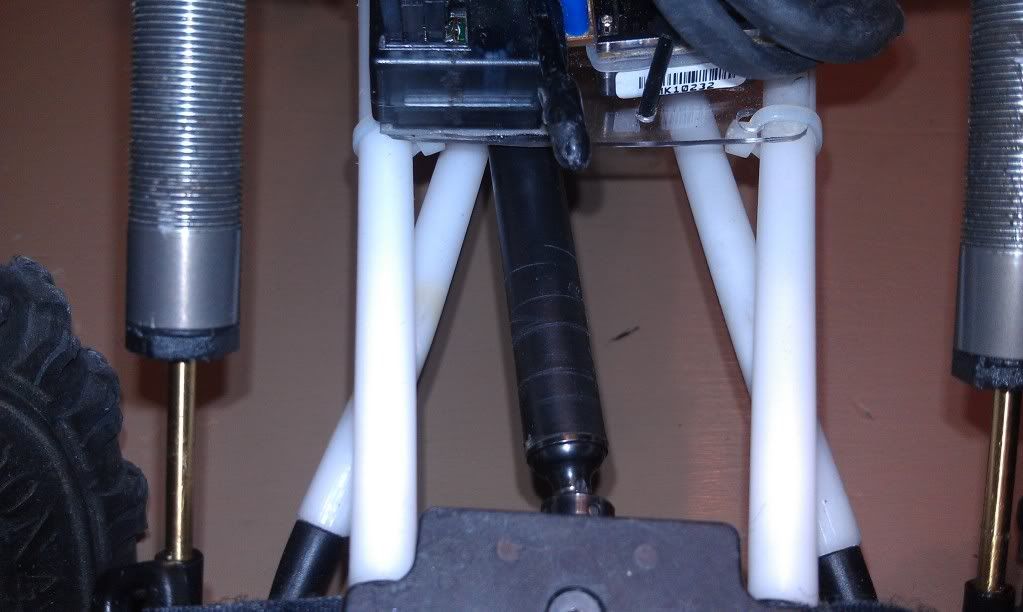 FULL FLEX-HITS UPPERS. 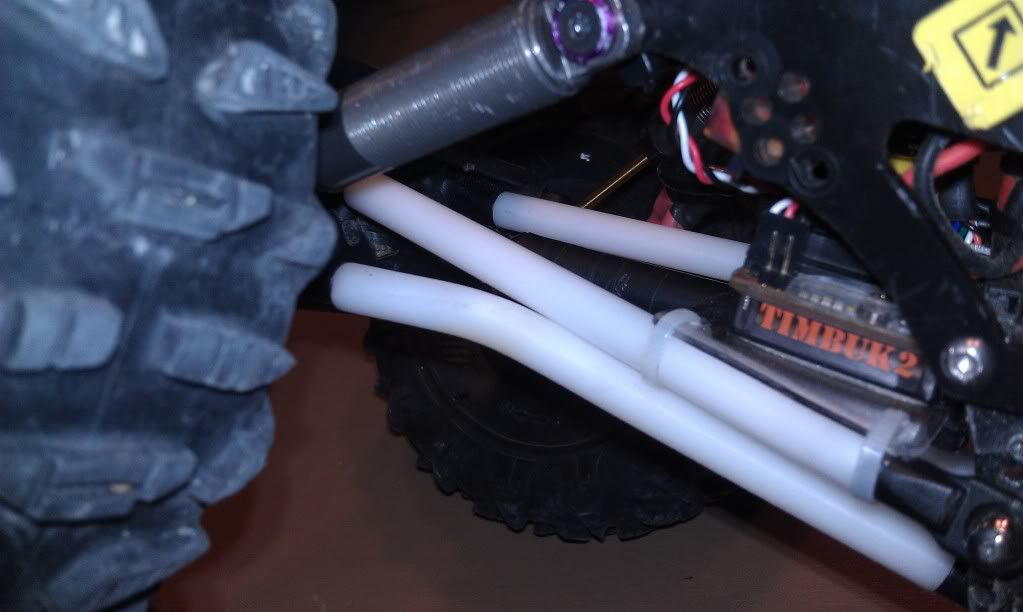 AFTER-CLEARS UPPERS. 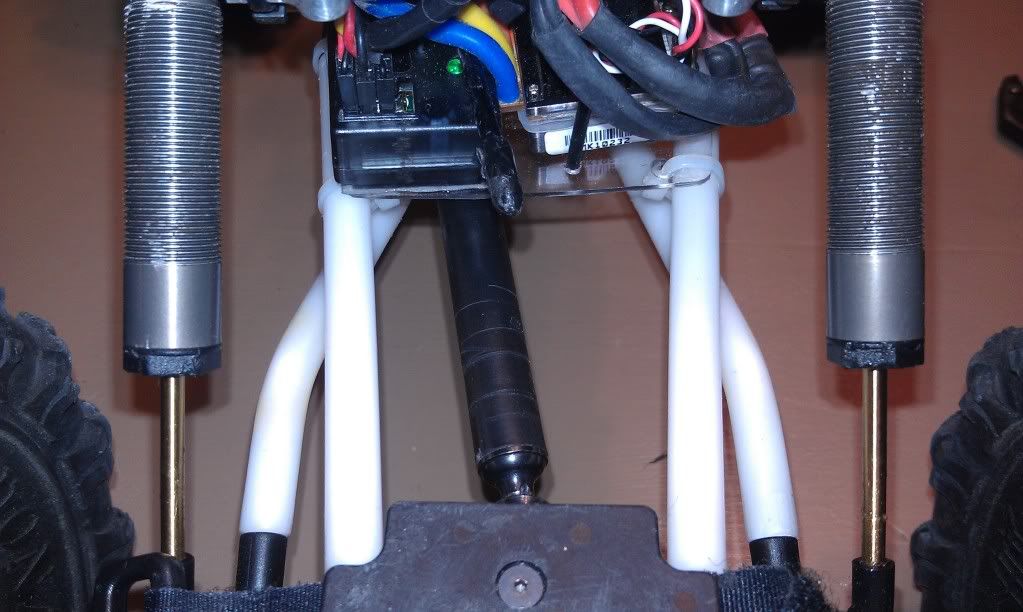 FULL FLEX-CLEARS UPPERS. 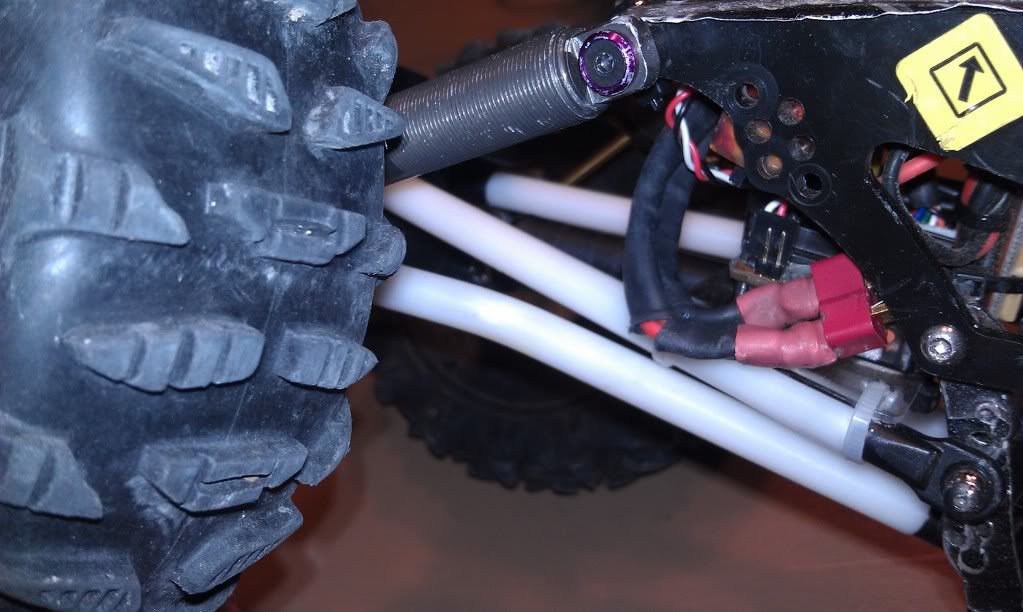 |
|
| |
|
11-24-2011, 01:54 AM
| #13 |
| Pebble Pounder Join Date: May 2006 Location: Chico, California
Posts: 194
|
Thanks for the pics. Thats what i was thinking you meant was lean the bend outwards so it doesnt hit the uppers. Ill work on that.  |
|
| |
|
11-24-2011, 02:01 AM
| #14 |
| Gold Star Baby! Join Date: Jan 2011 Location: SOUTH JORDAN, UT
Posts: 1,245
|
Yea.... I'm horrible when it comes to explaining things like this.
|
|
| |
|
11-28-2011, 12:40 AM
| #15 |
| Pebble Pounder Join Date: May 2006 Location: Chico, California
Posts: 194
|
Well I have some goodies in the mail on their way to me. I ordered a 10a castle BEC, some new aluminium threaded shocks, and buying an esc in the morning. Also I'll be making some bent lower links and playing with the upper link location to help avoid link collision (I hate when I get my Schwartz twisted). Of course pics will be of plenty. |
|
| |
|
12-10-2011, 06:38 PM
| #16 |
| Pebble Pounder Join Date: May 2006 Location: Chico, California
Posts: 194
|
Okay, after getting a little bit ticked off that smomething as simple as bent lower links was not working just right I took a week off and also waited for a few of my items to show up. I got my bent lowers made, they clear the uppers which I left stock and mounted in the highest mount location. They give me approx 3/4in of extra room for breakovers. Also My shocks and CC ESC showed up so I'm installing those now with my BEC on its way. I'll post pics soon. |
|
| |
|
12-10-2011, 06:58 PM
| #17 |
| Pebble Pounder Join Date: May 2006 Location: Chico, California
Posts: 194
|
FINALLY, SUCCESS!!! 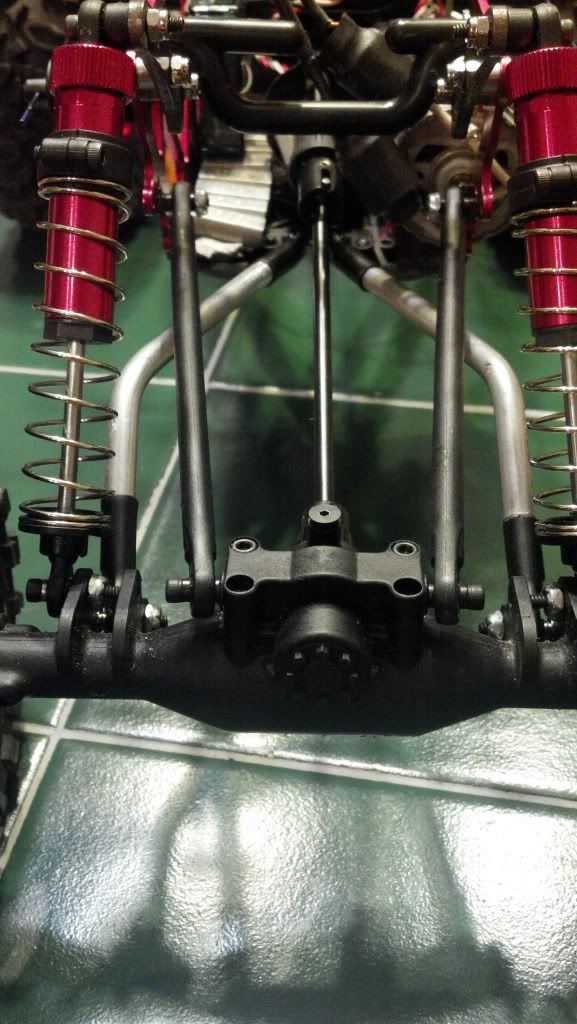 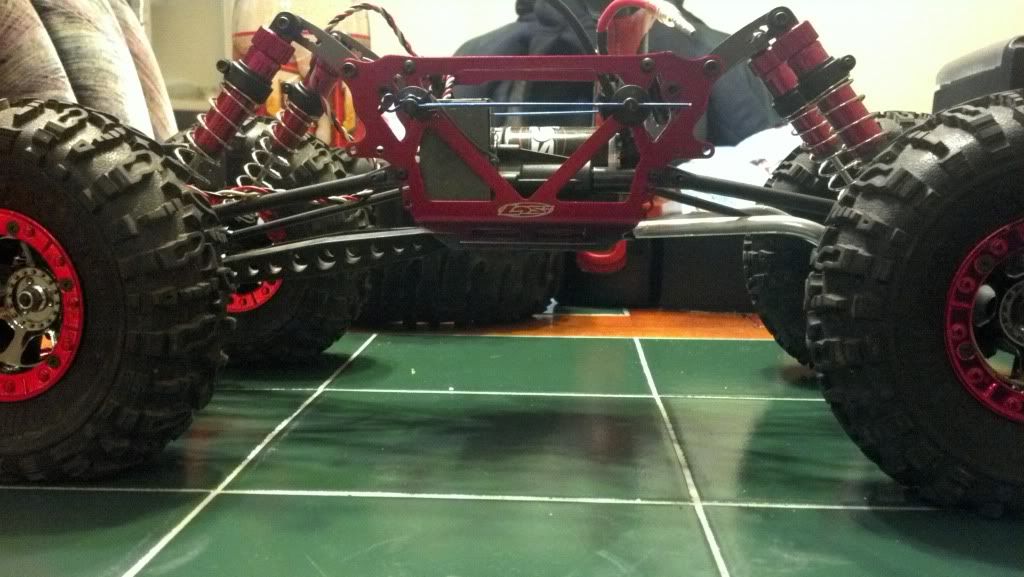 Installing my new aluminium threaded shocks now |
|
| |
|
12-10-2011, 08:03 PM
| #18 |
| Pebble Pounder Join Date: May 2006 Location: Chico, California
Posts: 194
|
Here is the comparison between stock(red) and the new Aluminium shocks. 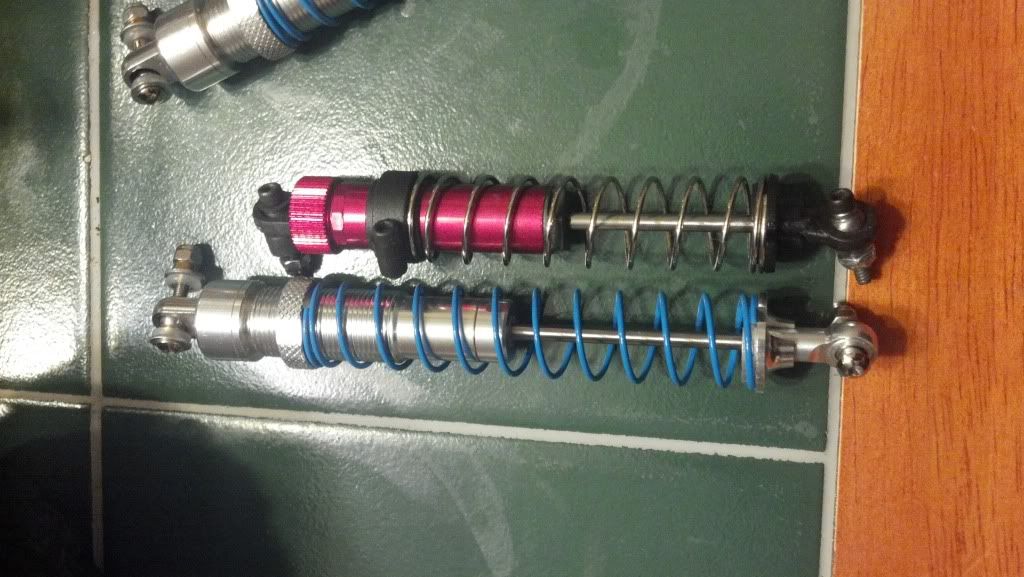 Here is the difference in stance with the new vs the old.  It does sit a bit higher and the suspension is a lot stiffer but it seems to settled in very well as it gets twisted. 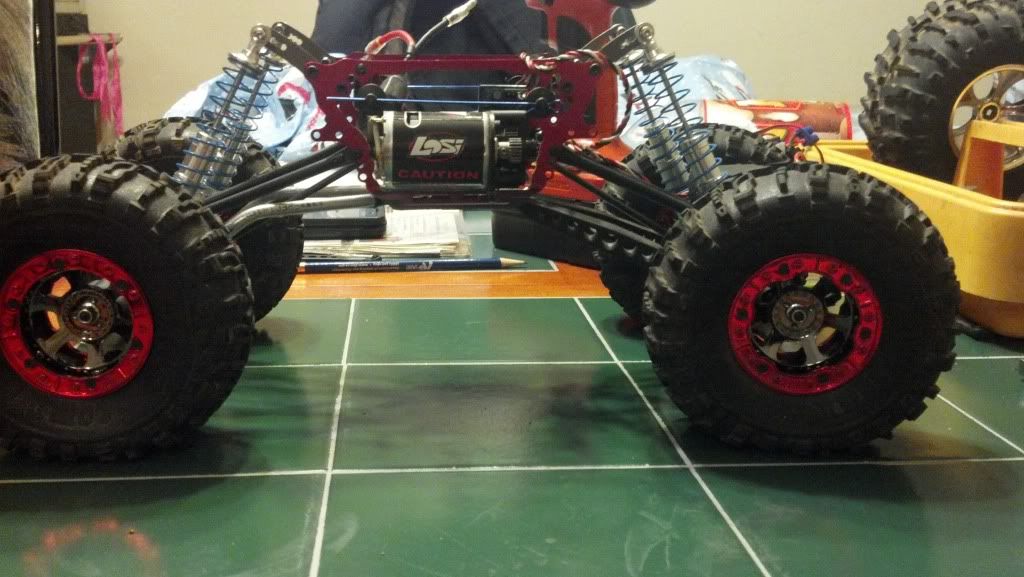 Heres a couple twisty pics, I think its going to work out well. Any tips on upper shock mounting to allow the rig to sit a bit lower? 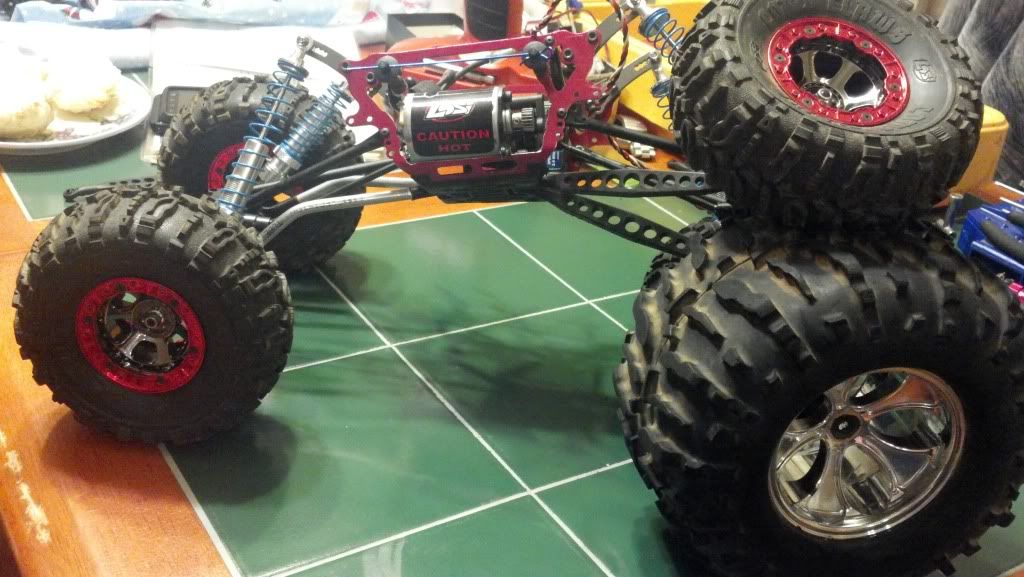 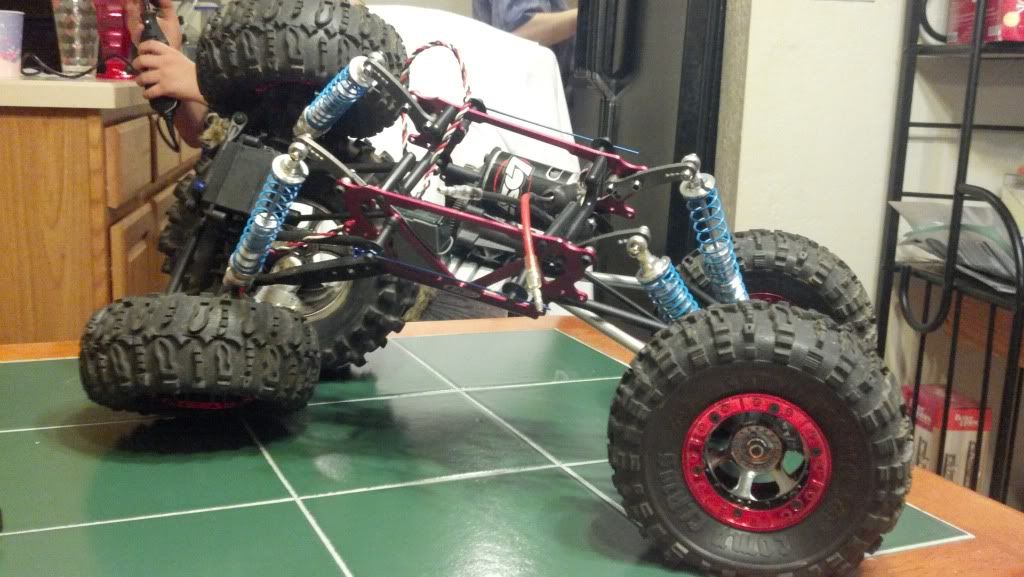 |
|
| |
|
12-10-2011, 09:30 PM
| #19 |
| Defy Gravity Join Date: Nov 2009 Location: wells, mn
Posts: 2,326
|
i'd just internally limit the shocks myself to get it lower. bit too much flex for my liking as well, good work on the links though, and also on the rubbaneck mod. just one little thing that may be coming off my monitor a bit strange, it looks like your shock arms are getting forced together during cycle, if so, you may want to brace them. |
|
| |
|
12-11-2011, 07:43 AM
| #20 |
| Rock Crawler Join Date: Sep 2011 Location: Richfield
Posts: 737
|
I'd watch your driveshaft angle as well. When building my LNC into a scaler, I was trying to get ride height a bit taller than stock, but I ended up trashing the drive cups and cvs on the stock lnc shafts. After one full battery, they were binding up, popping out and smokin hot! I actually started useing the stock LCC shafts which have cv's on both ends and i have less problems.
|
|
| |
 |
| |


 Linear Mode


