| |
 04-08-2009, 01:53 AM
| #21 |
| Newbie Join Date: May 2008 Location: Baton Rouge
Posts: 47
|
That scoop came out really good, are you going to leave the shocks red?
|

|  |
| Sponsored Links | |
| | |
|
04-08-2009, 11:03 AM
| #22 |
| Rock Crawler Join Date: Jun 2006 Location: Wisconsin
Posts: 570
|
Thanks for the kind words, Justin, cartronicshn, and lpinehyperite! I am really happy with the way the cowl turned out. Today I did some finish work on it. Mostly reinforcing the seams of the angled sections, by layering another piece of styrene over the top of the cowl to tie it all together. I then sanded and smoothed all the joints and the cowl is looking better then ever. It's such a beautiful day today, and finally above 30 degrees, so I took the High Lift outside for some bright photos in the natural sunlight! The photos are of the cowl in it's semi finished state. No body filler or putty at all, and it wouldn't need much to finish it when I paint. Barely a touch here and there, which is exactly what I hoped for. 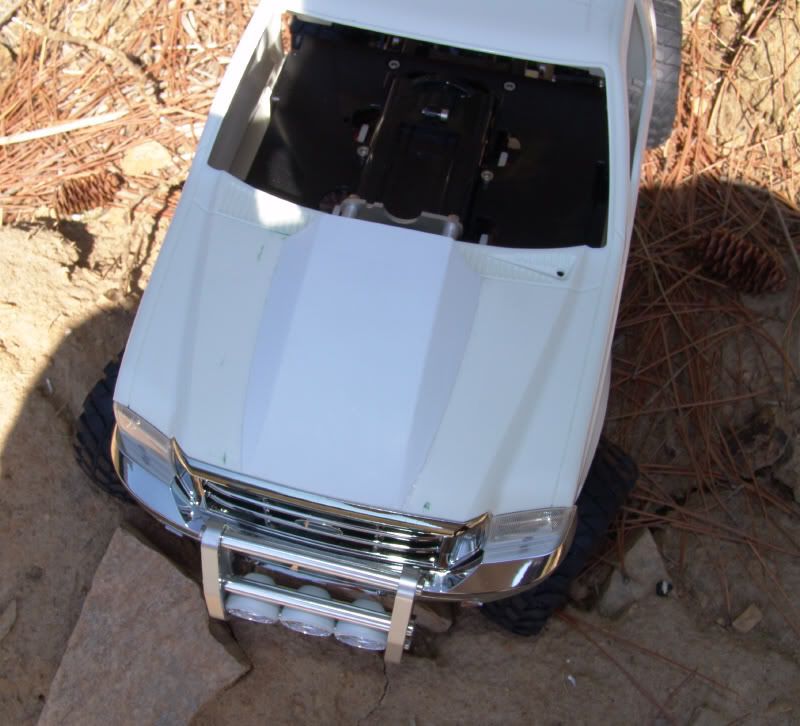 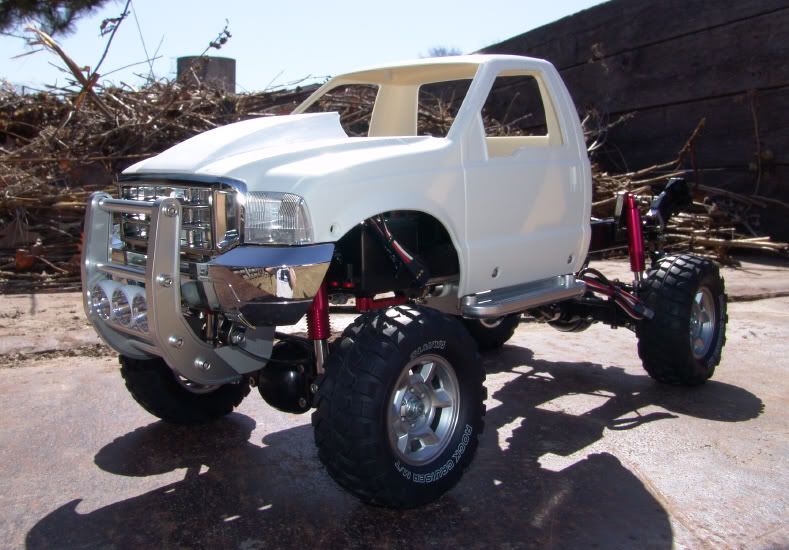 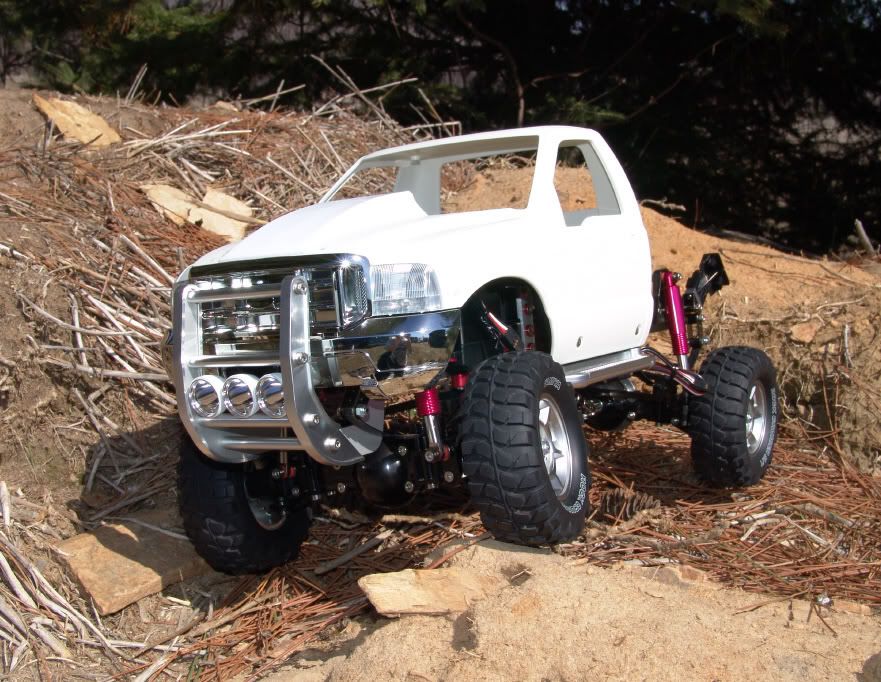 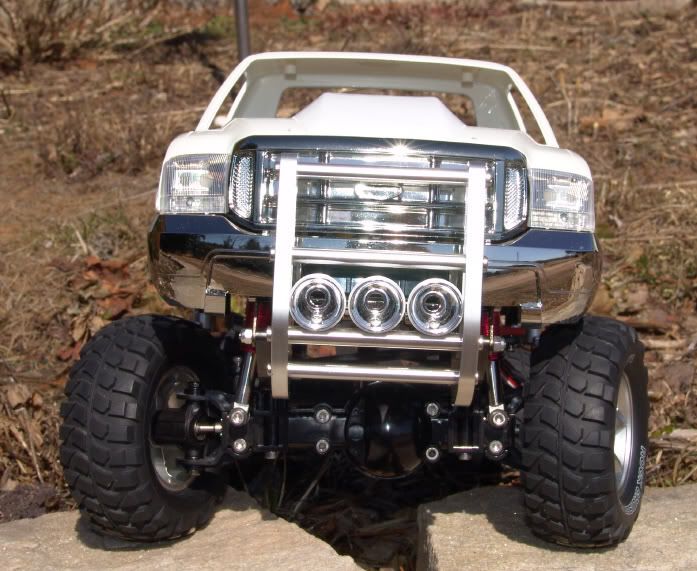 I do plan to keep the shock bodies red. I like that look and I think I will be tieing that color into the paint scheme, so it will give a nice high-light to the shocks, not to mention my anodizied washers match too. Since the cowl turned out so nice, I feel pretty good about giving a cab window visor a try now. I may also consider a bed drop, but the thing is I won't be able to get it as low as I feel I want it to be realistic. The chassis underneath limits the drop. Have any of you guys done a bed drop on a High-Lift Ford, with a stock chassis? |
|
| |
|
04-08-2009, 10:41 PM
| #23 |
| Newbie Join Date: May 2008 Location: Baton Rouge
Posts: 47
|
Yea, if your gona do a similar paint scheme, it will look good, but like mine, (charcoal gray) it just looks dumb.
|
|
| |
|
04-09-2009, 08:31 AM
| #24 |
| Rock Crawler Join Date: May 2007 Location: floriduh
Posts: 522
|
That truck just plain looks mean!!!  |
|
| |
|
04-09-2009, 10:04 AM
| #25 |
| Rock Crawler Join Date: Jun 2006 Location: Wisconsin
Posts: 570
|
Thanks badBKO and aplinehyperite. Yeah, I like the mean look the F-350 has taken on now. I can't wait to see it all finished up. Once I get some new wheels under the fenders, I think it'll look even meaner! RC4WD 1.9 True Scale beadlocks on back order..... Gives me time to try some extra body work.
|
|
| |
|
04-10-2009, 02:52 AM
| #26 |
| Newbie Join Date: Feb 2009 Location: Toronto
Posts: 47
|
trucks looking bad ass!!!!
|
|
| |
|
04-10-2009, 09:07 AM
| #27 |
| Newbie Join Date: Feb 2009 Location: Toronto
Posts: 47
|
When you gettin a winch for that?
|
|
| |
|
04-10-2009, 08:54 PM
| #28 |
| Rock Crawler Join Date: Jun 2006 Location: Wisconsin
Posts: 570
|
Thanks trynacrawl. I don't know if I will be installing a winch. I've considered it, but space is kind of tight. If I did put a winch on this truck, it would be hidden in the chassis some where, and only the fairlead, cable, and hook would give any clues as to what is hidding inside.
|
|
| |
|
04-15-2009, 07:35 PM
| #29 |
| Rock Crawler Join Date: Apr 2009 Location: NE Ohio
Posts: 794
|
Hello espeefan.. Great job on the chassis and the hood is looking good too. A question I have is are you interested in fabbing up another set of all the brackets you did and selling them?? I have a tundra and really like your metal work. I have tried several relocation on the steer servo without luck so my next option was something along the lines of what you have already done.
|
|
| |
|
04-16-2009, 03:29 AM
| #30 |
| Quarry Creeper Join Date: Sep 2008 Location: Petaluma
Posts: 282
|
ESP - That truck has really grown into an adult. Great job - keep it up. What are you using for screws? Or are those washers? The red ones look like something I haven't seen before. |
|
| |
|
04-23-2009, 10:33 PM
| #31 |
| Rock Crawler Join Date: Jun 2006 Location: Wisconsin
Posts: 570
|
Hi guys. Thanks for the comments once again. sickcivic95, to answer your question about the custom parts I made, and if I could make more, the answer is maybe, but not really at this time. I made the parts for my High-Lift with some equipment at work, which I have access to. I am allowed to use the machines for my own jobs, but only in my free time and on my own dollar. In this respect making parts for others would be difficult. The time frame is impossible to estimate. Sometimes I get the opportunity, other times not at all. If I owned my own milling machine, I'd be happy to help you out, but for now, I'm afraid I can't really take on any jobs for others. Dave, yes, the F-350 is growing up! I finally got some 'real' wheels and tires for the truck. I don't really have any photos of them yet. I ran into some problems with the rims. They are RC4WD True Scale 1.9s, just like yours. I had a couple stripped out threads on two of the rims. Luckily, I had a spare set of 4 marked for another project, so I was able to mount the tires to them instead, but now I am short 2 rims because I need to send the bad ones in for replacement. I'll get some photos later. To answer your question, the red anodized pieces you see are washers. They are sometimes refered to as cone washers, finishing washers, and sometimes even beauty washers. These are from Axial. They take 3mm flat head screws. The washers have a concave face and the shoulder of the flat head screws sit flush in the washer when tight. They look nice, so I am using them here and there for a little touch of constrast. Since I am typing, I might as well share another small update! I have begun to wire up some LEDs for my F-350. I won't be running the Tamiya MFU, so I need to work on making my own set-up. The lights will all be run off the 7.2 volt pack for the ESC, and while I could turn them on and off from the radio, I will instead use some toggle switches. I may buy some micro switching relays later. We'll see. Anyway, since I like lights so much, I am installing cab clearance lights on the roof for that heavy duty look. My 1:1 truck has them too, so I had to include them on my F-350. They came from a Toyota Tundra kit. Just playing around with the LEDs to see what they would look like .... 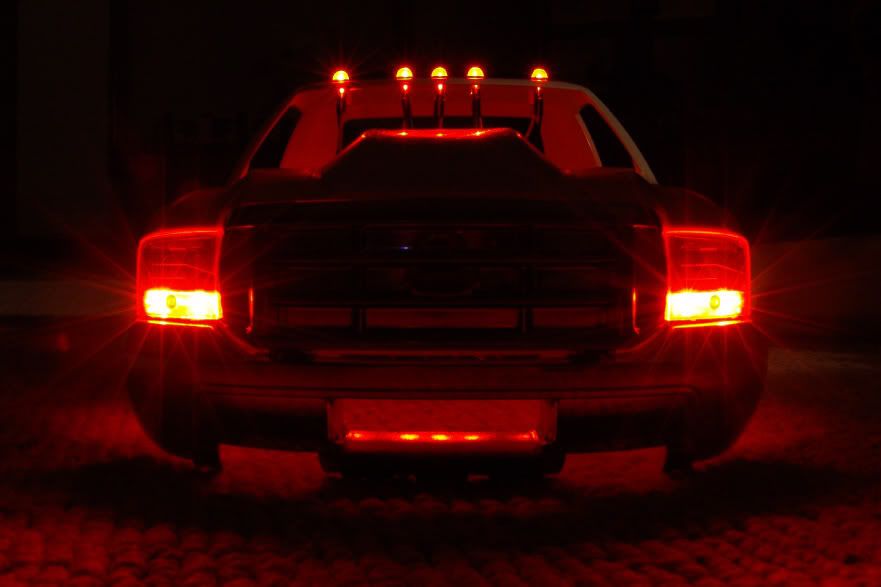 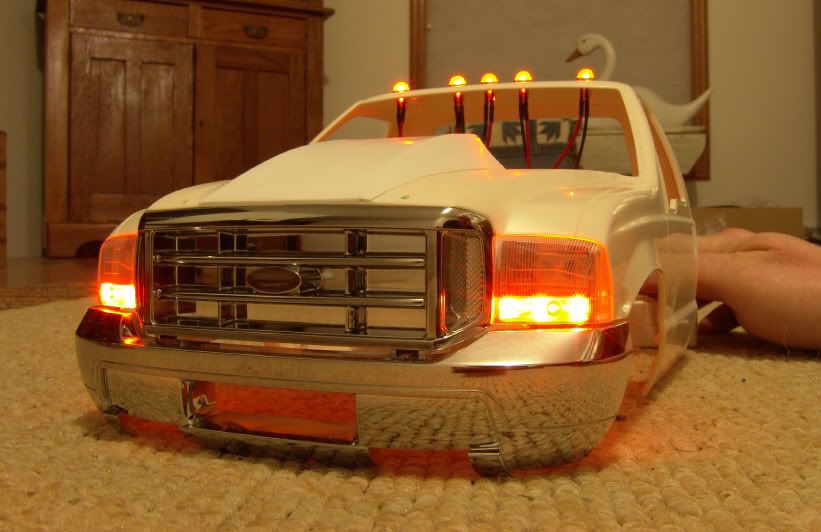  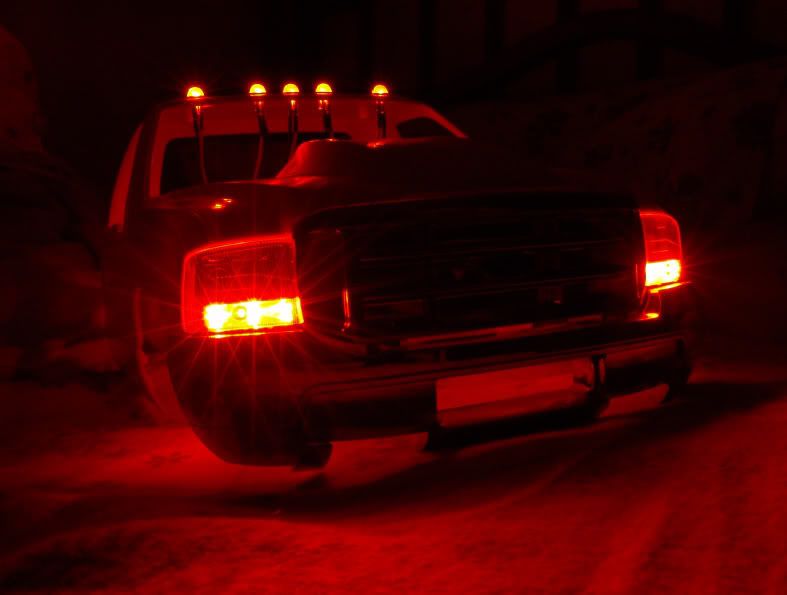 I like them! I have a lot of wiring to do yet, but I had to try them out! I can't wait to see the end result. |
|
| |
|
04-24-2009, 07:10 AM
| #32 |
| Rock Crawler Join Date: Dec 2007 Location: buckeye,AZ
Posts: 723
|
the truck looks awsome, the lights on the roof are sick |
|
| |
|
04-24-2009, 07:16 AM
| #33 |
| RCC Addict Join Date: Jun 2008 Location: Monroe, NC
Posts: 1,547
|
Very Nice. I need to figure out how to do LEDs I dont know anything about them.
|
|
| |
|
04-24-2009, 10:19 AM
| #34 | |
| RCC Addict Join Date: Jan 2008 Location: www.rccrawler.com
Posts: 1,113
| Quote:
 | |
|
| |
|
04-24-2009, 10:39 AM
| #35 |
| Rock Crawler Join Date: Nov 2008 Location: SoCal
Posts: 861
|
Excellent build. Got an extra set of the transmission mounts :-P? Keep up the great work! - Steve |
|
| |
|
04-26-2009, 12:14 AM
| #36 |
| Rock Crawler Join Date: Jun 2006 Location: Wisconsin
Posts: 570
|
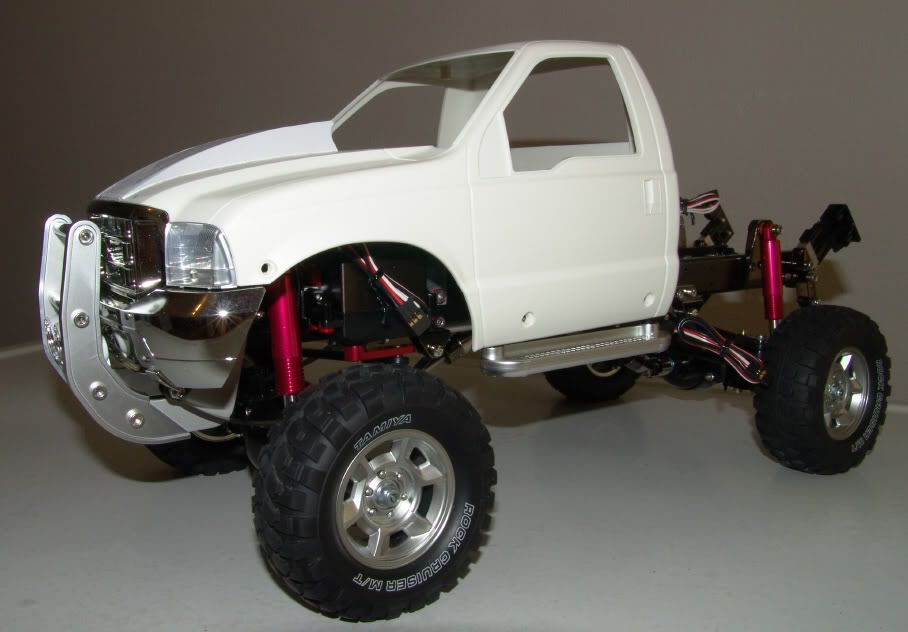
Hi guys. I appreciate the comments! The lights are comming along, but a bit slowly. I'm kind of flying by the seat of my pants, but I think I've got things figured out now. Wiring is no big deal, but trying to keep things tidy is the trick. There will be plenty of wires on this thing! The previous photos were with the LEDs powered by an LED tester I have, but now that I know they work, I'm starting on the actual wiring. 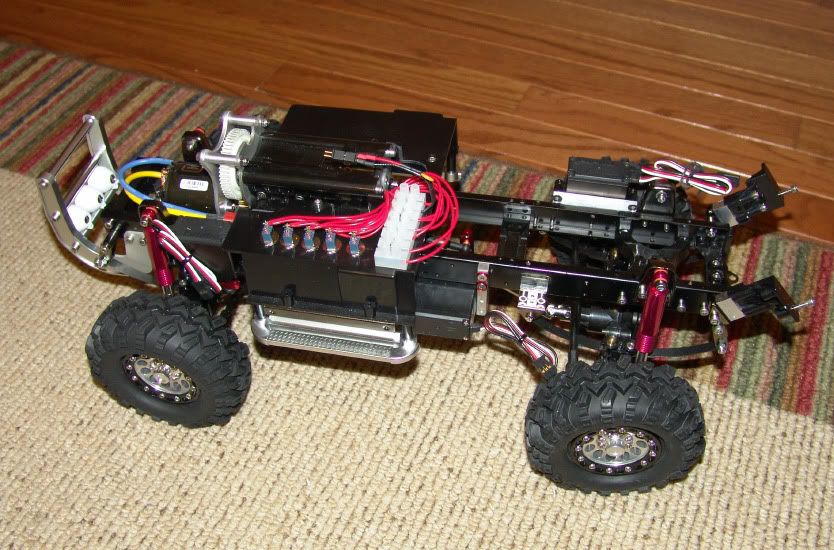 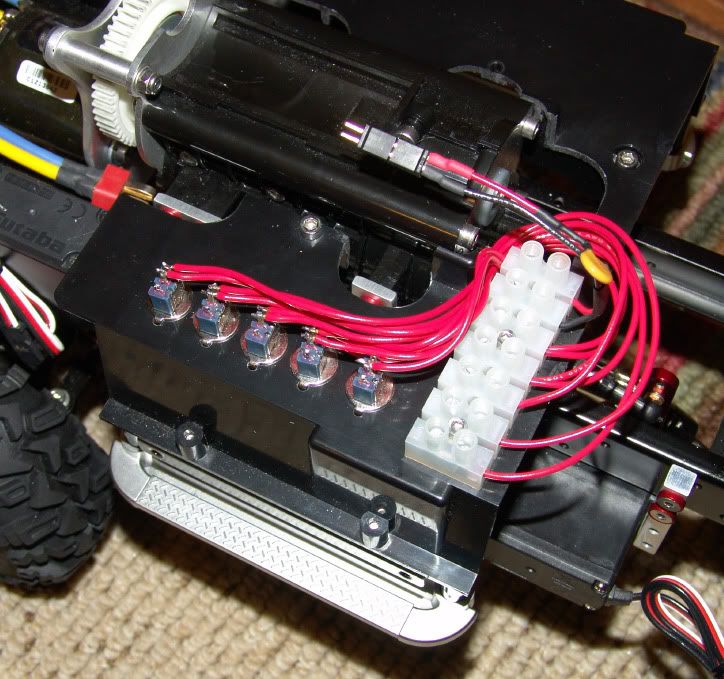 Basically I will have toggle switches running the lights. I will be able to turn on the parking lights, low beams, high beams, and off road lights, all separately, but the low beams will not turn on until the parking lights are on, and high beams won't turn on until the low beams are on. The off road lights (on the brush guard and roll bar) will be able to turn on at any time. 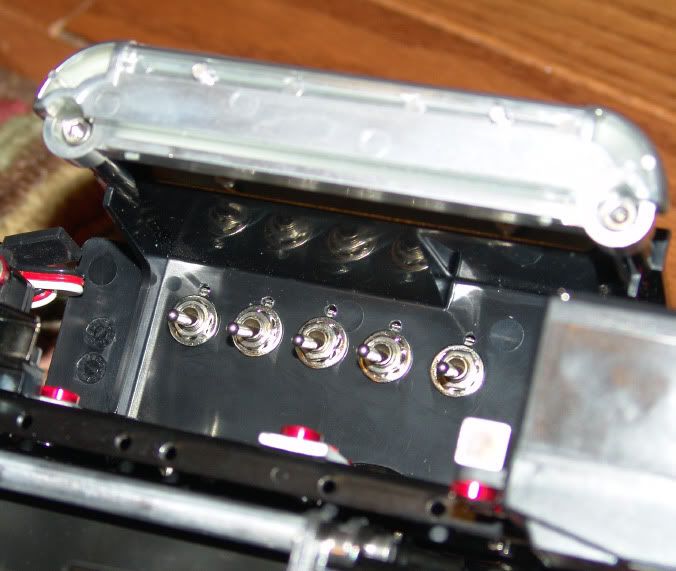 The toggle switches are interlocked. All 5 of them are now mounted to the cab floor/mount. I installed them so they are hidden, yet easy to flip on and off from the underside of the truck. To help control the wire mess, I'm using a terminal block I picked up special for this kind of work. This will also make it easier to change or repair the wiring or LEDs later, if I need to. I plan to use some micro Deans plugs so I can have the LEDs stay with the body, and just disconnect them for body removal. 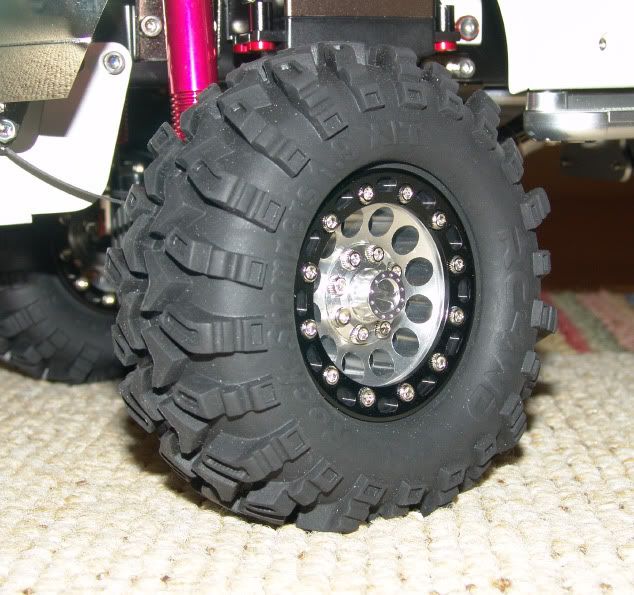 I also got a couple other little additions. My High-Lift now has some real wheels and tires. RC4WD True Scale beadlocks, with Rock Stomper tires. I switched the beadlock rings for black ones. They'll match the paint nicely. 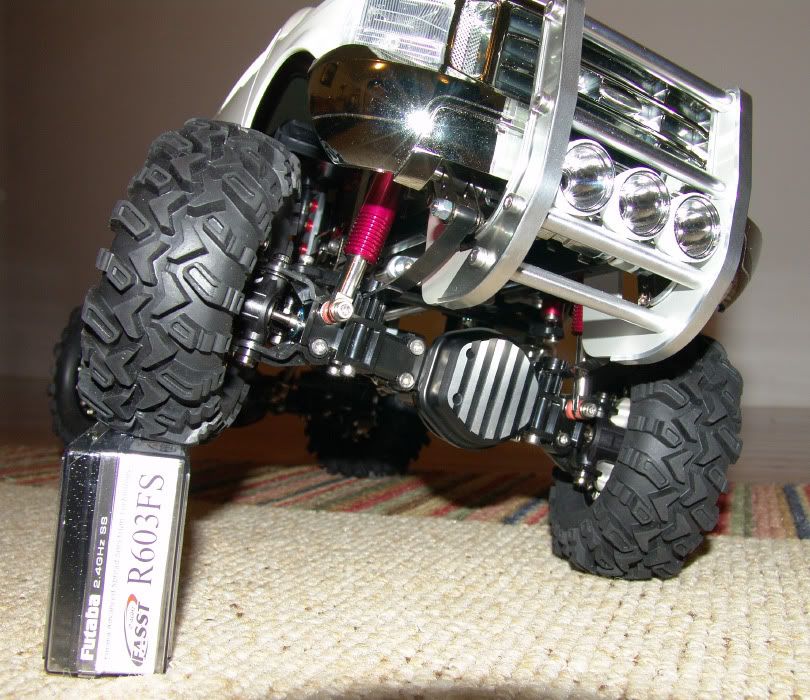 I also got some Junfac aluminum differential covers. I think they are pretty cool, though they still are pretty big, like the stockers. The last thing is I also have some spacers made so I can mount the box and match the height of the cab now. 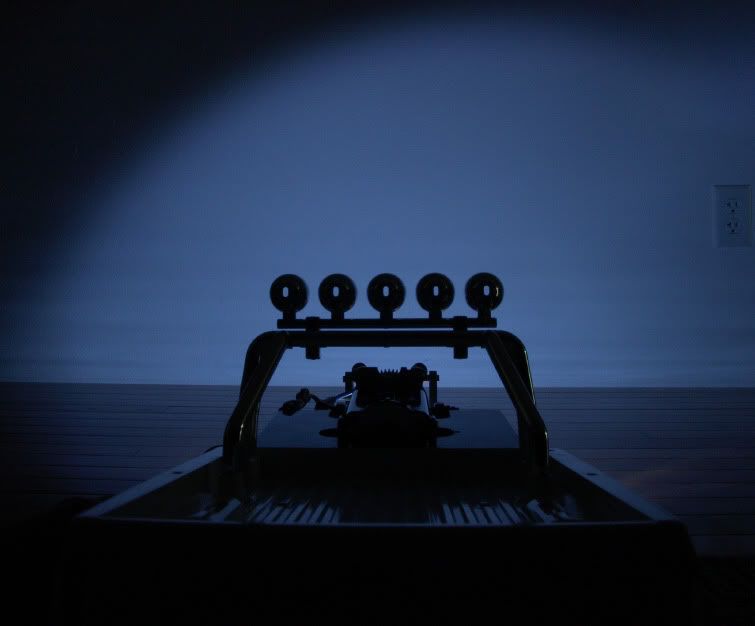 While I'm at it, one quick photo of the white LEDs in the brush guard in a dark room. They aren't focused, nor are the lenses of the light housings in place yet, but they still throw out the light! I cannot wait to get the truck finished. This summer, with all the lights on, I hope to do some late night running on a nice summer night. Should be really fun with 8 off road lights lighting up the night, plus the headlights! TheHeadHunter, Ha ha, it's a Spud Mackenzie dog. Yeah, I guess my F-350 does look like that! Steve, thanks for the comments. Unfortunately, I only made one set of my transmission brackets. Seems there is a lot of interest in those things. I'm surprised none of the manufacturers make them, but maybe it's because the High-Lifts are sort of loosing popularity with all the new scale trucks out there. |
|
| |
|
04-27-2009, 06:25 AM
| #37 |
| RCC Addict Join Date: Jun 2008 Location: Monroe, NC
Posts: 1,547
|
That thing looks great with the new wheels and tires on it. And the new diff covers really set it off. Nice work.
|
|
| |
|
05-01-2009, 02:18 PM
| #38 |
| Quarry Creeper Join Date: Sep 2008 Location: Petaluma
Posts: 282
|
NICE WORK! Watching this one come along nicely. Thanks for the heads up on the washers. I'll have to look for them next time at the hardware store (hope they have them, those really add a nice touch and on rig # 2 build, would like to try to set it up similar to the way you got yours going). That's quite the light setup - wow! A+! |
|
| |
|
05-01-2009, 10:33 PM
| #39 |
| Rock Crawler Join Date: Jun 2006 Location: Wisconsin
Posts: 570
|
Thanks Justin and Dave. No updates right now. I'm still working on the LEDs, wiring, and soldering, but maybe next week sometime I'll have something more to share. Getting the lights all wired up is turning out to be a real chore! I'll bet I have over 10 hours into that project alone. Dave, your best bet for locating some washers like I used would be to order them from Tower. They are very hard to find anywhere else. Especially in hardware stores, but I guess you could get lucky! Here are some links to the colors offered. http://www3.towerhobbies.com/cgi-bin...?&I=LXUUB9&P=7 http://www3.towerhobbies.com/cgi-bin...?&I=LXUUF0&P=7 http://www3.towerhobbies.com/cgi-bin...?&I=LXSAV7&P=7 http://www3.towerhobbies.com/cgi-bin...?&I=LXUUH5&P=7 http://www3.towerhobbies.com/cgi-bin...?&I=LXWDM1&P=7 |
|
| |
|
05-02-2009, 02:08 AM
| #40 |
| Newbie Join Date: May 2008 Location: Belgium
Posts: 48
|
Great work man! the way you modded the chassis is off the hook, Tamiya can really learn a few things from you. Anyway thanks for the lovely pics, they will be a guideline when i put my tundra together |
|
| |
 |
| |


 Linear Mode


