| |
| |||||||
 |
| | LinkBack | Thread Tools | Display Modes |
 10-08-2012, 11:32 PM
| #1 |
| I wanna be Dave Join Date: Oct 2008 Location: Golden
Posts: 2,588
|
I've been wanting to build this truck for over 2 years now, but it's been hard finding 2 of these bodies in good shape to chop up and glue back together. Well, now that walmart has these in stock, and I had a little cash burning a hole in my pocket, I bit the bullet and bought 2 of the bigger Silverado bodies. I scoured the local wally worlds, and found only 1 that had any Chevys, so I grabbed both. The New Bright body is a Regular Cab, short bed, which was only offered by Chevy in the work truck trim with a 119" WB, and is why these things look so funky. A coworker of mine has been looking at buying a pretty hard to find combo; Extended Cab, Short Bed. This is the extended cab with a 133.9" WB and the 5.75' bed (from the Crew Cab). Chevy offered this from '08 - '10 and only through special order. I wanted to build the truck he wants to buy. Here's the only pic I could find from a very short google image search of this configuration: 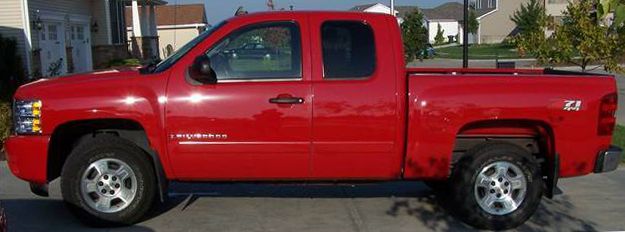 And a photochop of a better res picture: 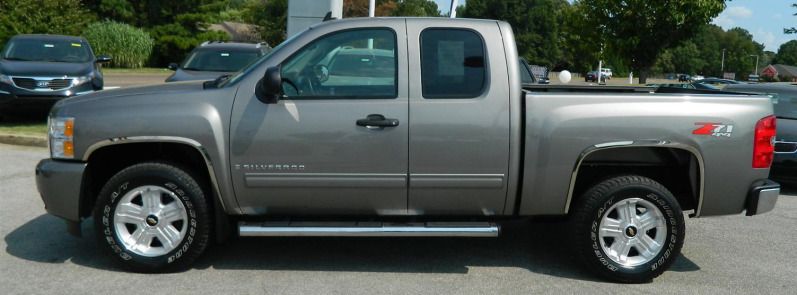 So, to start off, I took both bodies, marked the cuts, and mocked it up: 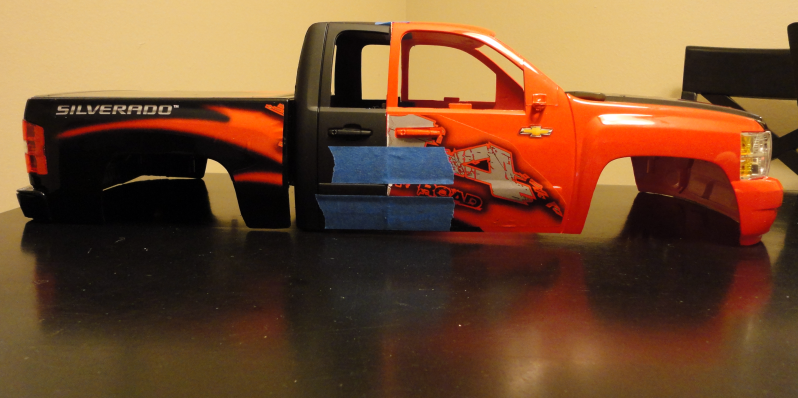 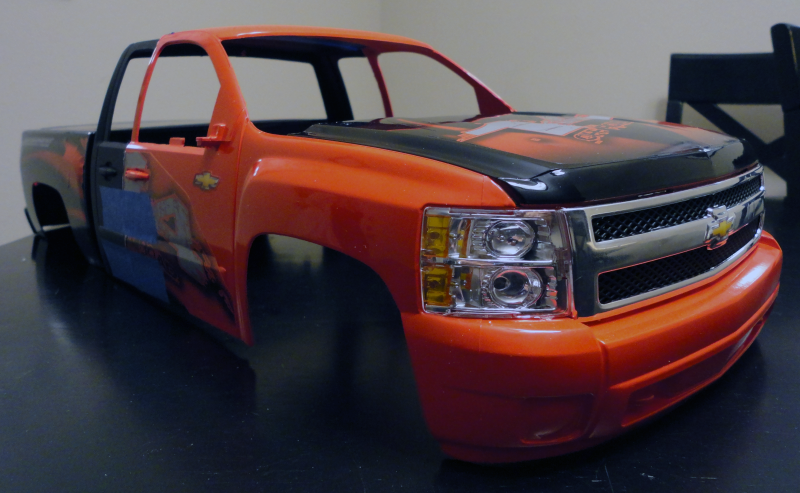 So, to compare the 1:10(ish) body with the 1:1 vehicle: 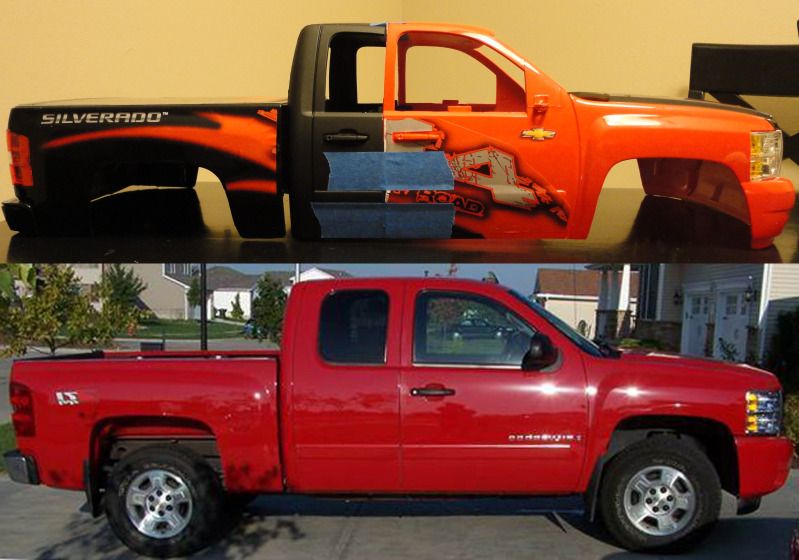 It looks like I've stretched it just a little short, but this was on purpose. The body is pretty close to 1:10 scale, so the wheelbase would have been 13.39" to be exact, but I think that is just way too big for 1.9's, so I only stretched it to 13" (which is still on the long side for 1.9's). As far as what is going under the body, I am killing my Savvy Avvy build, and using the SCX chassis, IFS set-up from the RS4, flipped solid rear axle and stock trans from the AX10/SCX10 with the WB stretched to 13". Haven't nailed down electronics plans yet though. Obviously, I have plenty of body work to do, with the hardest part being the roof. Although I may fudge it and make a small roof rack to hide the seam, I will probably use ABS cement, and a little bit of heat gun manipulation. This isn't my first Crew/Ext Cab extension, but these aren't easy either. I haven't decided on color, but for this one, I am thinking about getting some Chevy "Stealth Grey Metallic" or "Carbon Flash Metallic" from paintscratch.com for an authentic color. So, then what do I do with the leftover parts from the donor body? 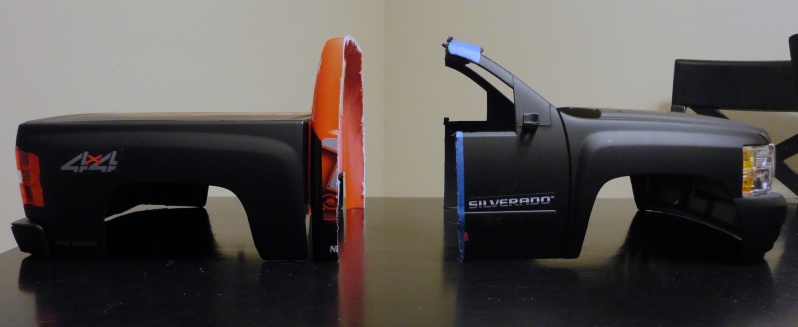 That's a perfectly good front clip and bed... So, how about a more extreme C3 crawler? Tube doors & bed, pinched nose, etc. Stay tuned for that build as well. As always, questions, comments and suggestions are welcome. |

|  |
| Sponsored Links | |
| | |
|
10-09-2012, 07:45 AM
| #2 |
| I wanna be Dave Join Date: Oct 2008 Location: Golden
Posts: 2,588
|
I wanted to know what this body scales out to, so comparing to the 1:1 - Dimension - 1:1 - Scale Body - Actual Scale Length - 220.3" - 22" - 1:10 Width - 79.9 - 8.375" - 1:9.54 Wheelbase - 133.9" - 13" - 1:10.3 That makes an average of 1:9.95, so we can just round it up to 1:10 scale. New Bright lists this body as 1:8 scale, but that would make this way larger than it is. 1:10 makes it nice and easy to figure out the scale of everything. First thing I have done to the chassis was to start getting the wheelbase worked out. This is what the chassis looked like right after pulling it from the Savvy Avvy: 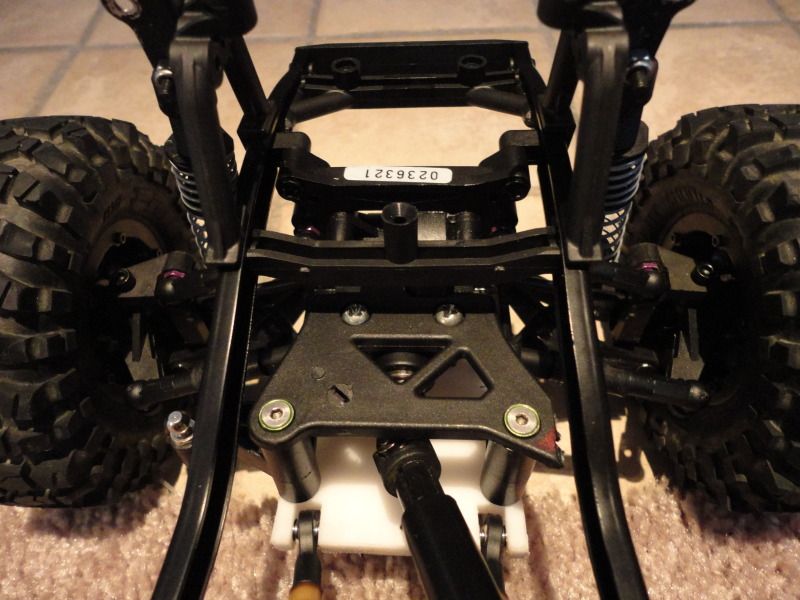 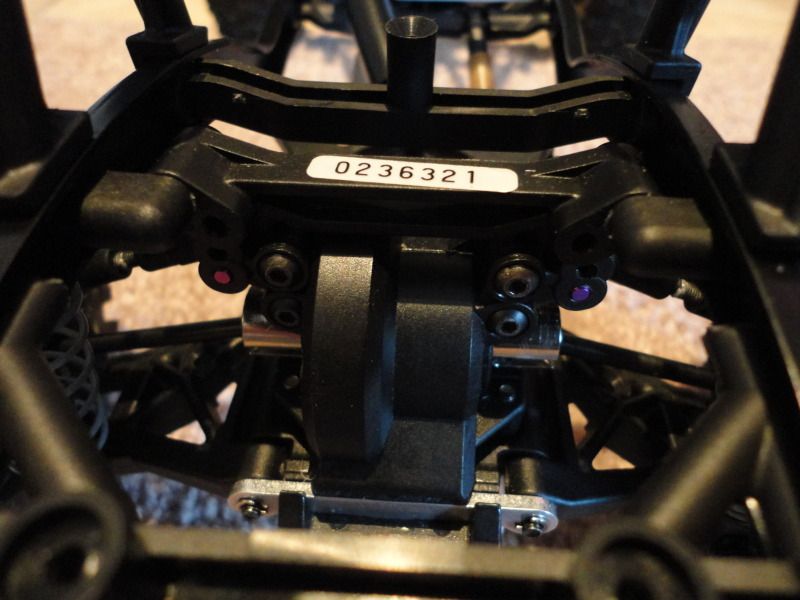 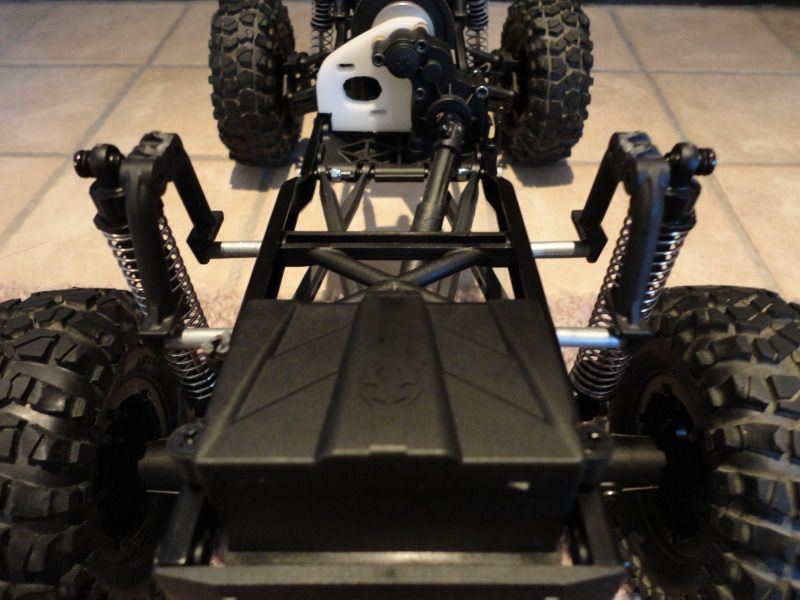 I flipped the IFS mount so that the RS4 Shock tower is in front of the mount, and moved the front shock towers forward. Next I need to stretch the rear to the final WB, and make new links all around. (Rear upper and lower, front lower, steering and IFS tie rods) I know the 1:1 uses leaf springs in the rear, but with the long wheelbase and IFS, I figure I'm already at a performance disadvantage, so I'm sticking with coilovers in the rear, but I am going to re-do the shock mounts as you see in the pic above. I am considering lay-down shocks with push rods, or maybe TC shocks. More to come soon. |
|
| |
|
10-09-2012, 08:09 AM
| #3 |
| Fan of wheelspeed Join Date: Jun 2011 Location: Southern IN
Posts: 3,369
|
nice start. This should be pretty cool.
|
|
| |
|
10-09-2012, 12:22 PM
| #4 |
| Rock Stacker Join Date: Jan 2012 Location: eldorado
Posts: 97
|
subscribing
|
|
| |
|
10-10-2012, 10:51 PM
| #5 | ||
| I wanna be Dave Join Date: Oct 2008 Location: Golden
Posts: 2,588
| Quote:
Quote:
Update: Got the initial wheelbase mocked up: 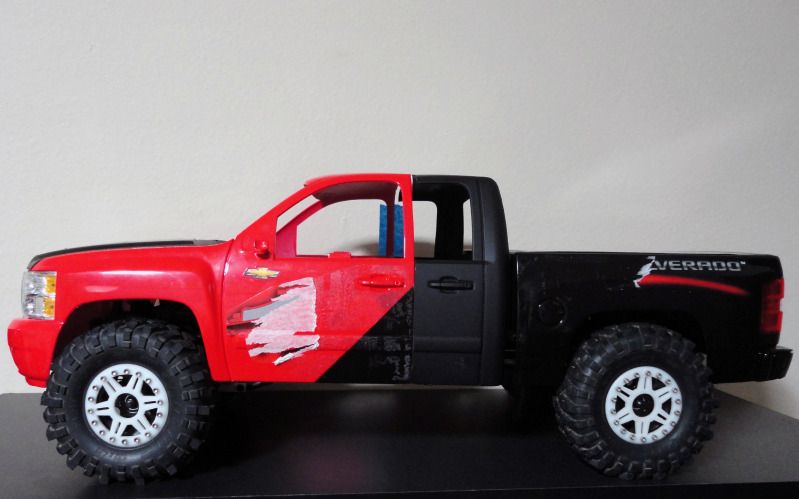 Wheelbase is just a little over 13", but will probably be the final WB with a little wheel well trimming to get the tires to tuck better. Width is great too, tires just barely stick out:   Although, I might look into just slightly narrower offset wheels, these (stock axial 1.9 beadlocks with Fubar Crawlers Delrin rings) should work just fine. So, some people have different methods for joining the pieces of the cab together. Here's how I do it: Clean-up the cuts and dry fit the pieces together, making sure that you rough up the plastic where you are going to be gluing together. 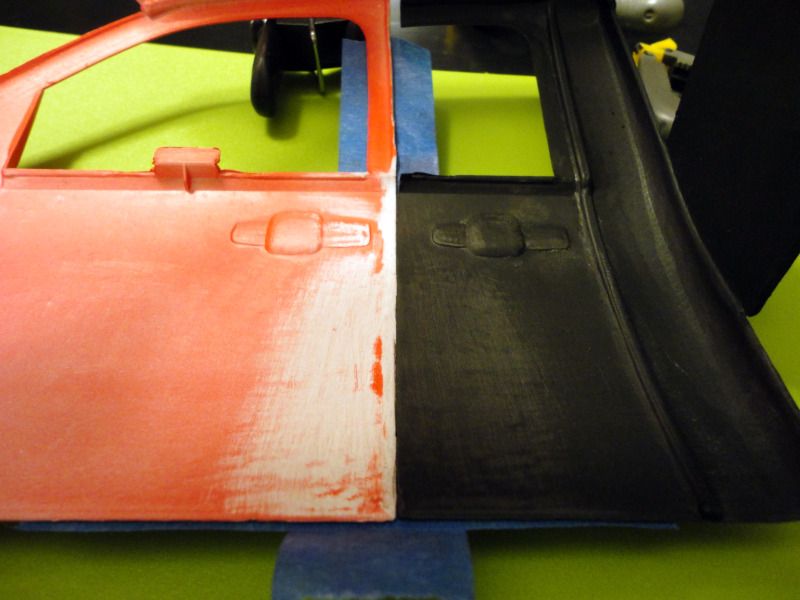 Then, with everything secured together, dab on some Oatey Brand ABS cement: 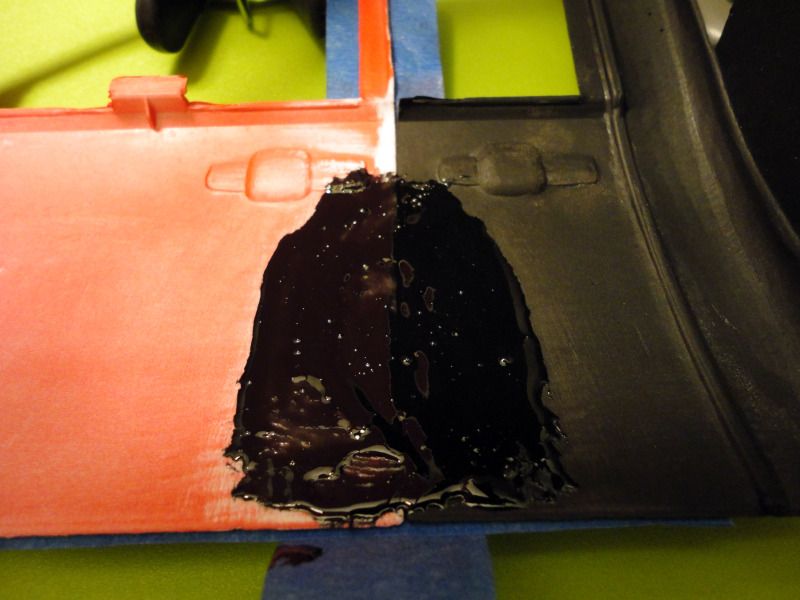 Then, using a piece of the door from the donor cab to strengthen the joint, apply some ABS cement to the joint piece and clamp everything together: 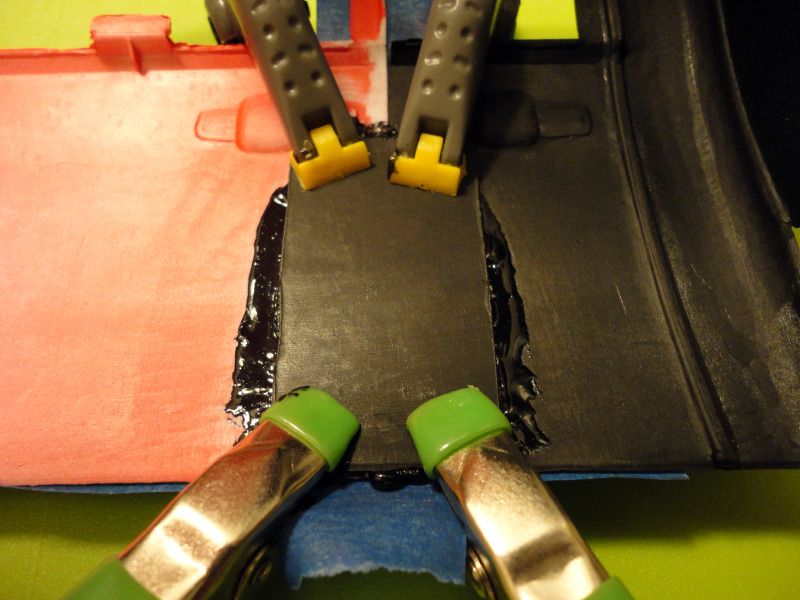 Next, add a little ABS cement to the edges of the joint piece and wait for the ABS cement to dry (this can be anywhere from a few minutes to over an hour):  After the cement has dried, you can unclamp it and leave it somewhere overnight to let the cement cure (the MEK in the cement will evaporate and the ABS will harden to it's final state). Tomorrow, I will finish applying cement to the entire joint on the inside of the body, and finish removing the damn stickers. On a side note, I am loving all the RC4WD buildoff builds. If I felt I could have finished this by the deadline, and had some cash to get the required 5 pieces of RC4WD gear, I would have loved to enter the buildoff. Alas, I will do my best on this build anyway, and hope to come out with something to be proud of. Stay tuned... | ||
|
| |
|
10-10-2012, 11:04 PM
| #6 |
| Quarry Creeper Join Date: Dec 2008 Location: Hawthorne, CA
Posts: 279
|
That looks great, can't wait for future updates.  |
|
| |
|
10-11-2012, 05:07 AM
| #7 |
| Rock Stacker Join Date: Aug 2008 Location: Valparaiso
Posts: 53
|
Looks like you're off to a good start! I've been wanting to build this exact truck to replicate my 1:1 2011 z71 ex-cab in victory red... Too bad nobody makes 1.9 general red letters!
|
|
| |
|
10-17-2012, 08:17 AM
| #8 |
| I wanna be Dave Join Date: Oct 2008 Location: Golden
Posts: 2,588
|
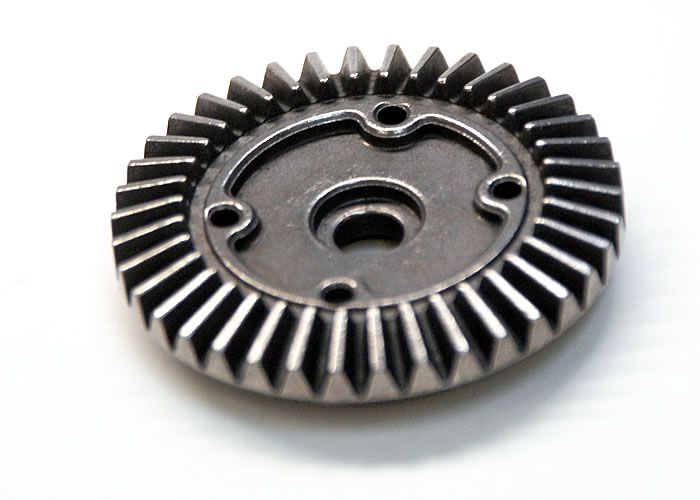
Sorry, no real updates, school this week was kicking my butt, and had some other things to take care of. I did get the stickers and residue off the cab, but haven't finished anything else with the body. The next step is to shave the door handles on the rear door and get the front part of the rear door cemented in. I might have some time tomorrow to work on it, but pictures will definitely be coming. I have received some PM's about how I did the IFS, and I don't mind sharing the info here as well: I used the entire front clip from the HPI RS4 Evo 3, with an axial diff and locker from the SCX10. The diff outputs are just sitting in the locker, not secured by anything other than the dog bones. To add it to the SCX frame, I simply used a short servo mount (one that came with the SCX frame set, see pic below) and screwed it into the SCX frame and the RS4 shock tower. For the lower end of the IFS, I made a skid plate from 1/4" Delrin and made some links to attach to the stock scx skid, but it would be simple enough to just cut the stock RS4 chassis and make some links to secure the lower end. Another method would be to make a skid plate that goes the full length to the SCX skid. This also allows the steering bellcranks to mount securely. (And this counts as a chassis mounted servo for scale points.) With the shock tower mounted like in the post above, with stock SCX10 rear links, it matches the stock wheelbase pretty closely (11.5" or so I think). So this could be an easy conversion for existing builds. The short servo mount came from this parts tree (AX80028 ):  The little ones in the top right corner of the picture. You probably already have this part from either an SCX kit/rtr or frame set, if not, the parts tree is pretty cheap, or you can use some other servo mounts or fab a bracket. Honestly, I don't know why more people don't use the RS4 stuff for IFS conversions with the SCX axles. They end up being exactly the same hex-hex width, and use the same ring and pinion. Only issue is that you have to flip the rear axle to reverse the direction the tires turn (to match the direction the front tires turn.) Although, I am considering a direction reversing transfer case so I can mount the trans further forward above the IFS and to possibly allow an interior later. This would be simply two 32p pinions with the output to the front axle on one pinion, and the input from the trans and output to the rear on the other pinion. This would keep the rear axle in the same orientation as stock. |
|
| |
|
10-17-2012, 10:05 AM
| #9 |
| I wanna be Dave Join Date: Oct 2007 Location: Castle Rock, WA
Posts: 8,785
|
Thanks for the information. What is the hex to hex width on the RS4?
|
|
| |
|
10-17-2012, 12:45 PM
| #10 | |
| I wanna be Dave Join Date: Oct 2008 Location: Golden
Posts: 2,588
| Quote:
| |
|
| |
|
10-17-2012, 06:40 PM
| #11 |
| I wanna be Dave Join Date: Oct 2008 Location: Golden
Posts: 2,588
|
Didn't snap pics, but measurements were the important part: Hex to Hex: Rear (stock SCX10) - 7.4375 (7 7/16") Front at widest - 7.5 (7 1/2") Front at ride height - 7.375 (7 3/8") So, plus or minus 1/16" during the suspension cycle. Last edited by monkeyracer; 10-17-2012 at 11:32 PM. |
|
| |
|
10-17-2012, 08:45 PM
| #12 |
| I wanna be Dave Join Date: Aug 2005 Location: NE Ohio
Posts: 8,817
|
Nice! Watching this one, been collecting parts and planning a crew cab version of this for a bit now Been hunting nitro rs4s for a bit |
|
| |
|
10-17-2012, 09:58 PM
| #13 |
| Quarry Creeper Join Date: Mar 2011 Location: queen creek az
Posts: 249
|
Nice like the use of the rs4 for the IFS. Check out frdtrkguy s exo wraiths front outputs could possibly work for you if you have issues with the dog bones and wanna use MIPS. Terra-Wraith now with MIP mod |
|
| |
|
10-17-2012, 10:11 PM
| #14 | |
| RCC Addict  Join Date: Mar 2010 Location: Yelm
Posts: 1,643
| Quote:
| |
|
| |
|
10-17-2012, 10:43 PM
| #15 |
| Rock Crawler Join Date: Jun 2010 Location: UTAH COUNTY
Posts: 837
|
Can you post more pics of the front end with the ifs setup?
|
|
| |
|
10-17-2012, 11:32 PM
| #16 | ||
| I wanna be Dave Join Date: Oct 2008 Location: Golden
Posts: 2,588
| Quote:
Quote:
As far as the output shafts benzoel linked to: They are definitely beef, but really overkill for this type of build. I highly doubt I will have any issues with the dogbones, but will cross that bridge if I do have any issues. I will try and post some pics of the IFS from further back in the next update. I want to look at the shocks and mounting position for the front and rear before I post more chassis shots since what is on there is just mock up. Thanks for the comments guys! Keep them coming. I appreciate the questions and feedback. | ||
|
| |
|
10-17-2012, 11:51 PM
| #17 |
| RCC Addict   Join Date: May 2011 Location: Utah County
Posts: 1,802
|
Going for a stock look or a crawler look? Sent from my SCH-I535 using Tapatalk 2 |
|
| |
|
10-17-2012, 11:53 PM
| #18 |
| RCC Addict Join Date: May 2011 Location: Utah County
Posts: 1,802
|
Another question. How do the gear ratios compare between front and rear? Sent from my SCH-I535 using Tapatalk 2 |
|
| |
|
10-18-2012, 07:32 AM
| #19 | |
| I wanna be Dave Join Date: Oct 2008 Location: Golden
Posts: 2,588
| Quote:
The truck I build from the spare body parts will be more of a TTC/G6/Highly Modified look. The RS4 uses the EXACT same internal gears as the Axial stuff, so in this one, I used the AX10 diff and locker in front and rear. The housing can accommodate any diff you can toss into an Axial housing (Stock 38/13, Overdrive, Underdrive, etc) This is what really initially led me to using the RS4 stuff. Same width, same diff gears. The gears from the RS4 3 Evo+ are actually heavy duty overdrive gears (HPI 86329), and for a LOT less money than Axial's stuff, and in another of my builds, that's what I am using. Last edited by monkeyracer; 10-18-2012 at 07:34 AM. | |
|
| |
|
10-18-2012, 07:51 AM
| #20 | |
| I wanna be Dave Join Date: Oct 2008 Location: Golden
Posts: 2,588
|
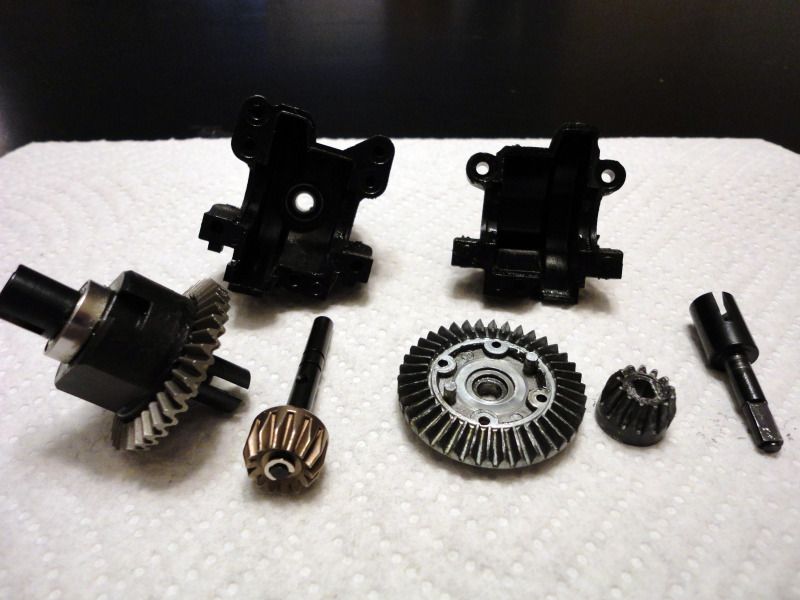
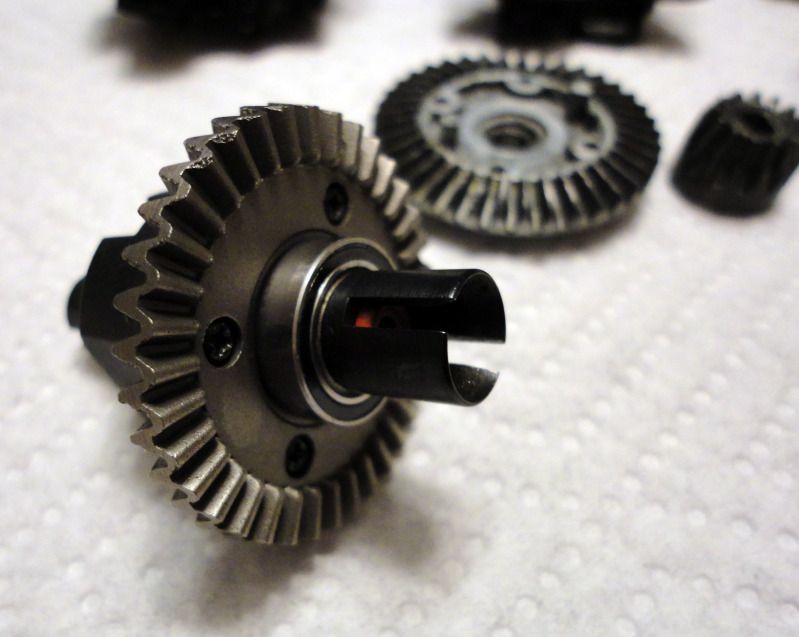
I found a post I did in another of my threads (Spare Parts Fun Buggy) that shows the different Ring/Pinion options: Quote:
| |
|
| |
|
 2009 Chevy Silverado IFS Ext Cab Short Bed - Similar Threads
 | ||||
| Thread | Thread Starter | Forum | Replies | Last Post |
| Ext Cab Hilux Honcho w/ Steel Bed | slobin3d | Axial SCX-10 | 304 | 08-16-2012 07:11 PM |
| Short bed Chevy | thunder7845 | 2.2 Scale Rigs | 11 | 01-07-2009 09:59 AM |
| My CHEVY SILVERADO rear bed/exocage build | xXWKMafiaXx | 2.2 Scale Rigs | 2 | 08-02-2007 09:29 PM |
| |


 Linear Mode


