| |
 02-06-2010, 07:14 AM
| #61 |
| Rock Stacker Join Date: Dec 2009 Location: napoleon
Posts: 81
|
now i want to build one
|

|  |
| Sponsored Links | |
| | |
|
02-06-2010, 08:17 AM
| #62 | |
| Suck it up!   Join Date: Mar 2008 Location: Arkansas
Posts: 11,652
| Quote:
One of the things I was hoping to accomplish with this build was to make people realize why custom stuff can be pricey, and to appreciate the reasonable price of regular comp chassis' that vendors like yourself offer to us. I'm guessing that when this is all said and done, I'll have 20 hours into it. If I were to charge $10 an hour (cheap!), add materials, I'd have to sell it for over $200. I don't know too many people willing to pay that much for a comp chassis. And actually, when I build a chassis, I usually do a prototype out of plastic first to see how everything is going to sit. Sometimes there will be two prototypes before I commit the design to metal. This one I'm just doing off the cuff. Good or bad, I keep everything I build. I've probably got a good pound of cutting board and aluminum hanging on the wall from past designs. Designing and building is something I really enjoy...maybe even a bit more than driving. But a plain ol' flat sided chassis? Yeah, I can hammer one of those out in a few hours.  Last edited by Duuuuuuuude; 02-06-2010 at 08:45 AM. | |
|
| |
|
02-06-2010, 08:46 AM
| #63 |
| Newbie Join Date: Apr 2009 Location: Work on large yachts so mostly in the Mediterranean
Posts: 38
|
Looks great any more today?
|
|
| |
|
02-06-2010, 08:50 AM
| #64 | |
| Suck it up! Join Date: Mar 2008 Location: Arkansas
Posts: 11,652
| Quote:
Untill then I'm going to get some pics of setting the chassis up using a wheelbase jig. I'm not going to get real heavy into suspension tech, but I'll show a few important points. | |
|
| |
|
02-06-2010, 11:27 AM
| #65 |
| Suck it up! Join Date: Mar 2008 Location: Arkansas
Posts: 11,652
|
On to setting up the chassis... You almost have to do this with a setup jig. You can do it without, but it makes life much easier if you have one. I've made my own out of aluminum angle, but there are a few around here that can be purchased in the vendors section. CDW makes this kick-ass jig... http://206.180.232.134/forum/showthread.php?t=132764 Here I've got the axles bolted in and the chassis parked in the middle. Be sure to remove the steering rods when you do this. If the knuckles are toed in or out in can put the axles out of square.  If you do make your own jig, be sure that you make it tall enough so that you can rotate the axle without interference. I cut mine kinda close...  A very important part of setting up the front axle is to make sure you're knuckles aren't leaned too far forward or backwards, which is called caster. You also have to take into account the angle of the pinion (where the driveshaft attaches to the axle). You want to keep it pointed at the transmission to keep binding to a minimum. Axial C's are adjustable, so you can aim the pinion up and still maintain close to neutral caster.  Now we need to figure the ride height of the chassis. If you know what kind of clearance you want, write that number down. Then measure from the center of the wheel to the outside edge of the tire. Subtract that measurement from your ride height. For example if we want 3" under the skid, and we have a wheel/tire that measures 2 1/2" from center, we'll end up with 1/2". With that measurement we now know that we need the skid to sit 1/2" higher than the axle stub. Find something to sit the chassis on that gives you that height. For mine, a pack of cigs is just about right. Don't smoke kids!  Now we need to figure lower link lenth. Get the chassis set where you want it. I like a little forward weight bias in my chassis, so this will sit just a bit ahead of center. This is commonly called 60/40. If it were dead center, it would be 50/50. Measure from the centerline of the axle mounting point to the center of the skid mounting point. Do both sides. If the measurements aren't the same, scootch the chassis around untill they are.  Write that measurement down. Grab the link ends that you are going to use and measure from the center of the ball to the end where it attaches to the rod. Multiply that by 2, then take that number and subtract it from the first measurement you wrote down. This is your link lenth. Cut, drill, tap, and assemble the front links. Links can be made from many different materials. Delrin and stainless steel are probably the least likely to grab when you slide them over the rocks. Hard anodized aluminum is good as well, but regular aluminum is soft and will get boogered up pretty quickly. Here are the delrin links I'll be using...  Last edited by Duuuuuuuude; 02-06-2010 at 12:32 PM. |
|
| |
|
02-06-2010, 11:39 AM
| #66 |
| RCC Addict Join Date: Mar 2006 Location: MUSE, PA
Posts: 1,273
|
oh, hey, don't forget to let these kiddies know that they can just use all-thread with a brakeline sleeve... it's a nice simple method, and easy for a beginner to make their own links, too!! |
|
| |
|
02-06-2010, 11:44 AM
| #67 |
| Suck it up! Join Date: Mar 2008 Location: Arkansas
Posts: 11,652
|
Go ahead and install the front links. I've bolted the shocks in with them.  Repeat the same process with the rear links. Bent links take a little more effort to measure out, as you have to figure more than just the lenth between the eyes of the ball ends. I'm not really great at it so we won't talk about it here.  Now we're on to the upper links. These are pretty important. They center the axle, and set your pinion angle. I like to have my uppers as long as possible to keep my pinion aimed where it should be as the suspension cycles. Really short uppers will make the axle rotate quite a bit. You measure for the uppers in the same way you do the lowers. Find where they attach to the front axle and where they attach to the chassis. *note that the chassis is not sitting flat and is cocked back a bit in the pic. Don't measure it like that!  Here are the uppers assembled and installed.  Full blown suspension tech is a true science. There are tons of books and theories and some mind bending math if you want to get that deep. If you search around here, you'll find some really good threads going into detail about squat/antisquat which is really important. This is what will keep your rig from flipping over easily on climbs, and helps keep it planted in general. I'm not going to go into any great depth here, but will stick to the basics and also what I've found to work pretty well. You might hear how you need to keep all your links level or parallel, but that is not really true for every setup. Like I said, the lowers are for setting your wheelbase. They can angle up, down, whatever. The uppers, and in this case, the front uppers, need to be kept close to level. Higher than level will give you squat, lower than level will give you antisquat. The more angle they have, the more effect they will have on things like torque twist, stability, and traction. Again, there are volumes that could be (and have been) written on suspension tech, so I'm not going to go much further into it here. Last edited by Duuuuuuuude; 02-06-2010 at 08:20 PM. |
|
| |
|
02-06-2010, 11:48 AM
| #68 | |
| Suck it up! Join Date: Mar 2008 Location: Arkansas
Posts: 11,652
| Quote:
If you aren't confident in your measuring and cutting skills, all-thread is a great way to work out link lenths without hacking up and ruining a bunch of material. Get an approximate measurement, cut the allthread to lenth, attach the rod ends, and bolt them in. If the chassis is sitting wonky, figure out which link needs adjusted and screw the ends either in or out to shorten or lenthen the link. Reinstall and remeasure. Once its square, remeasure the all-thread between the links and that is how long you need to cut your material. Or, you can cut some tubing to cover the all-thread. You can get it in delrin, aluminum, steel, or titanium. | |
|
| |
|
02-06-2010, 11:55 AM
| #69 |
| RCC Addict Join Date: Nov 2005 Location: Kansas
Posts: 1,280
|
Awesome build, and Awesome info I personally don't care for "body-less" rigs, though this one seem pretty sweet! Maybe it's just because I can see it from start to finish...:-P |

| |
|
02-06-2010, 06:00 PM
| #70 |
| Suck it up! Join Date: Mar 2008 Location: Arkansas
Posts: 11,652
|
On to the rear upper links... Like the front, you'll need to set your pinion angle, and measure from the center of the mountint point on the chassis to the center of the mounting point on the 4 link plate. Remember to do both sides, and don't stop adjusting and measuring untill both measurements are equal. Setting up the rear 4 link makes all the difference in the world when it comes to dialing out torque twist (commonly refered to as "TT") on a shafty chassis. There are many additional modifications that can be made to the shocks and spring, but I feel that with the proper link setup, you can dial out 80% of TT. All of the rigs I've built use the same weight shock oil in both rear shocks, and the same size springs. About all I ever do to them is add a little preload to the left rear spring. Thats it. If you remember the front links, you'll know that they are set level with the ground. For the rear, we are going to set the chassis end of the links lower than the axle ends. This will give us anti-squat. Anti-squat will help push the rear tires into the ground, while help prevent the chassis from lifting up and rolling over on a climb.  You'll notice that they are not mounted at the same height at the axle. If you've ever heard the term "asymmetrical", this is what it means. You can either do this at the axle or at the chassis. However, when you move a link up or down, it moves in an arc, not a straight line. If you were to just shim the link end up on one side, it would not only be moving up, but closer to the other end, making it act like it were shorter. Were you to not correct for this, the axle would shift slightly to one side and the truck would not track straight. The next picture will show you how much of a difference a little height will make.  Its pretty obvious that the raised link sits further forward than the lower one. There are a couple of ways to keep things in check. You can make one link a bit longer, you can add a washer or shim between the link and the end, or you can use a 4 link plate with some extra holes for adjustability. I decided to make one myself that would allow me to mount them damn near anywhere I wanted and still have the axle centered. Anti-squat sounds like something that you can't have too much of. After all, the more you have, the more traction and hill climbing goodness you get, right? Wrong. Too much will allow the rear wheels to hop instead of spin. There isn't much traction in air, so a tire spinning on the ground is going to be much more benificial. If you aren't sure how much you should have, start with the links level, test drive, move them down a bit, test drive again, move, test, move, test, etc, untill you find a happy place. So now we've got the chassis built and the initial setup done. Whats left? I was going to get into building battery plates and 4 link plates, but there are so many available for really good prices, so I think I'll skip it. Next will be the roof, hood, and side panels. Probably won't come untill tomorrow though, I need to give the roof some serious though as to what it will be made of. I will leave you with a couple more pics. Enjoy.   If anyone has any questions or comments, please post them up. There is alot of info here and I'd hate for anyone to get lost in it. |
|
| |
|
02-06-2010, 06:22 PM
| #71 |
| Quarry Creeper Join Date: Oct 2009 Location: Wells VT.
Posts: 311
|
Duuuude, you're really pouring it on now. Thank you for going into such detail, it's really helping me get my head around chassis setup when starting from scratch. Which I will be doing shortly |
|
| |
|
02-06-2010, 06:28 PM
| #72 | |
| Ex Nor-CalRCRC slave  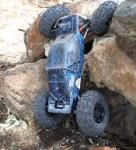 Join Date: Dec 2008 Location: San Mateo, CA.
Posts: 2,242
| Quote:
Yes, this thread is getting to sticky status. Great guide | |
|
| |
|
02-06-2010, 07:07 PM
| #73 |
| I wanna be Dave Join Date: Oct 2006 Location: Centered
Posts: 2,082
|
This is by far one of the best build threads I've seen to date, you couldn't ask for a more thorough compilation of tech. Nicely done my man |
|
| |
|
02-06-2010, 07:24 PM
| #74 |
| Pebble Pounder Join Date: Dec 2005 Location: MODESTO
Posts: 142
|
wow great detail..nice write up |
|
| |
|
02-06-2010, 08:18 PM
| #75 |
| Suck it up! Join Date: Mar 2008 Location: Arkansas
Posts: 11,652
|
Thanks guys. Its nice to know I've actually retained some usable information. And I'm still back-pedaling a bit! I'll be going back through all this shortly to see if anything needs to be expanded on or corrected before I move on. If you see something I should pay attention to, let me know! |
|
| |
|
02-06-2010, 08:22 PM
| #76 |
| Rock Stacker Join Date: Jan 2010 Location: mount vernon
Posts: 88
|
that was a really cool build you do really good work thanks for sharing
|
|
| |
|
02-06-2010, 08:50 PM
| #77 | |
| Suck it up! Join Date: Mar 2008 Location: Arkansas
Posts: 11,652
| Quote:
| |
|
| |
|
02-06-2010, 09:34 PM
| #78 |
| Rock Crawler Join Date: Aug 2007 Location: Atlanta
Posts: 615
|
hmm, nice build so far Duuude. I like how you take pics of every step you do. Definitely going to help the newbs out!
|
|
| |
|
02-07-2010, 09:51 AM
| #79 |
| Newbie  Join Date: Jan 2010 Location: Bend
Posts: 32
|
What are you using to scribe the lines with?
|
|
| |
|
02-07-2010, 10:07 AM
| #80 | |
| Suck it up! Join Date: Mar 2008 Location: Arkansas
Posts: 11,652
| Quote:
| |
|
| |
 |
| |


 Linear Mode


