| |||||||
Loading
 |
| | LinkBack | Thread Tools | Display Modes |
| |||||||
 |
| | LinkBack | Thread Tools | Display Modes |
| | #1 |
| Quarry Creeper Join Date: Oct 2016 Location: Hanover
Posts: 304
|
Alright yall, as some of you may know from my B1B build, My IFS Bomber Build, Iím pretty new to this RC world, but have built 3 rigs so far and am enjoying the building process and outdoor fun with them. I need one more rig in the staple so myself and 3 kids can each have one to play with at the same time. When DMG announced the release of their B2B kit, I was hesitant at first, but the more I looked at it and read about it, I decided this would be my 4th and final rig. Anyway, I should be getting the kit within the next couple days now, so figure I would get this thread started. Iíll try to be as detailed as my B1B build, hoping this will help someone down the road. Iíll be building this from scratch, like I did with the B1B, and will eventually do a comparison on different types of terrain with all 3 Bombers (Solid Front/Rear, (B1B) IFS/Solid Rear, and (B2B) IFRS) and see how they compare. |
| |  |
| Sponsored Links | |
| | #2 |
| Quarry Creeper Join Date: Oct 2016 Location: Hanover
Posts: 304
|
The parts list: Bomber Cage rear cage component - Axial AX31320 Battery Tray Chassis - Axial AX31318 Lower Cage rails - Axial AX31320 Center Cage - Axial AX31319 Cages sides - Axial AX31322 Interior set - Axial AX31328 Bomber clear body - Axial AX31327 Electronic box Wraith - Axial AX31179 Battery strap- Axial AX31332 Exo Bumper- Axial AX80093 Exo Bumper skid plate -Axial AX30799 Axial Body clip 6mm - AXA1059 Front End IFS DMG B2B Kit - DMG Yeti Upper Chassis brace - Axial AX31104 F2 Front toe block -Axial AX30812 Exo Toe Block insert set Axial -AX80100 (enough for front and rear) M3x61 screws -Axial AXA0128 M3x40mm cap head - Axial AXA0093 Steering king pins - Axial AX30382 Yeti A Arms - RPM 70472 Stainless Steel 3/16" tube for A-Arm sleeve Yeti front skid plate -Vanquish VPS07890 double sheer steer rack -Vanquish VPS0723 bell crank - Vanquish VPS07811 steering rack - Vanquish VPS07232 front link kit Ti - Vanquish VPS07200 front caster blocks - Vanquish VPS07581 steering knuckles - Vanquish VPS06551 Exo Yeti axle shafts with Open Diff Outputs- Dlux Yeti Bulkhead modified bearing (Axial AX80091) - Dlux When Open Front 20Million diff putty -Gravity RC GRC420 Spider Beveled Gears 13T/10T - HPI Racing # 86014 GCM Aluminum Diff Carrier 43t/13t HD Diff gear - Axial AX30402 When Locked Front LockedUp RC Yeti front locker HR Diff Cup #AEX11C01 Axial Standard Diff/Pinion 38/13 #AX30395 Rear end IRS Exo rear arms - RPM 70452 Stainless Steel 3/16" tube for A-Arm sleeve 43t/13 HD Diff gear - Axial AX30402 Rear Toe Bock set -Axial AX30864 Exo Toe Block insert set Axial -AX80100 (from front end) rear hub carrier silver - STRC STA80104 exo rear chassis brace - STRC STA80101 rear camber link silver - STRC STA80097 LockedUp RC Yeti Locker Exo/Yeti Axles with Open Diff outputs - Dlux Camber link - Grade 5 - 3/16" Titanium Rod - Dlux Yeti Bulkhead modified bearing (Axial AX80091) - Dlux Tranny Pieced together Supershafty Bombproof Wraith Tranny – includes: Aluminum Wraith Dig Tranny case - Hot Racing WRA3801 Super Duty Steel Mid Idle Gear - HR #SSCP1000XM Super Duty Steel Top Drive Gear - HR # SSCP1000XT Steel Diff Locker Gear - HR #WRA38X 5x18 Shaft - Axial AX30190 Super Shafty Beefy Top Shaft Axial Slipper Spring - Axial AX30413 Robinson Racing Steel Slipper - # 7856 Supershafty Wraith Motor plate Fast Eddy Wraith Bearing kit Spur Cover - Axial AX80078 Robinson Racing X-Hard Steel Pinion 32P 12T 5mm - #8612 with Robinson Racing 5mm- 1/8" reducer #1200 Drive Shafts WB8 HD - Axial AX31133 and AX31148 (Front and Rear) Suspension/tires Powerstroke XT 5" shocks (rear) - Pro-line 6275 Gmade XD Piggyback 93mm shocks (Front) - Gmade (With Pro-Line Powerstroke Slash springs #6063-03 and rebuild kit # 6063-02) Shock X Rings for both shocks - #2362 SLW 350 hubs - Vanquish VPS01040 Hub screw kit 4-40 5/16" cap head - Team KNK 2.0x11mm pin - Axial AX31028 12mm Hex Hub - LockedUp RC Proline Hyrax 2.2 Tires Proline Fautlines 2.2 Wheels Proline 2.2 dual stage Foams mixed with Crawler Innovation 6.0 DD Medium Foams Electronics Servo- Savox 2290SG - Savox SAVSB2290SG Servo Horn - 25T Aluminum - Axial AX30836 ESC – Castle Creations Mamba Monster X Castle X Series Sensor Harness - #011-0108-00 Motor – Holmes Hobbies Puller Pro BL540 3500 Brushless WP Axial M4x55 Turnbuckle - AX31272 - with Traxxas Jato Rod Ends for Drag link Futaba 4PV radio R304SB 4-Channel Telemetry Receiver Hobbico LifeSource Life 6.6V 1900mah radio battery Venom and Duratrax Onyx 3S Lipo Batteries Miscellaneous Bearings -Fast Eddy SS screws kit for Bomber - Team KNK Rod Ends - Traxxas #5347 Jato Rod ends - Traxxas #5525 Shock Xrings (for leak free shock) - Traxxas 2362 TA Green slime XT60 Connectors Last edited by *Old*; 04-17-2017 at 10:03 PM. |
| |  |
| | #3 |
| RCC Addict Join Date: Dec 2014 Location: So Cal
Posts: 1,005
|
Nice. Keep the pics a rollin'. So you're gonna be production B2B -1 then, right?  How cool is that? How cool is that?
|
| |  |
| | #4 |
| Quarry Creeper Join Date: Oct 2016 Location: Hanover
Posts: 304
| Last edited by *Old*; 04-05-2017 at 12:05 PM. |
| |  |
| | #5 |
| Quarry Creeper Join Date: Oct 2016 Location: Hanover
Posts: 304
|
Let's start with cutting the stock parts. For the Bomber cage, you're cutting the Axial Lower Cage Rails AX31320, and front bumper from the Axial Center Cage AX31319. For the Yeti Upper Chassis Brace AX31104, you cut off the wings. Here is the cage in stock form 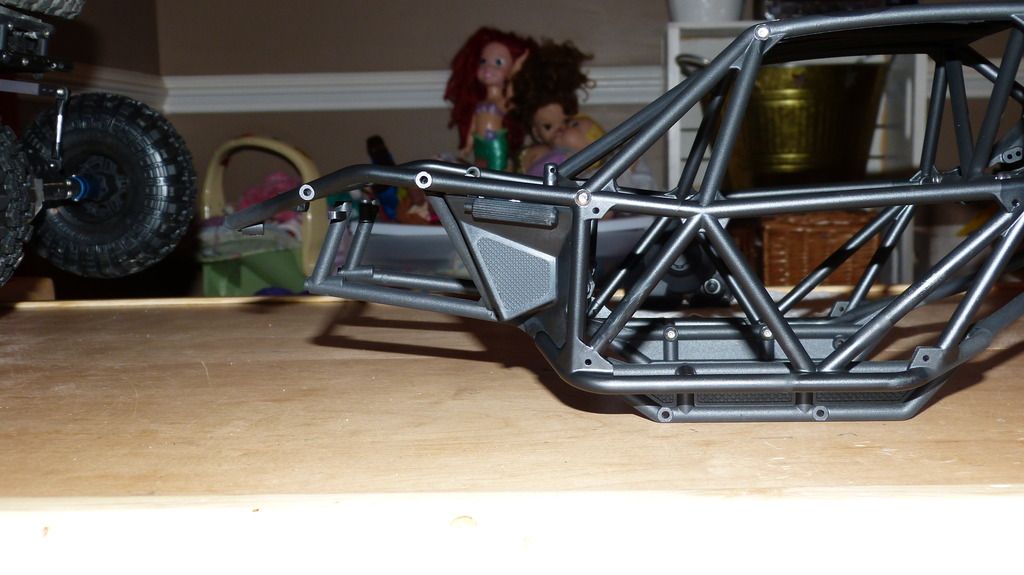 I used some wire cutters to clip off the two bottom cage brace. Take care not to cut too far into where the screw hole is. 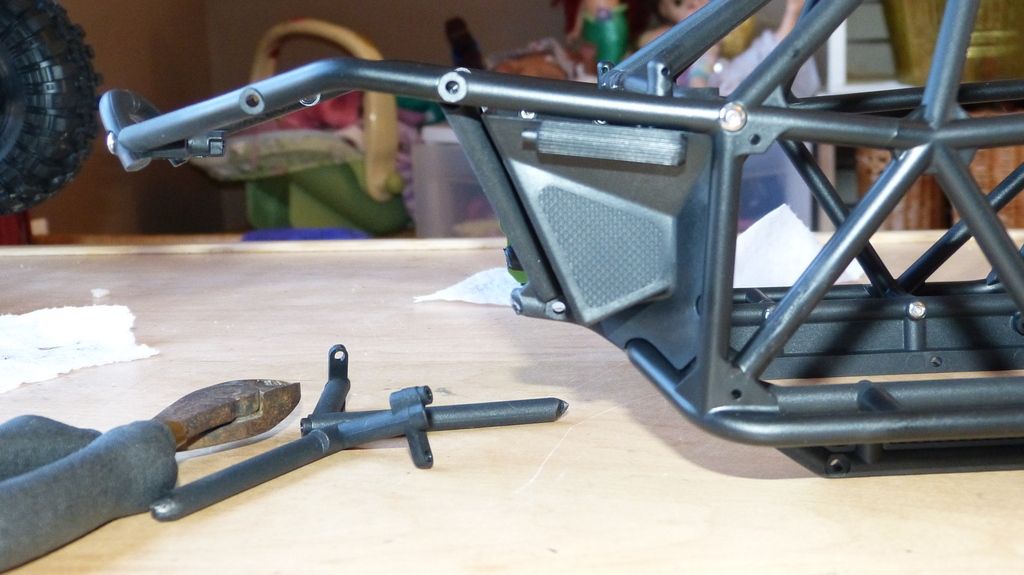 Cut the bottom area off the front bumper. Again, be careful not to cut into the screw hole. It's angled here, so it's easy to cut into if you're not paying attention. I almost did.  And the Yeti Upper Chassis brace - Do not use wire cutter to cut this. This plastic area is hard, not very flexible feeling. I used the wire cutter on my B1B build and it cracked, but I was fortunate the crack was in the right area. Here I used my band saw, but any Dremel type tool will work. 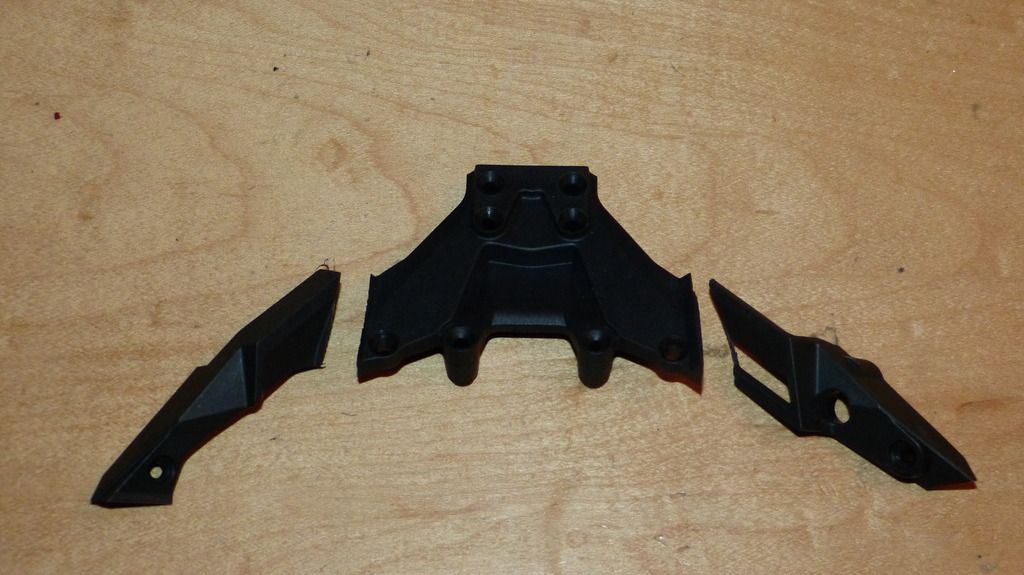 I went with the Exo Front Bumper AX80093, like on my B1B, and had to notch off approx 1/8" on each side of the bottom area to fit the VP front skid. 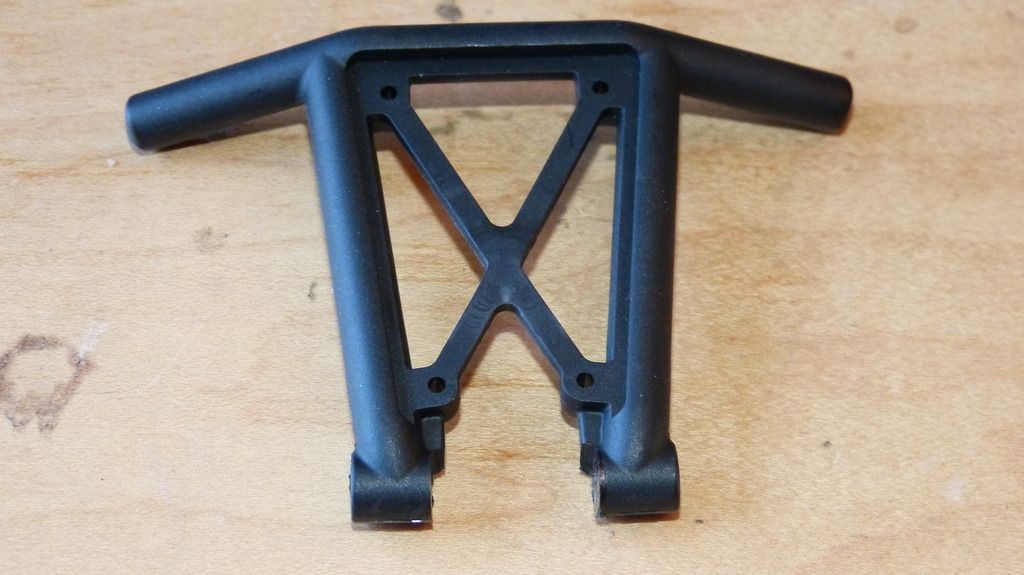 |
| |  |
| | #6 |
| Quarry Creeper Join Date: Oct 2016 Location: Hanover
Posts: 304
|
So I decided to go with RPM A Arms again, as oppose to Axial, since the RPM plastics are much stronger. From my experience with the B1B, I've hit stuff going full speed, and the arms are holding up pretty well so far. And even better, sleeving them will help "strengthen" the 3x61mm screws as well. I did this mod on my B1B and had some leftover 3/16" SS tubing, so naturally, I'll do it here since it's pretty simple to do. I didn't see any of the B1B guys doing this and I don't think any has mentioned bending their 3x61mm screw, however I've read many Yeti guys doing this, so why not. RPM Arms with the 3/16" tube cut to size. 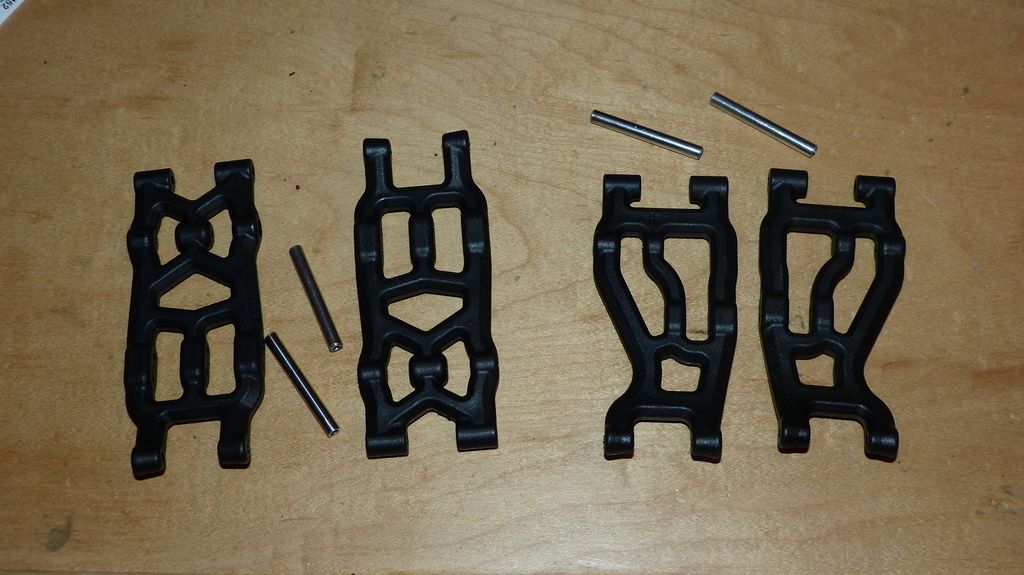 I used 3/16" drill bit and drilled fairly slow. The drill bit will go through plastic easily. Just keep her straight. 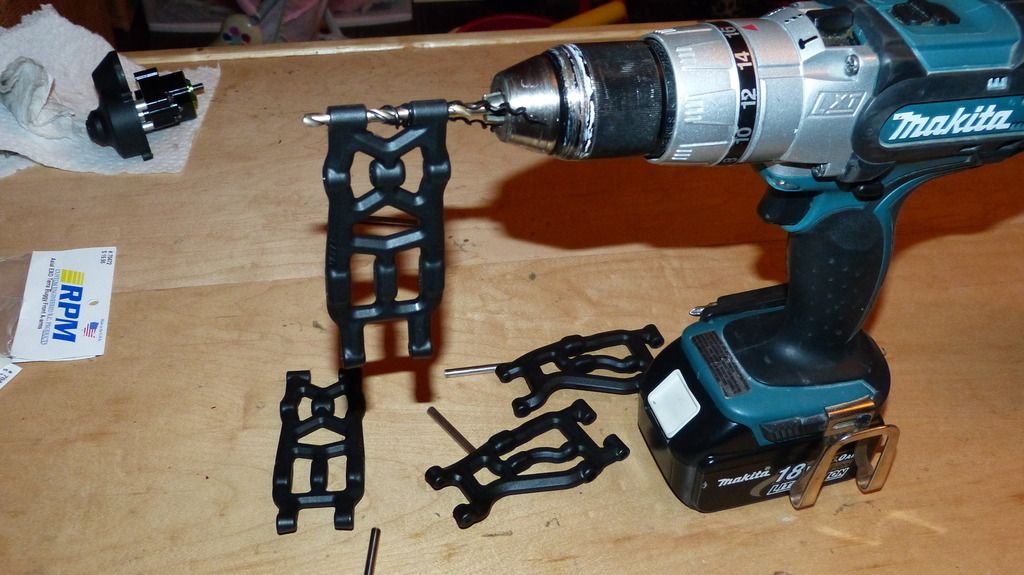 This required a lot of muscle, and anger  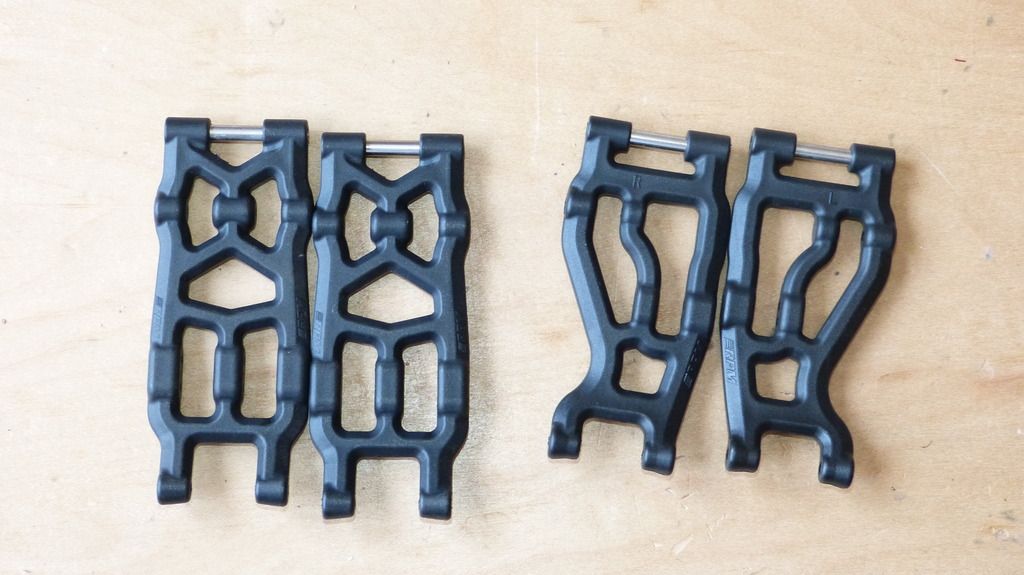 You want the tube to be flush or barely smaller than the arms.  |
| |  |
| | #7 |
| Quarry Creeper Join Date: Oct 2016 Location: Hanover
Posts: 304
|
Want to get this Tires/Foams stuff out of the way, since to me it's boring I was deciding between the ProLine Hyrax and TSL XLs. I have a set of the CI DD 6.0 Std inner, Medium Outer foams and the ProLine 2.2 Dual Stage foams. I'm using the Pro-Line plastic Fault line wheels b/c I'm fairly happy with them on the B1B. The one thing I hate about these wheels is all those damn beadlock screws. So here are the 3 foams. The CI on the left, PL Dual Stage in the middle and the Stock PL foams that come with the Hyrax and TSL. (It's nice to see these are are a lot smaller/better sized, than the stock foams that came with the PL Flat Iron XLs The center CI and PL foam are the same circumference, but the outer foam on the CI is much larger and (and softer). 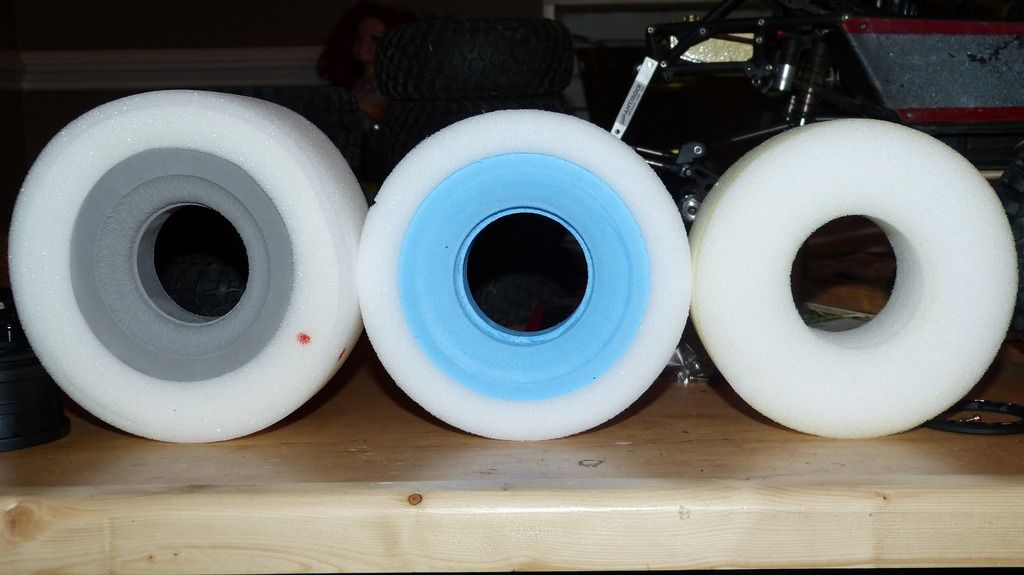 But the PL center foam is much wider, which fills out these PL tires better. 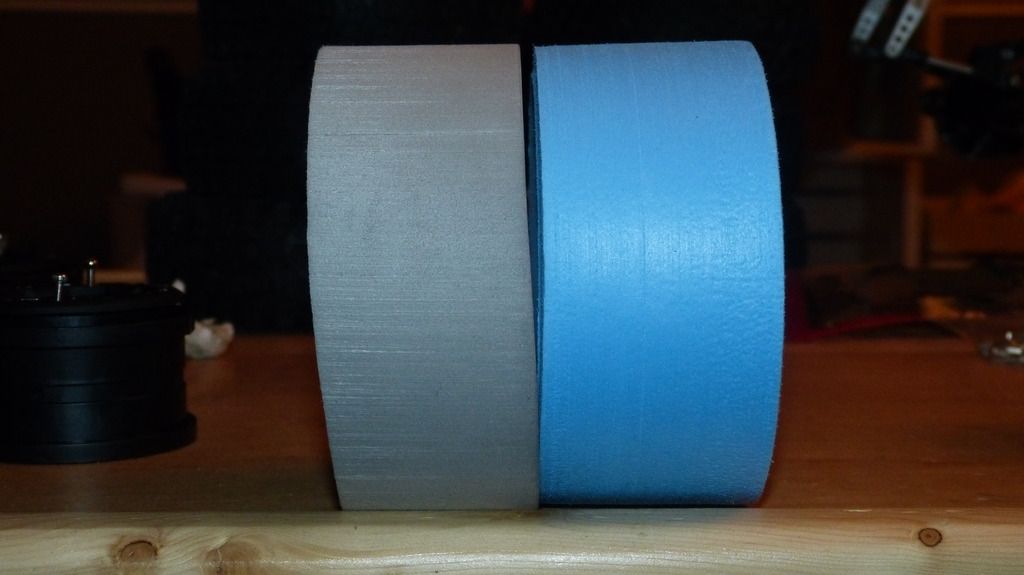 Just a few comparison pics between the Hyrax, TSL XL and Flat Iron XLs. The Hyrax has the CI 6.0 foams with Tuning ring. The TSL has the PL Dual Stage, and the Flat Iron has the CI 6.0 with no tuning ring. 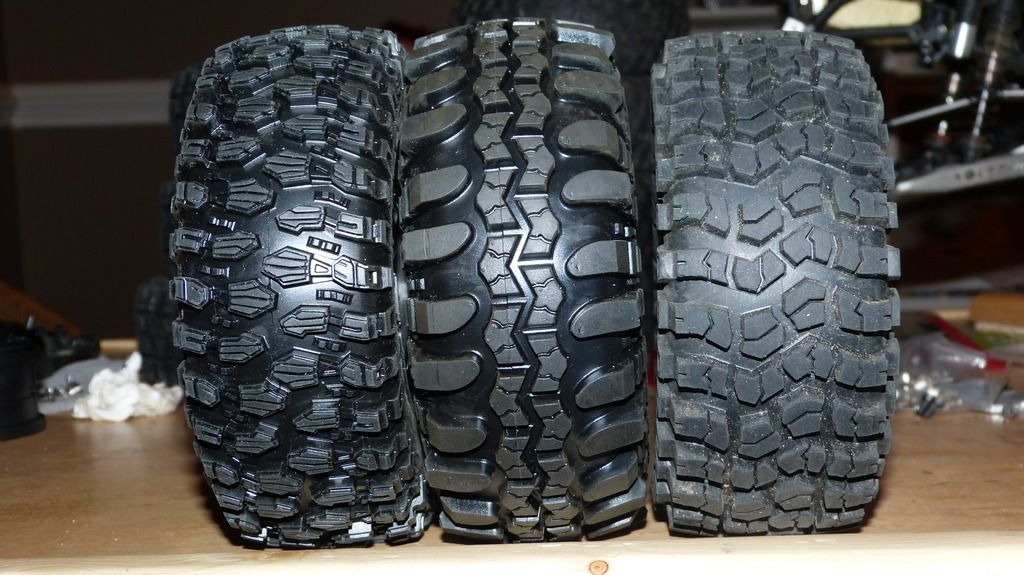 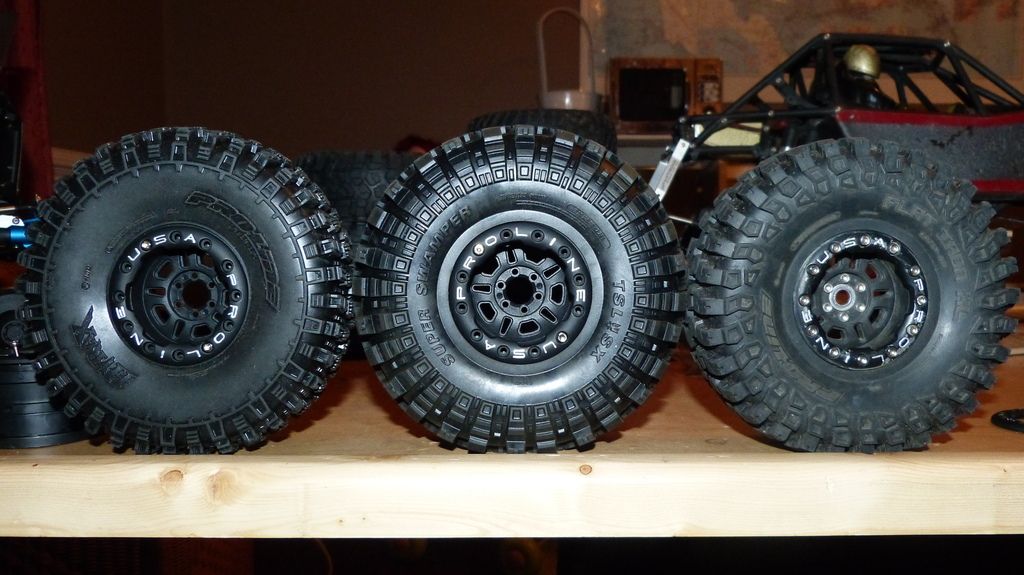 The Hyrax is noticeably thinner than the TSL and Flat Irons. 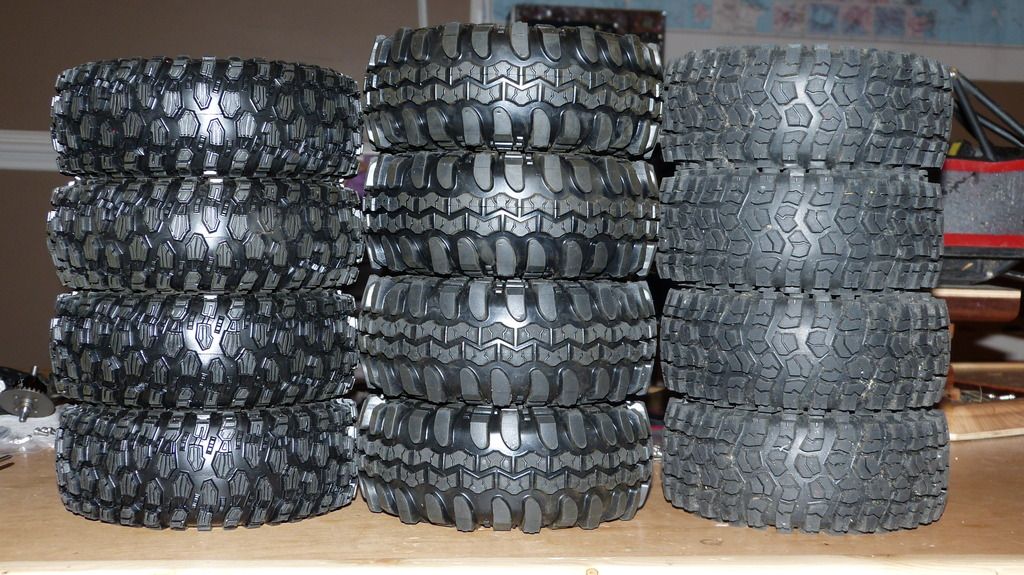 After a few days of testing with my sons, I decided to go with swapping the CI outer foams onto the PL inner foam and run these up front. For the rear, I used the PL Dual Stage. I felt this setup gave the best overall performance, however it was not "earth shattering" noticeable. I think most would be fine with just using the CI DD. On left is the PL dual stage with CI outer foams. Middle is the PL Dual stage. Right is the CI DD inner with PL dual stage outer foams. 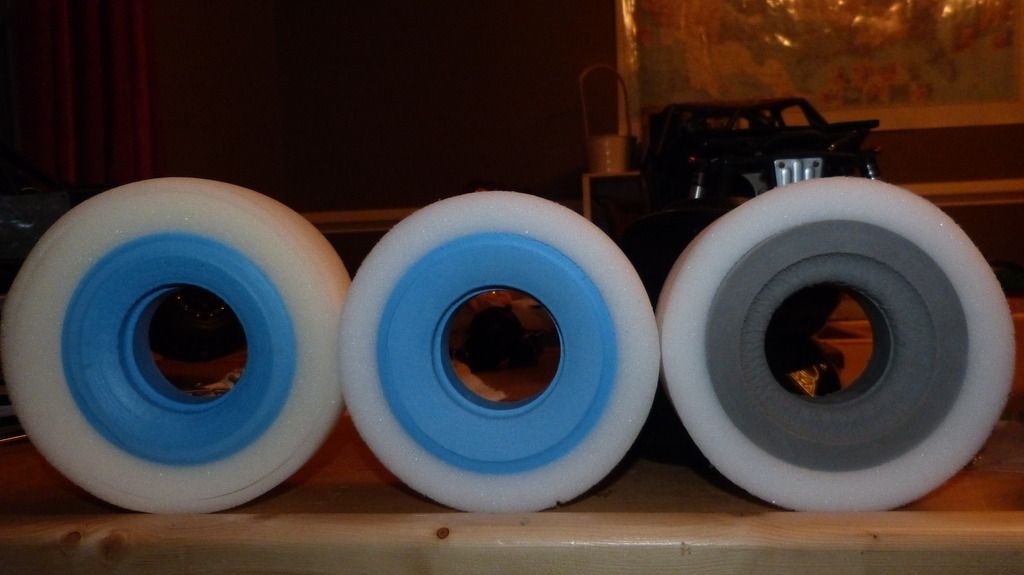 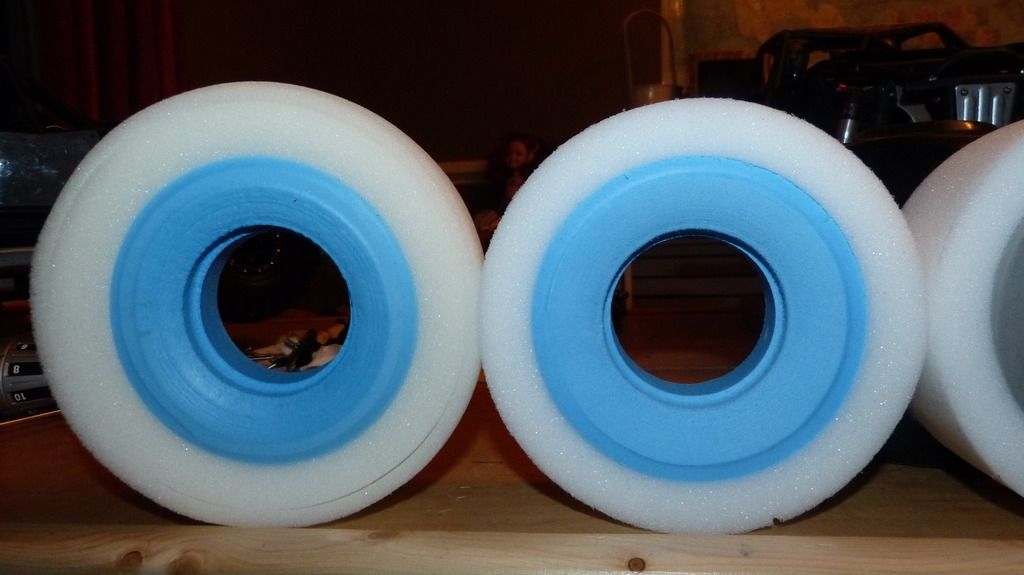 Also decided on the Hyrax for now. I really wanted the TSLs to be better as I like the look of it much more, but going with performance on this one... |
| |  |
| | #8 |
| Quarry Creeper Join Date: Oct 2016 Location: Hanover
Posts: 304
|
Alright, the last of the boring stuff. Posted on my B1B how to make the Gmade shocks leak proof. Figure I do the same here with the Pro-Line Powerstroke. I will say, the PL shocks seems to be very well made. I like the dual shock spring setup. Since it comes assembled, it's a breeze to use. I'm starting with 30WT oil and will go from there. Here is the PL shocks taken a part with the Traxxas X ring kit. 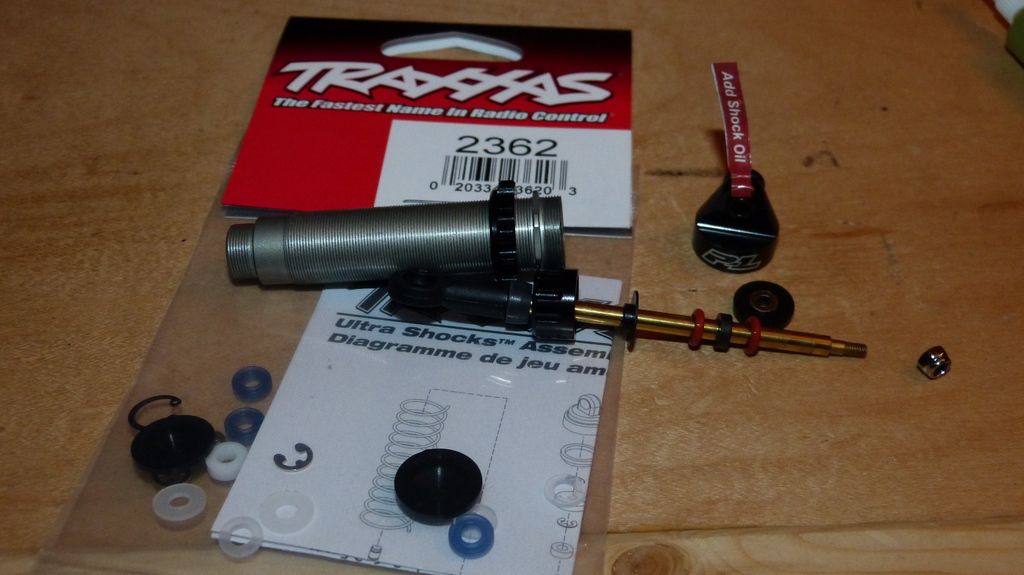 Replace the middle black plastic spacer with the Xrings. 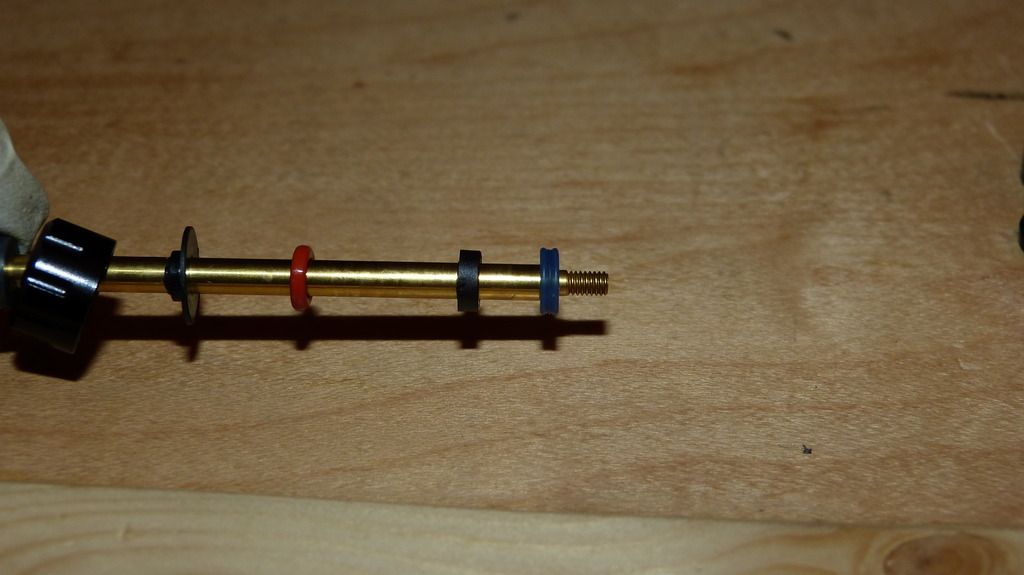 Put green slime on Orings and Xring. 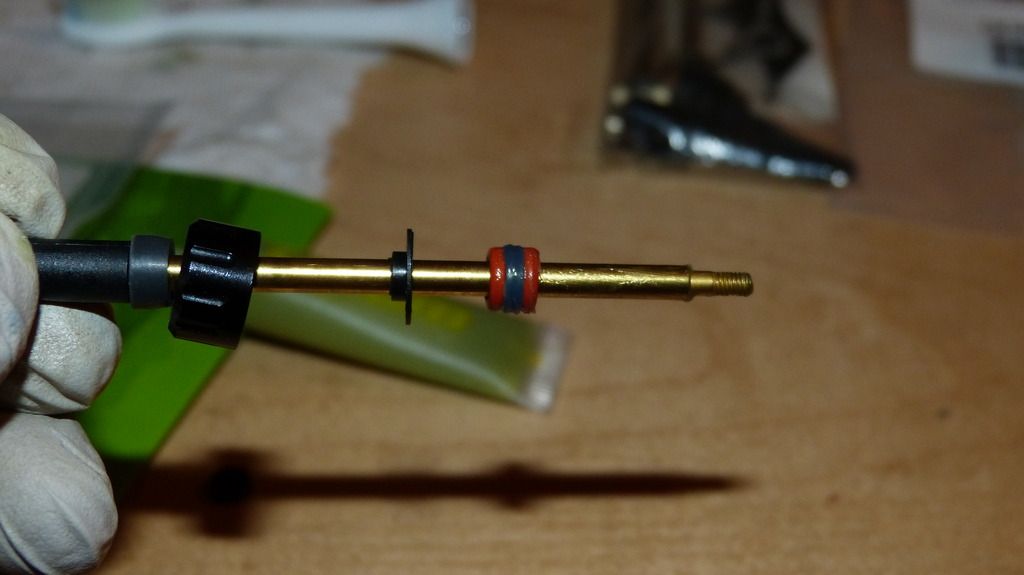 shove them in and add threads sealant and screw it tight. 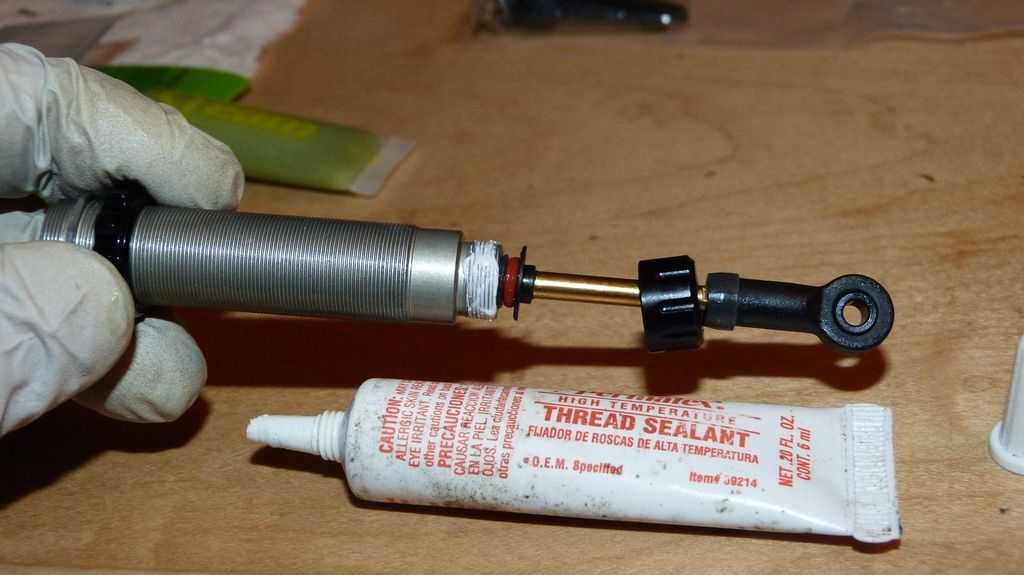 Decided to go with 30wt oil to start. Add thread sealant to the top threads. fill oil to top and screw the cap on as you push the shock arm up into the shock and tighten when it's all the way in. Some oil will spill out, but it's all good. 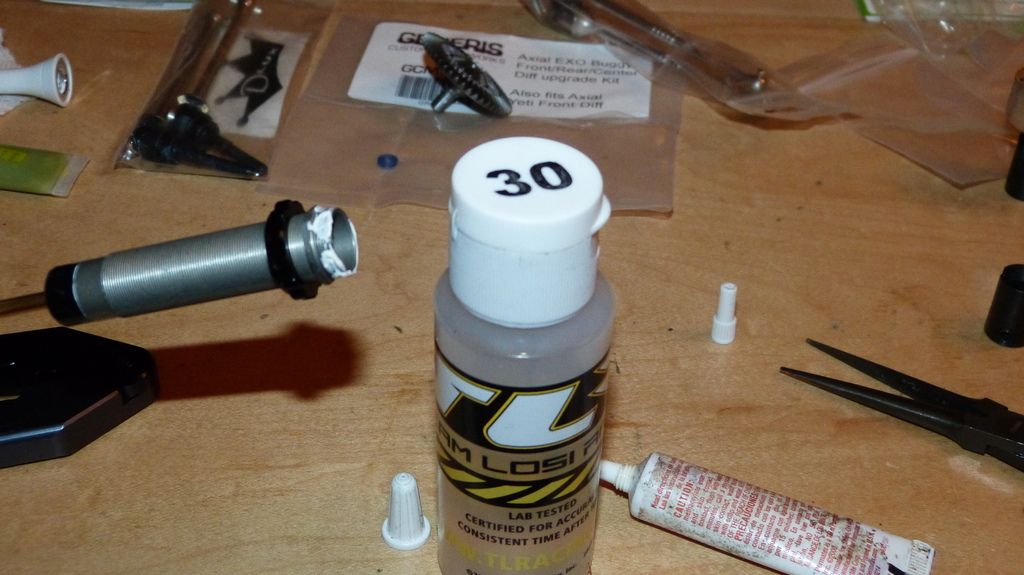 Done. 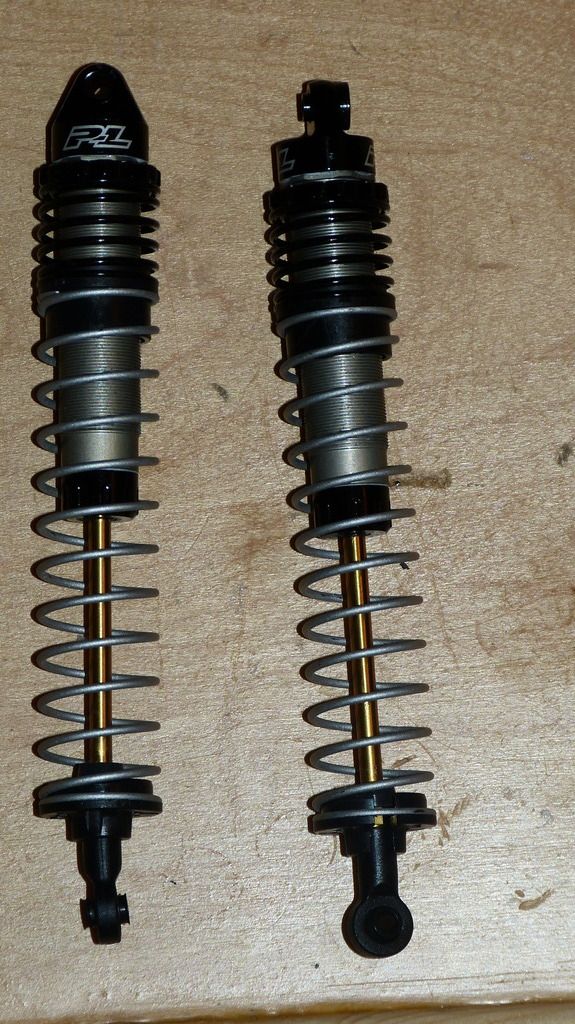 |
| |  |
| | #9 | ||
| Quarry Creeper Join Date: Oct 2016 Location: Hanover
Posts: 304
| Quote:
 Quote:
DMG makes their stuff simple and easy to put together. If you can put a kit together, you can put this together  . Only one way to find out right? . Only one way to find out right?  | ||
| |  |
| | #10 |
| Quarry Creeper Join Date: Oct 2016 Location: Hanover
Posts: 304
|
Fastest Shipping of all time!! Went home after work yesterday and saw this! DMG - You Rock!  Thanks for the towel as well! Thanks for the towel as well! Just Beautiful 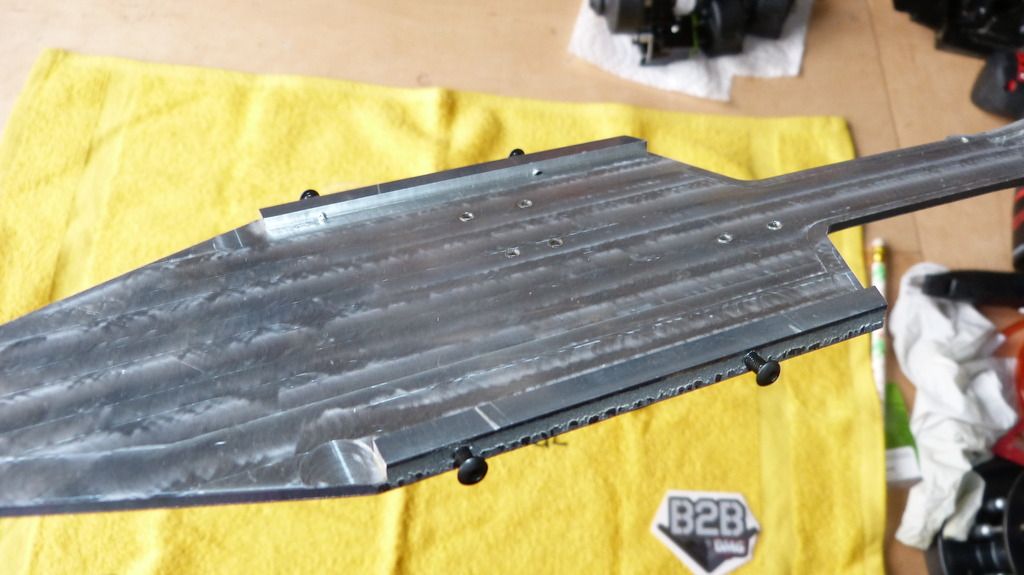 Quickly rubbed some RTV sealant on it, where the bulkheads will sit to keep the dirt out. Ate dinner, played with the kids, then proceeded to get started when they all went down. 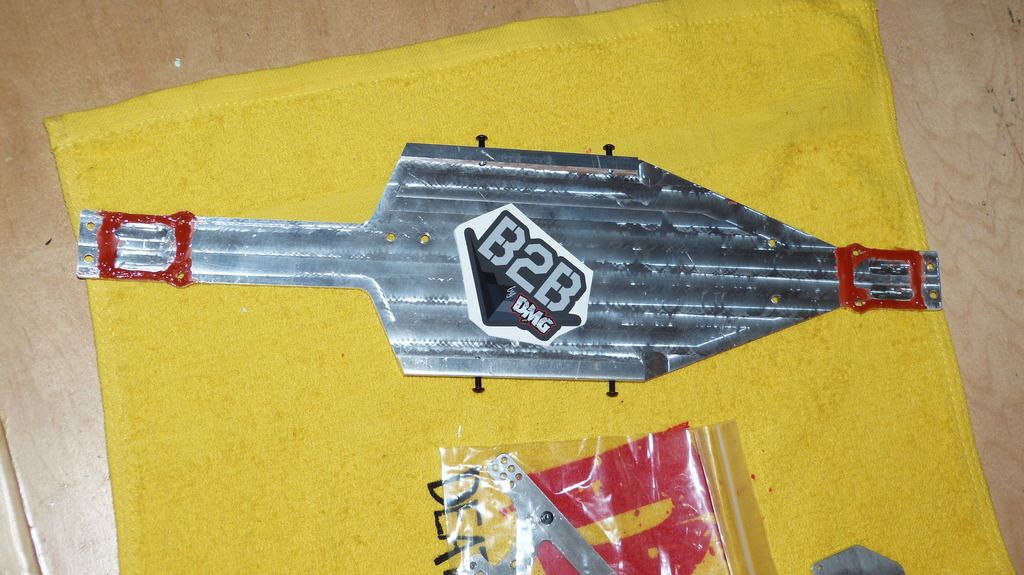 |
| |  |
| | #11 |
| Quarry Creeper Join Date: Nov 2011 Location: In the woods
Posts: 283
|
This is fantastic! I can't wait for more pictures and progress.
|
| |  |
| | #12 |
| Rock Stacker Join Date: Dec 2016 Location: Toulouse
Posts: 46
|
Thank you very much for your post on the tires and foams Awesome |
| |  |
| | #13 |
| Quarry Creeper Join Date: Oct 2016 Location: Hanover
Posts: 304
|
Thank you guys! So let's start with the rear end shall we: Decided to go with a Locked rear, using the LockedUp RC Lunch Box locker which utilizes a diff cup, in which I chose the HR aluminum diff cup since I prefer non-plastic parts here. The LURC Locker also requires you to use the open diff output shafts as well, which stock Yeti's come with. (Axial Yeti front locker will come with a different output shaft for their locker). Since I decided to use the Dlux HD Exo/Yeti axles, I needed to get it with the Open Diff output, which cost $10more. I went over the installation in detail in my B1B thread, so will brief it here. Here is the LURC Lunch box locker. It comes in two pieces. One will be clipped into the diff cup, while the other end is clipped into the Diff ring gear. 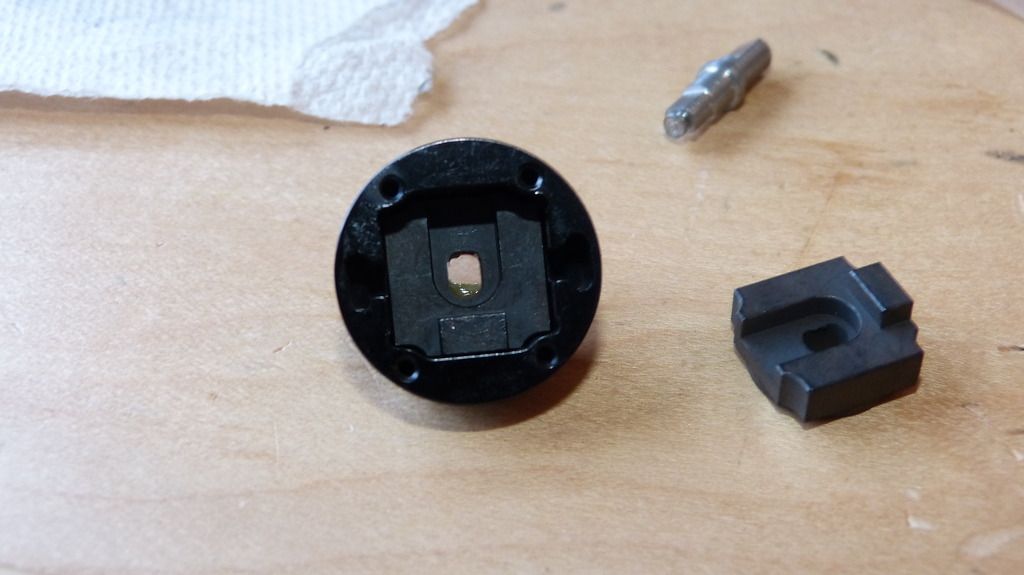 Here are the DLux HD axles with the open diff outputs 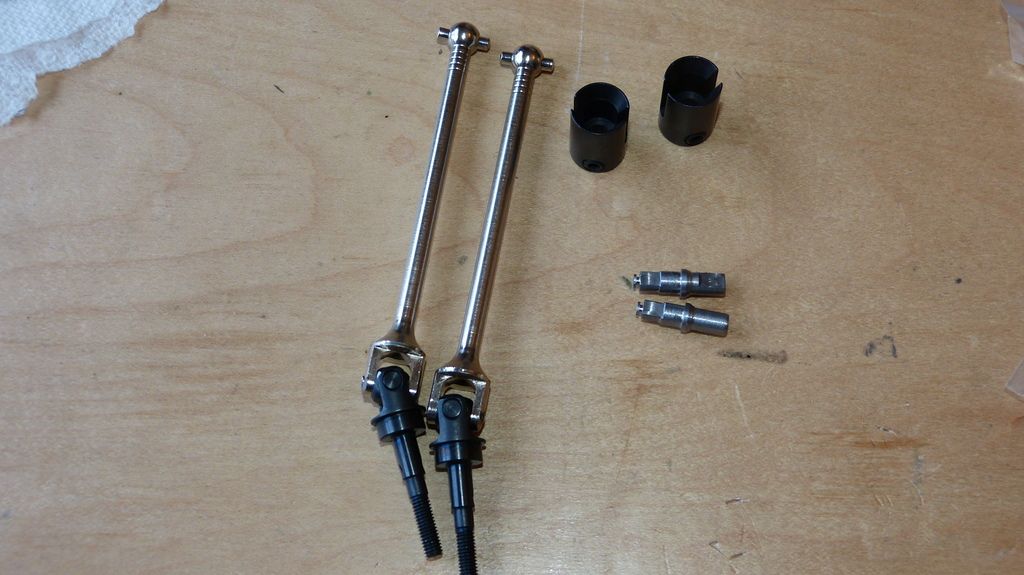 You'll want to use the 5x1mm O-rings, Axial # AXA1162, 4 total. 2 with the diff cup and 2 with the diff gear. Also, use the gasket, AX30385. This is a must to keep the gear mesh consistent. 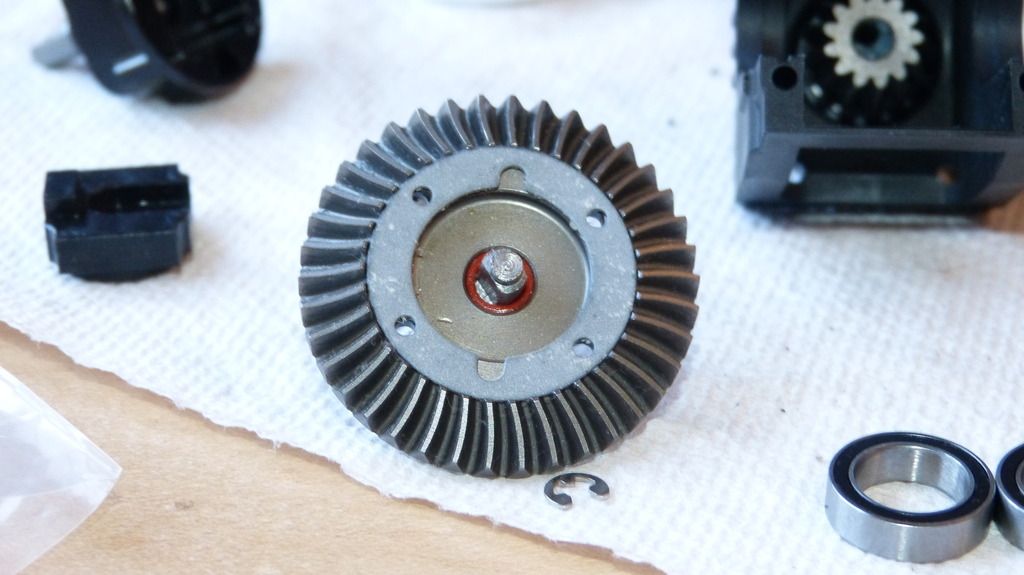 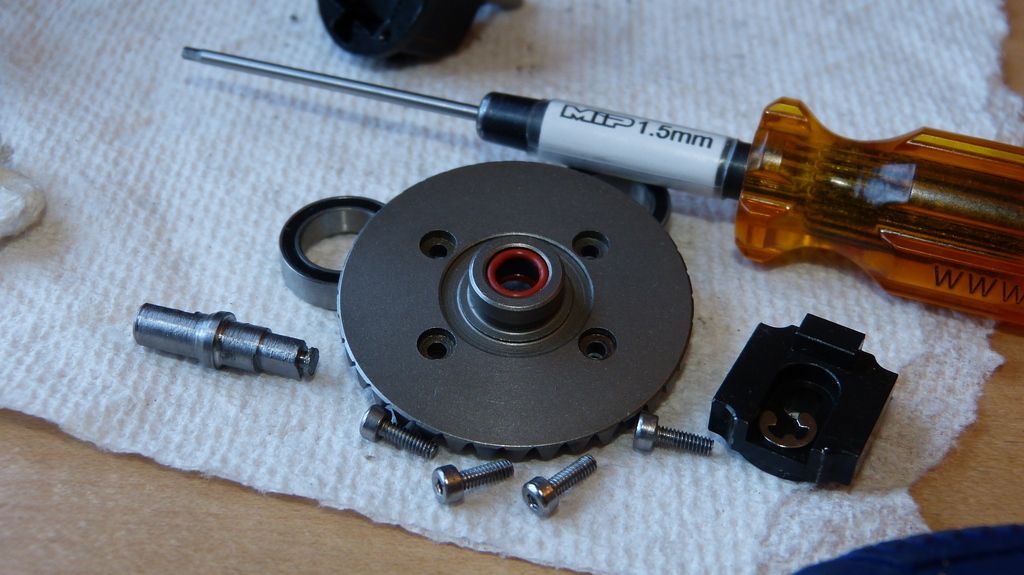 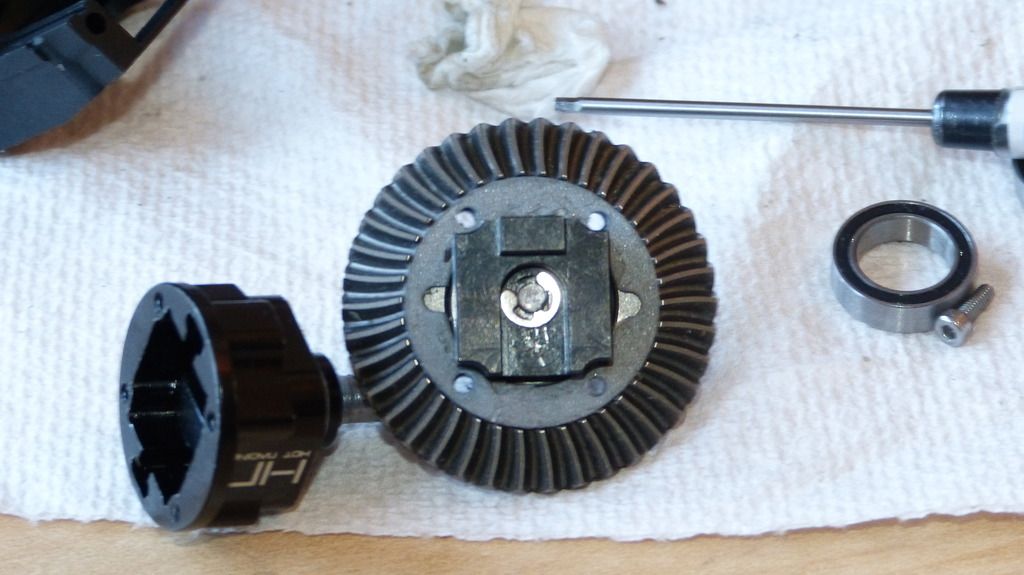 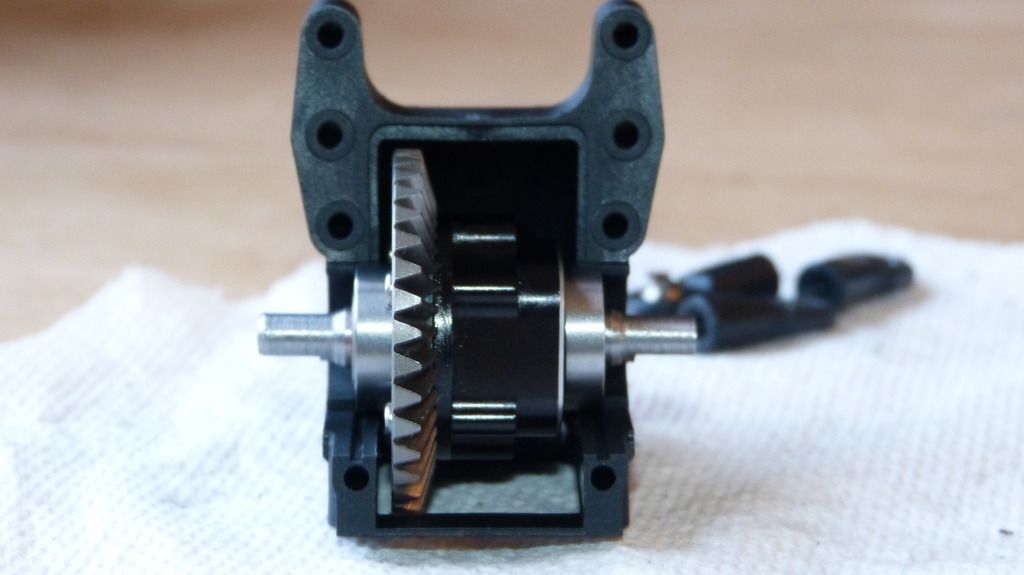 |
| |  |
| | #14 |
| Quarry Creeper Join Date: Oct 2016 Location: Hanover
Posts: 304
|
Before bolting the bulkhead to the B2B plate, I screw on the Rear R1 Toe bock to the back end of the bulk head. 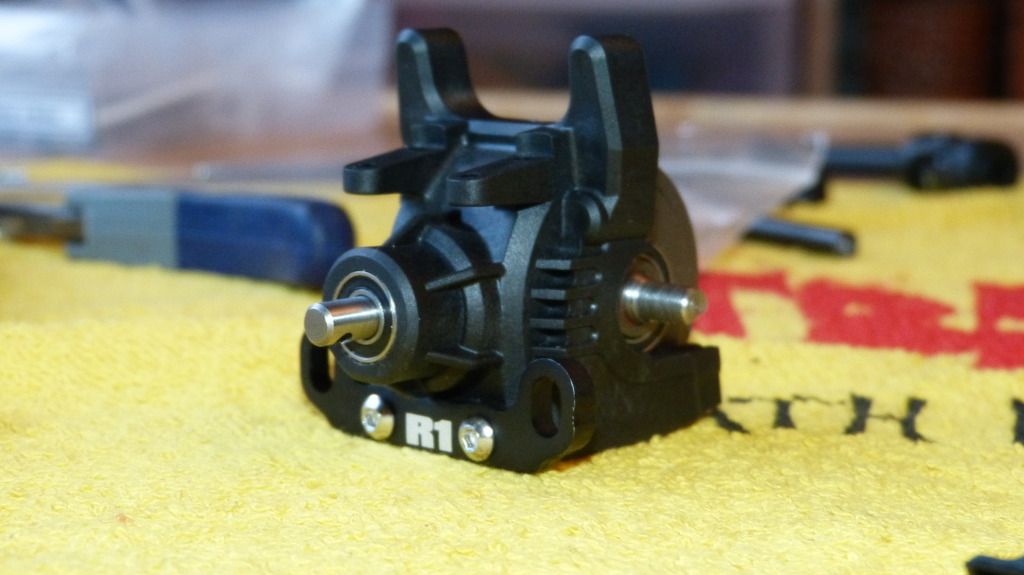 Then I screw the bulk head onto the plate and grease the gears. 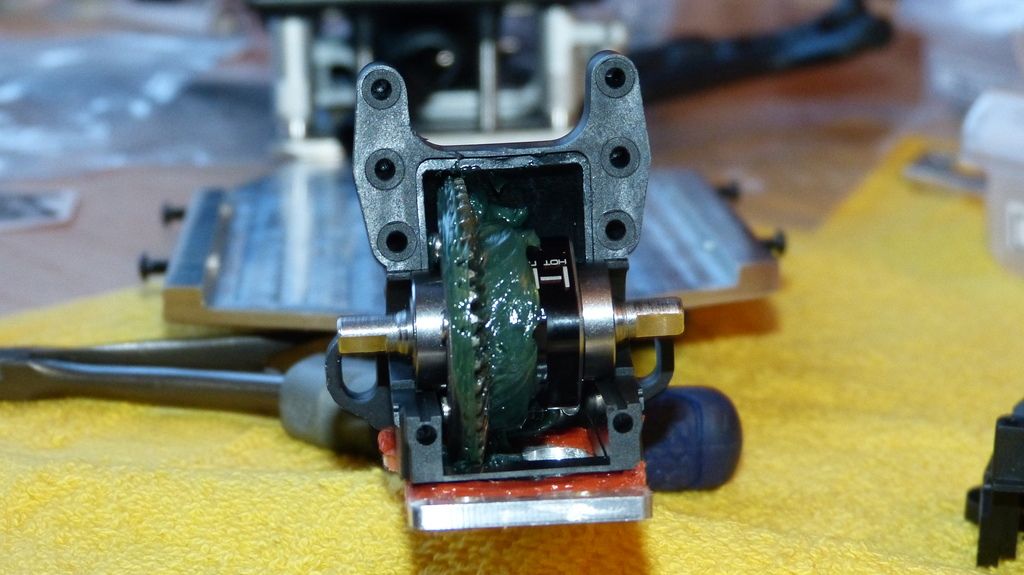 This is my first experience with STRC products and I can honestly say, I am pleasantly surprised. The fit and finish of their pieces are right up there with Vanquish! Here is the rear link mount and the chassis brace. 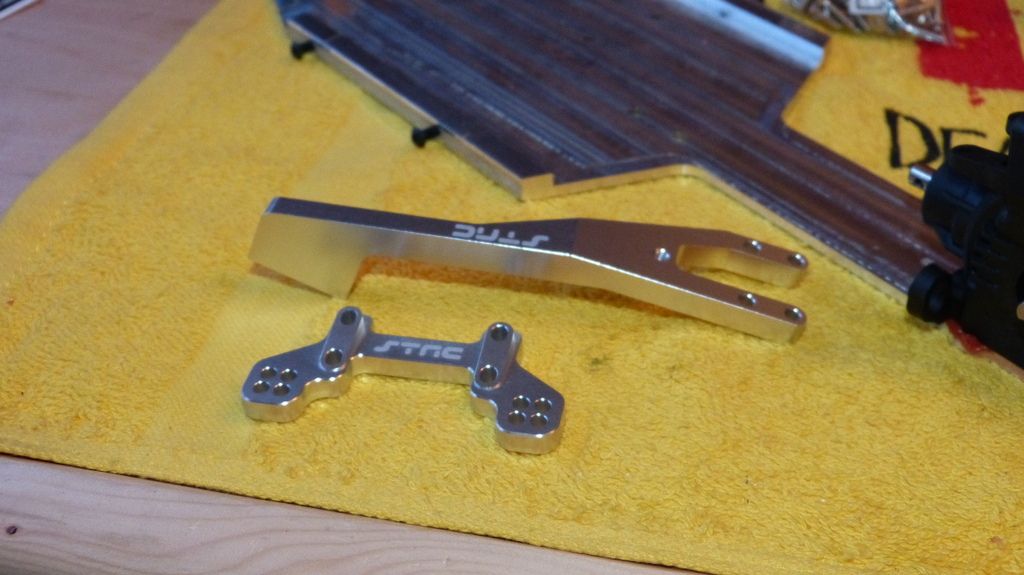 Installed. Take care not to screw over tighten the back two screws on the bulkhead. The plastic is thin there and will crack. 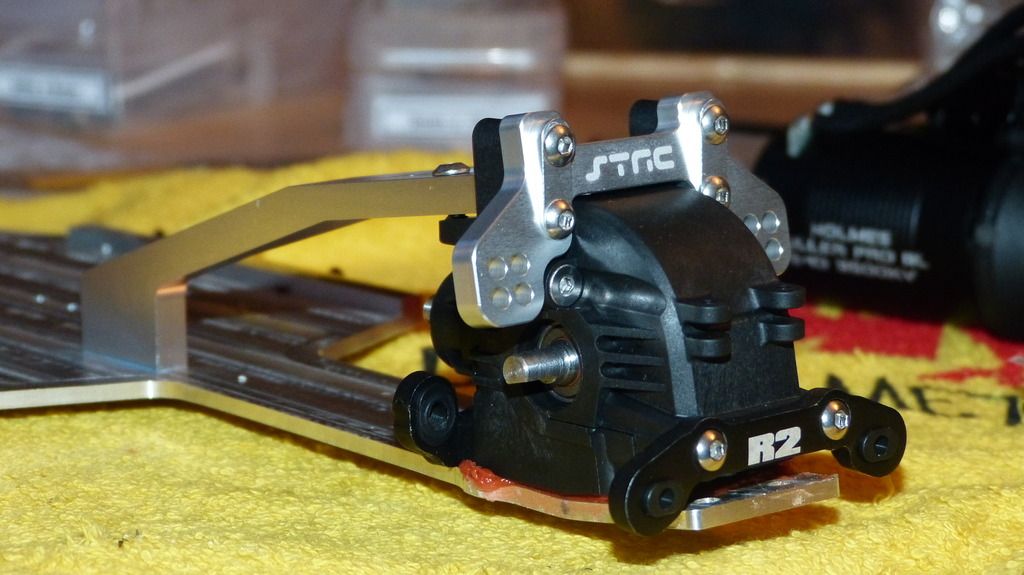 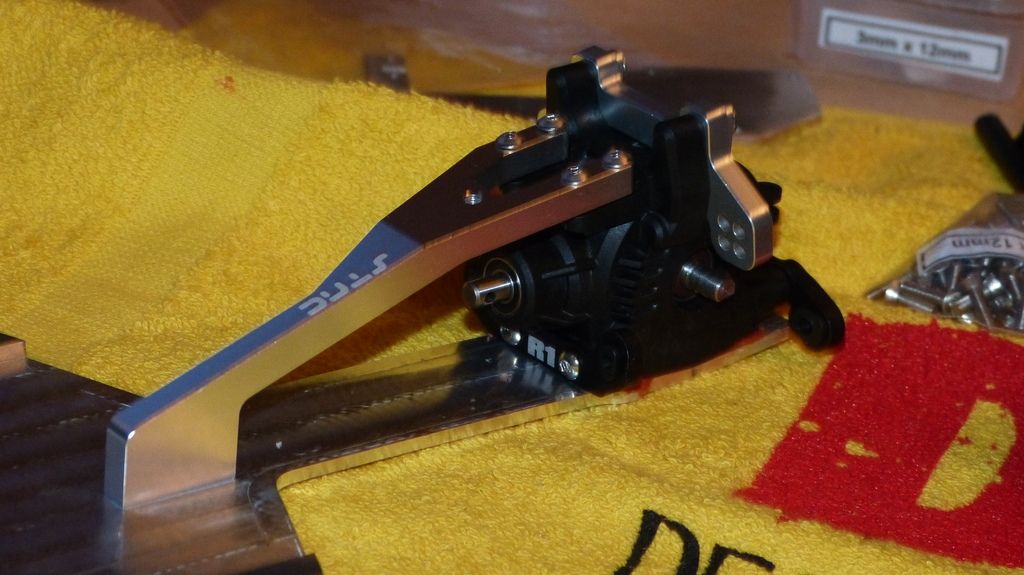 Now I screw on the rear toe block R2, to the front of the bulk head and install the 4 toe block inserts from AX80100 Notice the gap between the bulkhead and the B2B plate.... 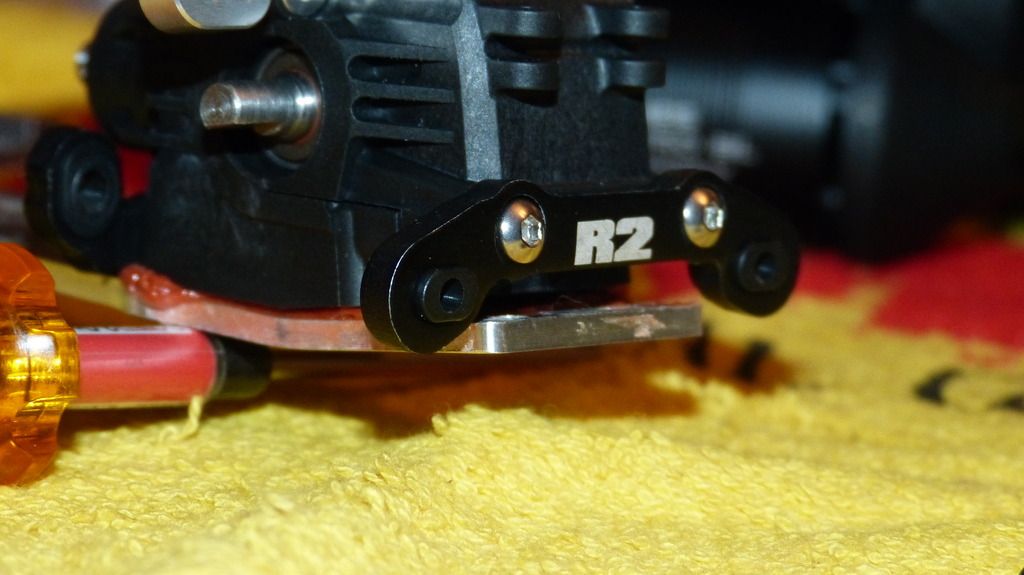 I think I have found another piece to use from the AX80100 bag. It comes with front and rear plastic skids for the Exo, which works here. Screamers B2B chassis came with this cool metal rear plate, however this is not part of the B2B kit, so we'll need to fashion our own rear "bumper"/skid if we feel the need for it. 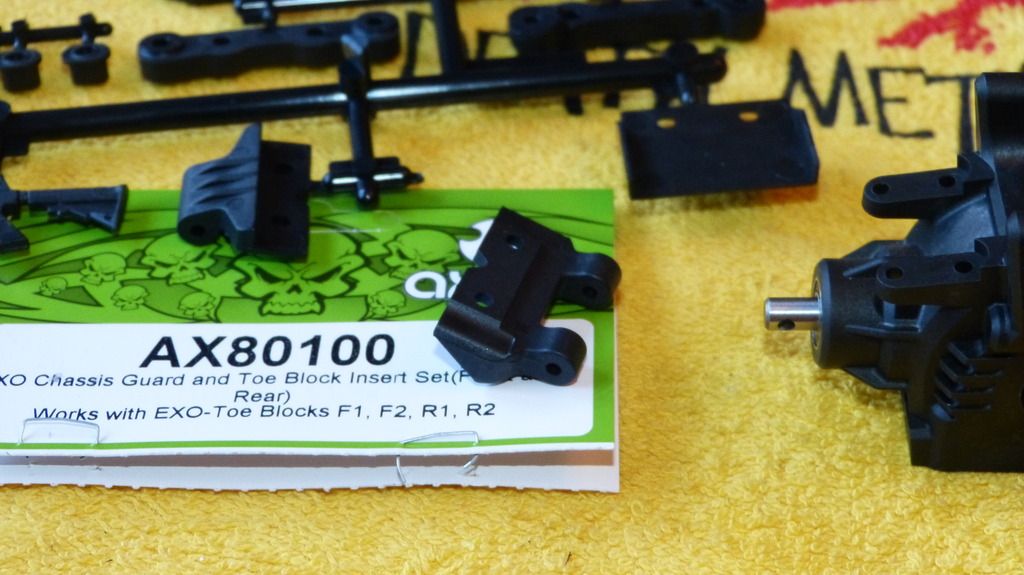 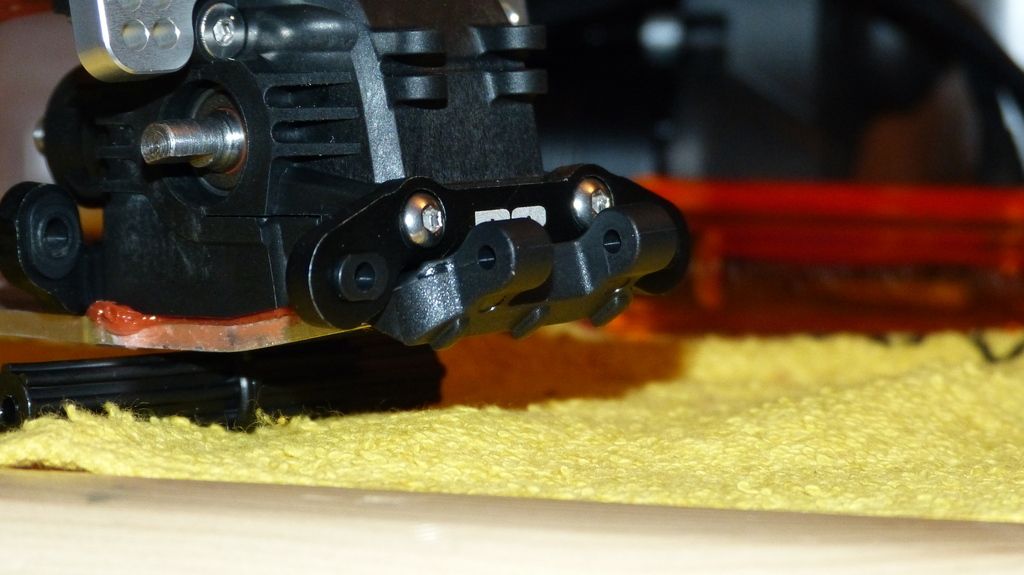 Only issue is the plastic skid overhangs the bottom a little which can get hung up. I think there is another part in the AX80100 that I can attach to the bottom of the plate that may solve this. I'll edit if when I try it. 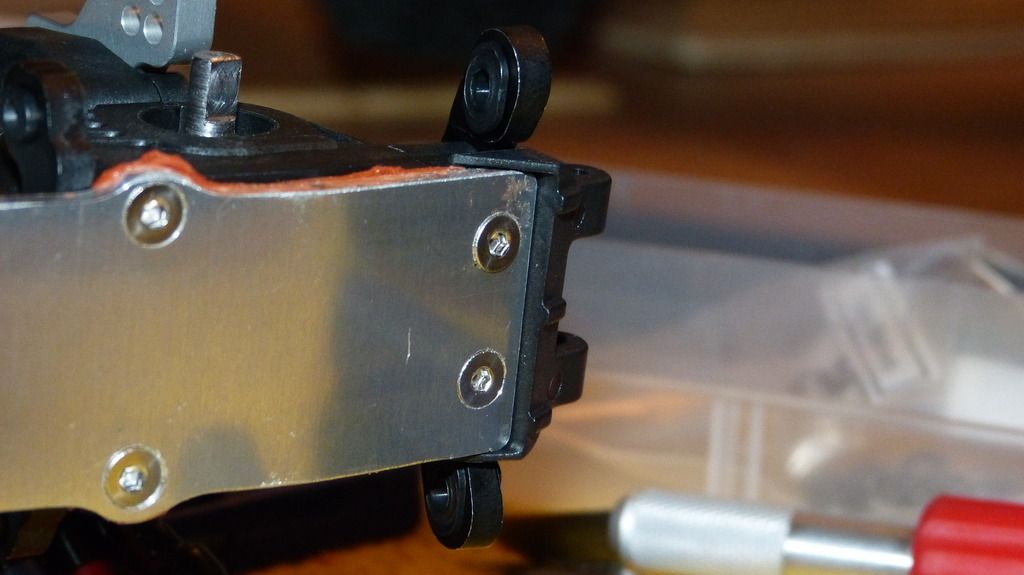 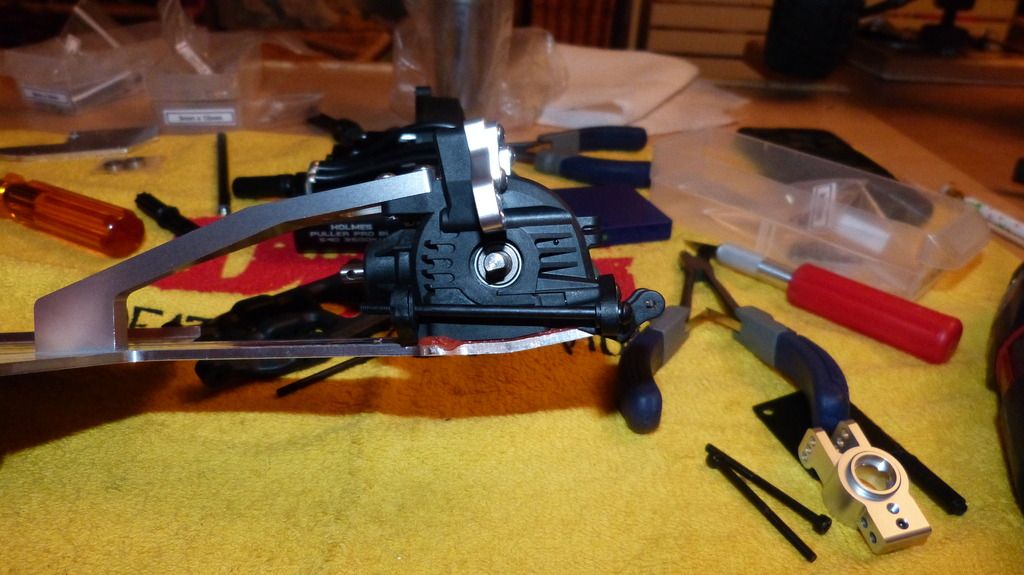 Now I attach the rear RPM Arms with the Axial M3x61mm screws 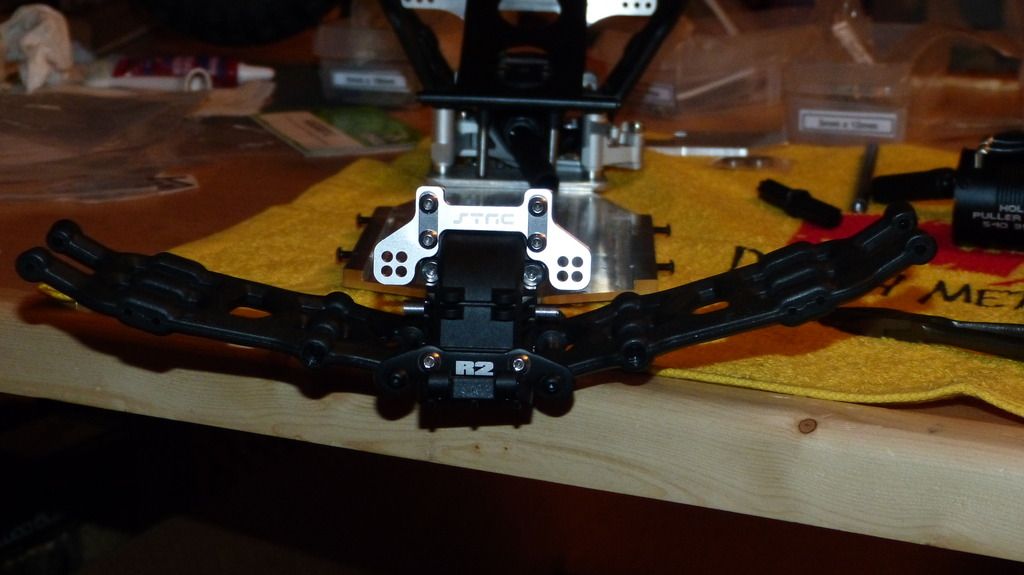 STRC Rear Hub Carriers 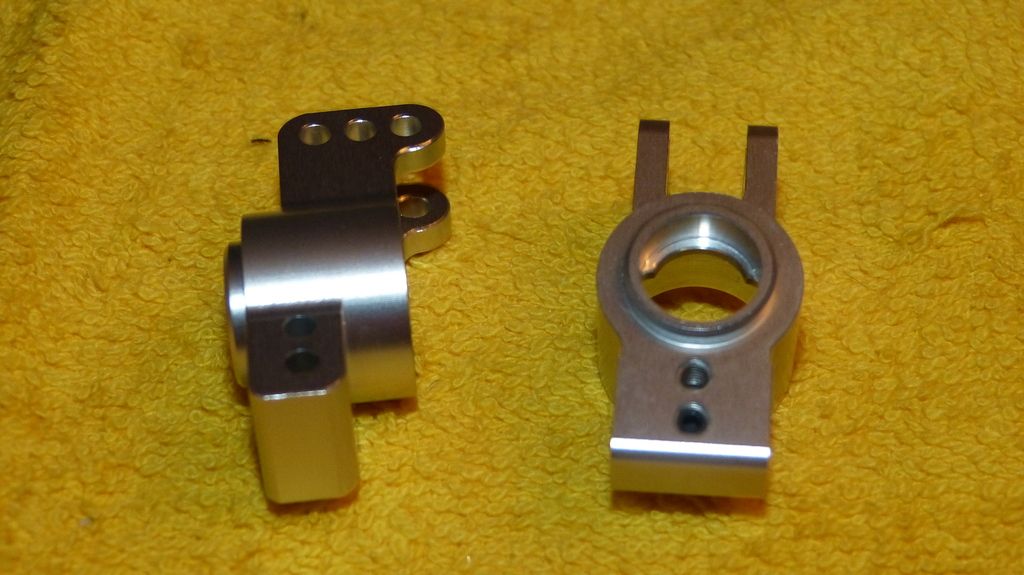 Installed with Axial M3x40 cap head. I find it odd that the screws go in in different direction through the arm..?? but whatever. 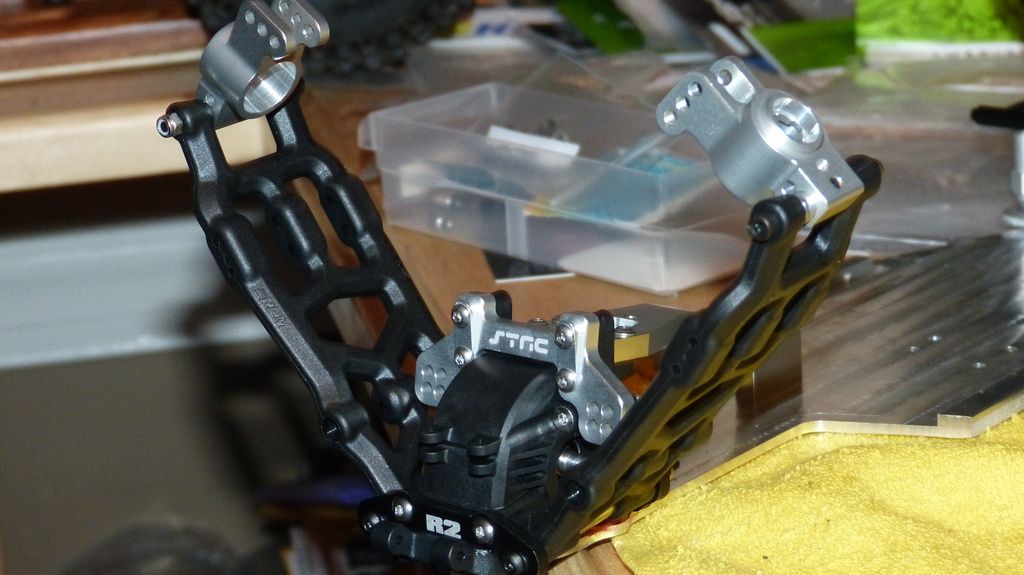 I used 2- 2mm aluminum spacers from Team KNK. I found 3mm was too small and 5mm were too big. 4mm would be perfect, but I didn't have any. I used them towards the back of the arm. I think you can use them in the front or back, your choice, which will increase or decrease the wheel base length as you see fit. 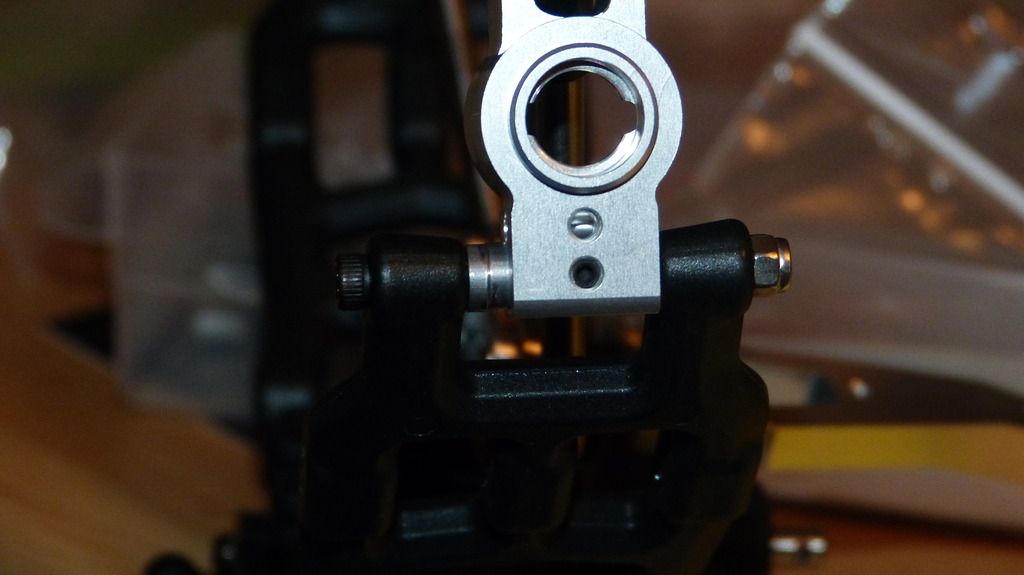 For the camber links I got I used 3/16" Grade 5 Ti custom made from DLux with Traxxas Rod ends. Screamer stated his length was 93mm eye to eye, so that is what I went with. 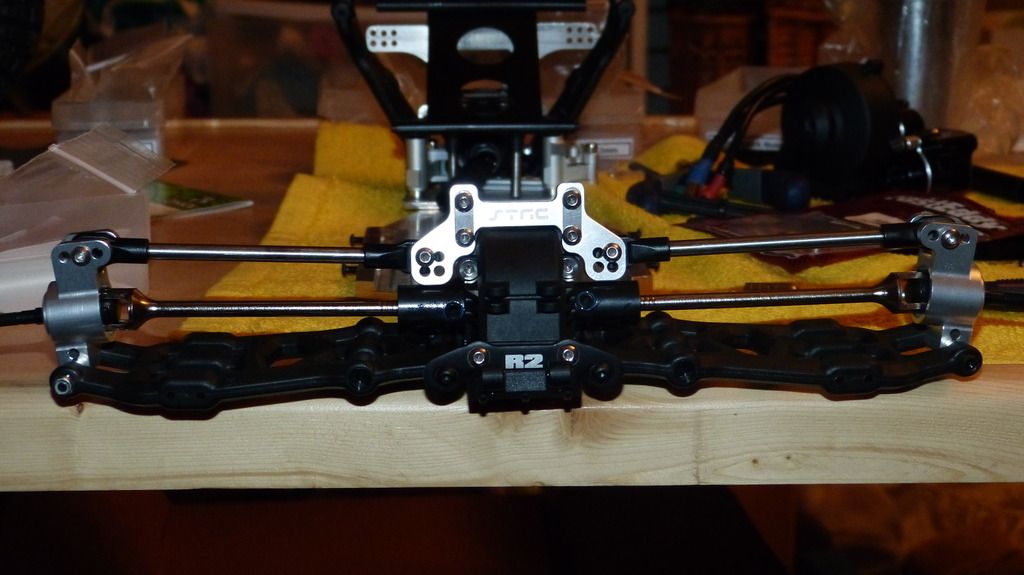 Here is the Dlux axle in the STRC Hub at full droop - No rubbing 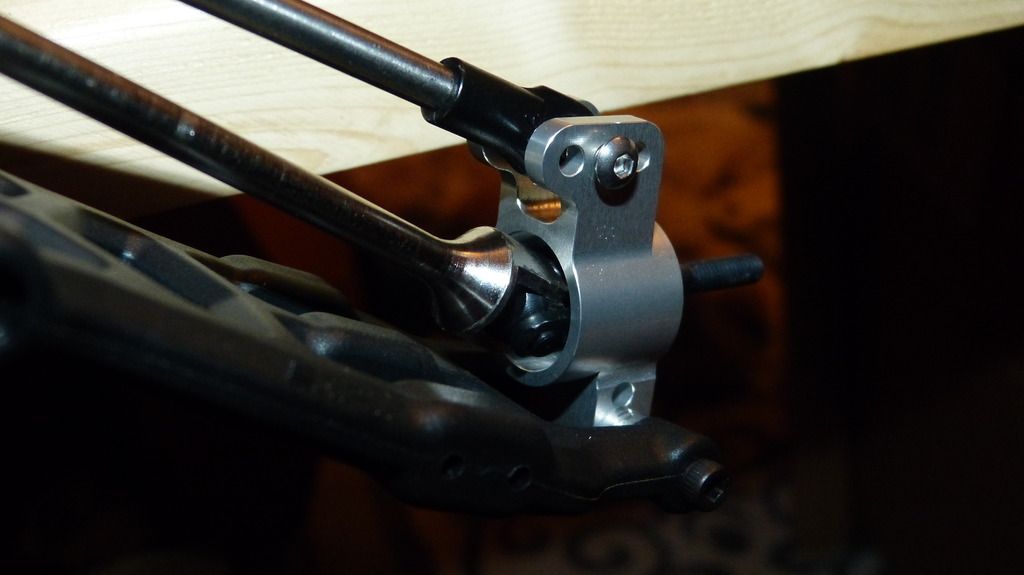 There is very little space between the Dlux oversized HD Drive cups and the STRC link mount. 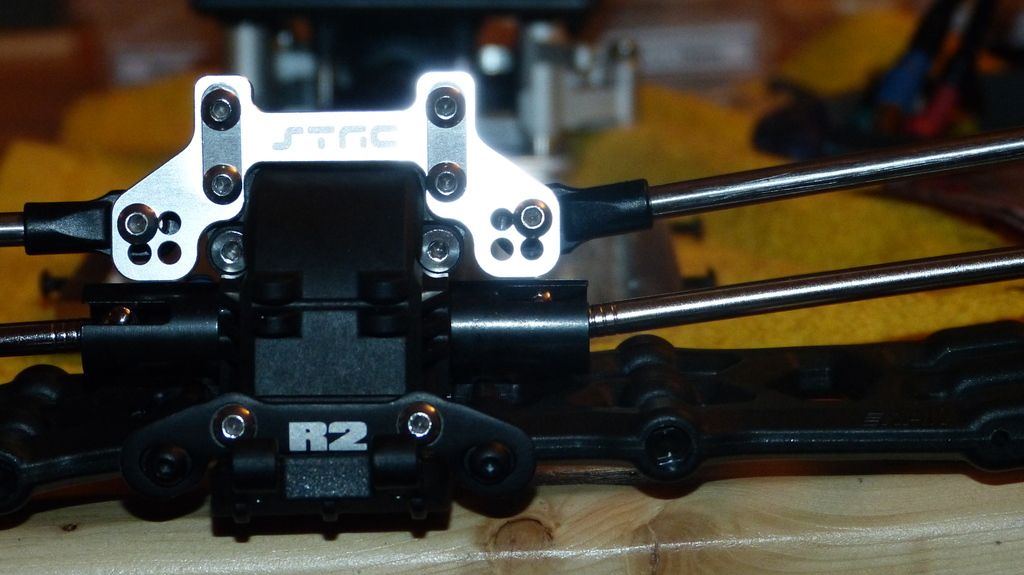 In fact, Dlux included a grub screw that was longer than the other one which made it stick out too far and got stuck on the link mount. I ended up swapping it out for one of the screws on the front end since there is much more room up there. 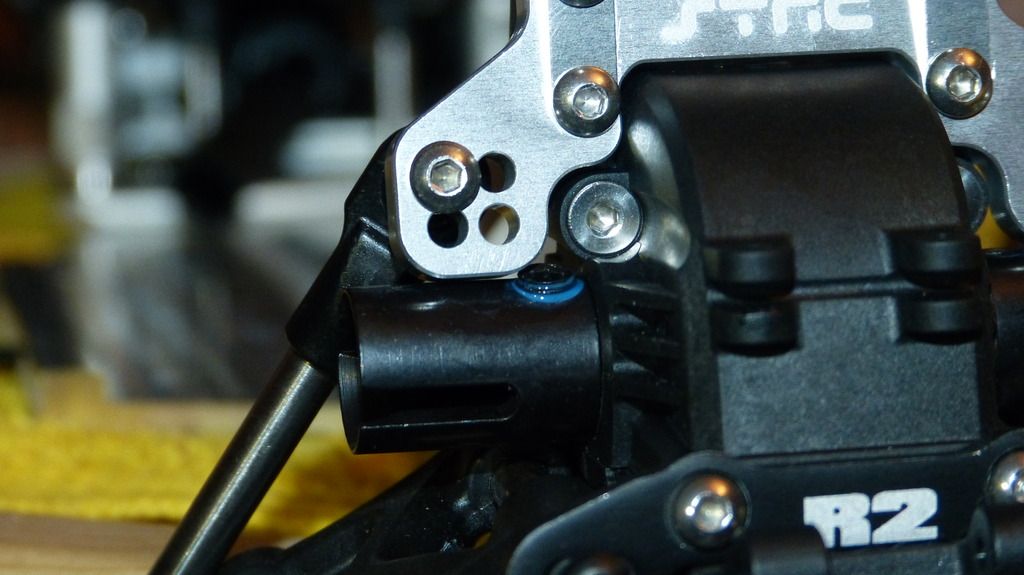 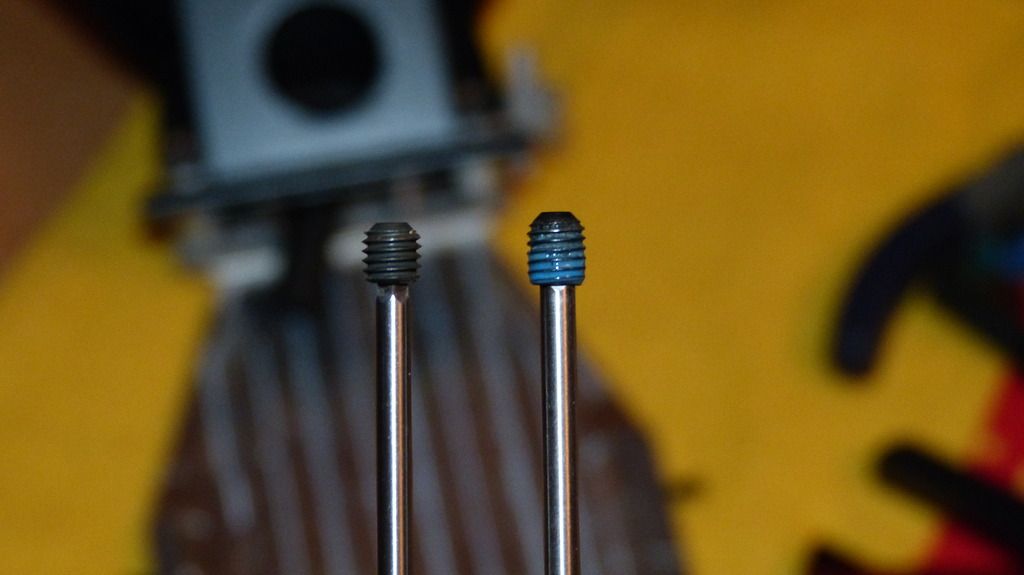 So here is the top view of the back end. These are just mocked in place. Nothing is tightened down yet, so I may end up changing some links points around. Also, I mocked on the rear Exo bumper skid, which I'm determined to try using, since I have the plate for it already. 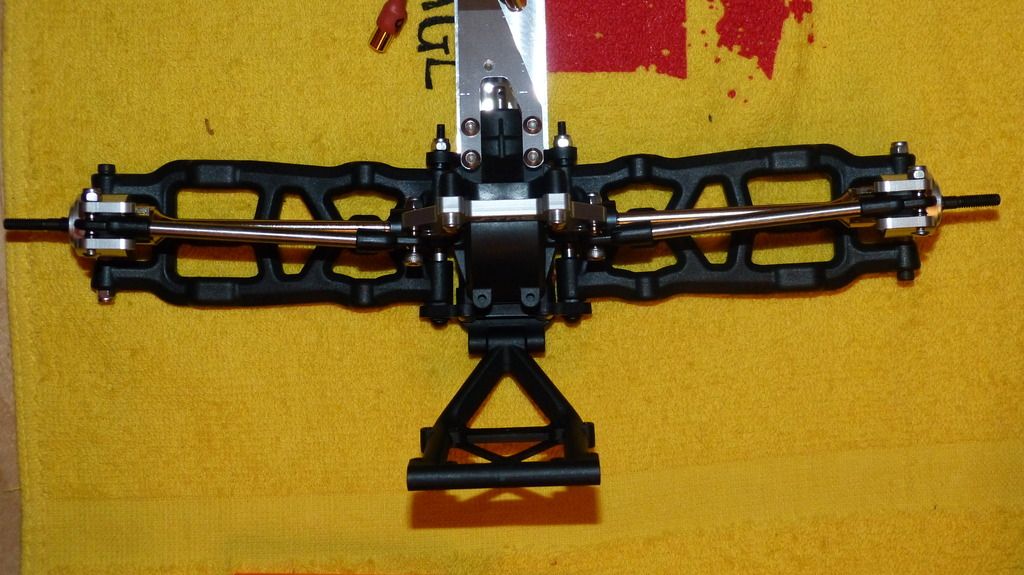 |
| |  |
| | #15 |
| Quarry Creeper Join Date: Oct 2016 Location: Hanover
Posts: 304
|
Onto the front. this is pretty much the exact same as the B1B. I'm going to start off with using an Open Diff setup with Gravity 20Million Wt Silicon in the GCM carrier. I tried the 20M wt in my B1B, using the Axial plastic carrier and it was OK, I wished it would lockup a little more. But I did install it in the GCM carrier and found I could not twist the output drive cups at all, like could when I used the Axial plastic carrier. So we'll see if this would make it "lock" a little better. Also I'll be going with UD 43/13 ring/gear to match the rear when running the open setup. If/When I switch to locked front, I'll run the Standard 38/13 setup in front. Here is the complete parts to run open. I'm using the HPI Racing spider gears, although I'm told by a knowledgeable member, DenisLM, that HPI gears are garbage and the Axials are way better. But this is what I have on-hand, so... 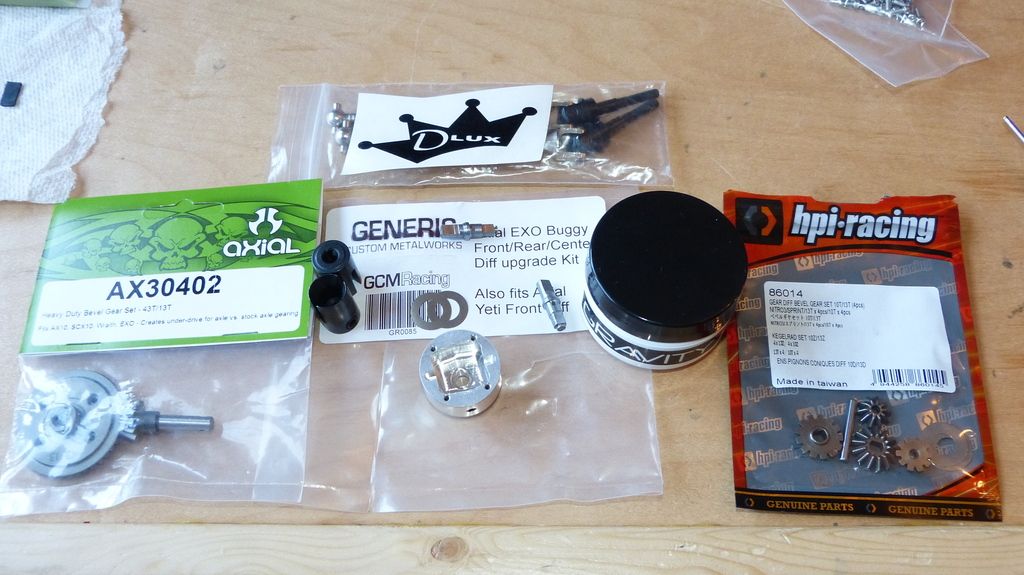 The GCM carrier is so nice looking and machined to perfect fit. It comes with an oil filler hole so you can fill up your diff gears if the oil run dries. This won't help when using 20M wt though. That seems impossible to squeeze through that tiny hole. 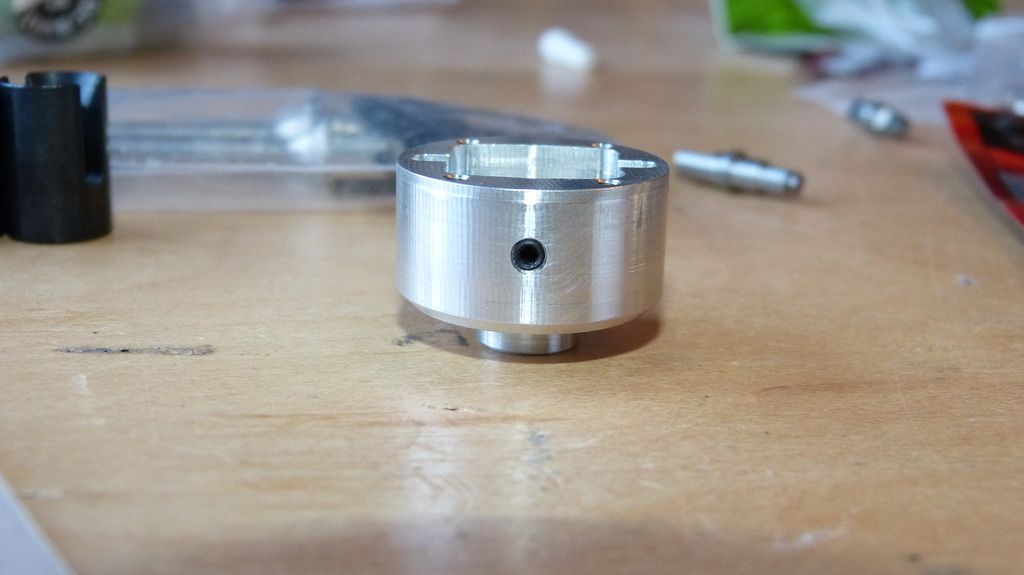 Here is the Gravity 20M Wt. I just pulled it out of the cup it comes in. This thing will hold it shaped to whatever you choose, but will eventually level out. It's neat stuff. 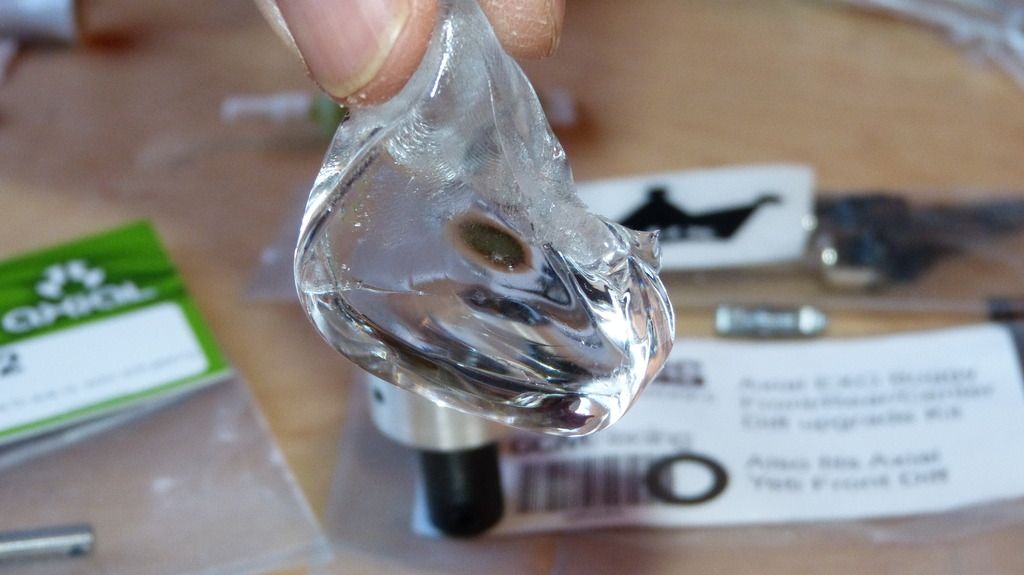 GCM includes 2 shims to use one in the carrier and the other in the ring just before the gear. GCM states NOT to use the Oring inside the diff carrier, but you do use it on the outside. 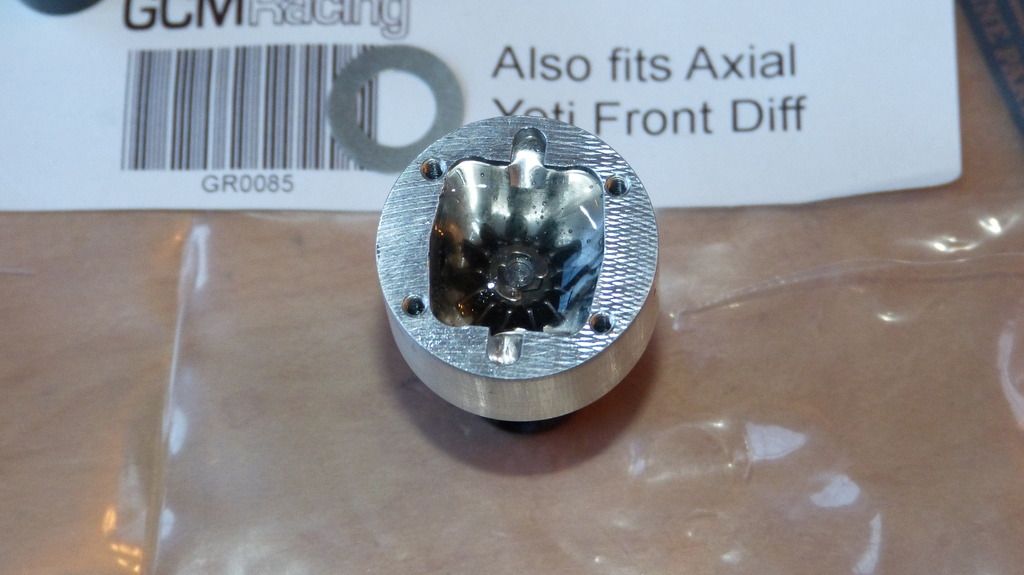 I used Traxxas 2.5 Eclips to clip these output shaft in place. I had to use pliers to push the shaft/spider gears into the GCM carrier. The shaft is press fit into place, so there is no play going on here. I put as much silicon as I could possibly fit.. 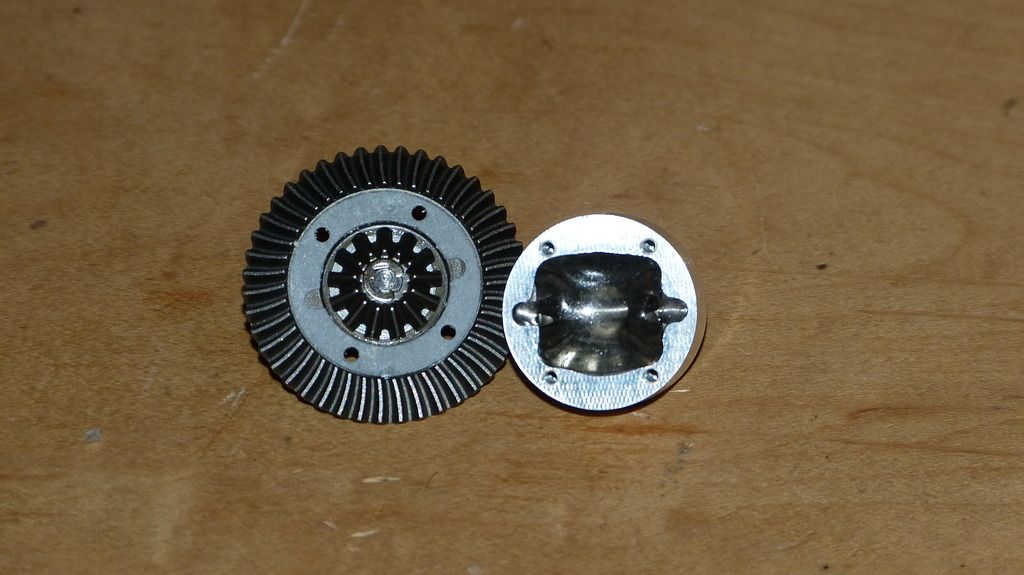 Once I put the ring gear on, I some silicon oozed out the sides. I hope this really tighten things up. And be sure to use the Axial gasket on the diff ring. It's necessary to provide consistent gear mesh. 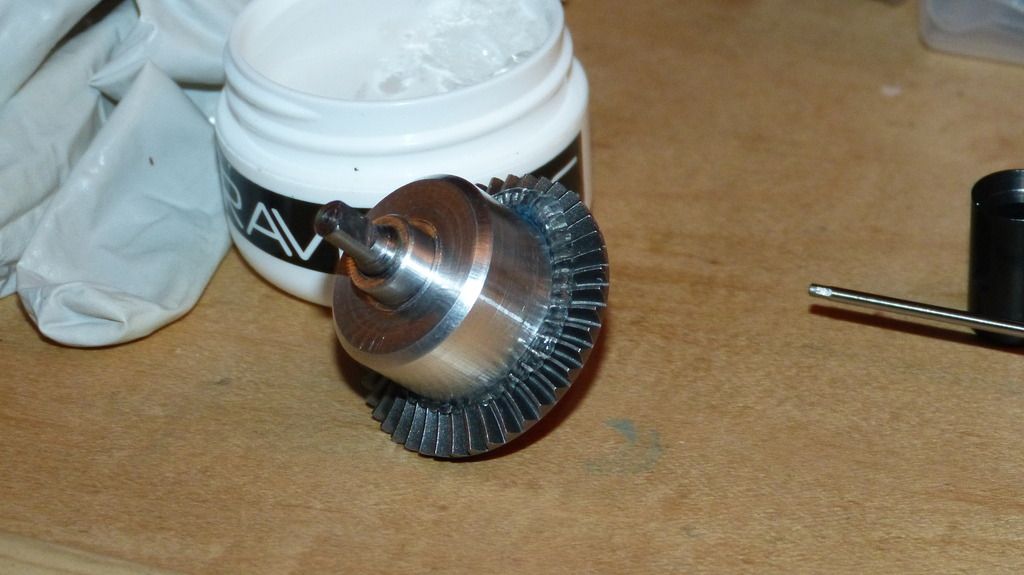 Greased and ready to rock! 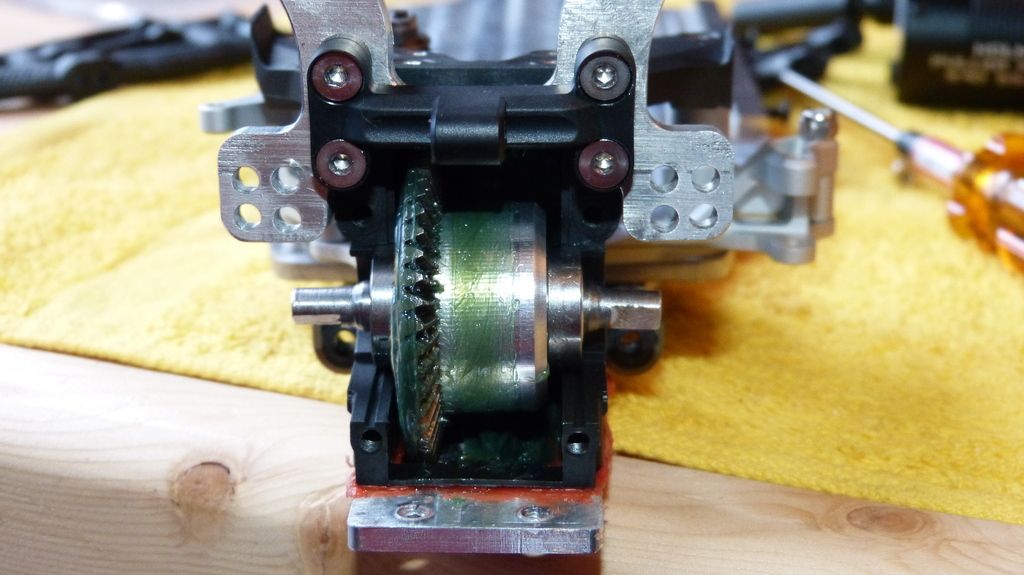 |
| |  |
| | #16 |
| Quarry Creeper Join Date: Nov 2011 Location: In the woods
Posts: 283
|
This is a great build. Thank you for taking the time to explain what is going on. I have one of these kits on order as well.
|
| |  |
| | #17 |
| Quarry Creeper Join Date: Oct 2016 Location: Hanover
Posts: 304
|
Let's start with installing the Vanquish Double sheer steering rack with the supplied bearing onto the B2B mount. I used Blue Loctite on the screws. 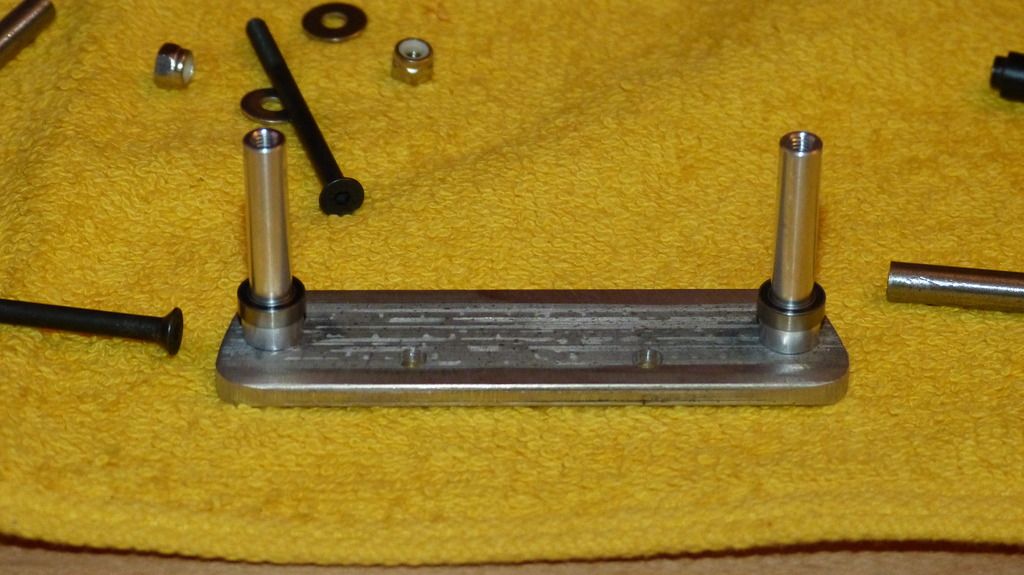 Then the VP Bell cranks 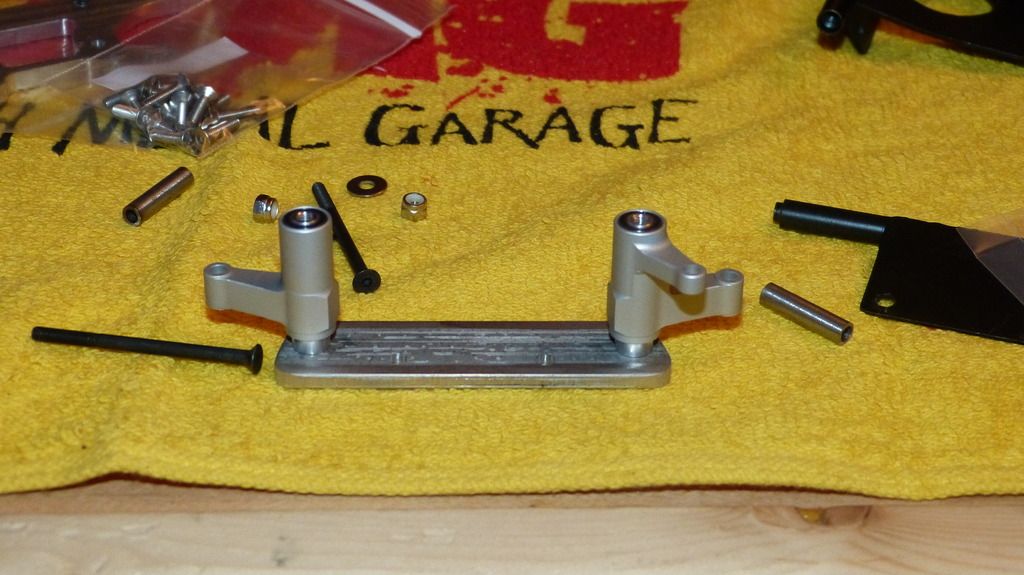 Then the VP Steering rack. 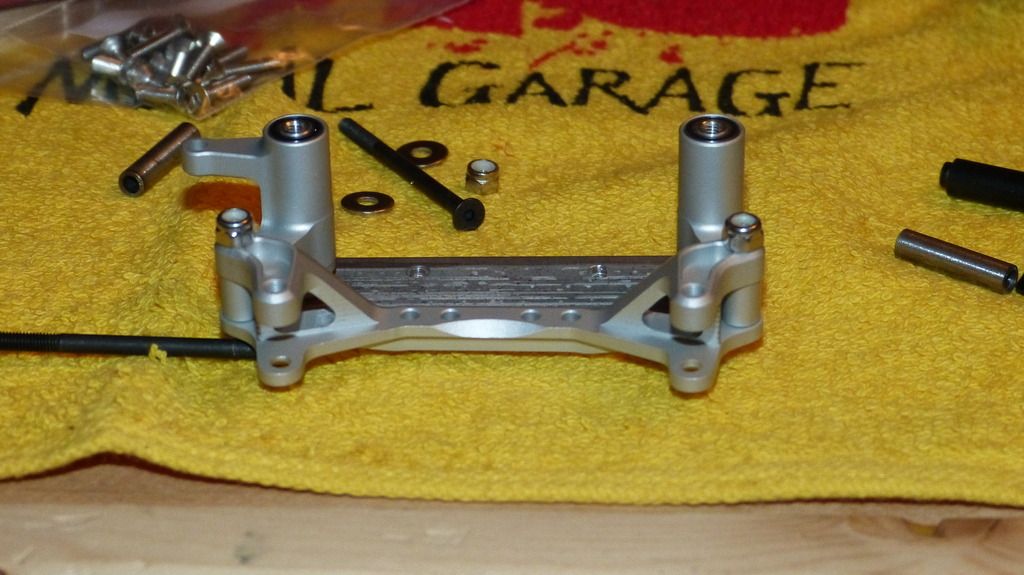 Now screw on the F2 Toe block to the back of the front bulkhead. Then I screw on the bulkhead to the B2B plate. 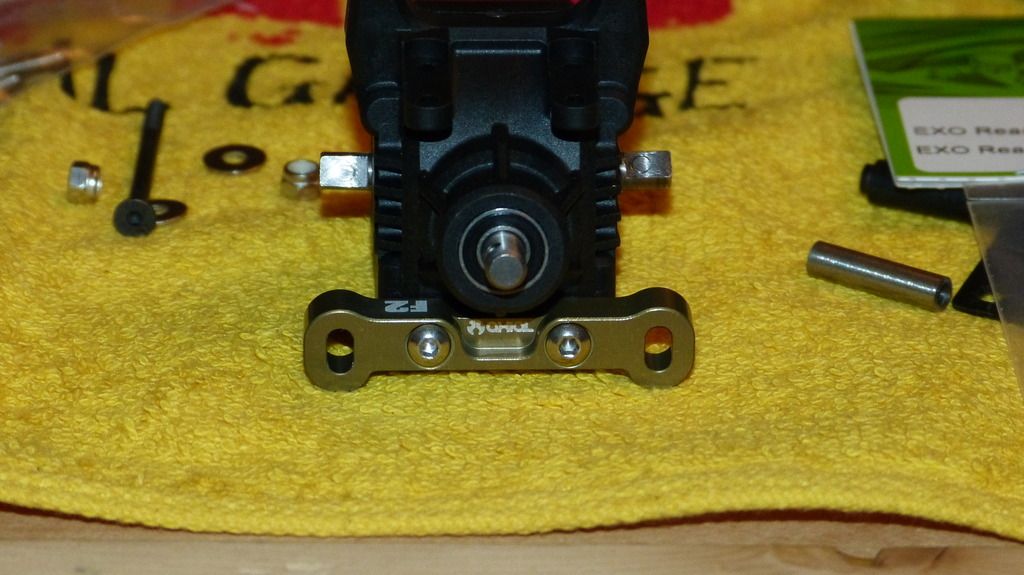 Then I screw on the Yeti Chassis brace while using the DMG supplied 2 long screws and spacers. I used Blue Loctite on the two screws on top going into the double sheer rack. Don't overtighten the two middle screws with the 3mm Nut. 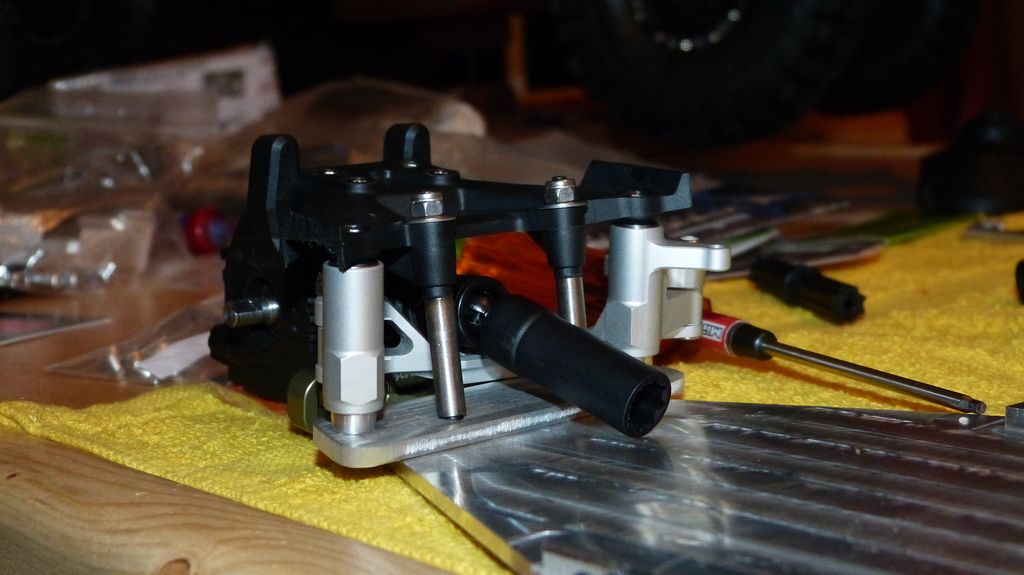 You'll notice the DMG steering rack plate will not sit flush onto the B2B chassis plate. This is good. This is how you want it to sit. 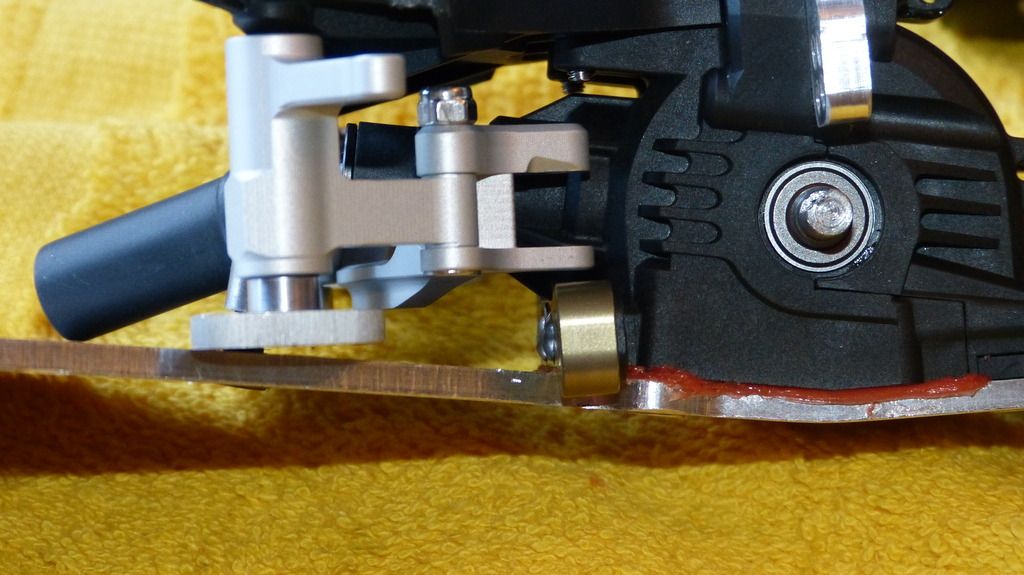 Now Install the VP front Yeti skid plate. 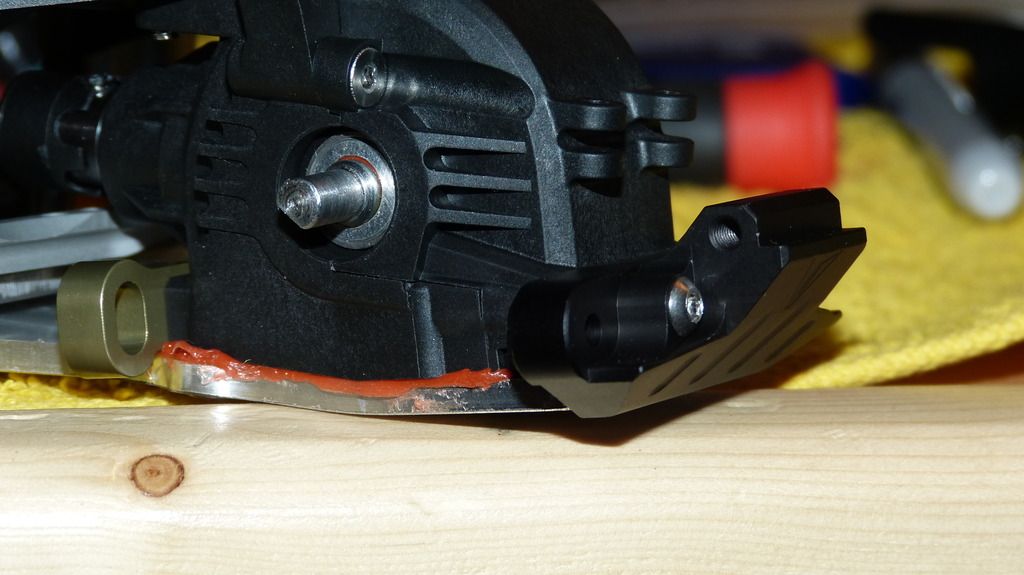 Then the Axial AX80100 toe block inserts 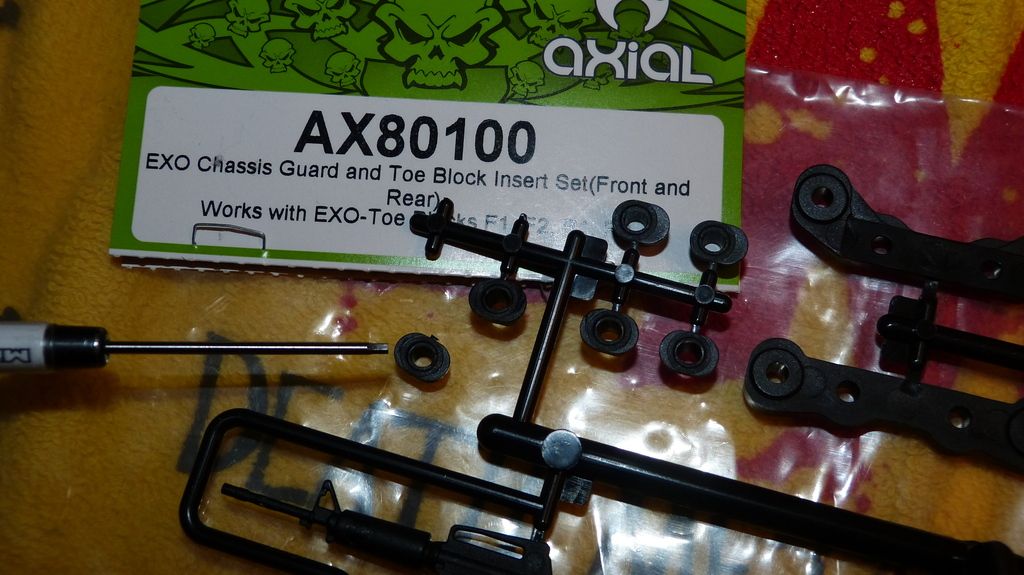 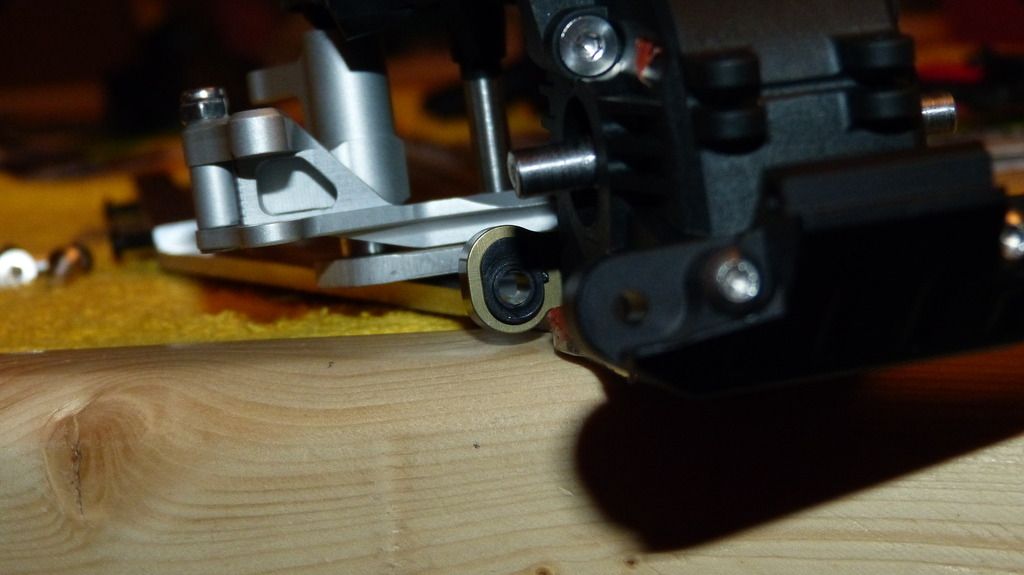 Then the RPM Aarms. Note the direction of the arms. They are L and R. 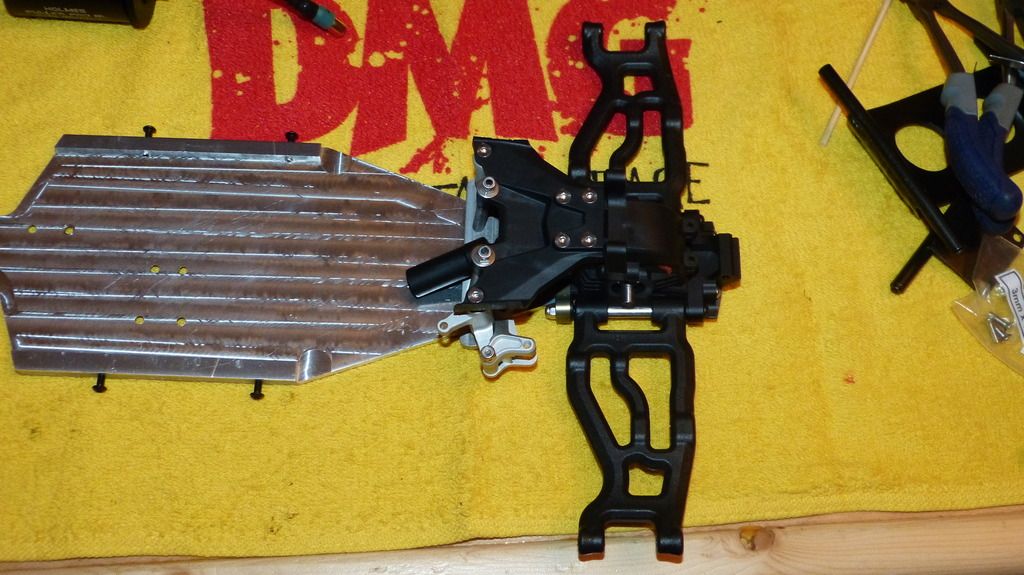 Then the DMG Shock Tower. Note the direction of the curve. It curves towards the front. I used the plastic shock tower clip piece from Axial AX80093, to hole the shock tower in place. The Axial AX80093 is for the Exo front/rear bumper. If you go with the Yeti Front bumper set, then this piece will come with that as well. 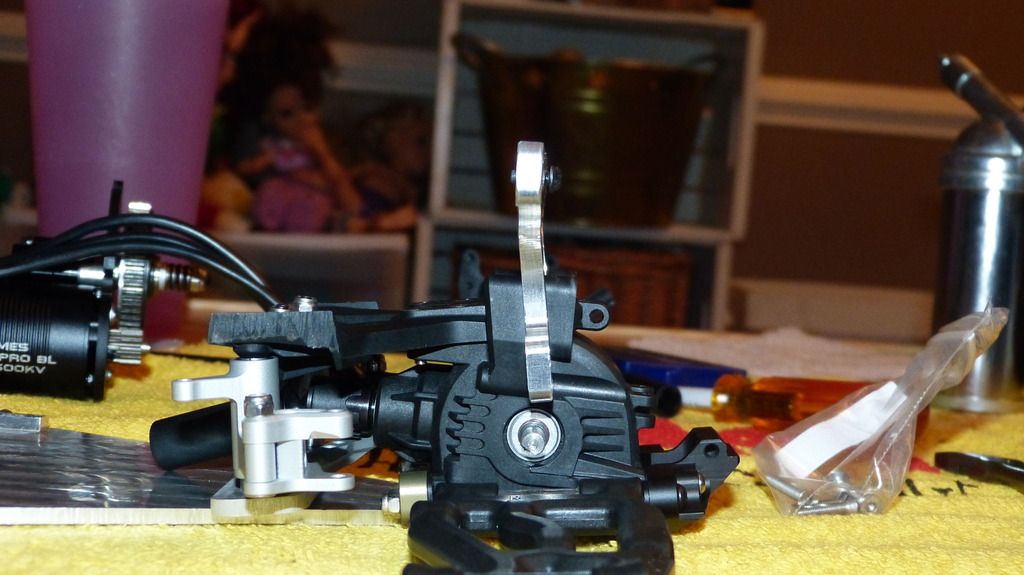 Then the DMG cage brace. 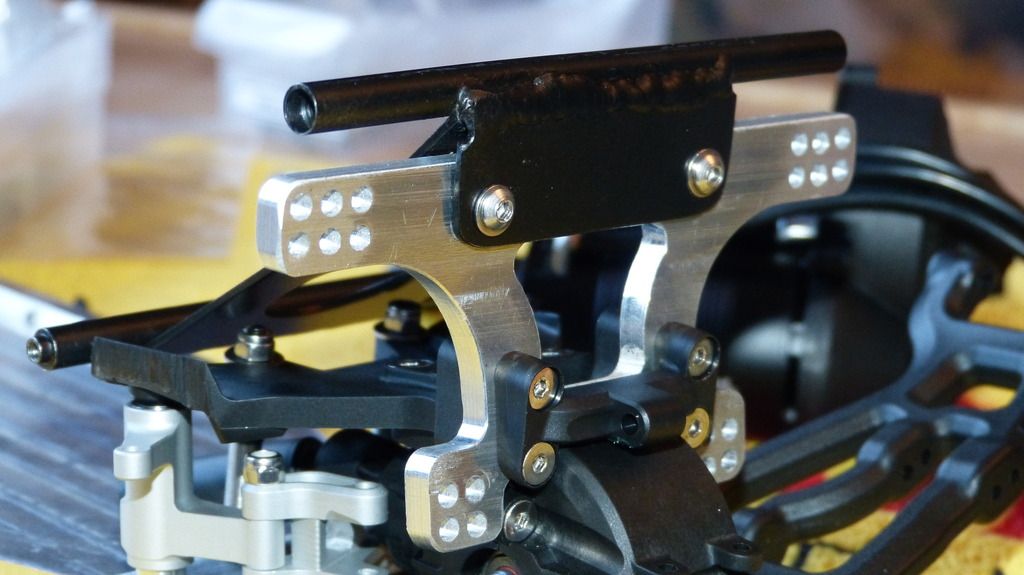 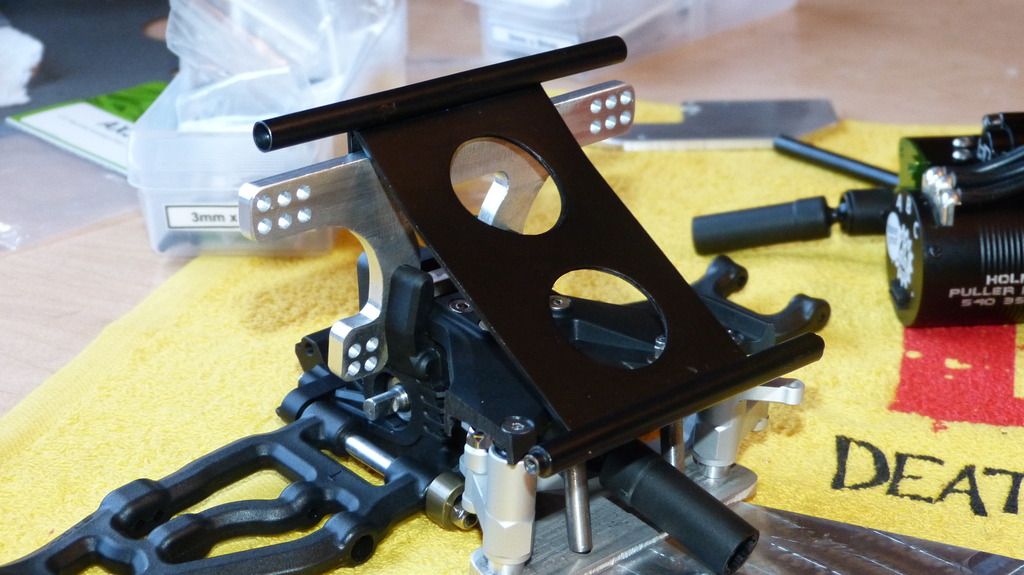 Here are the VP Castor blocks and Steering knuckles put together using the Axial Ti coated steering king pin AX30382. I used blue loctite on the grub screws. 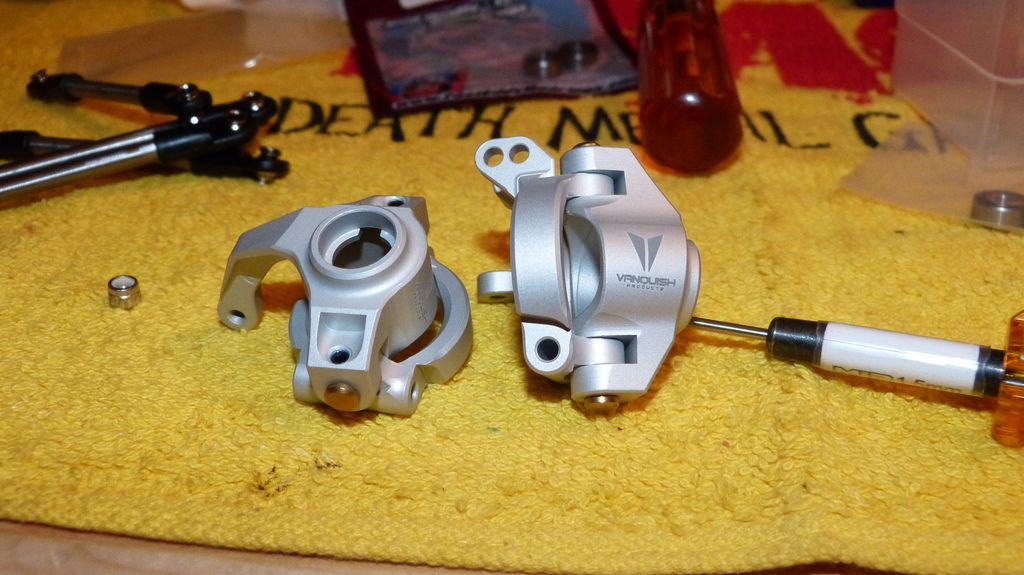 Here it is all installed onto the Arms with the VP 3/16 titanium front Yeti links. 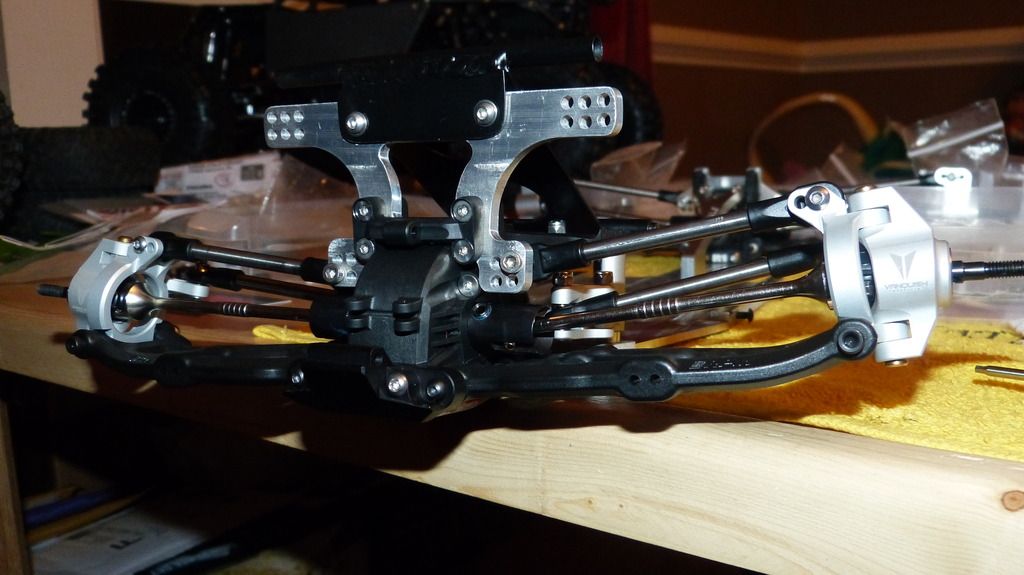 |
| |  |
| | #18 |
| Quarry Creeper Join Date: Oct 2016 Location: Hanover
Posts: 304
|
Time to mount the servo brace onto the Bomber cage. This goes onto the Passenger side. The DMG servo mount is a perfect fit! And I really like how the B1B and B2B puts the servo out of harms way. 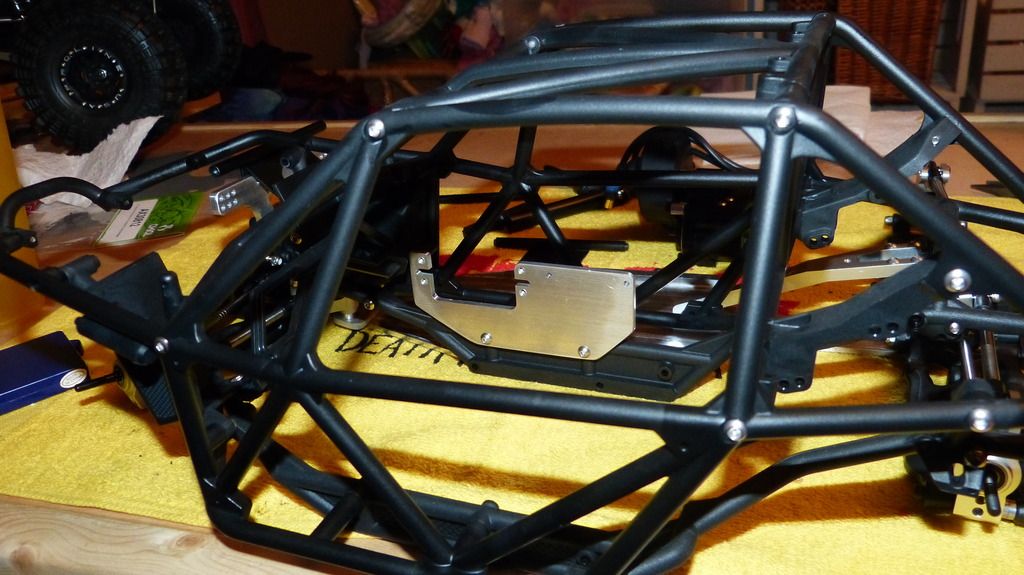 I decided to give the Savox 2290SG a try. I haven't had much luck with the Holmes SHV500 servo. I got really good at replacing the pins/gears, and Holmes customer service is among the best out there and I do praise them for that, however I need something better. Based on reviews I've read here, especially from a member "White Trash", this servo sounds like the answer! 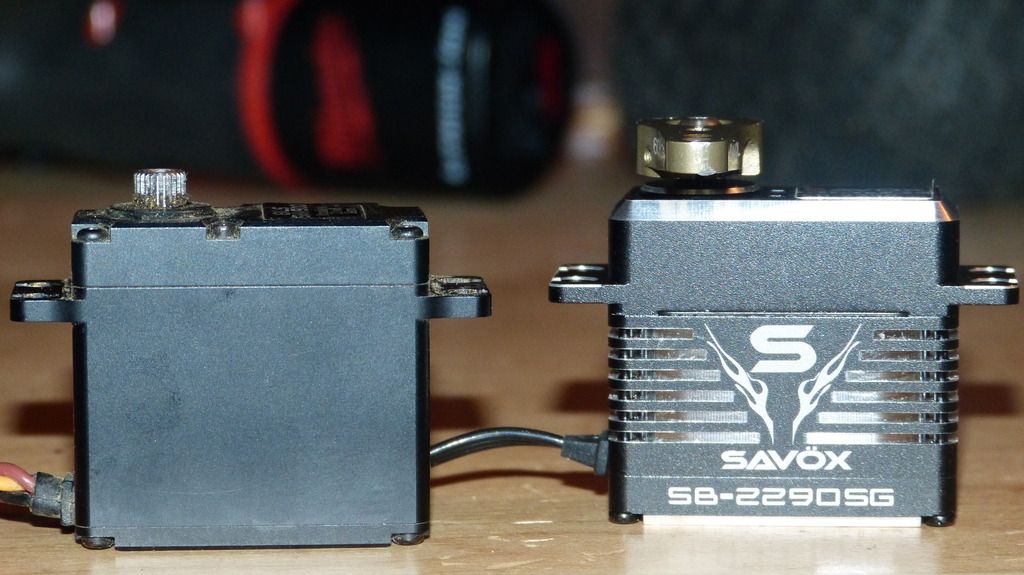 I'm using the Yeti 55mm turnbuckle with Traxxas Jato Rod ends for the drag link. This worked perfect for the B1B, so it should here too. 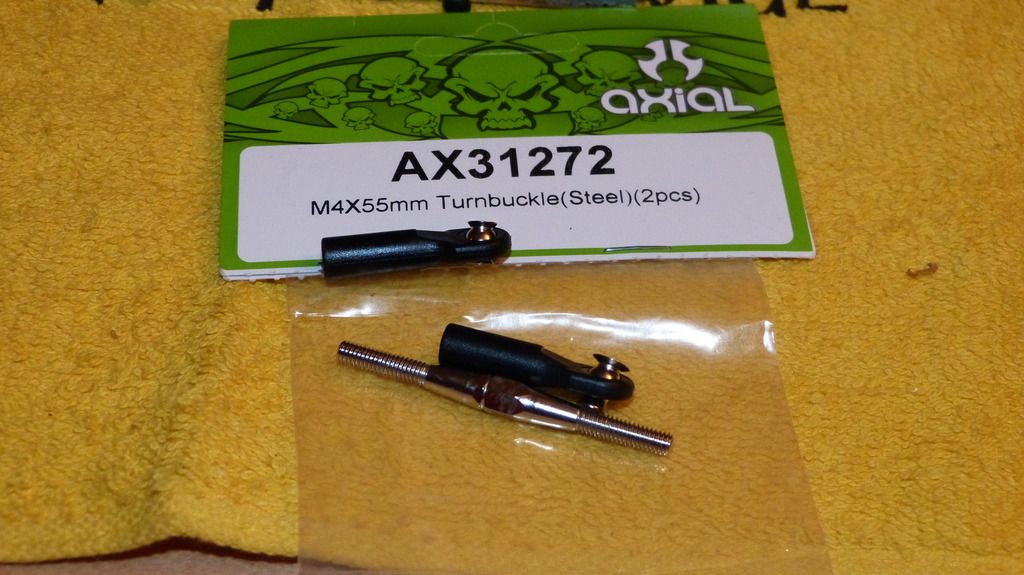 The Savox fits into place nicely. It does rub the cage a little bit, but still protected. I mounted it with the Servo ears on the outside of the mount. This was necessary on the B1B b/c of the tranny placement, but I think I may be able to mount it with the ears on the inside here since I think I will have more room since the tranny will be mounted reversed 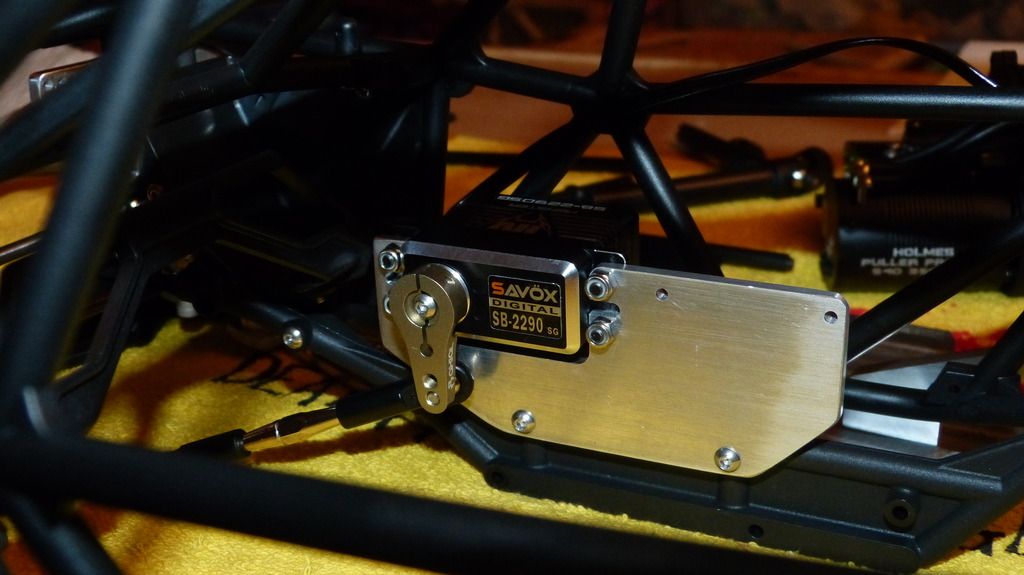 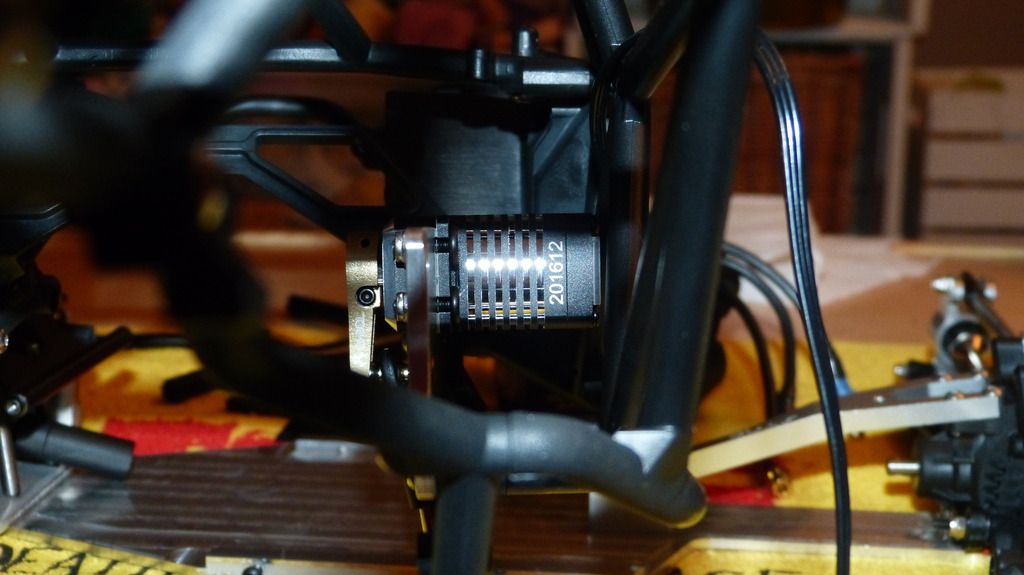 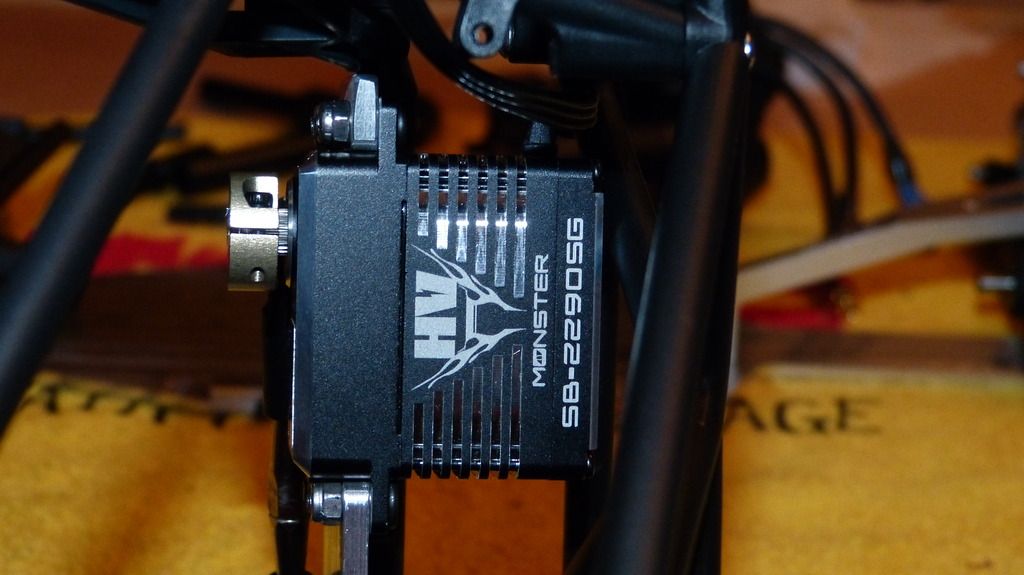 |
| |  |
| | #19 |
| Quarry Creeper Join Date: Oct 2016 Location: Hanover
Posts: 304
|
Here's where I'm at with the cage mocked into place. Everything is pretty loosely fitted into place. May end up moving some things around as I put it together. The Axial cage does line up very well with the DMG chassis plate. Much better than the Axial Bomber skid on the B1B. I had to drill out a hole for that one 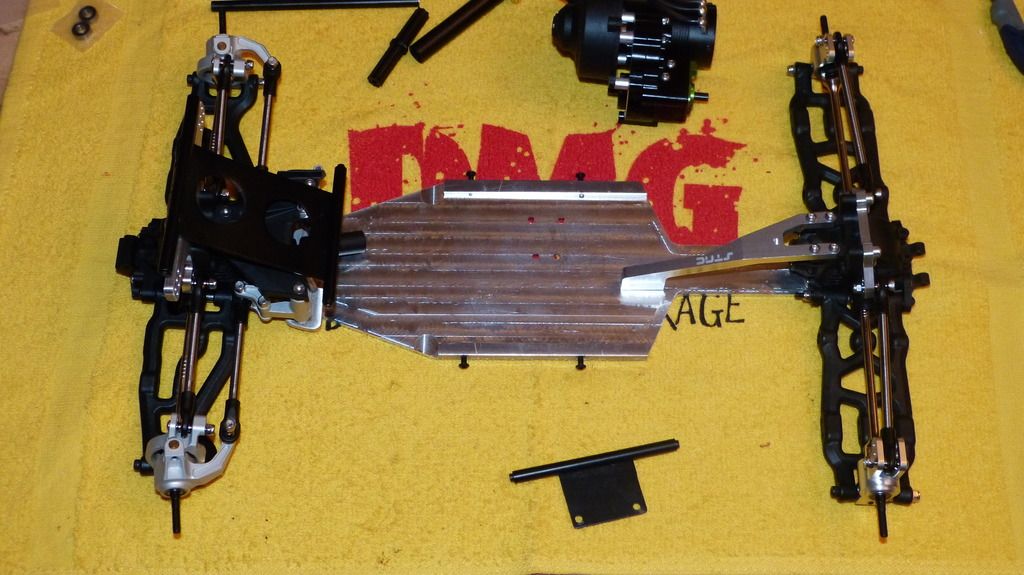 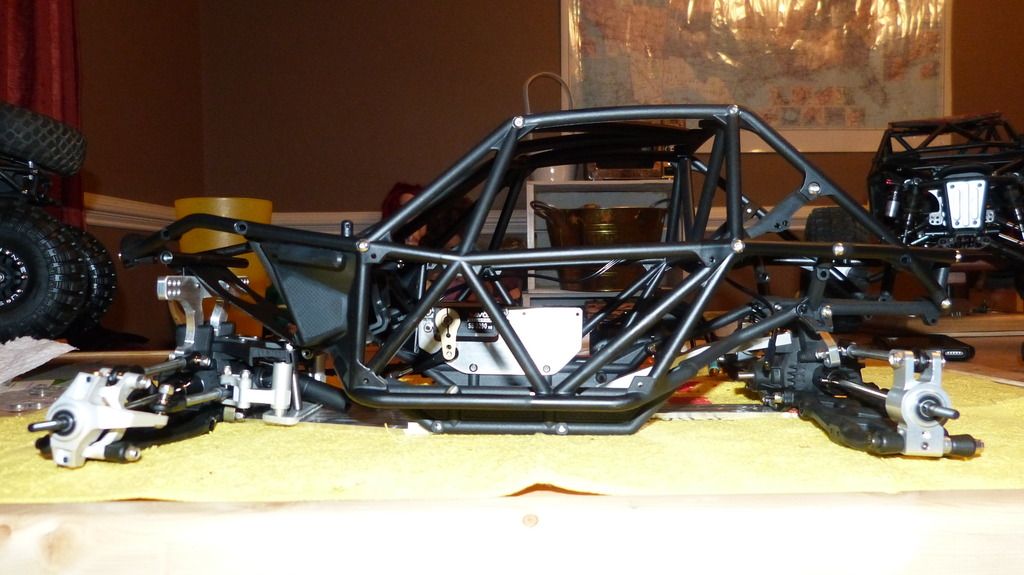 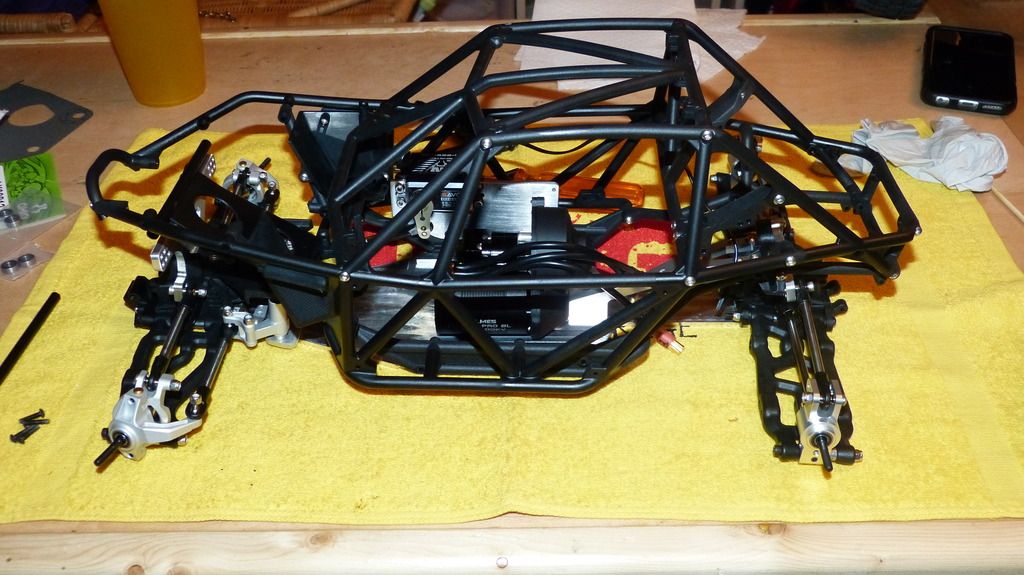 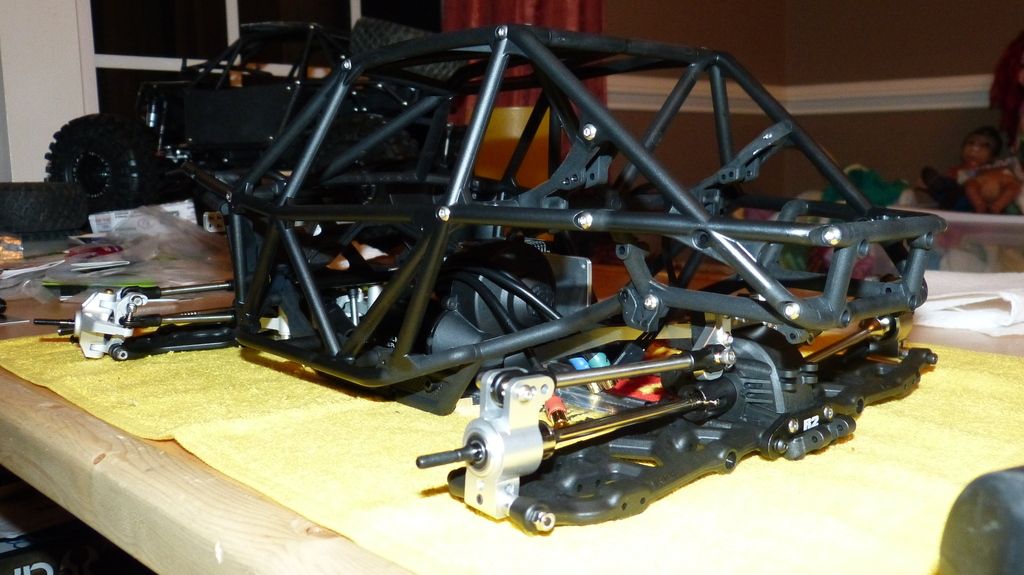 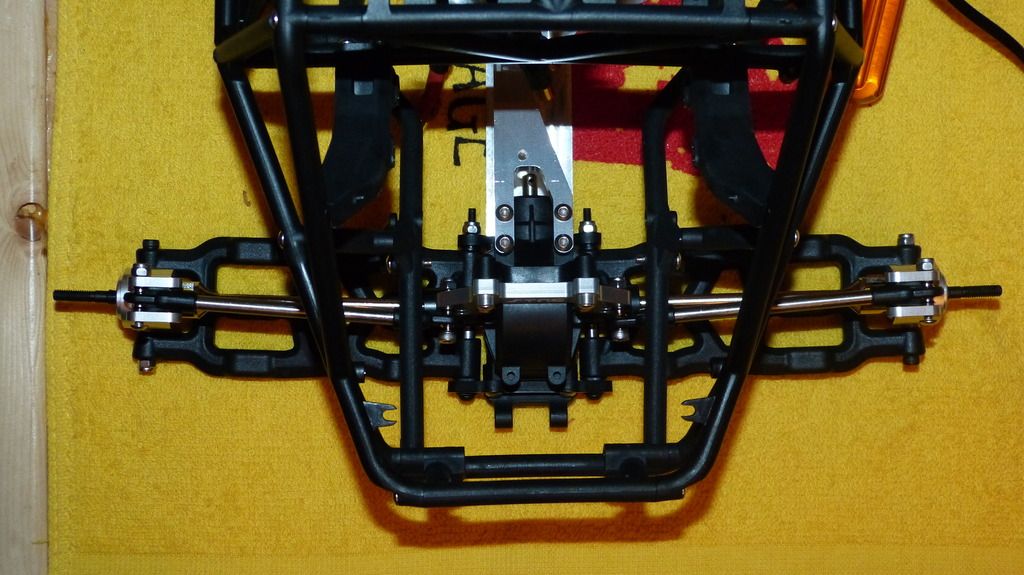 As stated, I'm determined to try and make this Exo rear skid work. I think the bulkhead needs some protection back here. We'll see what I can come up with. 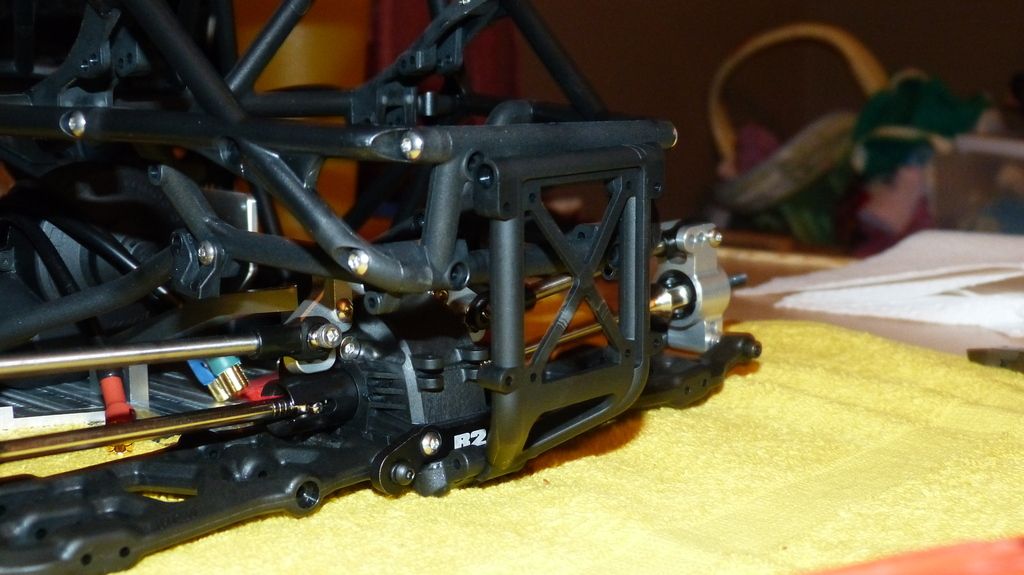 |
| |  |
| | #20 |
| Quarry Creeper Join Date: Oct 2016 Location: Hanover
Posts: 304
| |
| |  |
 |
 My IFRS Bomber Build - DMG B2B - Similar Threads
 | ||||
| Thread | Thread Starter | Forum | Replies | Last Post |
| bilinvic's DMG IFS B1B Bomber Build | bilinvic | Axial RR10 Bomber | 375 | 04-11-2024 07:56 AM |
| Dmg b1b & b2b bomber demo | Jasper105 | Videos! | 0 | 02-22-2016 07:26 AM |
| Ifrs wraith | Tmaxxed | Axial Wraith | 24 | 07-15-2014 03:05 PM |
| |