| |
| |||||||
 |
| | LinkBack | Thread Tools | Display Modes |
 12-17-2012, 06:14 AM
| #21 | |
| Pebble Pounder  Join Date: May 2008 Location: Mobile, AL
Posts: 163
| Quote:
| |

|  |
| Sponsored Links | |
| | |
|
12-19-2012, 05:58 AM
| #22 |
| Rock Stacker Join Date: Sep 2010 Location: Mobile, AL
Posts: 80
| Spent around 3 hours last night getting the rear axle to my liking - and I'm still not done. I dunno if it's the stock gears that are just not up to spec and have tolerance issues or what, but here are the differences I ended up noticing with the rear vs the front... First, to remove the side-to-side slop on the drive gear I ended up using 0.4mm worth of shims, instead of 0.2mm like the front. 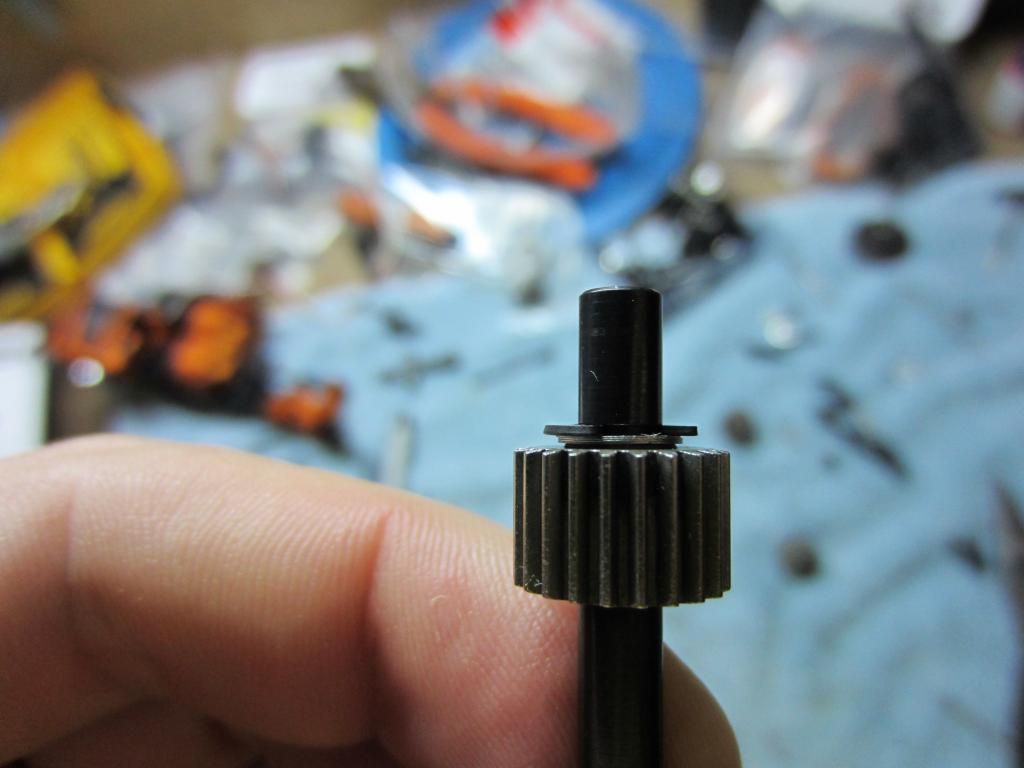 Same thing for the idler gear on the main shaft: 0.3mm shim instead of 0.2mm like the front. 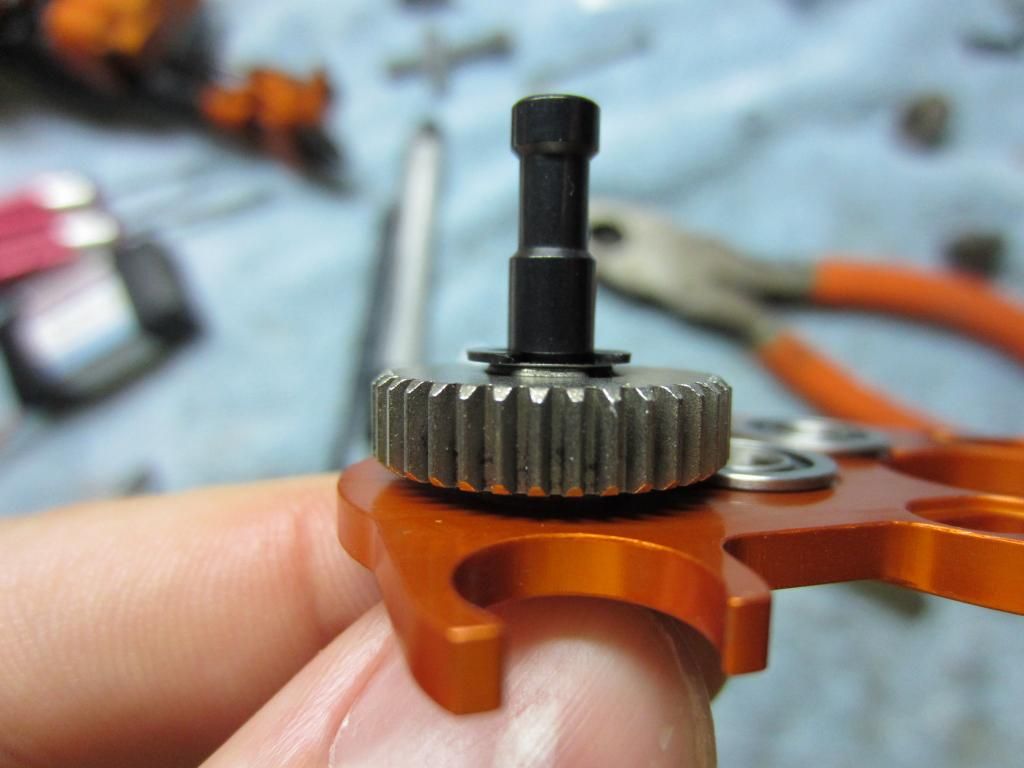 Also, to get the screw threaded in next to the idler gear, I had to grind the button head cap down to 0.175" from 0.220", it barely clears the gear teeth now... 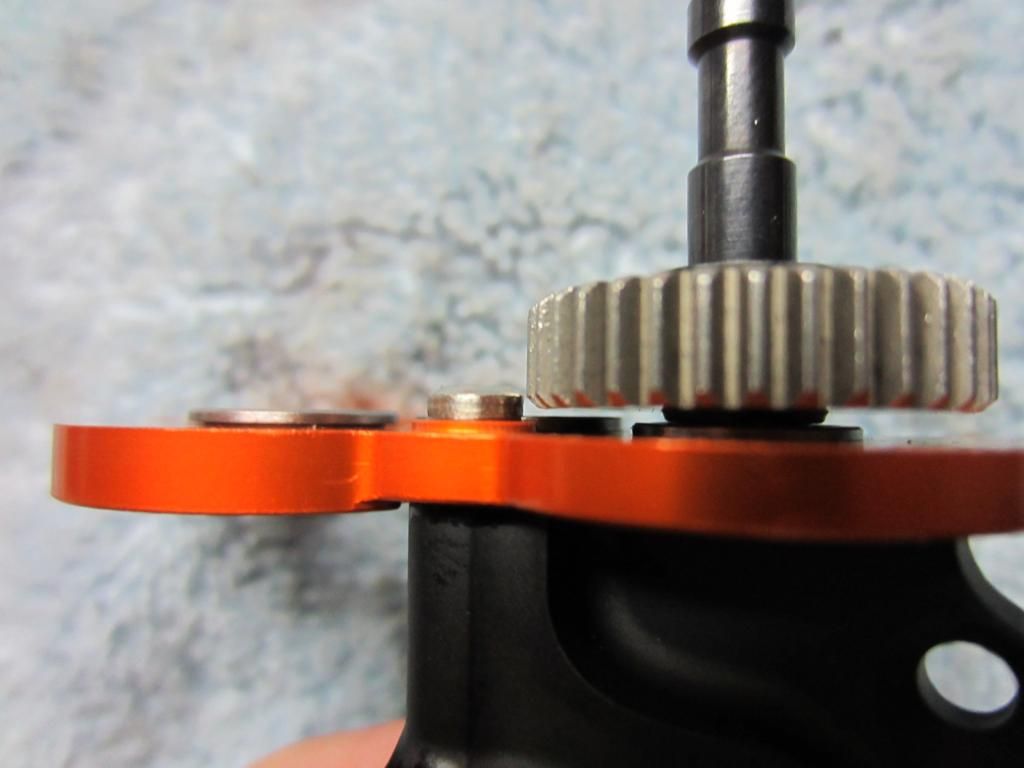 Turns out the orientation of the gears did matter (hopefully this only applies to the stock gears). I tried every combination possible as far as having which gear arrow facing which way, and the only orientation that even allowed the tranny to spin freely was with both idler gears' arrows facing 'outward'. 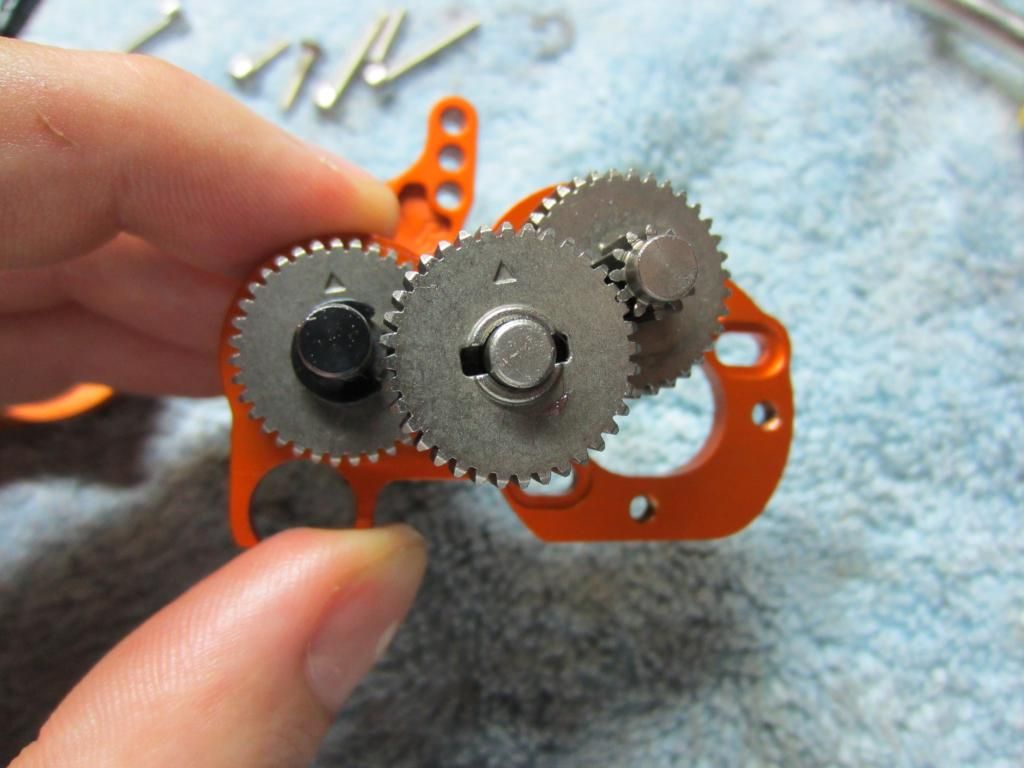 Lastly, to remove the side-to-side slop in the rear axle, I used a 0.3mm shim between each axle shaft and the outer bearing, instead of shimming up between the outer bearing and the hex nut like I did on the front. 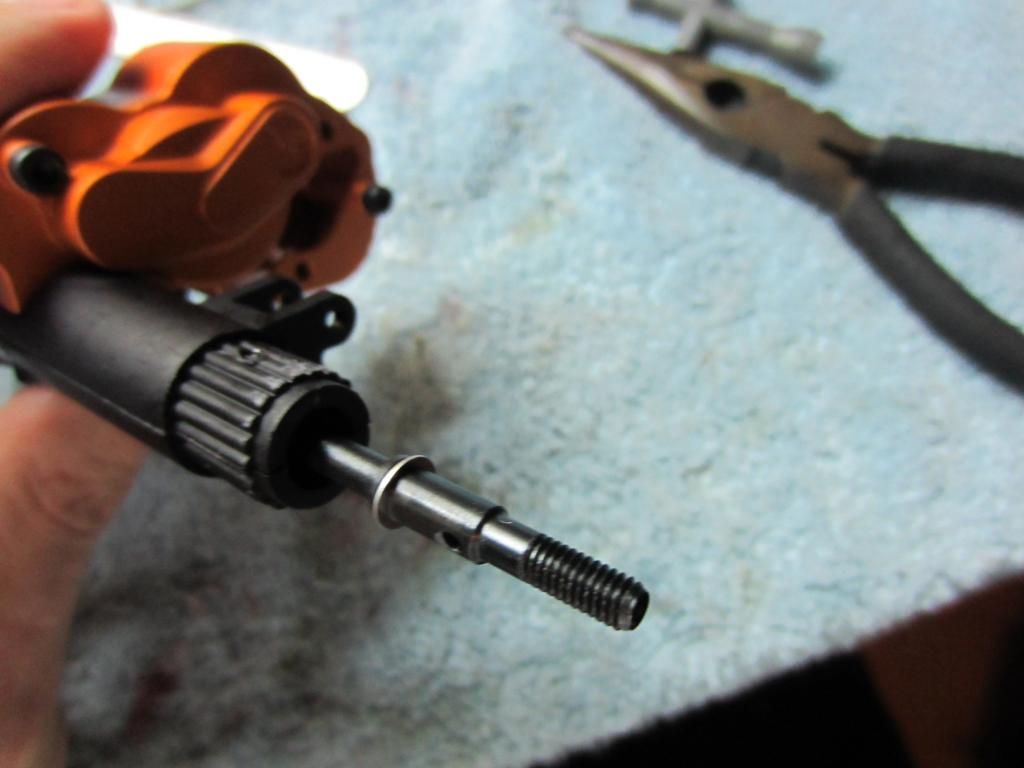 While the rear axles are mostly done, there are still a few mods I'm looking at doing. Stay tuned. |
|
| |
|
12-19-2012, 09:23 AM
| #23 | |
| I wanna be Dave Join Date: Sep 2005 Location: Houston, TX
Posts: 16,952
| Quote:
| |
|
| |
|
12-19-2012, 11:54 AM
| #24 |
| RCC Addict Join Date: Mar 2010 Location: Alburtis
Posts: 1,227
|
I don't remember having to grind down the screw to get it to fit. I just used a standard M3 screw and it all fit just fine. Very detail work with the shims. I am not sure of the overall gain, but it doesn't hurt. It is good shimming the axles, since that shows up in your wheels. Wes |
|
| |
|
12-19-2012, 12:29 PM
| #25 |
| I wanna be Dave Join Date: Aug 2011 Location: Burque
Posts: 3,805
|
I run the stock gears with the vanquish plates and have no problems.. I have heard of people having some thou. Anywho, the build is looking good so far  |
|
| |
|
12-19-2012, 12:48 PM
| #26 |
| I wanna be Dave Join Date: Sep 2005 Location: Houston, TX
Posts: 16,952
|
Maybe it was only with the VP plate and RC4WD gears (which have longer, vampire style teeth)...
|
|
| |
|
12-19-2012, 04:32 PM
| #27 |
| I wanna be Dave Join Date: Jan 2012 Location: williamsport
Posts: 8,649
|
I'm missing something.. or maybe you? A screw maybe.. mine from my vp tranny to vp link mount is cone shaped an sits in a little from flush with the tranny wall.. sits in more so flush then the flange on the bearing.. It's been a while an I coulda just picked it out of my screw pile, but its what I used.. no clearance issues no matter the gear or teeth. |
|
| |
|
12-19-2012, 08:07 PM
| #28 | ||||
| Rock Stacker Join Date: Sep 2010 Location: Mobile, AL
Posts: 80
| Quote:
Quote:
Quote:
Quote:
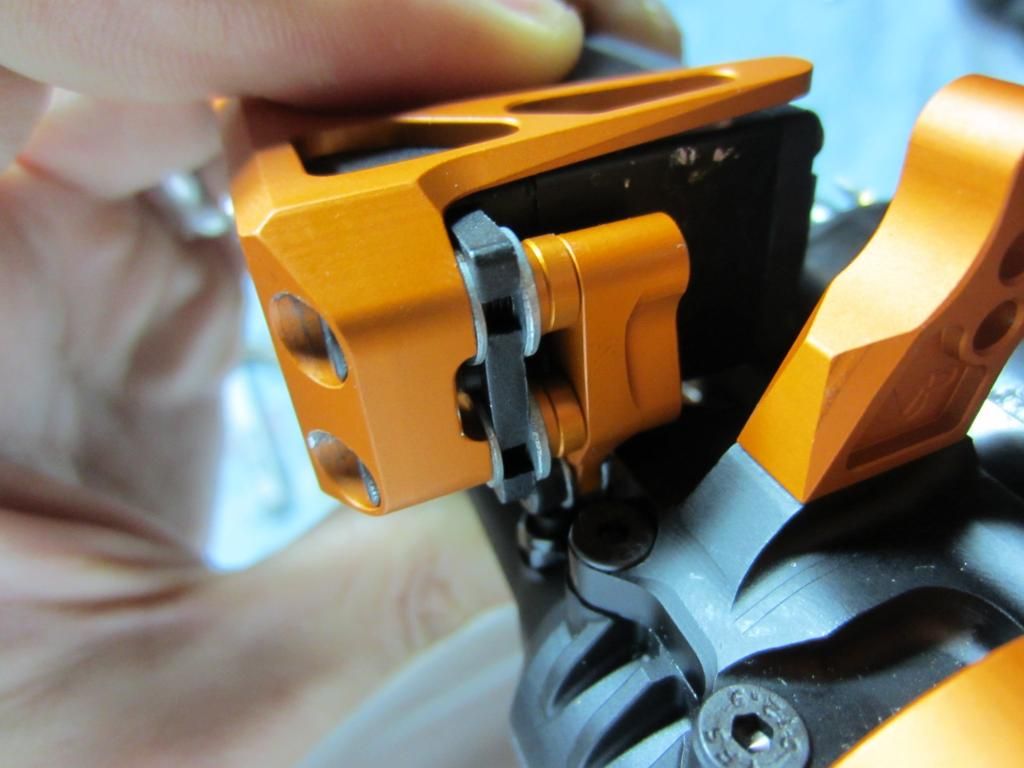
I finished the rear axle with a few final touches... First, I used a 1/4" counter-sink on the bottom screw holes of the VP rear lock-outs - with the goal being to use flathead screws on the bottom of the axle. 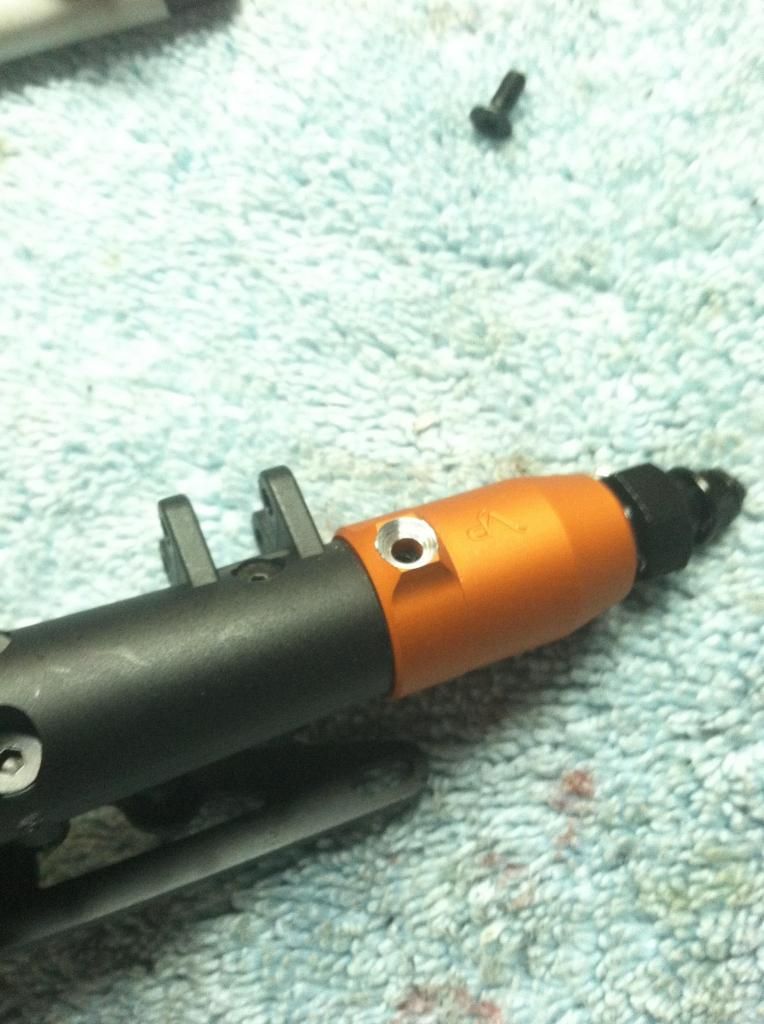 Turned out to provide pretty good clearance! 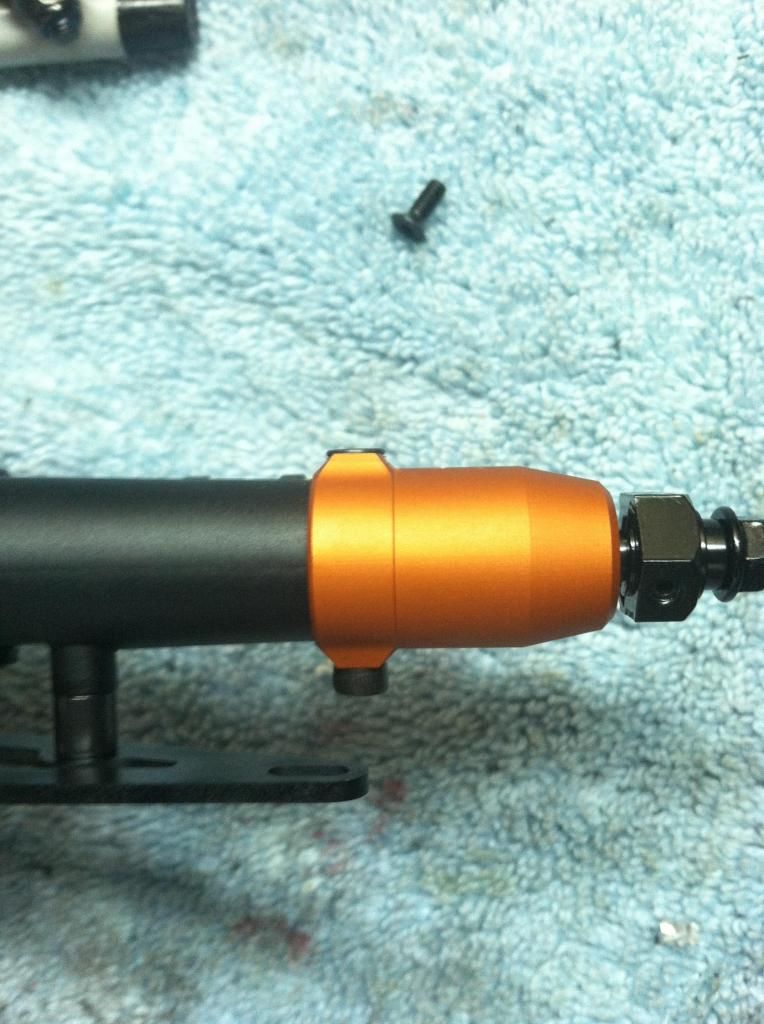 Next, I did the 'screw through the rear link mount' mod. Basicially took a 7/64" drill bit and put a hole all the way through the axle case using the existing hole on the VP link mount. 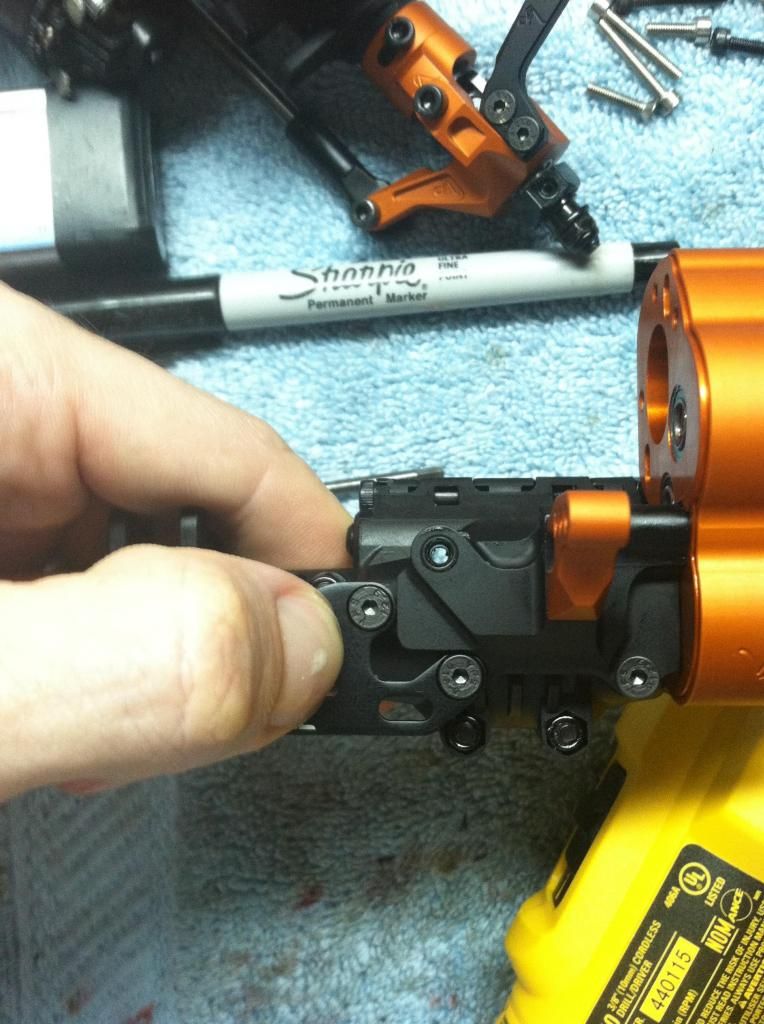 Then I put a 40mm button head screw in that hole from the bottom. 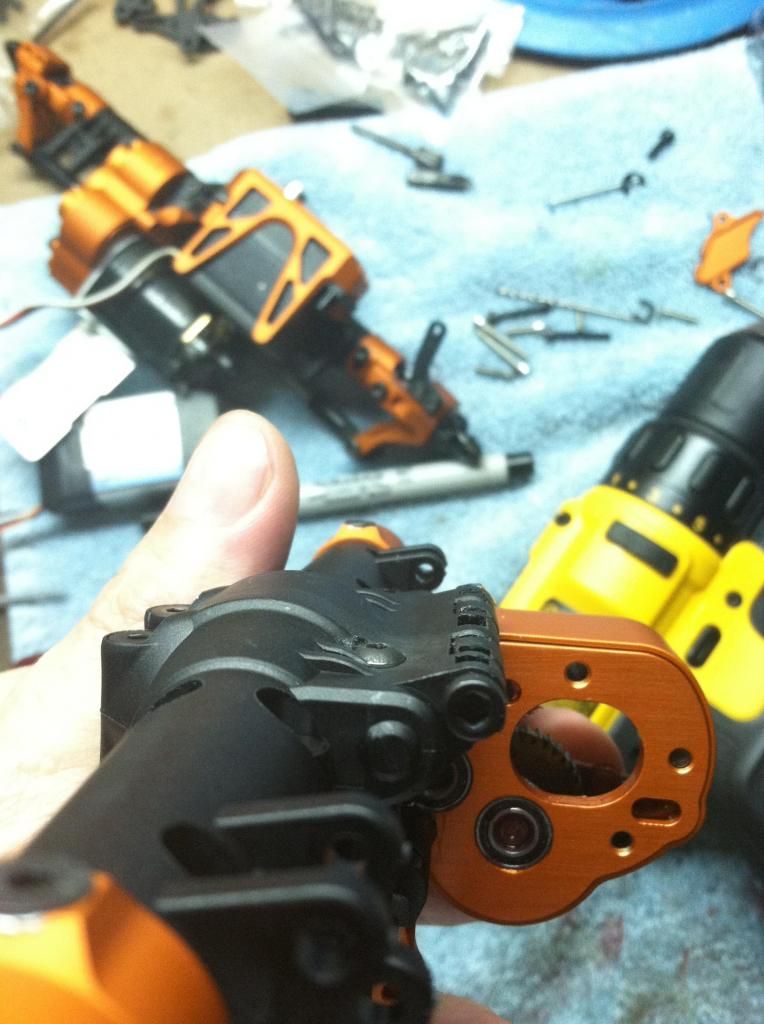 There was 5mm of extra threads past the locknut, so a 35mm screw (if you have one) is the one to use for this mod. 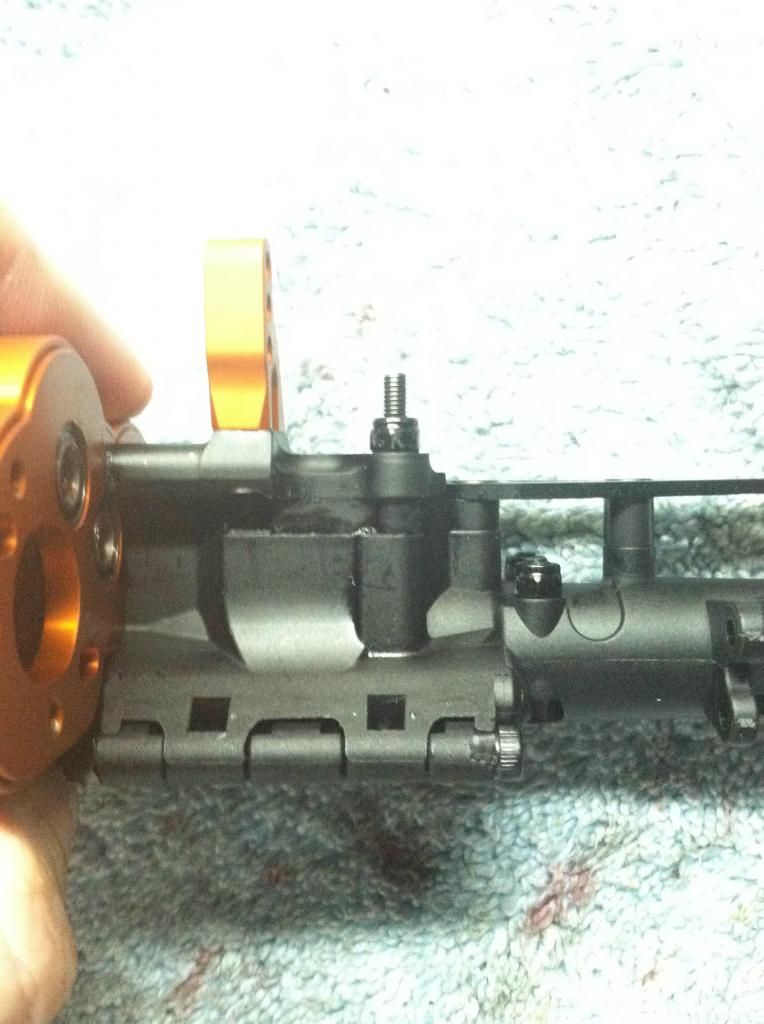 After mounting the motor, I had a complete rear axle! 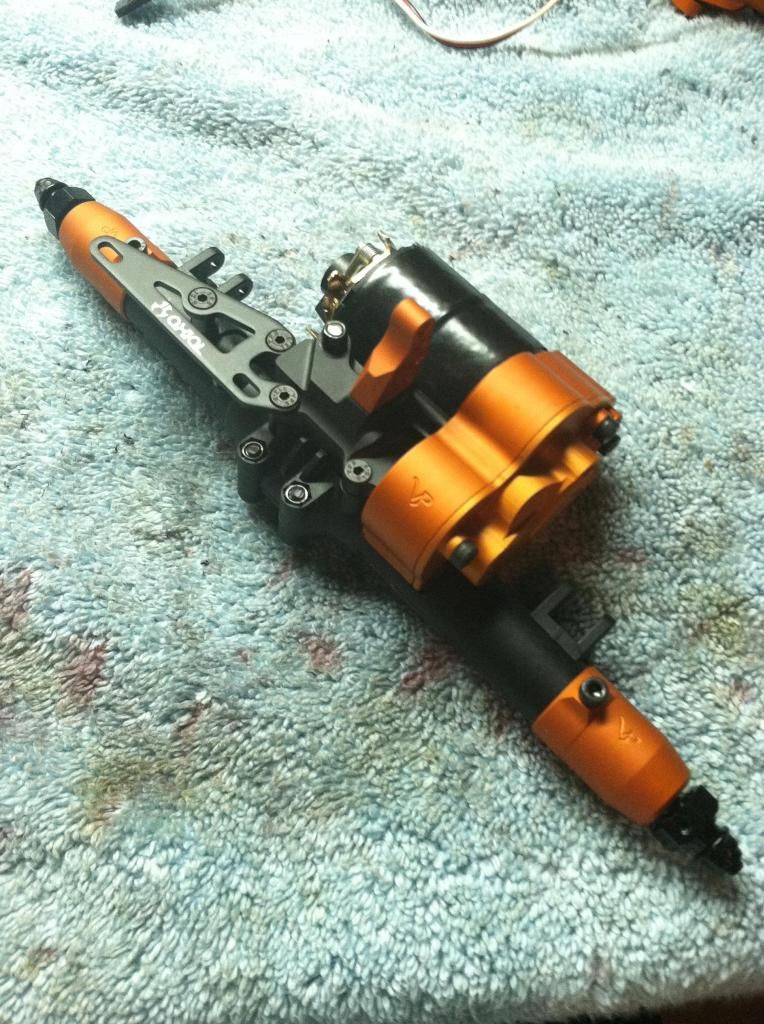 Rear axle w/motor weighed in at 15.1 oz. 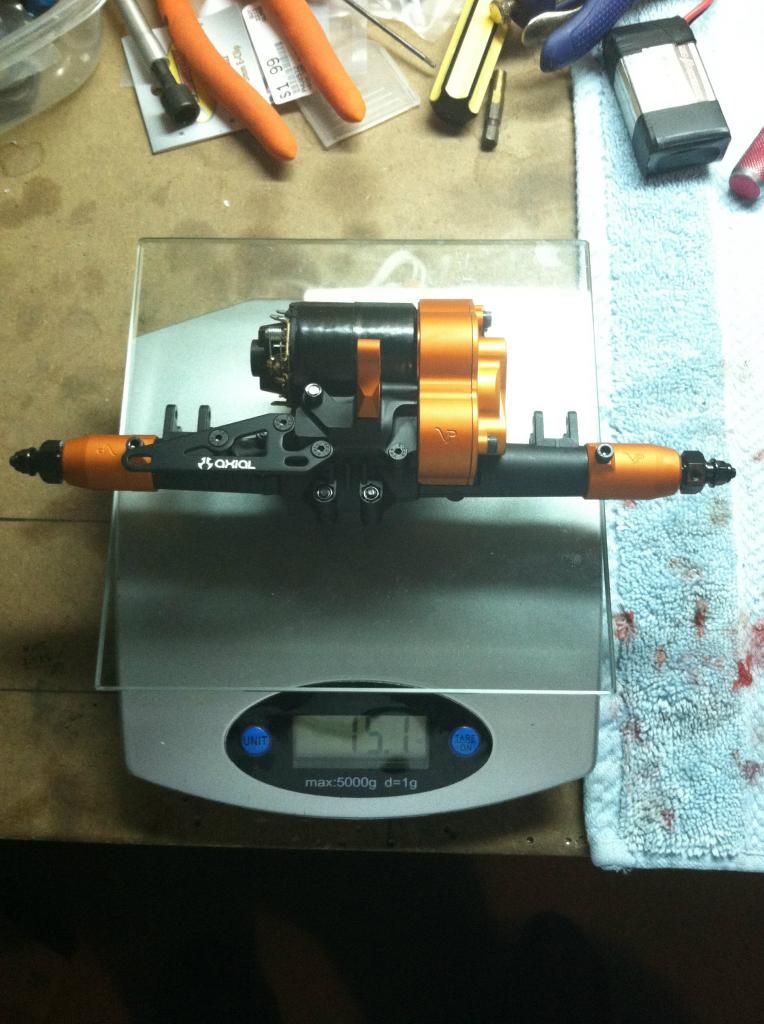 Until next time... Chris | ||||
|
| |
|
12-28-2012, 11:06 AM
| #29 |
| Rock Stacker Join Date: Sep 2010 Location: Mobile, AL
Posts: 80
| Got some more goodies in the mail from VP! Knuckle weights: 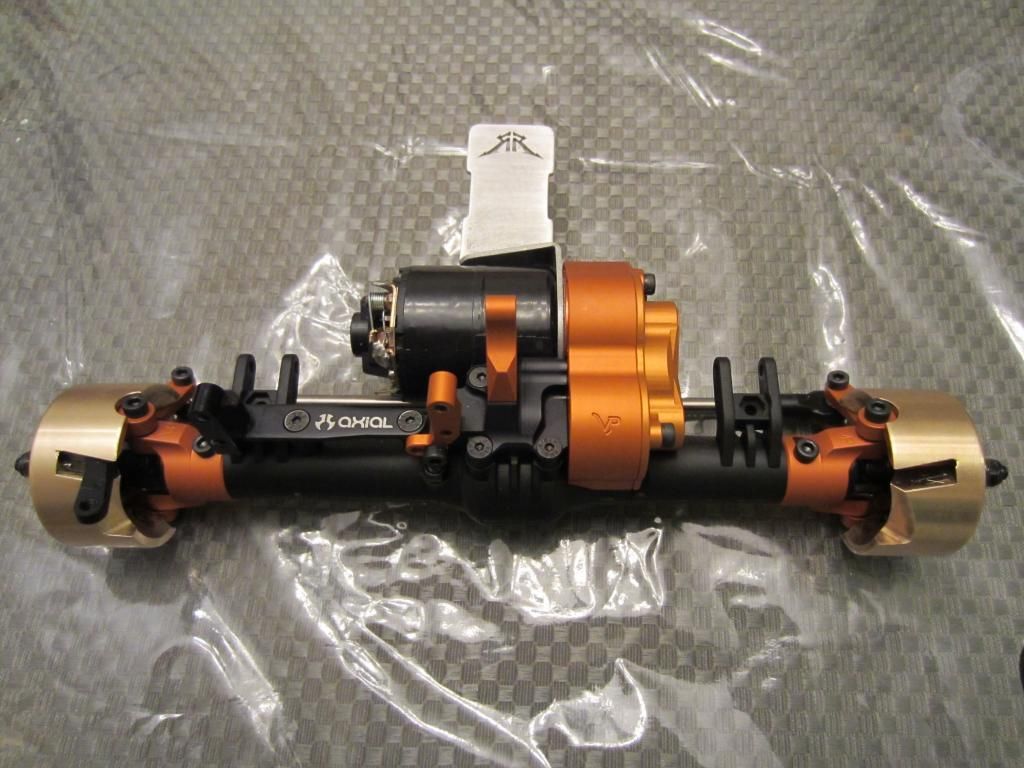 I had to file the slot down a little bit for the steering arm to slide in, but other than that, the weights fit like a glove. 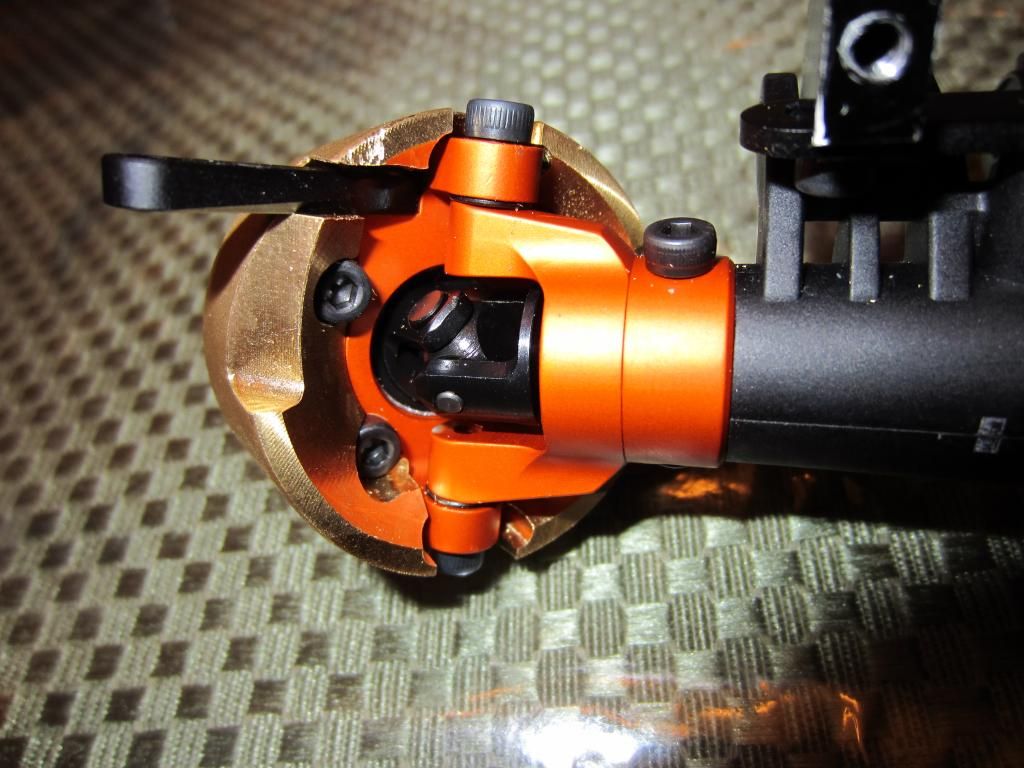 One thing I noticed on the front axle was how the servo mounts were not even, horizontally or vertically (I'm using a black aluminum ST Racing servo mount). 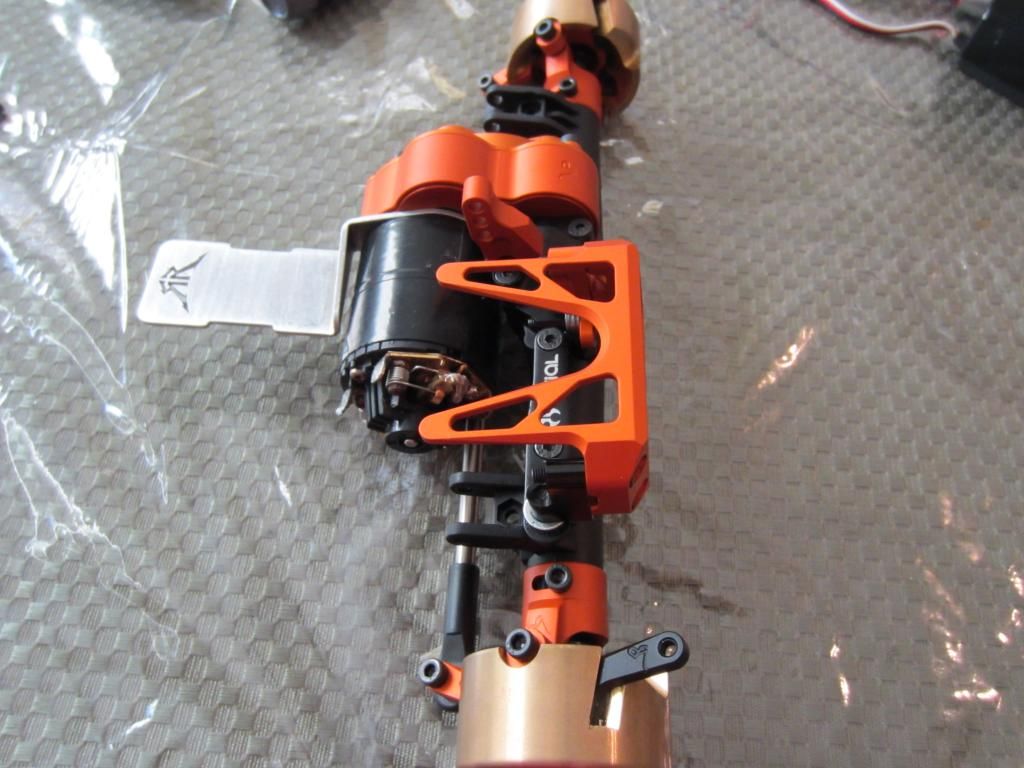 So I added some washers to accomodate: 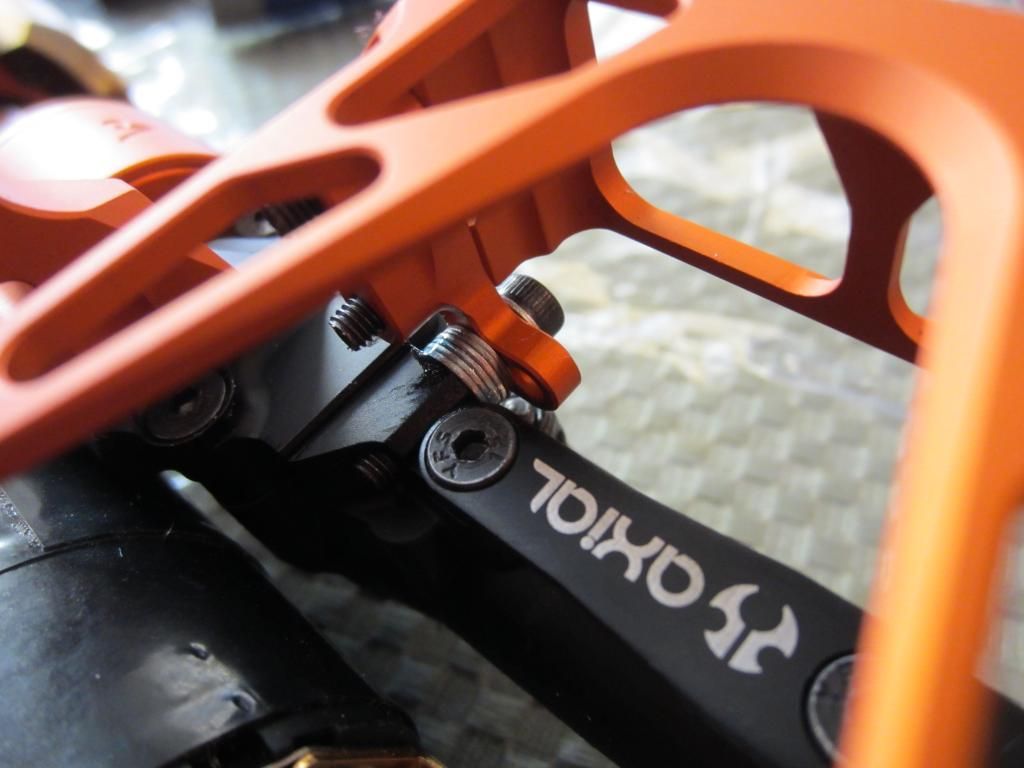 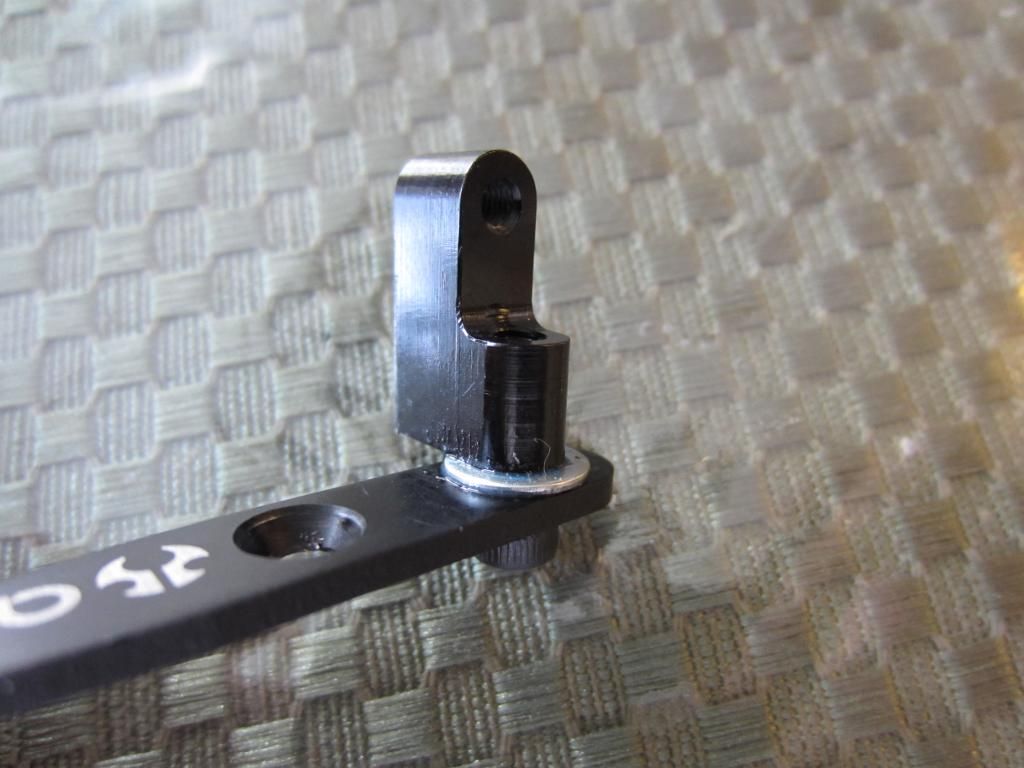 and voila! 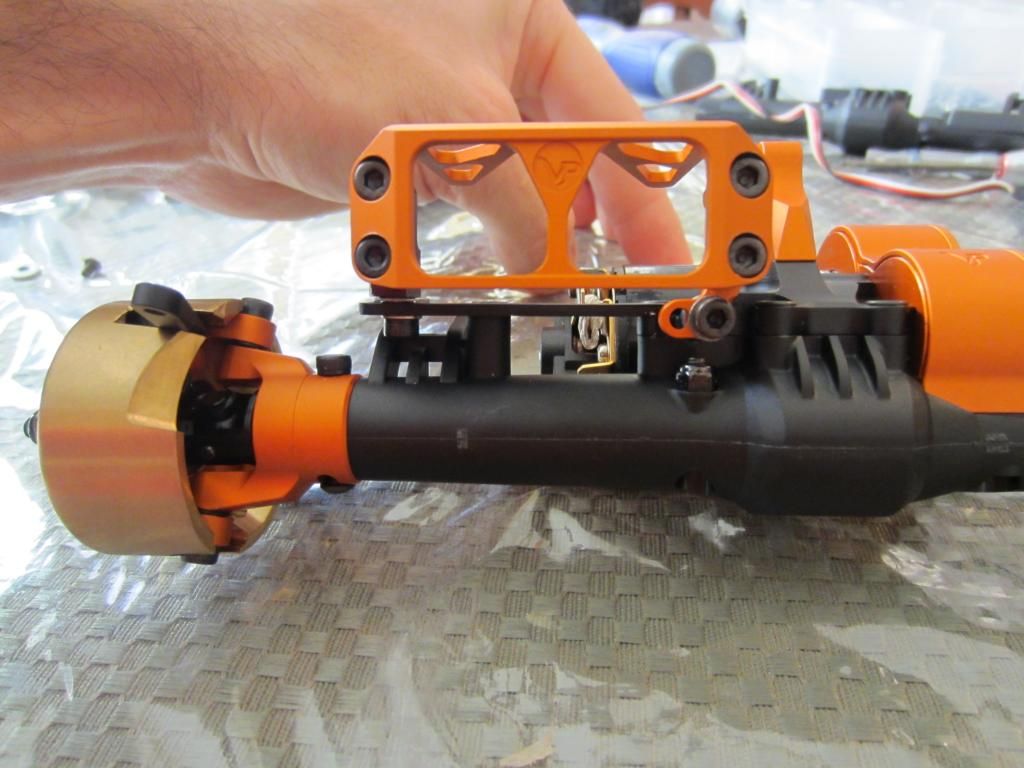 I also ended up flipping the servo like some of you were suggesting. The angles turned out to work well and provide symmetrical steering throw without binding. I used one of the stock steering linkages to adjust the steering link length and ended up going with 15mm of spacing using Traxxas small rod ends. I plan to replace the stock linkage with a 15mm orange Axial post to add some more orange. 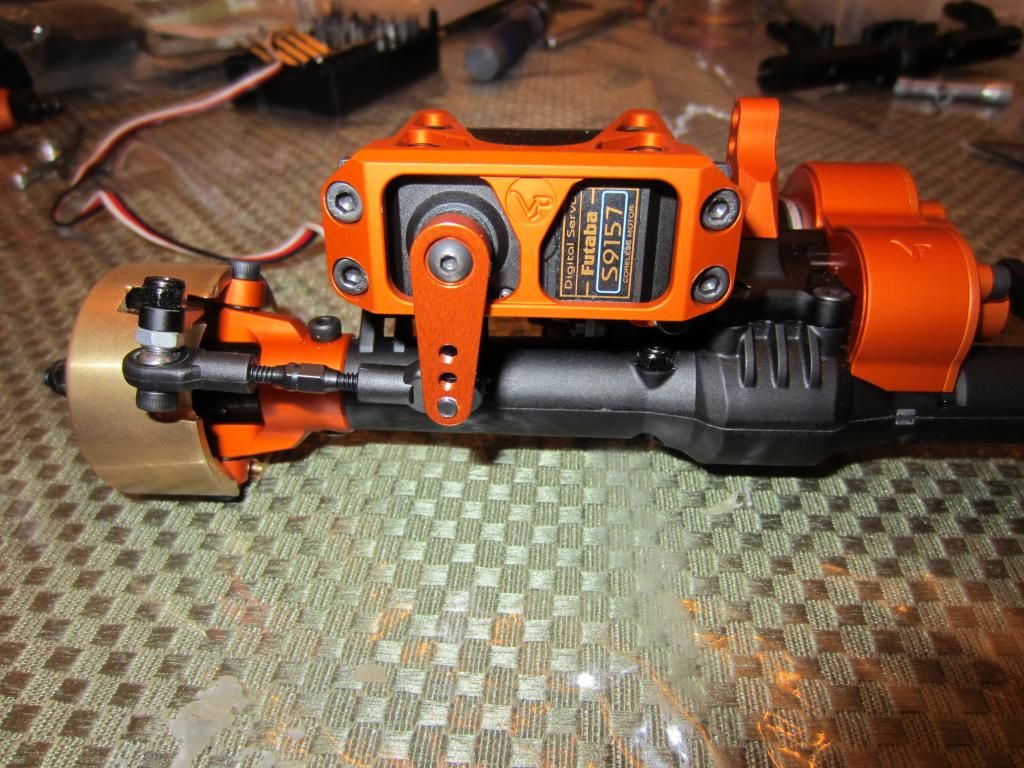 The front axle w/weights came out to 27.7oz 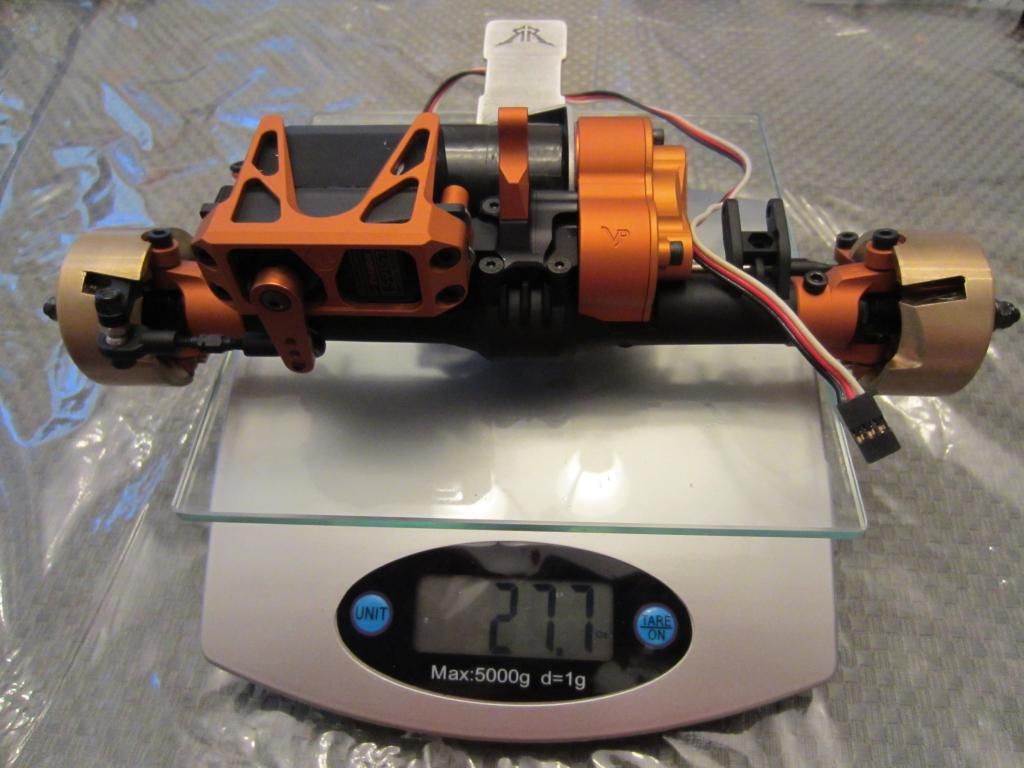 I've been thinking about mounting the battery on the axle, just like a lot of other XR's I've seen here. But I wanted to check the balance of the front axle to see how it would affect it. Turns out the axle is pretty balanced as is, with the weight bias 51.3% toward the servo side. 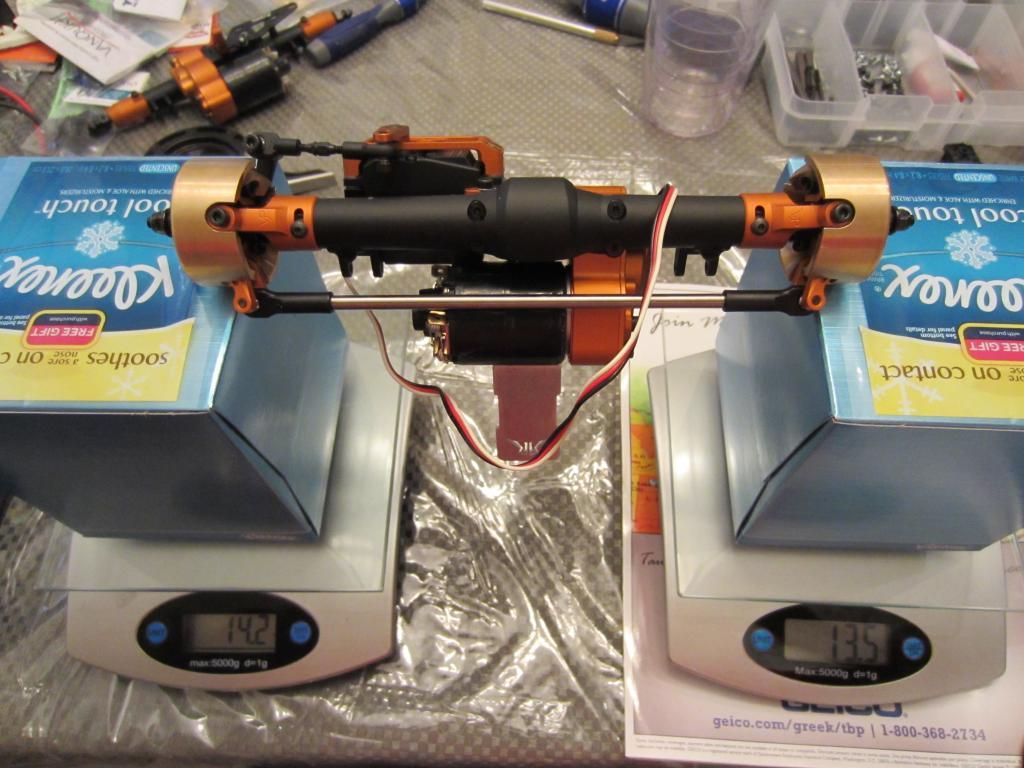 When I set my battery (3s 1350mAh) on the other side, the weight bias becomes 51.0% toward that side - even more balanced than before. 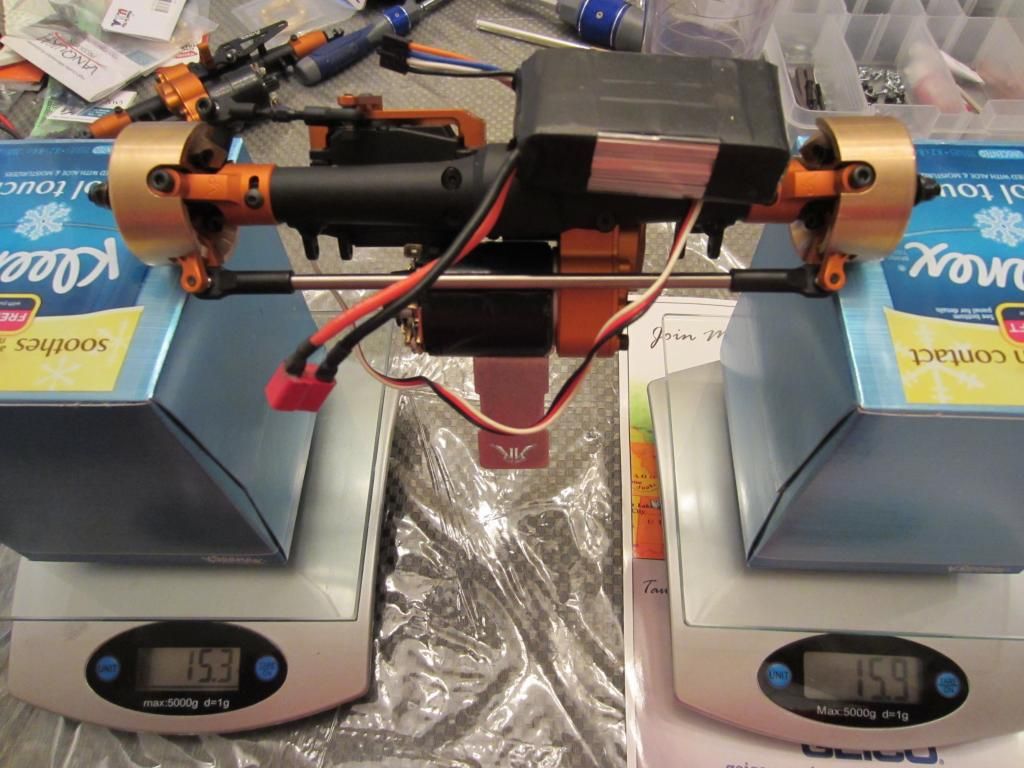 At this point, I'm planning on mounting the battery on the axle, the esc on the motor electronics mount, and the dig/receiver on the chassis. |
|
| |
|
12-28-2012, 11:13 AM
| #30 |
| I wanna be Dave Join Date: Jan 2012 Location: williamsport
Posts: 8,649
|
Looks awesome! I would be worried bout the vp servo mount breaking off at the washer.. as others have done with them mounted propperly.. just a thought. Next though is, maybe ur Bec under ur servo would give you a closer balance yet? |
|
| |
|
12-29-2012, 07:41 PM
| #31 | ||
| Rock Stacker Join Date: Sep 2010 Location: Mobile, AL
Posts: 80
| Quote:
 Quote:
A few more little tweaks: I replaced the stock grey spacer on the rear axle with an orange one for some extra bling: 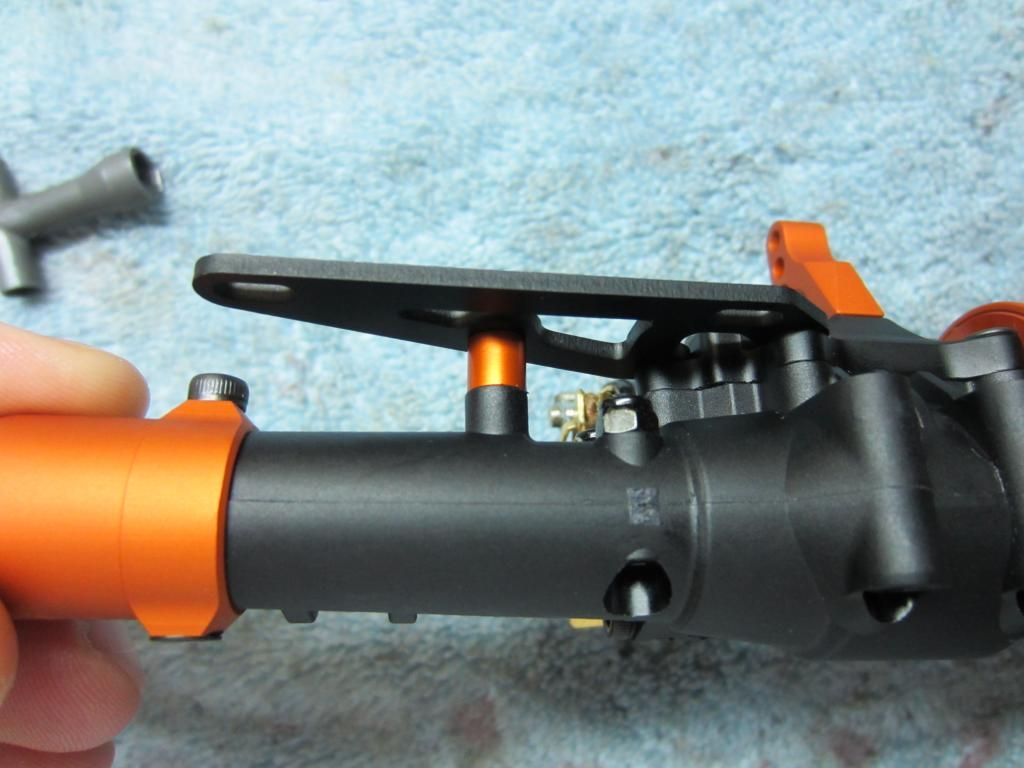 and replaced the steering link with a 15mm Axial post, using stock 16mm set screws Traxxas short rod ends:  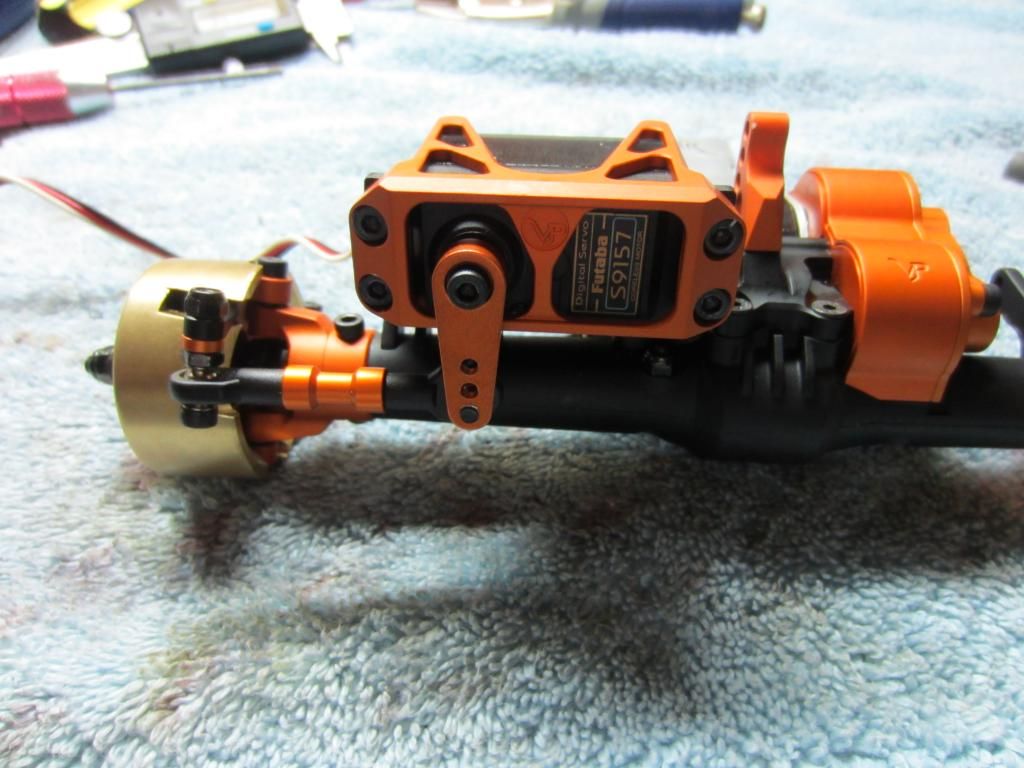 I'm working on drawing the chassis in CAD tonight - hopefully have an update on that tomorrow. Stay tuned. Chris | ||
|
| |
|
12-29-2012, 07:58 PM
| #32 |
| RCC Addict Join Date: Mar 2010 Location: Alburtis
Posts: 1,227
|
Man this thing is like a work of art. I would be scared to drive it. Wes |
|
| |
|
12-30-2012, 11:14 AM
| #33 |
| I wanna be Dave Join Date: Jan 2012 Location: williamsport
Posts: 8,649
|
I deleted my first post by accident so this is the short version The servo spacers look great an orange at that! Not sure of br-xl or futuba voltage, 7.4v? The br-xl is internal 6v Bec? John,HH, has a sticky in the electronics section that says, always a external Bec.. just for thought/reading |
|
| |
|
12-30-2012, 12:59 PM
| #34 | ||
| Rock Stacker Join Date: Sep 2010 Location: Mobile, AL
Posts: 80
| Quote:
Quote:
The s9157 has a 6v input, however there are alot of 7.4v servo's available now, which would definitely require an external BEC. When I started working on the chassis design, it became apparent early on that I had to nail down the link/shock mounting locations on the axles. This would provide a basis for alot of the chassis geometry. So I spent about an hour, with my caliper, getting the measurements as accurate as possible. Below is what I came up with. All dimensions are shown with respect to the axle centerlines. Feel free to use these for reference... 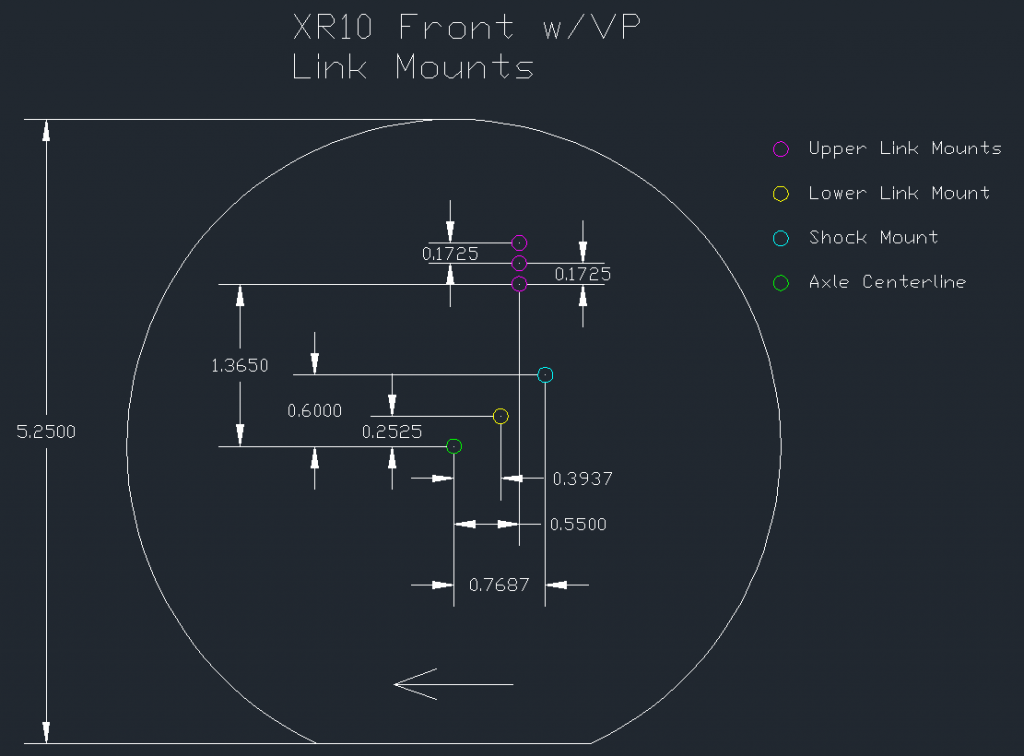  I'm in the process of finalizing the lines/angles of the chassis, but I'll have it done soon and posted later. | ||
|
| |
|
12-30-2012, 05:09 PM
| #35 |
| Pebble Pounder Join Date: May 2008 Location: Mobile, AL
Posts: 163
| Here's the outline of the chassis: 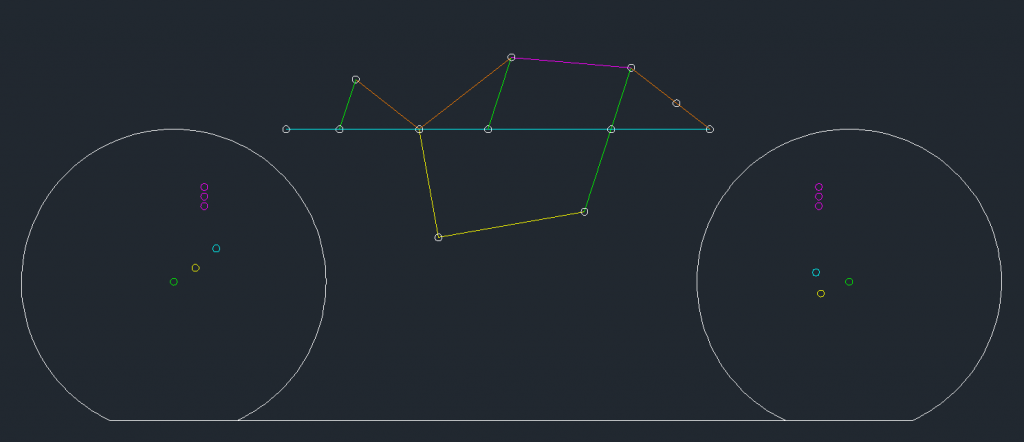 The lines represent .375" wide x .08" thick aluminum bars that will be used to make the chassis. Holes are either link/shock mounting points or connecting points between aluminum members. Lines that are the same color are the same angle from horizontal, except for the yellow lines, which are perpendicular. The chassis horizontal bias is 50/50 with the highest point being at the horizontal center of the wheelbase. The chassis vertical bias is 60/40. The shock angles and lengths, when viewed from the side (as shown) are the same. The front shock mount is 0.43" higher than the rear shock mount, because this is the height difference of the shock mount locations on the axles. Overall chassis height and length will be just over minimum required dimensions. The only links I plan on bending are the rear lowers - something around a downward 45 degree bend shortly after it leaves the chassis. The parameter I haven't decided on yet is the ride height. I'm trying to figure out if it's better to design for an overall truck height, a rear lower-link clearance height, or just what looks good. The way it's shown above has the major chassis horizontal member level with the top of the tires (5.25"). This setup would provide an overall height of around 6.8" and around 3.9" of maximum rear lower-link clearance. Anyone have suggestions (with evidence) on a good ride height to shoot for? Chris |
|
| |
|
12-30-2012, 05:12 PM
| #36 |
| Rock Stacker Join Date: Sep 2010 Location: Mobile, AL
Posts: 80
|
Lol, I'm at Jakerz's house and didn't realize I was logged into his account when I posted that last one...whoops. |
|
| |
|
01-03-2013, 07:51 PM
| #37 |
| Rock Stacker Join Date: Sep 2010 Location: Mobile, AL
Posts: 80
| I put some width on the chassis members and added another diagonal on the main panel for some additional triangulation. Here's what it looks like now...  It's kinda hard to visualize the depth of the chassis from a side view so I made top view showing how the members are going to be layered. The overall width will be just over 3". As shown, I plan to use various length Axial posts as the spacers between aluminum members. 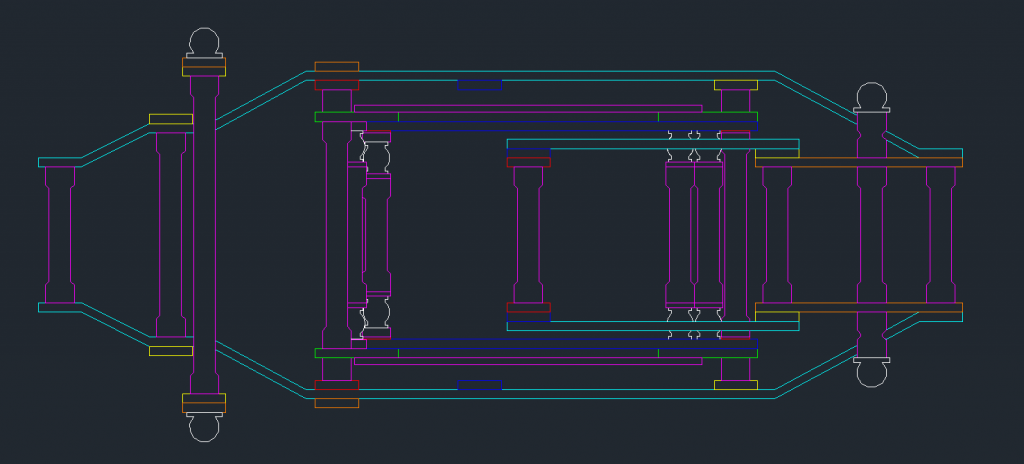 I'm gonna play around in Sketch Up and try to render a 3d model of the chassis to get a better idea of what it will end up looking like. Stay tuned. |
|
| |
|
01-05-2013, 06:55 PM
| #38 |
| Rock Stacker Join Date: Feb 2012 Location: Sunshine Coast Australia
Posts: 70
|
I'm really enjoying this build mate, keep up the great work... As for electrical tape on your motors, i'd also been thinking about ways to protect my motors from a drop or fall/scratches etc, but i decided no option was the best option. However i did consider using an aluminum heat sink with all the fins shaved off. The only problem I had with that idea was that perhaps the extra metal would affect the motors magnets to some degree? If anyone has an idea on this please let me know..If your motors get hot, that tape is going to get real gooey.. may be a dirt trap.. Anyhow kick ass effort..
|
|
| |
|
01-05-2013, 11:08 PM
| #39 | |
| Rock Stacker Join Date: Sep 2010 Location: Mobile, AL
Posts: 80
| Quote:
The tape was kind of a last layer of protection attempt that probably won't hold up too well. I think the best option is to find something that is cheap and easy to replace (i.e. film/medicine canister) to cover the motors with. Continuing with the build - Let me first say that Sketch-Up is an amazing free program. It's very, very useful for rendering things in 3D, as well as easy to use, provided you have accurate dimensions of the thing your drawing. Anyways, I drew all the chassis members in Sketch-Up first, similarly to how I'll build the actual chassis. 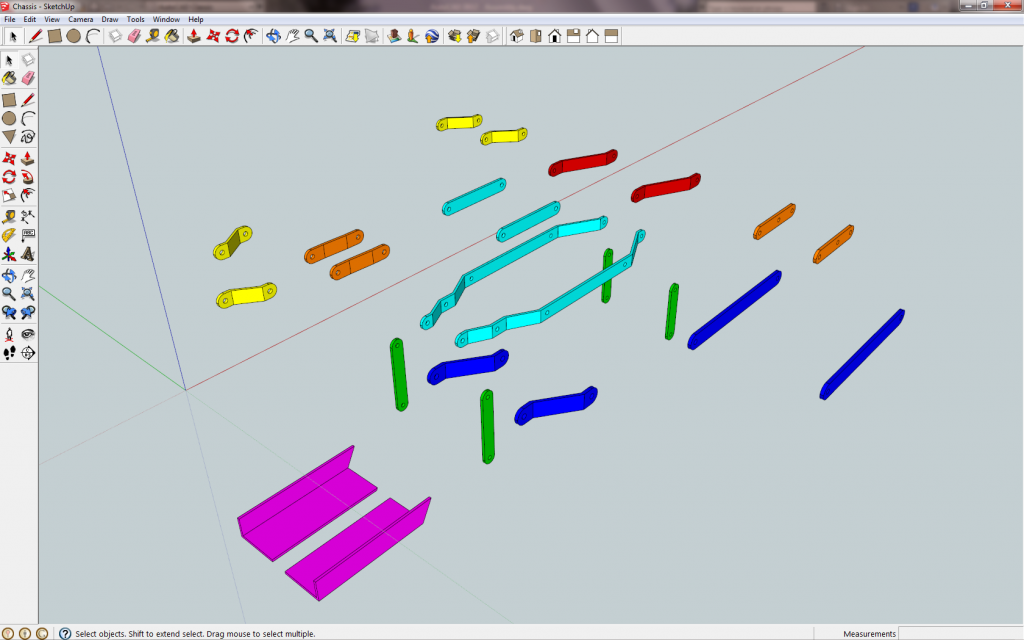 Then I started assembling it by aligning/rotating the members as I had drawn in cad before. (it helps to use consistent coloring for components between different softwares to avoid confusion) 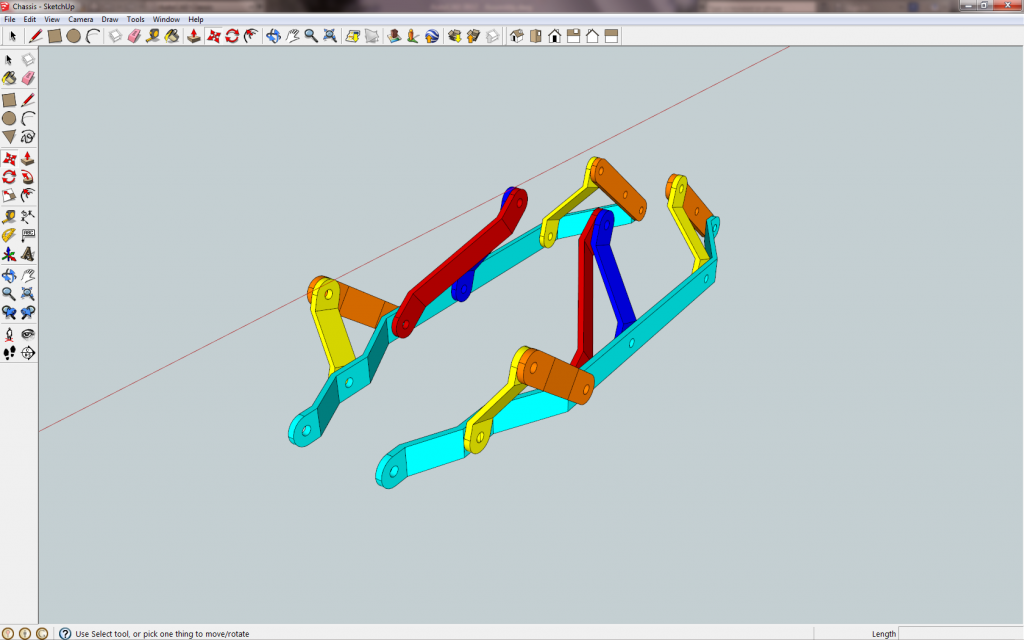 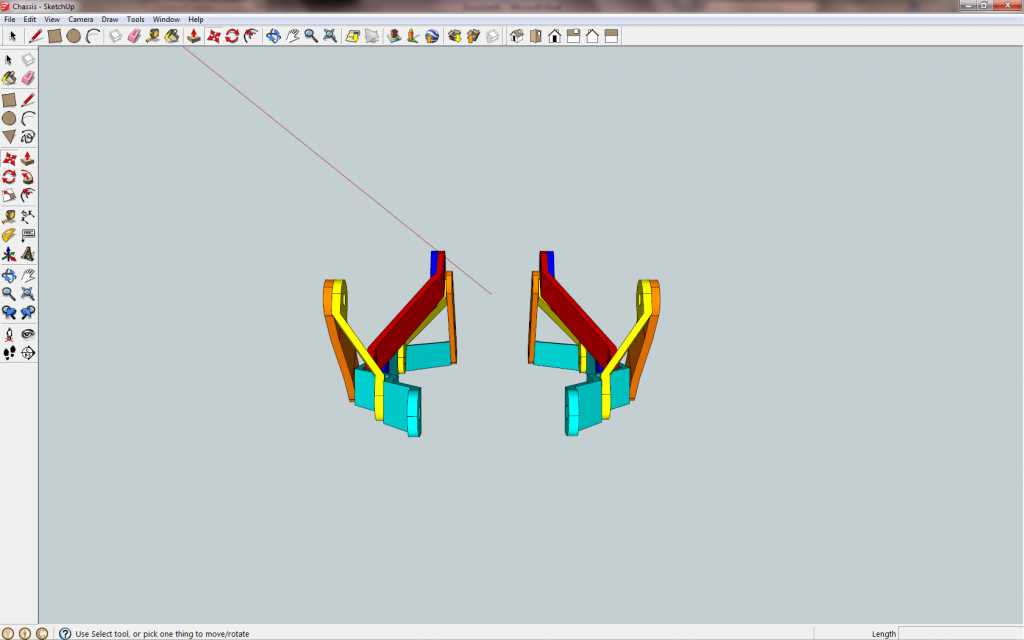 That's as far as I've gotten tonight...going to try and finish the assembly tomorrow. More pics to follow. | |
|
| |
|
01-05-2013, 11:27 PM
| #40 |
| Rock Stacker Join Date: Jan 2012 Location: North Delta
Posts: 74
|
I've seen a couple guys using part of a plastic pop bottle side and a couple zip ties to protect the motors, slides nice, price/weight is nice. Myself I just haven't bothered worrying about it. Running a pair of Axial 55t tin cans at the moment =D
|
|
| |
|
 Chris's "Cow Ant" XR Crawler Build - Similar Threads
 | ||||
| Thread | Thread Starter | Forum | Replies | Last Post |
| "THE CHUNK" Easily the sexiest damn custom mini this cow has ever seen! | The Cow | Non Crawler RC's | 2 | 07-11-2010 03:30 PM |
| ATTN: "TEAM COW" Supporters! Custom "CARBON COW" Avatars! | The Cow | Chit Chat | 5 | 06-12-2010 05:47 PM |
| Rampede's Bronco Trail Finder Build "Mud Cow" | Rampede | 1.9 Scale Rigs | 9 | 06-07-2010 01:59 AM |
| Chris's "Memphis" Tuber Build | Gimp | Axial AX-10 Scorpion | 79 | 05-10-2010 08:09 PM |
| Axial AX-10 Scorpion 1/10 Rock Crawler Kit Build, Chapter 2 "The Mod Build" | JAM MaxAmps.com | Axial AX-10 Scorpion | 42 | 06-06-2008 10:00 PM |
| |


 Linear Mode


