| |
| |||||||
 |
| | LinkBack | Thread Tools | Display Modes |
 03-06-2013, 04:16 AM
| #61 |
| Pebble Pounder  Join Date: May 2008 Location: Mobile, AL
Posts: 163
|
lol yea, the links take a while to make! I'm glad that die works as well as it does too! Looking good! Jake |

|  |
| Sponsored Links | |
| | |
|
03-26-2013, 08:01 PM
| #62 |
| Rock Stacker Join Date: Sep 2010 Location: Mobile, AL
Posts: 80
| So in addition to making custom Ti links, I decided to also make custom link sliders since I had access to a lathe anyway. I used 1/4" solid delrin rod to start with, then hollowed it out with a #14 (0.182") drill bit. 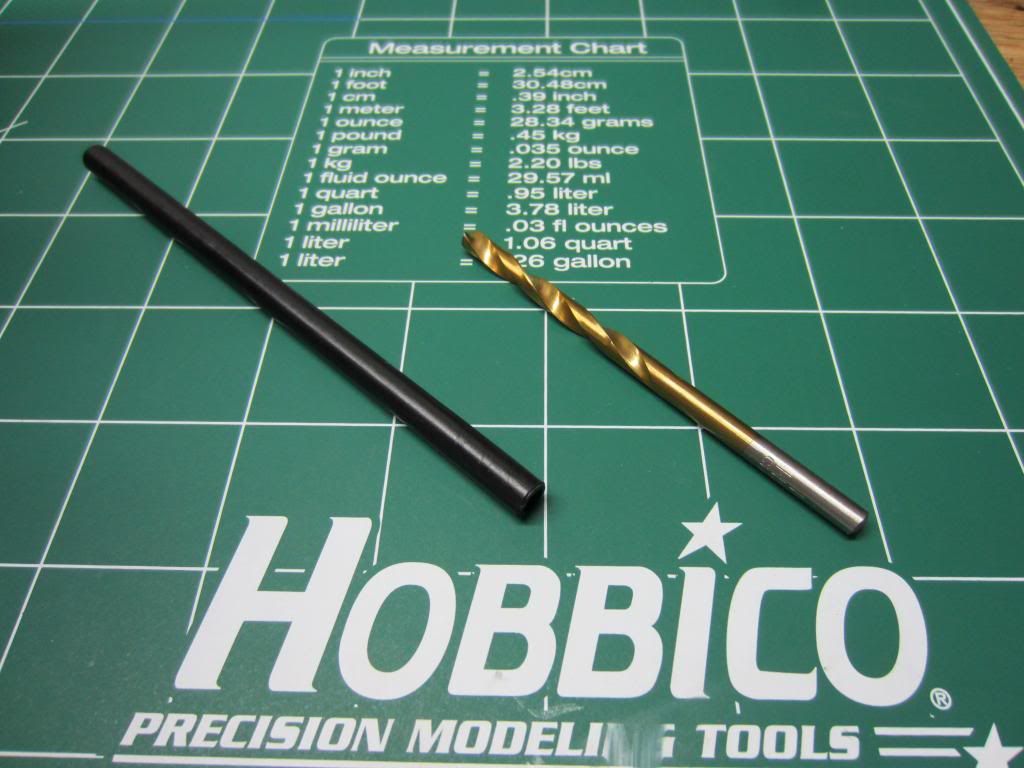 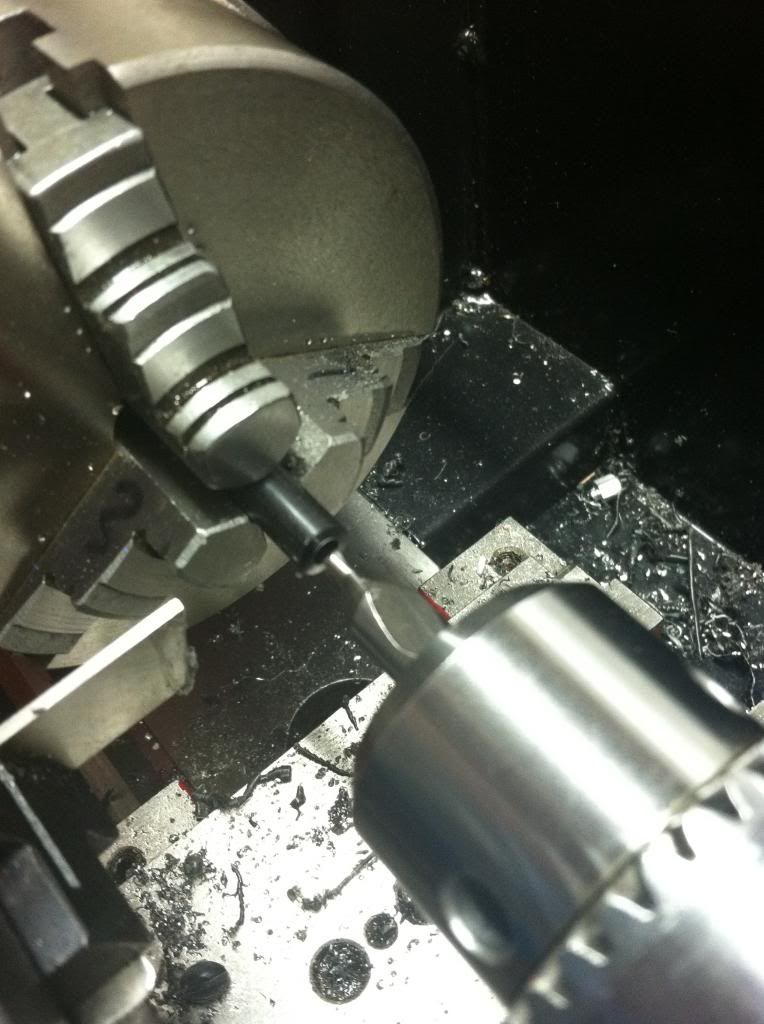 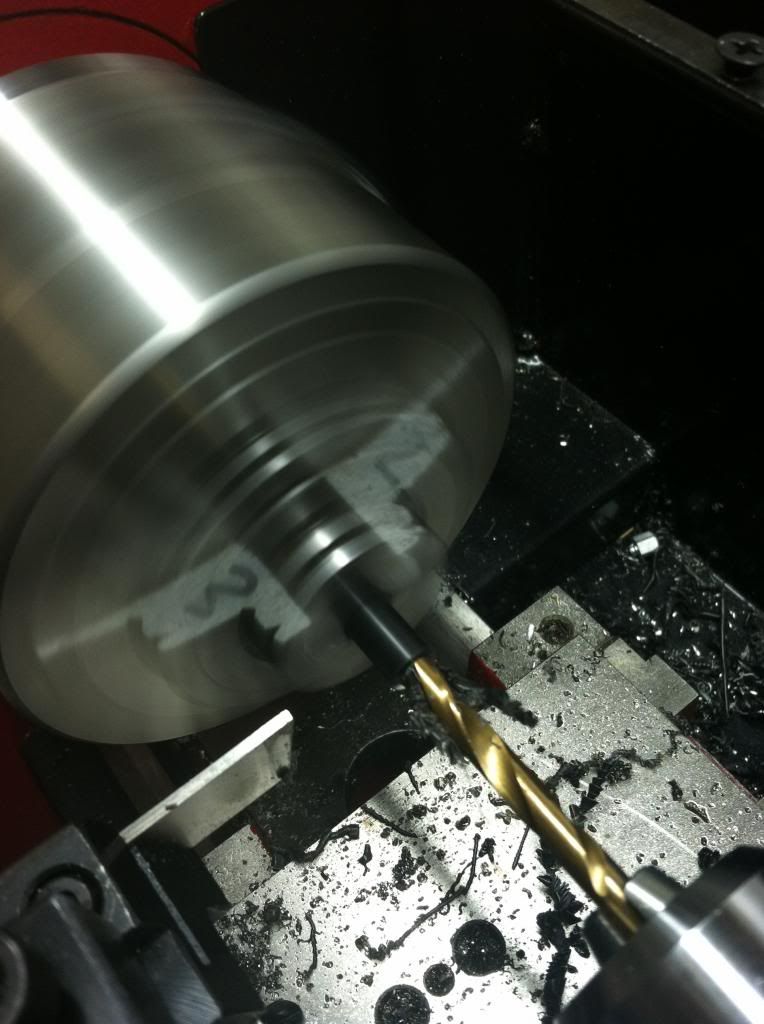 Then, using a cutting bit angled 6 degrees outward, I trimmed the sliders from the ID edge to the OD edge. The flex in the delrin ended up making them more of a tornado shape than a true cone!  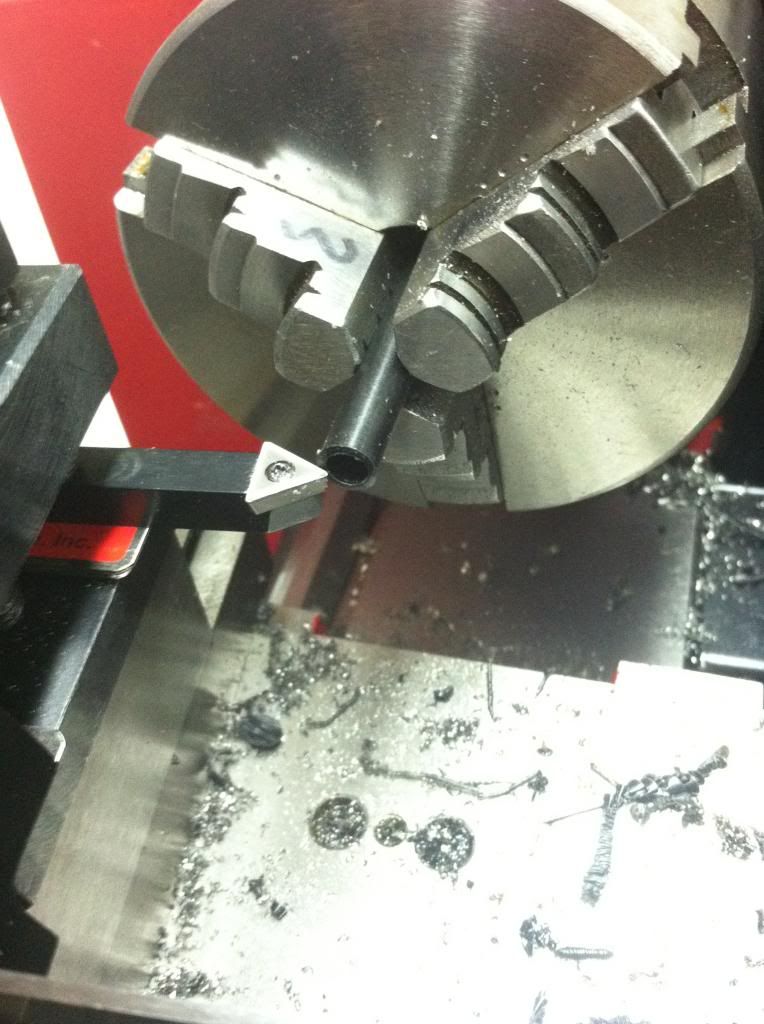 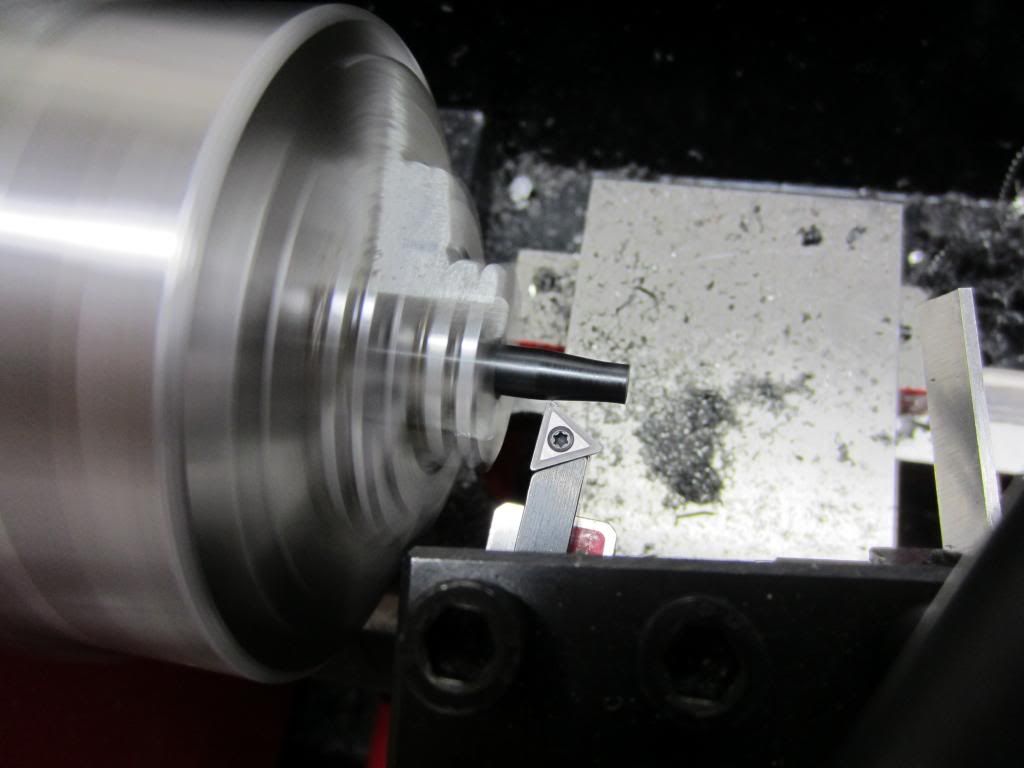 All in all, I think the links and sliders turned out well. 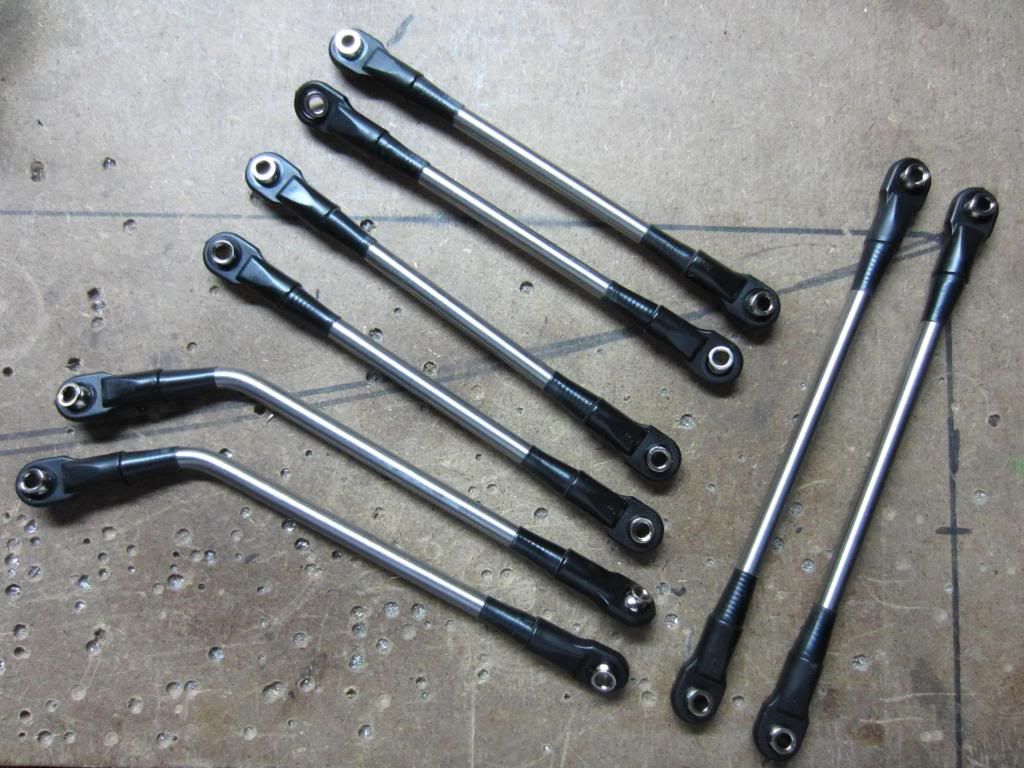 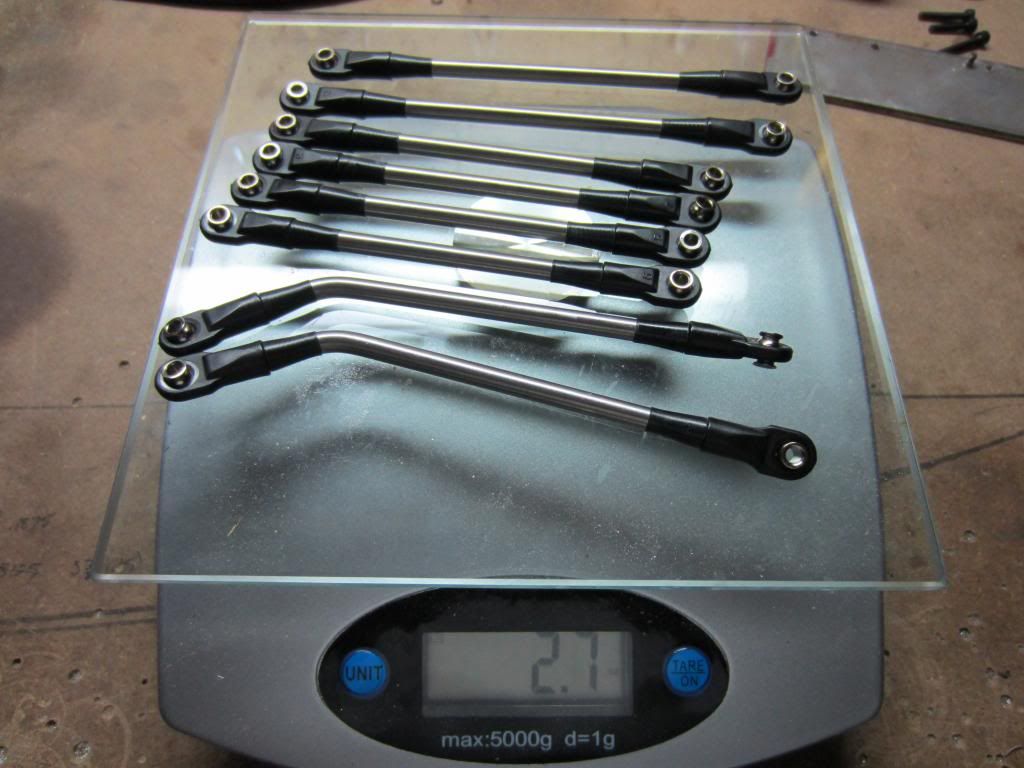 I even ended up putting sliders on my steering drag link. 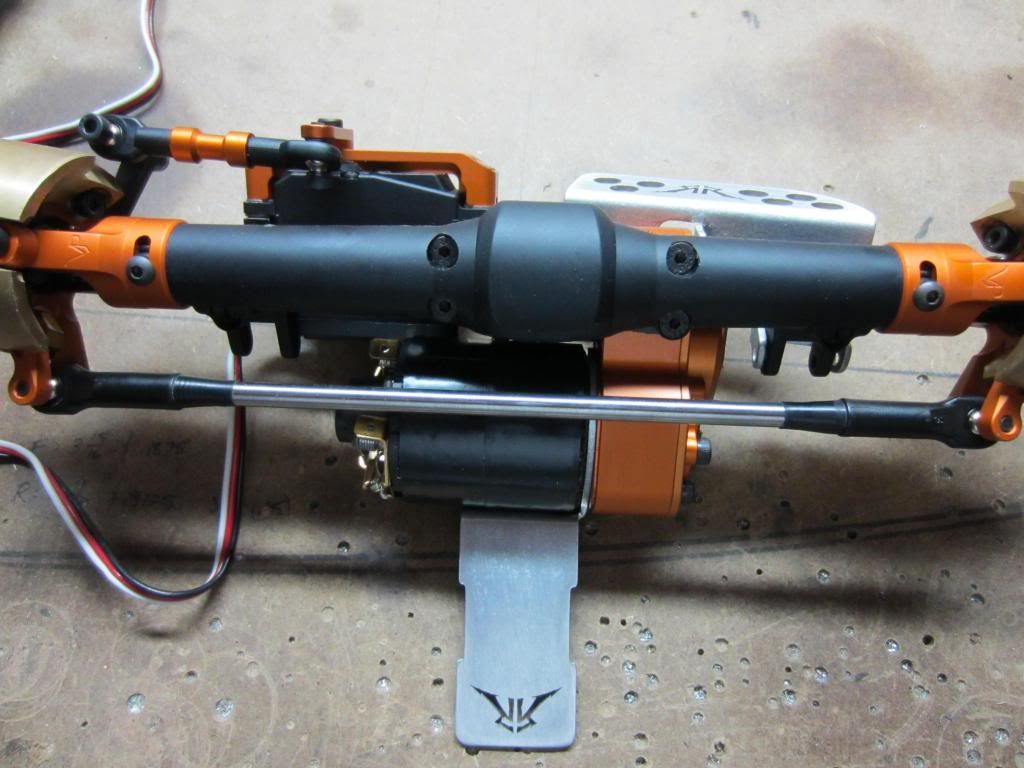 In other news, I sent off the chassis pieces to get bead-blasted and powdercoated flat black. I'll post pics once I get it back. In the meantime, I'm planning on trimming the knuckle weights to lower their CG and reduce overall weight. More to come... |
|
| |
|
03-31-2013, 08:57 AM
| #63 |
| Rock Stacker Join Date: Sep 2010 Location: Mobile, AL
Posts: 80
| Good morning. Hope everyone is having/had a great Easter Sunday! The first thing I did to the VP knuckle weights was drill out the mounting holes to 9/32", this allowed the use of 3mm washers to hold the weights better to the knuckles. 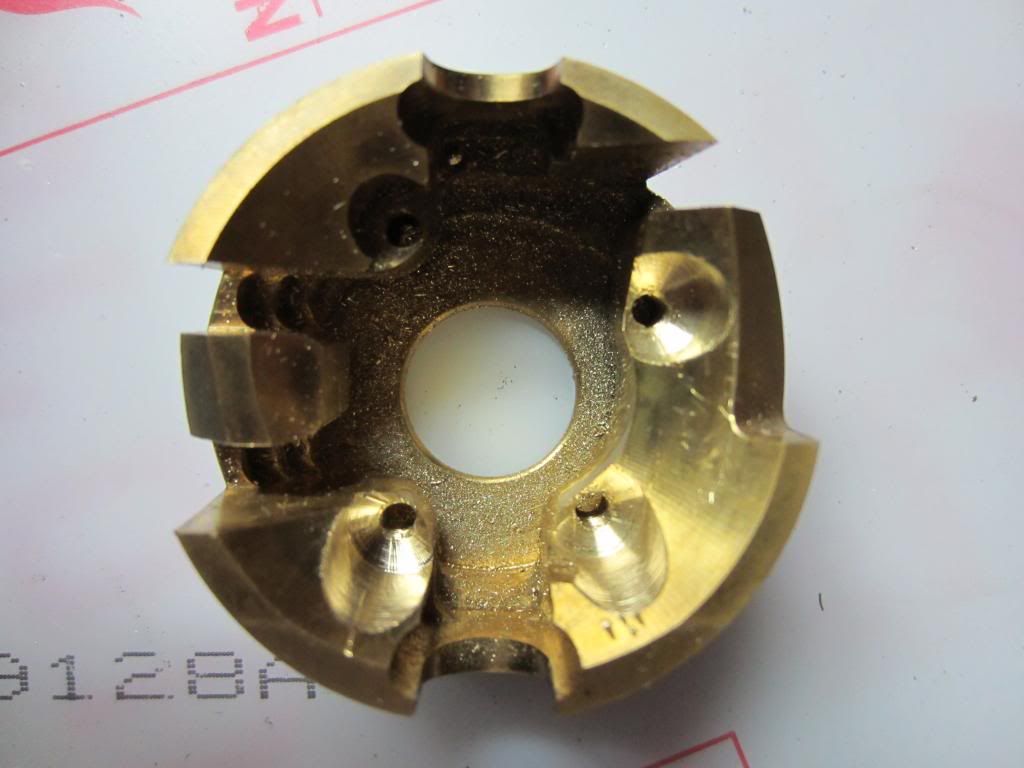 Then, to reduce some of that 3.4oz (each) weight, I started trimming... 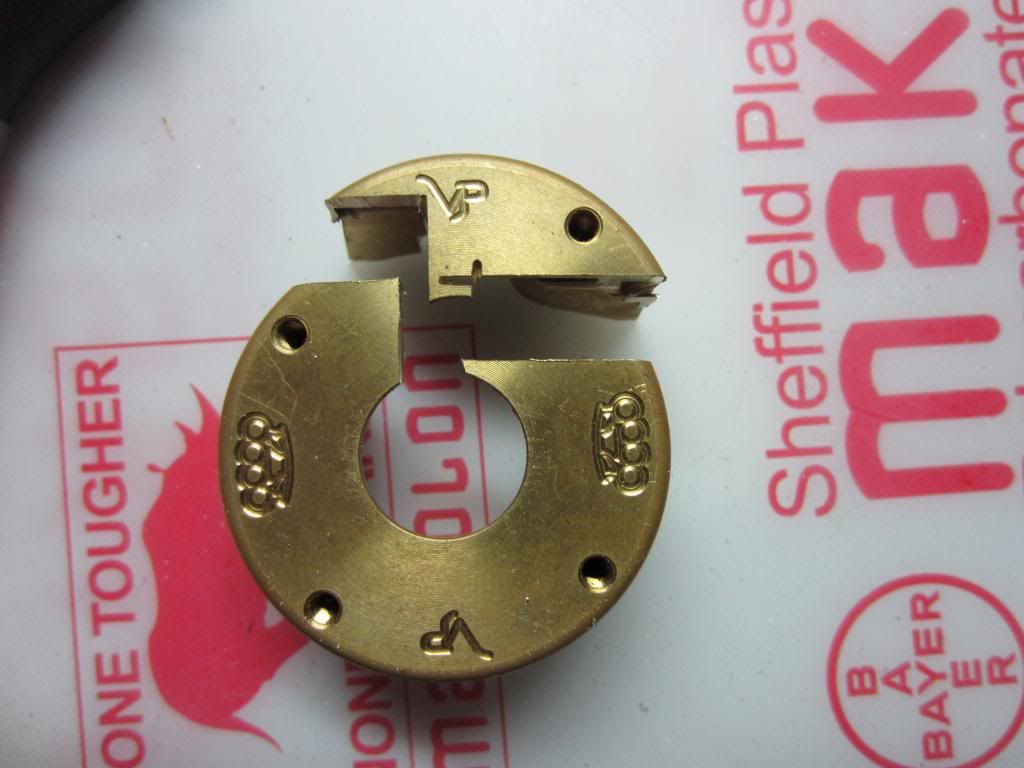 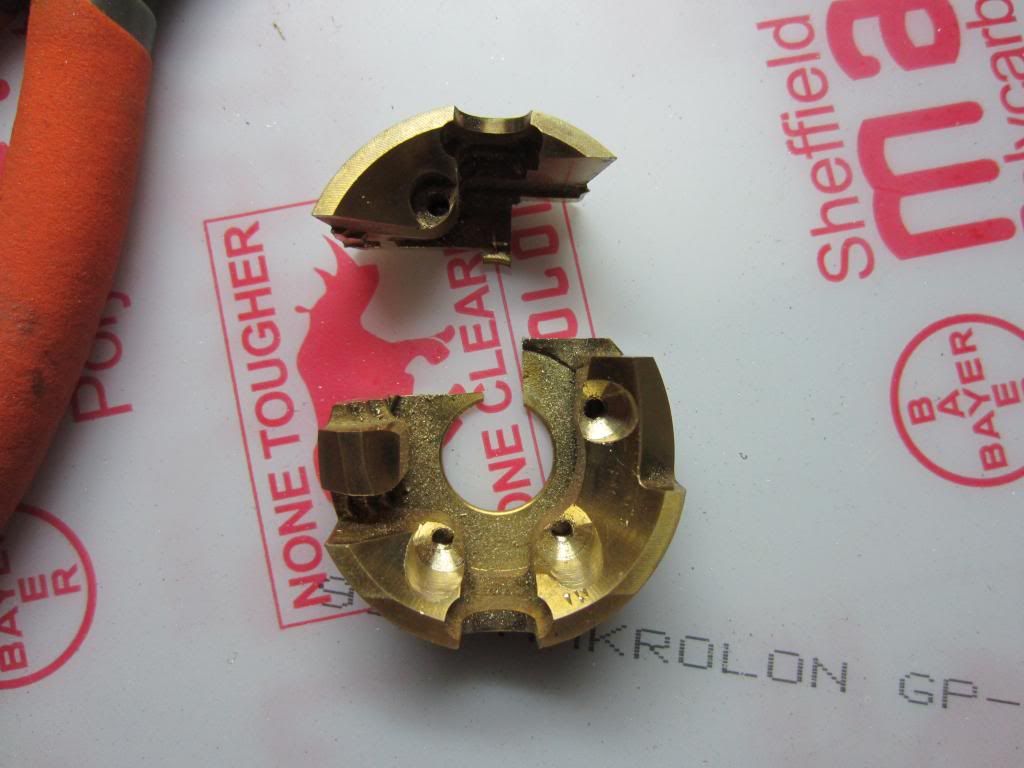 Then sanded down each top edge until I got to 60g (2.1oz) each:  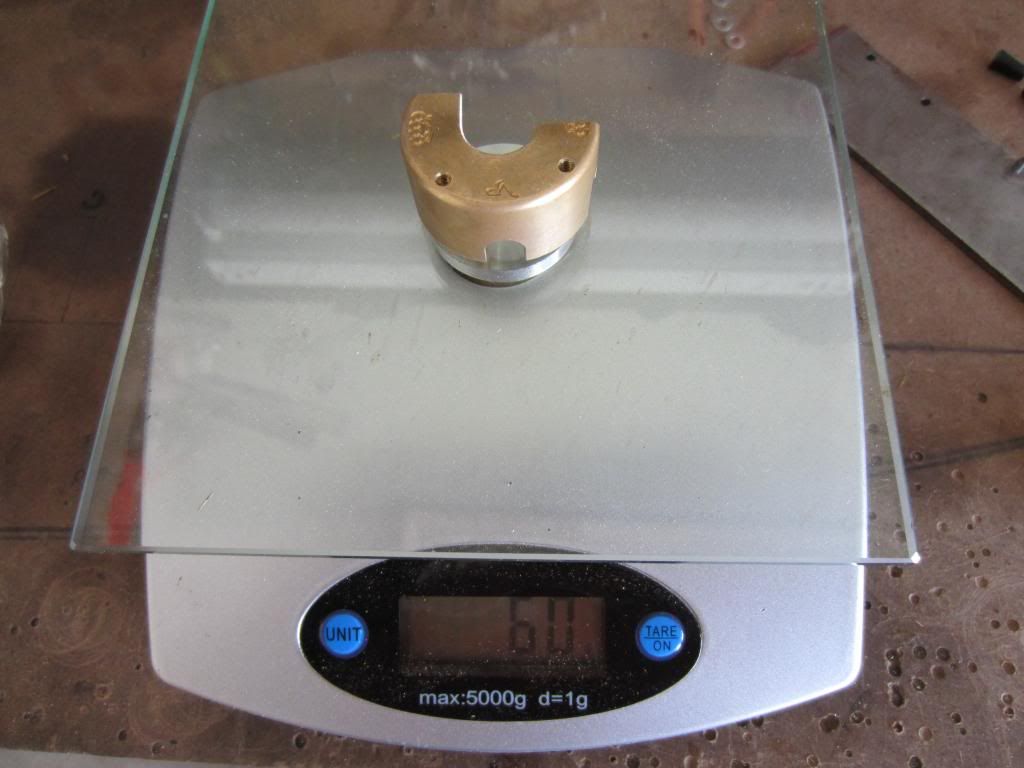 Installed on the axle w/washers... 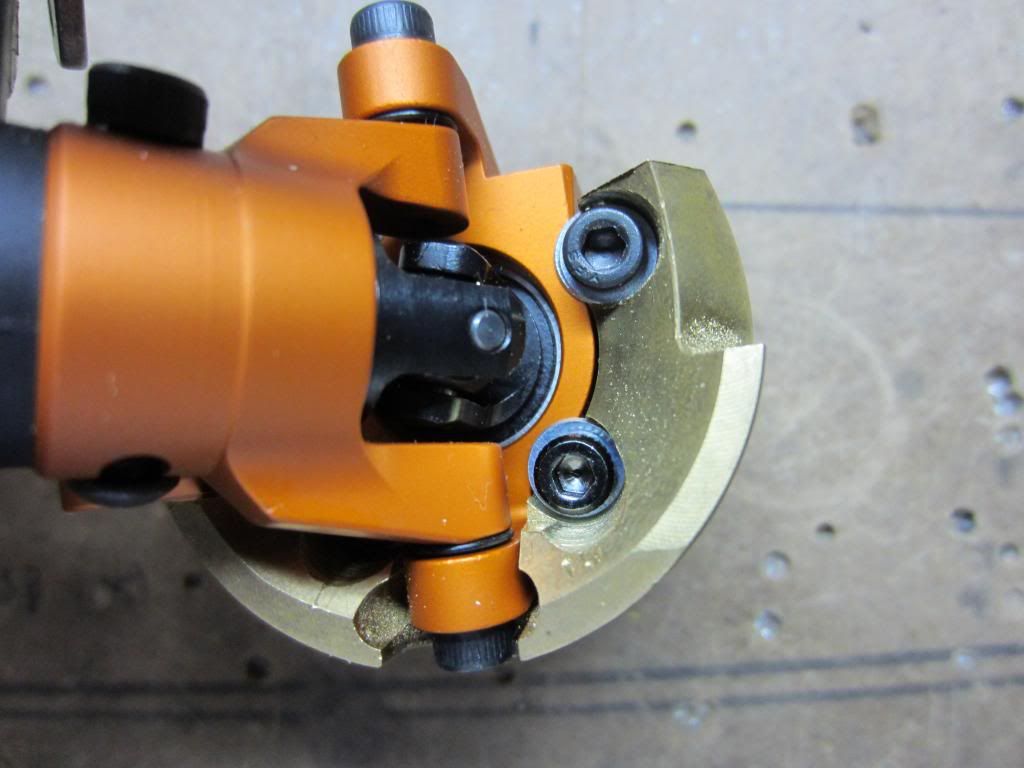 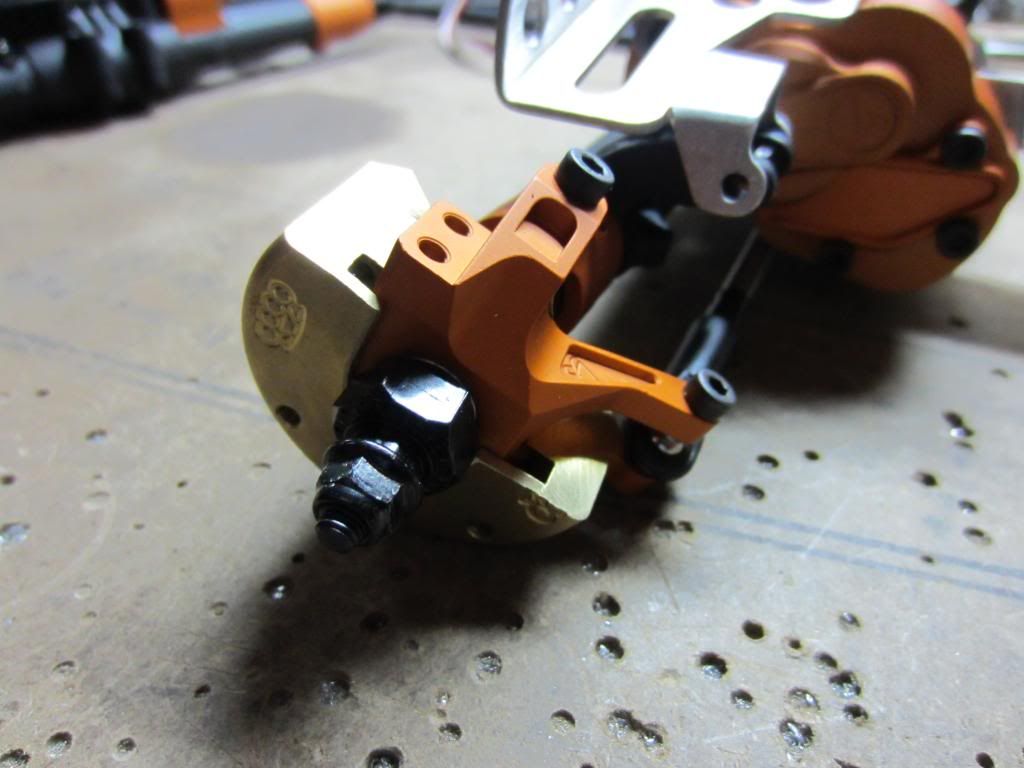 This should help reduce the CG, overall weight, and allow the addition of half-rings in the future. I also got the chassis pieces back from powdercoating...turned out well I think. More pics to come after I get this thing assembled! 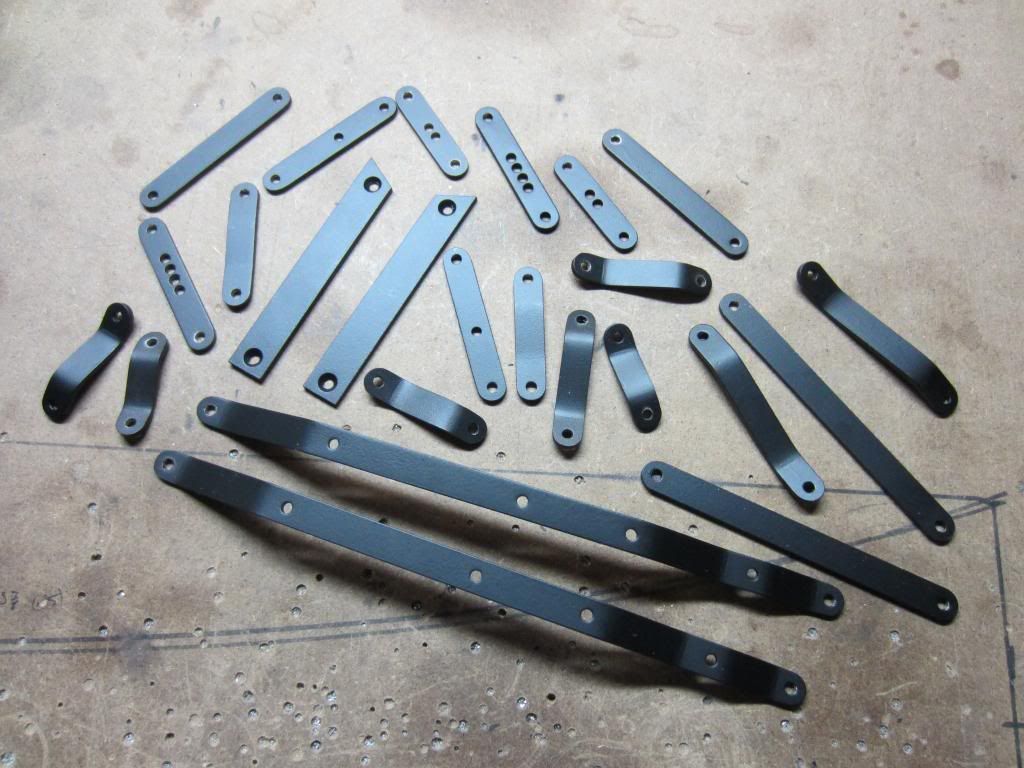 -Chris |
|
| |
|
03-31-2013, 06:56 PM
| #64 |
| Rock Stacker Join Date: Feb 2012 Location: Sunshine Coast Australia
Posts: 70
|
loving this project. keep it up mate! and Happy Easter!!
|
|
| |
|
04-07-2013, 06:56 PM
| #65 |
| Rock Stacker Join Date: Sep 2010 Location: Mobile, AL
Posts: 80
| Got the chassis put together finally. The overall fit and finished wasn't affected much by it being powdercoated, even though the guy was saying the coating is around 0.01" thick. 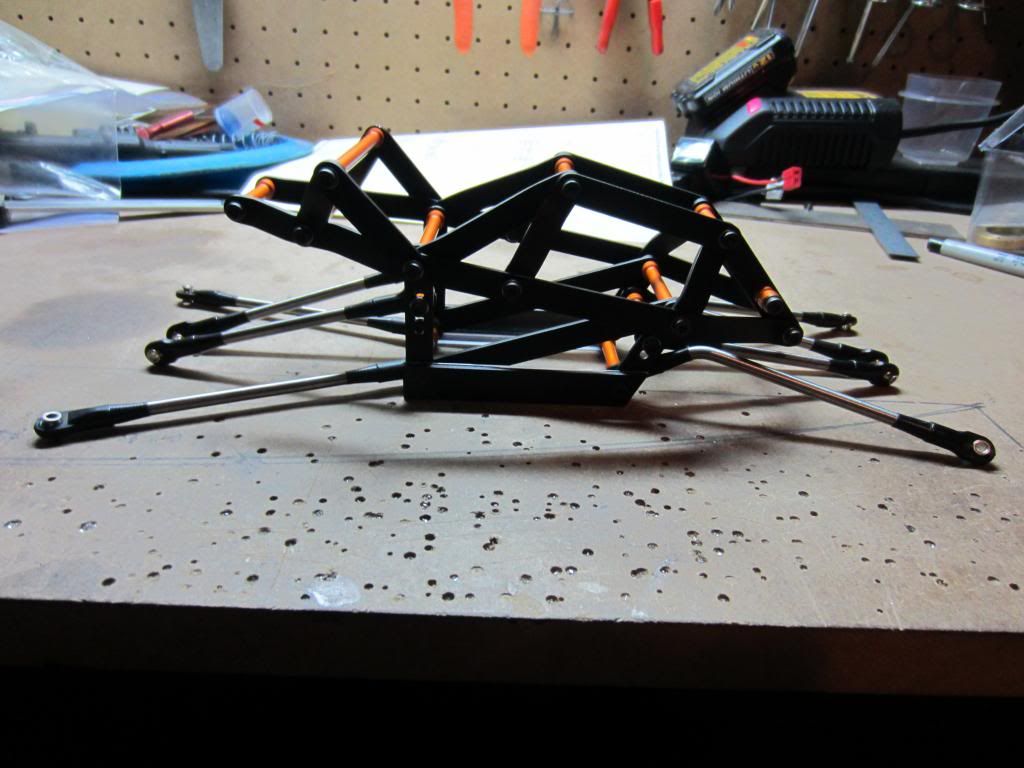  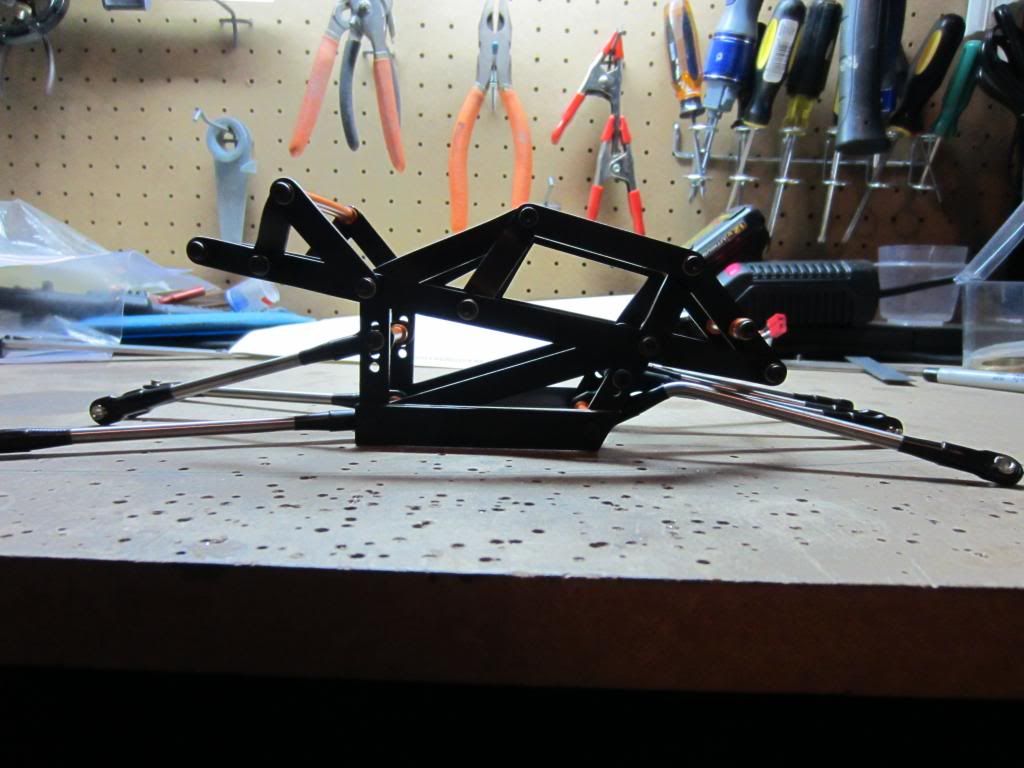 Total chassis weight plus links came out to 8.1oz. This makes the chassis 5.4oz (powder coating added 0.5oz).  When I was trying to connect the front lower links to the axle, I noticed the Revo rod ends won't quite slide into the slots made for the Axial rod ends. 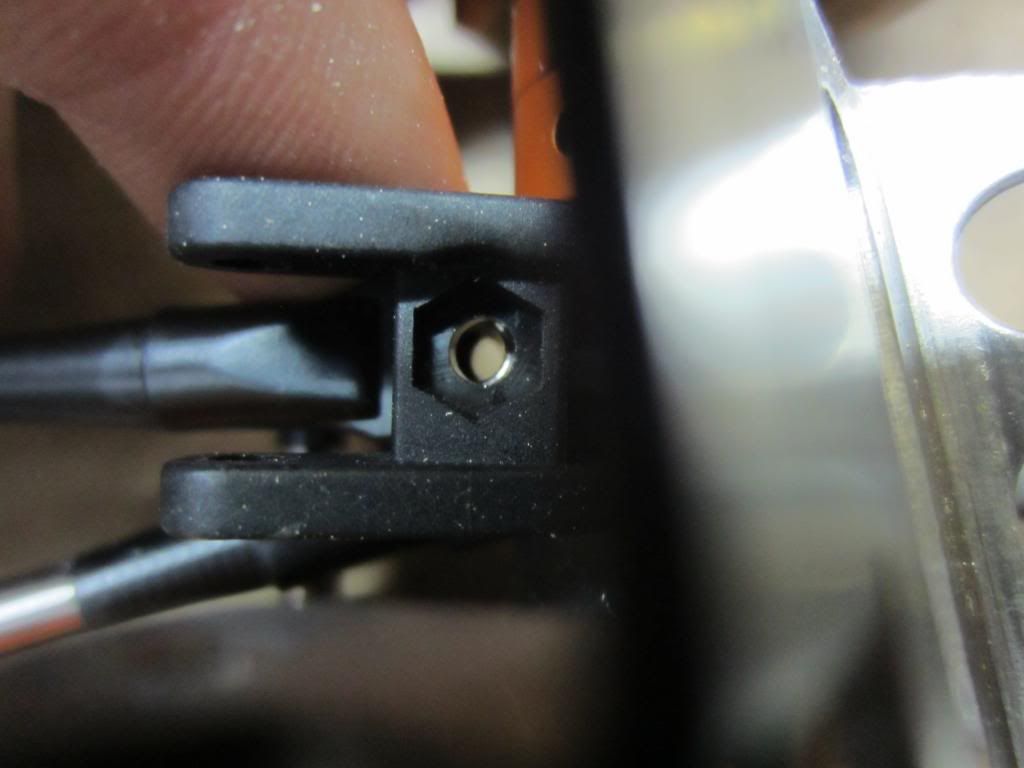 So I rounded them a little bit so they'd fit... 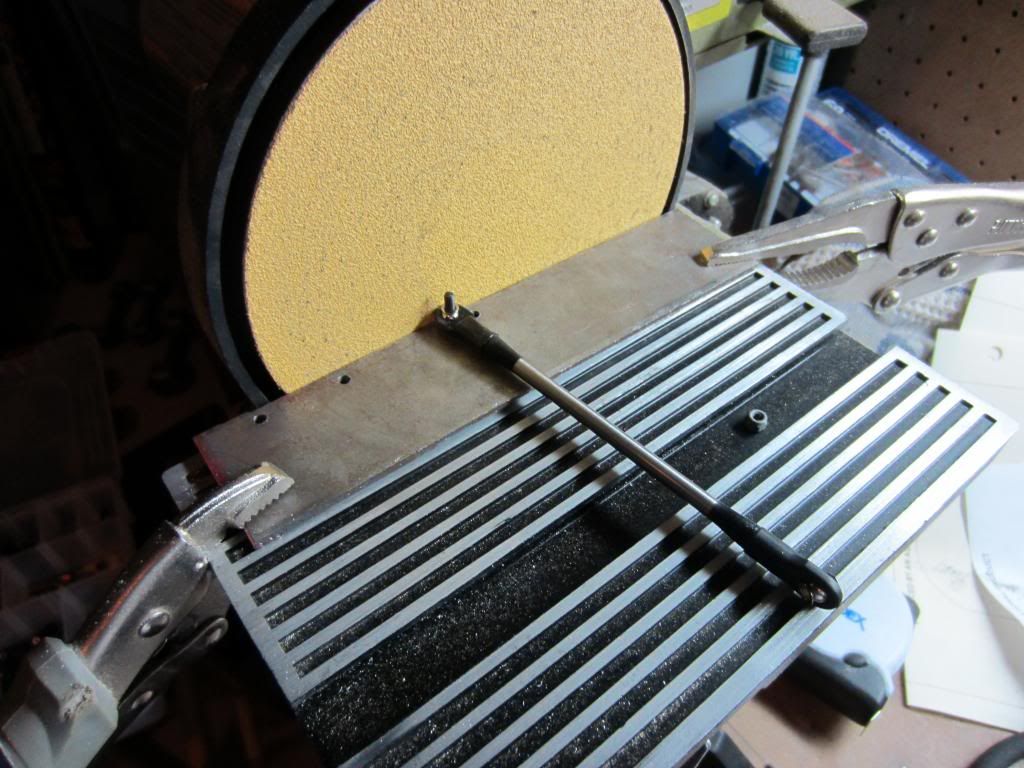 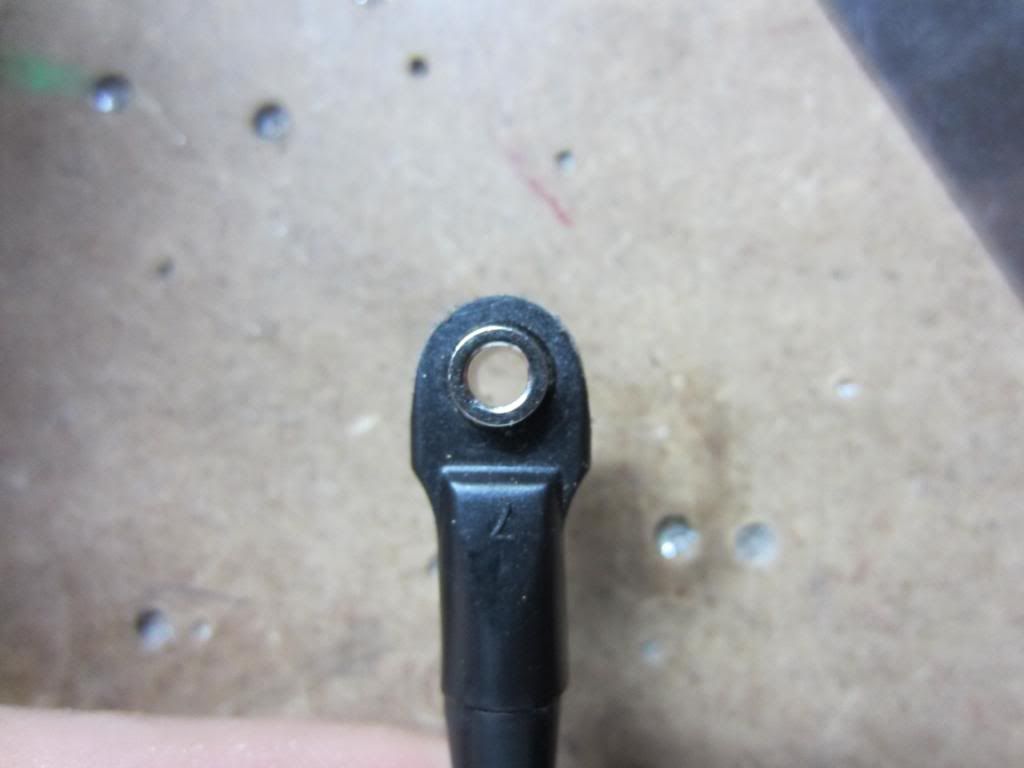 The chassis and axles installed inside my custom wheelbase jig (the alum angles there allow me to adjust the links while maintaining the chassis's designed ride height). 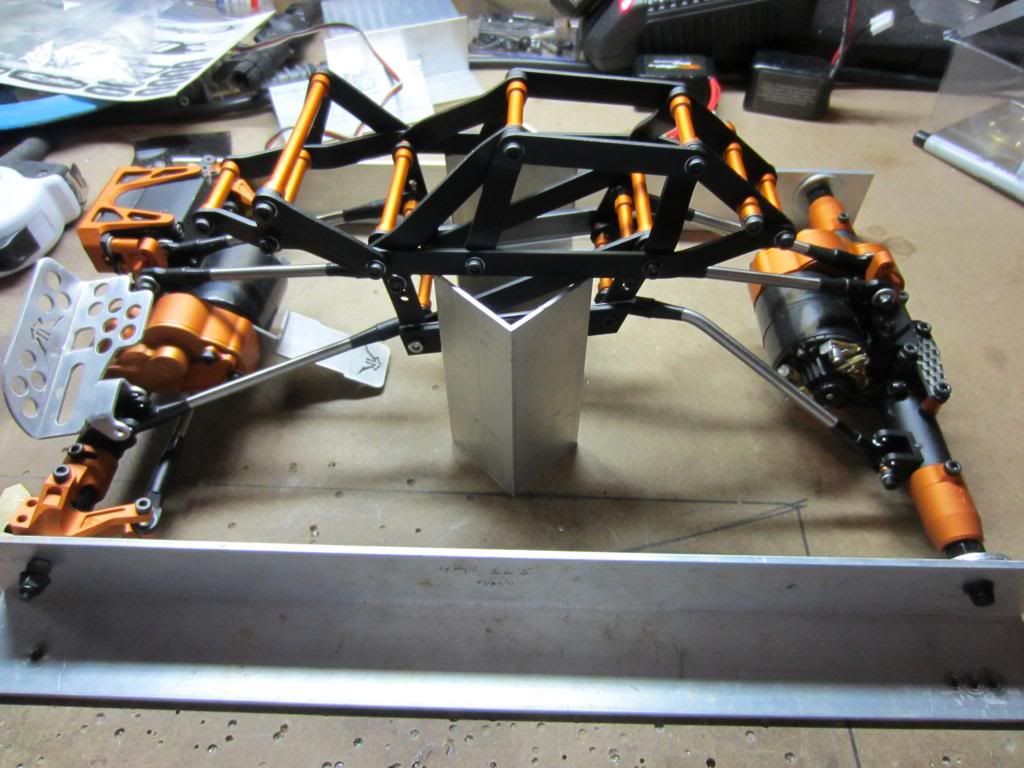 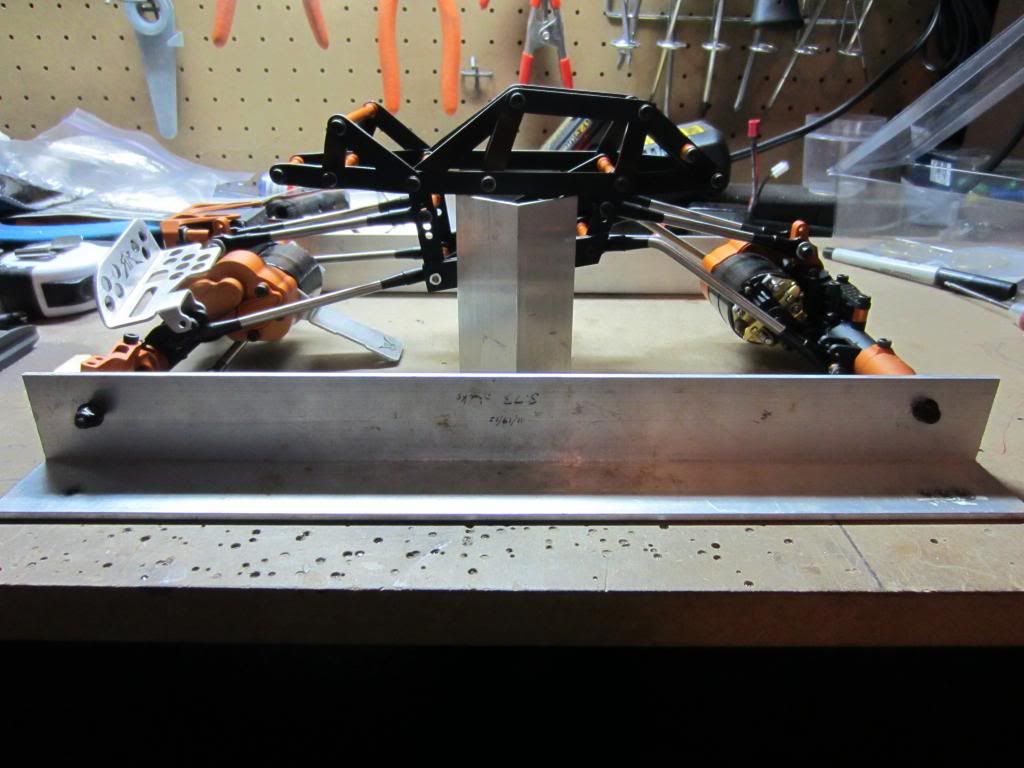 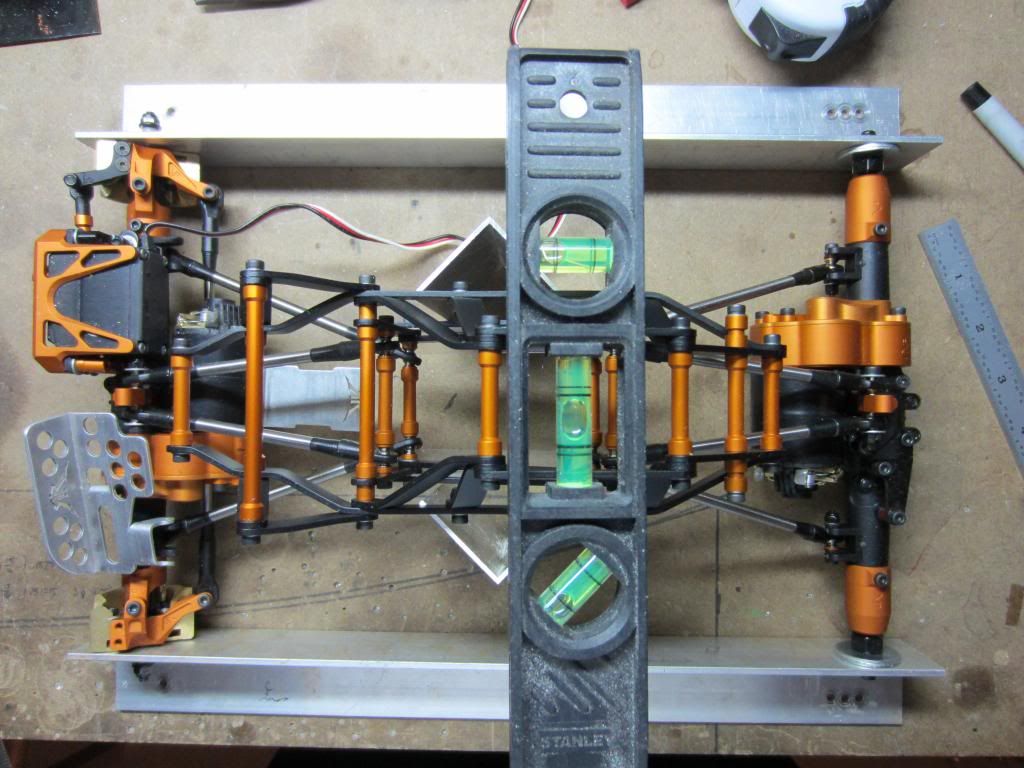 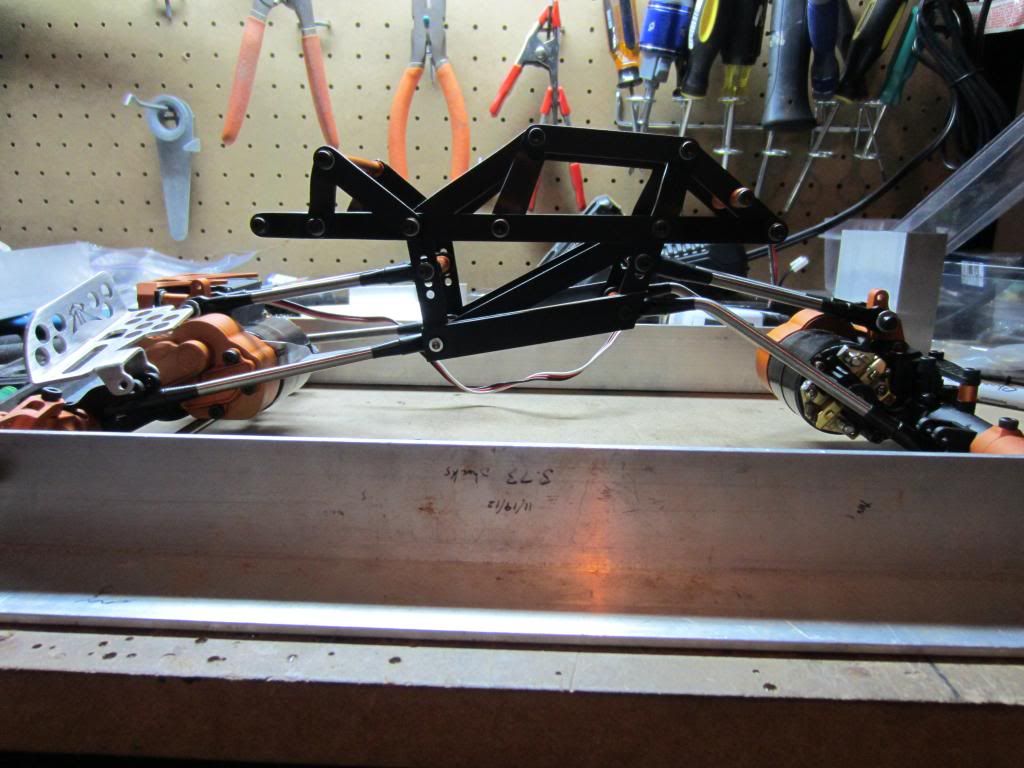 I'm gonna be building/installing the shocks next and then working on designing the skid plate and body panels. After that - installing electronics then hopefully get some driving time before ECC 2013...we'll see. |
|
| |
|
04-07-2013, 07:10 PM
| #66 |
| Newbie Join Date: Sep 2011 Location: St louis
Posts: 6
|
very interesting build man, Im interested to see the final product! keep it up  |
|
| |
|
04-10-2013, 08:07 PM
| #67 | |
| Rock Stacker Join Date: Sep 2010 Location: Mobile, AL
Posts: 80
| Quote:
So I got the shocks built to the right length and installed them. Here are some pics of it all put together with the axles and tires/wheels as well... 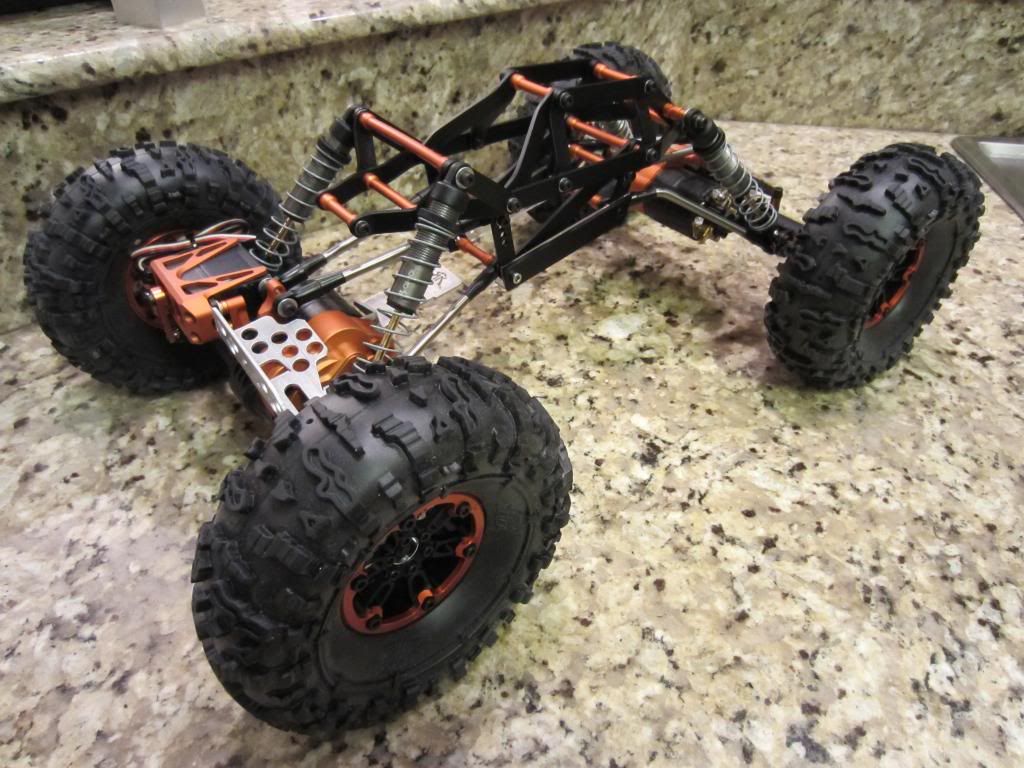 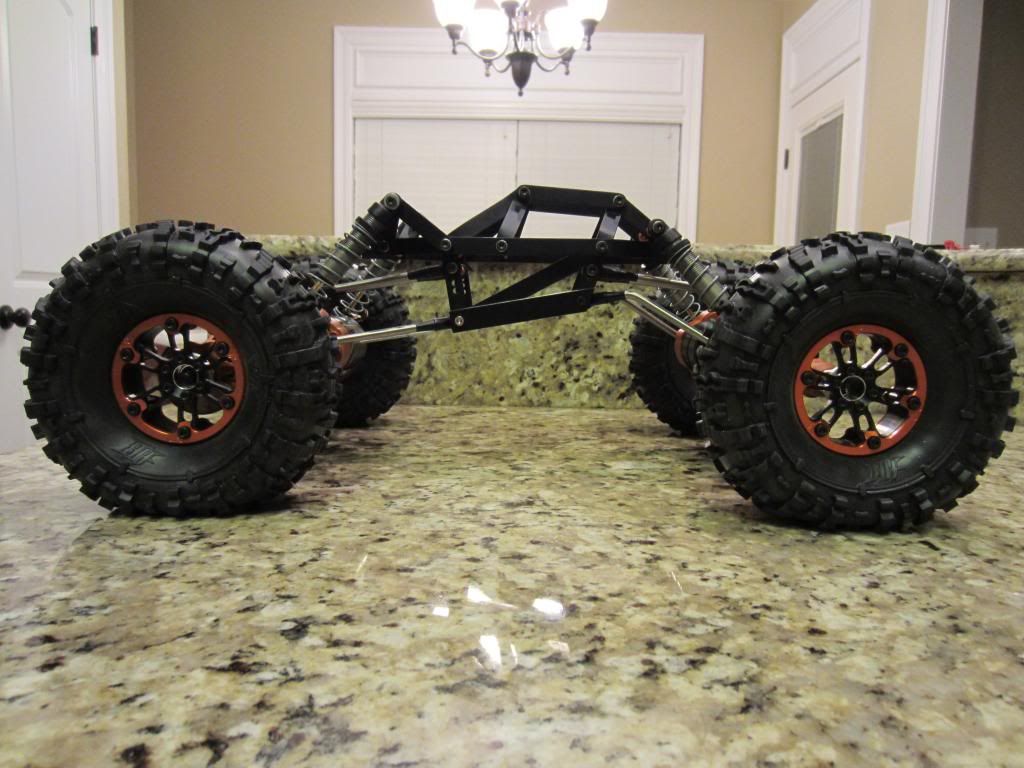 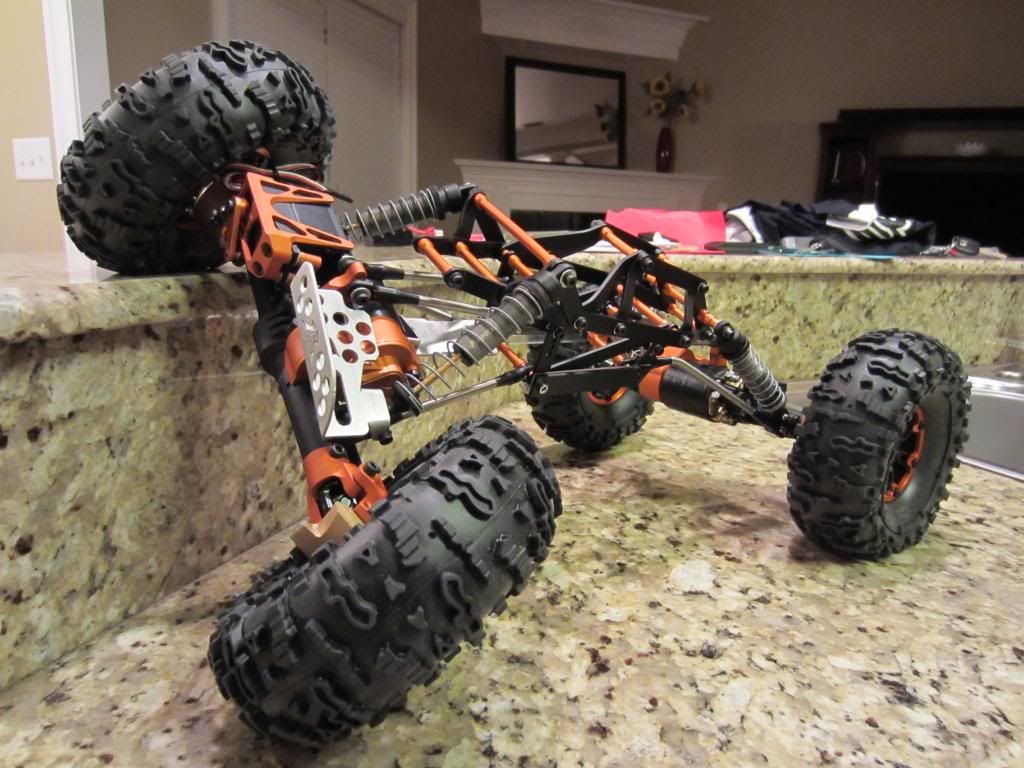  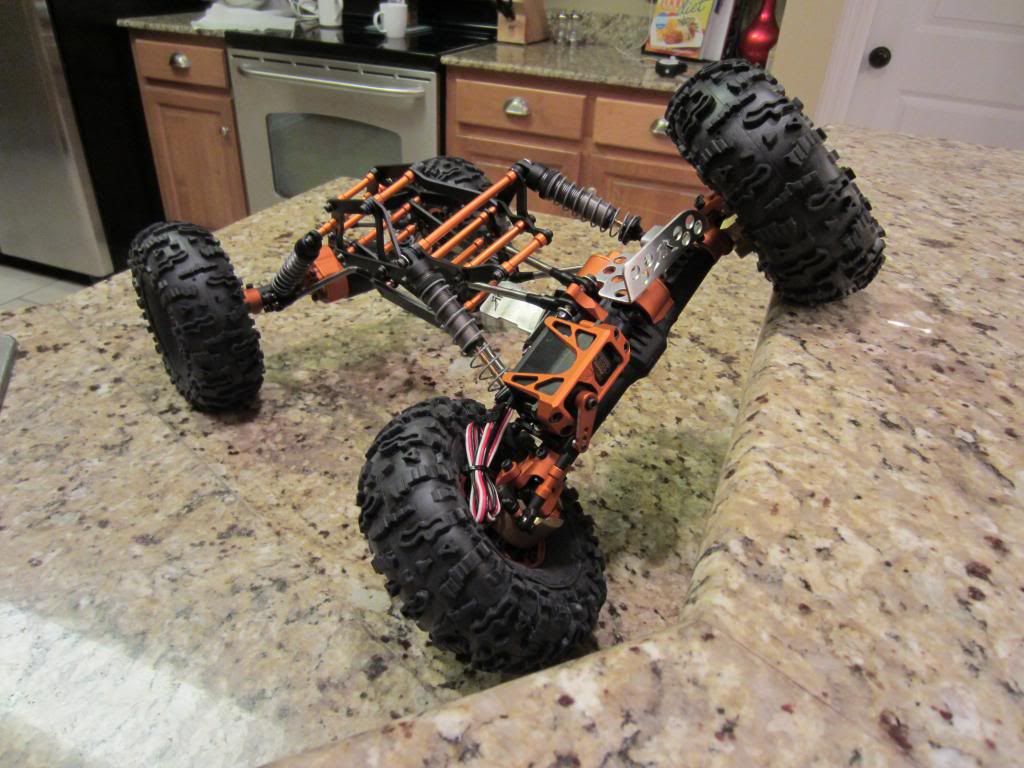 It weights 4.77lbs as it currently sits. Probably gonna be about 5.5lbs overall once I'm done. 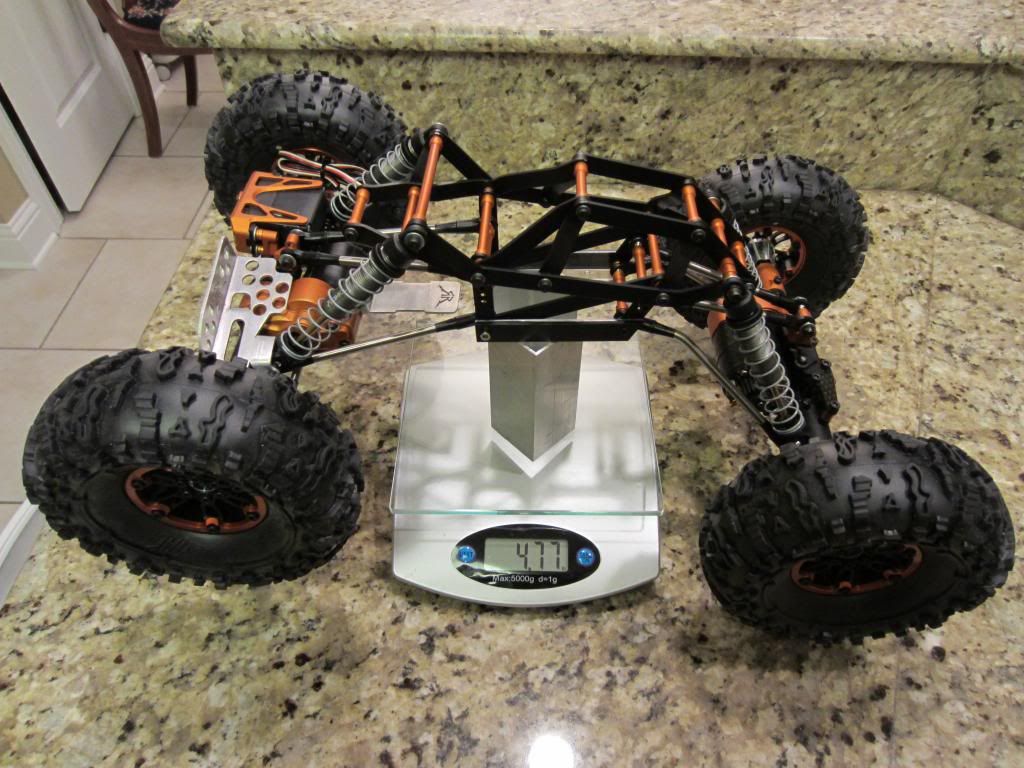 Working on the skid plate and body panel designs tonight. Hopefully have them made over the weekend. Stay tuned. | |
|
| |
|
04-10-2013, 08:56 PM
| #68 |
| Rock Stacker Join Date: Feb 2012 Location: Sunshine Coast Australia
Posts: 70
|
Looks sic mate!! I'm very impressed with all your efforts. Maybe you'll be able to start producing some of these chassis' down the track for $$...
|
|
| |
|
04-11-2013, 06:35 PM
| #69 |
| Quarry Creeper Join Date: Mar 2013 Location: Pilipinas
Posts: 377
|
fantastic job! |
|
| |
|
04-14-2013, 01:18 AM
| #70 | ||
| Rock Stacker Join Date: Sep 2010 Location: Mobile, AL
Posts: 80
| Quote:
Quote:
A few updates: The skidplate design is pretty simple and basically covers the flat surface under the chassis with no extensions. You can see the proposed Punk Dig and Receiver layout as well...a tight fit.   1/16" thick black delrin w/counter-sunk holes.  And installed on the chassis...  As you might have noticied, I bought some orange aluminum locknuts to give it a little more bling! While I was changing these out on the axles, I decided to go ahead and do the 2nd half of the "two screw" mod on the rear axle...    I'm currently working on wiring in all the electronics, more pics to follow soon! | ||
|
| |
|
04-16-2013, 05:34 PM
| #71 |
| Rock Stacker Join Date: Sep 2010 Location: Mobile, AL
Posts: 80
| To get the BR-XL to fit, I had to "shrink" it. This involved grinding down the heat sinks, removing the huge case, and heat-shrinking the whole thing.   Of course, I went with orange and black wiring...   Using two scales, I was able to determine the front/rear weight bias:  It's at around 58.5% on the front. I was hoping for a 60/40 split so I'll probably add some more knuckle weight halves to get it there. Overall RTR weight as of now is 5.21lbs. Even with the aluminum chassis and shocks, the cg is still pretty low. By elevating one of the scales, I was able to determine the cg height to be roughly 3/4" above the axle center-line. I'm glad to see the truck being able to sit on its side.  I'm still working on the hood and roof panel designs, but hope to have them complete soon so I can compete at ECC! -Chris |
|
| |
|
04-16-2013, 10:42 PM
| #72 |
| Rock Crawler Join Date: Nov 2010 Location: Springfield, Oregon
Posts: 527
|
I really wasn't liking how this looked until you got it all together. Now it looks good!
|
|
| |
|
04-17-2013, 06:09 AM
| #73 |
| Newbie Join Date: Mar 2010 Location: europe:P
Posts: 26
|
like the mekano looking chassis! (well with the rounded off corners anyways) keep up the new and shiney |
|
| |
|
04-19-2013, 04:22 AM
| #74 | ||
| Rock Stacker Join Date: Sep 2010 Location: Mobile, AL
Posts: 80
| Quote:
Quote:
I finished the panel design and decided to model it in sketchup as well, just to make sure it looked okay. Whatcha think?     | ||
|
| |
|
04-24-2013, 08:04 PM
| #75 | |
| Rock Stacker Join Date: Sep 2010 Location: Mobile, AL
Posts: 80
| Quote:
So I decided to do the shock cap mod on my stock XR10 shocks...  8mm flat-head screw with a lil bit of waterproof sealant     I also decided to add some more knuckle weight to get the weight bias right at 60/40. Total RTR came out to be 5.45lbs.   Oh yea...the panels are complete too!     The Cow Ant is finally finished and ready for ECC! -Chris | |
|
| |
|
04-24-2013, 10:22 PM
| #76 |
| Rock Stacker Join Date: Feb 2012 Location: Sunshine Coast Australia
Posts: 70
|
Kick ass effort mate, i'd like to see a pic or two of it doing some crawler stuff! |
|
| |
|
04-24-2013, 10:30 PM
| #77 |
| Pebble Pounder Join Date: Apr 2013 Location: Nacogdoches
Posts: 107
|
Holy ish... One hell of a build thread. I can't wait to see a vid of it in action. *subscribed* |
|
| |
|
04-30-2013, 05:45 PM
| #78 |
| Rock Stacker Join Date: Sep 2010 Location: Mobile, AL
Posts: 80
| ECC 2013 was a blast! Met some very nice folks, got to crawl on some amazing terrain, had a nice road trip there and back, and even learned a thing or two about crawling. As far as the competition goes, I placed 43rd out of 47 drivers...pretty dang awful. Over the weekend, I learned that successful competition crawling is heavily based on driver experience, knowing what your rig can and can't do, and having an eye for which line to take on any particular gate. It also helps to be familiar with the rules and how points are handled Overall, I'd say the truck performed well but there are definitely things to address - such as: -moving the weight bias more forward (lightening the rear) -reducing the overall ride height (rig is unable to flip over by itself once upside down) -needing softer springs to allow for easier articulation -clocking the rear axle to get some extra clearance -using motor skids to protect the cans -changing gear ratios/using faster motors to have more wheel speed -making a ligher (and more compact) chassis design -using the body panels to protect the chassis members more Still, the most important thing is practice. I saw rigs that were easily over the $2500 mark that didn't do well due to driver error. Hopefully, I can find some crawl spots down here in south Alabama. Anyways, here are some pics from the event:         My daughter had a good time as well! Gotta start 'em early!  I'm sure I'll be revising the build at some point with pics to follow - as always. Until then, happy crawling! -Chris |
|
| |
|
04-30-2013, 06:43 PM
| #79 |
| Rock Stacker Join Date: Feb 2012 Location: Sunshine Coast Australia
Posts: 70
|
Hi there, I've been wondering if anyone is making motor skids? My cans are scratched up quite a bit, but then the damage seems to end there. I also am wondering if you are using a dig unit? ..I think that will help you with competitions. Also what turn motors are you using? I am using 55T with 3s Lipo...But i have ready to install some 45T brood motors. But peeps using 45T motors seem to be using lower teeth pinions. ie 12 or 13T instead of stock 14t...so i think a 55T with 14T pinion would be similar speed..Check my friends list for brood racing..and Heyok for dig unit....Anyway i think you did very well considering its your first event. Good work..Nice pics too thanks!!!
|
|
| |
|
04-30-2013, 06:45 PM
| #80 |
| RCC Addict Join Date: Jun 2009 Location: Australia
Posts: 1,703
|
Great pics. Comps are a great learning experiance and ultimatly no matter how much money you throw into a rig you need drive time to know how it reacts in different situations. Still congrads on enjoying and learning things at the comp. Sent from my GT-I9300 using Tapatalk 2 |
|
| |
|
 Chris's "Cow Ant" XR Crawler Build - Similar Threads
 | ||||
| Thread | Thread Starter | Forum | Replies | Last Post |
| "THE CHUNK" Easily the sexiest damn custom mini this cow has ever seen! | The Cow | Non Crawler RC's | 2 | 07-11-2010 03:30 PM |
| ATTN: "TEAM COW" Supporters! Custom "CARBON COW" Avatars! | The Cow | Chit Chat | 5 | 06-12-2010 05:47 PM |
| Rampede's Bronco Trail Finder Build "Mud Cow" | Rampede | 1.9 Scale Rigs | 9 | 06-07-2010 01:59 AM |
| Chris's "Memphis" Tuber Build | Gimp | Axial AX-10 Scorpion | 79 | 05-10-2010 08:09 PM |
| Axial AX-10 Scorpion 1/10 Rock Crawler Kit Build, Chapter 2 "The Mod Build" | JAM MaxAmps.com | Axial AX-10 Scorpion | 42 | 06-06-2008 10:00 PM |
| |


 Linear Mode


