| |
 09-08-2009, 01:18 AM
| #61 |
| Rock Crawler Join Date: Feb 2008 Location: UK
Posts: 818
|
OK - looks fine. I've ordered another Turborix - let's hope that this one stays working properly! |

|  |
| Sponsored Links | |
| | |
|
09-09-2009, 08:50 AM
| #62 |
| Rock Crawler Join Date: Feb 2008 Location: UK
Posts: 818
|
I got a couple of these direct from Hong Kong: 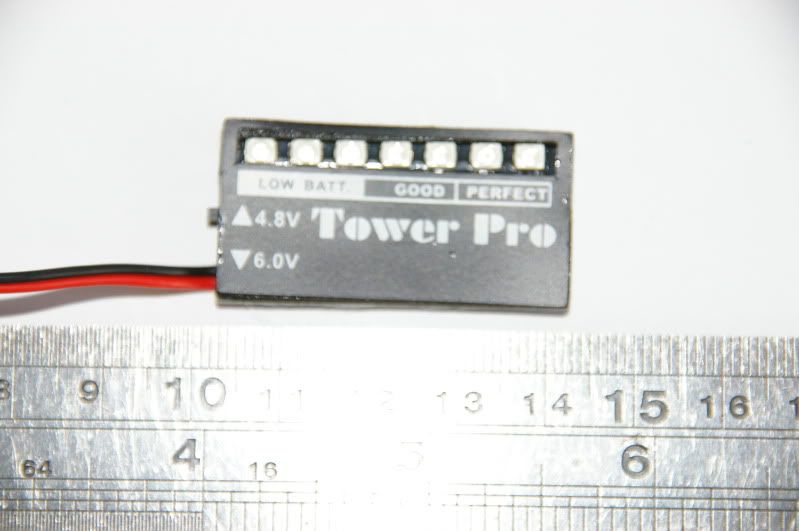 They are designed for RC plane receiver packs, switchable between 4 and 5 cell use. The PCB is very thin, with a foam pad front and rear. The LEDs are surface mount, so I pulled off the front pad, removed the LEDs, and added some standard 3mm LEDs just to check that it'll work: 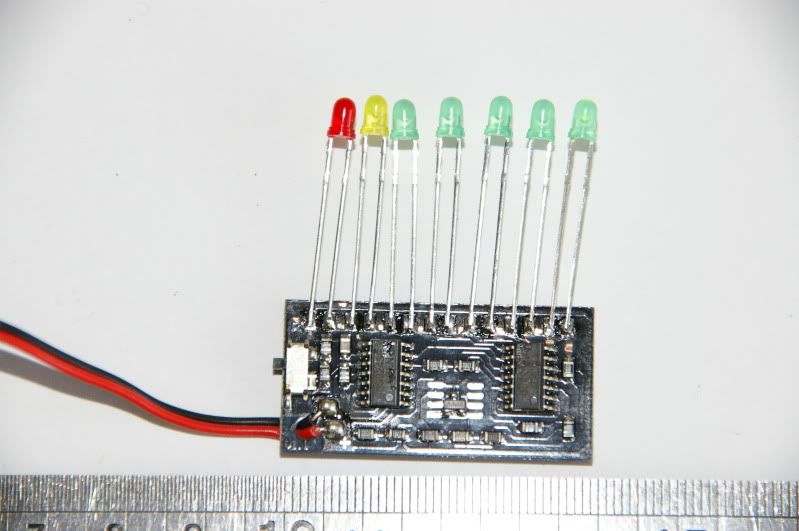 Works perfectly. The LEDs are lit, one at a time, in 0.1v increments. Red comes on at 4.75, amber is 4.75 to 4.85. |
|
| |
|
09-09-2009, 03:51 PM
| #63 |
| Rock Stacker Join Date: Aug 2009 Location: Crawlarado Springs
Posts: 64
|
clockworks, since you seem to have a great deal of knowledge about small electronics and wiring i have a question for you. I am trying to wire up a remote start on my Revo 3.3. The only thing I'm stuck on is reducing the power that goes to the glow plugs. I am using an onboard E-flite 7.4V 800 mAh 2S lipo and i need to drop the voltage down to 1.5V for the glow plug. Any ideas of what resistors I need? Or anything else I need? |
|
| |
|
09-10-2009, 02:39 AM
| #64 |
| Pebble Pounder Join Date: Aug 2008 Location: Spain
Posts: 103
|
Hi Steve, today I've tested the TX Outdoor. Everything goes perfect  I've tested it on the Scale, using the "multisteering Switch" to activate/desactivate the driver's steering wheel. It works right. I had just one problem. One of the cells goes suddenly down, and the TX didn't sent signal or sent a "confused" signal. Just replace the cells and everithing right. Cheers. |
|
| |
|
09-10-2009, 06:21 AM
| #65 |
| Pebble Pounder Join Date: Aug 2009 Location: San Jo
Posts: 113
|
clockworks...this is an awesome build thread. i think its alot more then i would go through for a multiple channel radio but very informaional. and obviously you can get the job done for a fraction of the cost. very tedious work but good job. when will you actually be finished/test the unit? and what rX are you using?
|
|
| |
|
09-10-2009, 08:11 AM
| #66 | |
| Rock Crawler Join Date: Feb 2008 Location: UK
Posts: 818
| Quote:
You couldn't drop the voltage with resistors, as the resistance of the glow plug will change, depending on how hot it was. The voltage at the plug needs to be regulated, which means using an electronic circuit or a battery. I'm guessing that you just need to get 1.5v to the plug, for a few seconds before you spin the starter? The easiest way to do this, if you don't want to use a ready-made airplane kit, would be to use a 1.5v battery, switched by a relay (wired to the relay contacts). The relay coil could be powered from the Rx or BEC, if you choose a relay with a 5V coil. You could switch the relay coil with a "pico switch" which would plug into a spare Rx channel. You could also use a servo and microswitch to switch the 1.5v battery. It would be possible to build a voltage regulator to drop the LiPo voltage down to 1.5v, thus removing the need for a 1.5v battery, but that's beyond my designing ability. Might be worth looking on RCGroups - there are some proper DIY electronics wizards over there. If I was doing this, I'd investigate how the commercially available airplane kits work, then either buy the parts off the shelf, or look for a DIY design. Whatever system you choose, it needs to be reliable - you don't want to keep burning out plugs. Last edited by clockworks; 09-10-2009 at 08:13 AM. | |
|
| |
|
09-10-2009, 08:15 AM
| #67 | |
| Rock Crawler Join Date: Feb 2008 Location: UK
Posts: 818
| Quote:
Let's hope that my next Turborix works properly. Cheers | |
|
| |
|
09-10-2009, 08:28 AM
| #68 | |
| Rock Crawler Join Date: Feb 2008 Location: UK
Posts: 818
| Quote:
My first build (DX6i/KO Mars) has been working fine for a few weeks, so I know that the theory is sound. Carlos ("meao") has built several Txs, using the Turborix as a base. We've been swapping ideas, so this thread is really a joint effort. I've got another Turborix Tx on order, direct from Hong Kong. I should receive it within the next week or so, so the final build should be done in maybe 3 weeks, if all goes to plan. Once it's finished, I'll draw up some schematics. That way, anybody should be able to build their own version, or just take the ideas and do their own thing. The Turborix comes with it's own Rx - looks similar to the Spektrum AR6200, complete with a remote receiver. The Spektrum Rx alone costs nearly double the price of the complete Turborix set, including shipping from Hong Kong. AFAIK, extra Rxs are available from Hong Kong for about $15. Plenty of people are flying planes using the Turborix and other clones, so the radio is fine, as long as you get one that works. They obviously cut a few corners to sell at this price. Quality control seems to be the main area of cost saving! | |
|
| |
|
09-16-2009, 05:26 PM
| #69 |
| Rock Crawler Join Date: Feb 2008 Location: UK
Posts: 818
|
I received the 3 digit "voltmeter" from Hong Kong today. It works fine, reading the Tx pack as one cell. Unfortunately, it doesn't display just the voltage, it alternates between flashing "---" and displaying the voltage. Still waiting for the Turborix to arrive. |
|
| |
|
09-18-2009, 07:56 AM
| #70 |
| Pebble Pounder Join Date: Aug 2008 Location: Spain
Posts: 103
|
Hi Steve. I'm still waiting for the new voltmeter(the same as yours) to fit into the TX. I've been running the TX for about 4hours and no problems with it. No jittering at all. Everithing works right. Some "crawlectronics users" had made me a video-joke(it's a funny video) talking about my builds(it's in spanish): http://www.youtube.com/watch?v=5vHPorMP8n0 Cheers, Carlos. |
|
| |
|
09-19-2009, 10:11 AM
| #71 |
| Quarry Creeper Join Date: Oct 2008 Location: alex city
Posts: 200
|
wow that is cool wish i could
|
|
| |
|
09-23-2009, 12:17 PM
| #72 |
| Rock Crawler Join Date: Feb 2008 Location: UK
Posts: 818
|
My new Turborix Tx arrived today. I'l give it a thorough test before I strip it down and have another go at the conversion. One thing I have noticed, as I left it switched on while I was playing with my new iPod Touch on line - these 2.4GHz radios play havoc with home WiFi! |
|
| |
|
09-25-2009, 12:44 PM
| #73 |
| Rock Crawler Join Date: Feb 2008 Location: UK
Posts: 818
|
I think I've found the cause of the jittering problem with the original Turborix! I noticed that the new Turborix jitters slightly on the PC setup screen - the graphic "servo" bars move slightly. The actual servos are fine, though. This got me wondering if the jitter problem was caused by the PC interface board. I extended the wires to fit it in the base of the pistol case. I unsoldered the wires, and the servos are rock steady Now I need to work out if I can disable the interface board when not in use and keep the long wires, or if I need to relocate the connector and use short wires. |
|
| |
|
09-25-2009, 06:01 PM
| #74 |
| Pebble Pounder Join Date: Aug 2008 Location: Spain
Posts: 103
|
Good News!!! , now you have a couple of TX to build 2 news;)You can use a rotatory switch to disable the interface board. Talking about other things, now I'm working with and old Graupner 4014. It has 8 channel. And the posibility of add 2 nautic modules(using 2 channels) to obtain 16 extra channels(all of them 3 position). And I'm going to try to convert it to 2,4Ghz also. Cheers, Carlos. |
|
| |
|
09-28-2009, 02:52 AM
| #75 |
| Rock Crawler Join Date: Feb 2008 Location: UK
Posts: 818
|
Carlos: Do you have a photo or a link for the Graupner 4014? |
|
| |
|
09-28-2009, 05:27 PM
| #76 |
| Pebble Pounder Join Date: Aug 2008 Location: Spain
Posts: 103
|
Yes, of course!: Graupner/JR 4014 TX:  Graupner/JR 4014 RX:  TX inside(it has a mod to reverse channels mechanicaly):  I will try to convert it to 2.4Ghz using this module:  And, more info(in spanish) on this thread: http://zonacrawling.com/foros/viewto...=5097&start=60 That's the thread where a post all the buildings I'm doing. I give you another link, this one is a video using the "crawlectronics" TX to manage a mechanical brake. Easy and functional: http://www.zonacrawling.com/foros/vi...php?f=7&t=5646 Cheers, Carlos. |
|
| |
|
09-29-2009, 09:09 AM
| #77 |
| Rock Crawler Join Date: Feb 2008 Location: UK
Posts: 818
|
Carlos That Graupner looks quite old - do you know when it was made? |
|
| |
|
09-29-2009, 09:29 AM
| #78 |
| Rock Crawler Join Date: Feb 2008 Location: UK
Posts: 818
|
Right - now I've got to the bottom of the servo jitter problem, the build is going again! WIRING IT ALL TOGETHER I decided to shorten the wires for the PC interface connector back to their original length, avoiding the jitter problem. This means that the PC connector has to be relocated. I settled for a position at the bottom of the grip. I drilled a 12mm hole: 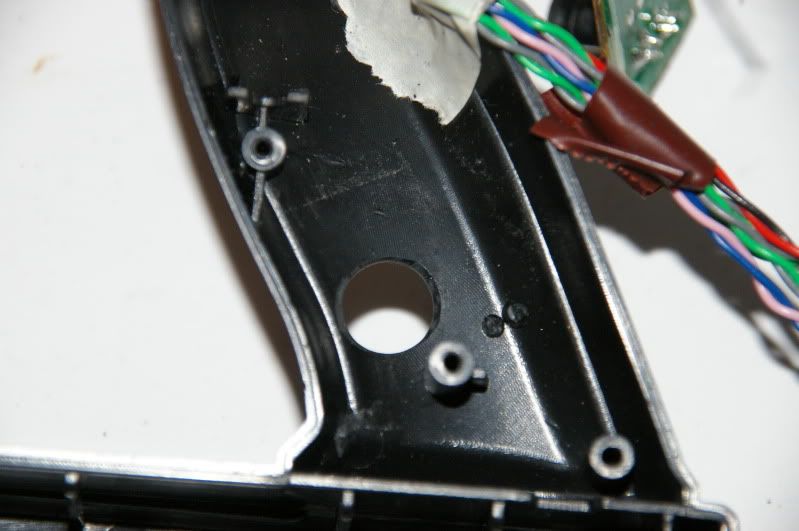 Added a couple of styrene tube standoffs: 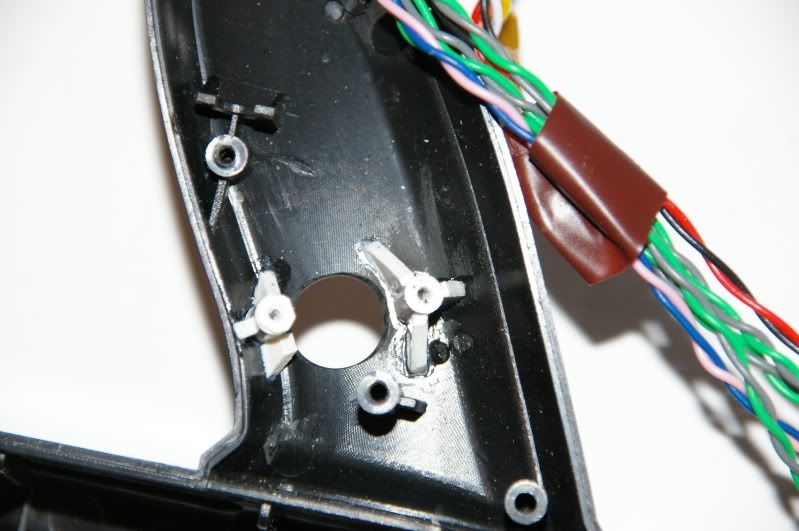 And screwed the connector PCB in place: 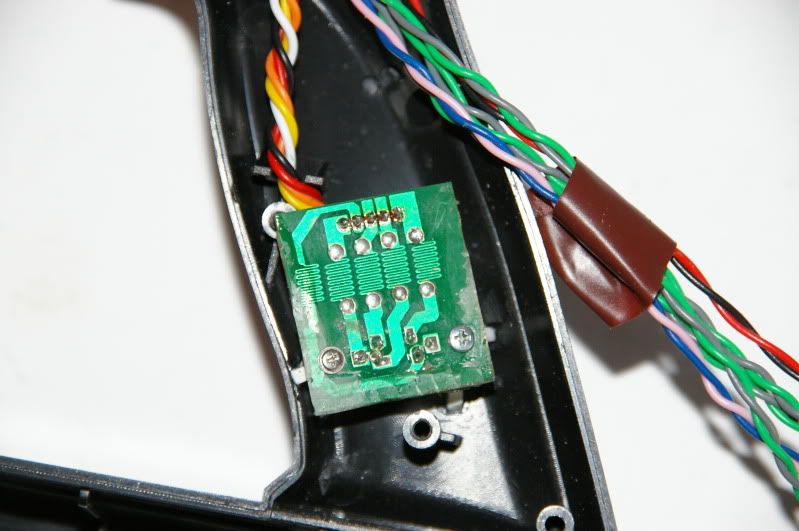 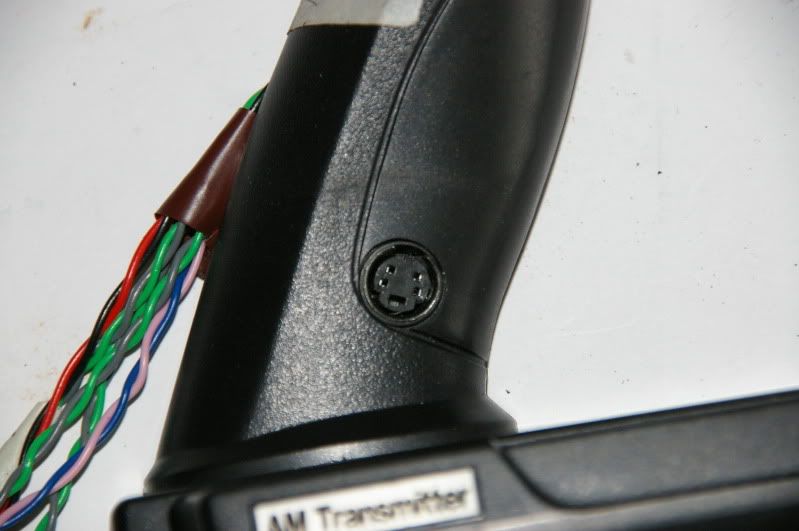 I spent a couple of hours doing all the wiring to the main PCB: 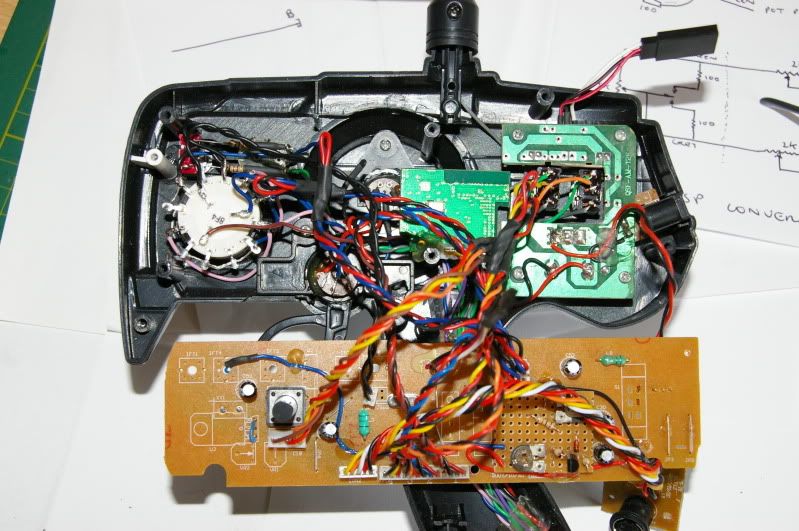 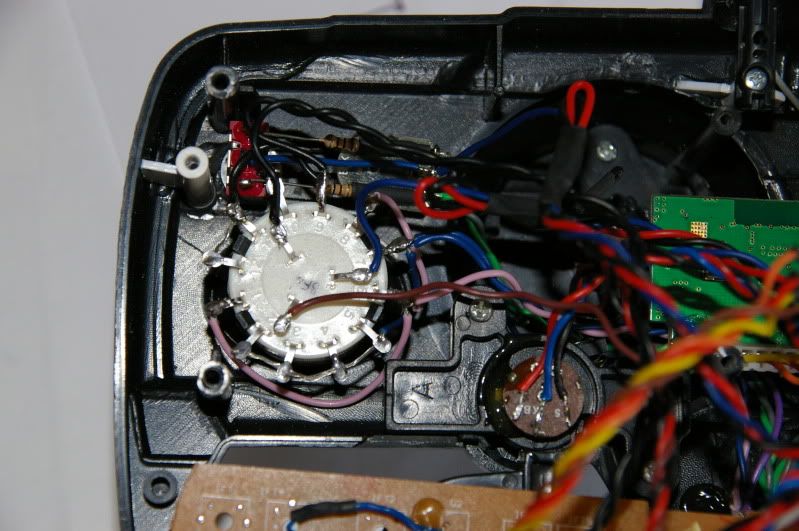 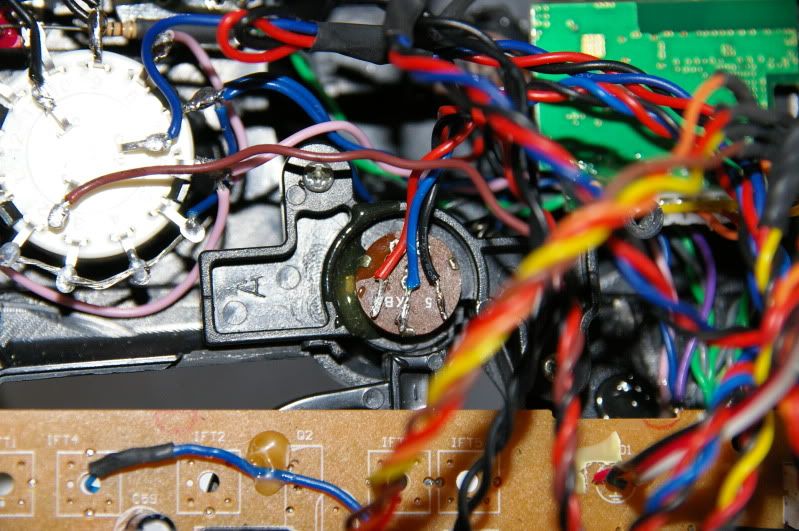 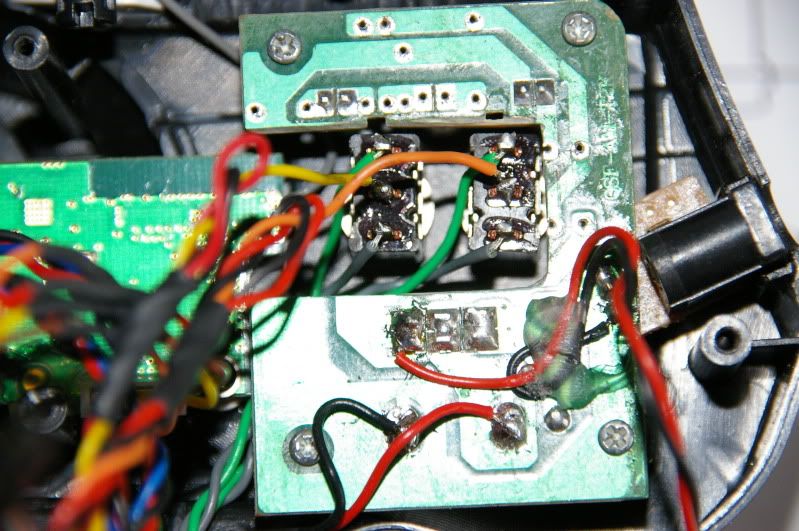 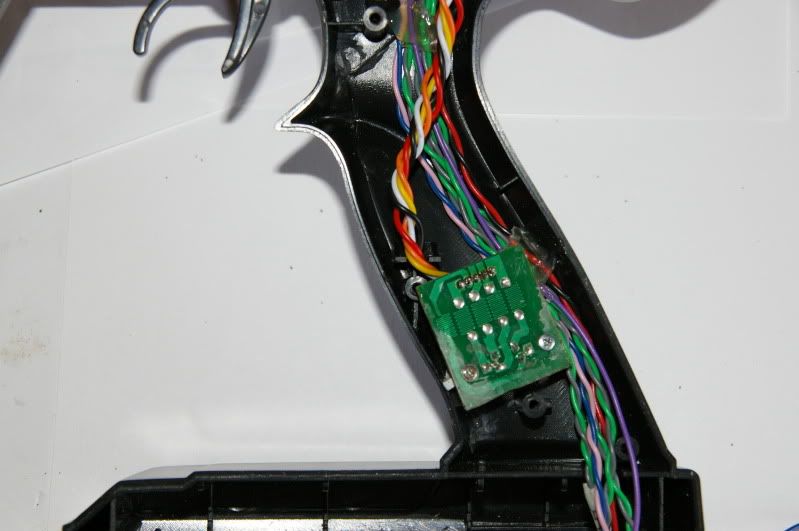 Despite the mass of wiring, the main PCB, with the warning LED "daughterboard" fitted neatly into place: 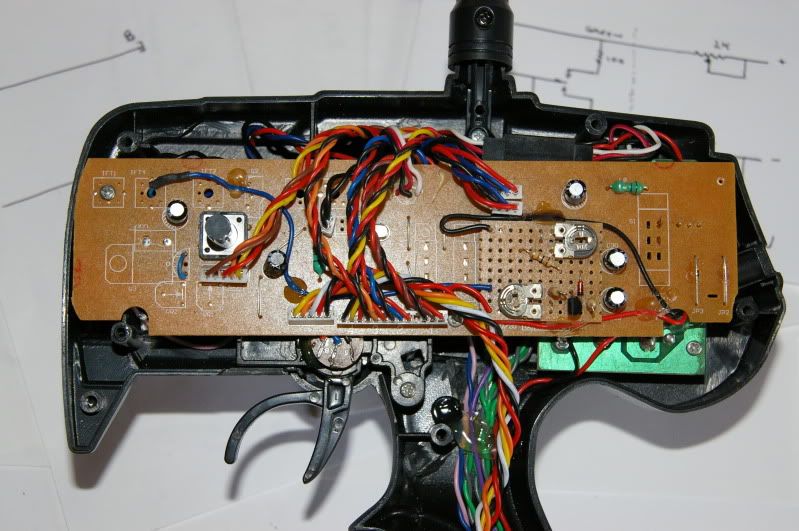 I temporarily rigged up some pots and resistors to the wires sticking out of the bottom of the Tx to test my design for the various trims, before trying to cram all the required components onto the smallest piece of stripboard possible. |
|
| |
|
09-29-2009, 04:11 PM
| #79 | |
| Pebble Pounder Join Date: Aug 2008 Location: Spain
Posts: 103
|
Good Job Steve Quote:
It's a good TX, very good quality in everything. | |
|
| |
|
09-30-2009, 11:23 AM
| #80 |
| Rock Crawler Join Date: Feb 2008 Location: UK
Posts: 818
|
TRIM PCB Although this is a computerised Tx, with adjustable servo travel (EPA) and subtrims, you need to use a PC to make any changes. No problem for the original setup on the bench, but it could be a bit of a pain in the field if you need to adjust your steering or dig. If you are happy to take a laptop crawling with you, or you never bend a linkage, you don't need to worry about adding trims - ignore this section. I decided to play it safe and add trims for all the channels except the throttle (ch2). Easy enough to do the wiring - just a trimpot or two, plus some fixed resistors. The challenge was to get all 5 channels (9 trimpots) onto a 3" x 1" piece of stripboard: 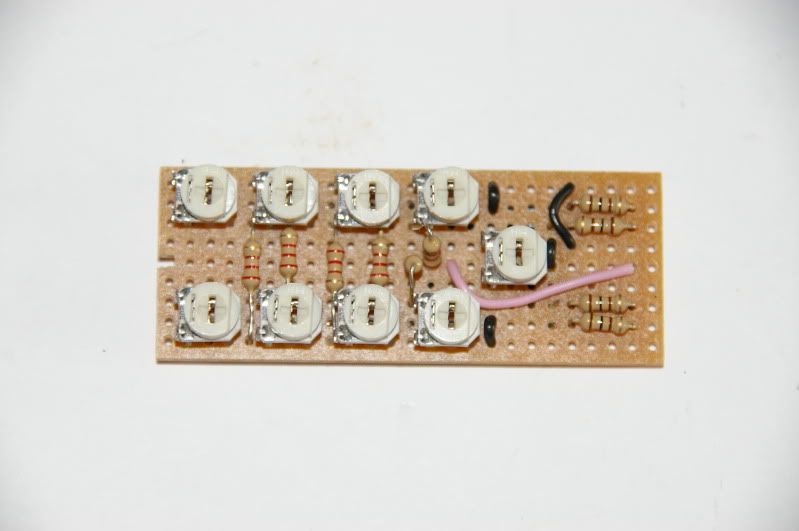 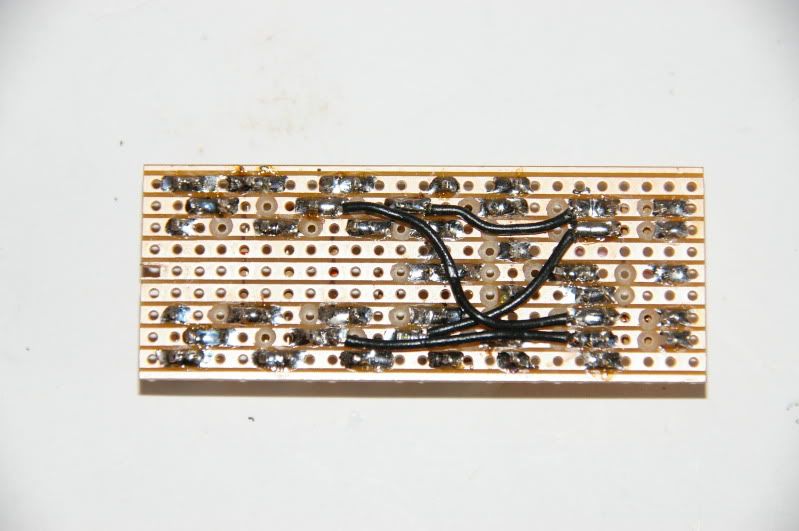 From right to left in the photos, the board is laid out for ch1 (front steering), ch6 (rear steering), then chs 3 4 and 5. The 3 steering channel pots allow the 2 channels to be finely balanced. The single pot for channel 1 trims the steering, the 2 pots for ch6 make sure that everything works in all 4 steering modes. Chs 3 4 and 5 adjust the EPA in both directions. The trim PCB fits neatly into the battery housing: 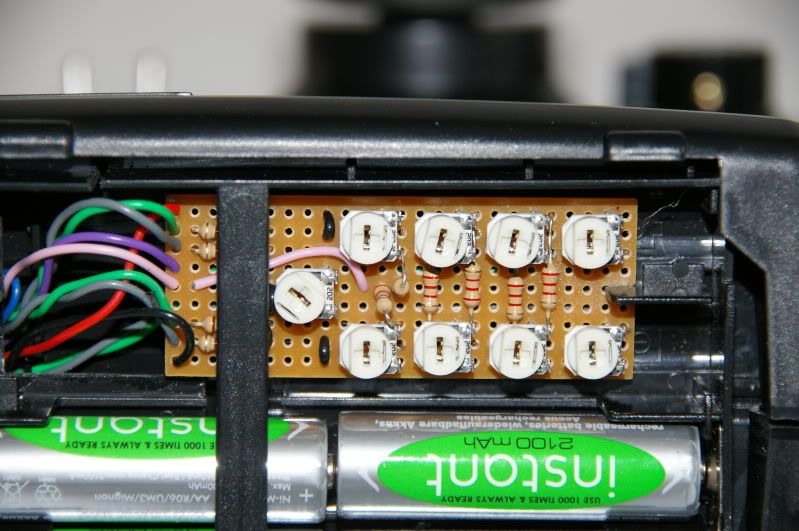 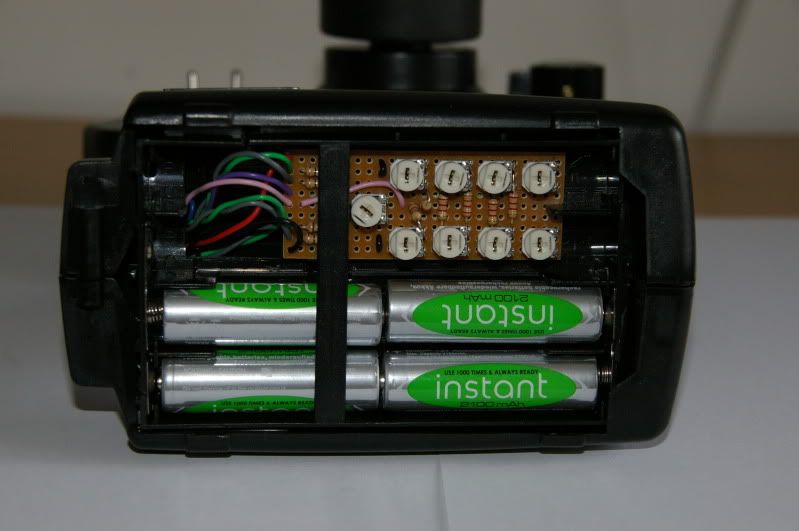 That's all the mods finished. Just need to set up the mixes: Mix1- VRA > ch6 always on Mix2- ch1 > ch6 switch B Mix3- VRB > ch5 always on The finished Tx: 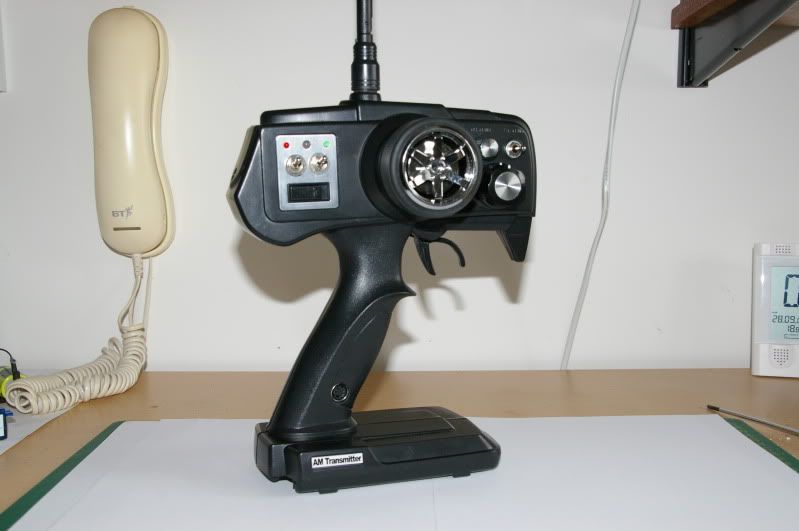 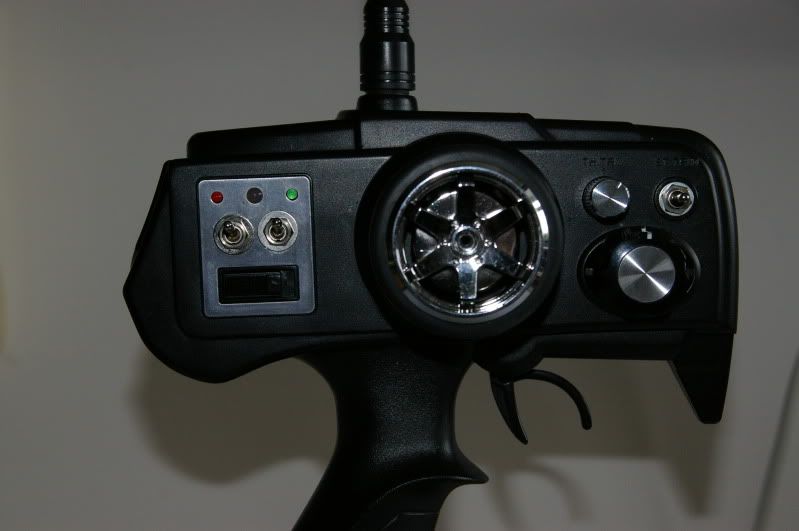 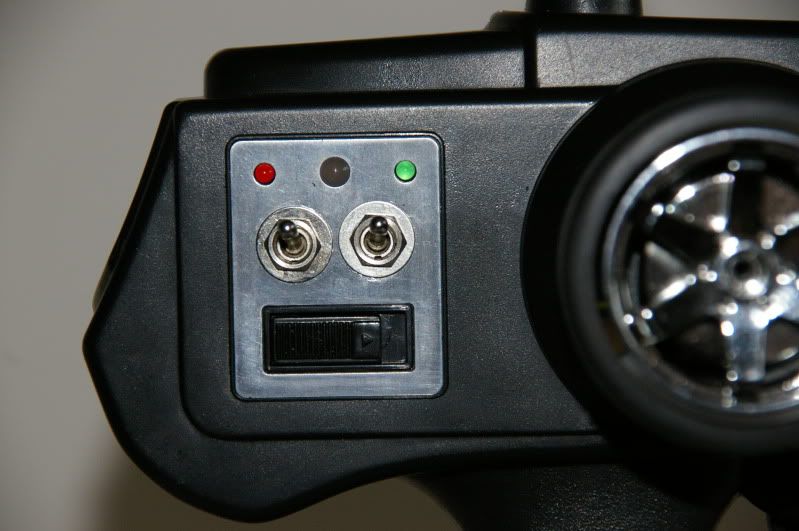 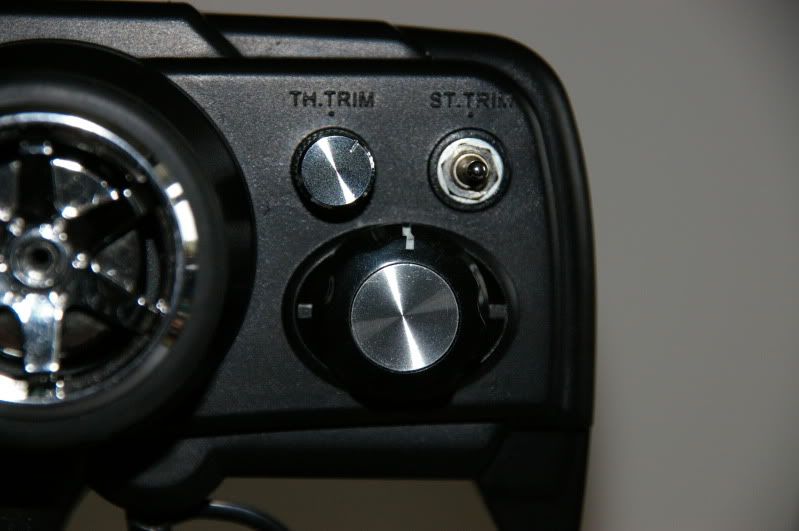  On the left panel are 2 2-position switches for channels 3 and 4, and the power switch. The middle LED is the 3-colour voltage warning light. The other 2 are dummies, from the original Tx. On the right panel is the 4-way steering selector switch. The knob and toggle are for ch5 - both 3-position switch and fully variable. The bind button is on the back, to the left of the large circular moulding. In total, the parts for this build cost me 85GBP, which is very close to my target of $120. A fair chunk of this total was postage, as I got everything on eBay. Since everything is cheaper in the USA than it is where I live, I reckon you could buy all the parts for significantly less than $100 in the US. I hope that this inspires a few more people to have a go and build their own Tx. |
|
| |
 |
 LinkBacks (?)
LinkBack to this Thread: http://www.rccrawler.com/forum/electronics/193303-build-5-6ch-pistol-tx-%24120.html | ||||
| Posted By | For | Type | Date | |
| ZONACRAWLING • Ver Tema - -CRAWLECTRONICS- "Post Oficial" | This thread | Refback | 02-19-2013 05:12 PM | |
| |


 Linear Mode


