| |
| |||||||
 |
| | LinkBack | Thread Tools | Display Modes |
 05-16-2007, 10:31 PM
| #21 |
| Rock Crawler Join Date: Dec 2005 Location: houston
Posts: 650
|
Got some more tube work done. Now I just need to finish the tubing in the rear, weld on some nuts for the body panels, and make shock mounts. Then comes links and mounts. Got some carbon arrow shaft for the links, thanks for the tip, works GREAT!! PICS... 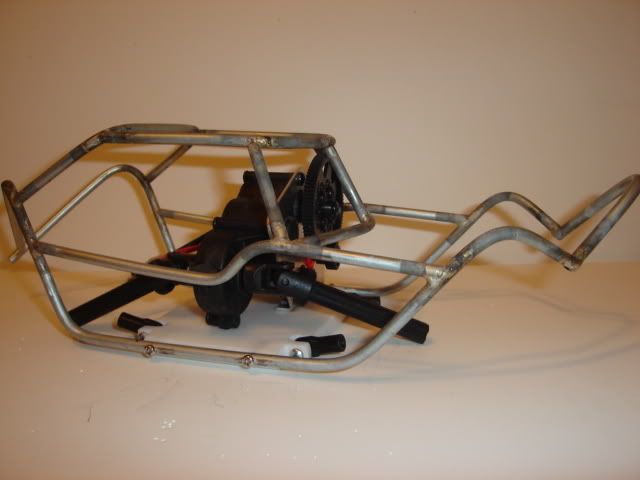 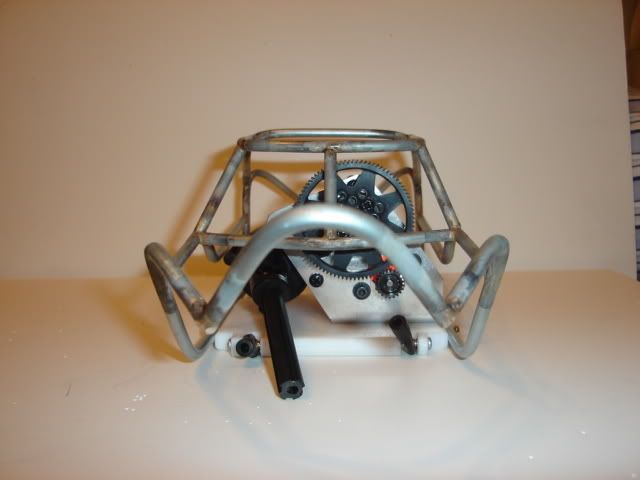 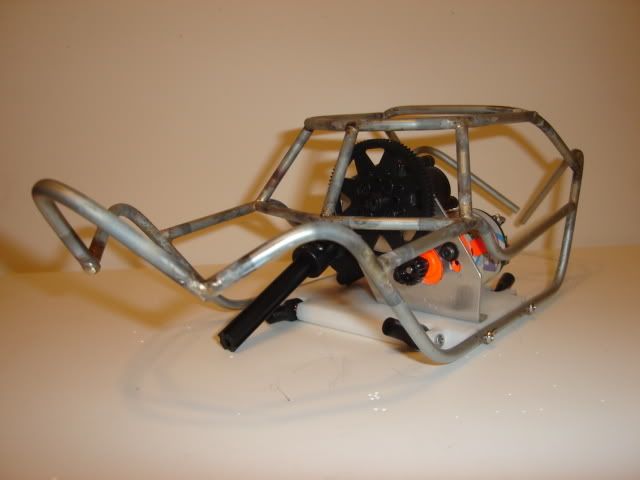 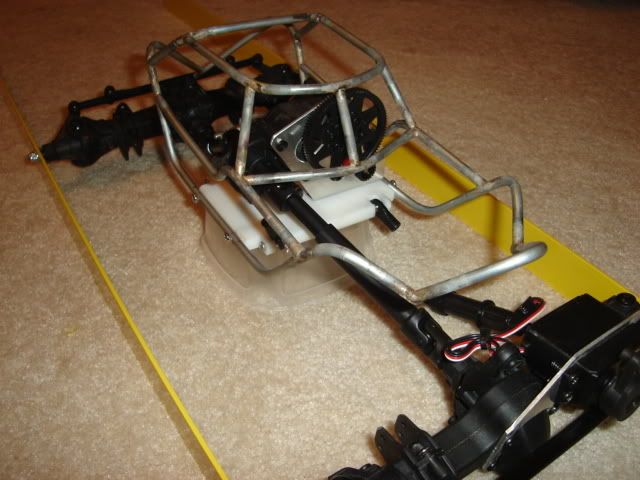 |

|  |
| Sponsored Links | |
| | |
|
05-16-2007, 11:39 PM
| #22 |
| Rock Crawler Join Date: Dec 2006 Location: Sierra Vista
Posts: 672
|
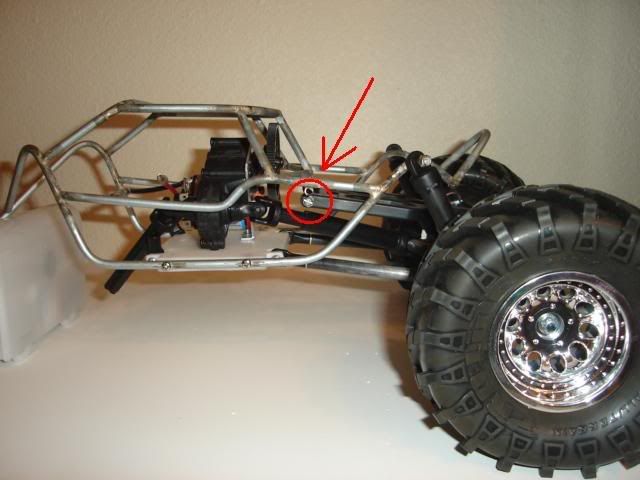
OK, I admit it, I loved the clocked tranny idea so much I stole it, I just got through making something similar to yours and I've got some questions. How far is too far to mount the driveshafts off center? Squeezing the tranny mount in between two plates is going to prove to be difficult keeping the driveshafts anywhere near center....just wondering how far off center yours is offset if you don't mind telling, if not no biggie I guess I can live and learn with it, just trying to figure out how to set up things in order to create my chassis side plates. Wish I had the skills to do a nice tuber like yours but that's gonna have to wait a while, I love the way this is coming together... |
|
| |
|
05-17-2007, 07:29 AM
| #23 |
| Pebble Pounder Join Date: May 2007 Location: Titletown
Posts: 132
|
Man The clocked tranny mount is great! I spent all night last night working on how to mount my clocked tranny on my WK scale on a MFM chasis and came up with a simalar idea but yours works even better! Gonna steal it, and hope ya don't mind |
|
| |
|
05-17-2007, 07:31 AM
| #24 |
| Pebble Pounder Join Date: May 2007 Location: Titletown
Posts: 132
|
What thickness alum are you using? I made rough one with 1/8 was worred about it flexing but its tuff to work with a dremmel on, that looks thinner than 1/8. Thanks Dave |
|
| |
|
05-17-2007, 08:58 PM
| #25 | ||
| Rock Crawler Join Date: Dec 2005 Location: houston
Posts: 650
| Quote:
Quote:
| ||
|
| |
|
05-17-2007, 11:58 PM
| #26 |
| Rock Crawler Join Date: Dec 2006 Location: Sierra Vista
Posts: 672
|
Thanks for the info on the offset, mine is sitting close to 1"-1 1/2" off center, I got the side plates done and the cutting board skid done today and looking at it your right, there is alot of play left in the shafts, shouldn't be a problem at all..
|
|
| |
|
05-18-2007, 01:04 AM
| #27 |
| I wanna be Dave Join Date: Nov 2005 Location: Crawler practice!
Posts: 2,104
|
DUDE that tuber is MEAN looking i love it and cant wait to get my wk |
|
| |
|
05-18-2007, 05:20 AM
| #28 |
| I wanna be Dave Join Date: Sep 2005 Location: USA
Posts: 11,196
|
Very Nice...You have a great start and one of the best WK builds going right now...I'll have to keep checking in on this one..... |
|
| |
|
05-18-2007, 06:57 PM
| #29 |
| Rock Crawler Join Date: Dec 2005 Location: houston
Posts: 650
|
Thanks guys for all the comments!! I got some more work done to it yesterday. I also picked up some new Mashers and Rpm Revolver wheels, the moabs were just for mock up and have to go back on my other crawler. I got the front axle mounted. The lower links are made from carbon fiber arrow tube, and the upper three link bar is made from a T-Maxx long travel upper A arm. Also got the shocks mounted as a droop set up, we'll see how that works out. Hope to have this thing finished by next weekend! ( fingers crossed ) I still need to narrow the wheels and put on rock rings once I decide what color I'm going to paint it. PICS... 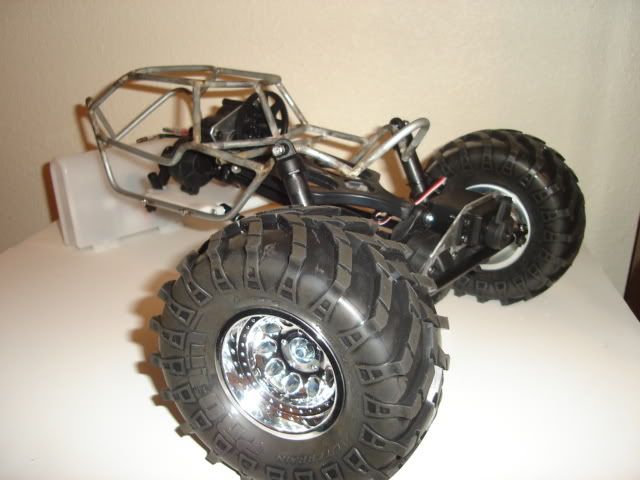 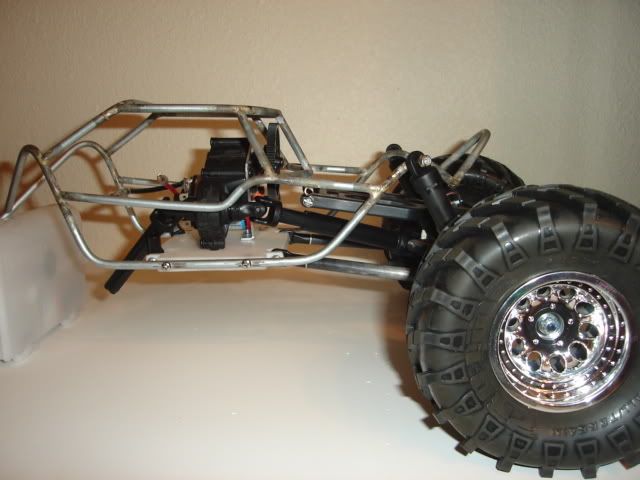 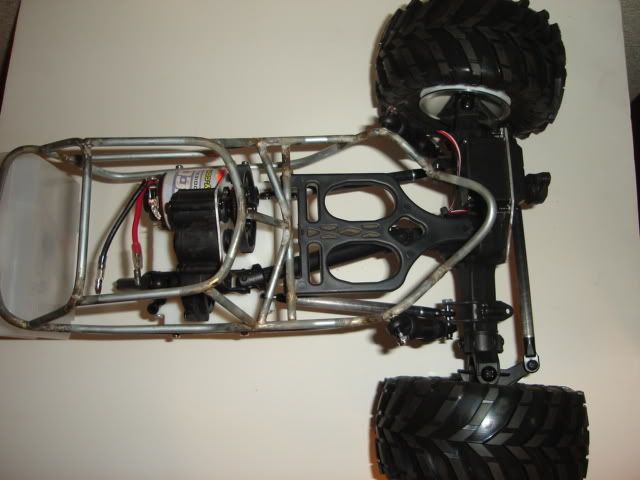 |
|
| |
|
05-18-2007, 07:42 PM
| #30 |
| [HOONIGAN]  Join Date: Nov 2005 Location: Grand Junction
Posts: 4,269
|
Looking great. This thing is going to be awesome!  |
|
| |
|
05-18-2007, 09:12 PM
| #31 |
| I wanna be Dave Join Date: Jul 2006 Location: Moscow Mills MO
Posts: 2,204
|
what kinda WB are you shootin for? Looks awesome so far. |
|
| |
|
05-19-2007, 09:11 AM
| #32 |
| Rock Crawler Join Date: Dec 2005 Location: houston
Posts: 650
|
There aren't really any comps around here so I was going to set the WB at 13 - 13 1/2", but I may go ahead and drop it to 12 1/2" just in case. Also, I can't decide between rear steer or front dig set up. Kinda leaning toward rear steer. Hope to get more work done tonight.
|
|
| |
|
05-19-2007, 03:30 PM
| #33 | |
| I wanna be Dave Join Date: Jul 2006 Location: Moscow Mills MO
Posts: 2,204
| Quote:
| |
|
| |
|
05-21-2007, 04:39 PM
| #34 |
| Pebble Pounder Join Date: Jan 2007 Location: Clovis
Posts: 158
|
where do you plan on mounting your battery?
|
|
| |
|
06-02-2007, 10:05 PM
| #35 |
| Rock Crawler Join Date: Dec 2005 Location: houston
Posts: 650
|
It's been a while, but I finqlly got some more work done on my tuber. First are pics of my narrowed wheels and home made rock rings. The rings are made from 1 1/2" electrical reducing washers from Lowe's. Next is the chassis before paint and trimming. Tomorrow I will paint it and begin reassembling the crawler and make body panels. I geared it 96/15 with a 65T Lathe motor, crawls great, but the motor started ticking for no reason. I took it apart and there is no trash in the motor or sign of damage, so I guess I wil try new brushes. Anyway, on to the PICS... 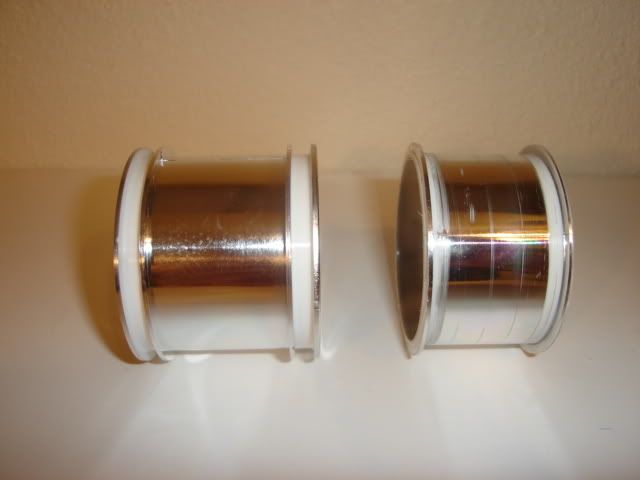 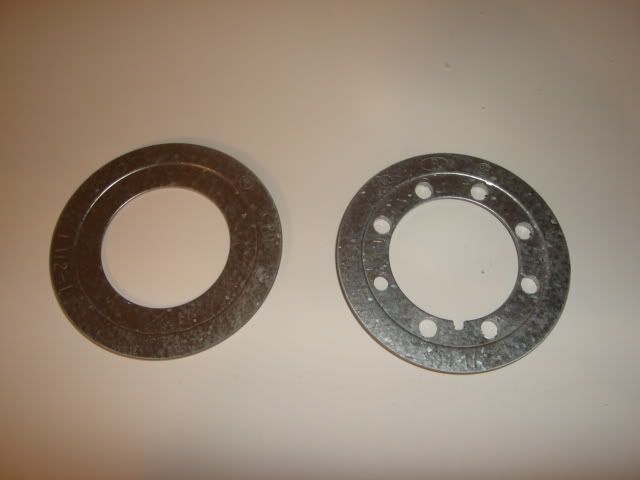 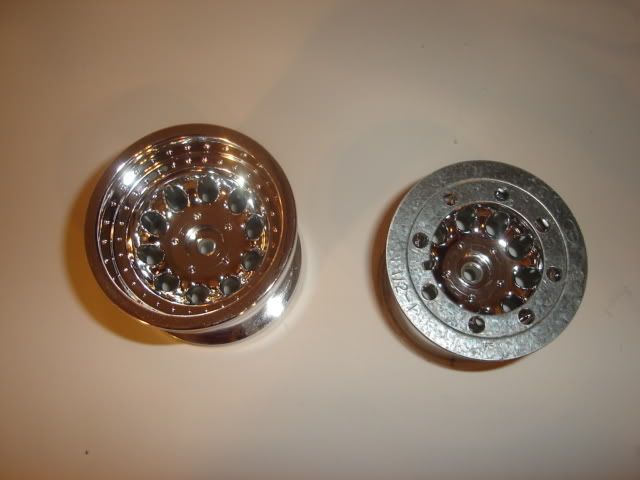 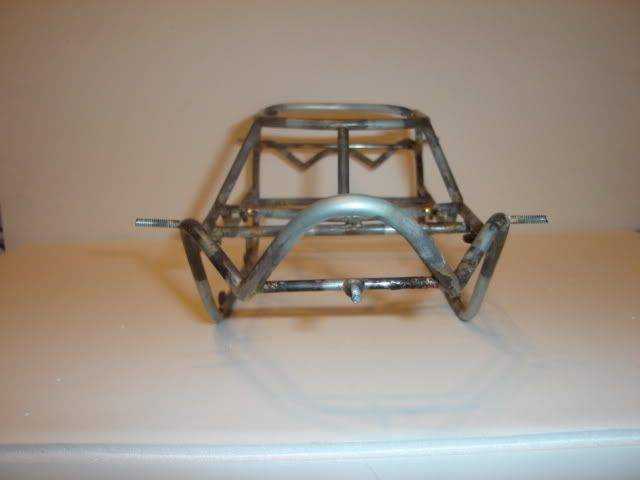 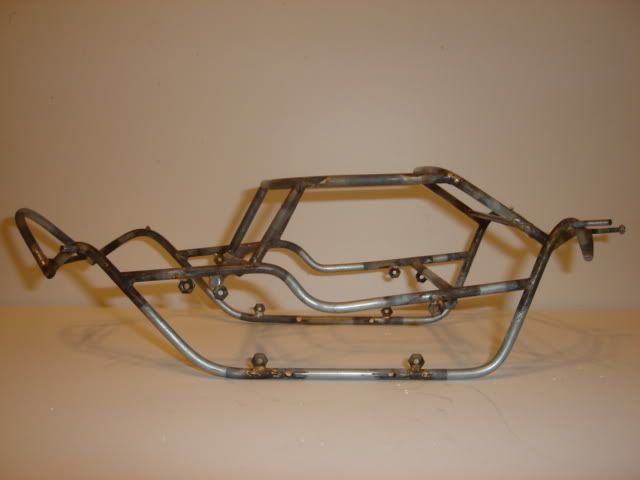 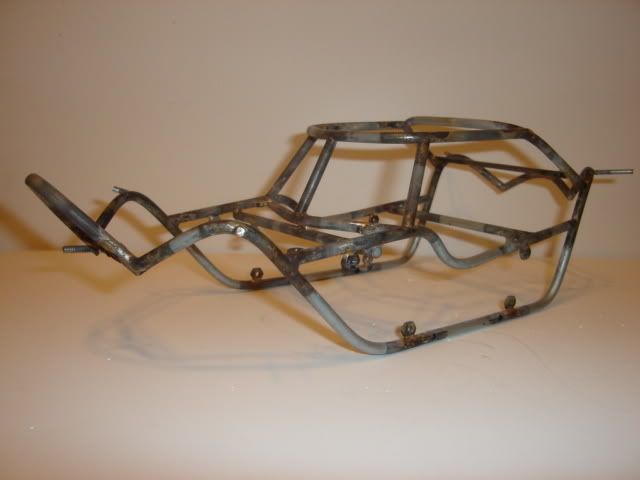  More to come soon!! |
|
| |
|
06-03-2007, 08:54 AM
| #36 |
| Rock Stacker Join Date: Apr 2007 Location: SUNNY-CITY
Posts: 52
|
Here is how I did mine with "Harley's" clocked template....    |
|
| |
|
06-04-2007, 08:33 AM
| #37 |
| Rock Stacker Join Date: Apr 2007 Location: Clayton
Posts: 72
|
looks nice. how did you mount up the T-Maxx arm?
|
|
| |
|
06-04-2007, 04:47 PM
| #38 | |
| Rock Crawler Join Date: Dec 2005 Location: houston
Posts: 650
|
Slowcrawl; your trans mount looks great, should be very sturdy. I wish i had a little thicker aluminum for my mount, but with a few test runs it seems to work great. No signs of flex! I think I will make my next mount out of cutting board material. Quote:
| |
|
| |
|
06-04-2007, 05:01 PM
| #39 |
| RCC Addict Join Date: Aug 2006 Location: ****, SL,UT
Posts: 1,610
|
daum your joints are so clean |
|
| |
|
06-04-2007, 05:32 PM
| #40 | ||
| Rock Crawler Join Date: Dec 2005 Location: houston
Posts: 650
| Quote:
  Quote:
| ||
|
| |
|
| |


 Linear Mode


