| |
 03-30-2010, 09:41 PM
| #81 | |
| Quarry Creeper   Join Date: Jun 2004 Location: Utah
Posts: 458
| Quote:
Blade | |

|  |
| Sponsored Links | |
| | |
|
03-31-2010, 12:01 PM
| #82 |
| Rock Crawler Join Date: Feb 2009 Location: Milwaukee
Posts: 609
|
Well I was sick of staring at pictures so I just ordered one.  "What" or "how" are people mounting bodies to thier frame?? |
|
| |
|
03-31-2010, 12:14 PM
| #83 | |
| Quarry Creeper Join Date: Jun 2004 Location: Utah
Posts: 458
| Quote:
Blade | |
|
| |
|
03-31-2010, 01:51 PM
| #84 | |
| RCC Addict Join Date: Jul 2006 Location: So Cal USA
Posts: 1,109
| Quote:
So far its holding up great! | |
|
| |
|
03-31-2010, 03:55 PM
| #85 | ||
| Rock Crawler Join Date: Feb 2009 Location: Milwaukee
Posts: 609
| Quote:
Quote:
| ||
|
| |
|
03-31-2010, 06:39 PM
| #86 |
| Pebble Pounder Join Date: Apr 2007 Location: Nowhere
Posts: 139
|
got it today and assembled it...AMAZING pixs to come
|
|
| |
|
03-31-2010, 11:24 PM
| #87 |
| Pebble Pounder Join Date: Apr 2007 Location: Nowhere
Posts: 139
|  |
|
| |
|
04-01-2010, 09:05 AM
| #88 | |
| Quarry Creeper Join Date: Jun 2004 Location: Utah
Posts: 458
| Quote:
Blade | |
|
| |
|
04-01-2010, 10:35 AM
| #89 |
| Newbie Join Date: Jan 2009 Location: okemos
Posts: 14
|
can someone please post a video of this chassis in action? i have been dying to see this thing on some rocks.
|
|
| |
|
04-01-2010, 02:07 PM
| #90 |
| Pebble Pounder Join Date: Sep 2008 Location: Encinitas
Posts: 134
|
This just in! Thanks Crawler X!  |
|
| |
|
04-01-2010, 02:44 PM
| #91 | |
| Quarry Creeper Join Date: Jun 2004 Location: Utah
Posts: 458
| Quote:
Blade Last edited by BLADE; 04-01-2010 at 02:54 PM. | |
|
| |
|
04-01-2010, 07:17 PM
| #92 |
| Quarry Creeper Join Date: Sep 2005 Location: Canon City
Posts: 466
|
Mine has been shipped. I just picked up a new HS-65 servo for it today, so when it gets here, the Magick can happen. |
|
| |
|
04-04-2010, 01:46 AM
| #93 |
| Rock Stacker Join Date: Feb 2010 Location: Portland,OR
Posts: 93
|
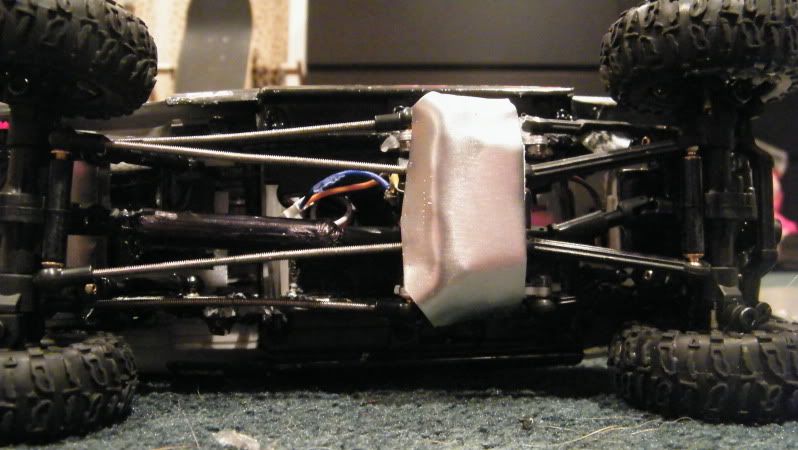
Got mine half built. I only have one short driveline atm :< Had a few problems with the leafs not fitting around the stock shock mounts and i ended up having to shave them down a bit to get them to stop binding. Haven't seen any flex shots so here ya go. just threw some crap on it to make it close to the weight it should be. 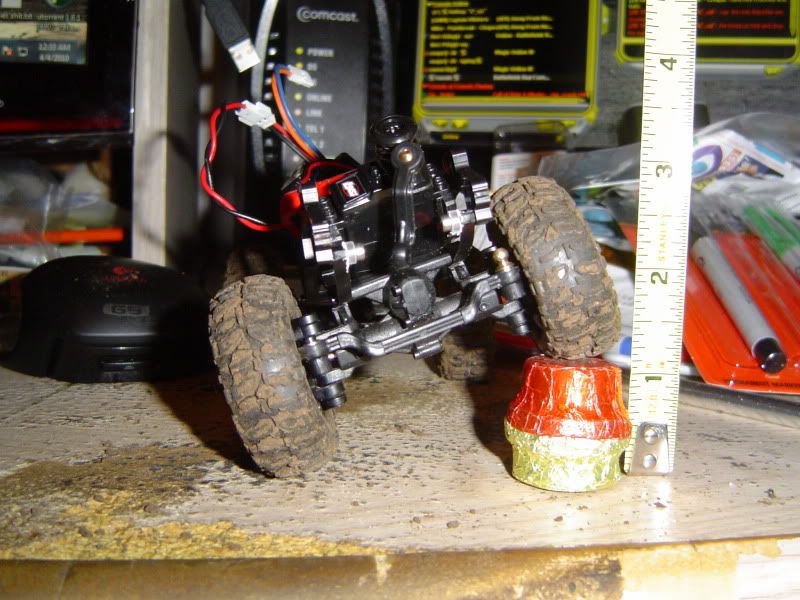 Last edited by Ratboy99; 04-04-2010 at 01:48 AM. |
|
| |
|
04-04-2010, 10:11 AM
| #94 | |
| Quarry Creeper Join Date: Jun 2004 Location: Utah
Posts: 458
| Quote:
Blade | |
|
| |
|
04-07-2010, 10:10 AM
| #95 |
| Newbie Join Date: Apr 2009 Location: Los Angeles
Posts: 30
|
Hey Blade. I received the chassis and love it. I finished the build with a couple of issues I'd like to see if I did something wrong. First one is the rear drive shaft is a little to short. I put the rear axle on the last two holes and the front axle on the forward most holes in order to get the largest wheelbase I can get. Front drive shaft is fine but the rear is just at the edge. Any form of pressure or articulation will make it pop out. The second issue is the servo and steering arm. I mounted the servo on the top and most forward set of holes. I also had to mount the steering arm on the backside of the horn instead of the frontbecause it was at an ackward angle. Now the steering arm will bind up against the leaf spring when turning left and I wont get any articulation. I was thinking about moving the servo down to the lower holes but that looks like the servo will bind against the frame when articulating. I looked at your pictures of the build but there aren't any clear shots from the front. Can you help me with this?? Thanks
|
|
| |
|
04-07-2010, 11:17 AM
| #96 | |
| Quarry Creeper Join Date: Jun 2004 Location: Utah
Posts: 458
| Quote:
You got a PM Blade | |
|
| |
|
04-07-2010, 11:19 AM
| #97 |
| Quarry Creeper Join Date: Jun 2004 Location: Utah
Posts: 458
|
I just wanted to mention to everyone that has purchased a kit and that is going to, the chassis is designed with the 4" wheelbase in mind it can be slightly extended but you will then have to extend your drive lines any one who has some pics and info on what they did to extend there Micro drivelines please let me know so I can pass it on to others. Thanks Blade |
|
| |
|
04-07-2010, 03:04 PM
| #98 | |
| Rock Stacker Join Date: Feb 2010 Location: Portland,OR
Posts: 93
| Quote:
Cut the female end of the shaft in half and super glue the pieces in to a pic pen tube. I've made 4 of them this way and haven't broke one yet. | |
|
| |
|
04-07-2010, 04:40 PM
| #99 | |
| Quarry Creeper Join Date: Dec 2009 Location: Long Island
Posts: 262
| Quote:
 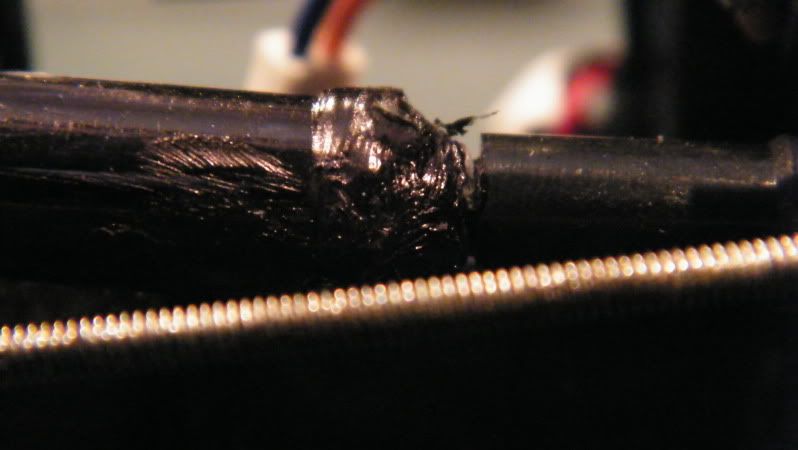 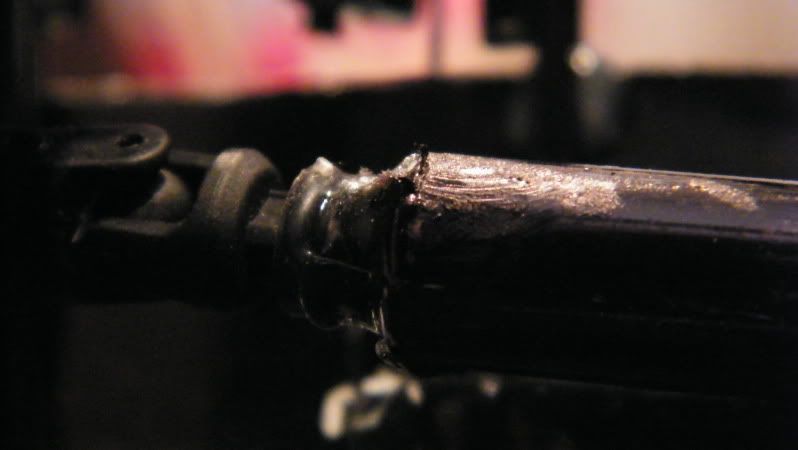 Hope this helps. Any more pics needed, just ask. I used pipe cutters(those little things that you twist the pipe in to get an even cut) and then used a hand drill to open up the hole more, then hot glued each end into it and made it black, to look better with the chassis. Not perfectly straight the female end was in but it works. Then just connect up to the shafts and its all good. Of course mine is much longer than anyone else's will probably be(besides Ratboy and his Silverado | |
|
| |
|
04-07-2010, 05:40 PM
| #100 |
| Newbie Join Date: Apr 2009 Location: Los Angeles
Posts: 30
|
So the pen diameter is the same? You don't have to make the hole bigger or anything even though the male is square in shape?
|
|
| |
 |
| |


 Linear Mode


