| |
 01-20-2013, 04:44 AM
| #1 |
| Rock Crawler Join Date: Jan 2011 Location: Portugal
Posts: 638
|
This is how I started, more than on year ago. First Build: Bully Havoc With the double fxr and stick radio the car was really nice to drive. The RTR weight was 2525g and that's not too bad for a bully with a cast front as LW rear... Even if I was happy with the car... Let's face it, we are never happy! So the 2013 project started. For now, the chassis. I did the design and a friend cut it out of CF. It was inspired on the Sinister Pro but I think I manage to make it different and I can change the set up in many different ways. Since this is the first time I'm doing something like this I want to be able to try different thing for future projects. These are the cuts 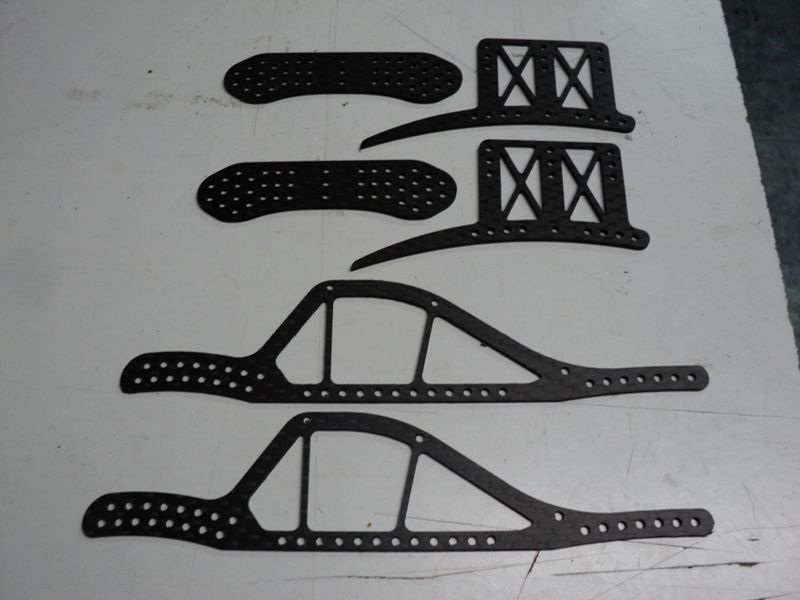 And this is how it should look like put together 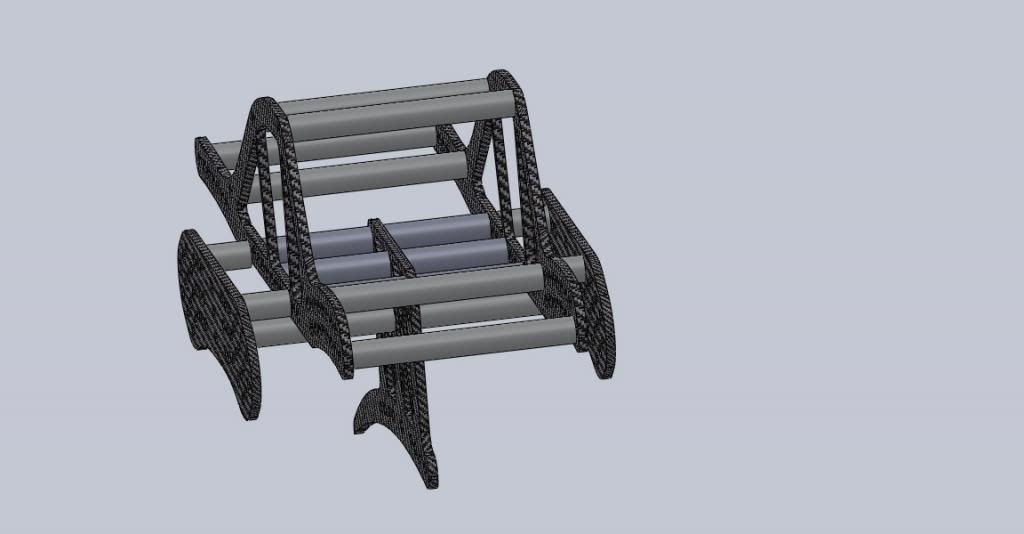 I tried to do a mockup with some axles... 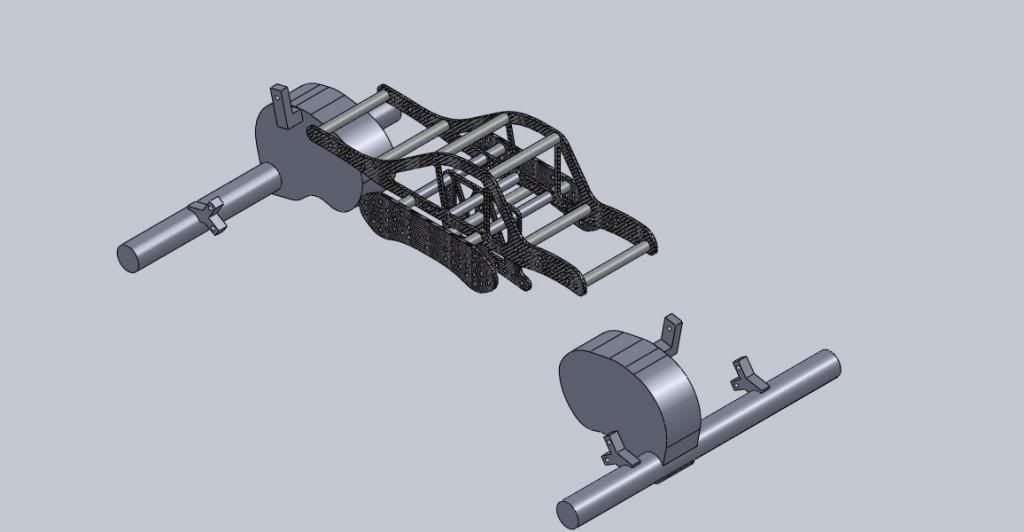 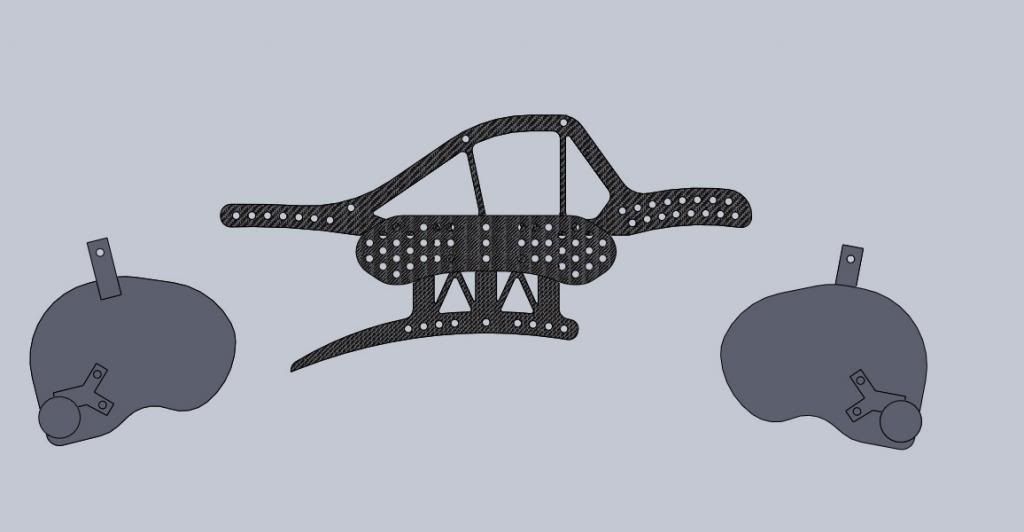 I tried to design it for 4'' shocks or a bit smaller, but that is one of those things that I'll have to test... With the long skid plate I'm looking for a 75/80g chassis. I'm a bit sick at the moment but I'll try to put the chassis together ASAP. I'll have to think about where to put the electronics but that's part of the fun!  At the moment I'm looking for some wheels but the new ones (Like D-Lux or VP), are very expensive and the shipping from the States kill's it for me... I just have to keep my eyes on the "for sale" section Tell me what you think. |

|  |
| Sponsored Links | |
| | |
|
01-20-2013, 10:47 AM
| #2 |
| Rock Crawler Join Date: Jan 2011 Location: Portugal
Posts: 638
|
This afternoon I felt a bit better and manage to go to my man cave and get my tools to put the chassis together. This is what I ended up with:  The weight will still go up because I'll had a full skid and the skins. Maybe 70g or something like that... From what I have seen maybe I'll have to try to make the upper link mounts a bit lower but that's easy ;) |
|
| |
|
01-21-2013, 09:09 AM
| #3 |
| Rock Stacker  Join Date: Dec 2012 Location: Starkville
Posts: 92
|
Looks great! I wish I knew someone with the tools to cut a chassis.
|
|
| |
|
01-22-2013, 08:32 AM
| #4 |
| Quarry Creeper Join Date: Jun 2006 Location: Carrollton
Posts: 316
|
Sick looking chassis!
|
|
| |
|
01-23-2013, 02:59 PM
| #5 |
| Rock Crawler Join Date: Jan 2011 Location: Portugal
Posts: 638
|
Only 2 comments? The bully section really has the thoughest of crowds! For the axles I went with extra wide D-Lux tuber with D-Lux servo mount. I drilled the bully knuckles to take the 6x3x2.5 (flanged) bearing but I'm not so convinced... I can't tight the bolts at all or the knuckle wont turn... Also the super bully shafts don't allow the same angle as tthe 2.2 V6, and that sux! 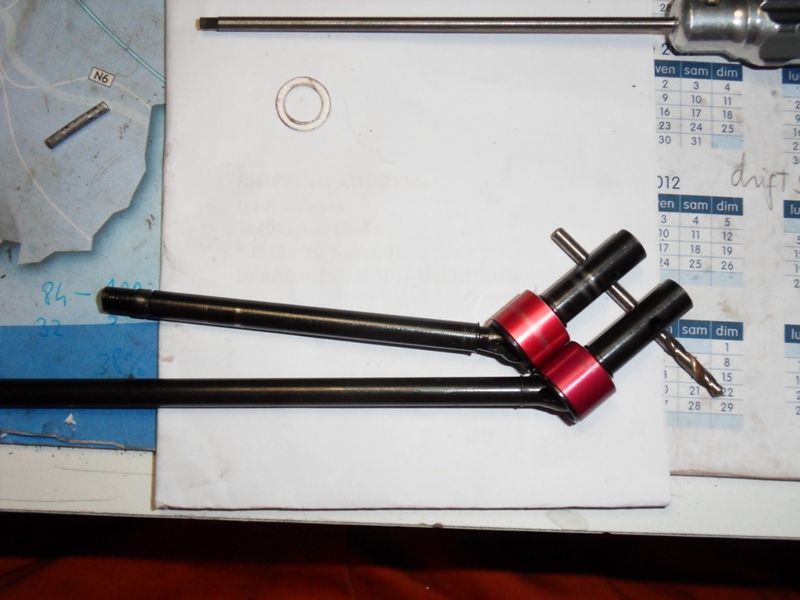 The guilty party 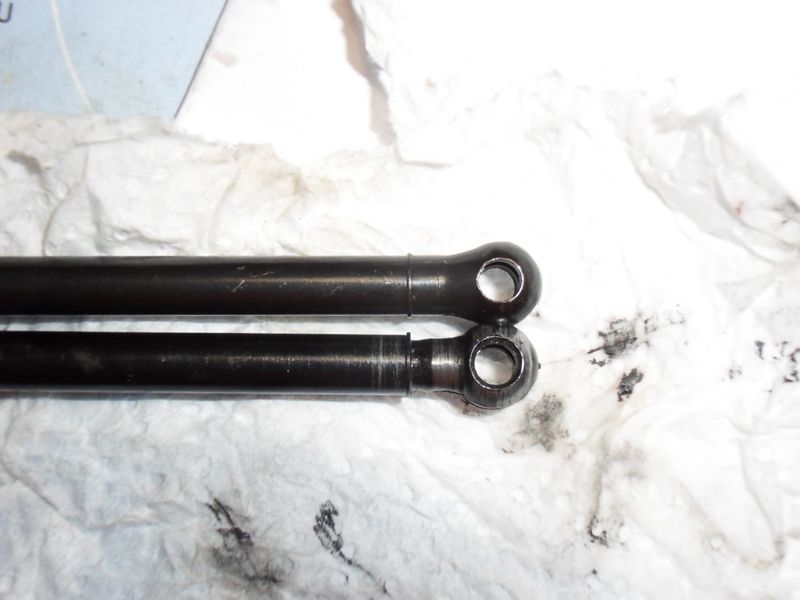 But, after a trip to meet friend of mine... 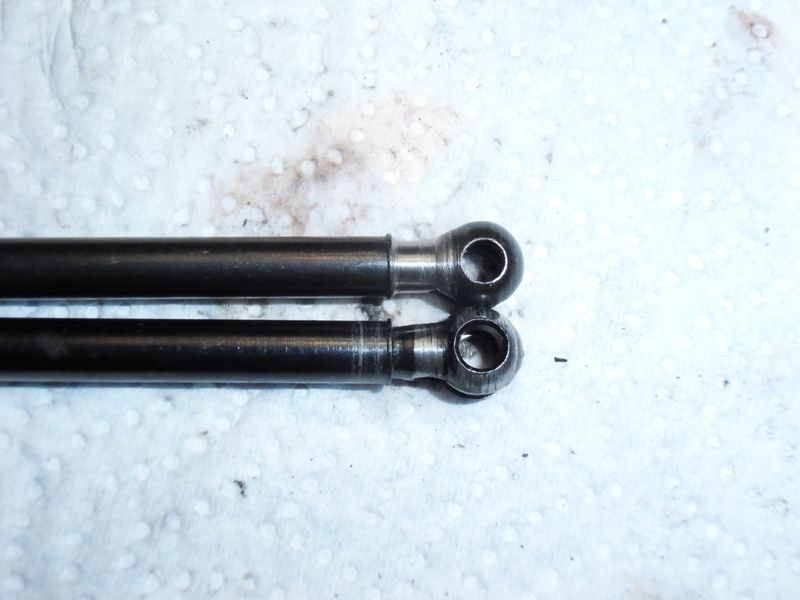 They are now turning the same, if not just a little bit more  The gears for the back axle were lathed down to 2mm, the ones I have in the front were lathed to 3mm and are about 8gr heavier (stock gears are 80gr) 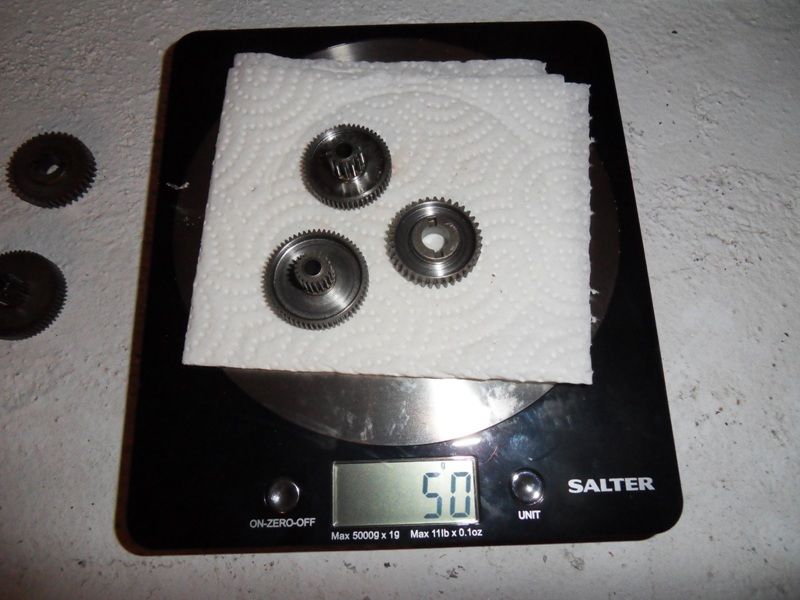 Here's the final result: 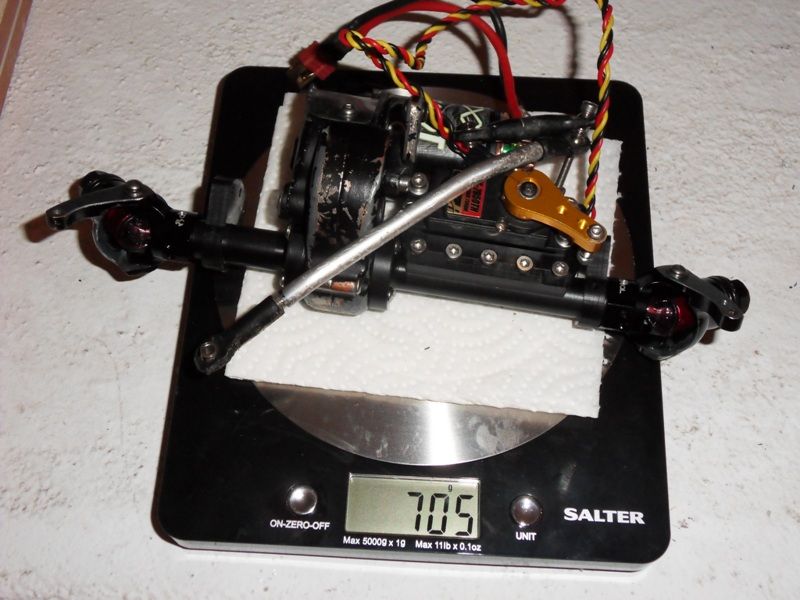 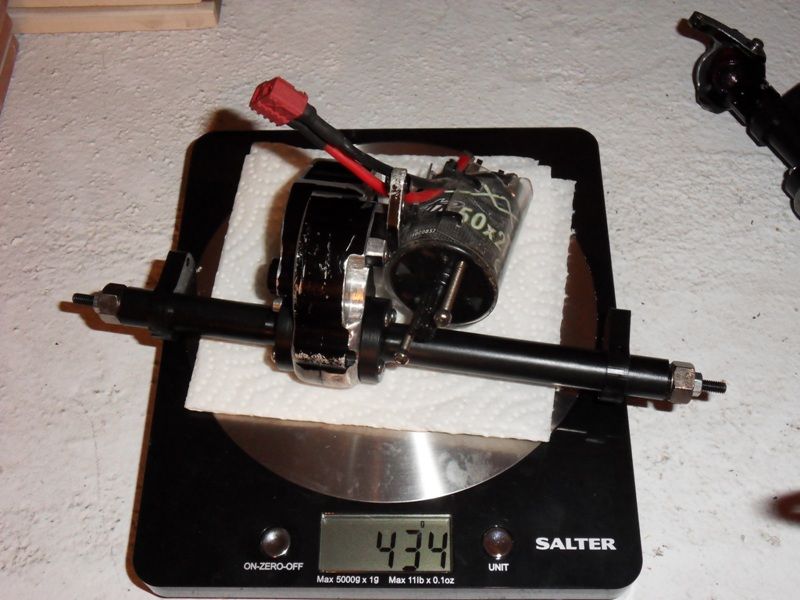 Compared to: 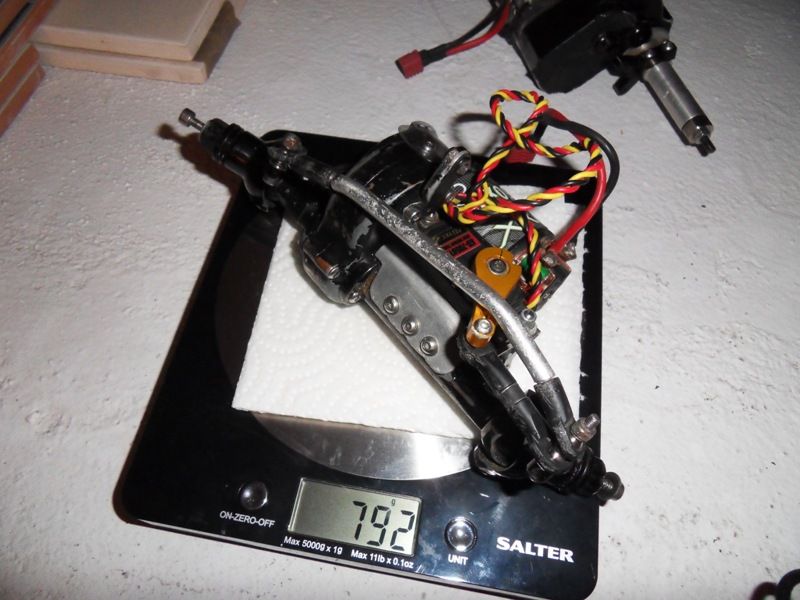 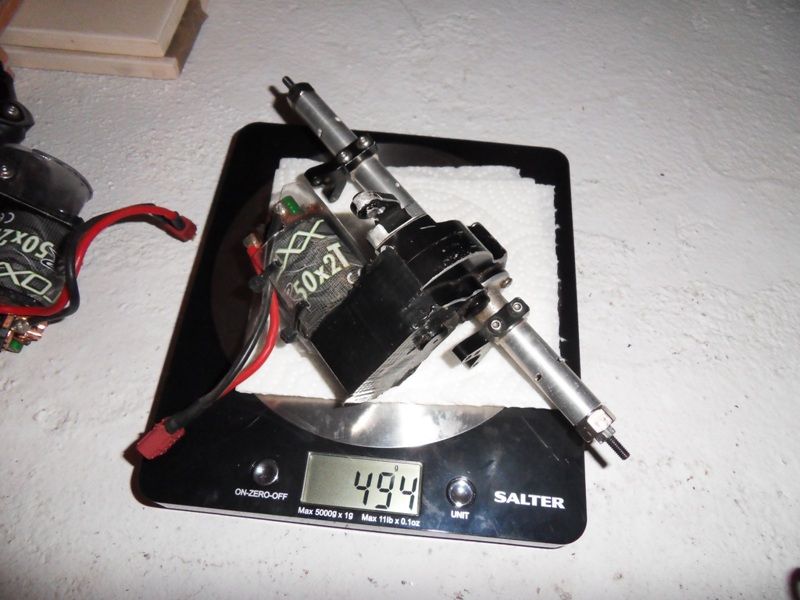 Yesterday and today I was eyeballing the links. Everything will still provisional but I have no bind and the upper links are straight, something that I wanted (more on that later) 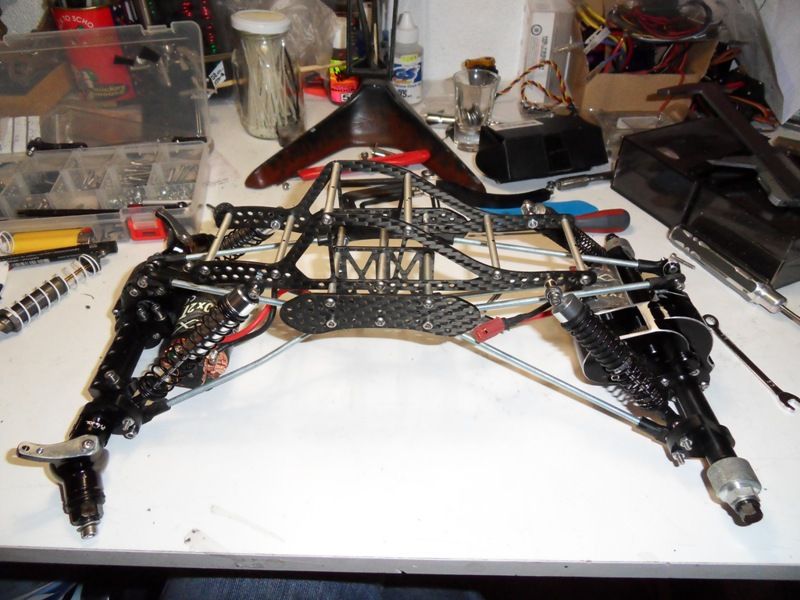 I had to molest D-Lux servo mount... 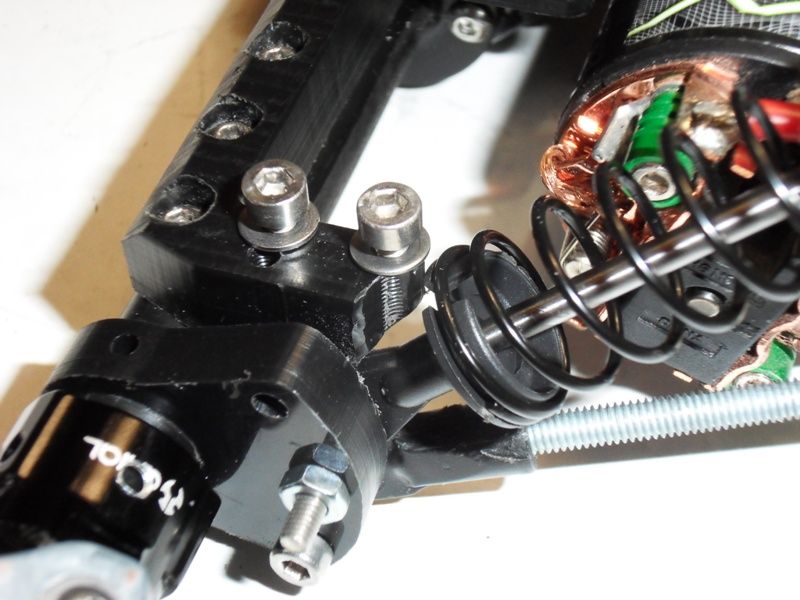 And I just had to put some wheels on, just to have a look at the stance!  Just for future reference... 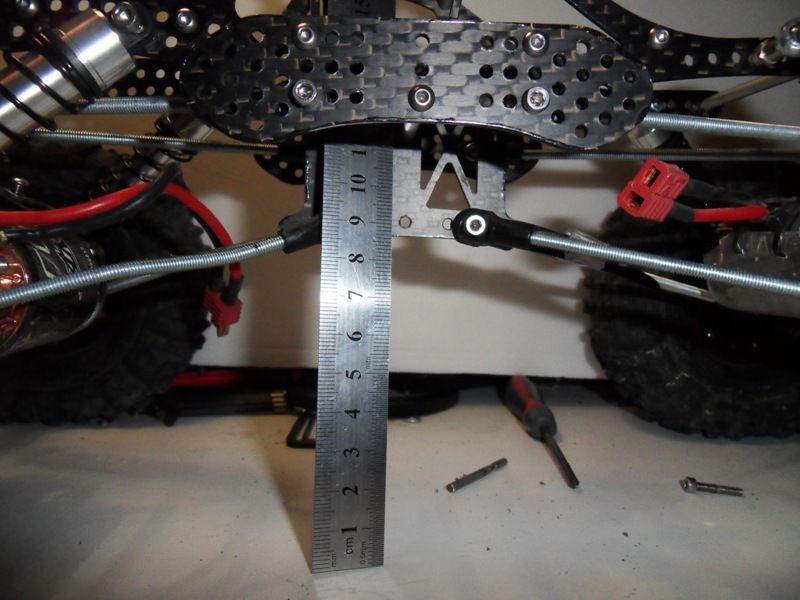 That's it for now... The car is now tooooo wide in the front. I have to buy some new wheels for sure! I know what I need and what I want, the problem is the cost, especially for the shipping Around +300$ for wheels alone is heavy on the wallet... |
|
| |
|
01-24-2013, 08:59 AM
| #6 |
| RCC Addict Join Date: Jun 2007 Location: Indian Village Pontiac
Posts: 1,910
|
Very interesting build.. Subscribed , its nice to see the bully's get some love.
|
|
| |
|
01-24-2013, 09:18 AM
| #7 |
| Rock Crawler  Join Date: Dec 2005 Location: Connellsville PA."fayettenam" lol
Posts: 739
|
Looks good man!
|
|
| |
|
01-25-2013, 05:43 AM
| #8 |
| RCC Addict Join Date: Mar 2011 Location: Way out there!
Posts: 1,465
|
Here is an idea for the skid plate. I used some thicker lexan and a bent some tabs 90 degrees and attached it to the sides. Works great.
|
|
| |
|
01-25-2013, 09:13 AM
| #9 |
| Rock Crawler Join Date: Jan 2011 Location: Portugal
Posts: 638
|
Thanks for the tip Josh. The skid is on the to do list, after the definitive links are done I already have a 1mm lexan sheet waiting to be cut and the mounting tabs done. How's your new CF chassis working for you? |
|
| |
|
01-25-2013, 11:57 AM
| #10 |
| RCC Addict Join Date: Mar 2011 Location: Way out there!
Posts: 1,465
|
It is working great. Light weight and tough as nails. Don't forget to sand off the edges and seal it with CA glue to keep it from delaminating.
|
|
| |
|
01-26-2013, 07:00 PM
| #11 |
| Newbie Join Date: Jan 2013 Location: bloomingtion
Posts: 9
|
the bully looks good
|
|
| |
|
01-30-2013, 04:08 AM
| #12 |
| Rock Crawler Join Date: Jan 2011 Location: Portugal
Posts: 638
|
I was in a battle to make up the links. The bottom links are 4mm stainless steal, I hope the will be up for the job. I was struggling to do the treads on them, they would stay steel!!! I can't imagine the titanium ones.... The upper links are aluminum. I don't know how long they will last but because they are straight tey might have a chance. We'll see.... 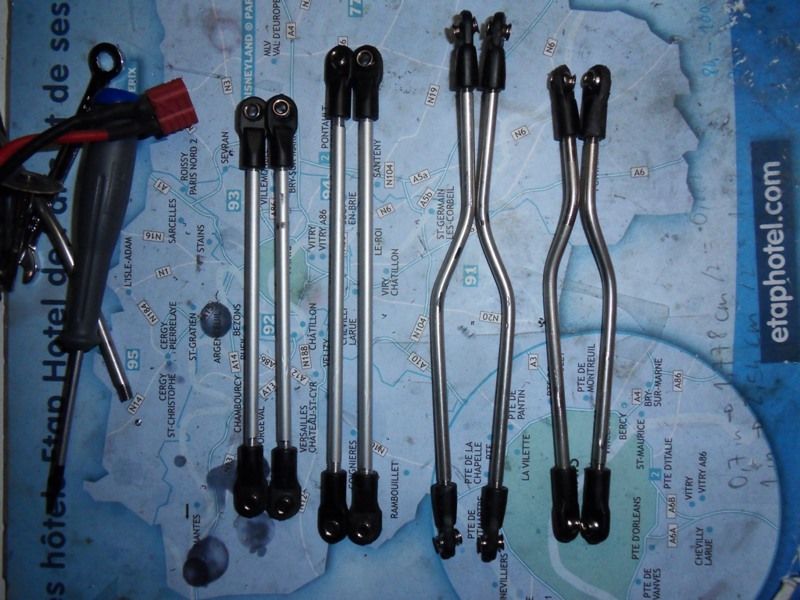 I also made some adjustments to my "things" mount. 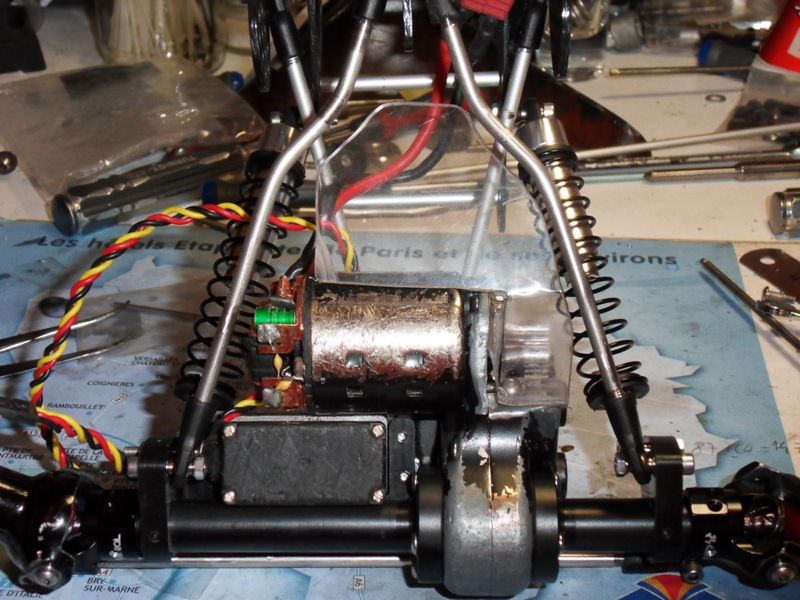 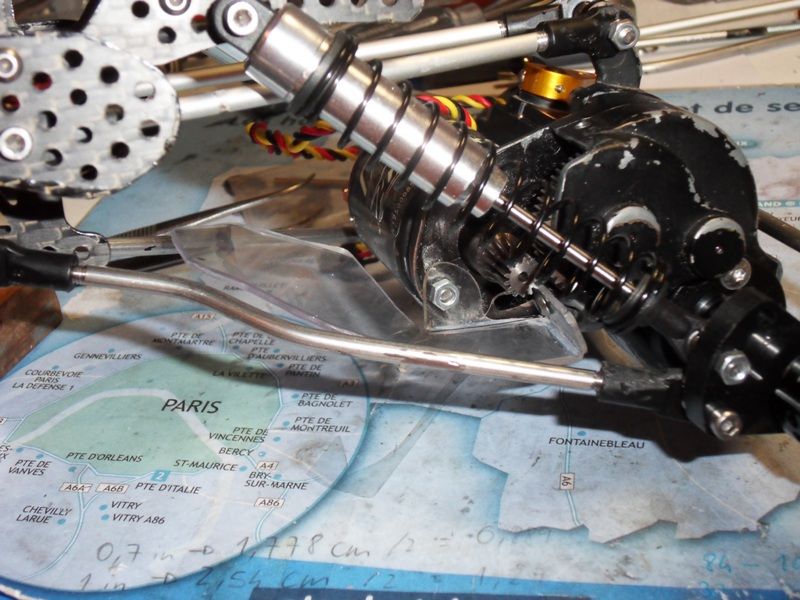 In the end the links were a bit on the long side and that increase my wheel base. But since I can adjust the wheel base on the chassis mount everything is now under the rules! It's nice to be able to adjust the wheel base in a very simple way. For now they will remain like this. 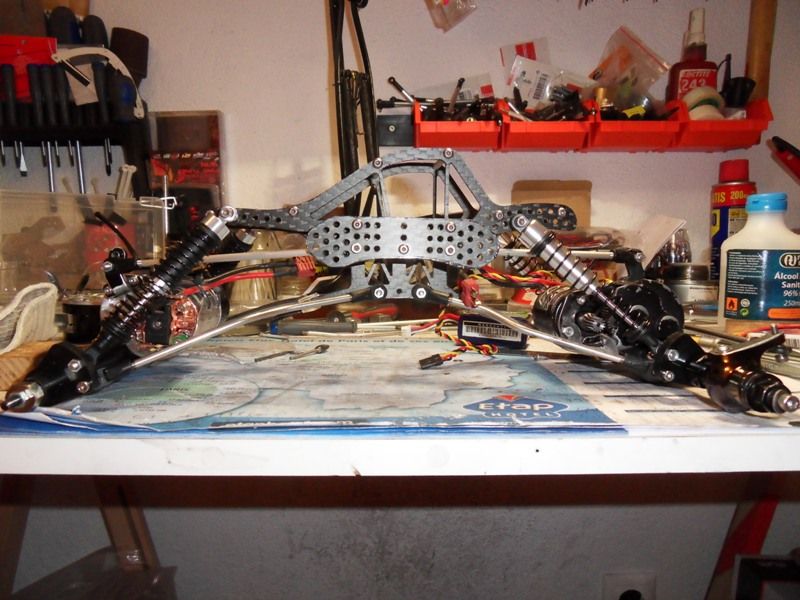 Now I'm missing some stuff to continue with the work but I'm happy with the way it's coming along. |
|
| |
|
03-25-2013, 03:08 PM
| #13 |
| Rock Crawler Join Date: Jan 2011 Location: Portugal
Posts: 638
|
Today it was time to mount the wheels 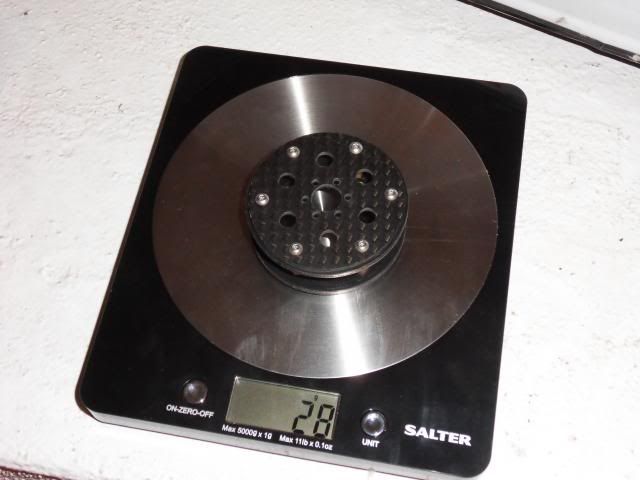 Beadlock made out of CF and plastic and, so far, with stainless hardware. So far they are 0.7'' wide. I'm still missing the VP hubs. Comparing with my old wheels: 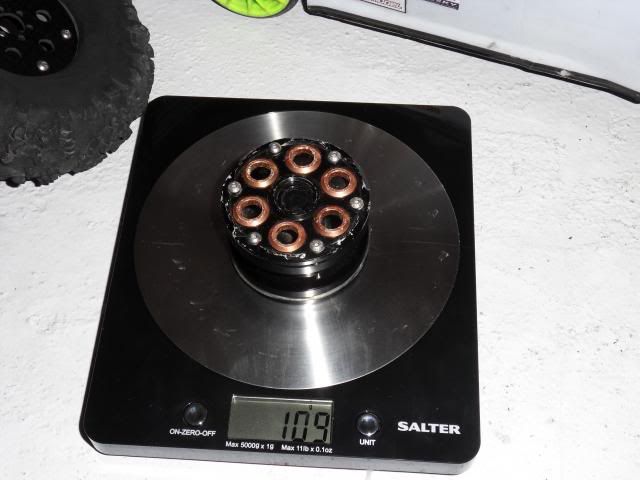 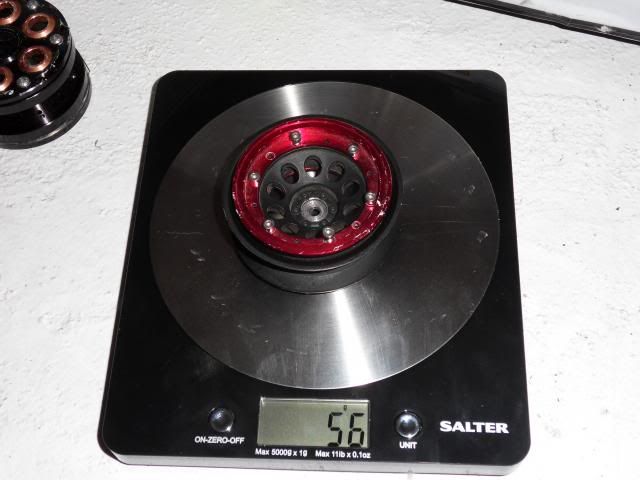 Initially I was not going to shave my rear tires but after this: 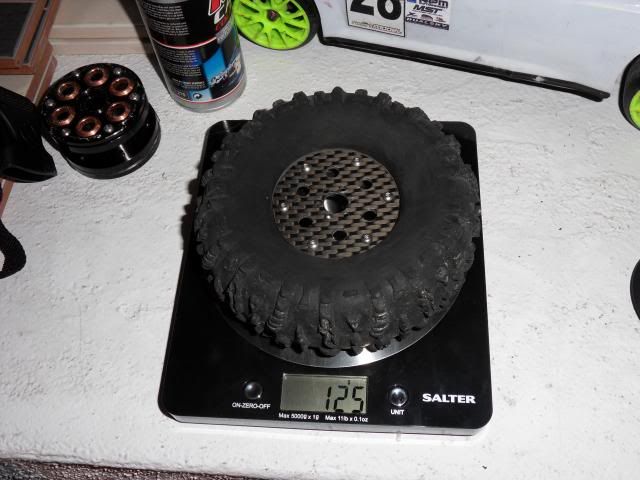 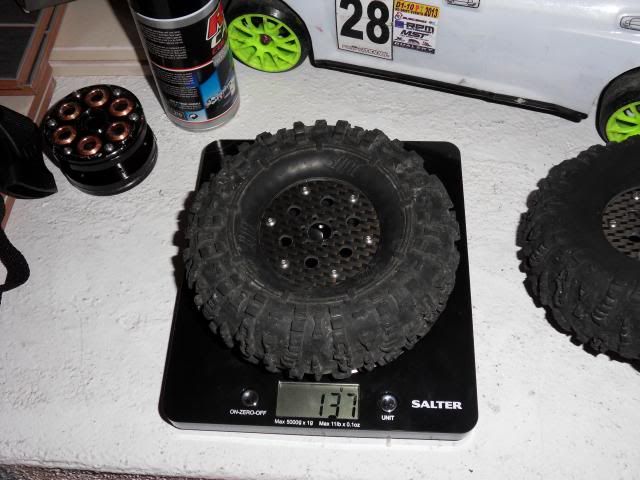 I think I have work for tomorrow! The weight difference is considerable! |
|
| |
|
03-25-2013, 05:34 PM
| #14 |
| RCC Addict Join Date: Mar 2011 Location: Way out there!
Posts: 1,465
|
Good find on the steering difference between the 2.2 and the super axles. I should have noticed when I used them. I noticed a difference and never thought much of it. Seeing the two side by side I see I have been missing a lot of steering. Good work and good thread. I am especially fond of your single vertical plate chassis. I got the idea from flying profile airplanes.
|
|
| |
|
04-04-2013, 08:24 PM
| #15 |
| Rock Crawler Join Date: Jan 2011 Location: Portugal
Posts: 638
|
So, I was going to put my Vanquish hubs on the wheels and finally mount them up. After one month of waiting I can say I was really looking forward to do this!! Hub on the wheel, M3 screw on the screwdriver and.... Oh shit... The hubs are threaded to some API threads!!!! The metric screws are a no go... Now in Portugal is not easy to buy API screws. Could I try to tap the hubs for an M3 screw? Would that work? If not, can anybody tell me the size of the screws for the VP hubs? For a company that sells world wide I think it's not very smart to use that kind of threads because in most of the places they are really hard to find. Hobby shops here don't stock anything that's in inches... |
|
| |
|
04-04-2013, 09:21 PM
| #16 | |
| I wanna be Dave Join Date: Aug 2011 Location: Burque
Posts: 3,805
| Quote:
The screw size for vp hubs is 4-40. Fasteners express is the site I use to get all of my hardware, but I mostly purchase aluminum. They do have steel screws as well so it's worth a look. | |
|
| |
|
04-29-2013, 01:16 PM
| #17 |
| Rock Crawler Join Date: Jan 2011 Location: Portugal
Posts: 638
|
Today I had a full day dedicated to the car! Ohh how I messed day's like these!!! This was how it was. (I bought some 4/40 screws for the hubs)   After the photo shoot, time for work! I was still having problems with the bearing on the knuckles (now I was tying without flange). Everything was still getting hard to move when I tighten the king pin screws! So I made some aluminum washers to serve as spacers. After a lot of trial and error, everything e smooth now.  My jig to move the bearing out as they are very tight.  After lunch the plan was simple! To do a battery mount! Simple right?! Sure! It took me +4h... I was half way when I remembered the photos...  Mount it, test it, take it out, change, mount again. (.....) Repeat!  Final product with some paint. I'm happy with it, but testing will make it or brake it.   With an 800mah gens ace  When I was at work I remembered where I took take some weight out of the back without the extreme cut that I made on the front. The Before:  Can you see all that FAT?! I sure can!!  Half way.  Be protected  FAT no more!!!  Yes, only 6g. But 6g on the back axle are always better than 0g! And now I remembered that I could take some more since I'm not using that screw....  And what do we have here?!  Bling Bling!! (45T)  Axles ready!  Lets see if I can do something tomorrow. |
|
| |
|
05-03-2013, 04:53 AM
| #18 |
| Newbie Join Date: Apr 2013 Location: Sydney
Posts: 28
|
Nice rig
|
|
| |
|
05-03-2013, 10:21 AM
| #19 |
| Rock Crawler Join Date: Jan 2011 Location: Portugal
Posts: 638
|
Thanks! Some more progress. Side skins  The rest of the skins and under body.  Chassis definitely assembled.  New rod ends.  A bit more.  I'm still not happy with the shocks that I'm using in the back... Some "El Cheapo" shocks. I'll have to work a bit more on that.  Bead lock screws for one wheel. Stainless  Aluminum  It's a roller (again    Now I have to redo my electronics. I was using a FXR Pro and FXR. Now I take out the Pro and do 2 FXR Still I had to try and get some weight! With the "old" electronics and a nanotech 850  With a Gens Ace 450  Not bad for a Bully! For what I saw weight bias should be around 60/40 and that sound very good without any added weight. We'll see ;) |
|
| |
|
05-04-2013, 04:23 PM
| #20 |
| Newbie Join Date: Apr 2013 Location: Sydney
Posts: 28
|
Looks great.
|
|
| |
 |
 xkill's 2013 build - Similar Threads
 | ||||
| Thread | Thread Starter | Forum | Replies | Last Post |
| Josh's 2013 sporty build | Joshie | Axial AX-10 Scorpion | 23 | 07-07-2013 04:23 AM |
| Superduty's 2013 sa3.5 build | superduty03 | EnRoute Berg | 26 | 02-17-2013 10:44 AM |
| catpwreds Hallstyle 2013 build | catpwred | EnRoute Berg | 26 | 01-02-2013 10:20 PM |
| |


 Linear Mode


