| |
 07-10-2008, 12:26 PM
| #21 | |
| I wanna be Dave Join Date: Aug 2007 Location: santa monica
Posts: 3,687
| Quote:
For the grille I was going to dremel the center between the lights smooth then build it back up with styrene. | |

|  |
| Sponsored Links | |
| | |
|
07-10-2008, 12:34 PM
| #22 | ||
| Sinking with the ship   Join Date: Mar 2005 Location: El Capitan...sole survivor and sinking fast
Posts: 8,864
| Quote:
Quote:
 | ||
|
| |
|
07-10-2008, 12:38 PM
| #23 | |
| RCC Addict Join Date: Dec 2007 Location: London
Posts: 1,950
| Quote:
Cheers matey some nice Front on Grill shots would be good if you have any. | |
|
| |
|
07-10-2008, 12:58 PM
| #24 | |
| Sinking with the ship Join Date: Mar 2005 Location: El Capitan...sole survivor and sinking fast
Posts: 8,864
| Quote:
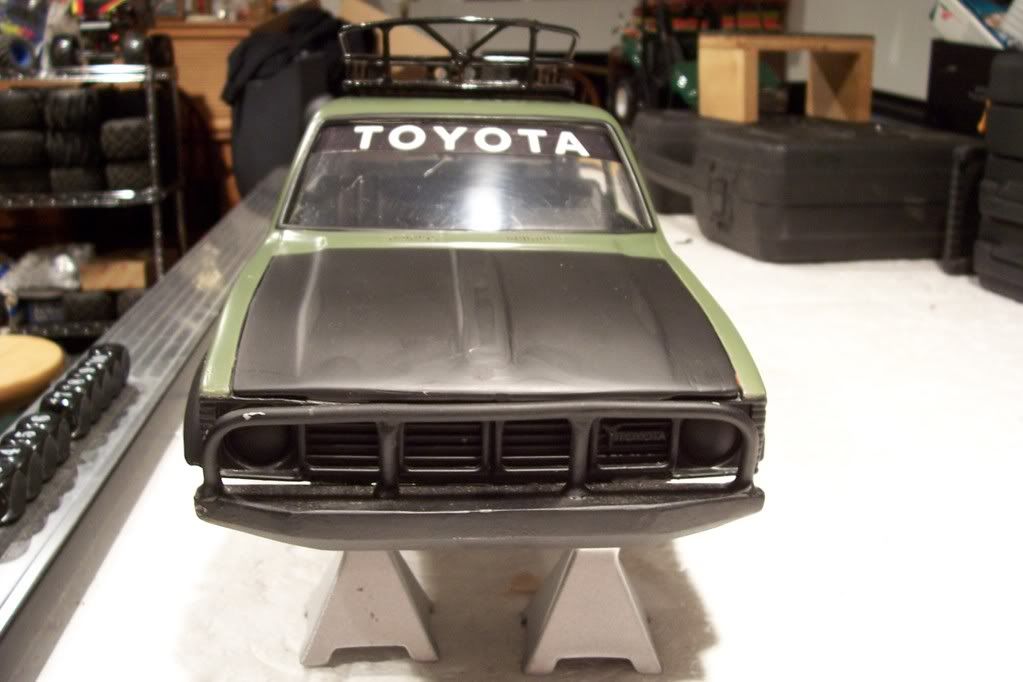 Album here: http://smg.photobucket.com/albums/v7...0pj%204runner/ | |
|
| |
|
07-10-2008, 02:31 PM
| #25 |
| RCC Addict Join Date: Dec 2007 Location: London
Posts: 1,950
|
First Pass Fiberglass and metal strengthening mesh  Rough Shape and Sand.  Second Pass P45 Filler    I'm Gonna be here Forever! As you can tell i'm, not the best with the old sticky stuff i end up sanding more off than i put on in the first place. Ho Hum gonna need some more Sandpaper! |
|
| |
|
07-10-2008, 04:33 PM
| #26 |
| I wanna be Dave Join Date: Aug 2007 Location: santa monica
Posts: 3,687
|
really nice so far!
|
|
| |
|
07-10-2008, 05:11 PM
| #27 | |
| Newbie Join Date: Jul 2008 Location: uk
Posts: 1
| Quote:
keep the pics coming its taking shape, newbie to the site CAD Last edited by CAD; 07-10-2008 at 05:14 PM. Reason: added | |
|
| |
|
07-10-2008, 06:29 PM
| #28 |
| Pebble Pounder Join Date: Oct 2006 Location: Ogden, Utah
Posts: 194
|
thats badass
|
|
| |
|
07-10-2008, 06:50 PM
| #29 |
| Quarry Creeper Join Date: Aug 2007 Location: Amarillo, TX
Posts: 486
|
Looks very good so far..!
|
|
| |
|
07-11-2008, 12:33 AM
| #30 | |
| RCC Addict Join Date: Dec 2007 Location: London
Posts: 1,950
| Quote:
Alright Cad fancy seeing you here>? Will keep the pics coming for sure and thanks for popping over here | |
|
| |
|
07-11-2008, 12:34 AM
| #31 | ||
| RCC Addict Join Date: Dec 2007 Location: London
Posts: 1,950
| Quote:
Cheers Matey Quote:
Fingers crossed more to come very soon i've been sanding all night | ||
|
| |
|
07-11-2008, 12:50 AM
| #32 |
| Quarry Creeper  Join Date: Mar 2006 Location: Gresham
Posts: 382
|
Very nice start, I'm going to be watching this build!. Good luck |
|
| |
|
07-11-2008, 12:52 AM
| #33 | |
| RCC Addict Join Date: Dec 2007 Location: London
Posts: 1,950
| Quote:
I'll need more than luck | |
|
| |
|
07-11-2008, 03:28 AM
| #34 |
| RCC Addict Join Date: Dec 2007 Location: London
Posts: 1,950
|
Here's some shots of the interior that i started before attacking the body. Just found them on my camera and thought i'd post em up. You can never have to many photo's Am trying to get everything in there that you would have in a real truck. The Figure is Marv From Sin City he was in my old ride and he fitted perfect so i figured i'd use him again. Gear Stick boots are cut down Tamiya Frog Driveshaft covers everything else is scratch built from styrene.      Did some more sanding last night, more to do and some more filler but it's getting there. The filler dust gets everywhere!  Last edited by Dready; 07-11-2008 at 03:34 AM. |
|
| |
|
07-11-2008, 04:33 AM
| #35 |
| RCC Addict Join Date: Oct 2007 Location: Long Island-Land of one batch of rocks in Sag Harbor and at least one fellow crawler
Posts: 1,371
|
This is really coming along very nicely Marv looks like he can not wait until he can get inside and drive it!Great work with the custom interior and the 4runner rear came out great! Cant wait to see it finished! |
|
| |
|
07-12-2008, 04:09 AM
| #36 |
| RCC Addict Join Date: Dec 2007 Location: London
Posts: 1,950
|
Made Some more progress onMy 4runner project Bonnet Mounting Hole filled 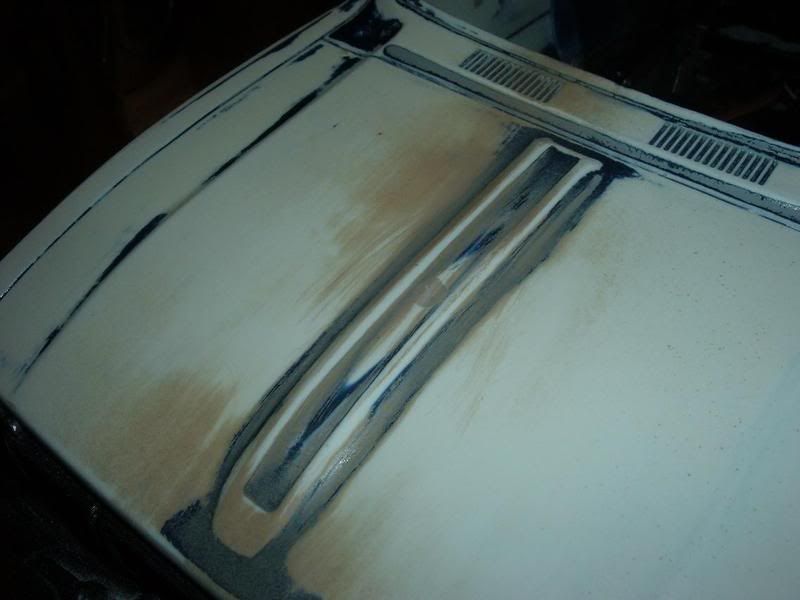 More Sanding and still more filling to go but i'm getting there. 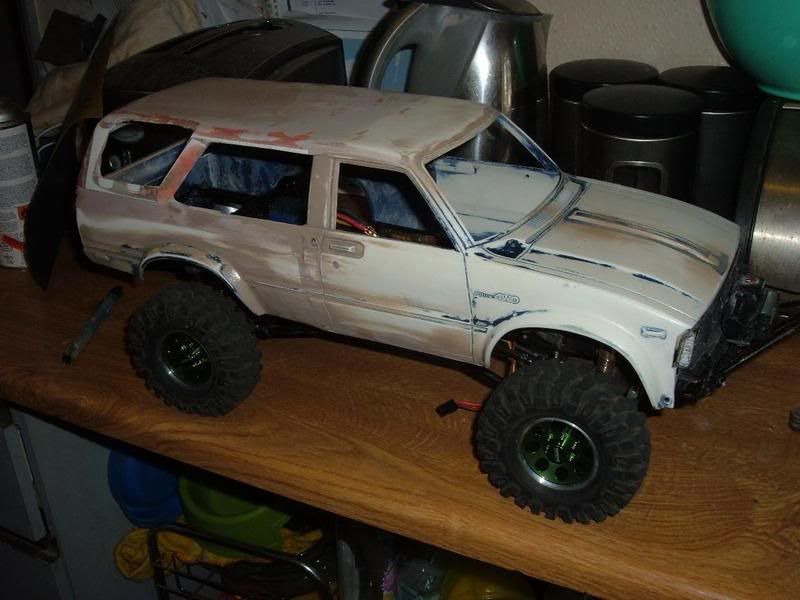 Still got to change the rear window apperture. 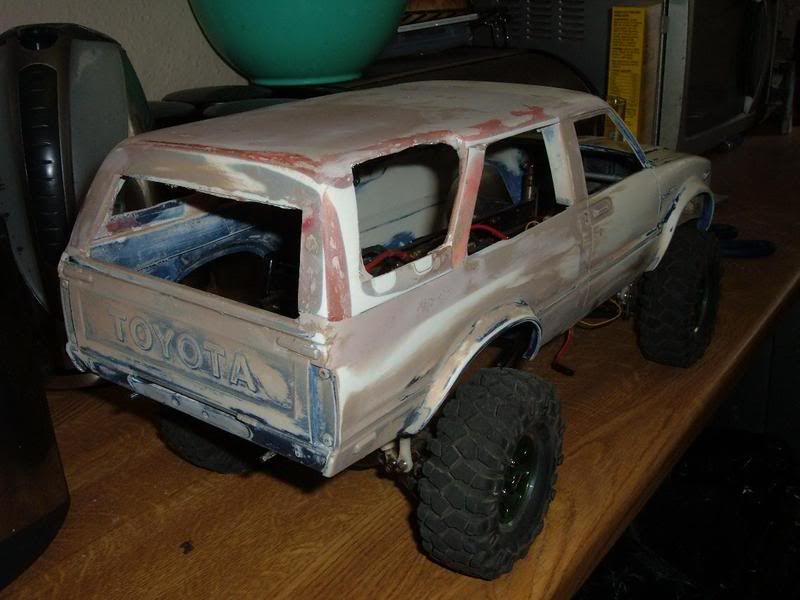 Getting There! Slowly 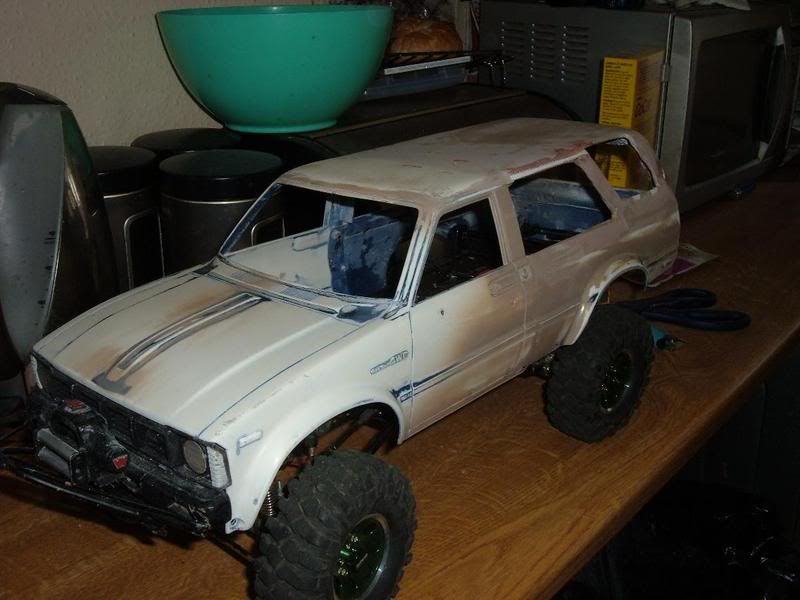 Door holes and re gapped the panel 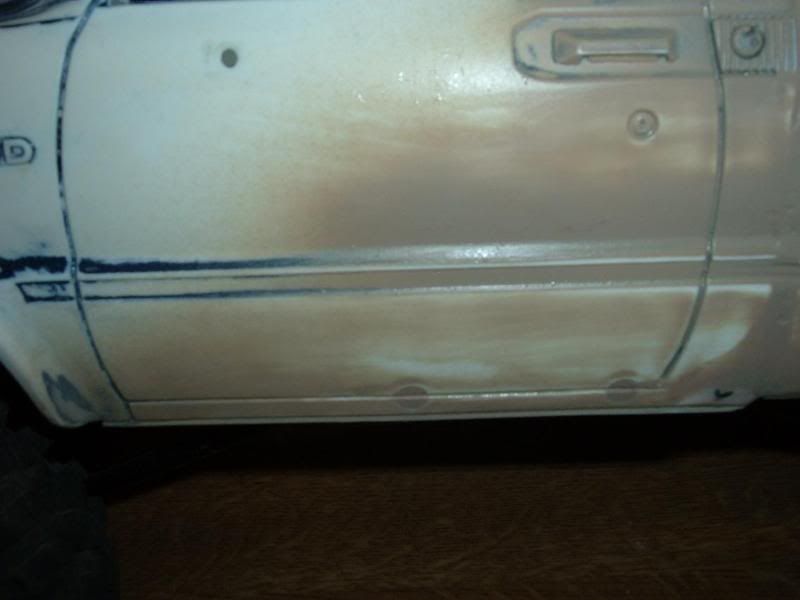 Got these off a buddy does anyone know an easy way to remove the anodizing? That doesn't envolve polishing for three years afterwards? Otherwise there getting painted instead 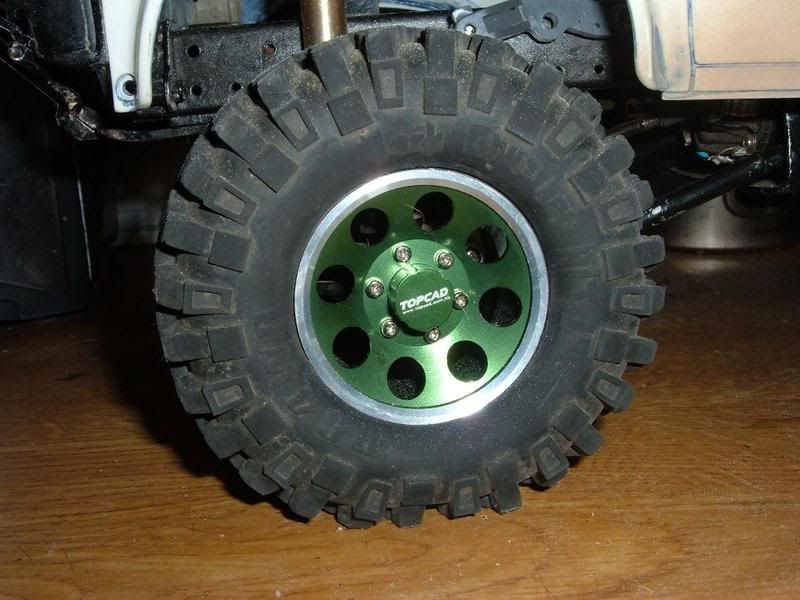 Chucked some paint at it tp see where i'm out and where needs work. Surprisingly the roof is looking pretty good. Still some work to do but i'm on the case. 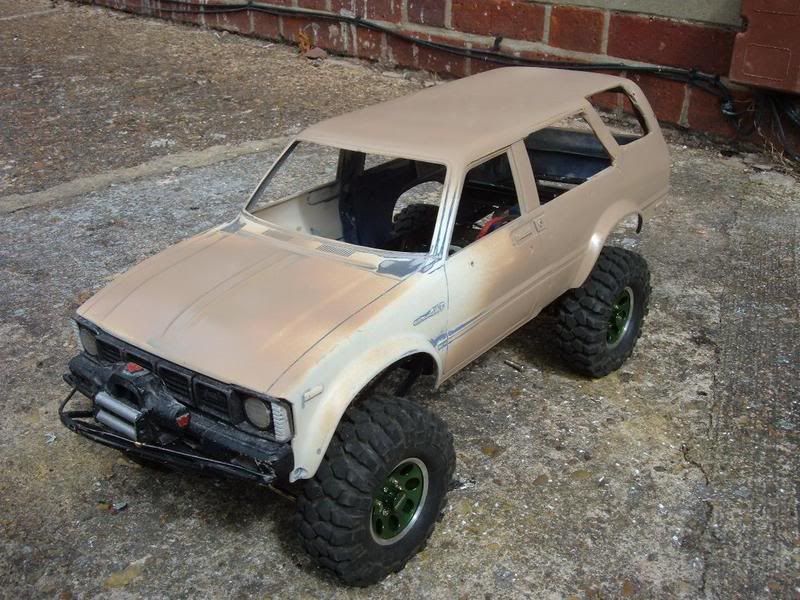 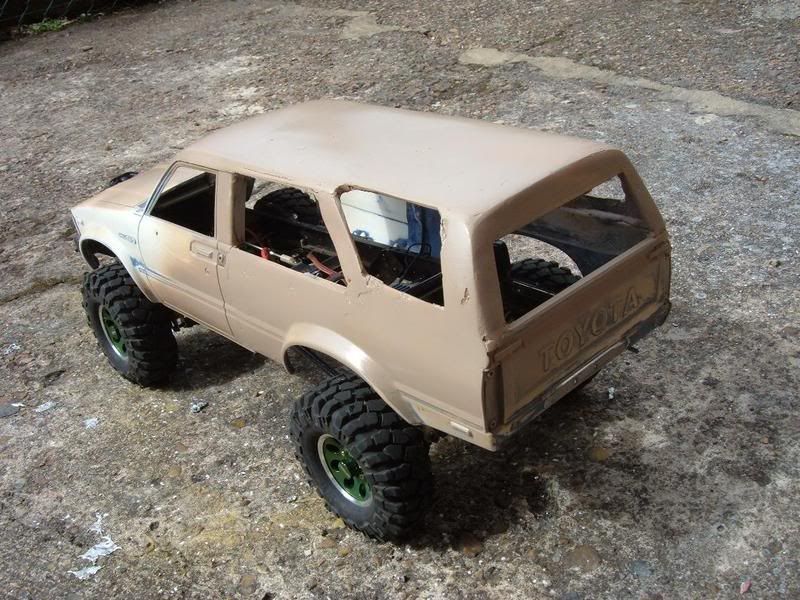  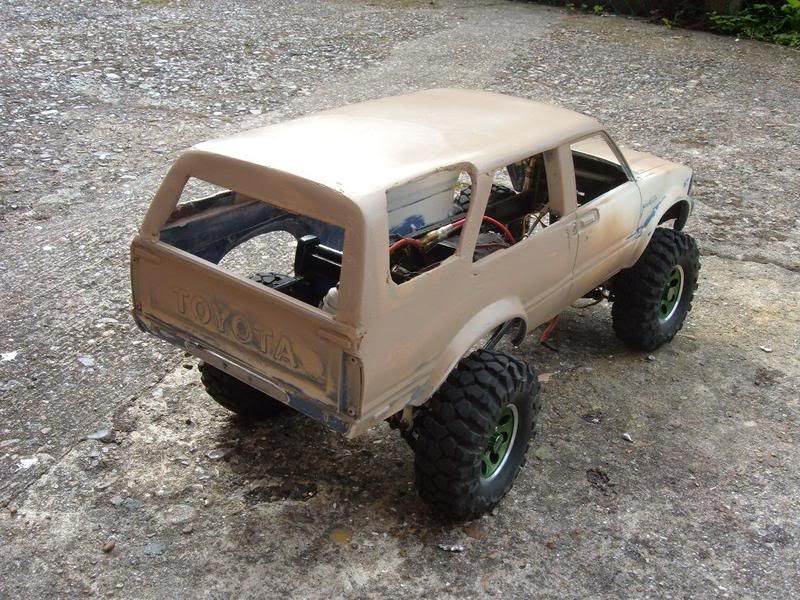 More to come very soon. Comments welcome as usual Neil |
|
| |
|
07-12-2008, 06:50 AM
| #37 |
| Rock Crawler Join Date: Aug 2007 Location: usa
Posts: 593
|
when i removed the green anodizing off my axial links i used castrol superclean. worked great in a few hours of soaking. not sure if they sell that in the uk though |
|
| |
|
07-12-2008, 08:58 AM
| #38 |
| Sinking with the ship Join Date: Mar 2005 Location: El Capitan...sole survivor and sinking fast
Posts: 8,864
|
Coming along very nicely! I use a liquid plumber type stuff ( stuff you poor into the drain in the sink to get rid of clogs and crap) to strip anodizing off, it works pretty damn good. |
|
| |
|
07-12-2008, 09:06 AM
| #39 |
| RCC Addict Join Date: Dec 2007 Location: London
Posts: 1,950
|
I bottled stripping the wheels, Painted them Dark steel silver instead just got to detail them up. I didn't fancy polishing them after stripping. Thanks for the tips though always handy to know in the future. neil Last edited by Dready; 07-12-2008 at 09:08 AM. |
|
| |
|
07-12-2008, 09:09 AM
| #40 | |
| Sinking with the ship Join Date: Mar 2005 Location: El Capitan...sole survivor and sinking fast
Posts: 8,864
| Quote:
| |
|
| |
 |
| |


 Linear Mode


