| |
 11-12-2008, 07:34 AM
| #81 | |
| RCC Addict Join Date: Aug 2005 Location: Akron
Posts: 1,784
| Quote:
| |

|  |
| Sponsored Links | |
| | |
|
11-24-2008, 08:06 AM
| #82 |
| RCC Addict Join Date: Aug 2005 Location: Akron
Posts: 1,784
|
I haven't had much time to work on this, was hoping to have it done enough for the comp this past weekend but didn't even have time to make it there. Did get a chance to start on the rear window last night. I got some 1/8" x 1/8" square styrene from the hobby shop and cut one edge off (not fun) to turn it into a channel. Then used that for the trim/framing of the window. I have some "I" beam styrene I got that I want to use for vertical trim because I plan on trying to make a sliding window. 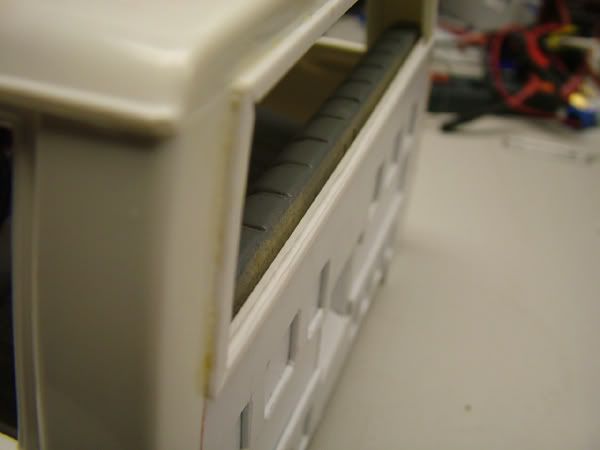 |
|
| |
|
11-28-2008, 06:57 AM
| #83 |
| RCC Addict Join Date: Aug 2005 Location: Akron
Posts: 1,784
|
Was wanting some 1.9 beadlocks but wanted a nice offset so I had a local guy (Bartos Chassis) machine a set for me. Looks good with the scale wheel nuts. Now I just need new tires! (come on pro-line) 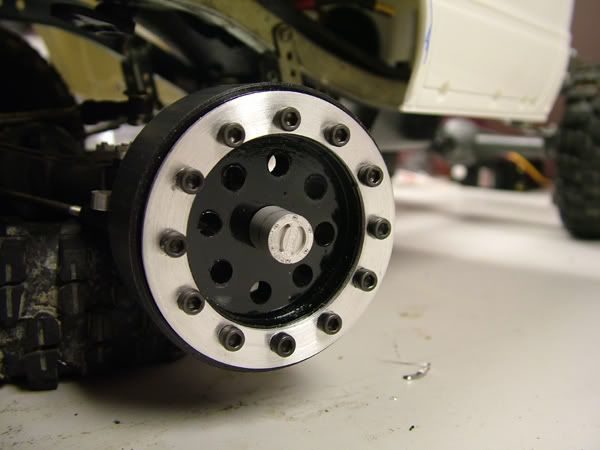 It's a CLOSE fit! Going to have to go button heads on the back for sure and might have to go with a different ring on the back too. Going to be nice and narrow though. 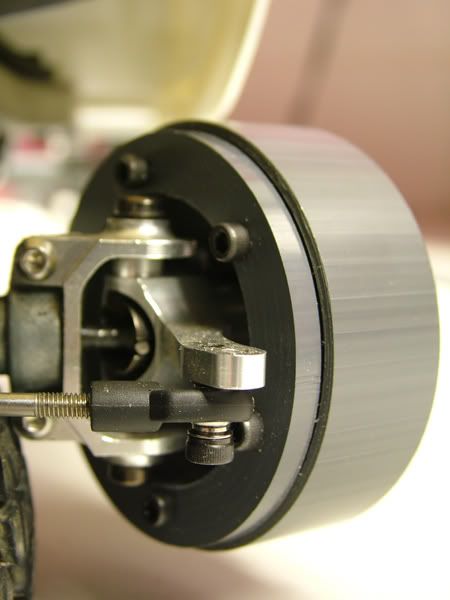 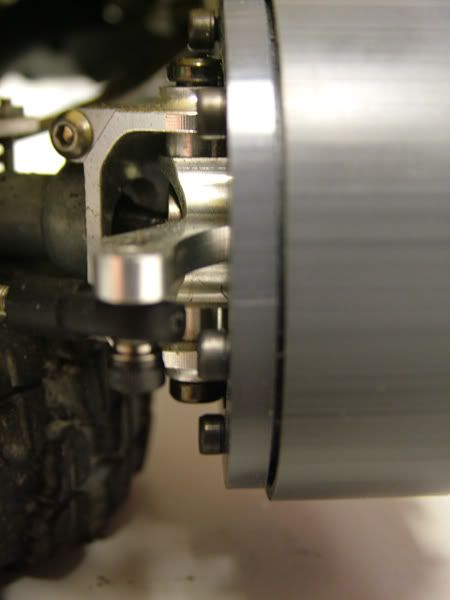 |
|
| |
|
11-28-2008, 11:24 AM
| #84 |
| RCC Addict Join Date: May 2006 Location: Roseville
Posts: 1,469
|
Looking good Nick! How's the family?
|
|
| |
|
11-28-2008, 11:27 AM
| #85 |
| RCC Addict Join Date: Aug 2005 Location: Akron
Posts: 1,784
|
Doing good, keeping BUSY! Holidays have us running around like crazy people. Yourself?
|
|
| |
|
11-28-2008, 12:31 PM
| #86 |
| RCC Addict  Join Date: Mar 2007 Location: Penngrove
Posts: 1,809
|
love the last shot in post #83...lots of machined awesomness great build  |
|
| |
|
12-01-2008, 08:35 PM
| #87 |
| RCC Addict Join Date: Aug 2005 Location: Akron
Posts: 1,784
|
Figured I better just jump in and start on the body work. Hoping to have this thing painted for saturday. At least primer Still a looooooooot of work to do..... 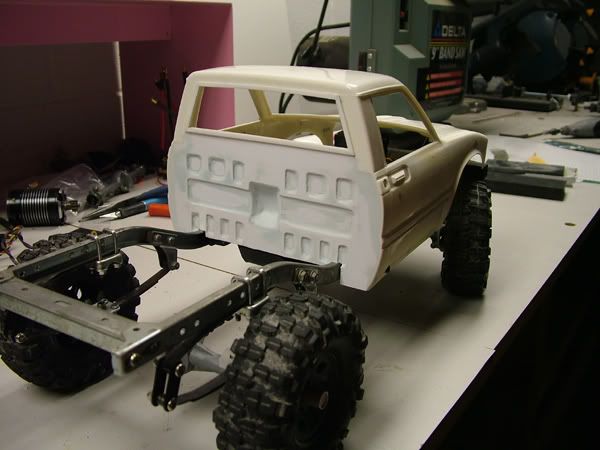 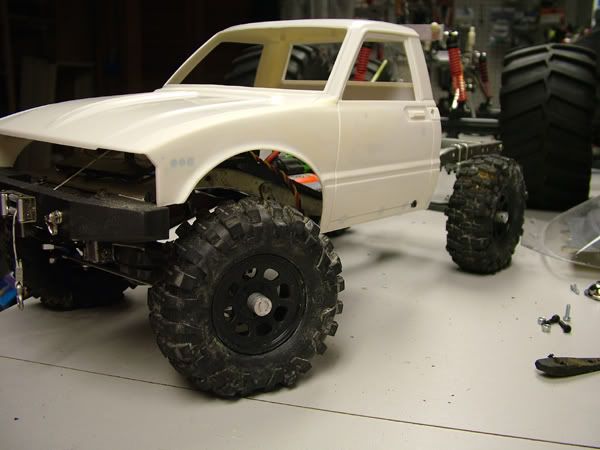 Floor board will give me some much needed room for electronics. 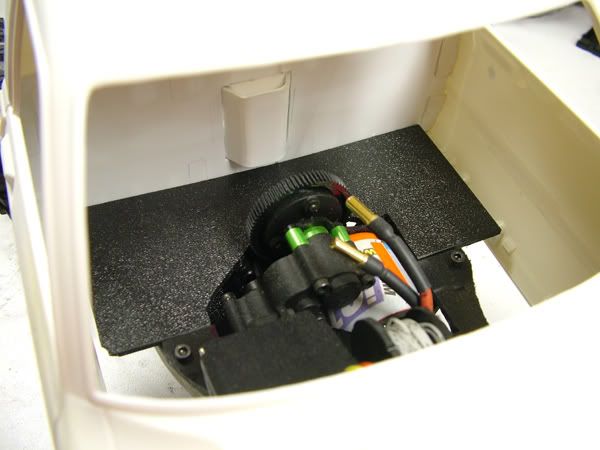 |
|
| |
|
12-08-2008, 09:32 PM
| #88 |
| RCC Addict Join Date: Aug 2005 Location: Akron
Posts: 1,784
|
Nothing to new. Figured I'd post a pic of how the body is coming along. I put it together to run over the weekend but never got a chance to run it. Getting tired of body work and going to start on the bed. 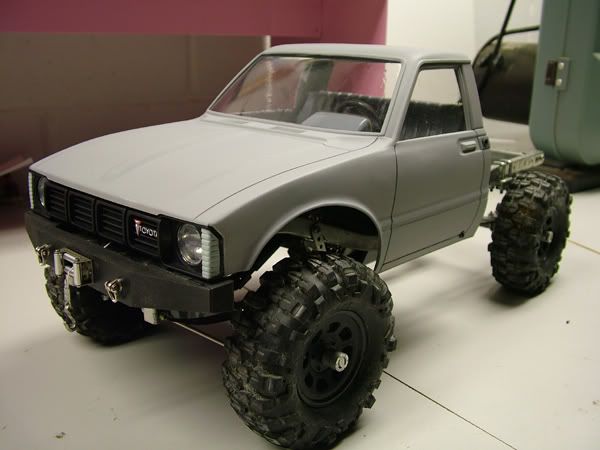 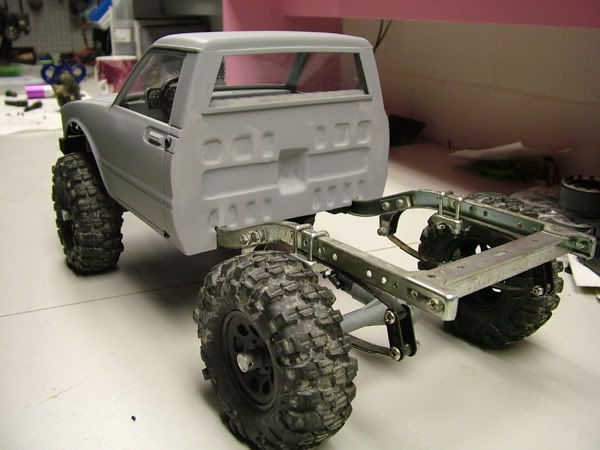 |
|
| |
|
12-08-2008, 10:30 PM
| #89 |
| Quarry Creeper Join Date: Mar 2004 Location: n.e. ohio
Posts: 433
|
N.O.S.T.R. bruiser buildoff!!! Wait till you see my next update... |
|
| |
|
12-08-2008, 10:39 PM
| #90 |
| Oppan Gangnam Style   Join Date: Jun 2005 Location: Shingle Springs
Posts: 5,164
|
Looking good Nick! Back cab looks nice. Can't wait to make use of the axle C's I got from you. |
|
| |
|
12-08-2008, 11:02 PM
| #91 |
| I wanna be Dave Join Date: Dec 2005 Location: Orlando
Posts: 7,420
|
Clean build Nick.
|
|
| |
|
12-09-2008, 12:01 AM
| #92 |
| Pebble Pounder Join Date: Jul 2007 Location: SinCity
Posts: 126
|
at first i thought that bumper was made out of delrin.... nice work!
|
|
| |
|
12-17-2008, 08:07 PM
| #93 |
| RCC Addict Join Date: Aug 2005 Location: Akron
Posts: 1,784
|
Been slacking lately and hit the workshop hard tonight. Got a comp on sunday and want this thing closer to complete than it is. Reworked the front end and moved the fixed point of the leafs to middle of the chassis and brazed on some mounts. This moved the axle forward a tad which will help. Started the tube bed too. Not sure how far I'll go with it. I have some plans for the inside that I'll be working on at lunch time. I'll see how that works out before doing more tube work. These things are LIFE SAVERS 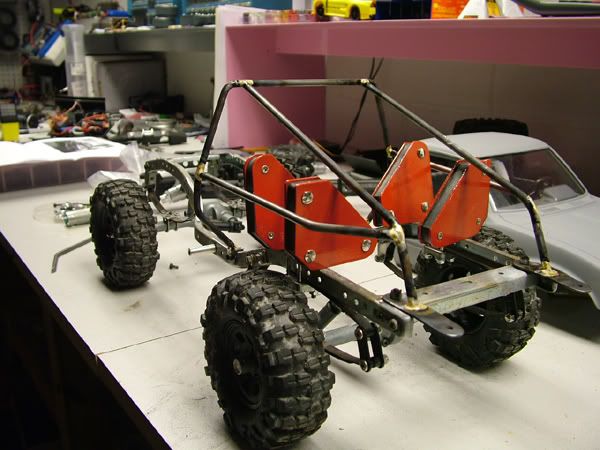 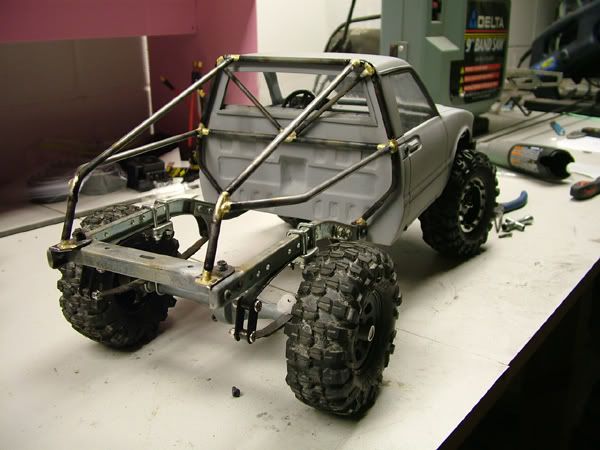 Crusher mocked up in the front to see how the flat irons will fit. I want a low stance. 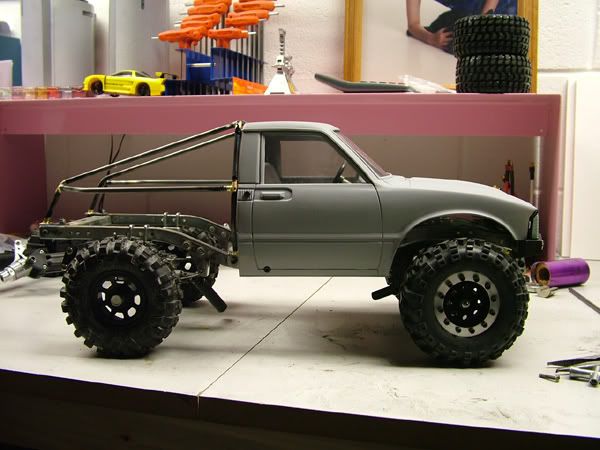 Shackles are now up front. Have a couple mounting locations for them since I'm not sure where I want the ride height yet. 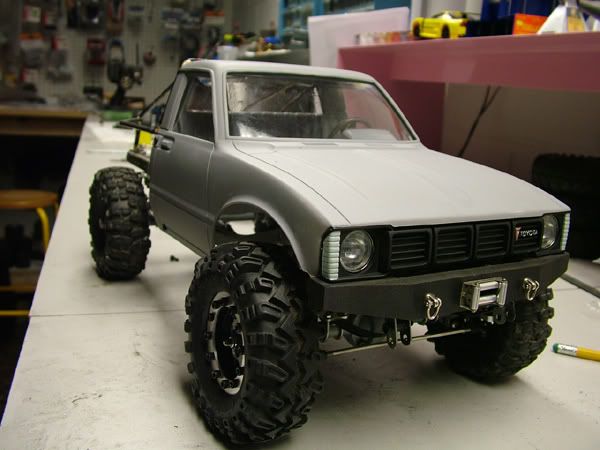 |
|
| |
|
12-17-2008, 08:19 PM
| #94 |
| Quarry Creeper Join Date: Jan 2007 Location: Cuyahoga Falls
Posts: 239
|
Looks good Nick! that bed really sets it off. Where did you get that fairlead?
|
|
| |
|
12-17-2008, 08:22 PM
| #95 |
| RCC Addict Join Date: Aug 2005 Location: Akron
Posts: 1,784
| |
|
| |
|
12-17-2008, 08:57 PM
| #96 |
| I wanna be Dave Join Date: Aug 2005 Location: NE Ohio
Posts: 8,817
|
loving it! I need to pick up some of those magnets... |
|
| |
|
12-18-2008, 06:37 AM
| #97 | |
| ~THE SCALE SHOP~ Join Date: Apr 2006 Location: KILLEEN TX
Posts: 10,056
| Quote:
| |
|
| |
|
12-18-2008, 06:38 AM
| #98 |
| RCC Addict Join Date: Aug 2005 Location: Akron
Posts: 1,784
|
I'm using the harbor freights ones. I just make sure not to put the flame on them |
|
| |
|
12-19-2008, 06:17 AM
| #99 |
| RCC Addict Join Date: Aug 2005 Location: Akron
Posts: 1,784
|
Got far enough to call it quits on the bed for sunday's comp. Still have a lot more detailing I want to do to the tube work and the bed but this will do for now. Dusted it with some flat black so it didn't look so bad. Tube work is a bit rough since I didn't do anything to it to clean it up. 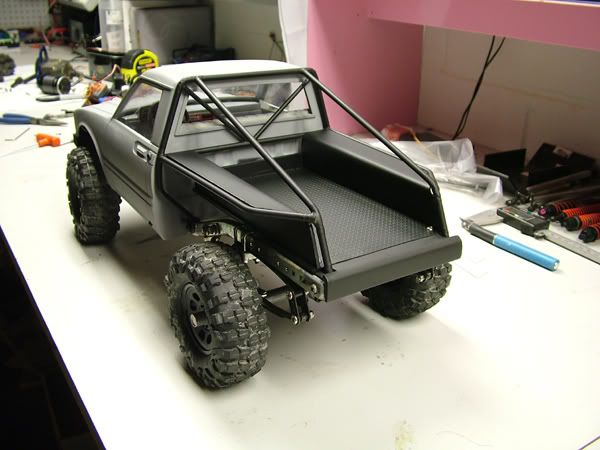  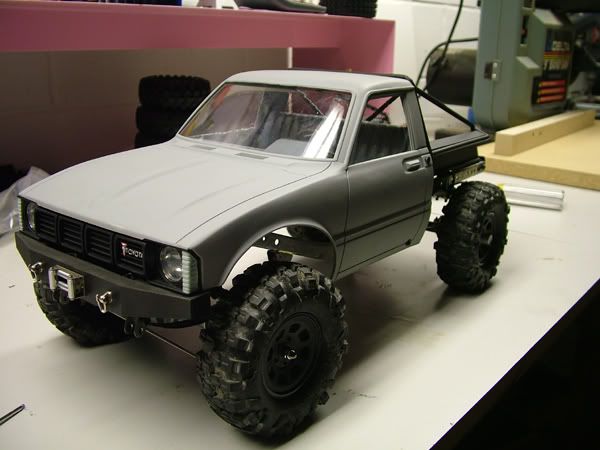  Got to have a battery in there somewhere 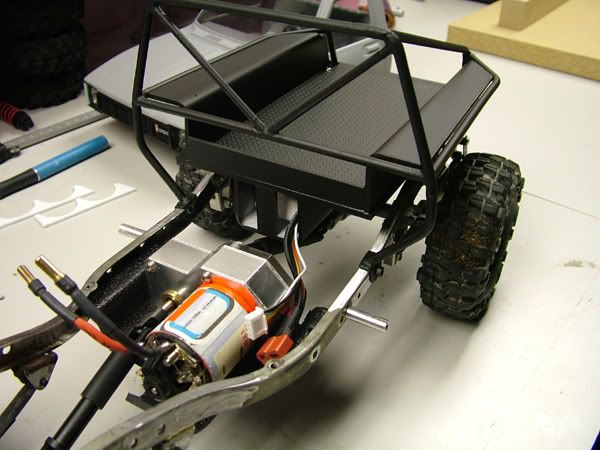 Pretty tight fit but it's down low. 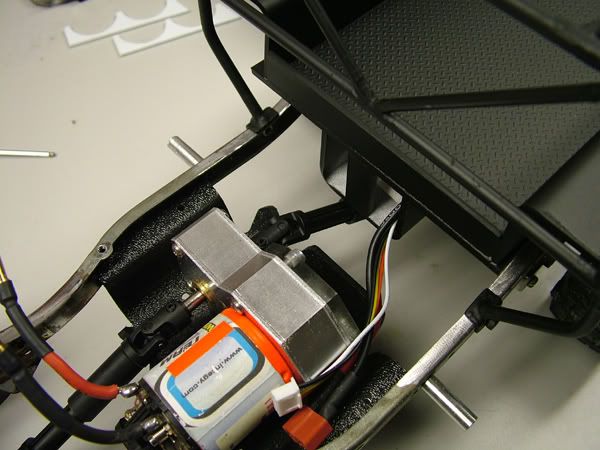 I still need to make a back panel to cover the battery that is removable. Was thinking about making a fuel tank look a like or something. A spare tire might work too. Ideas? 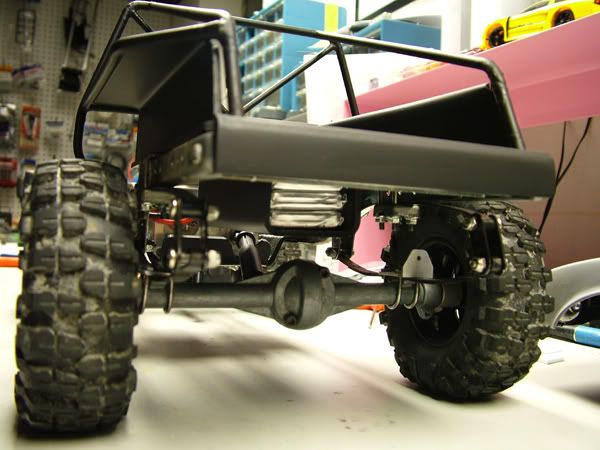 |
|
| |
|
12-19-2008, 06:37 AM
| #100 |
| I wanna be Dave Join Date: Aug 2005 Location: NE Ohio
Posts: 8,817
|
Nick, that is turning out awesome!
|
|
| |
 |
| |


 Linear Mode


