| |
 03-19-2013, 07:44 PM
| #41 |
| Pebble Pounder Join Date: Mar 2013 Location: Honolulu
Posts: 196
|
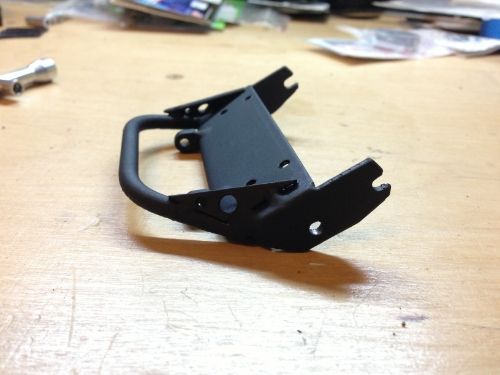
Went out for a crawl yesterday at Makapu'u. My goal was to make it to the top while tackling some harder sections and all without using the "hand of God". Starting point. 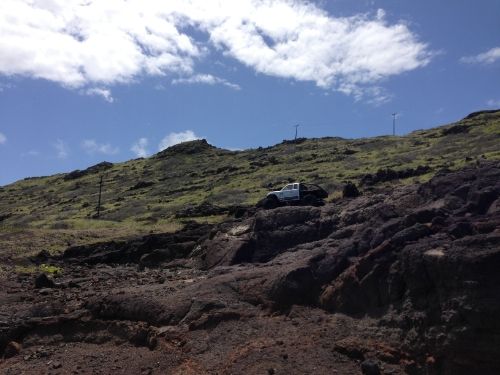 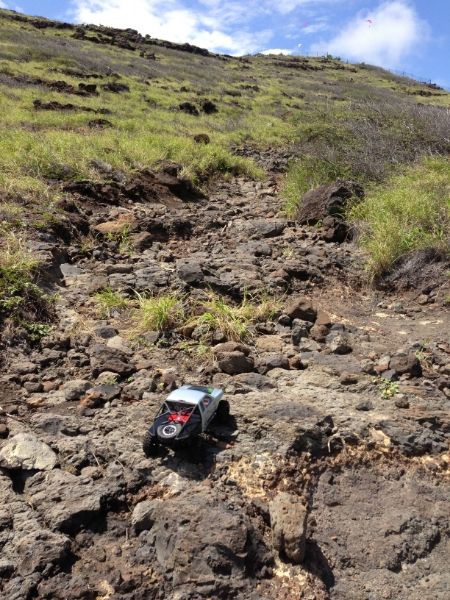 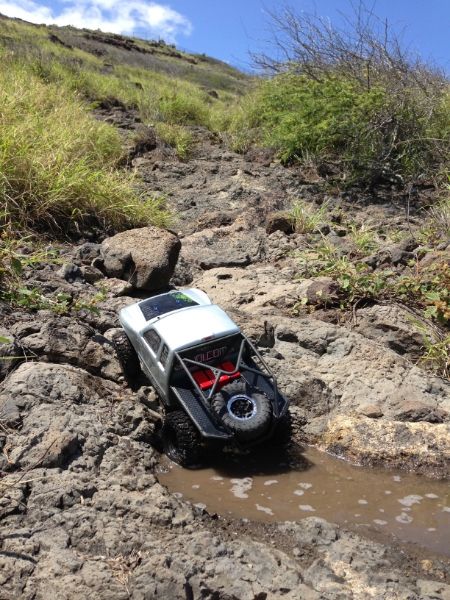 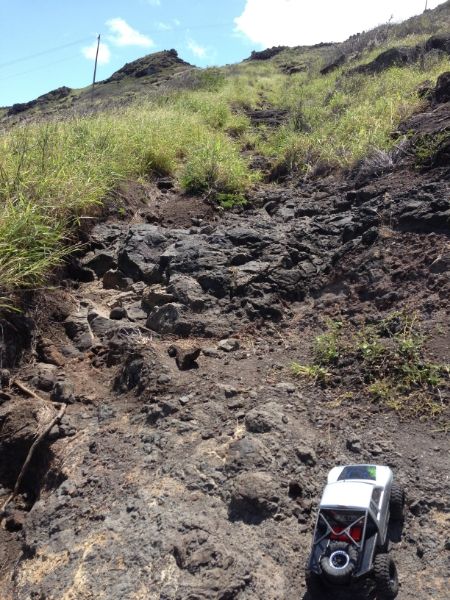 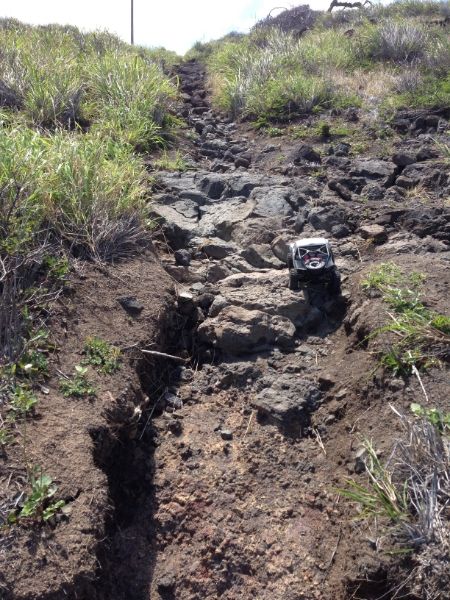 Made it about 3/4 way and then my Stock plastic knuckle broke 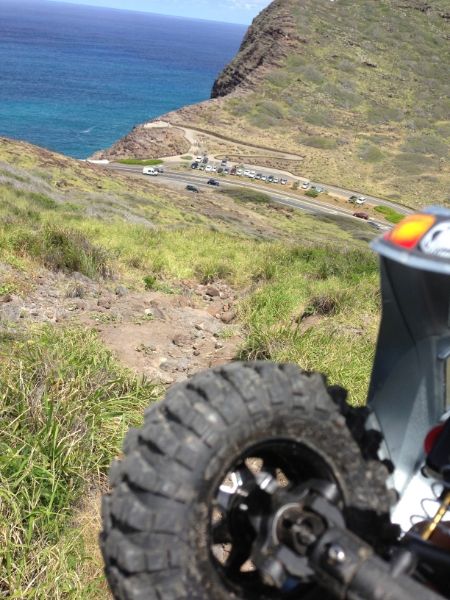 Good news is...look what was in my mail box when I got home... Aluminum Knuckles!!!! Also C-hubs, rear lockouts, and BEEF TUBES BABY! 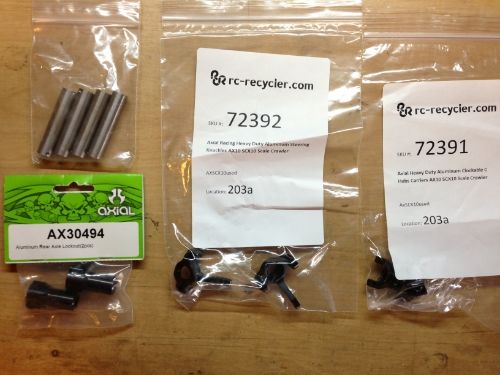 Added: Got the Beef Tubes from Biggin69 in the Vendors Market. Great Product, Excellent customer service, and extremely fast shipping! Last edited by cox308; 03-22-2013 at 05:04 PM. |

|  |
| Sponsored Links | |
| | |
|
03-19-2013, 08:08 PM
| #42 |
| Pebble Pounder Join Date: Mar 2013 Location: Honolulu
Posts: 196
|
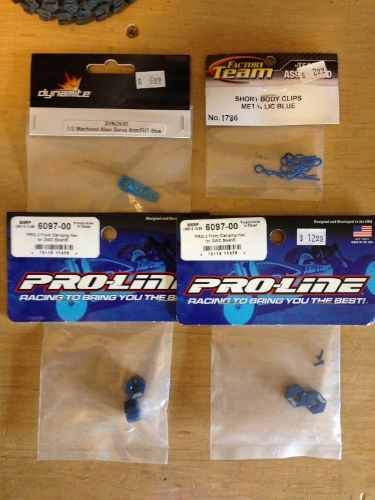
Got more goodies in the mail today! I've also been holding out a few on you guys too. This build is about to go from mild to wild! (by my standards anyways. lol) I've got a lot of work to do First up. Holmes waterproof Torquemaster BR-XL ESC/Crawlmaster 16T motor combo  and some Dean's and a New battery (Still 2s for now but will be going 3s in near future!) and some Dean's and a New battery (Still 2s for now but will be going 3s in near future!) Some new Spurs and Pinions to go with. Pictured is a 15t pinion and a 84t spur. Also picked up a 16t and a 17t pinion. 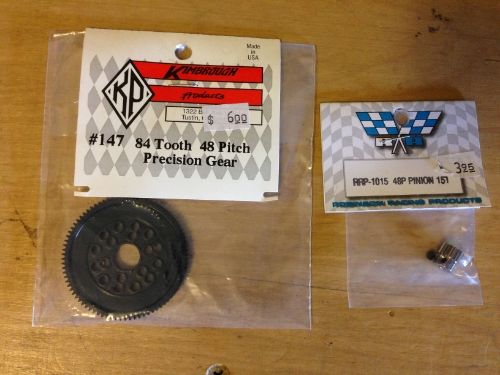 Oh yes! VP CVD's and VP front and rear no slop lockers  I'm still undecided on shocks but shock towers were a no brainer! VP 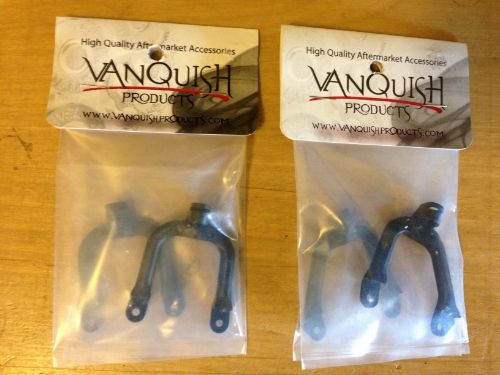 This will replace my ghetto plastic ESC mount! 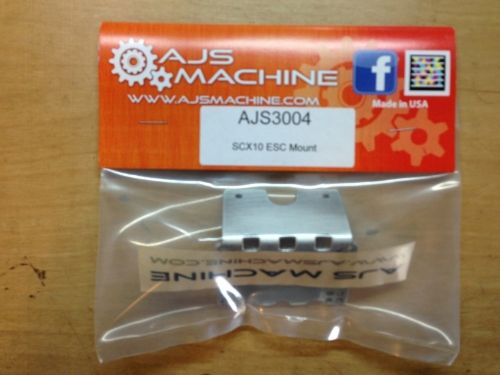 And Finally a new Honcho Cab with Yota decal sets from Bowtie 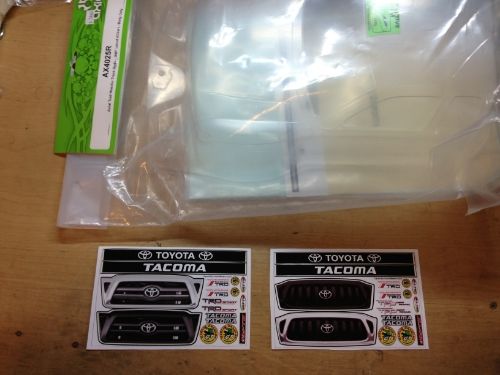 Stay tuned!!! Last edited by cox308; 03-19-2013 at 10:54 PM. |
|
| |
|
03-19-2013, 08:28 PM
| #43 |
| Rock Crawler Join Date: Jan 2013 Location: Cen Cal
Posts: 556
|
By the looks of things here that sweet trail that claimed your knuckle is doomed for completion in the near future. What are your paint plans for the new body? I'm tuned. =D |
|
| |
|
03-19-2013, 08:39 PM
| #44 |
| Pebble Pounder Join Date: Mar 2010 Location: chico
Posts: 120
|
I Aswell have a honcho but am unable put the funds in that direction, great progress on the mods! I'm locked in till the end on this one.
|
|
| |
|
03-19-2013, 10:52 PM
| #45 |
| Pebble Pounder Join Date: Mar 2013 Location: Honolulu
Posts: 196
|
^^^thanks guys! Not sure on the paint. I think I want it to be Toyota metallic grey or like a Gun Metal Color. I can't find the colors in stock at my LHS and paint is hard to have shipped to Hawaii. I'm waiting for the pearl white to come back in stock and then I'm going to back it with black. The guy at my LHS said that will make a Nice Gunmetal color. |
|
| |
|
03-20-2013, 12:26 AM
| #46 | |
| Rock Crawler Join Date: Jan 2013 Location: Cen Cal
Posts: 556
| Quote:
I don't know much about painting but that sure seems risky. I'm very interested in seeing how that comes out. | |
|
| |
|
03-20-2013, 05:02 PM
| #47 |
| Pebble Pounder Join Date: Mar 2013 Location: Honolulu
Posts: 196
|
A picture of the MIP drive shaft without the dust cover installed. You can see that there is very little room between the spur and the end of the shaft. This is after I switched to a smaller 84 tooth spur. The factory 87t spur was nearly touching the shaft so I would have been near impossible to run the dust cover with that spur.  I still had to heat up the dust cover AND take a Dremel to it. I accidentally went a little to far and made a pin hole in it. A little JB weld took take of that. I really wanted keep the dust cover even though the earlier scx10's didn't have it and many say it is unnecessary. I like the idea if keeping rocks out of my pinion and spur especially since I'm running the 48 pitch gears. It works perfect now and this unsightly part can't be seen when installed 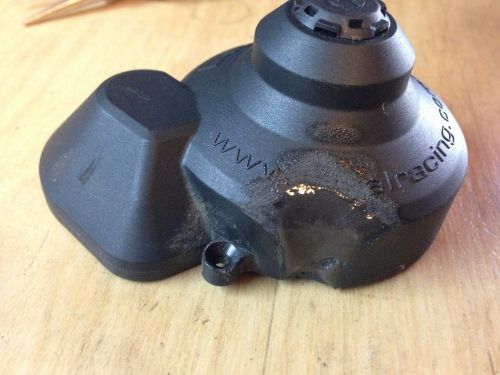 Last edited by cox308; 03-20-2013 at 07:31 PM. |
|
| |
|
03-20-2013, 05:42 PM
| #48 |
| Pebble Pounder Join Date: Mar 2013 Location: Honolulu
Posts: 196
|
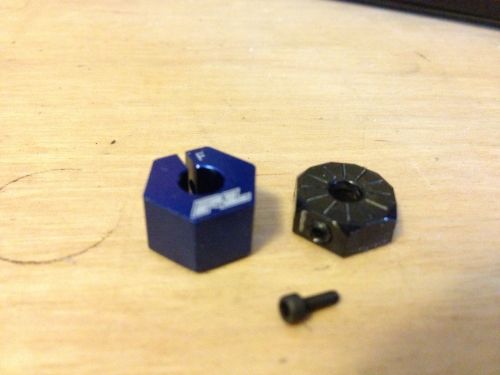
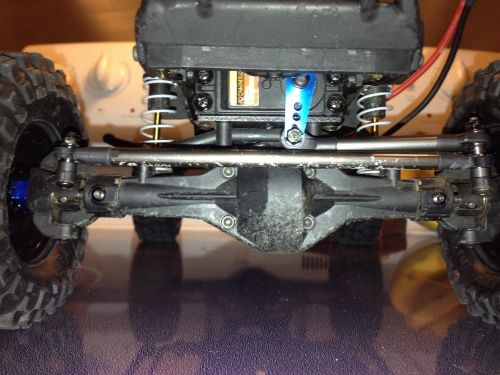
Aluminum knuckle and c-hub next to the factory plastic pieces. Also VP CVD next to the factory dog bone. Notice the improved turning capabilities! 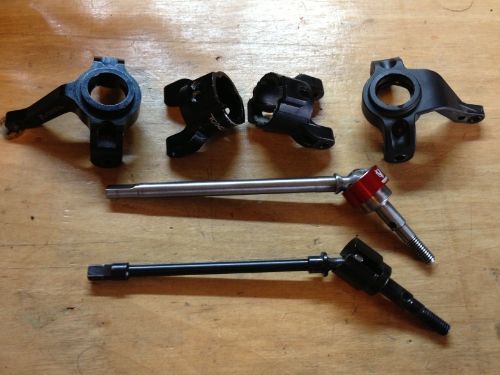 Factory locker and plastic housing left and VP "no slop" locker right. Awesome upgrade! Locks the axles in tightly together and much stronger. Very precise machining. 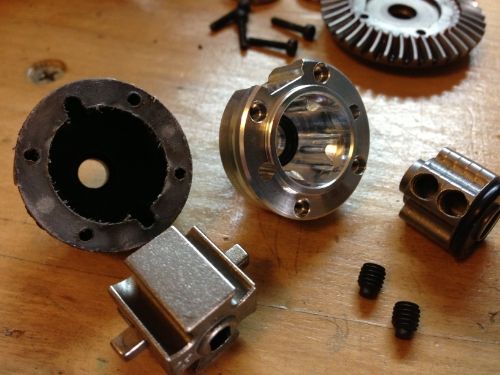 Beef tubes installed! A beautiful sight This added a good amount of weight to the axle and also greatly strengthened the axle housing assembly. Also gives the c-hubs something solid to screw to. It is a common problem to have he factory c-hubs loosen up and cause major problems.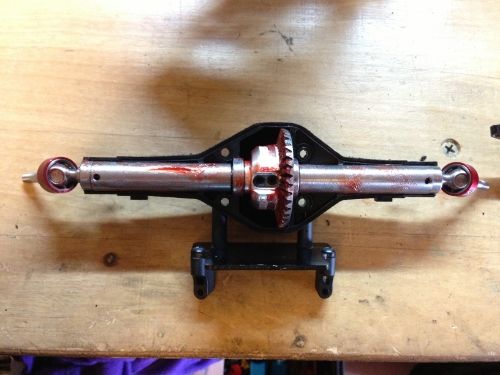 A picture of front completed 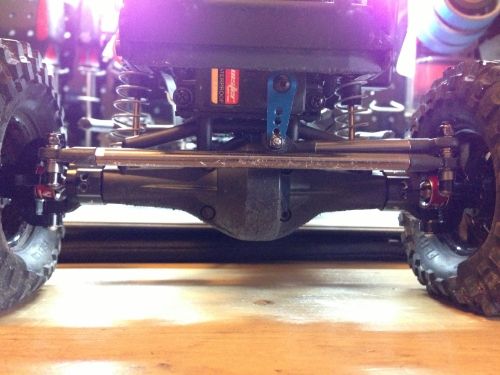 A note on hardware. Looks like there is no screw in the front but there is. I installed a M3x6 set screw with locktite(these set screw came with the rear lock outs). This eliminates the problem of the knuckle hitting the button head screw limiting steering. M3x6 button head screw in the back. M3x8 SS button heads attaching the knuckles to the c-hubs. I am absolutly loving this setup 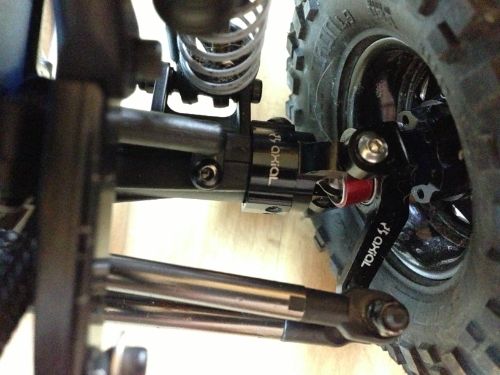 Also note that these are the clock-able c-hubs. I clocked them backwards which allowed me to clock the entire axle housing forward by lengthening the upper arms. This slightly points the axle housings outdrive upwards relieving the angle on the drive shaft and also keeps the driveshaft higher so it gets snagged on the rocks less. I did the same thing to the rear axle housing by lengthening the upper arms. |
|
| |
|
03-20-2013, 06:04 PM
| #49 |
| Pebble Pounder Join Date: Mar 2013 Location: Honolulu
Posts: 196
|
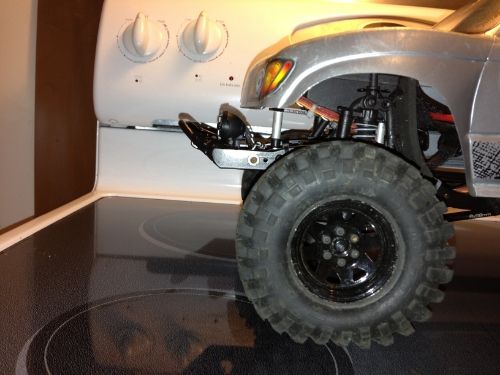
Here is a pic of the rear straight axle next to the front dog bone axle. It is way bigger! I thought it looked stong enough and I was going to just run it but I ran into some problems when installing it with the VP lockers and beef tubes 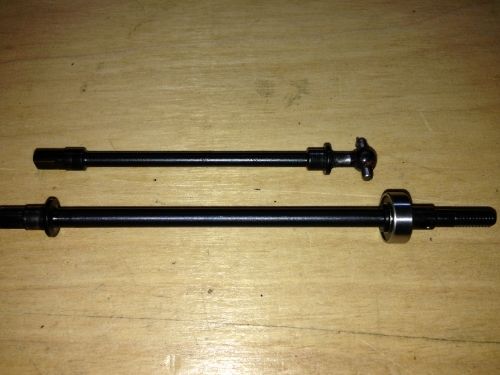 For now I am just running it the way it is. It was a tight fit to get it all to fit but I got it closed up. I will update with pics when the new axles arrive. 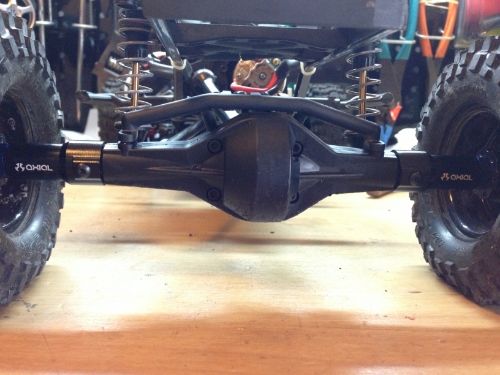 Note: I also shaved off the servo mounts on the top of the rear axle housing. Looks much better! Hardware note: M3x6 screws used both front and back on the rear lock outs. |
|
| |
|
03-21-2013, 08:42 PM
| #50 |
| Pebble Pounder Join Date: Mar 2013 Location: Honolulu
Posts: 196
|
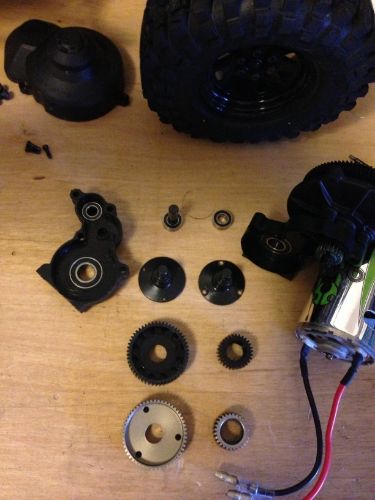
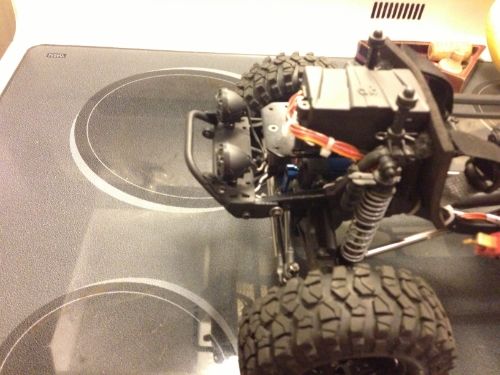
Update time! Got to install the rest of the parts I showed earlier in the thread! New Holmes Crawlmaster is smaller than the stock motor...hope it is as strong...lol... 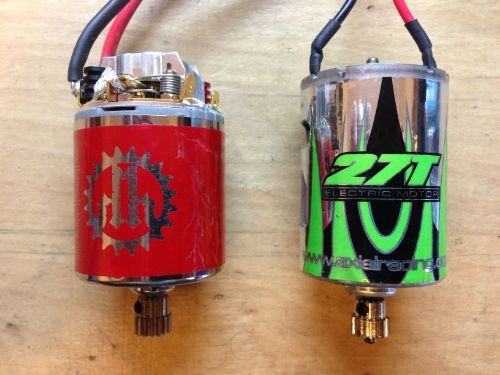 I've read a lot of people saying how the Holmes Tq Master ESC is so HUGE... its actually the exact same as the Axial ESC. They use the same housing and heat sink...size doesn't matter in this build anyways as there is plenty of room to spare. 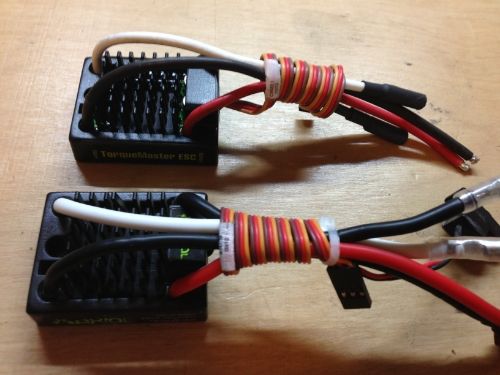 Motor installed. I got rid of the lights for now. I'm trying to keep it as clean as possible under the hood. I'll likely reinstall them onto the new body. Also all the electronics removed here to be redone. VP shock towers are also installed in this pic. 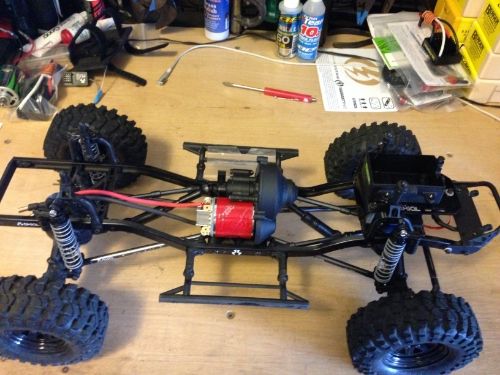 Holmes ESC installed with new ESC mount 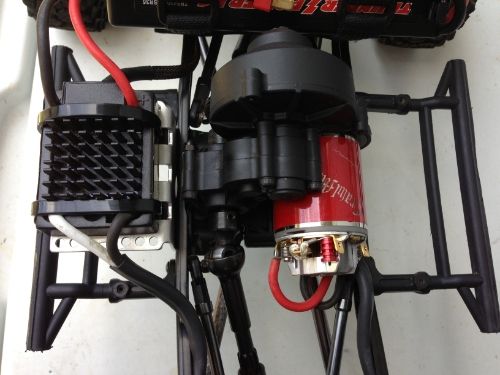 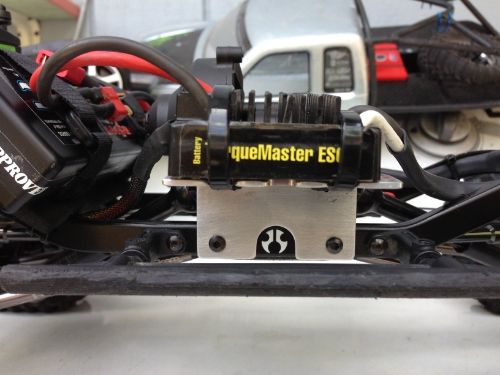 Cleaned up the wiring 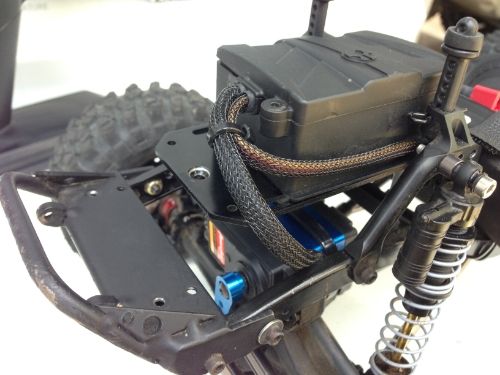 Lowered the battery even more. 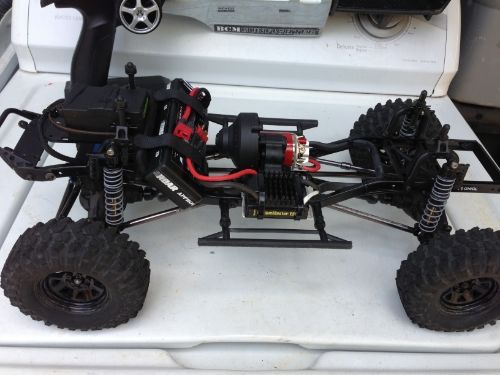 Initial thought after mods and driveway test: It was pretty slow with the 15/84 pinion /spur combo. I swapped to the 17t pinion and it was much improved. Still slower that the stock config but this build is more of a crawler than anything else. The torque is AWSOME! It seems like nothing can keep these wheels from spinning! Low speed throttle control is excellent! This is the main reason I went with the HH Crawlmaster! Last edited by cox308; 03-22-2013 at 06:50 AM. |
|
| |
|
03-21-2013, 09:11 PM
| #51 |
| Pebble Pounder Join Date: Mar 2013 Location: Honolulu
Posts: 196
|
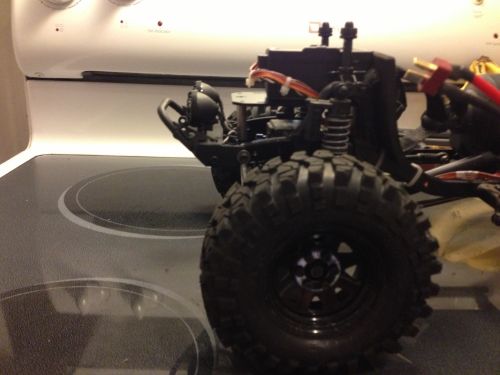
Also got to field test! Took the Honch out on a 3.5 hr hike today up St. Louis Heights (Mt. Olympus). Couple body off shots before hike began.   I admit that the setup is slow on the flat easy sections like this. It isn't painfully slow or anything but bashing and jumping is out of the question. Its okay cuz this ain't no basher 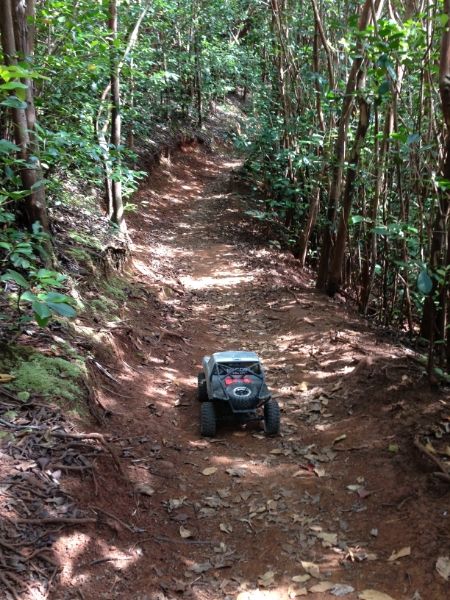 These are the sections where it really excelled! 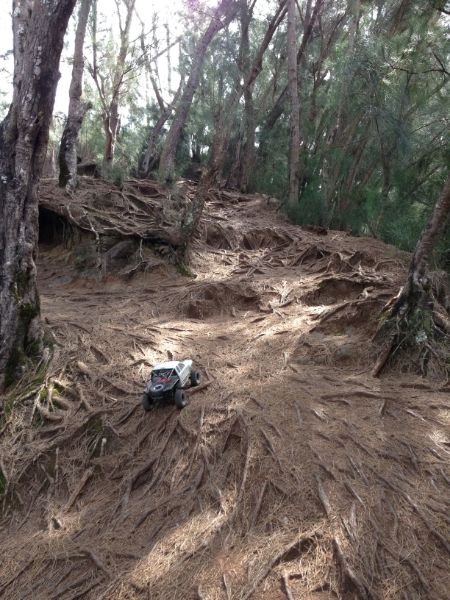 Notice in this pic how the suspension is flexing even though there are no bumps. It's just from the incline. It's really hard to capture the inclines on these or any pictures for that matter. I sure most of you know this already. 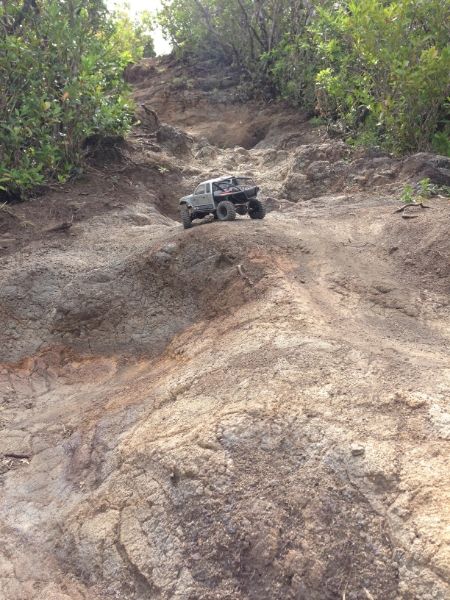 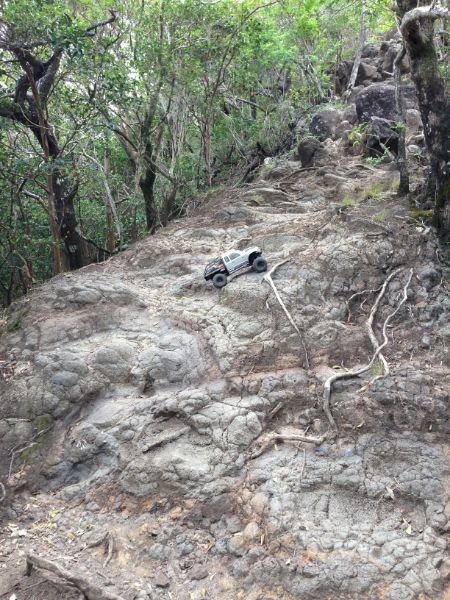  My thought after the 3.5 hr hike: The Honcho held up great! No broken parts! It's my own body that feels broken now. lol. The low end contol and smoothness isn't just awesome...it is UNREAL Last edited by cox308; 03-23-2013 at 04:39 AM. |
|
| |
|
03-22-2013, 08:00 AM
| #52 | |
| Rock Stacker Join Date: Jan 2012 Location: Walters, OK
Posts: 89
| Quote:
Um, question, where did you get the beef tubes and are those axial HD Diffy gears? Looks great by the way! | |
|
| |
|
03-22-2013, 02:12 PM
| #53 | |
| Pebble Pounder Join Date: Mar 2013 Location: Honolulu
Posts: 196
| Quote:
I got the beef tubes from Biggin69 in the venders market. Link Below http://www.rccrawler.com/forum/axles...e-updated.html | |
|
| |
|
03-23-2013, 04:33 AM
| #54 |
| Pebble Pounder Join Date: Mar 2013 Location: Honolulu
Posts: 196
| 3S LIPO UPDATE! Got one of my 3S Lipo batteries in the mail today! Got this one new off eBay for under $50. I Also ordered a Thunder Power from Chris_The Battery_Man at Cheapbatterypacks.com 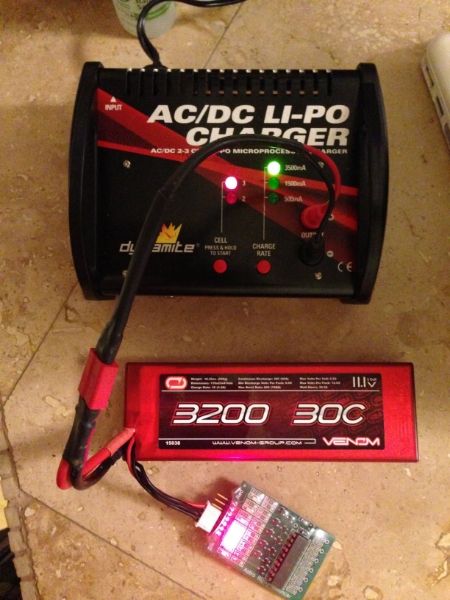 Here are my thought after trying the 11.1v lipo in the driveway. HO LEE SHIITSKIE! The 3S Lipo really brought this thing to life! It is SUUUUUPER PUNCHY now. It's much faster than even the factory configuration was. Wheelies in reverse, spins tires in forward, jumps curbs, flips over super easy when carelessly on the trigger. Crazy torque BUT.... still has all the finesse and low end power! With the 3S the truck is Bashable! Also when a wheel gets stuck the slipper clutch will give. It could never to that before....In short...It's the shit! |
|
| |
|
03-23-2013, 04:50 AM
| #55 |
| Pebble Pounder Join Date: Mar 2013 Location: Honolulu
Posts: 196
|
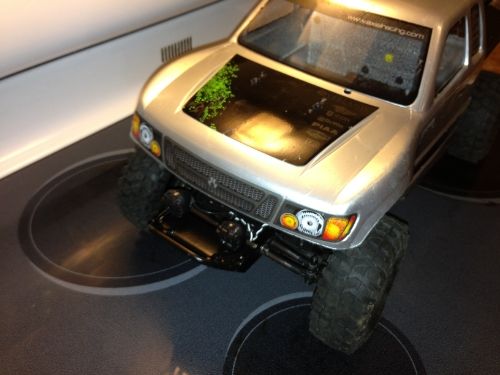
Field test! It was a little wet today. With running the 3S Lipo the Hawn Honch is a straight up BEAST! Having that instant wheel speed really helps get up tough obstacles. It's almost like cheating! It is actually a unrealistic amount of wheel speed. It would definetly be helpful in comps because it helps flip you back onto your tires when in your side but, I'm thinking I'm going to change the pinion from the 17t to a 16t or even a 15t. Speed is cool but I like even more TORQUE better! 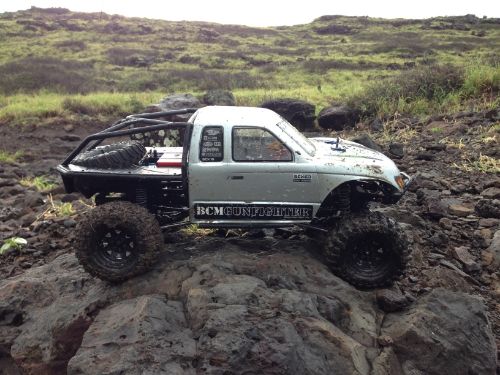 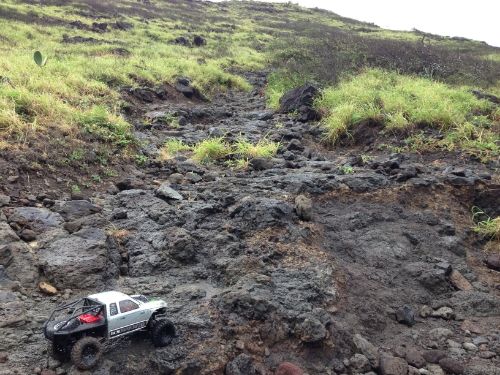 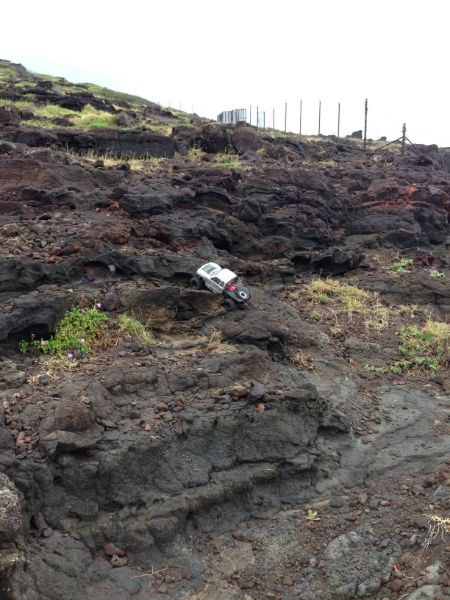 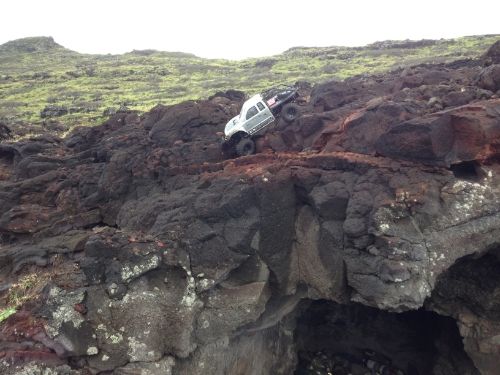 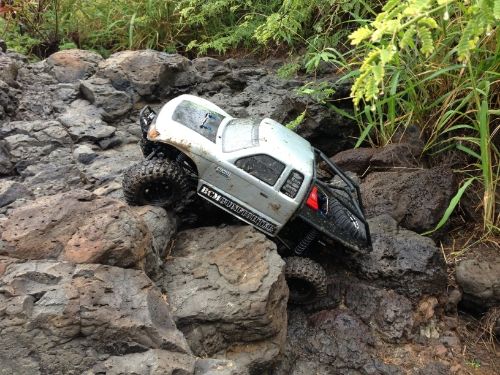 Last edited by cox308; 03-23-2013 at 01:43 PM. |
|
| |
|
03-23-2013, 02:38 PM
| #56 |
| Pebble Pounder Join Date: Mar 2013 Location: Honolulu
Posts: 196
|
Picked up a 3racing wench. I was looking for the Rc4wd wench but it was out of stock. I've heard that this one is just as good so I gave it a try. 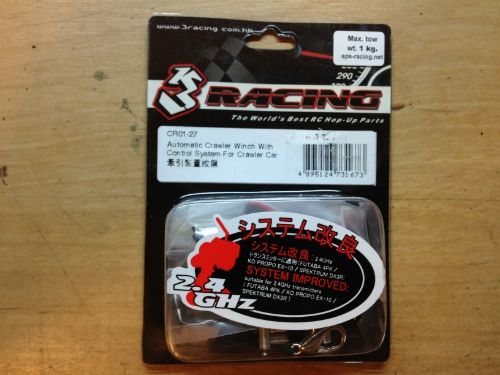 Got it mounted up. Had to drill new holes in the mounting plate and cut a new hole in the electric box for the wiring. 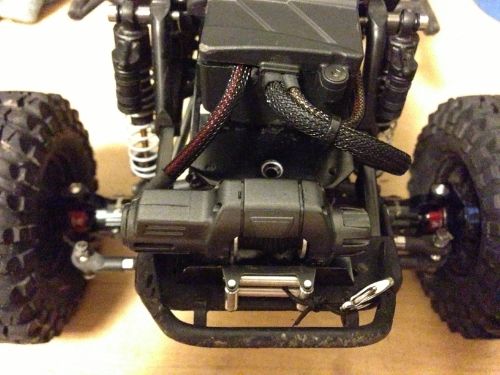 I pulled a MAJOR newb move and let the magic smoke out of the control panel 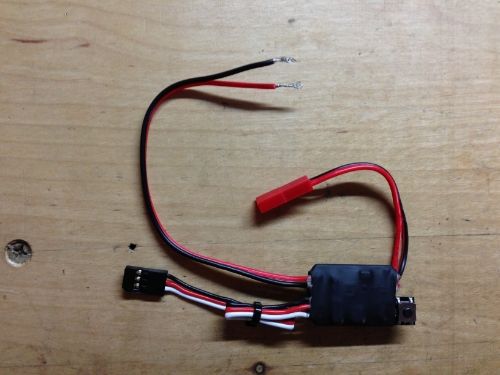 If you're really sharp you're probably thinking but your RTR Axial transmitter doesn't have a 3 position channel.........good time to step it up 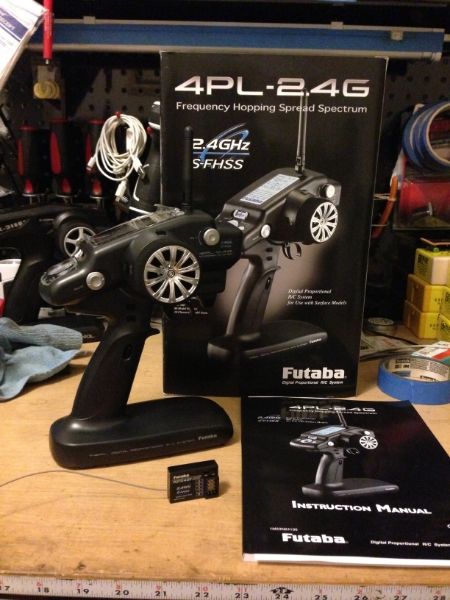 This shit is gettin serious! Last edited by cox308; 03-23-2013 at 03:17 PM. |
|
| |
|
03-23-2013, 06:39 PM
| #57 | |
| Rock Crawler Join Date: Jan 2013 Location: Cen Cal
Posts: 556
| Quote:
 I love 3s too. Keep tabs on the running temp of that Crawlmaster, adjust gearing as needed. | |
|
| |
|
03-23-2013, 07:46 PM
| #58 |
| Pebble Pounder Join Date: Mar 2013 Location: Honolulu
Posts: 196
| need help! Took the Honch out today and ran into some problems. Up the mountain with the 3s lipo no problems. About 1.5 hours latter I swapped batteries back to a 2s after the 3s died. about a half hour later my throttle started getting inconsistent. It wasn't happening very often at first and I thought I was imagining things but It started to happen very often so I thought it may be a dead battery even though the battery should have had at least half life. I swapped to a fresh 2s again and same thing. Eventually it got so bad that i had to carry the honch back to my truck I'm thinking this is either a motor or a ESC problem but I'm not sure. Please advise. Note: I was checking the heat of the motor and ESC frequently. They didn't get hot at all. UPDATE: Now that I'm home I cleaned the truck and plugged a fresh battery to test. No throttle at all. I disconnected the motor and plugged in my spare stock Axial motor. Works perfect. Plugged back in the Crawlmaster...nothing. So I removed the crawl master from the truck completely and plugged it in...still nothing. I started inspecting it and I pulled at the brushes and made sure they move freely. Plugged motor back in and now it works Now before I put everything back together is there something I can do to fix the problem so it doesn't happen again. I only have a few hours using the motor and I have already lost faith in it Last edited by cox308; 03-24-2013 at 05:23 AM. |
|
| |
|
03-23-2013, 08:07 PM
| #59 |
| Rock Crawler Join Date: Jan 2013 Location: Cen Cal
Posts: 556
|
Does the BRXL have an automatic lipo cutoff setting, or do you have to set it yourself? if so it may be set for 3s and the 2s packs are below cutoff. Same thing happens when I plug a 2s into my FXR without first remember to set the cutoff to 2s.
|
|
| |
|
03-23-2013, 08:14 PM
| #60 | |
| Pebble Pounder Join Date: Mar 2013 Location: Honolulu
Posts: 196
| Quote:
| |
|
| |
 |
 Hawaiian Honcho build! - Similar Threads
 | ||||
| Thread | Thread Starter | Forum | Replies | Last Post |
| One Nada Local boy. Hawaiian Hawaiian | kailuaboy | Tamiya Txt-1 and Juggernaut | 12 | 12-17-2006 08:04 PM |
| |


 after
after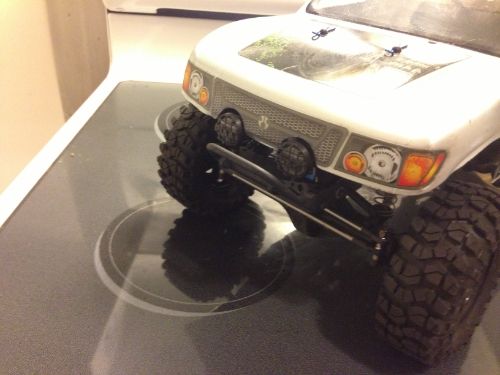
 after
after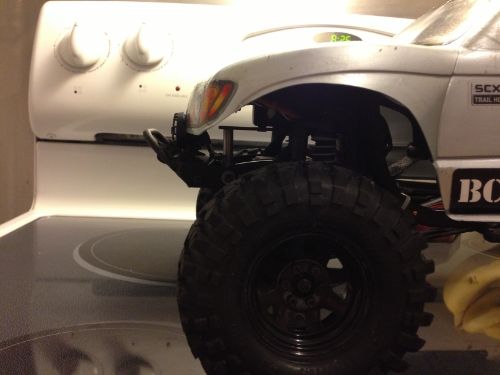
 Linear Mode


