| | #61 |
| RCC Addict Join Date: Dec 2006 Location: Flatwoods
Posts: 1,036
|
@simp: Your welcome. I finished up the battery tray and moved the battery. I started to buy a pre-made mount but that just didn't feel like it was staying in the cheap spirit of this build. I had to buy a sheet of metal ($4.87 @ the local hardware store) and used plastic card and parts I already had. First I made me a little cardboard template. 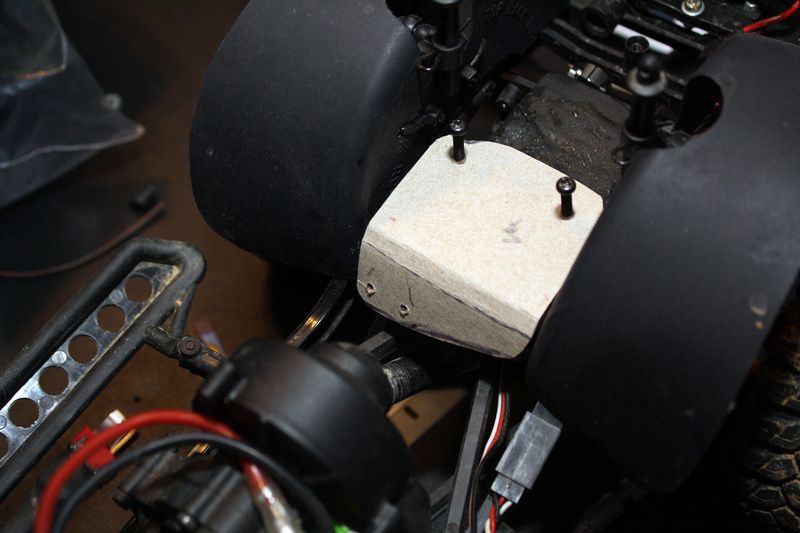 Transferred that template to the sheet of metal. 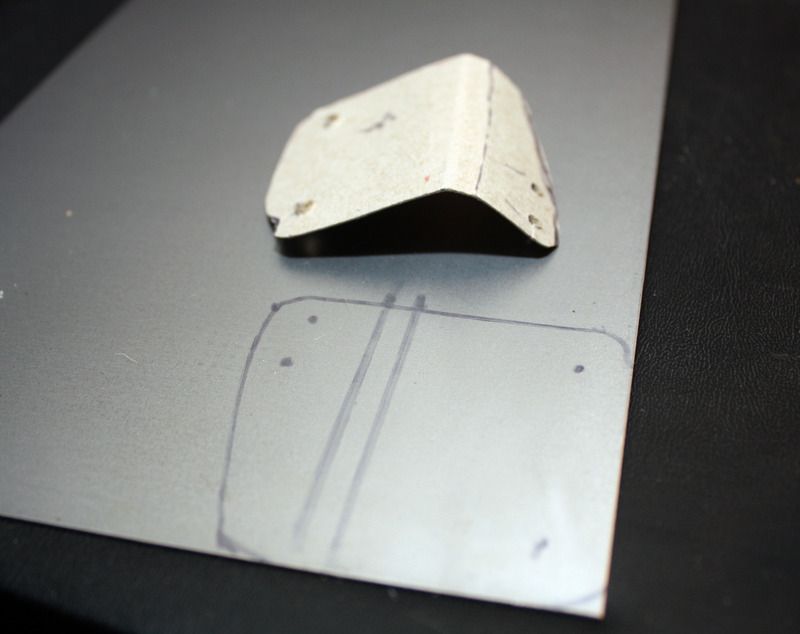 Cut out with mounting holes drilled. The extra larger hole is just for aesthetics. 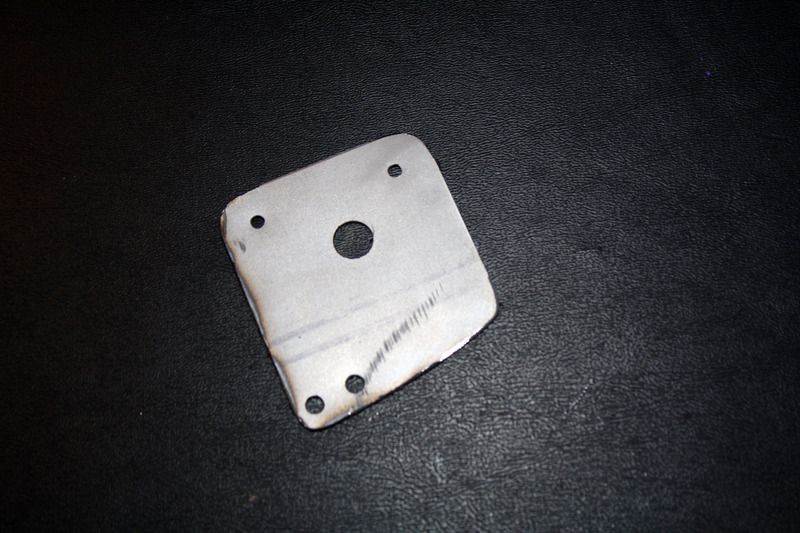 Bent up and ready to test mount it. 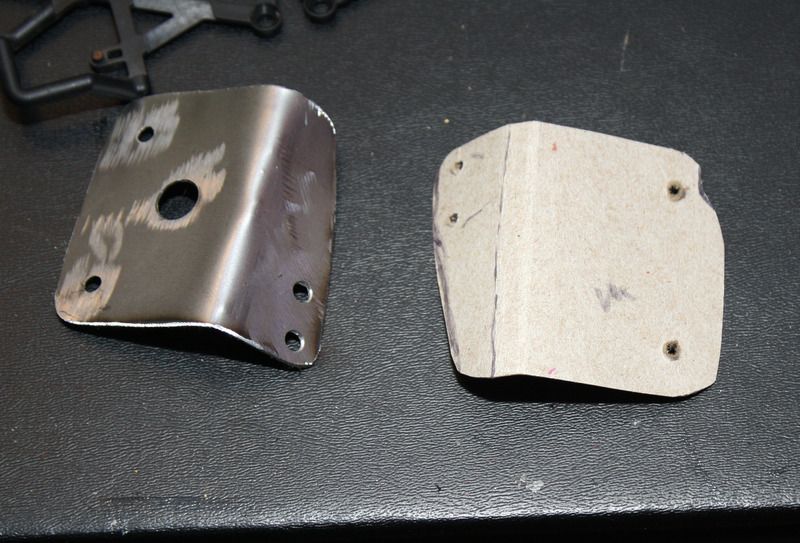 Test fitted. You can see the plastic card I used to make it use all four of the battery mounting holes. I could have made this out of metal but went with the card because it was a bit easier. 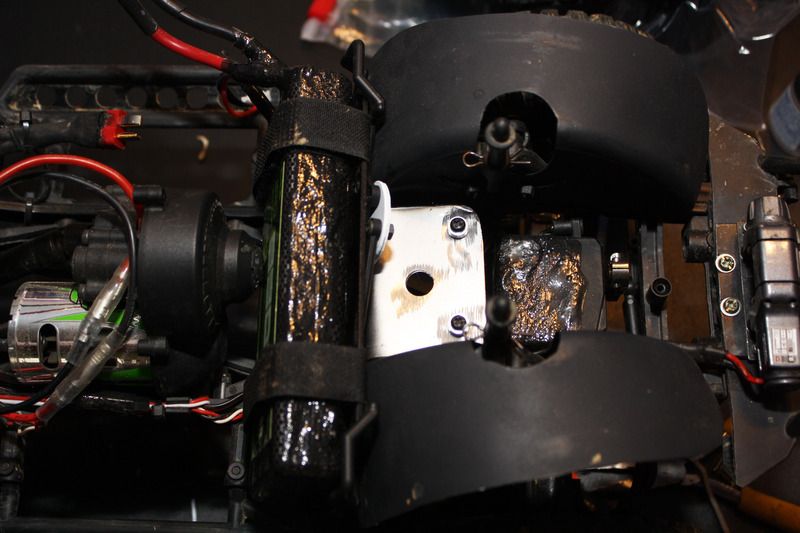 Painted up and ready to install. 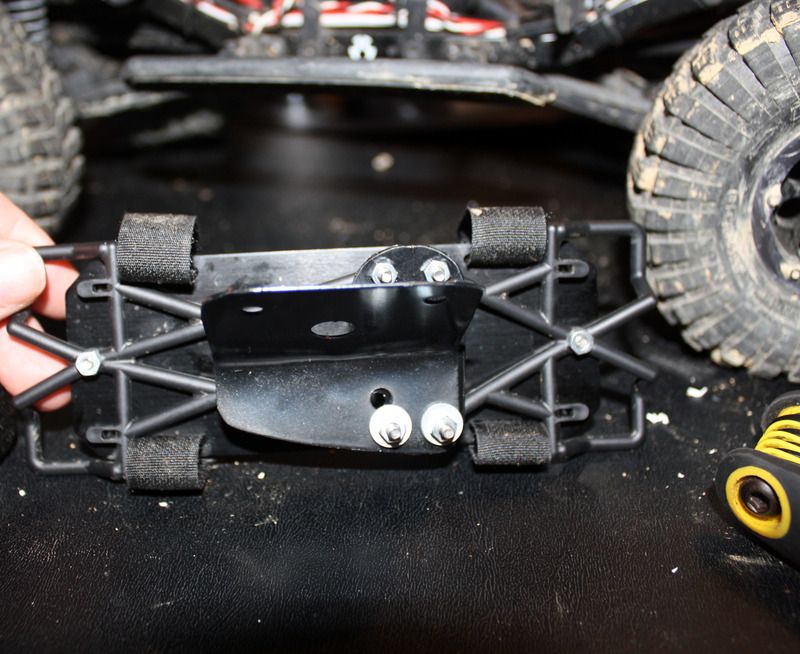 Mounted up. 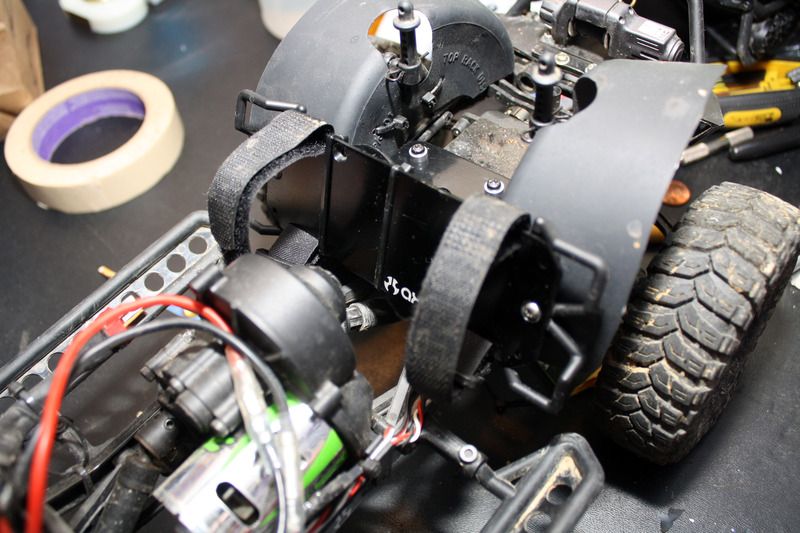 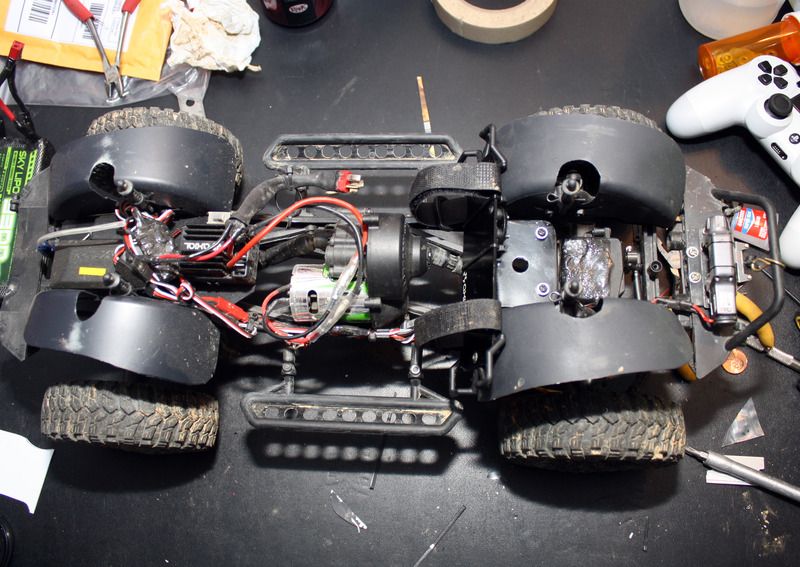 Mounted up with the batt. Downside is the battery almost touches the spur cover. So unless I flip the trans back to stock I will not be able to step up to a 3s, luckily I plan to stick with my 2s lipos. 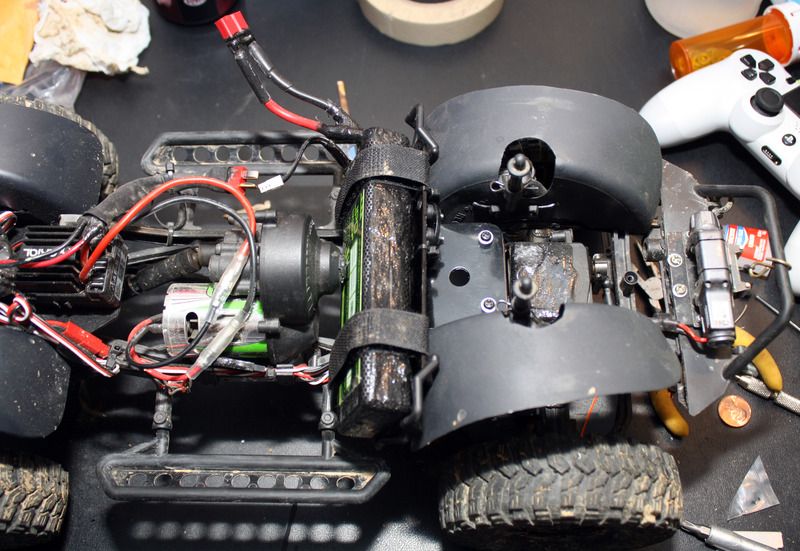 I haven't tried this out on the trail yet but on my work table it feels much more stable. Next up will hopefully be links. According to the tracking numbers they came into New York this morning so now I am just waiting on Mr. Postman to get them to my house. -Prime- . |
| |  |
| Sponsored Links | |
| | #62 |
| Pebble Pounder Join Date: Oct 2007 Location: Ohio
Posts: 166
|
looks good prime,  I had that servo in my list lol. I had that servo in my list lol. |
| |  |
| | #63 |
| Pebble Pounder Join Date: Oct 2007 Location: Ohio
Posts: 166
|
Hey did you get the links from him too, I made my steering links out of 8/32 sleeved with 1/4 tube but was looking at strc links from tower.
|
| |  |
| | #64 |
| RCC Addict Join Date: Dec 2006 Location: Flatwoods
Posts: 1,036
|
Nope I got the lower links from a different seller. Speaking of links, the tracking info shows that the mail carrier dropped them off at my house today!! So they should be waiting on me when I get home. My next upgrade will prob be steering links, the stock plastic one flexes like crazy. I am thinking bout going with STRC steering links or maybe a solid one piece drag link just for something a little different. |
| |  |
| | #65 |
| Rock Crawler Join Date: Jan 2014 Location: Granite Falls, WA
Posts: 568
|
This has been a fun thread, Prime. I think it might even have inspired me to put my Deadbolt body back into commission, sooner than I had planned. Well, I never really had a planned time, but was eventually going to swap it back with the Jeep JK body I replaced it with, last November. The Deadbolt body makes for a nice rig. I think I want to repaint mine, though.
|
| |  |
| | #66 |
| RCC Addict Join Date: Dec 2006 Location: Flatwoods
Posts: 1,036
|
I really like this body. At first I did not care for it at all but I have fallen in love with it. I wish it came out of the box with a windshield like the replacement body does. If I ever get a replacement body it will be another stock Deadbolt body and I will prob paint it red and black. My links came in and I am very happy with them. I love the look of the stock DB links but they are way too soft and flex like crazy. I wanted to go metal but did not want the look of the standard tube links everyone runs. I found these from China on eBay under a "Best Offer" auction so I threw out a low ball offer on two sets of front links and it was accepted. I figured for $15 shipped I would give them a try. It got my four lower links and two of the front upper links. They are aluminum and are non-adjustable. Best part is they look exactly like the stock plastic links and look to be the exact same length. Lets hope they fit and work as good as they look. How they come. 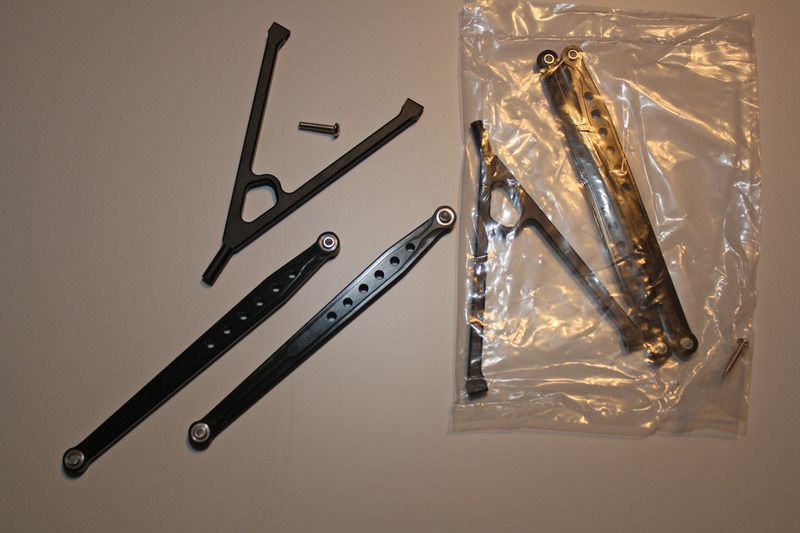 Close up shot. 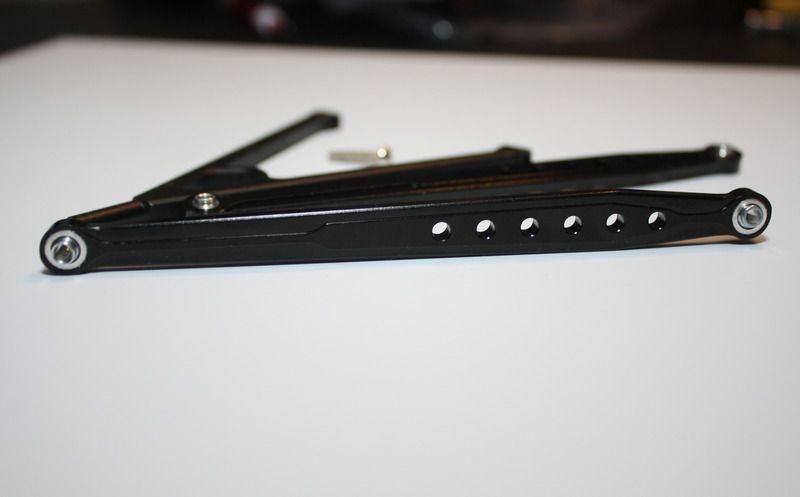 The only problem so far is that there are some light chips in the finish on one of them but considering the abuse they are going to take this is no big deal, they will have many more chips and scratches in no time.  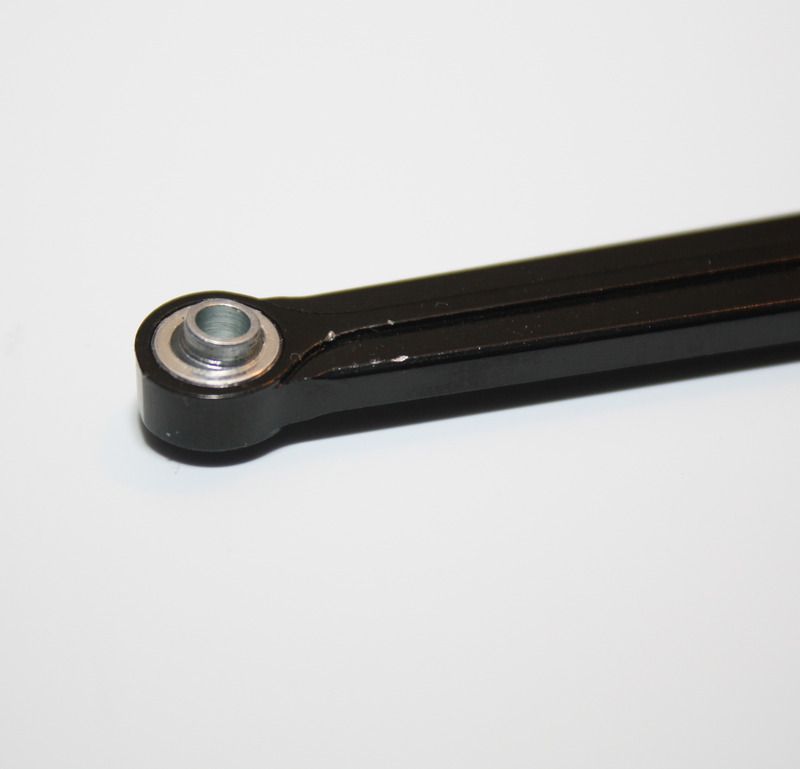 Now to just get the time to install them.  -Prime- . |
| |  |
| | #67 |
| Rock Crawler Join Date: May 2012 Location: Upland
Posts: 901
|
I ran those links on my wraith. They are fine for length and strength, but the pot aluminum is so soft that sharp rocks will dig into them and cause more drag a harder aluminum pipe
|
| |  |
| | #68 |
| RCC Addict Join Date: Dec 2006 Location: Flatwoods
Posts: 1,036
|
That's cool, thanks for the heads up. I am glad to hear they hold up for the most part.  -Prime- |
| |  |
| | #69 |
| RCC Addict Join Date: Dec 2006 Location: Flatwoods
Posts: 1,036
|
I finally got my links installed. The stock plastic links did their job but they were starting to show their wear. (and yup, I am missing two tranny screws. I think I forgot to tighten them down after I flipped the trans. Here are the stock plastic fronts, as you can tell the driver side link has a permanent bend in it now. 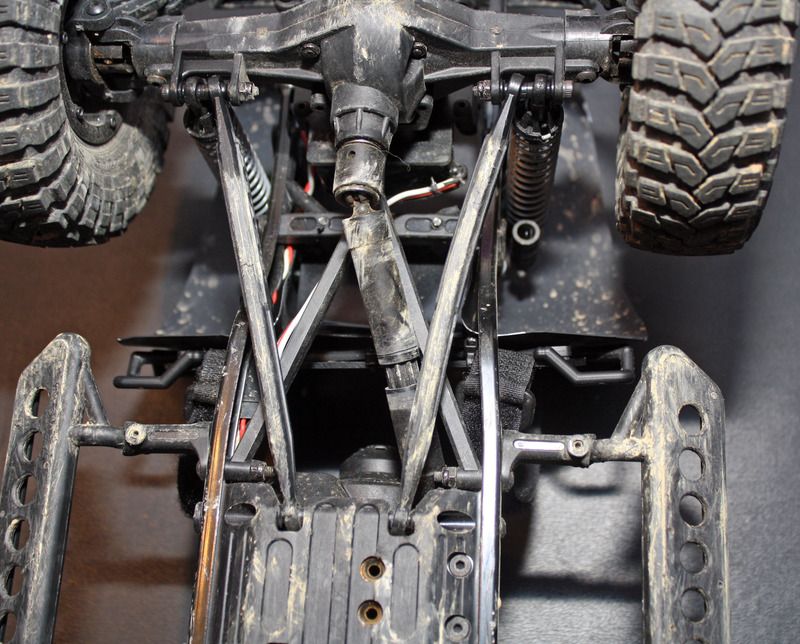 Like I said from the start, I like the fact that these links mimic the stockers. 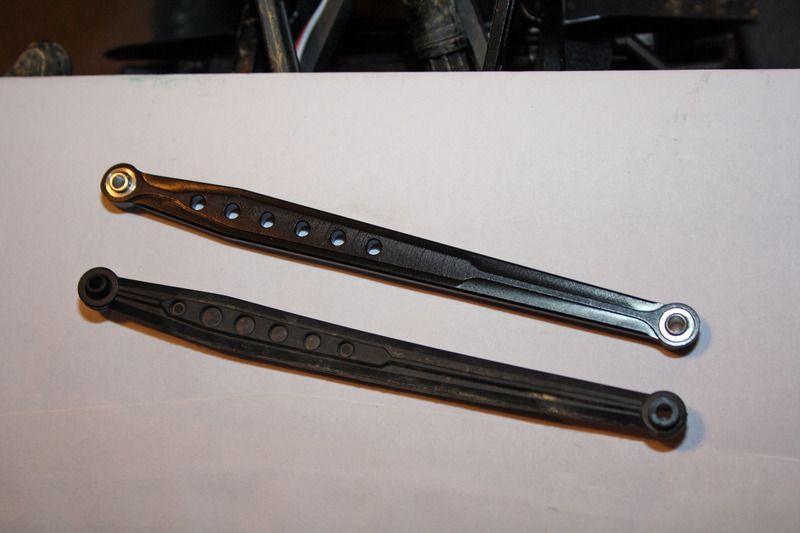 One down. I sprayed the pivots with Moo-Slick to help the move smoothly. I also usually hit all pivot point with a little squirt of the stuff before any big runs or after playing in the water. 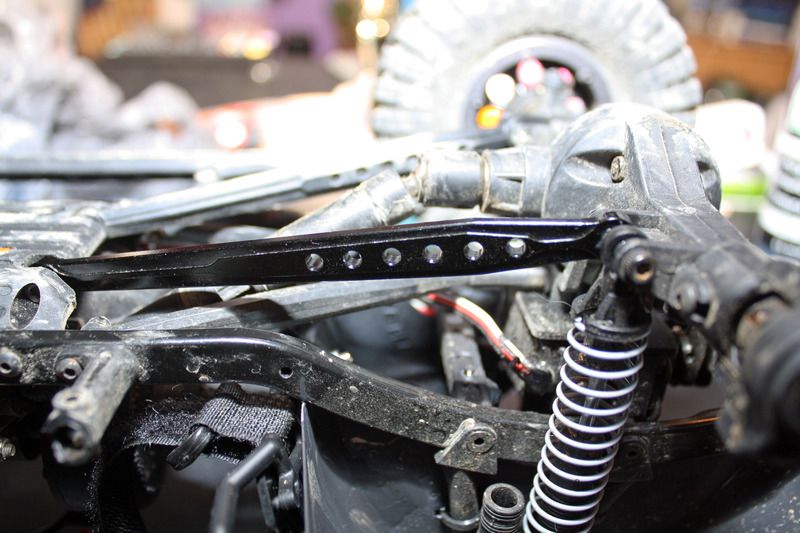 The sets I got came with the front upper y-link as well. Stock versus new one. 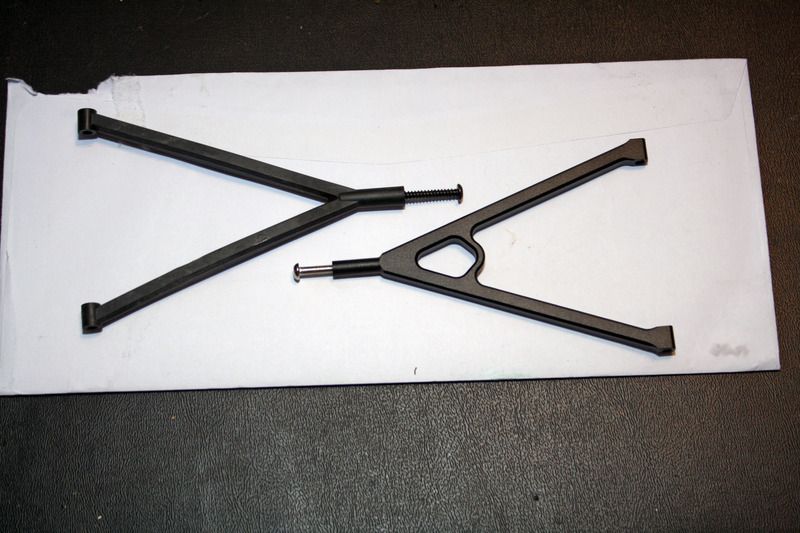 The front all installed. 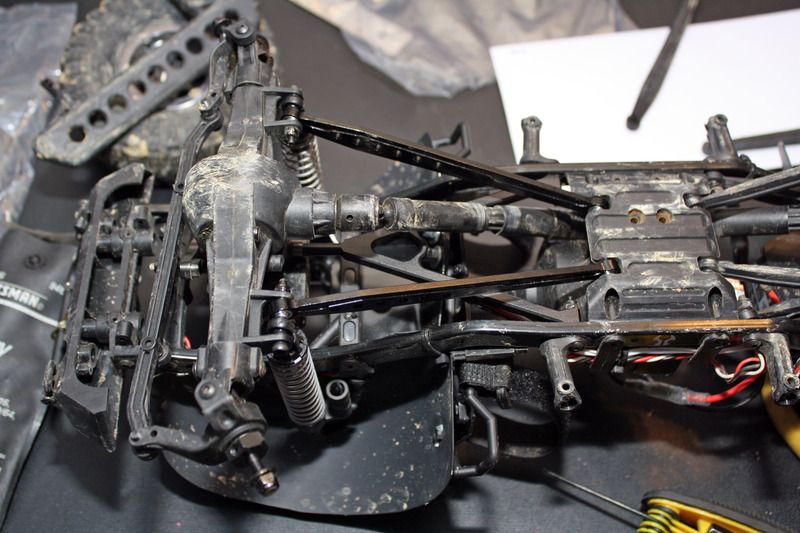 And the rear finished up. I still need to either find or make a set of upper links for the rear. 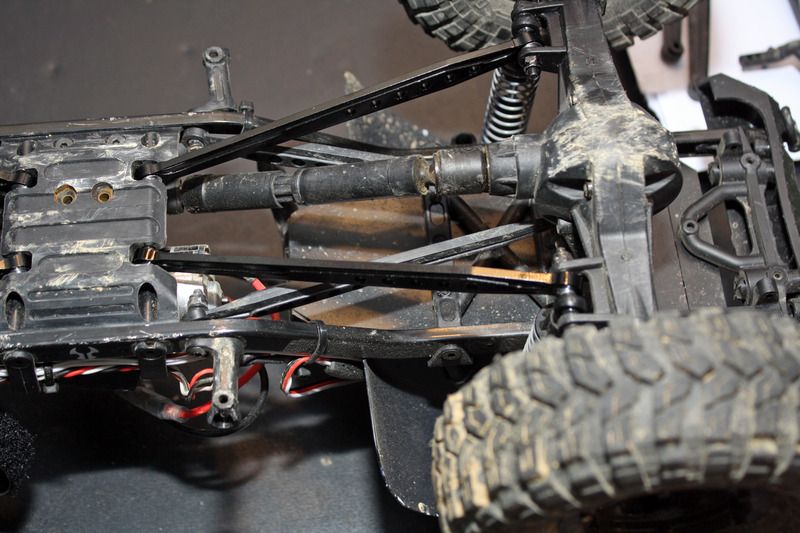 Next up? I think I might try to make a grill for it, something to give it a little more definition and hopefully improve the looks a bit. Thanks for looking. -Prime- . |
| |  |
| | #70 |
| RCC Addict Join Date: Dec 2006 Location: Flatwoods
Posts: 1,036
|
I decided to make a simple grill for the Deadbolt, just a little something to give the front a bit more pop. To make it easier to make the grill fit right I decided to make a template. To do this I put the front of the body onto a flatbed scanner, scanned it, cropped it down, and then printed it out. Doing so I realized I am almost out of toner but this is good enough for my needs. 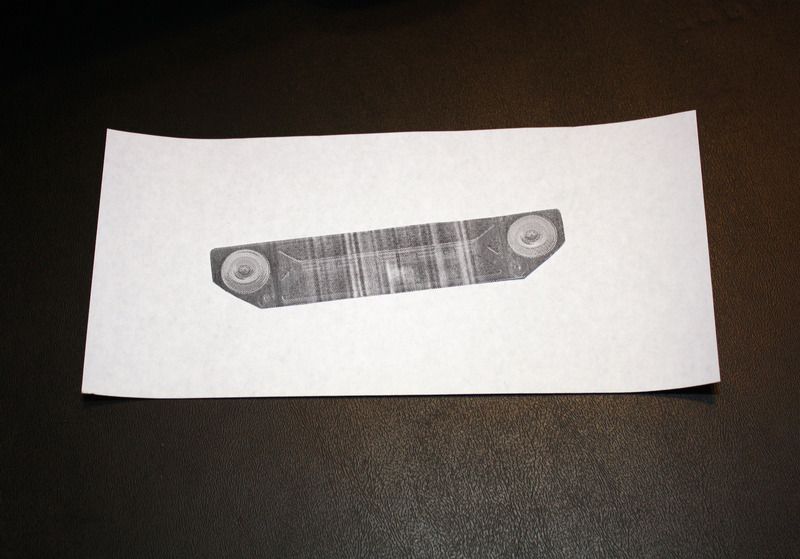 Trimmed it out and transferred it, with a couple of changes, to the plasti-card. 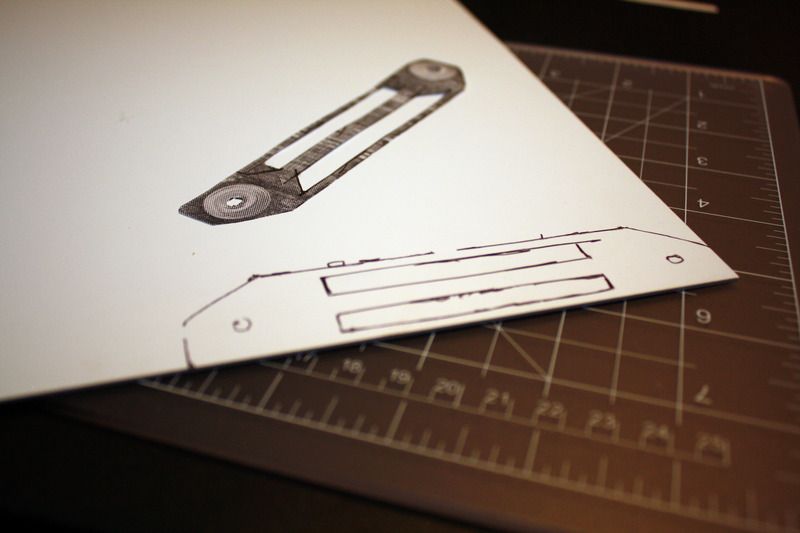 Cut out and test fitted to the truck. 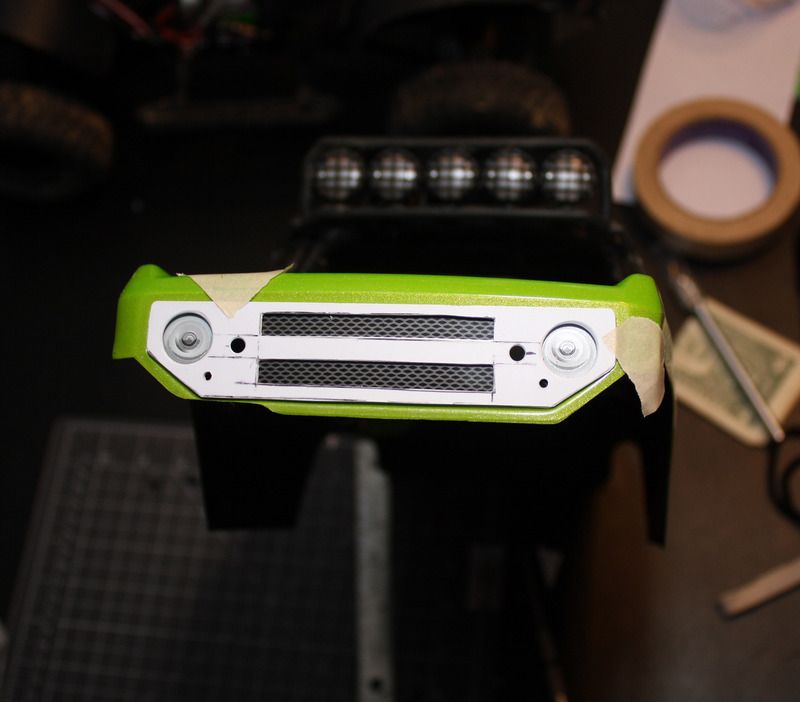 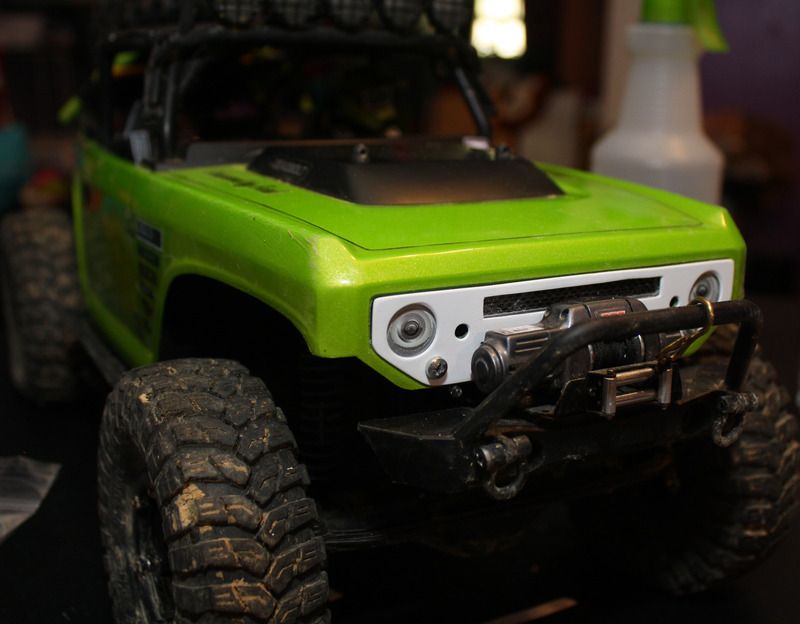 Painted it flat black to match the hood and roof. Mounted it with black hex hardware and moved the lights up by the headlights, about where they are on a real Bronco. I like this because it lets the mesh of the stock grill decal show through and makes the headlights look a bit better. Someday the head lights will get replaced with working ones. 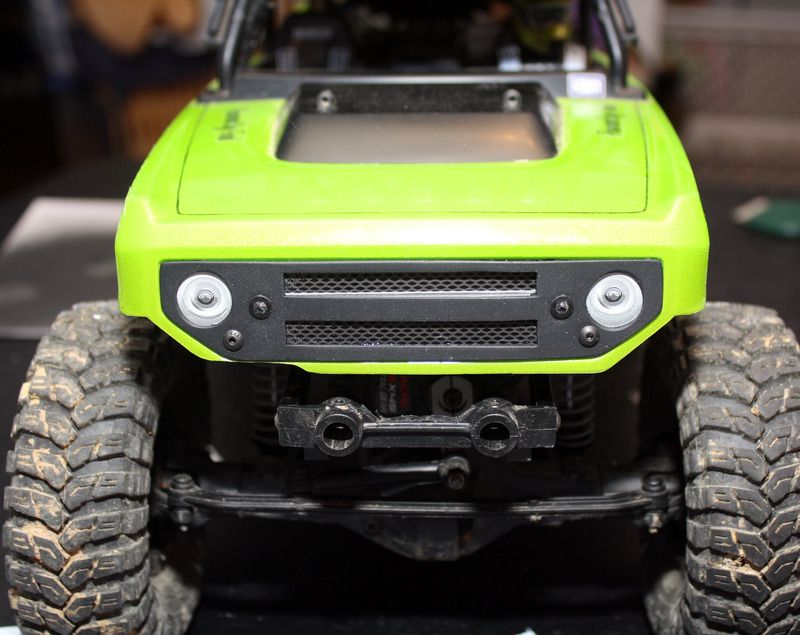 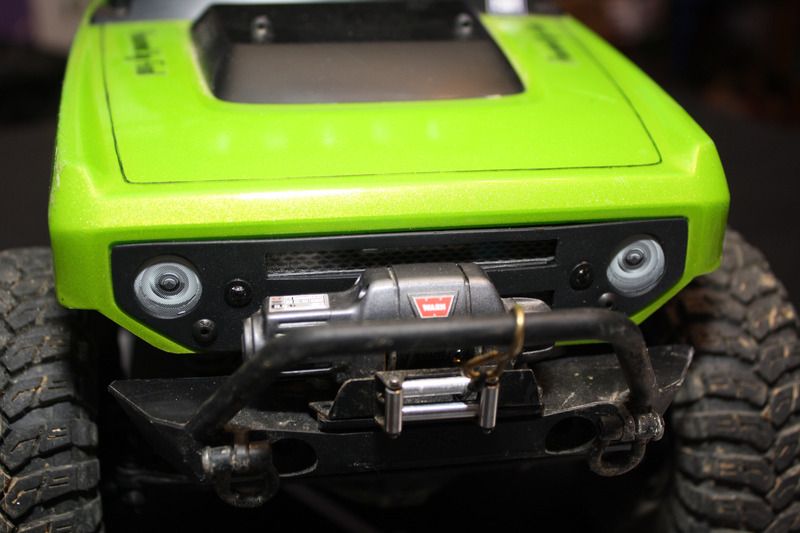 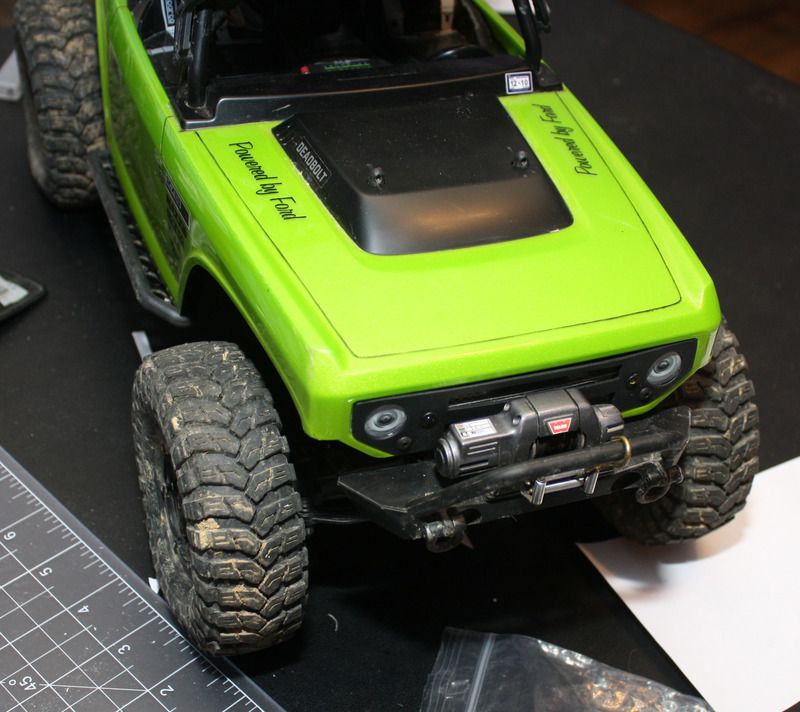 Over all I am happy with the outcome. Though I am thinking about making the center spar a bit more 3D or maybe adding Ford script to it. Next up? Maybe steering links. Guess we will just have to stay tuned to find out. Thanks for looking. -Prime- |
| |  |
| | #71 |
| Pebble Pounder Join Date: Oct 2007 Location: Ohio
Posts: 166
|
Looks great Prime, If you go to Wal-Mart they have a letter holder that have mesh side`s and you could cut the decal out in the back and replace it with real mesh. |
| |  |
| | #72 |
| Newbie Join Date: Mar 2015 Location: Harrogate
Posts: 38
|
Do you like that winch I've been thinking about buying one
|
| |  |
| | #73 | |
| Pebble Pounder Join Date: Oct 2007 Location: Ohio
Posts: 166
| Quote:
| |
| |  |
| | #74 |
| RCC Addict Join Date: Dec 2006 Location: Flatwoods
Posts: 1,036
| I like the 3Racing winch, this one has been on three rigs and is one of the first ones and is still going. I have been thinking about upgrading the motor and maybe adding the free wheeling mod. It is a bit slow but then again it is a scale speed. Just make sure you water proof the winch controller. I used liquid electrical tape to waterproof mine. Like Simp said the stock bumper is a bit soft but I think I have a way to "firm" it up some. So far though the stock bumper has taken everything I have thrown at it.
|
| |  |
| | #75 |
| Rock Stacker Join Date: Feb 2015 Location: Vancouver, BC, Canada
Posts: 70
|
So since you had your lights going for a while, do you still find the placement of the Ballon covered controller box a good location? Zipped tied behind the passanger seat? I finally have a little time to work on my deadbolt and got a new grill installed, wire mesh backing, front headlights and tested the lights and all work, but not mounted yet. I am using your setup as a guide as I think it's great. Before I do my final install just wondering if you found anything that didn't work out well or all good still? Also just waiting for the traxxas receiver box to show up to finish off this work. Thanks, great posts again.. |
| |  |
| | #76 |
| RCC Addict Join Date: Dec 2006 Location: Flatwoods
Posts: 1,036
|
Your welcome. Yup, it is proving to be a great spot, still very happy with the location. Up out of the way and securely mounted to the body so I just have to unplug the servo extension I use to power it to remove the body. 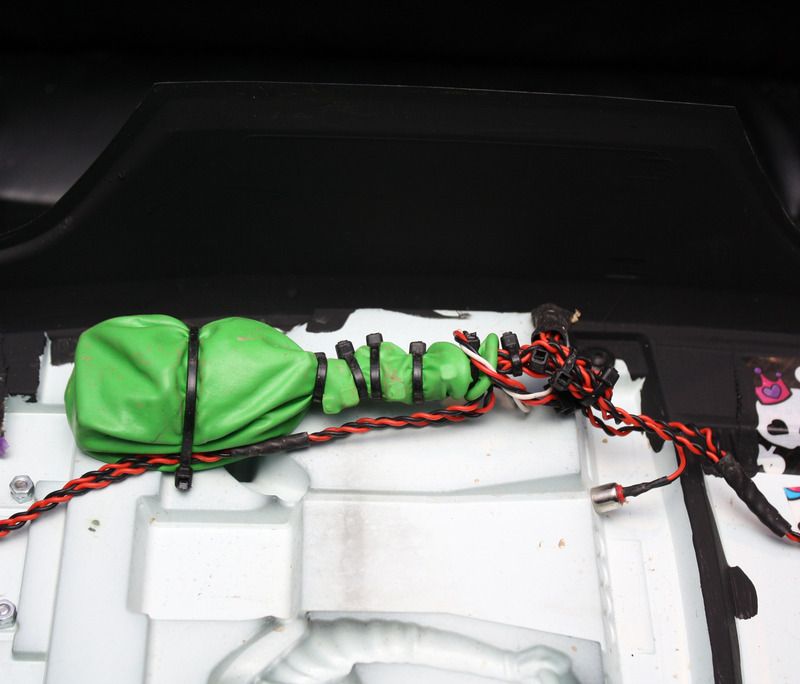 As you can see in the pic it is doing well. I have also painted the inside of the body black everywhere it was visible. Helps make it look a bit more real. As an added bonus it makes the green of the body look a bit darker when in the sun. |
| |  |
| | #77 |
| RCC Addict Join Date: Dec 2006 Location: Flatwoods
Posts: 1,036
|
Awhile back I said I was going to try to "firm" up the stock DB bumper, well here is what I did. The problem is that the bumper flexes upward when it comes in contact with something. Normally not a problem but with the winch mounted on there it pushes the winch into the grill of the truck. With the grill decal that wasn't a problem until I added the new grill. Now I don't want the winch unnecessarily scuffing it. I have my winch mounted on a thick solid piece of plastic and then I mount it to the bumper with two screws. This is how I had to mount it on the first truck the winch was on and have just stuck with it. To stop the bumper from flexing at the mounting points I made this little spacer that will use the winch mounting bolts to hold it in place. 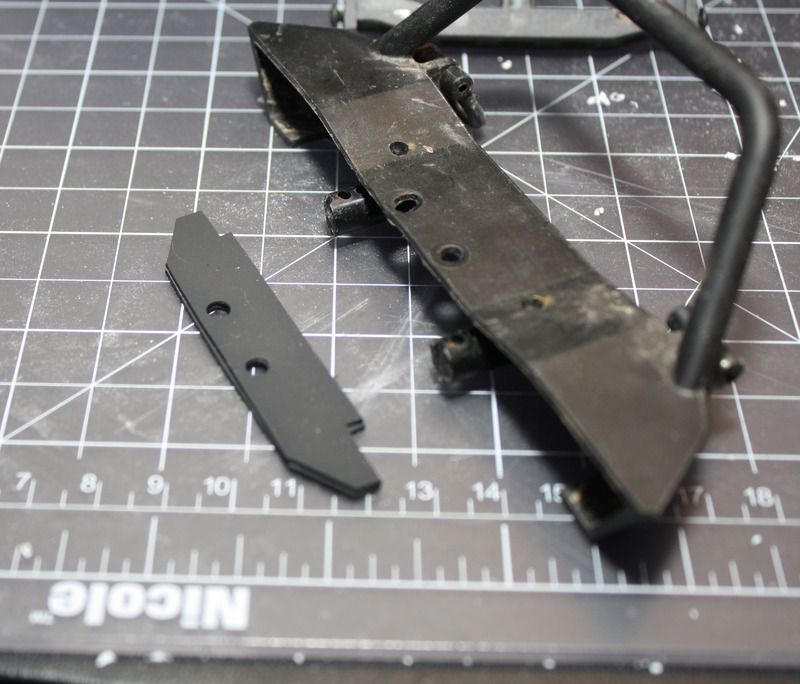 This way when the bumper is slid onto the truck the spacer fits snugly between the bumper and the mount. This is proving to be a very solid fix to this problem. 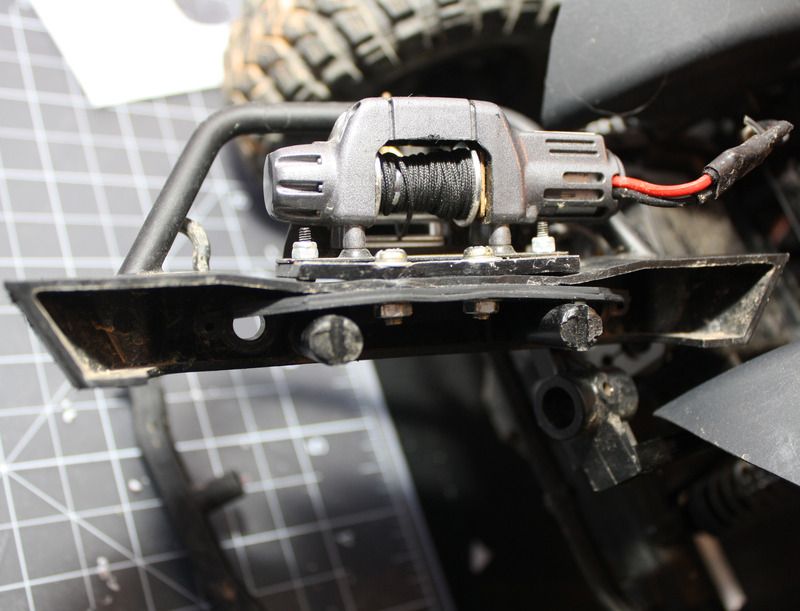 I know it is no big mod but to me it is little things that improve the whole. I also removed the brace that is behind the bumper mount. It was hitting on the steering servo at full compression so I decided to give it the boot. Next up? Maybe some steering links. Thanks for looking, -Prime- Last edited by Prime; 05-12-2015 at 03:58 PM. |
| |  |
| | #78 |
| RCC Addict Join Date: Dec 2006 Location: Flatwoods
Posts: 1,036
|
It's been a while but I am back with a little more work done to the truck. The stock steering links on this truck are waaaaay too soft. So sticking with the "cheap" theme I decided to make a set of steering links. I used threaded rod and a brake line sleeve. For the end links I just used some random ones from my parts box. I went ahead and made the main link bent so that it will clear the pumpkin once I change the knuckles and shafts for more steering. 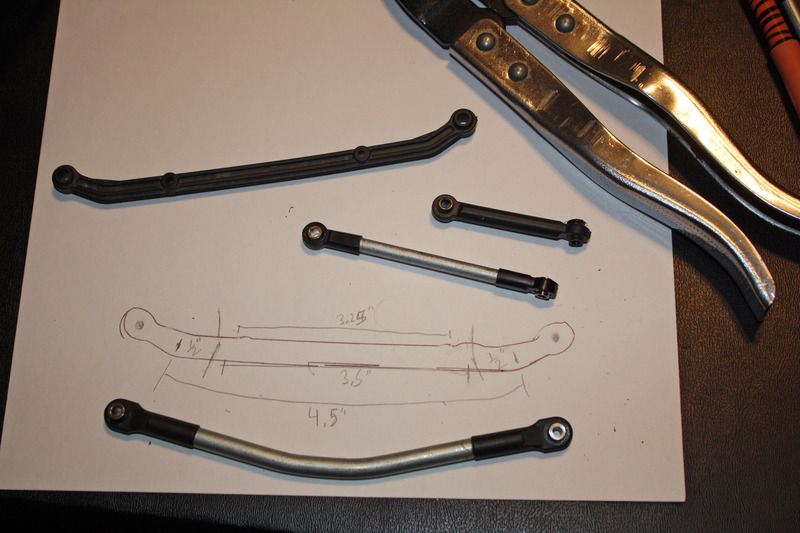 Painted up 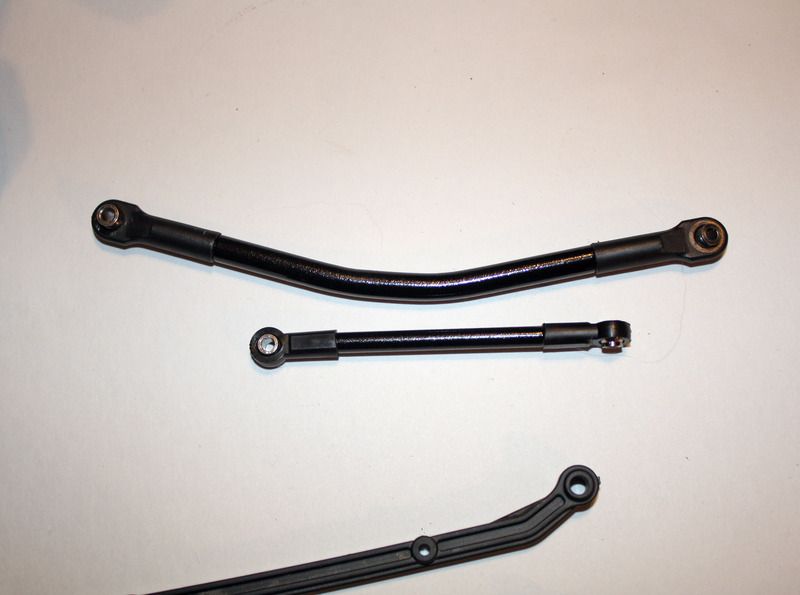 And installed. 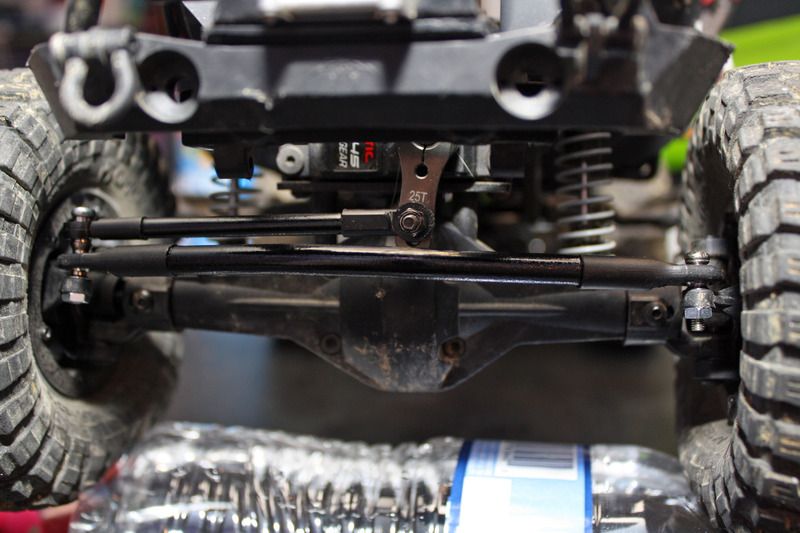 This should make the truck much more controllable while out on the trail. Thanks for looking, -Prime- |
| |  |
| | #79 |
| RCC Addict Join Date: Dec 2006 Location: Flatwoods
Posts: 1,036
|
Since I already had the tools out from making the steering links I decide to make a set of upper rear links as well. Now all the links are metal. Once again, threaded rod, brake line, and end links from the parts box. Upper links before painting. 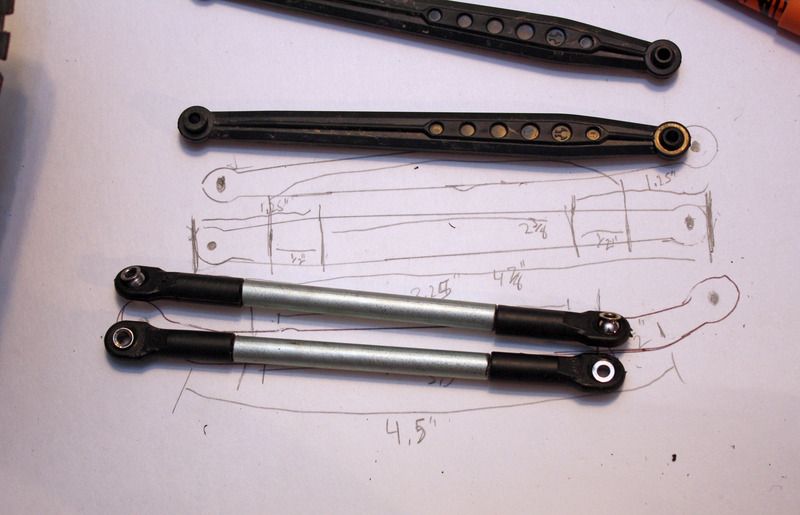 And after painting. 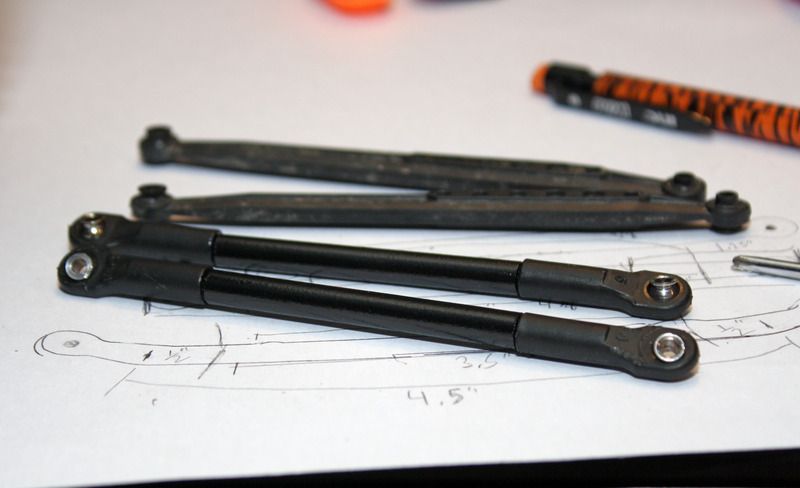 This should really firm up the suspension and now with all metal links there shouldn't be any unwanted flex. I still need a metal truss for the rear and a metal three link mount in the front. |
| |  |
| | #80 |
| Rock Stacker Join Date: Dec 2013 Location: The Mitten
Posts: 74
|
Is it just me or are your new uppers a tad shorter?
|
| |  |
 |
| Tags |
| deadbolt, scx10 deadbolt |
 Start of a new Deadbolt project. Lets call it Project: Cheapbolt - Similar Threads
 | ||||
| Thread | Thread Starter | Forum | Replies | Last Post |
| LCG deadbolt crawler project | 1JEEPNICK1 | Axial AX10 2nd-gen | 9 | 02-10-2015 05:18 PM |
| Deadbolt aka project joker | BigCountry11 | Axial SCX-10 | 2 | 11-25-2014 11:48 AM |
| I think I'll call it project aggression... | Blue buggy | Axial Wraith | 6 | 05-08-2014 02:40 PM |
| The i'm not sure what to call it project. | motoxkfx | 2.2 Scale Rigs | 6 | 08-30-2013 07:58 AM |
| Start of my project | bluto | 2.2 Scale Rigs | 2 | 04-02-2008 08:59 PM |
| |