| |
 11-05-2017, 11:18 AM
| #381 | |
| I wanna be Dave Join Date: Aug 2016 Location: Orange County, CA
Posts: 3,643
| Quote:
| |

|  |
| Sponsored Links | |
| | |
|
11-05-2017, 01:43 PM
| #382 |
| RCC Addict  Join Date: Jun 2012 Location: Meridian,Id
Posts: 1,045
|
I haven't seen those yet but maybe
|
|
| |
|
11-05-2017, 02:27 PM
| #383 |
| I wanna be Dave  Join Date: Apr 2015 Location: Roseville, Ca
Posts: 2,506
| |
|
| |
|
11-05-2017, 03:22 PM
| #384 |
| Quarry Creeper Join Date: May 2012 Location: Berlin
Posts: 310
| New bearing only helped a little bit. I think CVA's will actually help quite a bit. Just a bit more support. Now i am dealing with my front diff. I used the wrong gears. HPI 86917 instead of 103400. So i have to take apart the diff again until the new gears show up. THEN again when i get the CVA's. Ugh.. that is getting old. Im also going to shim where the front lower links attach to the skid. There is a lot of play there and it creates quite a bit of slop in the front axle. I'll post pictures later on. |
|
| |
|
11-05-2017, 06:01 PM
| #385 |
| Rock Crawler Join Date: Apr 2017 Location: Northeast PA
Posts: 516
|
Interior done! I put a lipo alarm in so the driver can keep an eye on the vitals The floorpan is painted black on the bottom side with Tamiya flat clear on the top side. This is the second lexan interior I've tried the flat clear on and it's been working great.    |
|
| |
|
11-05-2017, 10:00 PM
| #386 |
| Rock Crawler Join Date: Jan 2011 Location: Groningen, The Netherlands
Posts: 528
|
Flat clear looks good. I am about to take the car apart anyways, ecause I want to fit a driver. A bit f preliminary fitting has shown that -with a little cutting- the driver for the bruiser will actually fit. On the stuck/binding shifter forks: Pay excessive, obsessive, precise attention to pages 18, 19, 20 and 21 of the manual when building. A mistake is easily made. I -for instance- fitted the shifter forks the wrong way around, and couldn’t get the gearbox to close without locking all the gears I liberally slapped Tamiya ceramic grease on everything inside the gearboxes. That seems to do the trick. No binding, reasonably smoothshifting, with only sometimes the need to re-shift. It’s not as good as the Twin Hammers, though. The GOM isn’t too fond of shifting on the fly, especially shifting back at speed. I endo’d it quite a few times The aluminium shift forks are the first thing I am going to upgrade. I have little trust in plastic shift forks. They haven’t broken yet, but still.. Last edited by Jay-Em; 11-05-2017 at 10:22 PM. |
|
| |
|
11-05-2017, 10:02 PM
| #387 |
| RCC Addict Join Date: Jun 2012 Location: Meridian,Id
Posts: 1,045
|
My driver one eye Willy  Sent from my iPhone using Tapatalk |
|
| |
|
11-05-2017, 10:09 PM
| #388 |
| Rock Crawler Join Date: Jan 2011 Location: Groningen, The Netherlands
Posts: 528
|
Hah. WW fits almost anywhere. By the by, for those wanting to open-up the front diff: DustinF noticed that only the hpi 103400 bevel gear set will fit correctly ( be it with some dremeling and grinding). It also needs shimming. I forgot to mention that. I used the shims from a Tamiya DT02 kit, they’re exactly right. For filling the diff with, say, 100000wt, it also needs 2 tiiiny o-rings around the outgoung shafts. There are recesses in the diff housing for that. Axial diffs/lockers usually have those little o-rings. All my Axial kits came with extra o-rings in all kinds of sizes. That’s where I swiped mine. Last edited by Jay-Em; 11-05-2017 at 10:32 PM. |
|
| |
|
11-06-2017, 08:26 AM
| #389 |
| Rock Crawler Join Date: Jan 2011 Location: Groningen, The Netherlands
Posts: 528
|
A couple of pics to show the GOMs current state, including home-made sway bars ( Im kinda chuffed that the system I thought out for my Wraith, years ago, still works)  Lightbar is the Vaterra Slickrock Led lightbar and housing.  Axial radiator stuck to GOM fake one with shoe goo  Overview. And yup, copied paintscheme from Dustinf |
|
| |
|
11-06-2017, 08:46 AM
| #390 |
| Rock Crawler Join Date: Apr 2017 Location: Northeast PA
Posts: 516
|
^^^Looking good. What's the little pushbutton on the passenger side for?
|
|
| |
|
11-06-2017, 08:55 AM
| #391 |
| Rock Crawler Join Date: Jan 2011 Location: Groningen, The Netherlands
Posts: 528
|
Hahaa... that’s a secret!! Nâh. It’s a button to externally switch the desert lights in the rear from just orange flashing, just red flashing, orange flashing with a half second break, and all lights flashing one at the time. I had no channel left to use a remote switch, so I used the switch that came with the Turnigy ‘smart’ light controller itself. ( Hobby King). It’s about to get the cover of a fuel nozzle-thing-whatsitcalled, to camouflage it. |
|
| |
|
11-06-2017, 09:30 AM
| #392 | |
| Quarry Creeper Join Date: May 2012 Location: Berlin
Posts: 310
| Quote:
This was freaky... man, you nailed the paint. Same angles and everything. Nice work. It's a flashy looking pant scheme. Mine has gotten all scratched up... so seeing yours as a new shinier version of mine has me jealous haha I had a similar sponser sticker layout in mind. But havnt gotten around to it yet. Last edited by Dustinf; 11-06-2017 at 09:35 AM. | |
|
| |
|
11-06-2017, 11:00 AM
| #393 | |
| Moderator   Join Date: Sep 2008 Location: PA
Posts: 13,935
| Quote:
 | |
|
| |
|
11-06-2017, 11:56 AM
| #394 |
| Rock Crawler Join Date: Jan 2011 Location: Groningen, The Netherlands
Posts: 528
|
@DustinF Well, Yours looked like perfection to me, so the choice was easy. I only deviated with the interior. I went for gun metal there. There’s quite a bit of scratching going-on ùnder the panels, though. I couldn’t wait to run it after building, so I ran it for a few packs without any panels. By now it’s running a 17t double Orion v-brush, and I also found a HW 1060 in a drawer. It’s tiny. Much better than the clunky big HPI ESC. It’s pretty peppy now, still no speed-demon, but fast enough to have some fun on the trails. Last edited by Jay-Em; 11-06-2017 at 12:00 PM. |
|
| |
|
11-06-2017, 09:34 PM
| #395 |
| Quarry Creeper Join Date: May 2012 Location: Berlin
Posts: 310
|
I've finally machined a link for the cage. 104mm fits really well, but 104.5mm fits better. The spot is for a 1/4" size rod... or close enough not to matter. It matches the rear brace right below it. This one is drilled and tapped on both sides and really helps the cage in rigidity. 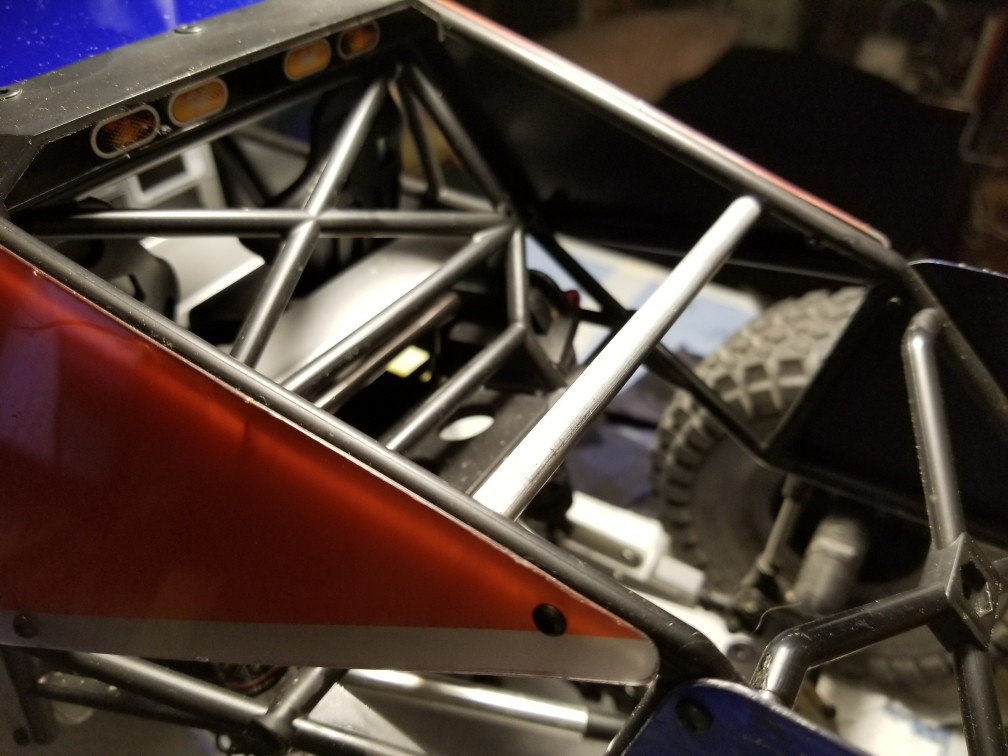 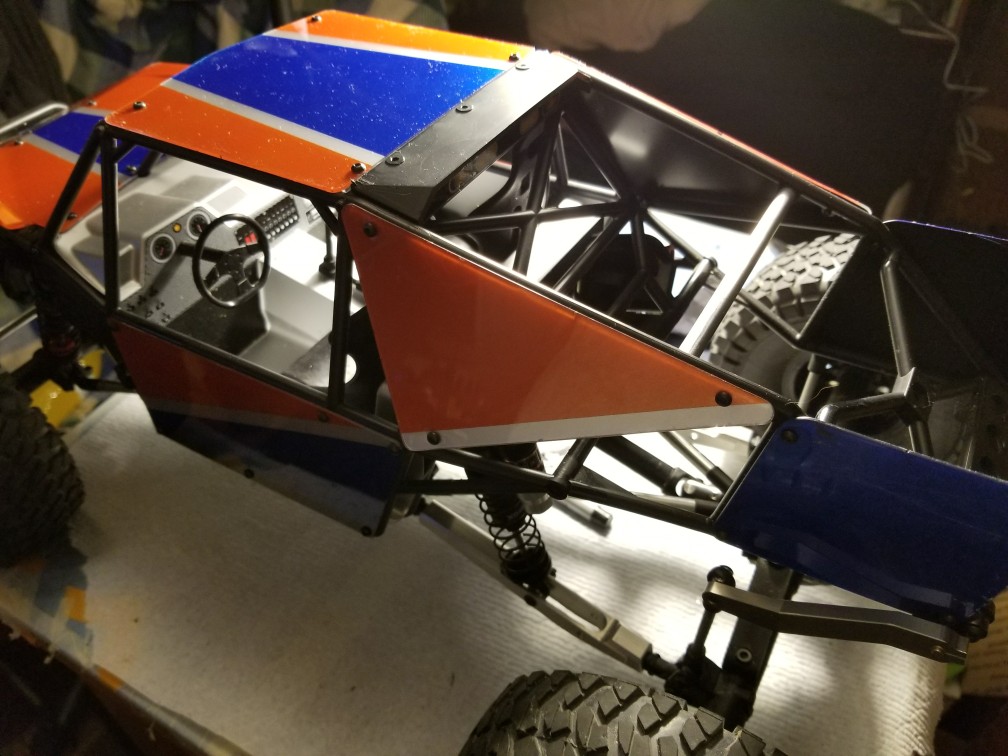 I think I'm going to put it back on the lathe and give it a concave of some type. Also, a Trail Finder 2 bent steering link would fit there... and probably look pretty cool.  I've also ordered a rear yeti bezel that I'm going to fit. And possibly the radiator... this will be the fourth one I've bought painted and mounted so I'm going to try something different first. Hobbywing fans and covers. Once the new tires come in and I mount a spare, I'm going to focus on interior details. Last edited by Dustinf; 11-06-2017 at 09:48 PM. |
|
| |
|
11-06-2017, 09:40 PM
| #396 |
| I wanna be Dave Join Date: Aug 2016 Location: Orange County, CA
Posts: 3,643
|
Good idea with the Yeti Radiator. Thankfully I have one from my Yeti! I never ended up putting it on. Will have to take a look when I get to that step.
|
|
| |
|
11-07-2017, 07:29 PM
| #397 | |
| Rock Crawler Join Date: Apr 2017 Location: Northeast PA
Posts: 516
| Quote:
 Anyway, if you're reading this Jay-Em, I took a shot at timing the motor and I was hoping you could check my work based on the second picture. The notch in the can is zero degrees, so did I move the endbell in the correct direction to give it positive timing in the GOM? If so, it that a reasonable amount of timing? I just wanted to give it a little bit without going overboard, mostly just for the sake of tinkering. Thanks again for all the info.   | |
|
| |
|
11-08-2017, 05:33 AM
| #398 |
| Rock Crawler Join Date: Jan 2011 Location: Groningen, The Netherlands
Posts: 528
|
Nope, sorry,exactly the wrong way... The endbell should be rotated counter to the shaft rotation. Looking at Your 2nd pic, the notch in the endbell (where the brushes sit) should be to the right, not the left. If You look at the shaft from the front at the end where the pinion goes, the shaft must rotate clockwise, consequently, the endbell/notch should be rotated COUNTER clockwise looking at the can from the front,pinion side, about 2mm Don't go beyond 3.5mm. For a start 1 to 2 mm is enough. Watch the temps. Burning finger = too much timing and too big pinion for -said- timing. And 13turns? Ehh.. The car might get to be a tad..ehh "nervous" Though the fact that it's double-wound, should make for a smooth mid-range. Start with the included 13tooth pinion, and -again- watch those temperatures! (cannot stress that enough)If my explanation doesn't make sense to You ( not unheard of.. Last edited by Jay-Em; 11-08-2017 at 05:59 AM. |
|
| |
|
11-08-2017, 06:19 AM
| #399 | |
| Rock Crawler Join Date: Apr 2017 Location: Northeast PA
Posts: 516
| Quote:
| |
|
| |
|
11-08-2017, 06:44 AM
| #400 |
| Rock Crawler Join Date: Jan 2011 Location: Groningen, The Netherlands
Posts: 528
|
Usually it's enough to just get one of those clip-on heat sinks for brushed 540-size motors. If You can afford it, with a fan. There's enough space under the bonnet. Or, if it's too high, just stick it through the bonnet. Might even look cool. I use a cheapie from Carson/Dickie/Tamiya. Works fine ,and fits like a glove. The fact that the motor is at the front, open to the elements also helps tremendously. |
|
| |
 |
| Tags |
| gmade, gom |
 Coming soon .....GMADE GOM-GR1 Rock Buggy - Similar Threads
 | ||||
| Thread | Thread Starter | Forum | Replies | Last Post |
| Malin's new Gmade R1 Rock Buggy | BentKa | G-Made Crawlers | 59 | 09-28-2012 06:30 PM |
| |


 Linear Mode


