| |
 10-30-2011, 07:16 PM
| #101 |
| Rock Crawler  Join Date: Jan 2010 Location: rockford
Posts: 878
|
looks like a killer build. i choose to use a proline floor pan and chop off the back half. gives you wheel wells and a floor. plus a little added splash protection.  |

|  |
| Sponsored Links | |
| | |
|
10-30-2011, 10:25 PM
| #102 | |
| Quarry Creeper Join Date: Jul 2011 Location: Lake City, Fl
Posts: 380
| Quote:
| |
|
| |
|
10-31-2011, 10:55 AM
| #103 |
| Rock Crawler Join Date: Sep 2011 Location: Southern Utah
Posts: 778
|
Ha ha I like that idea. And I like free. I'm going to try that tonight.
|
|
| |
|
11-05-2011, 06:56 PM
| #104 |
| Quarry Creeper Join Date: Jul 2011 Location: Lake City, Fl
Posts: 380
|
well I finally tore up a trans gear today lol had some family over and me and two of my cousins beat on the rig for hours; probably ran 7 packs through it. we gave up when it started throwing drive shafts off the rear diff :P but on the second pack it tore the idler gear up and I had to pull one out of my original SCX10 trans and put it in the Wraith trans sent from my BAMFed Thunderbolt |
|
| |
|
11-06-2011, 09:55 PM
| #105 |
| Quarry Creeper Join Date: Jul 2011 Location: Lake City, Fl
Posts: 380
|
alrighty, just got done placing an order Robinson Racing idler and final gear, diff inputs that came out with the Wraith WB8 drive shafts (the ones with the drilled through holes), some more longer set screws to use with the drilled inputs, Traxxas steel yokes (one of the original Axial ones has a broken off screw in it right now... my fault... but I'll keep the other 3 as spares), some Axial drive shaft rings, and a few other odds and ends (body clips, wheel nylon lock nuts, and so on). I have YET to demolish one of the Traxxas drive shafts, but I am having issues with them popping off at the u-joints, so I'm hoping that the rings will stop that. and I KNOW the drilled through diff inputs will stop the yokes from coming off and the trans should be relatively bullet proof now with all metal gears inside. the only plastic gear will be the spur, but it should be fine. got to have a weak point somewhere I guess, and why not it be the easiest gear to replace |
|
| |
|
11-07-2011, 04:27 PM
| #106 |
| Newbie Join Date: Jan 2010 Location: Nor★Cal
Posts: 30
|
You're tinkering and ingenuity are both inspiring. I love to tinker with my Honcho, but seeing your process and results has given me a renewed interest and I just got home with some new 100mm shocks, and some drive shaft rings! Time to start wrenching!
|
|
| |
|
11-08-2011, 10:54 PM
| #107 |
| Quarry Creeper Join Date: Jul 2011 Location: Lake City, Fl
Posts: 380
|
tore apart the Wraith trans today, still waiting on the gears though that I ordered only the other day 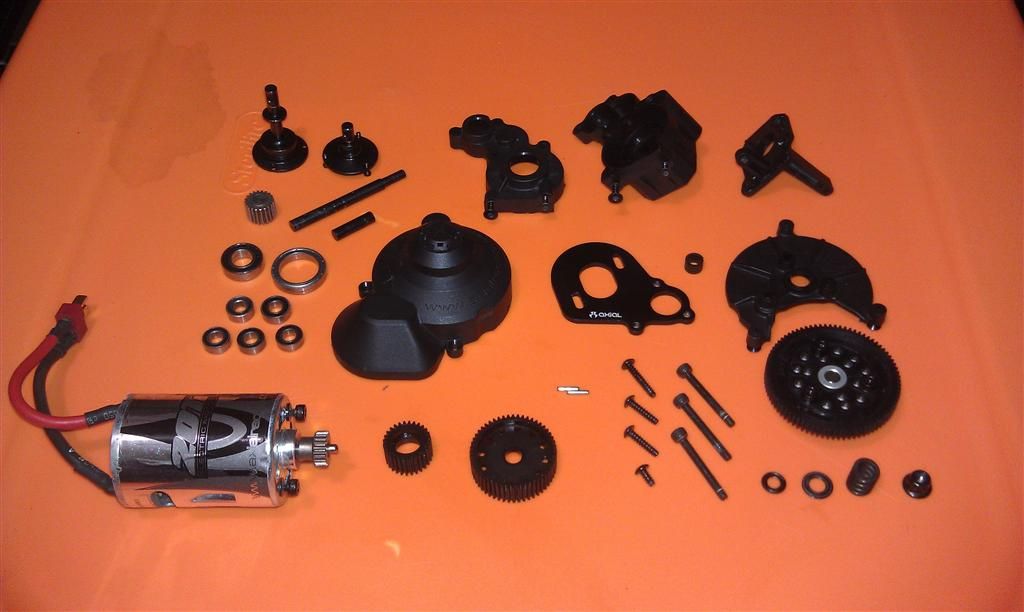 pesky little plastic gears... 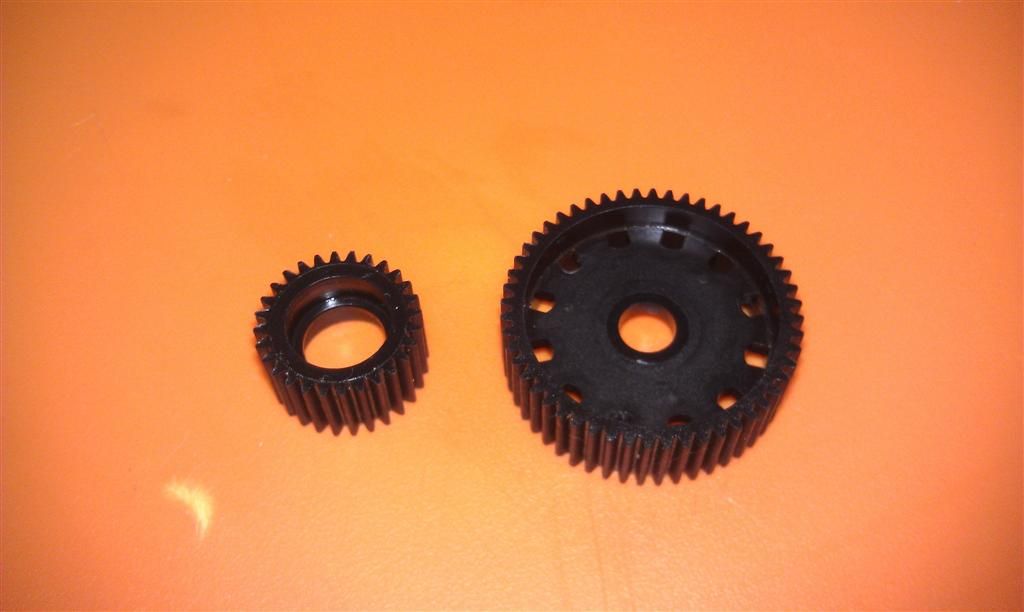 I do love these stock Wraith outputs though it'll be SO nice having the cross-drilled inputs on the diffs too! 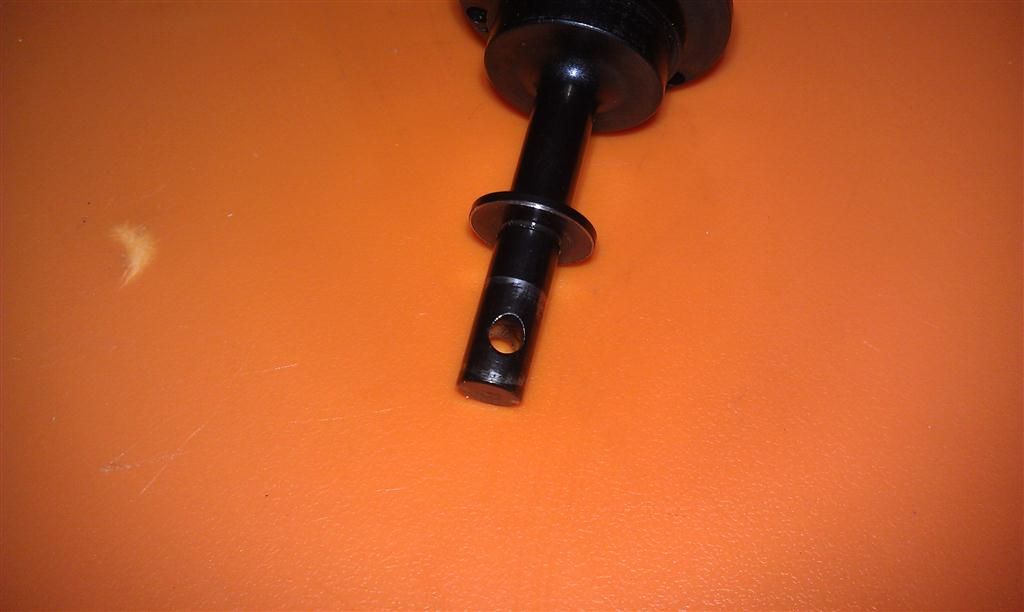 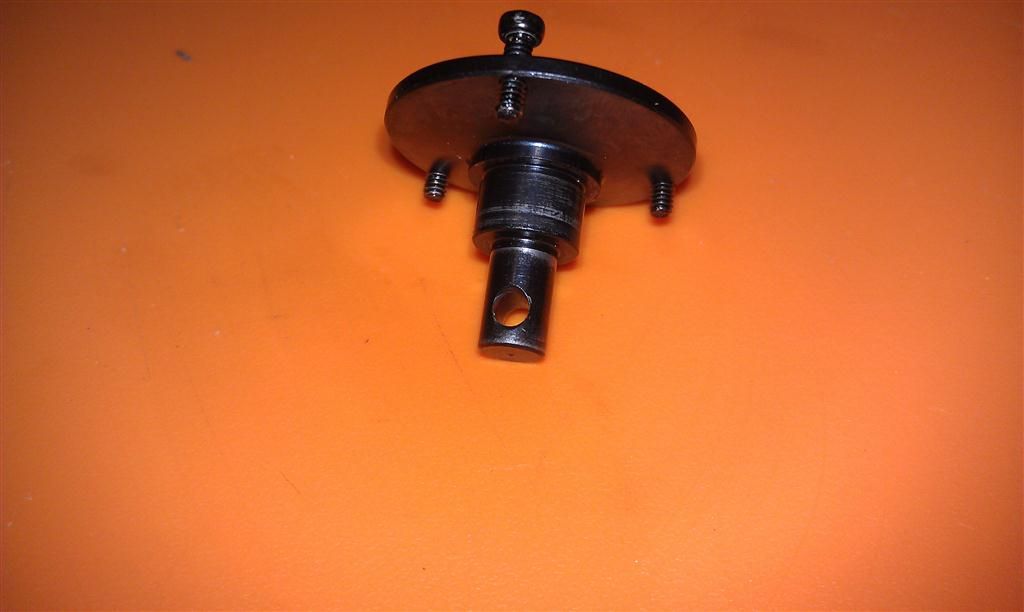 I'll be taring the diffs apart tomorrow Last edited by iamsuperbleeder; 11-08-2011 at 10:56 PM. |
|
| |
|
11-09-2011, 07:07 PM
| #108 |
| Quarry Creeper Join Date: Jul 2011 Location: Lake City, Fl
Posts: 380
|
well, got the Traxxas hardened yokes in today. looks like they're going to be a direct replacement! keep in mind that I'm also using the Traxxas drive shafts too, and I'll continue to use them at $10 for a pack of 6 complete shafts 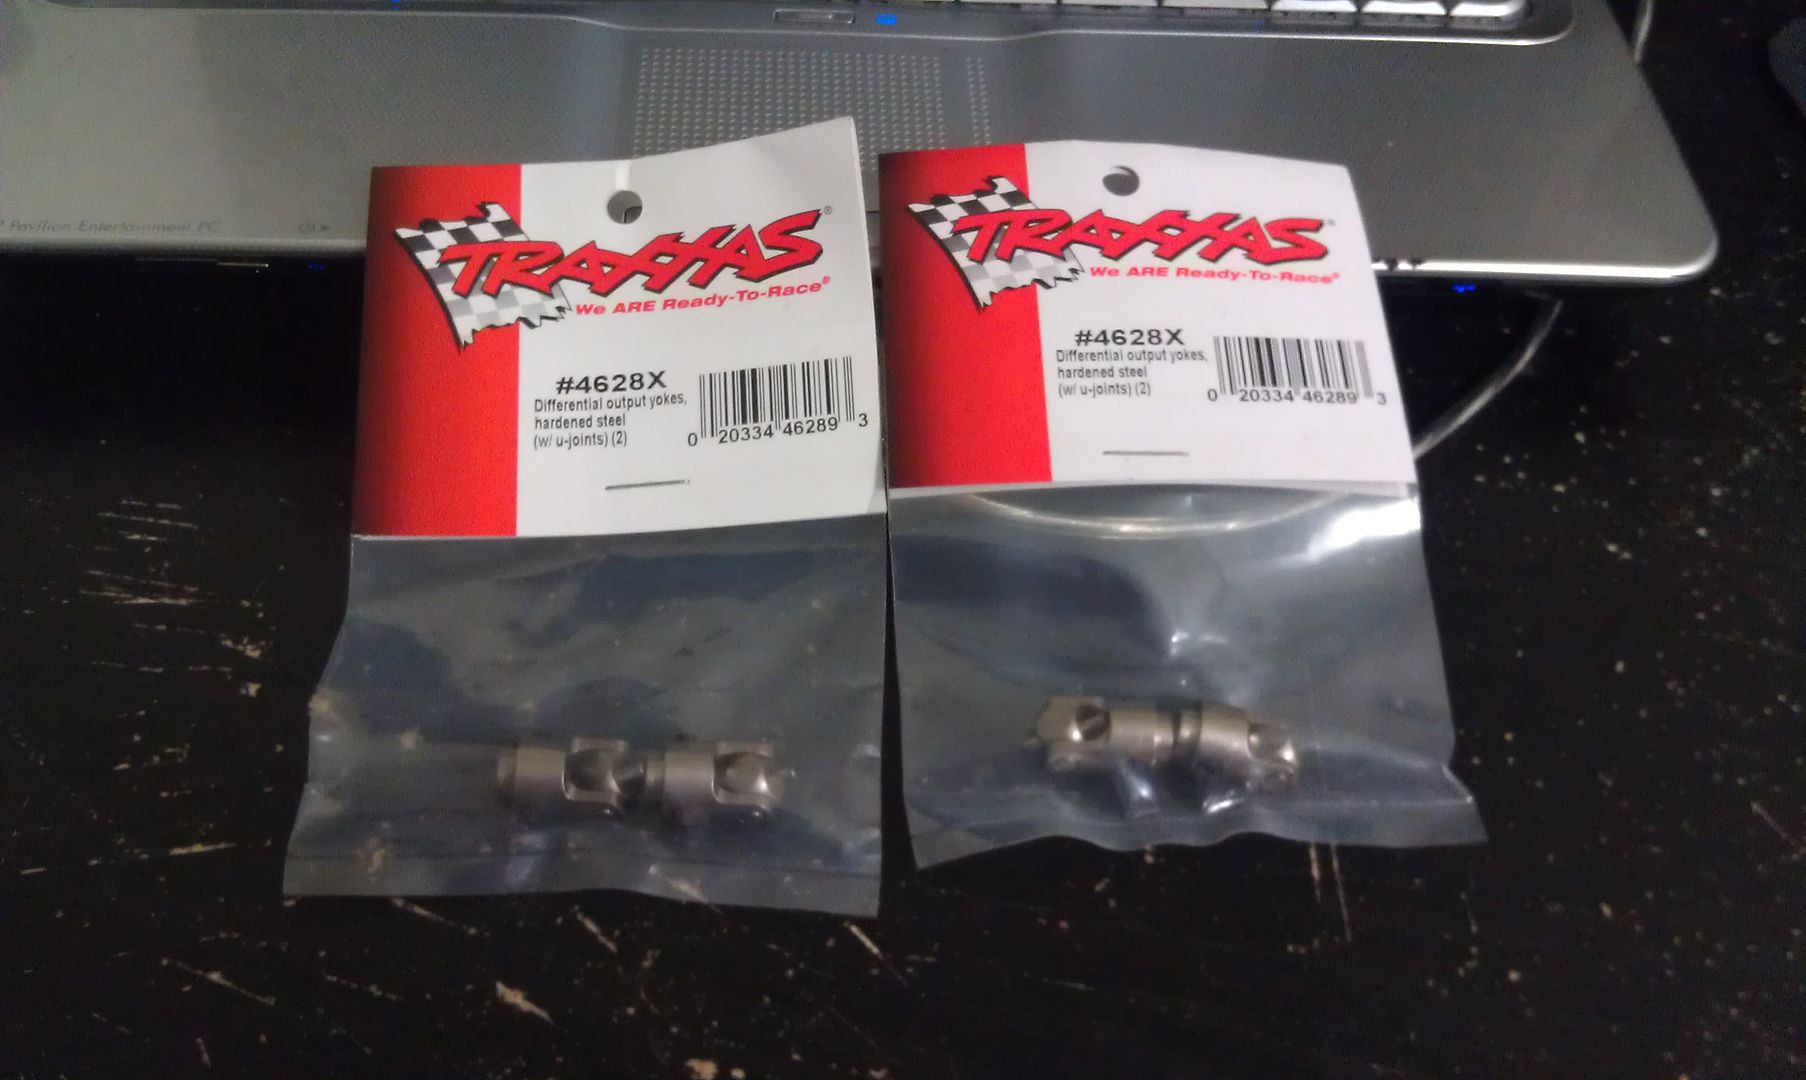 Traxxas yoke on the left, original Axial yoke on the right 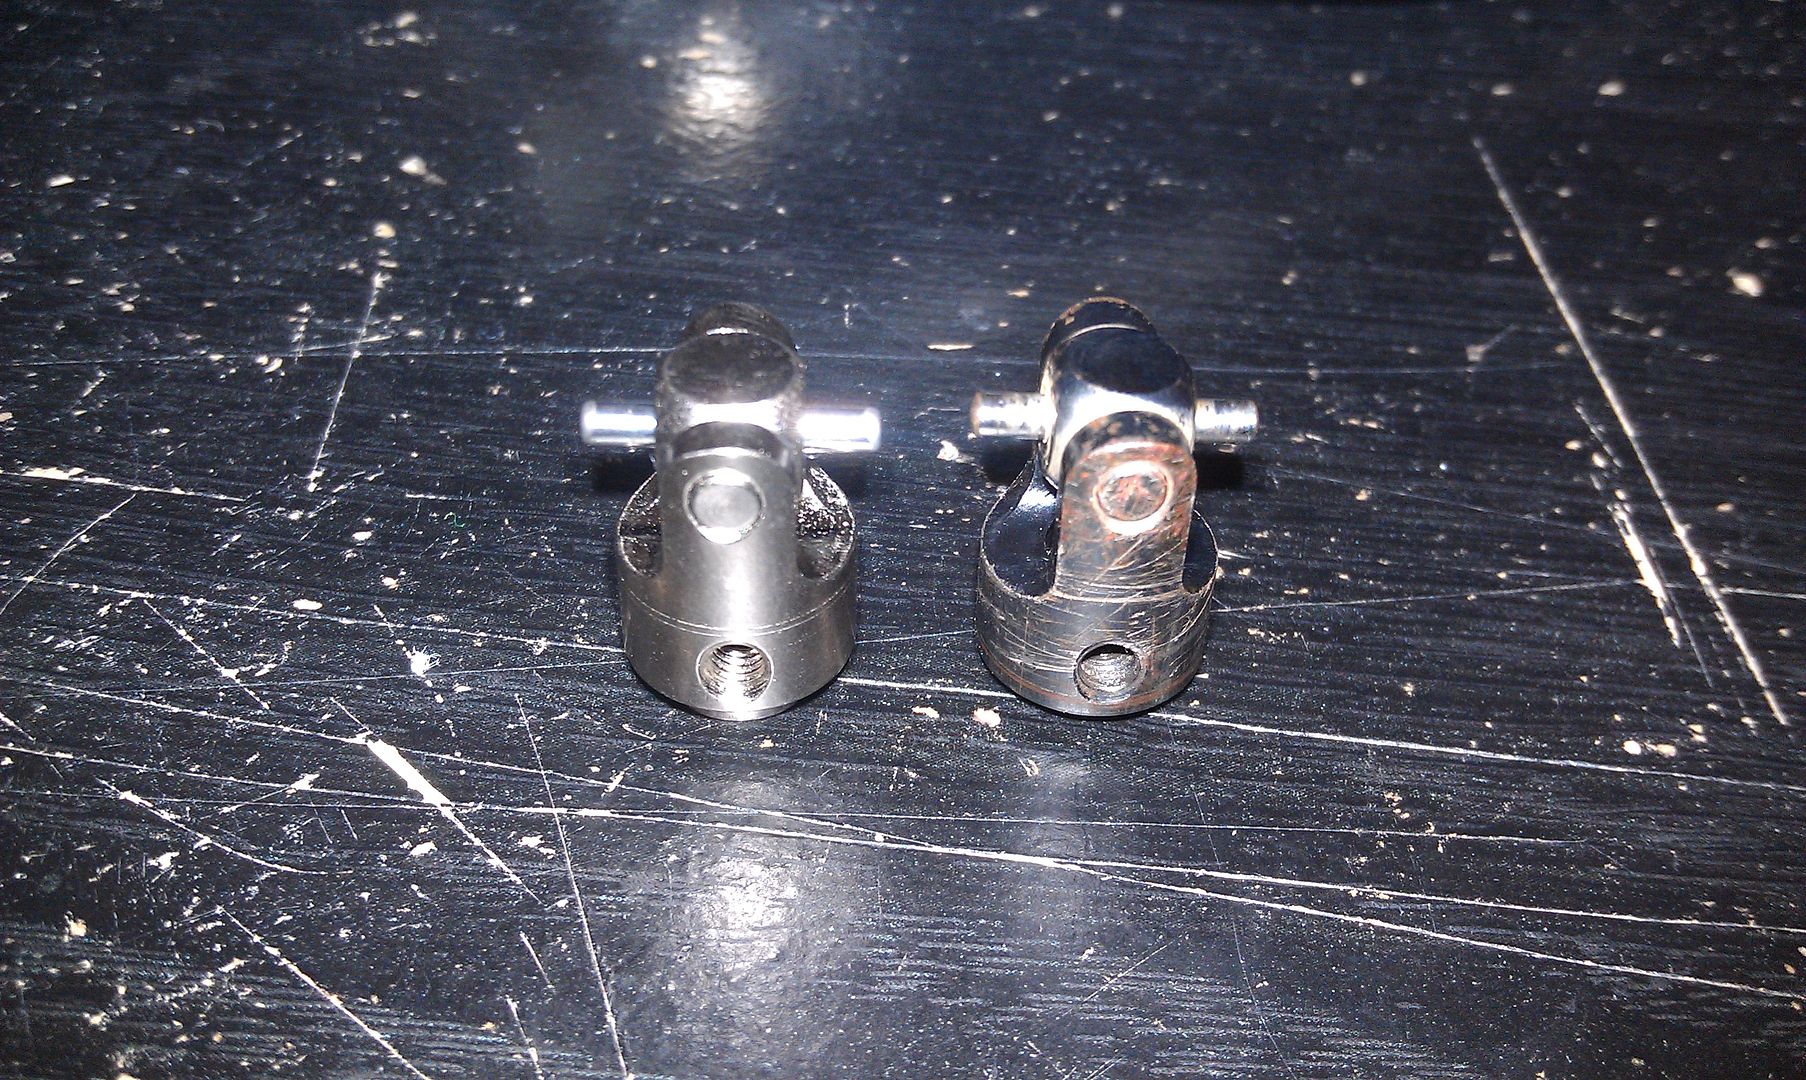 slips onto the trans ouput perfectly. ACTUALLY, the fit feels better than the Axial yokes! 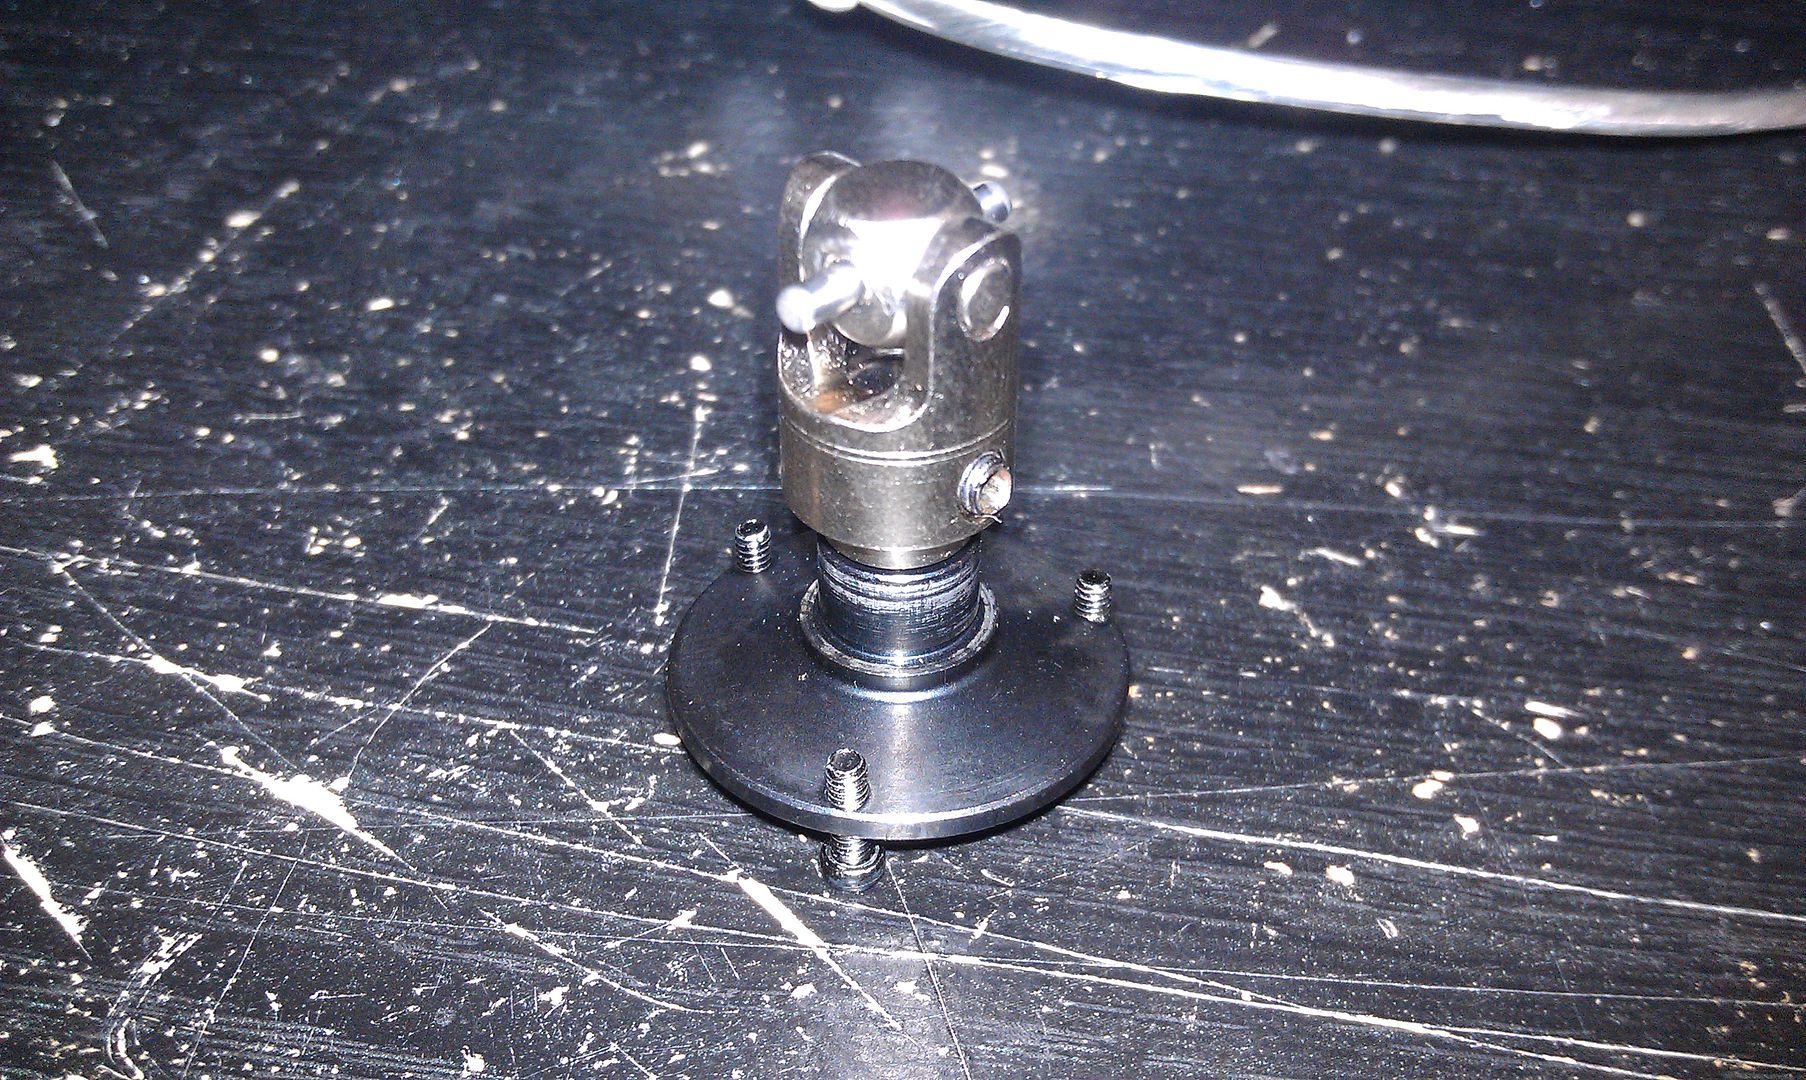 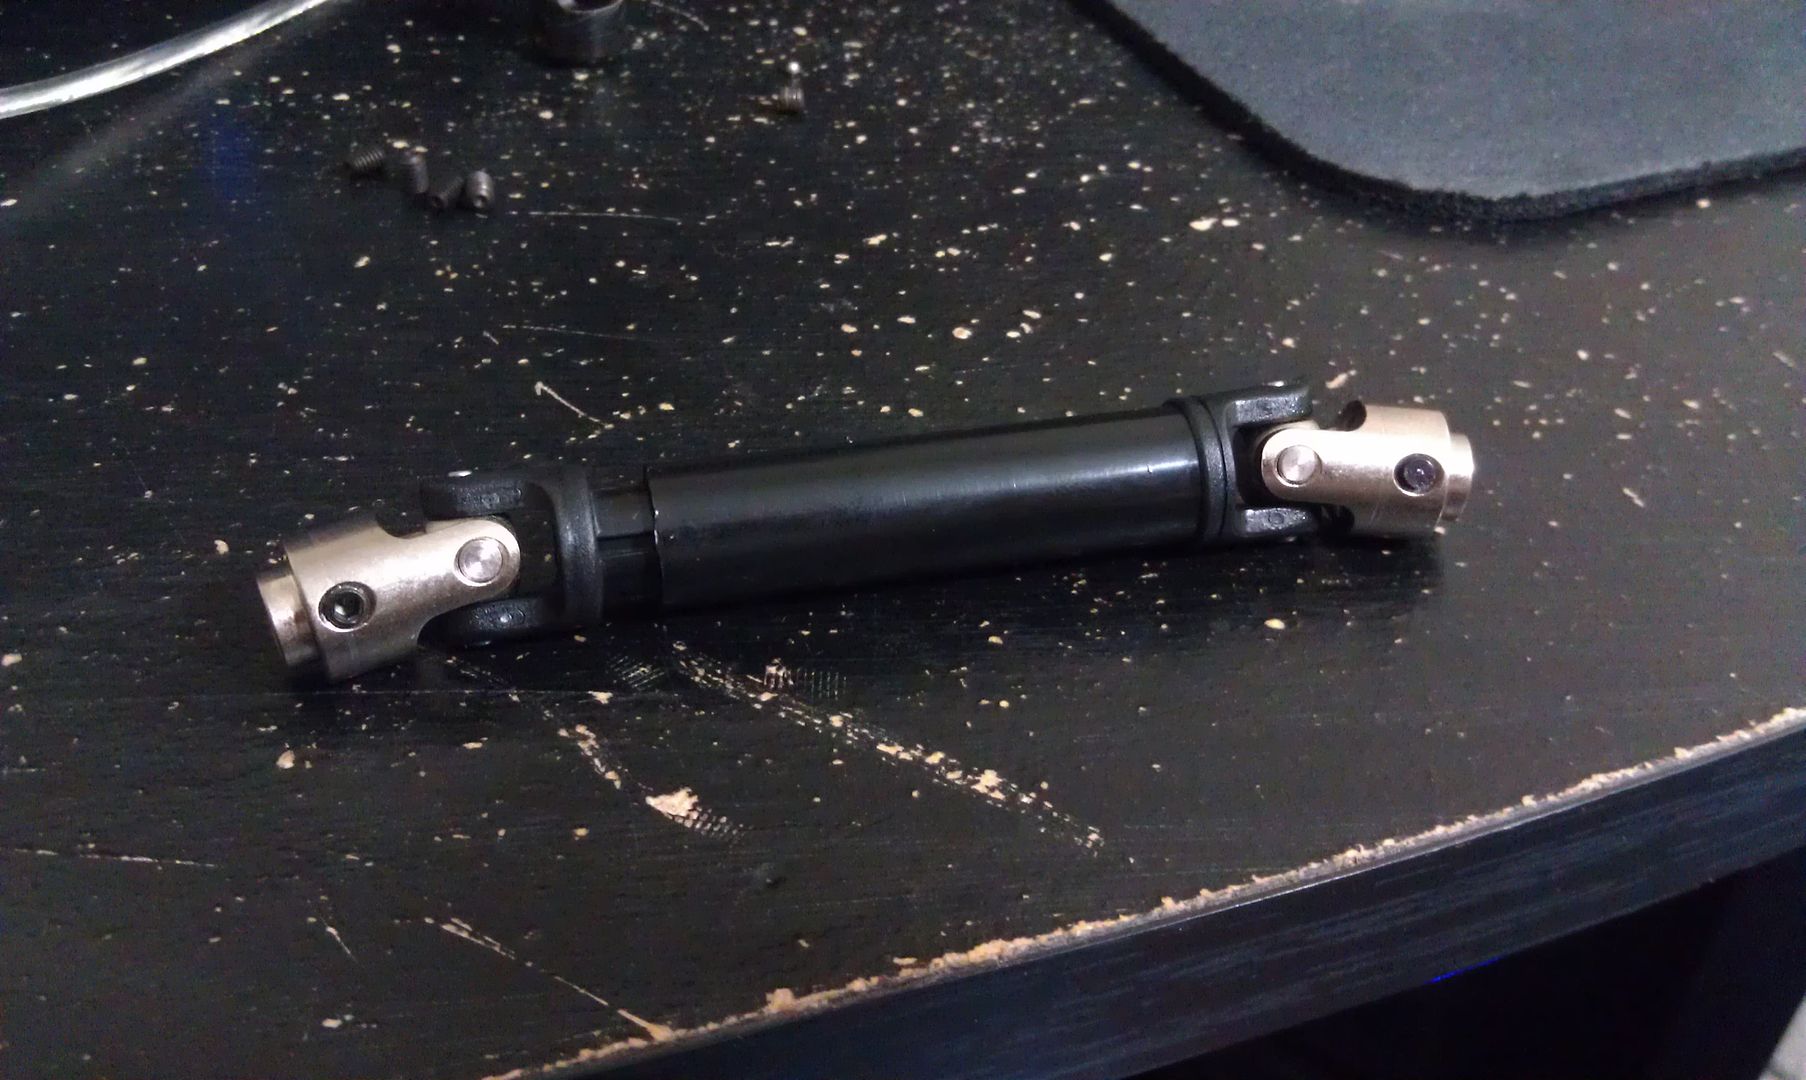 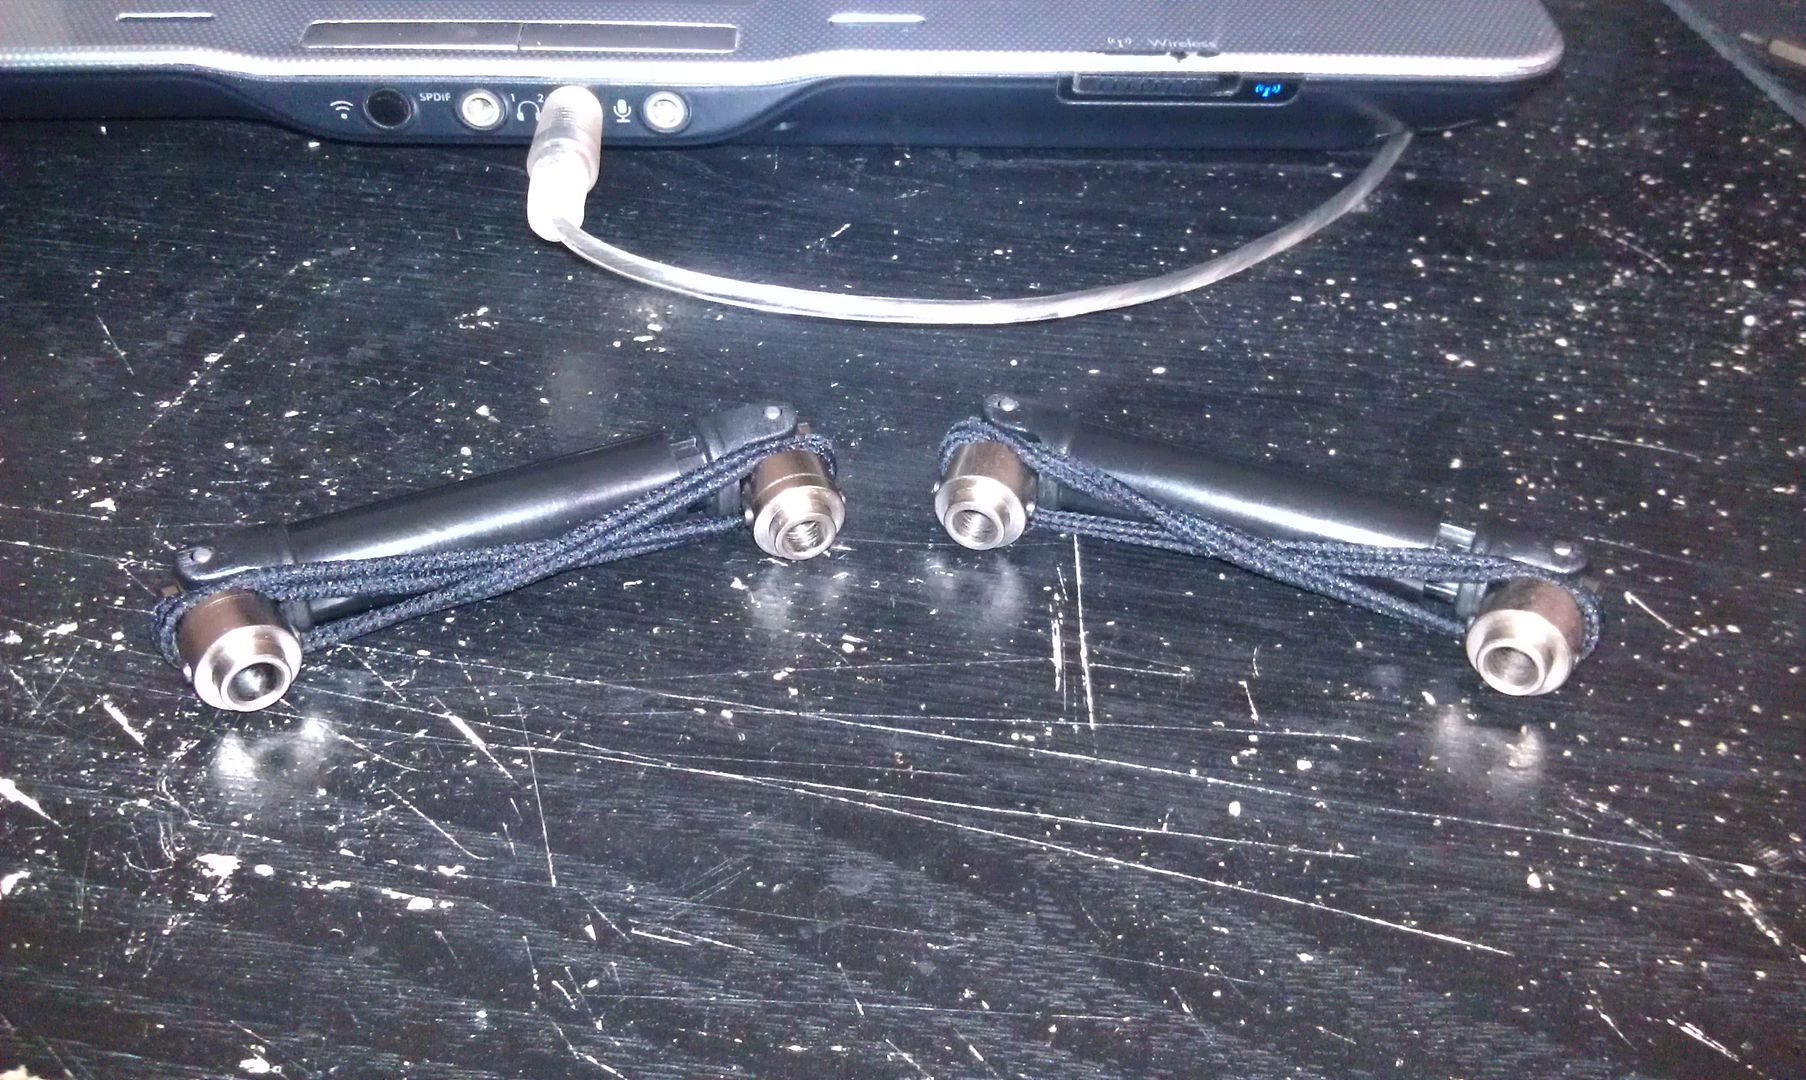 sent from my BAMFed Thunderbolt |
|
| |
|
11-09-2011, 09:39 PM
| #109 |
| Quarry Creeper Join Date: Jul 2011 Location: Lake City, Fl
Posts: 380
|
started to tear the diffs apart and looky what I found... so THAT'S where that noise was coming from, lmao. not even sure how this happened. its one of the bearings on one side of the ring gear and locker assembly. somehow the outter race is actually CRACKED 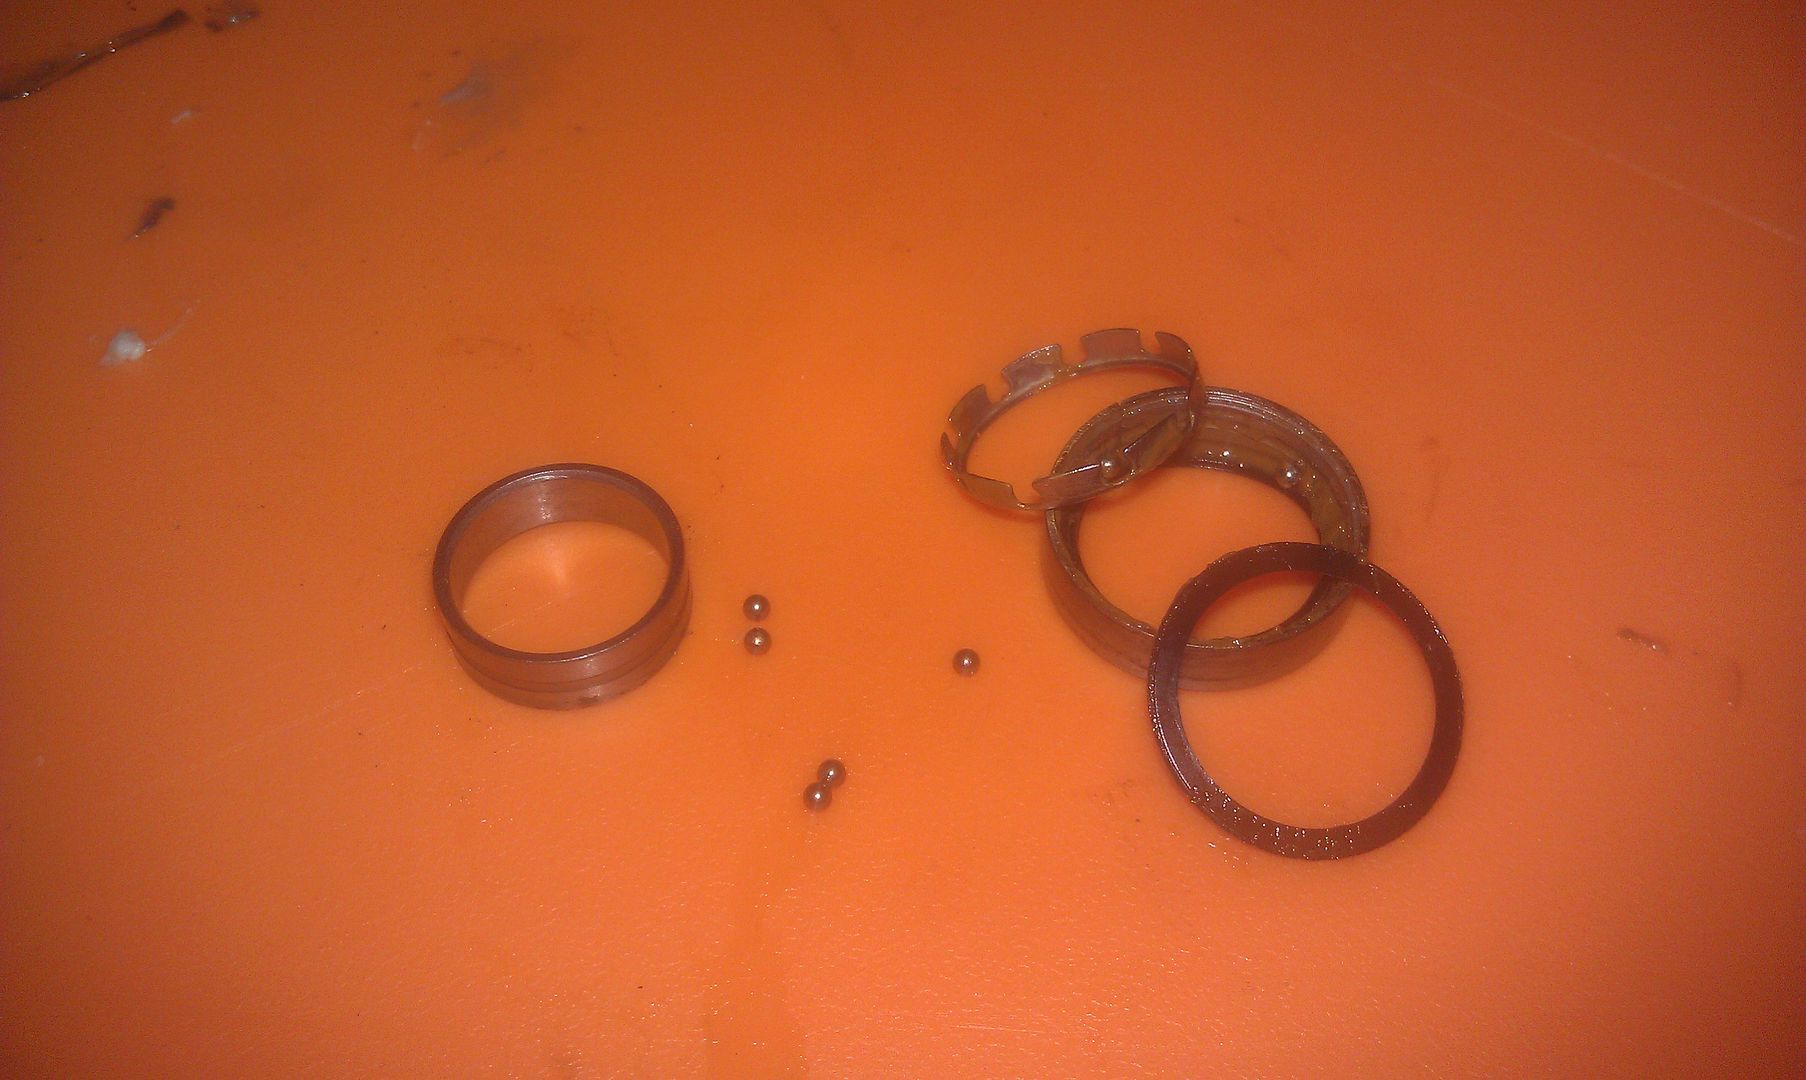 guess I need to order some spare bearings sent from my BAMFed Thunderbolt |
|
| |
|
11-10-2011, 10:15 PM
| #110 |
| Quarry Creeper Join Date: Jul 2011 Location: Lake City, Fl
Posts: 380
|
came home to some goodies today 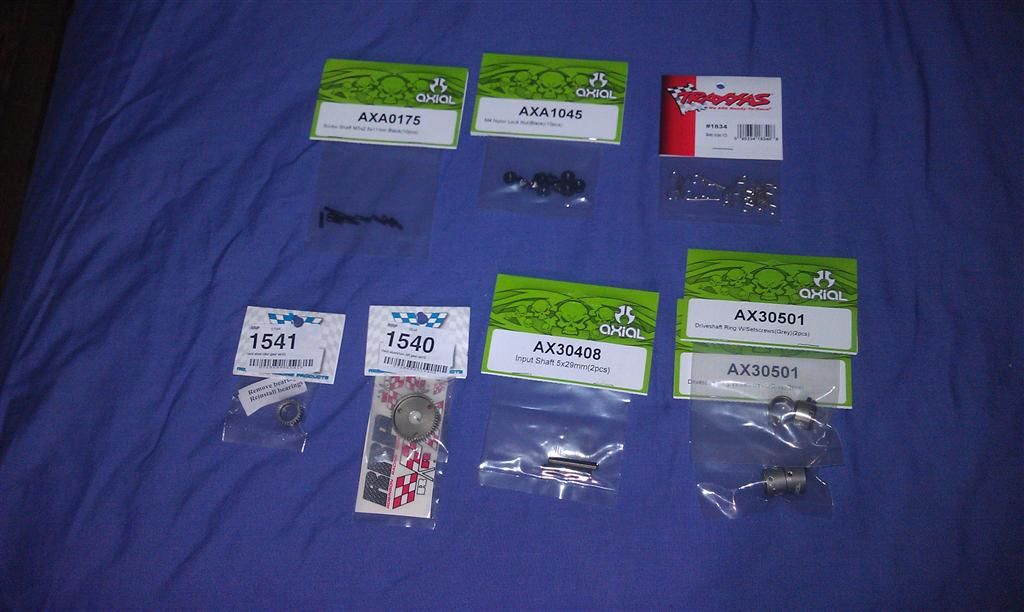 these fit SNUG on the Traxxas drive shafts... maybe a little too snug; they seem to make the joint hard to move. so I will probably try to save a little off either the drive shaft or the ring itself 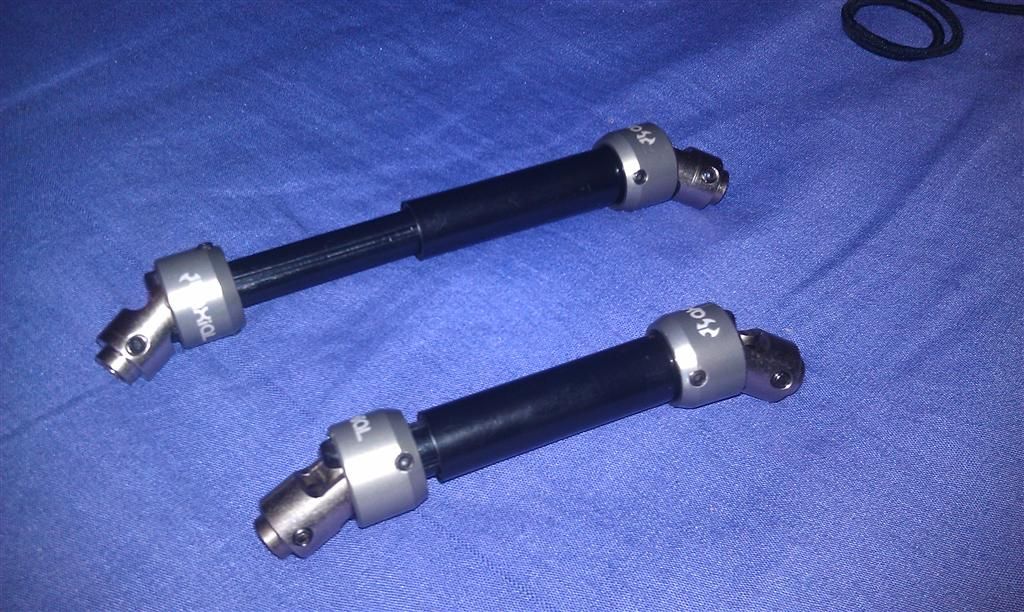 new pinion shafts for the differentials new one on top, original one on bottom obviously 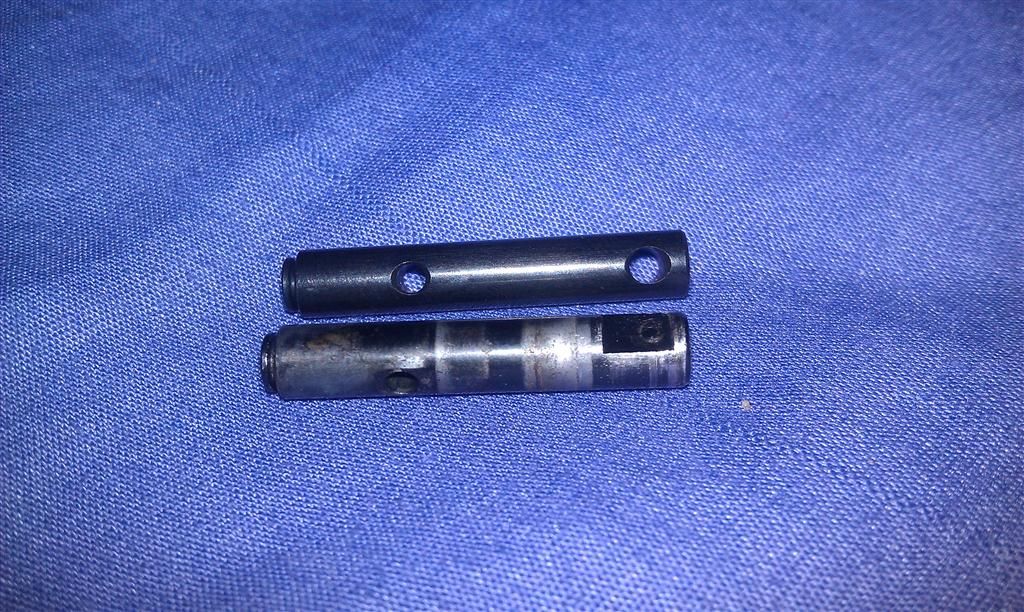 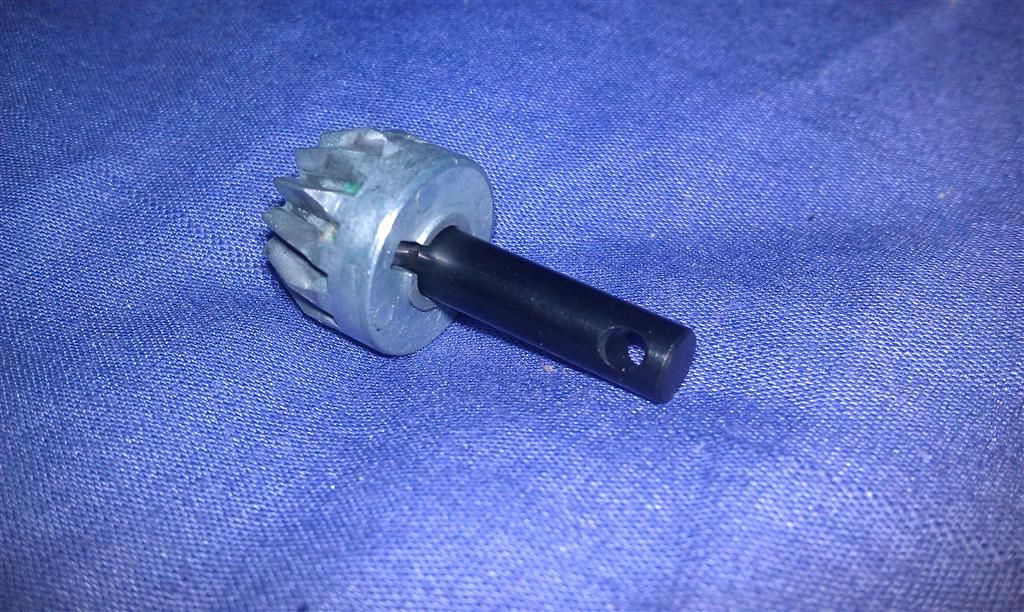 and some gears! 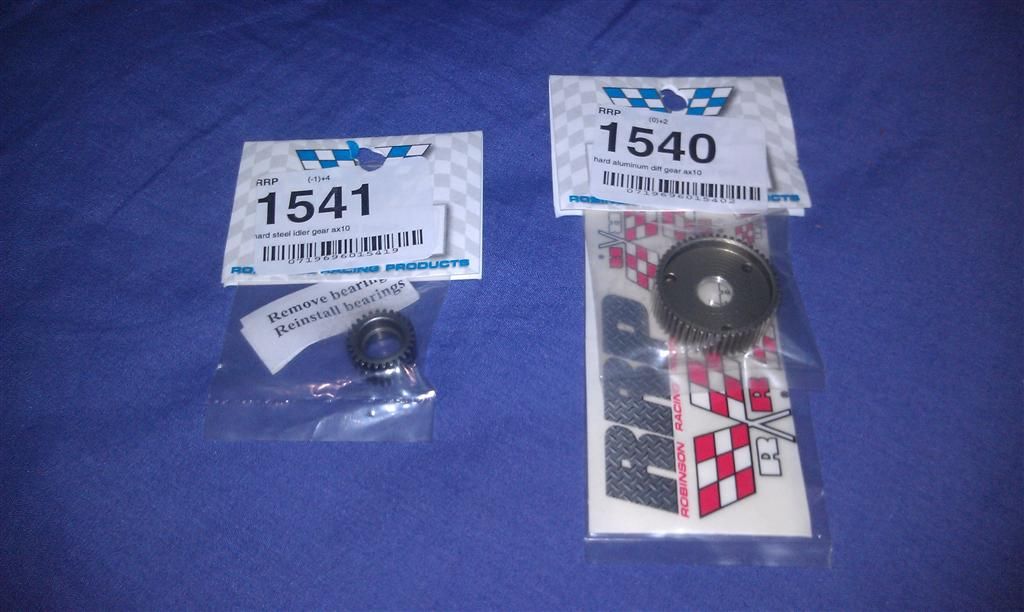 no way 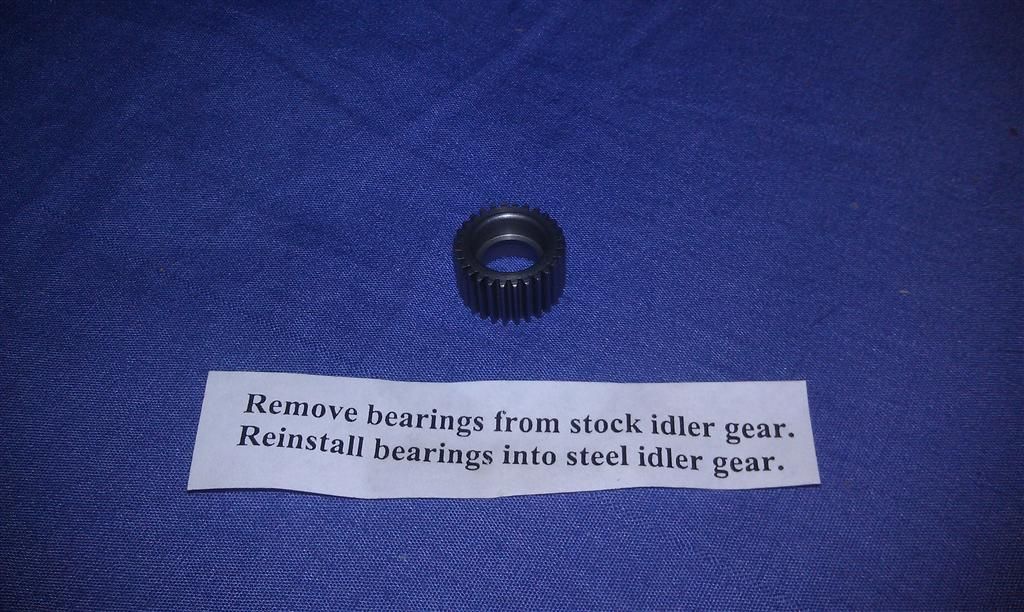 and who doesn't like stickers! 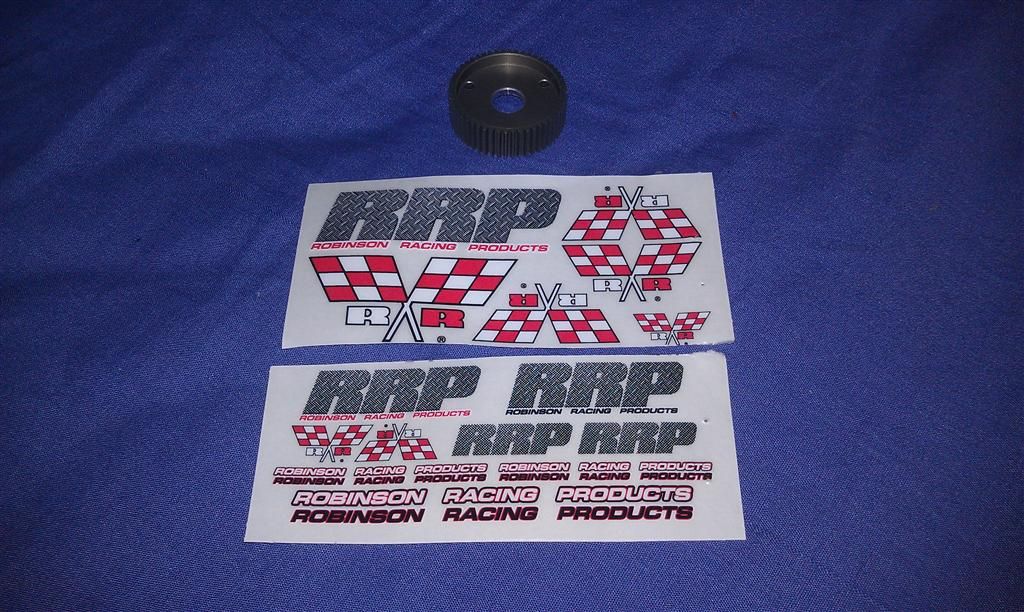 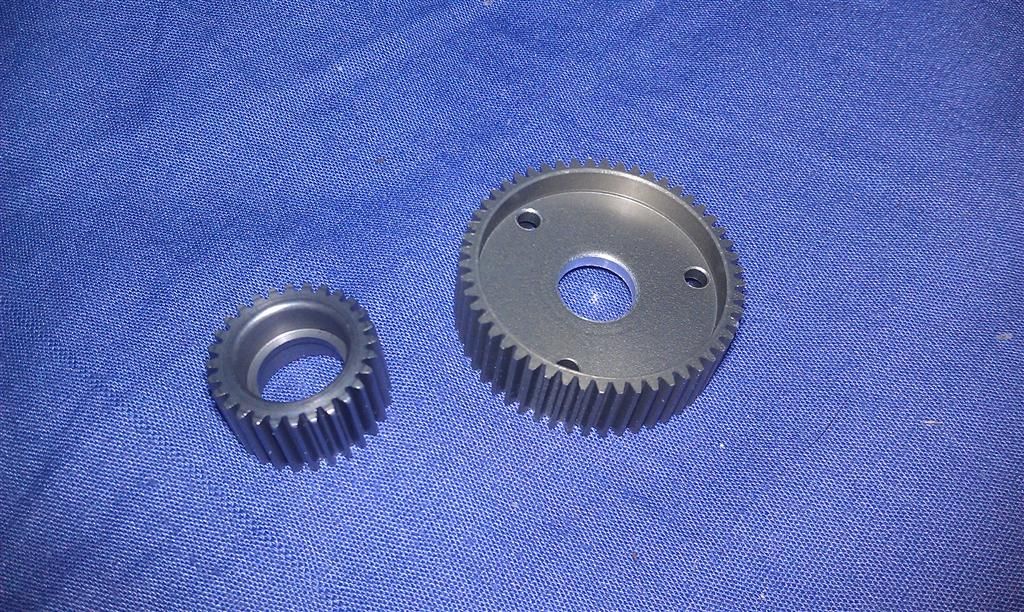   but as usual with my luck, it's one step forward and then two steps back... found this after pulling the ring gear/locker assembly apart in the front axle... how in the hell does this even happen? lol. to be honest, it would probably be fine without that little broken off piece, and I'm probably going to put it back together as it is and see what happens, but I'll look into ordering another one soon figures that I'd find this after placing an order on RPP just yesterday... 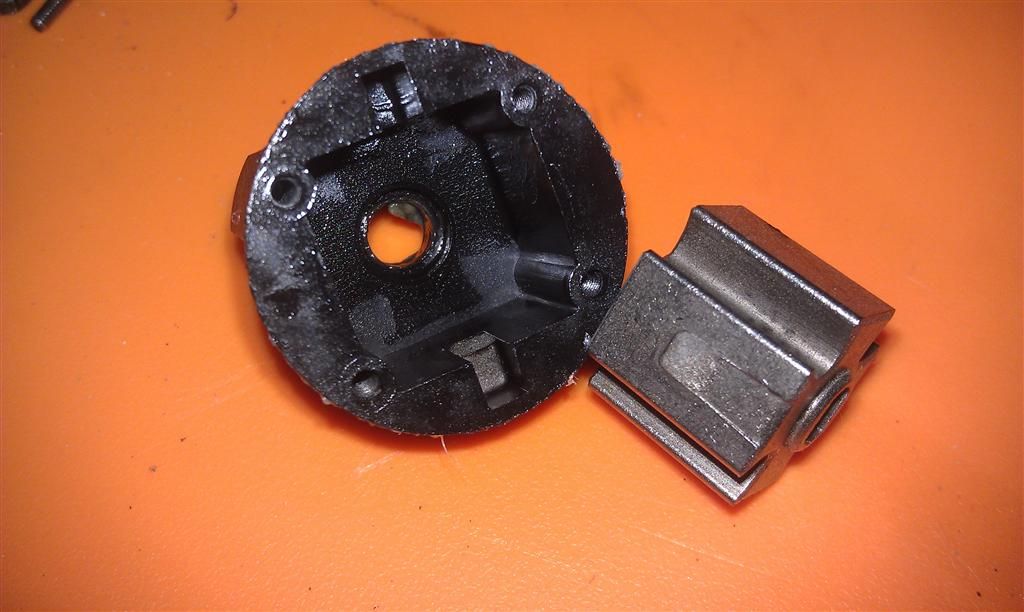 Last edited by iamsuperbleeder; 11-10-2011 at 10:20 PM. |
|
| |
|
11-12-2011, 12:35 AM
| #111 |
| Quarry Creeper Join Date: Jul 2011 Location: Lake City, Fl
Posts: 380
|
I'm going to bump this again with more updates got the transmission and axles all together and mounted today (although I'm still waiting on the replacement bearings to come in, but that's just in the knuckle so that's a quick and easy install) 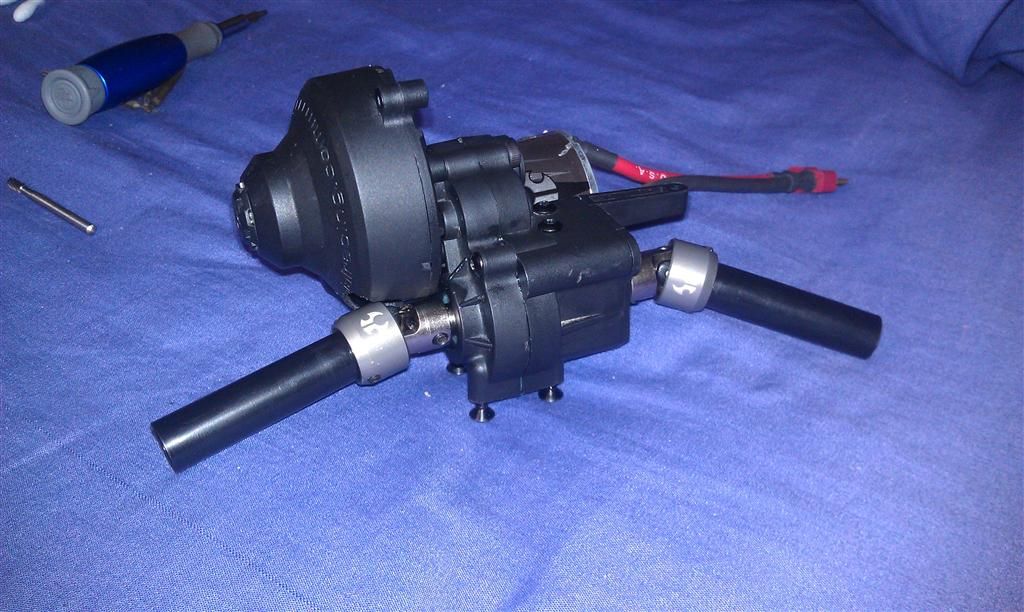 had to make some clearance for the drive shaft ring. easy enough to do with a Dremel 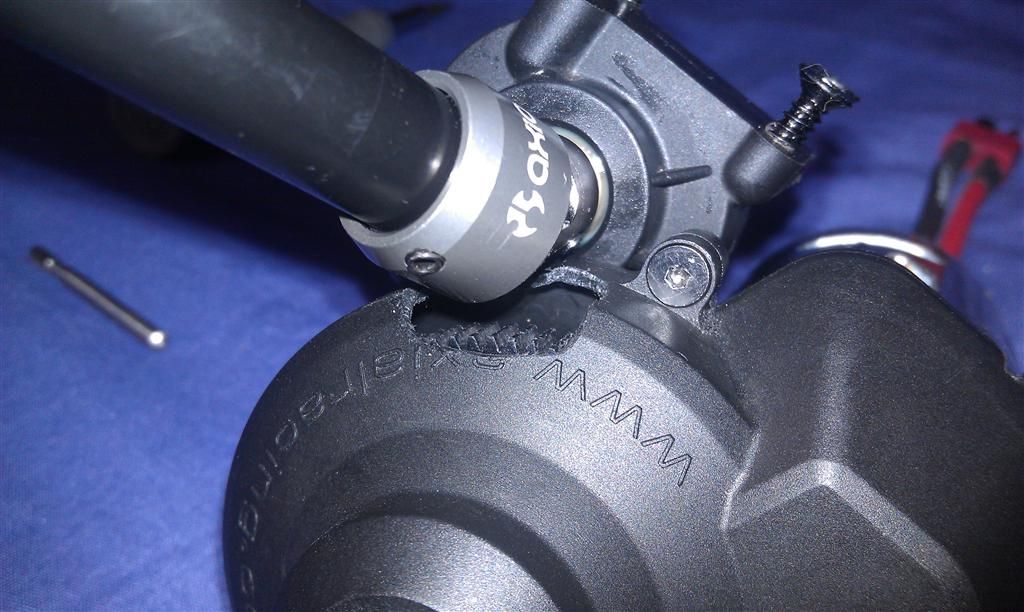 also gave the bottom of the cover a drain hole. I noticed last time I went out taring through the creek with a sandy bottom, there was a lot of sand trapped in the spur cover. we'll see if this will help let most of it stay washed out 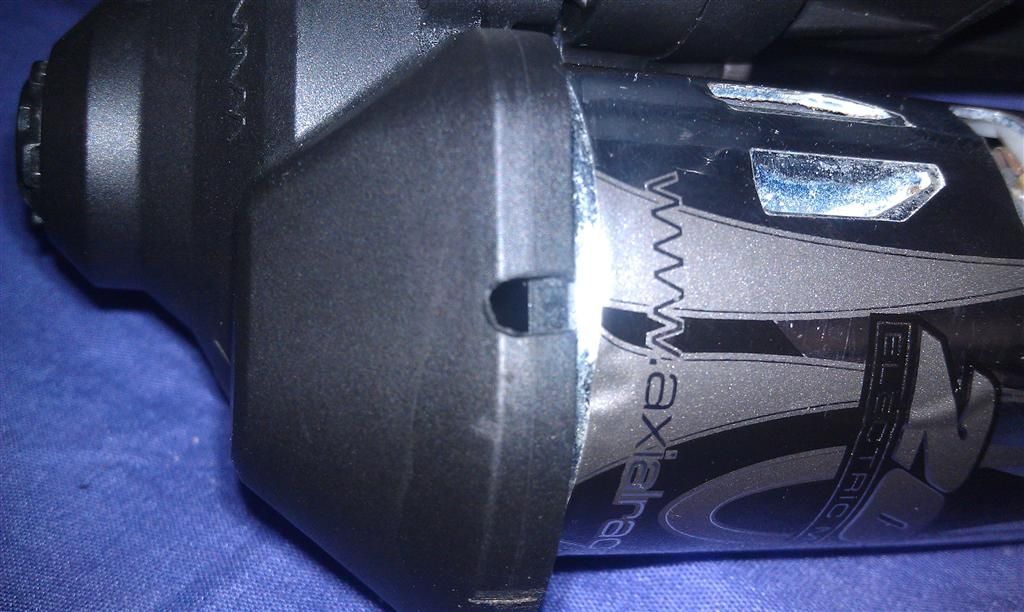 and of course I bolted every back onto the chassis already 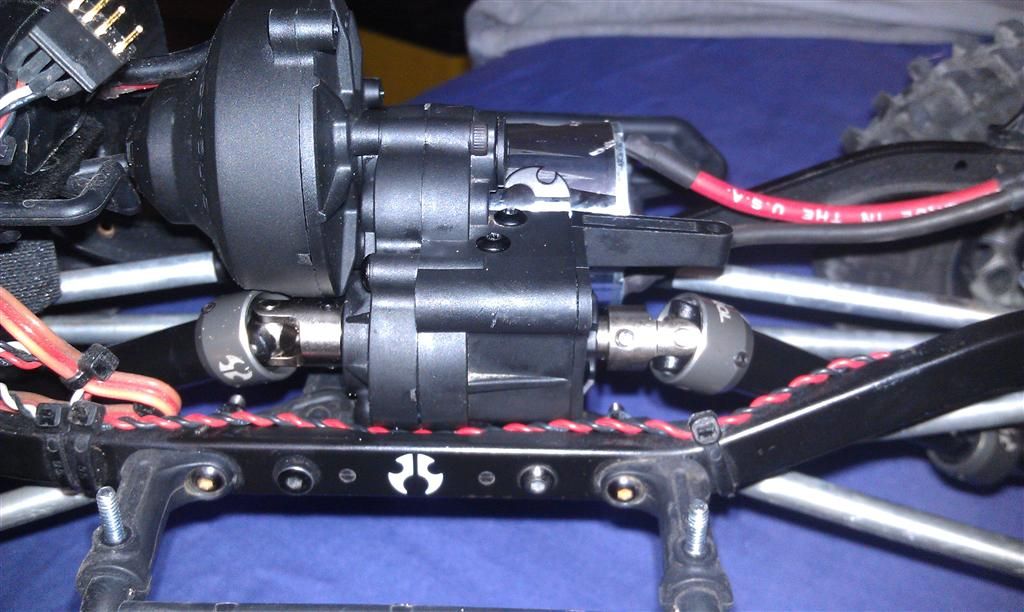 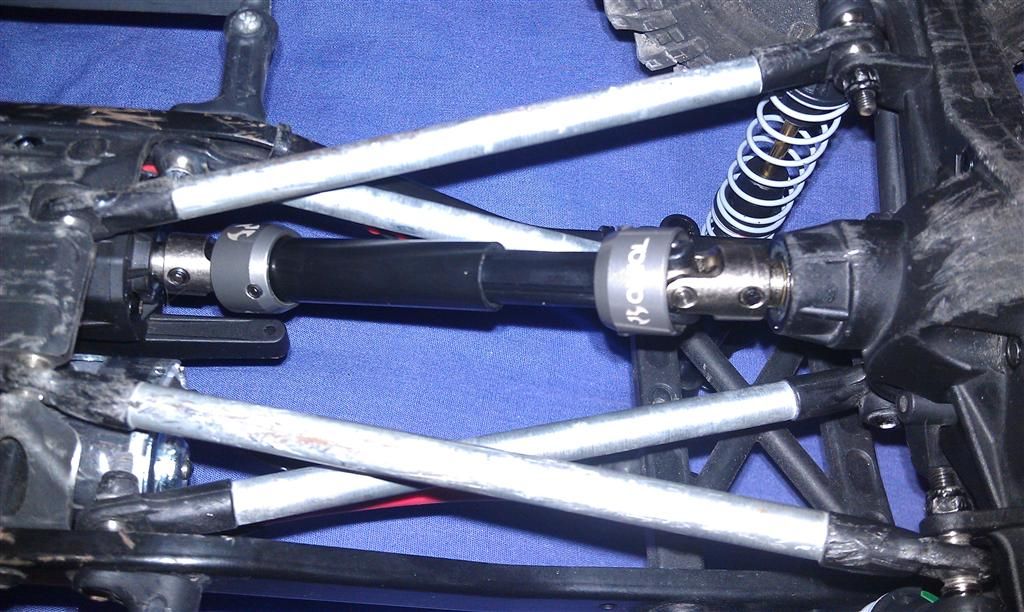 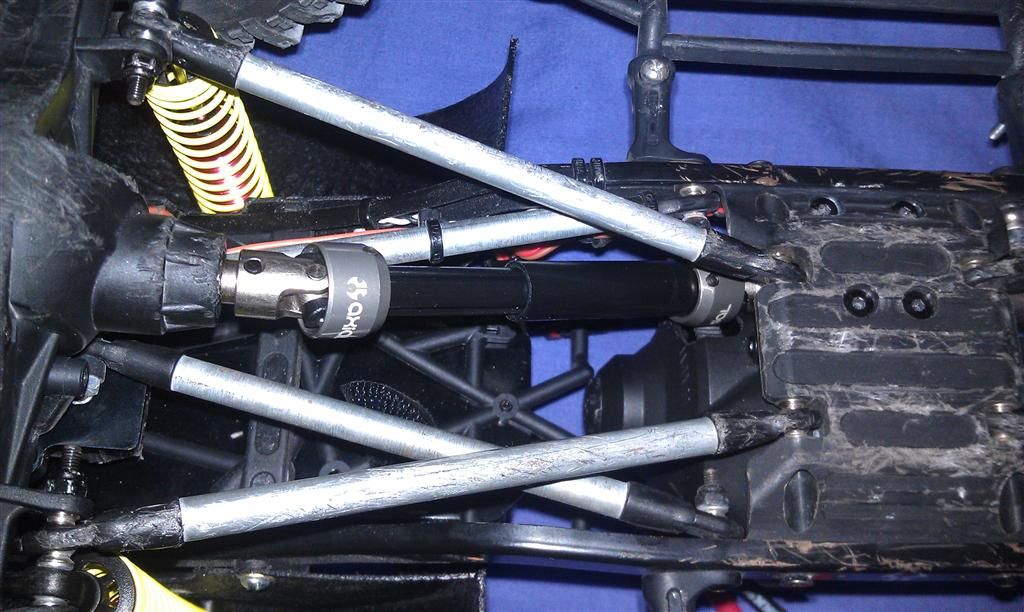 I made one screw up... trying to rebuild my cheap shocks, I broke one of the lower eyes 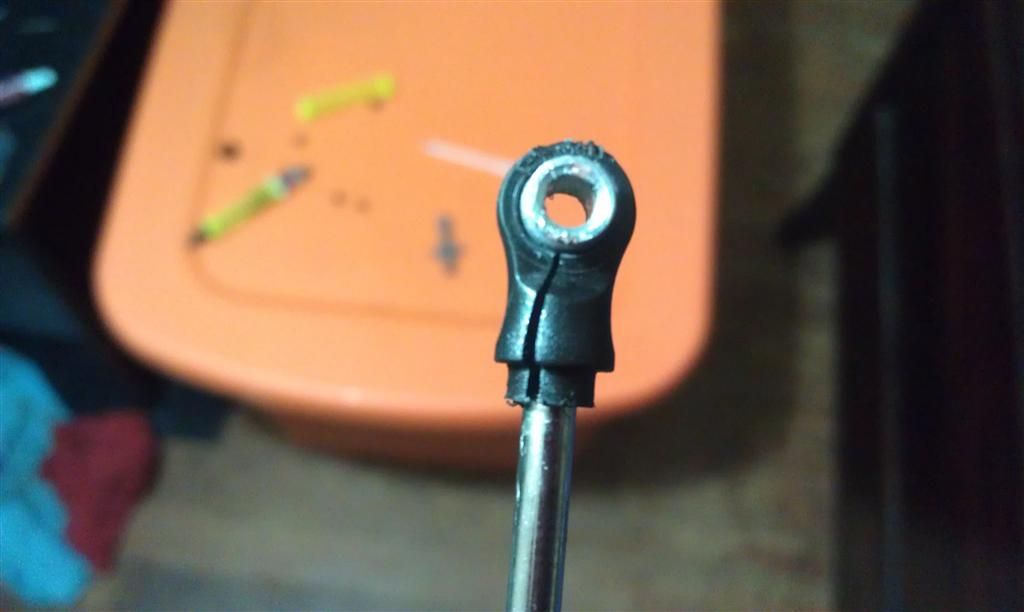 but it's whatever. I left the 100mm on the front and put the originals on the rear 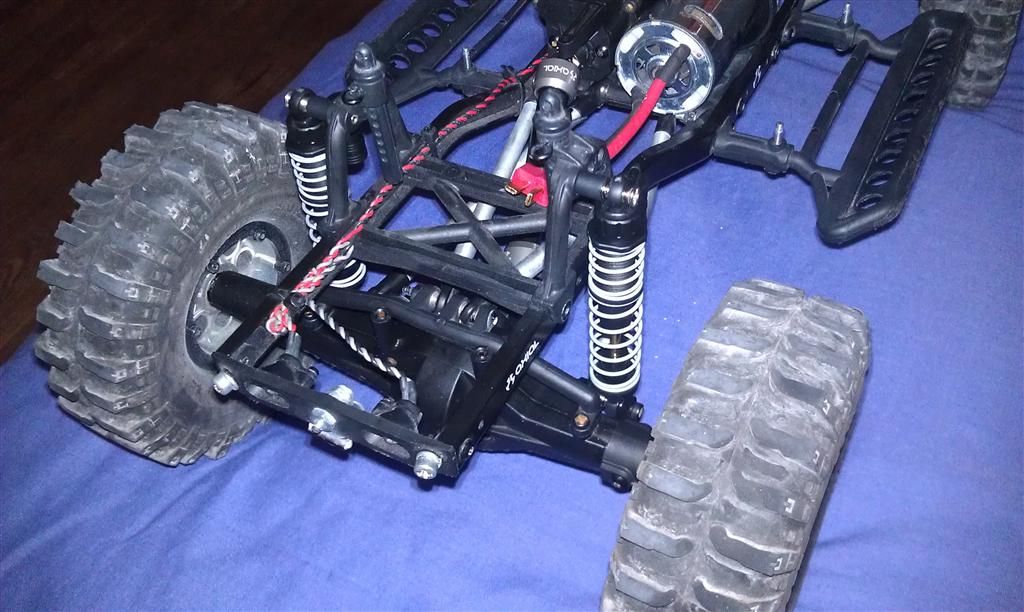 it sites a little raked to the back, but not all too bad since the weight of the battery is up front 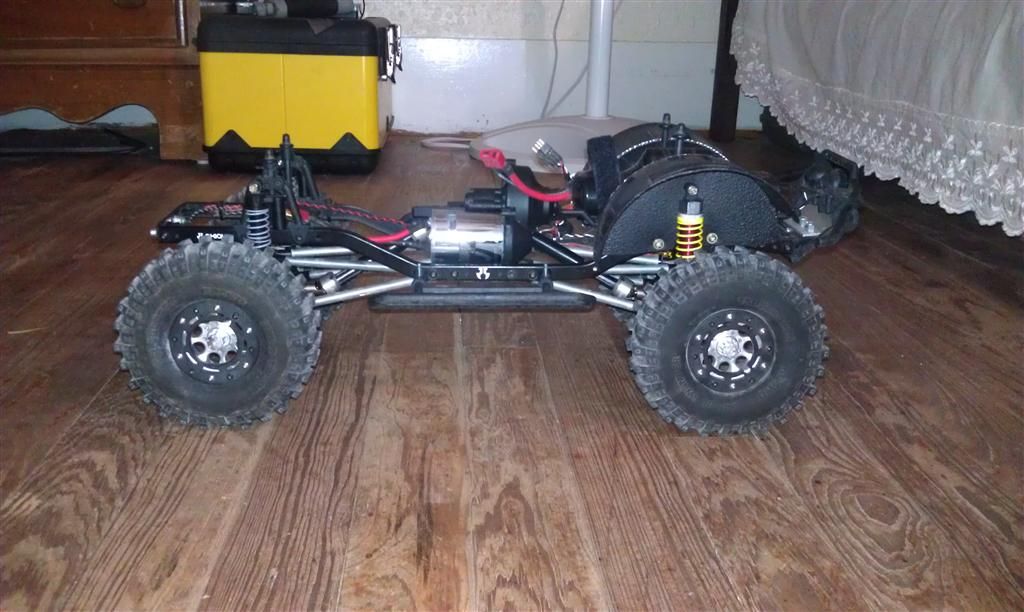 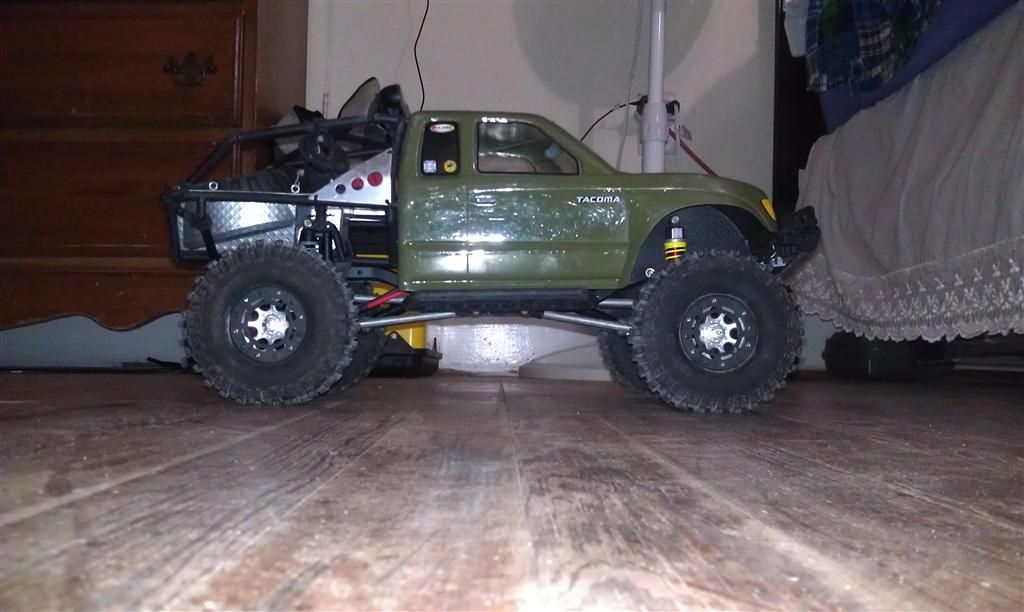 the down travel difference is noticeable when it's sitting with the axles suspended 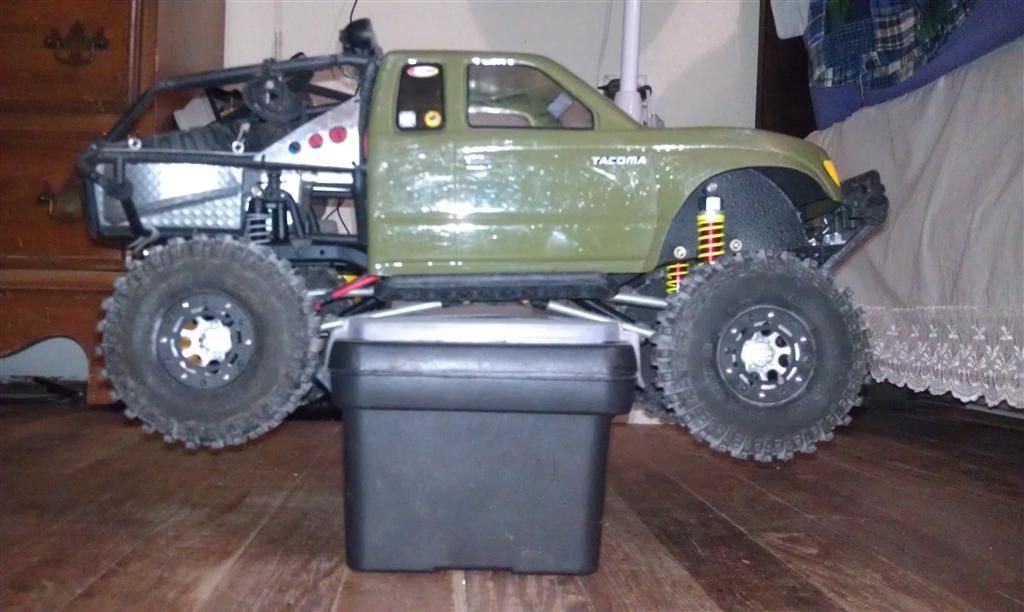 but I think the lower stance will actually just help out more for the COG. it still flexes really well too 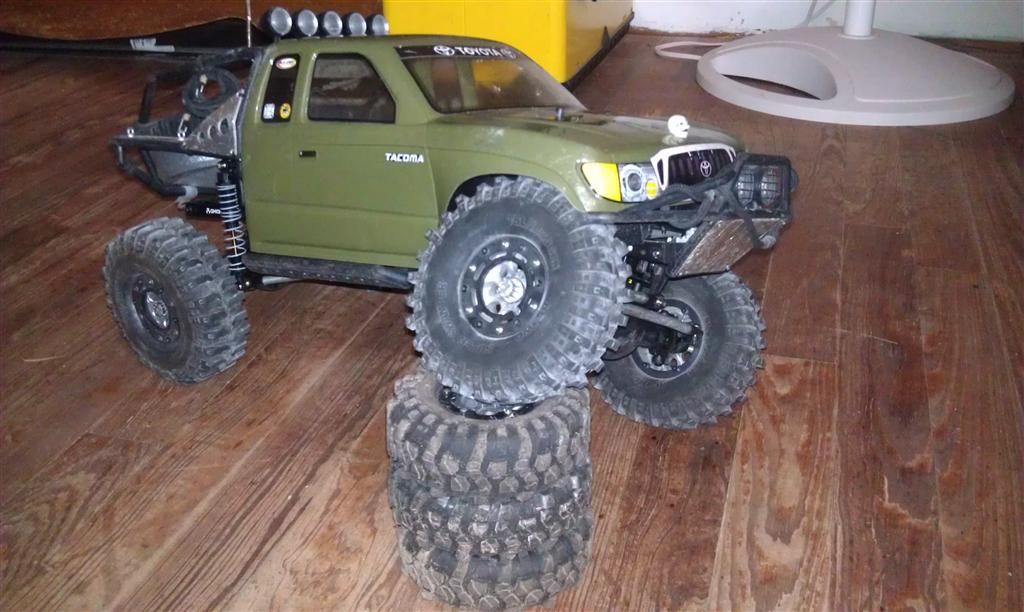 |
|
| |
|
11-12-2011, 10:44 PM
| #112 |
| Quarry Creeper Join Date: Jul 2011 Location: Lake City, Fl
Posts: 380
|
got MORE goodies in today bearings so I could finish reassembling the drivetrain, a new bumper just because I really like the way the Dingo bumper looks on a Honcho, and a cheap servo to attempt a servo winch 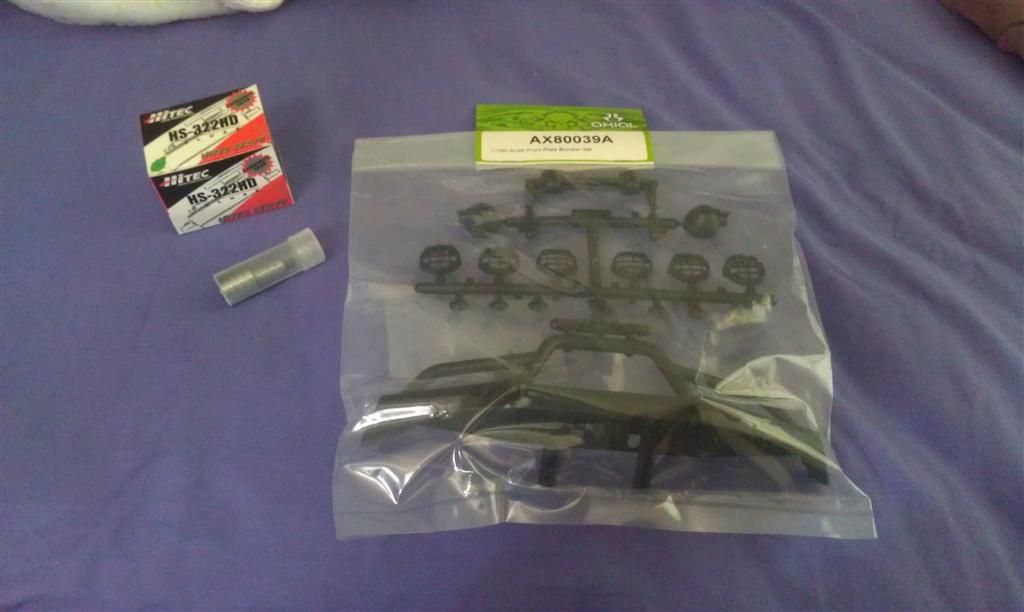 starting with the bumper, easy enough. fabbed up a pair of aluminum brackets to raise it up and get it high enough to look right. came out pretty good, and I put the LEDs in the two center lights for now; I plan on adding another two LEDs and putting them in the mounts in the bumper, maybe tomorrow 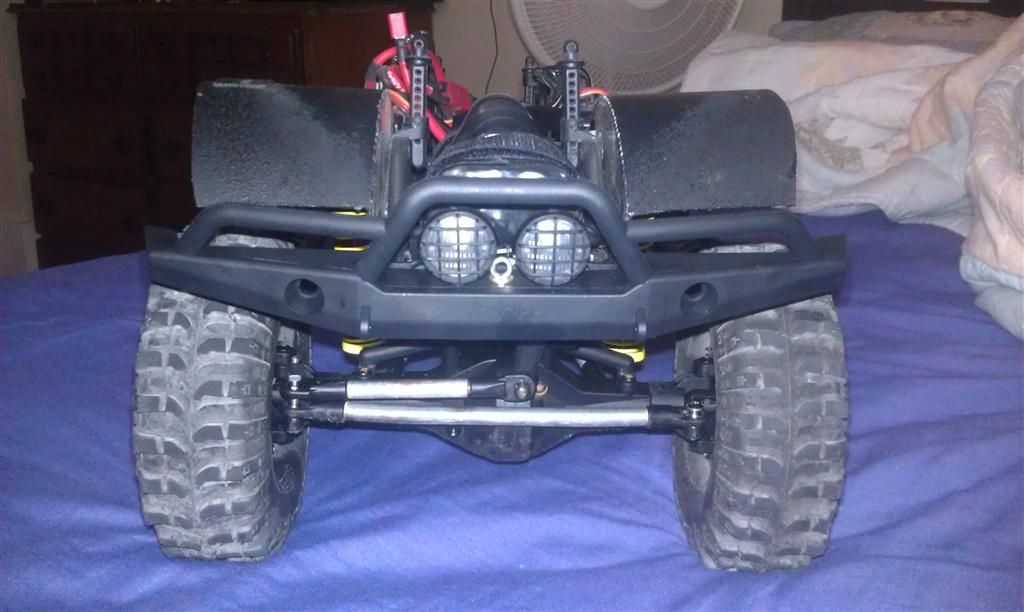 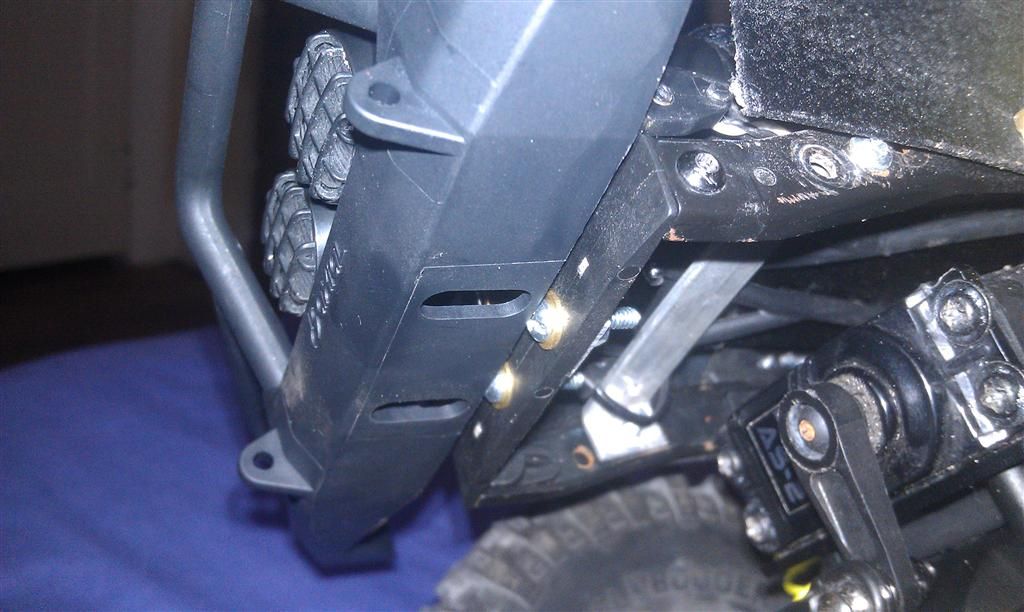 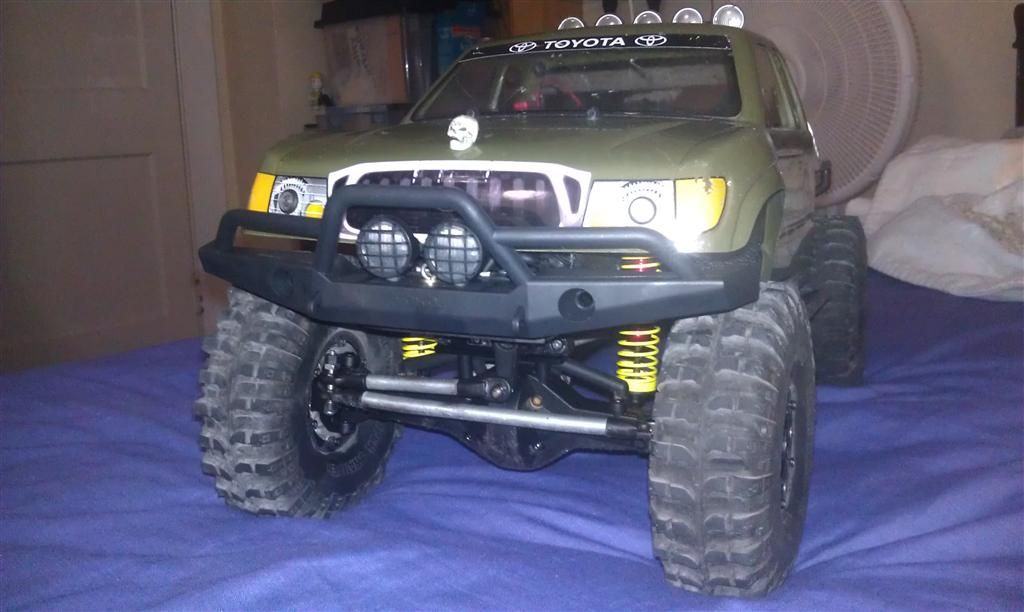 you can see the fairlead I put on for the servo winch too. I'll probably have to remove it and install 2 of them instead; one further back and one further forward. I screwed this one to the bumper before I mounted the two lights and it sits too far back 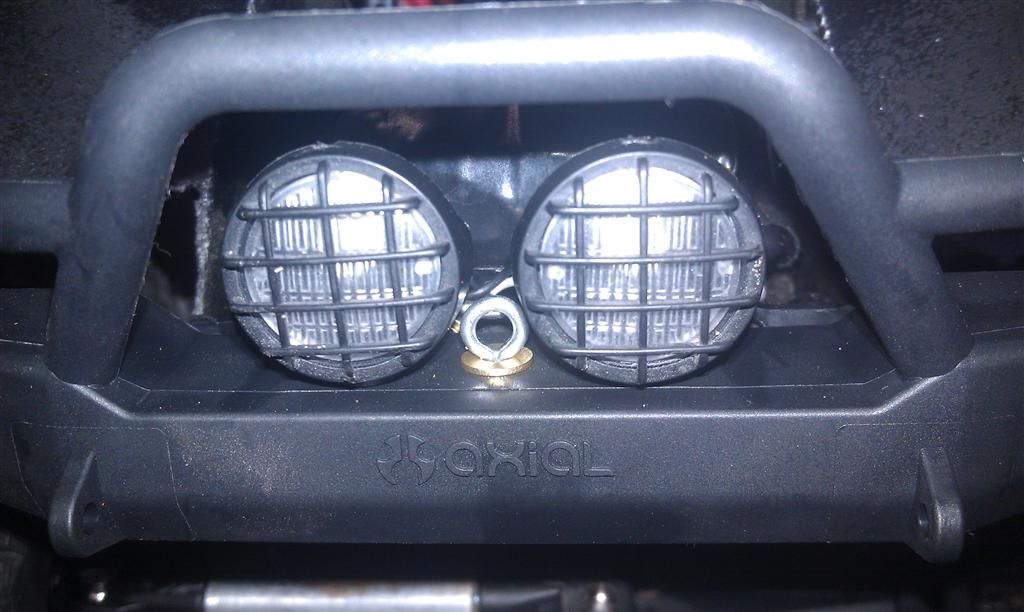 on to the servo winch, a $10 Hitec HS-322HD. we'll see how long it lasts. I just ordered a cheap one to see if I could make this work, and it seems to work pretty good so far in bench testing! I tore it apart, cut off all of the limiting notches inside, and soldered some wires directly to the motor inside so it just has two wires coming out of it (automotive door speaker wire works GREAT for this by the way 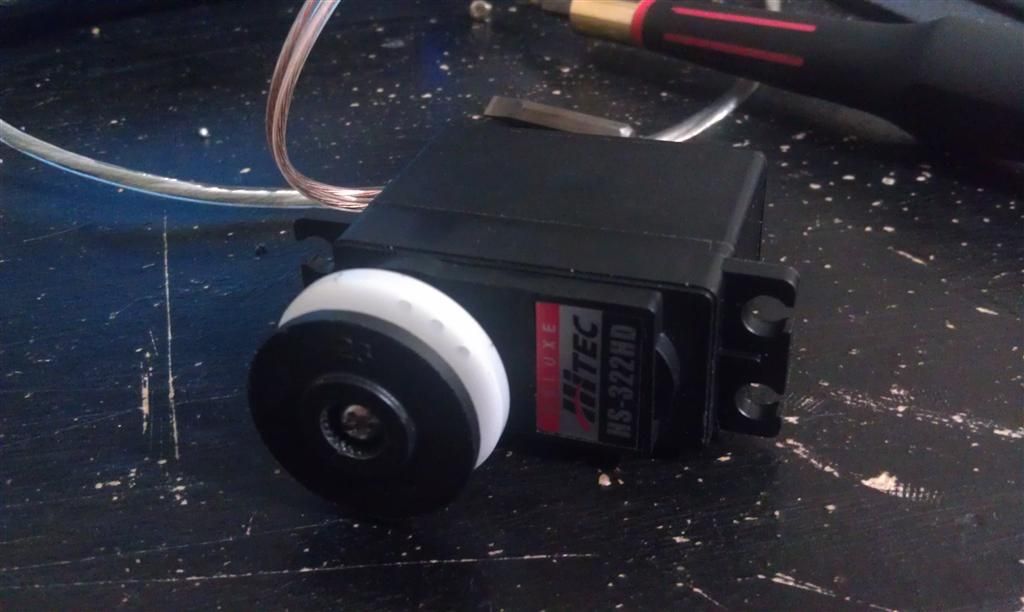 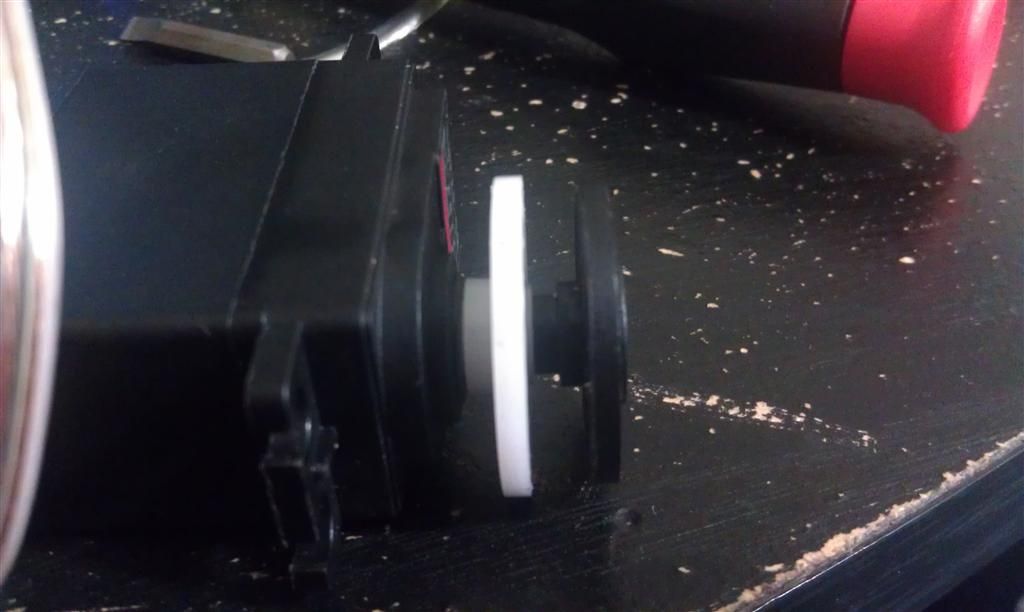 since I only have a 2 channel radio, this is where I decided to get creative and make a wired winch controller. built it from parts that I had laying around in my electronics box, so I didn't spend any extra money on it Radio Shack project box, a momentary button, a switch, a red/green/blue LED, a resister, and a little bit of wiremock-up layout  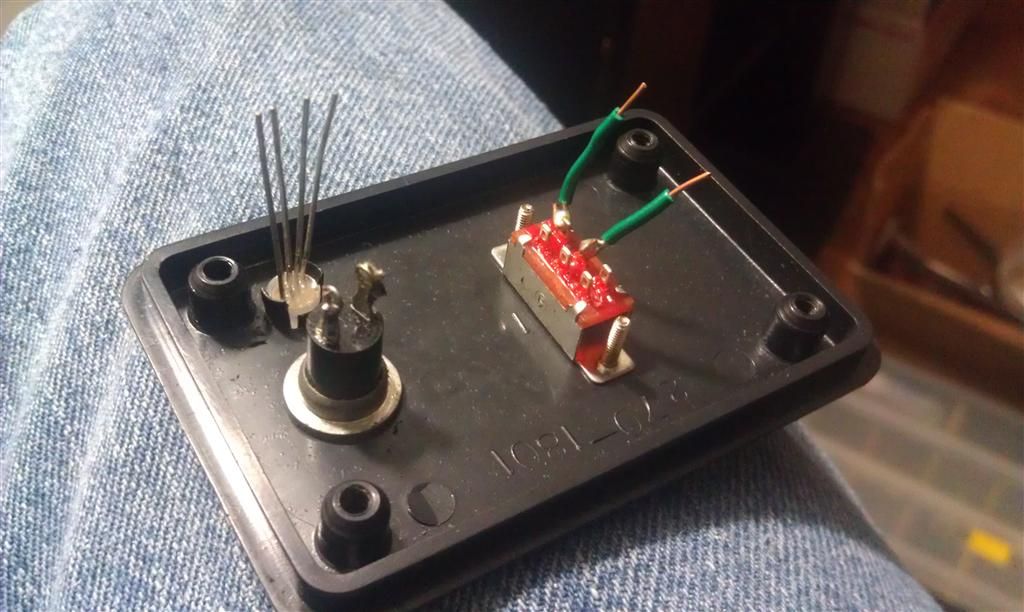 and all soldered together 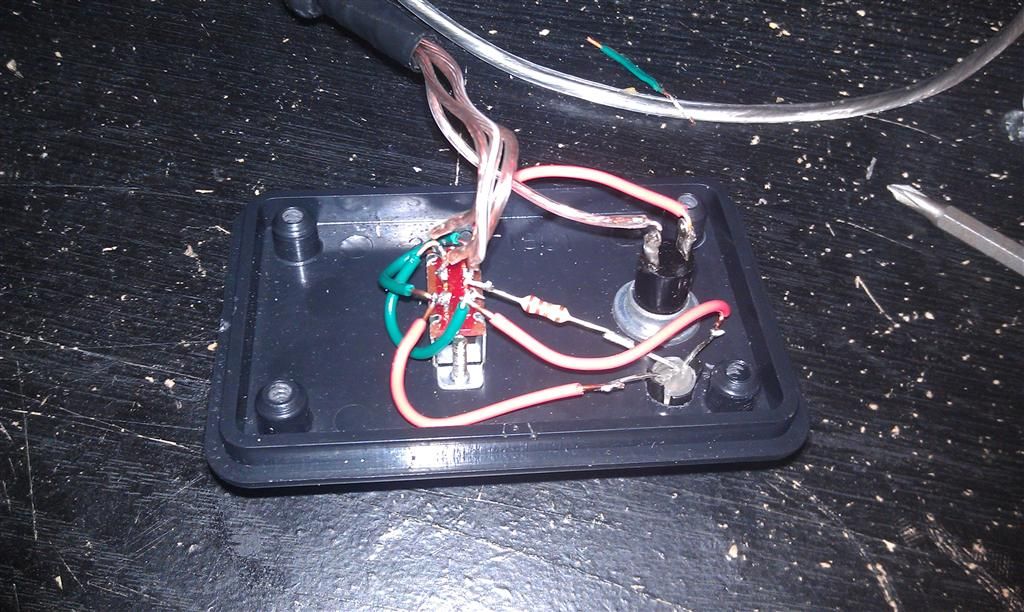  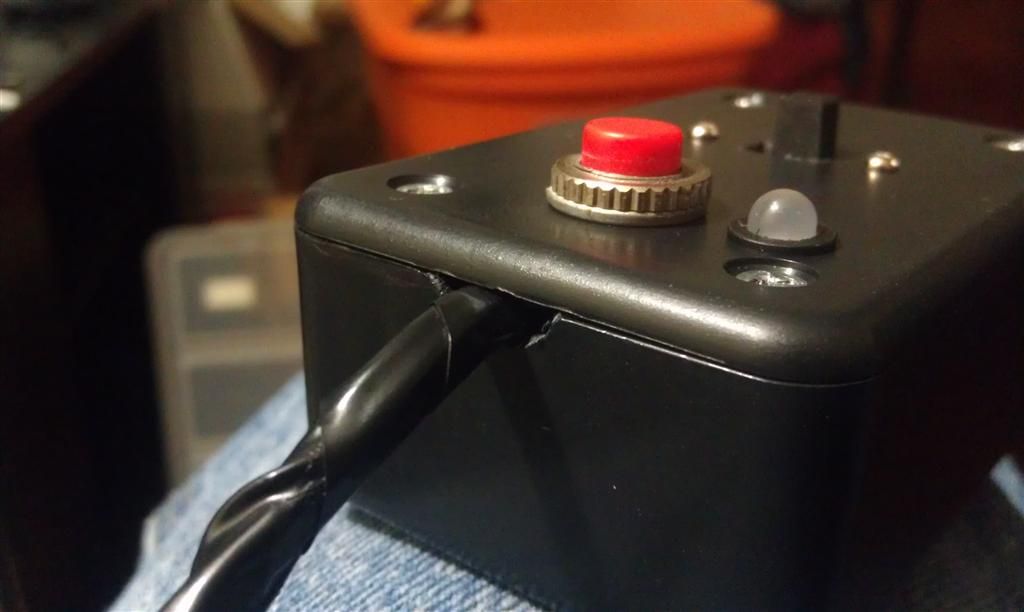 Put a Dean's 4 pin plug on the end, and I'll have the other end on the truck for quick and easy connecting and disconnecting. it pulls it's power directly from the battery in the truck, there's two power wires going to the box, and two wires coming back going to the winch 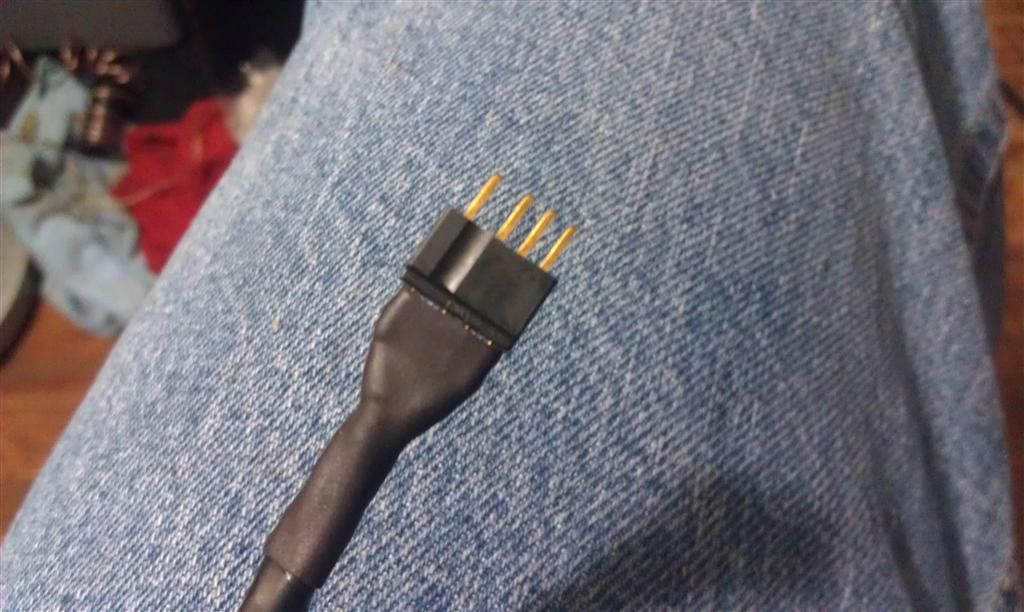 the LED lights up red when the switch is thrown in one direction (winching out) and green for the other (winching in). the light is always on if it's plugged into the truck, but the winch will not move unless the button is pushed 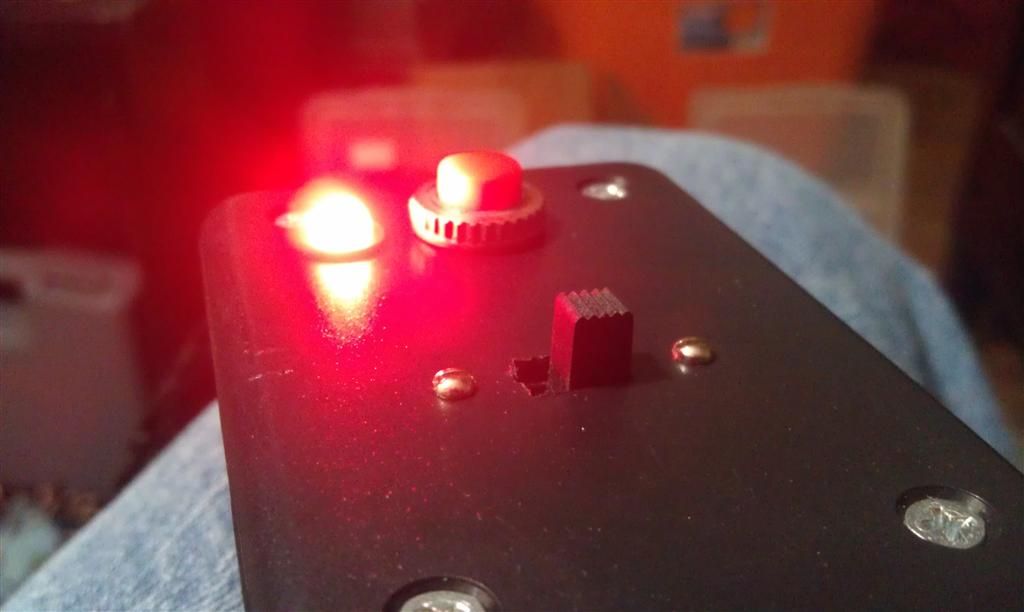 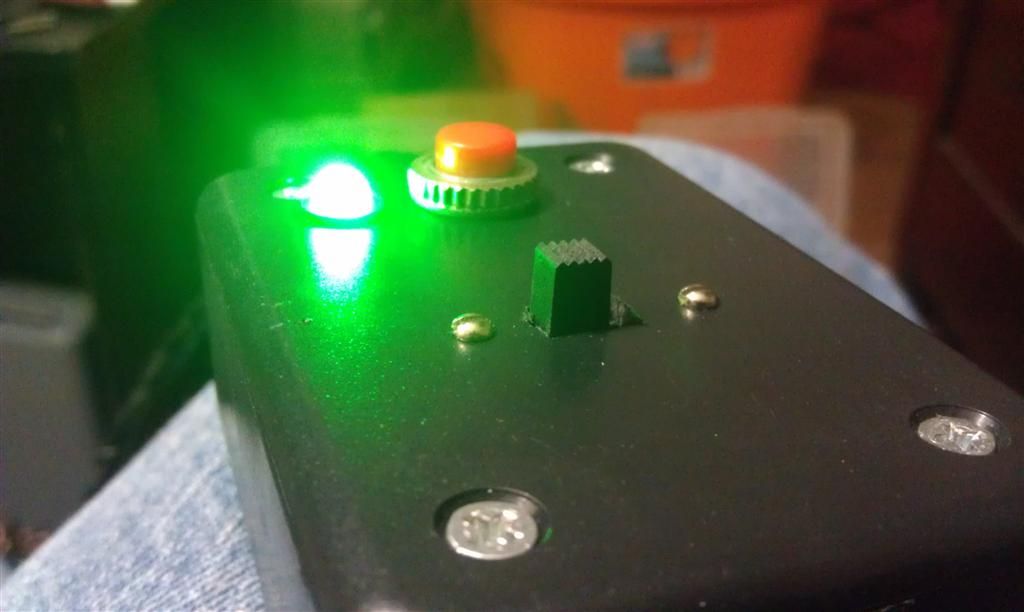 put a velcro strap on it so and it can be stored and carried easily, and that puts that project in the bag 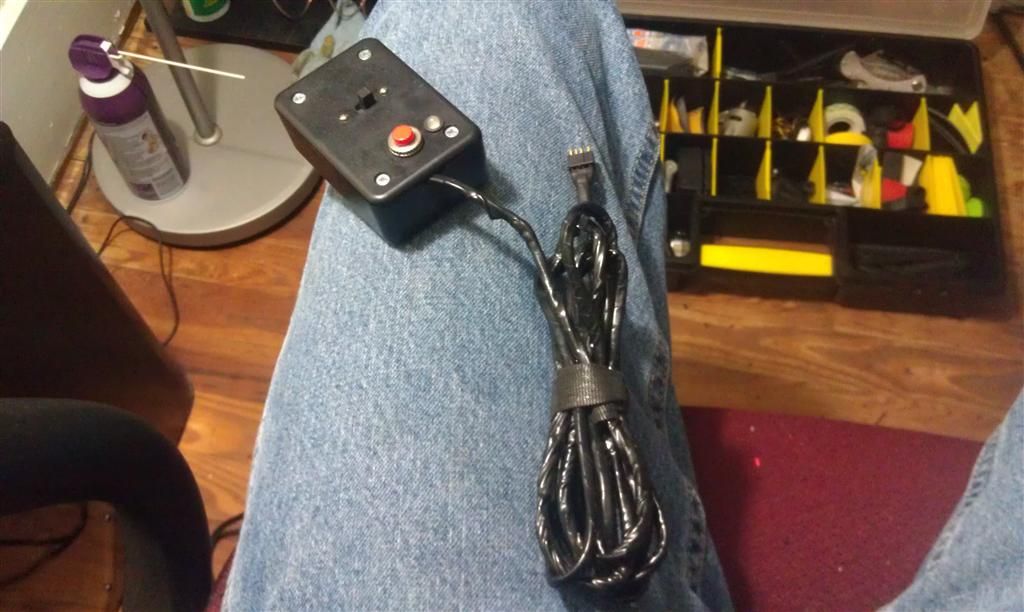 hopefully tomorrow I'll get the servo winch mounted and see if I can't scrounge up some wire to use and fashion up a hook Last edited by iamsuperbleeder; 11-12-2011 at 10:49 PM. |
|
| |
|
11-13-2011, 10:28 PM
| #113 |
| Quarry Creeper Join Date: Jul 2011 Location: Lake City, Fl
Posts: 380
|
well the winch is mounted jammed it in under the battery tray and whipped up a couple brackets; it's not going anywhere, it's VERY sturdy in it's place it's a VERY tight fit, but nothing hits under full articulation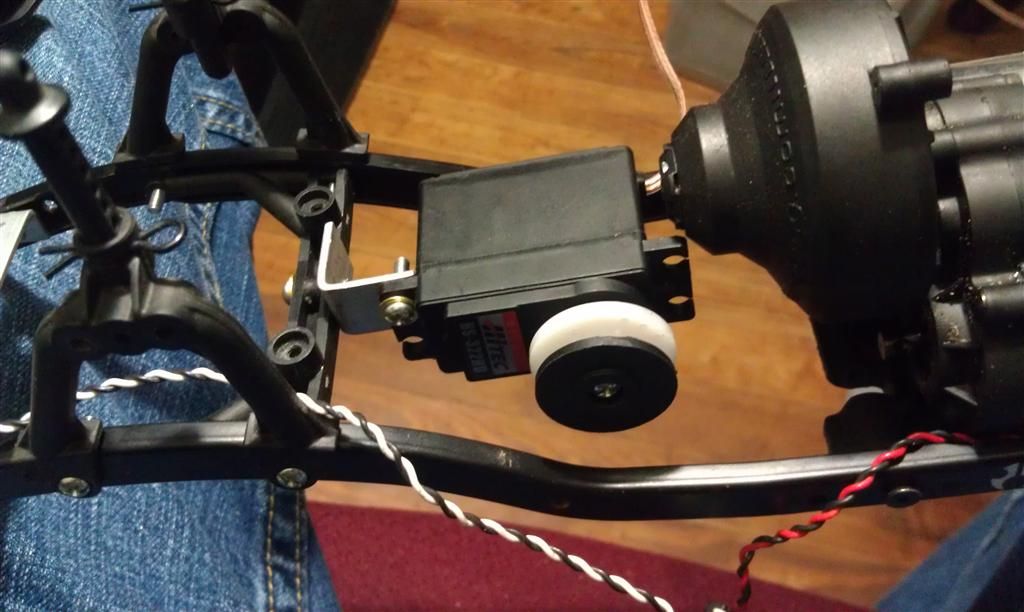 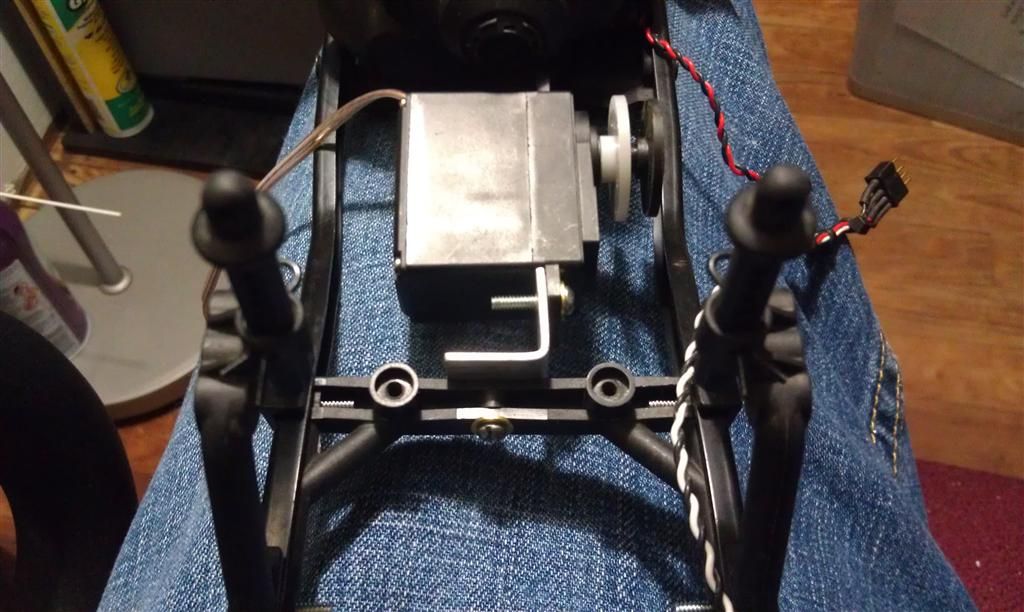 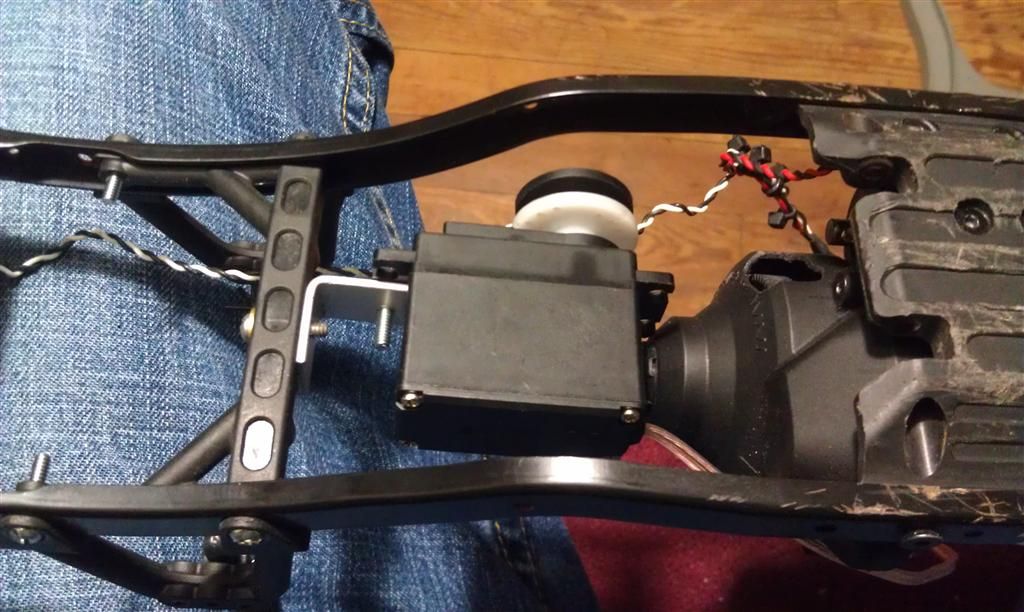 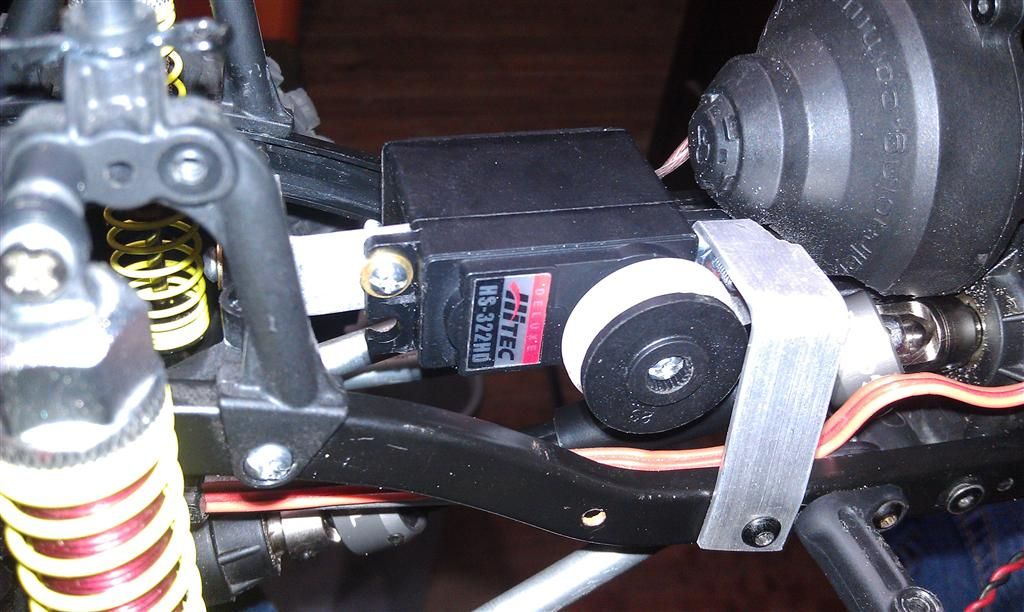 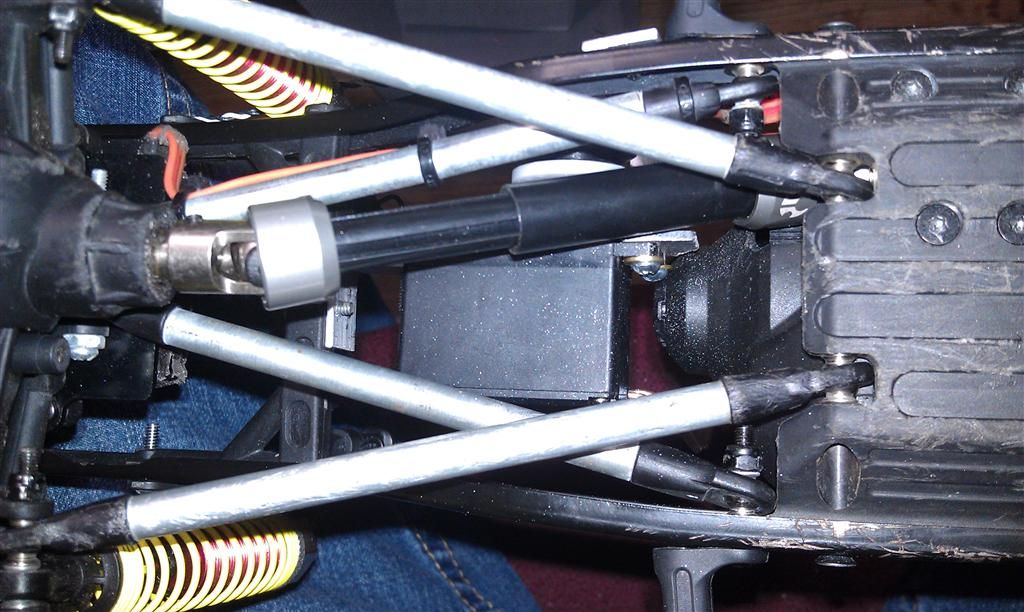 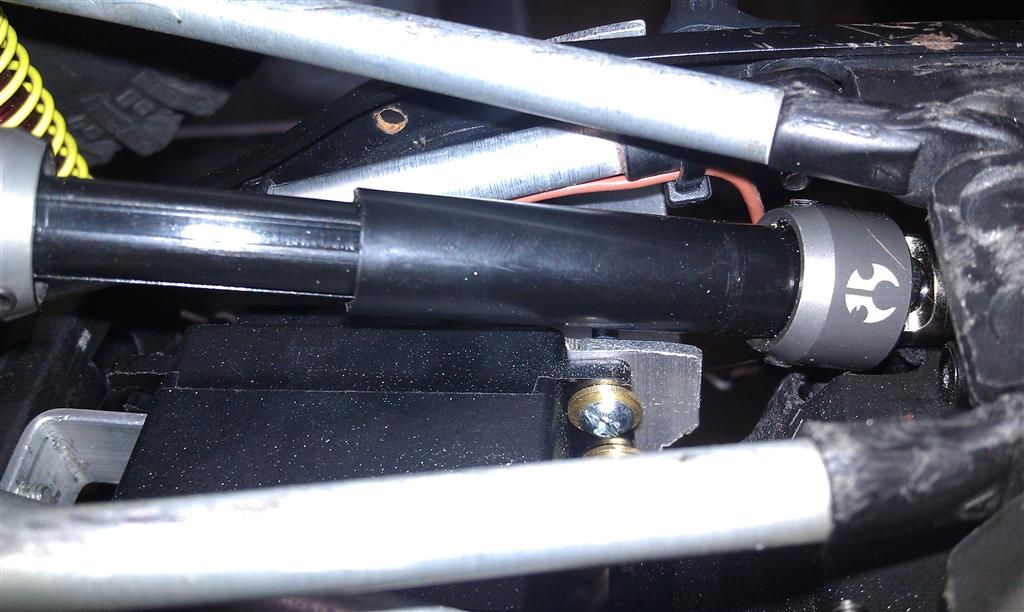 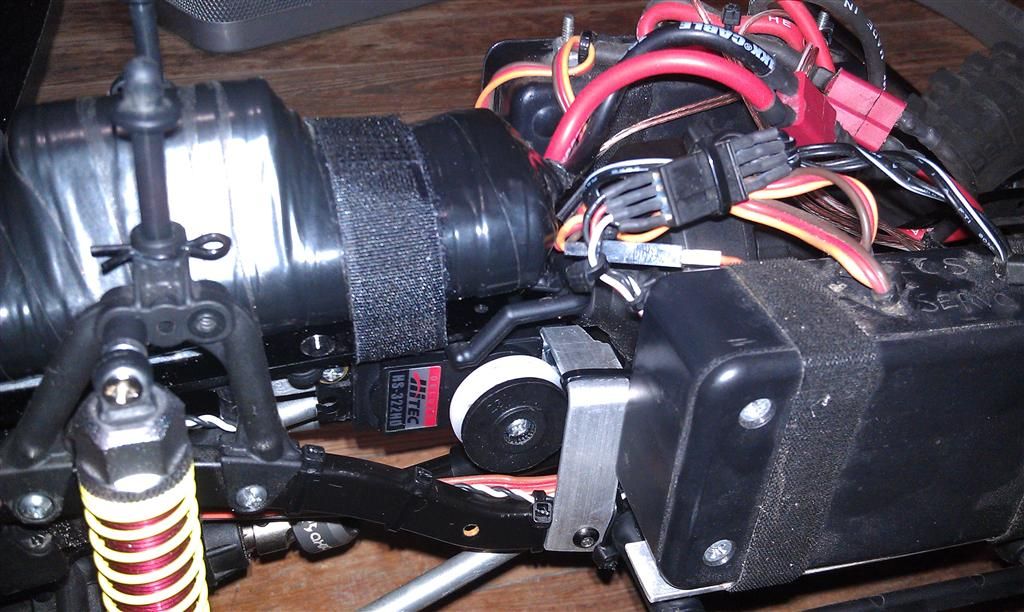 put some eyelets in place to route the wire through when I get some sometime this week 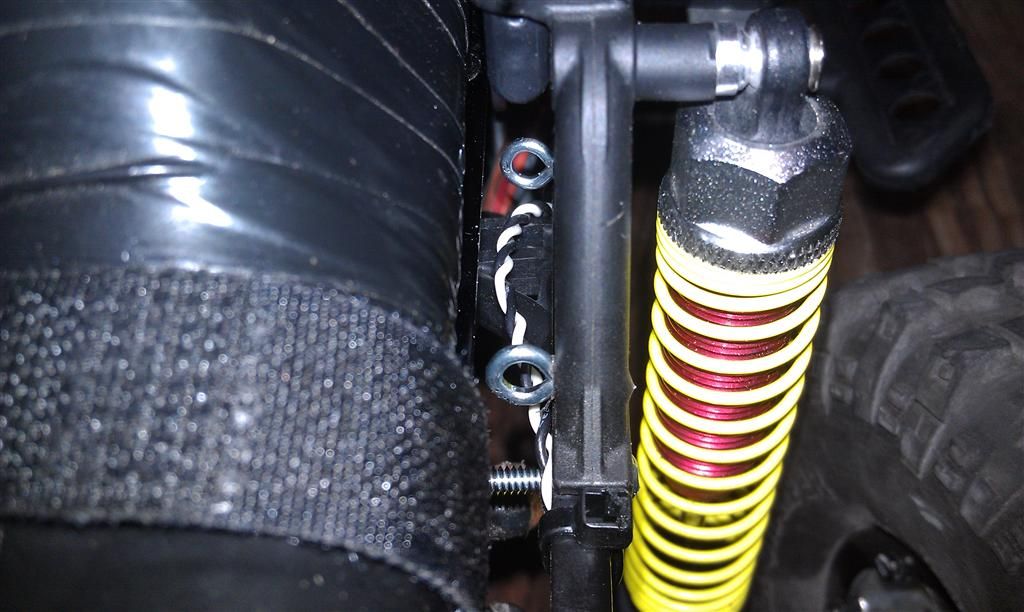 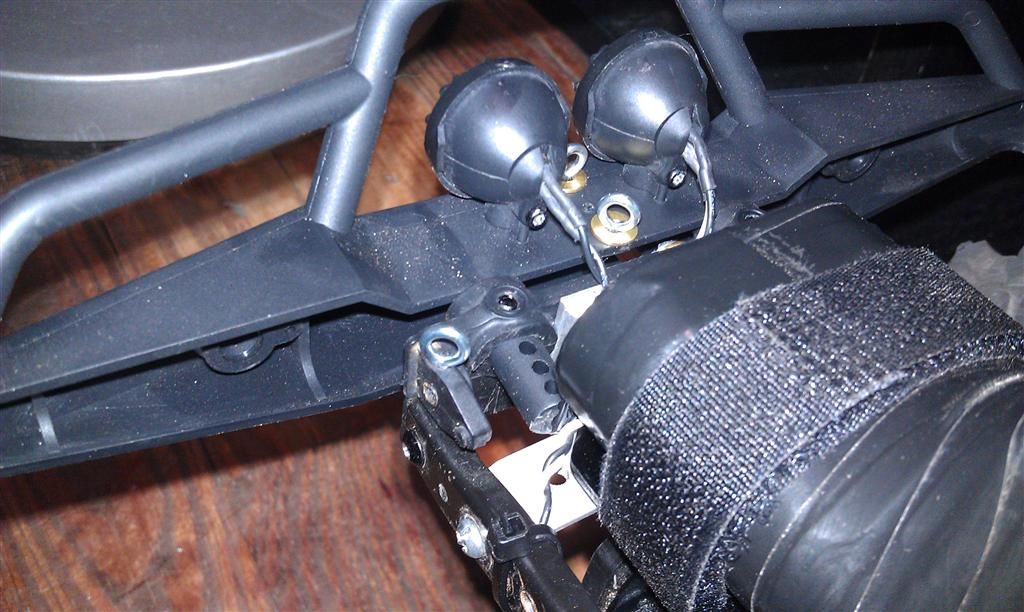 then just ran the wire back, zip tied it down, and routed it out the driver's side right behind the cab. pops out under the rear, and I hooked a bungee I made to the end so I can fasten it up to the rear cage so it's easy to access quickly. should keep it out of the way from getting damaged but it's still in a good spot so it's easy to reach and plug the controller into really fast 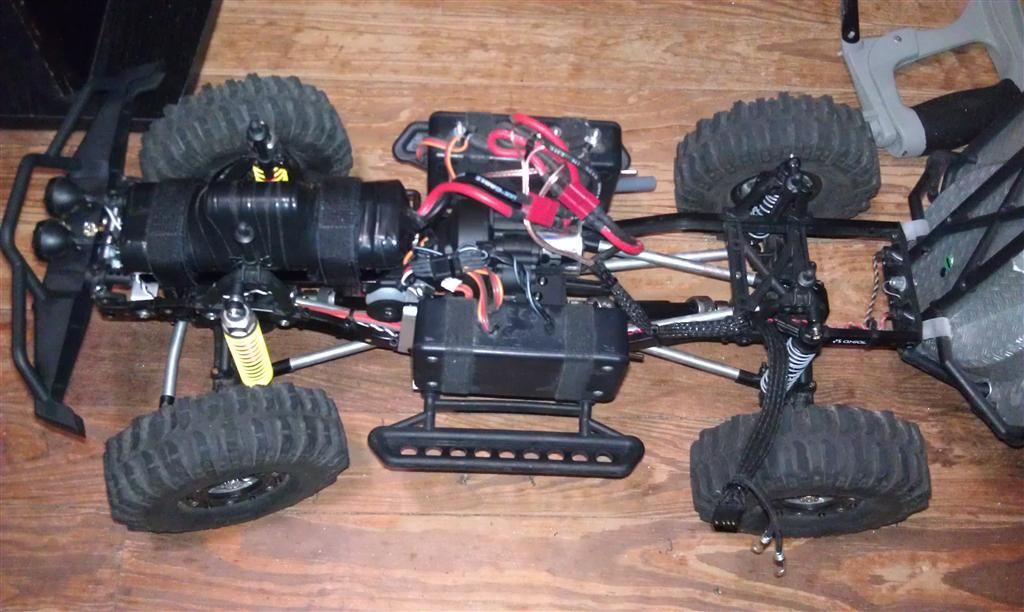 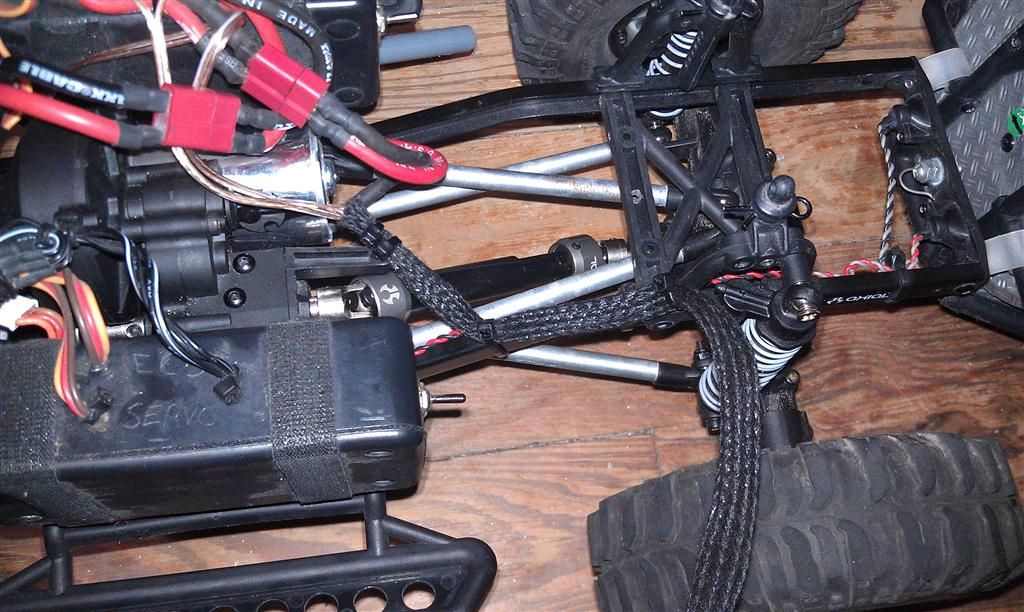 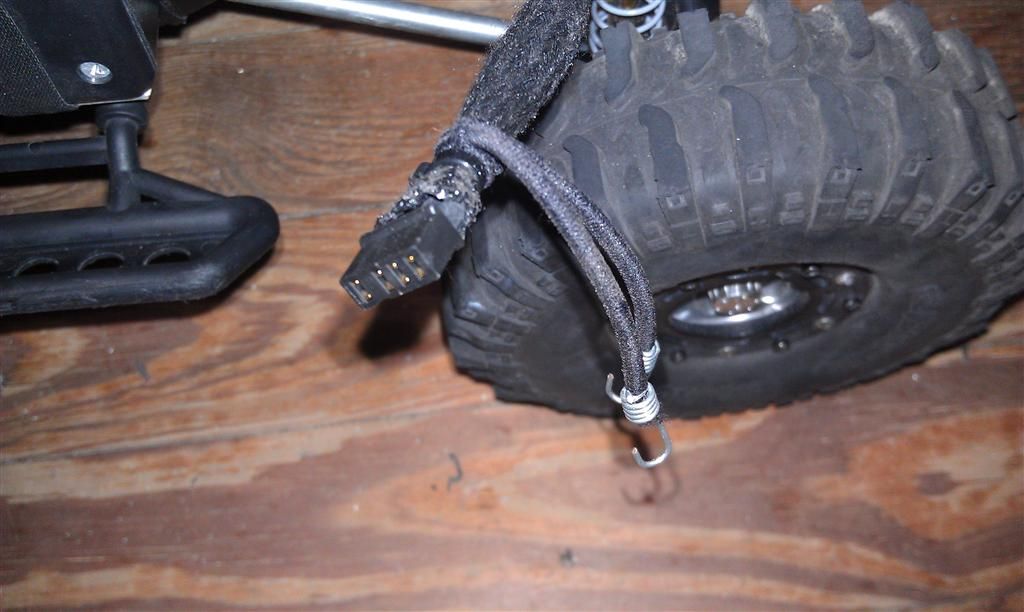 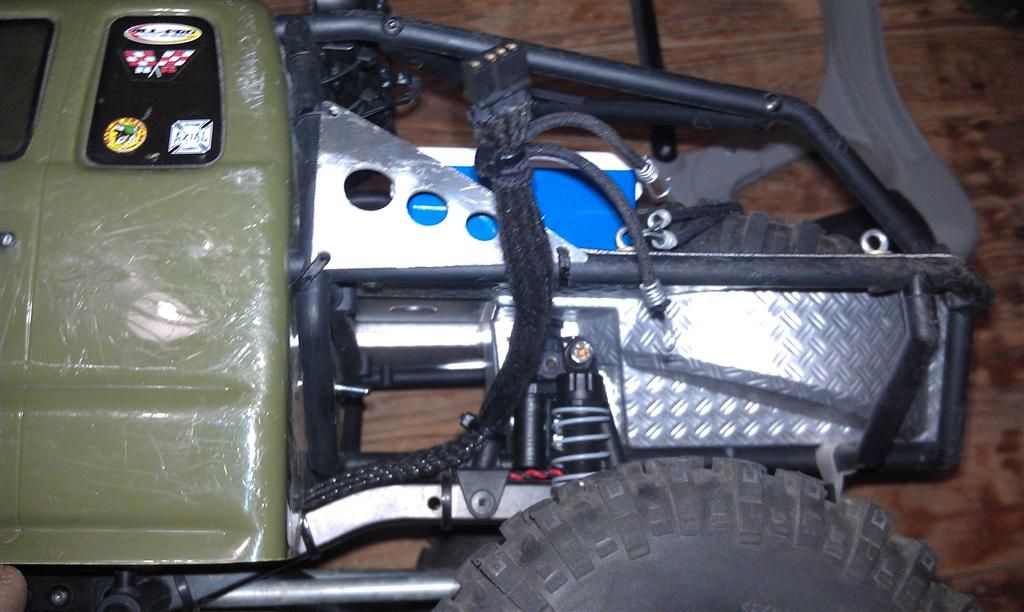 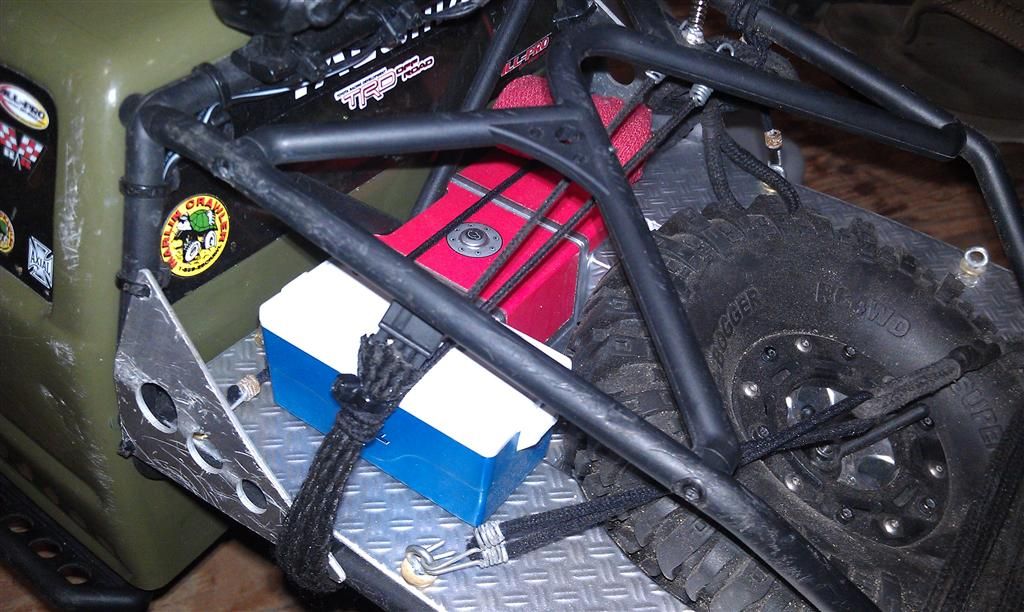 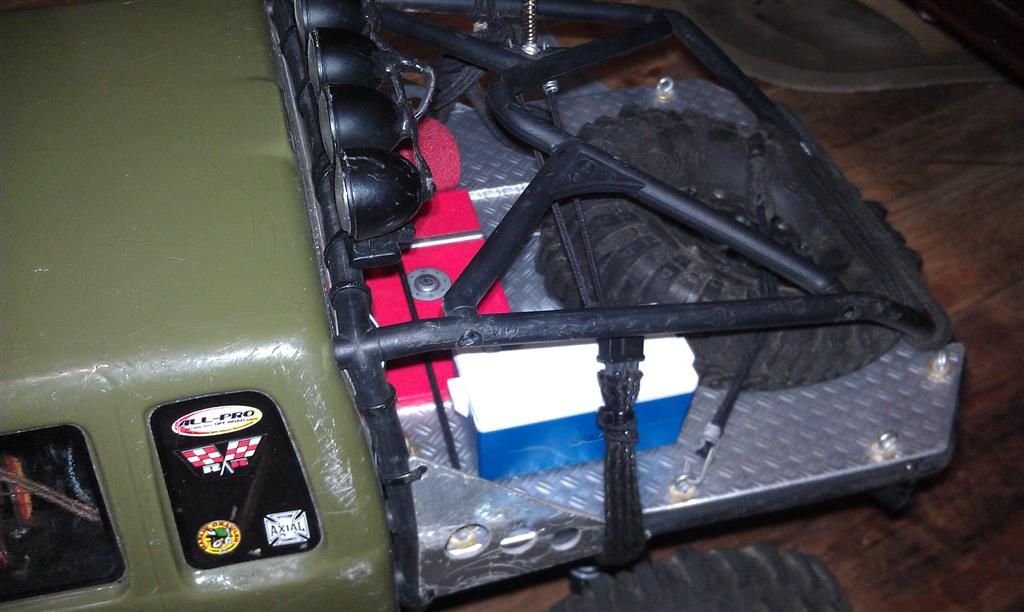 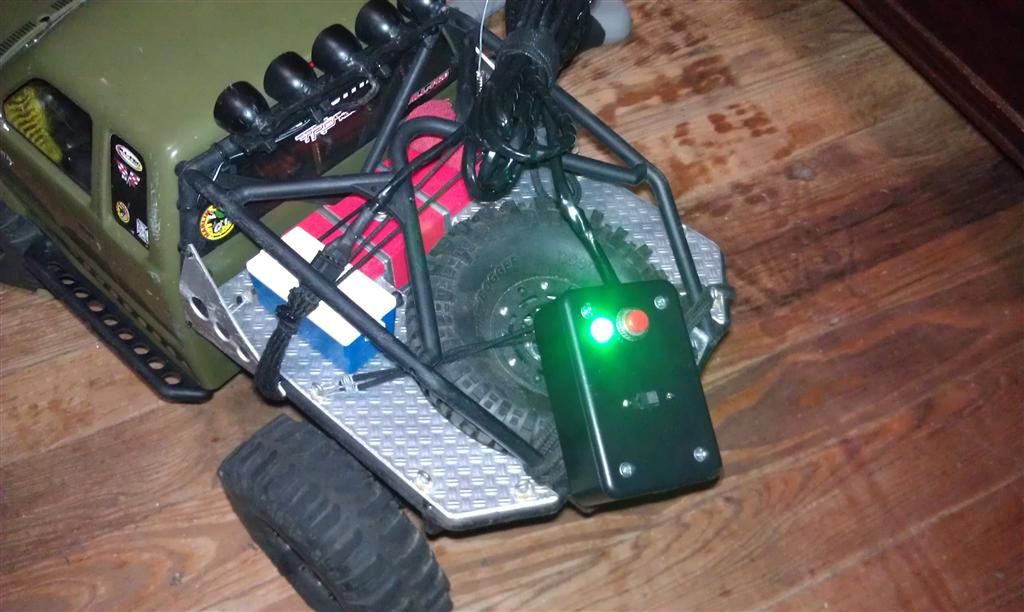 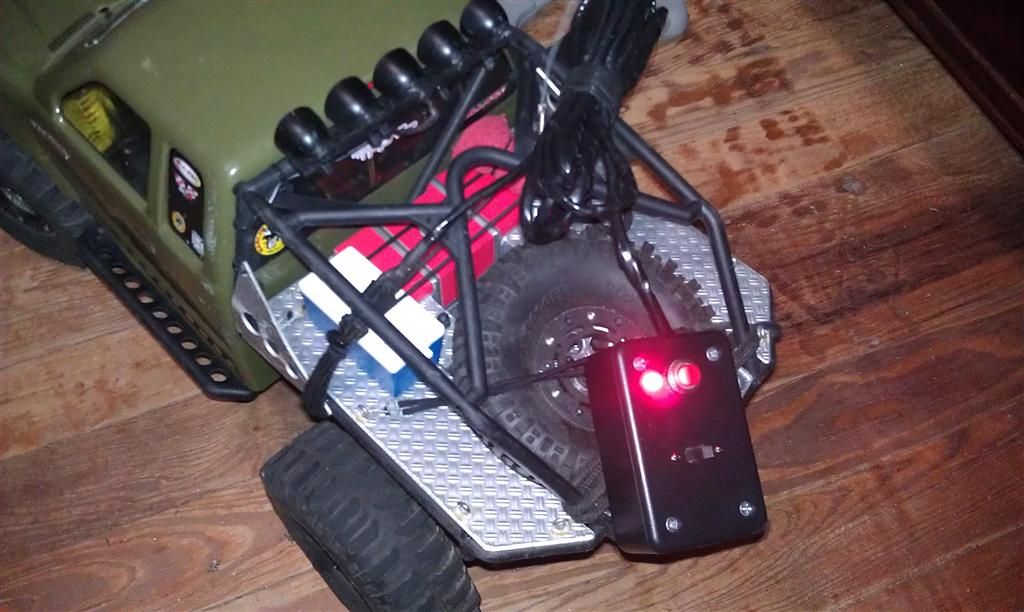 works like it should, and it should EASILY be able to lift the entire weight of the truck, so I think it might work out really well for the $10 I spent on it |
|
| |
|
11-14-2011, 11:30 PM
| #114 |
| Quarry Creeper Join Date: Jul 2011 Location: Lake City, Fl
Posts: 380
|
grabbed some string and some S hooks from the hardware store this afternoon and finished the winch! also used some of the S hooks to fashion some crude D-rings 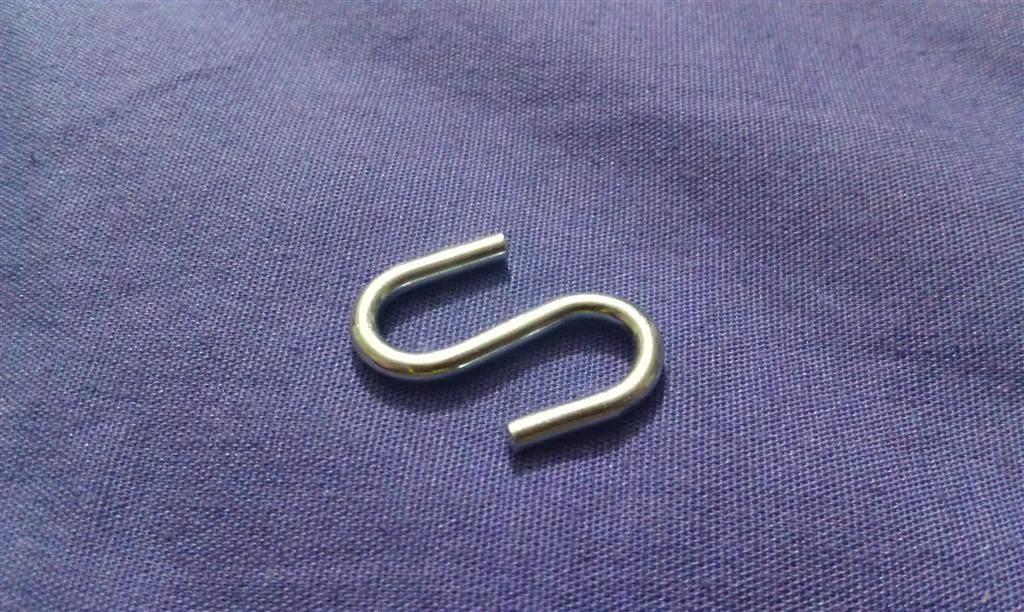 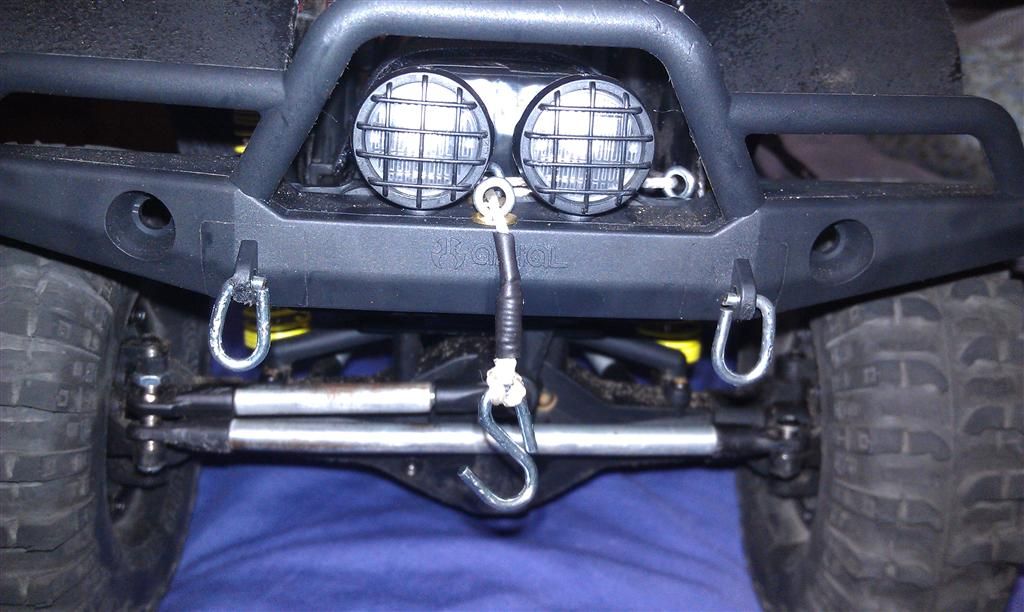 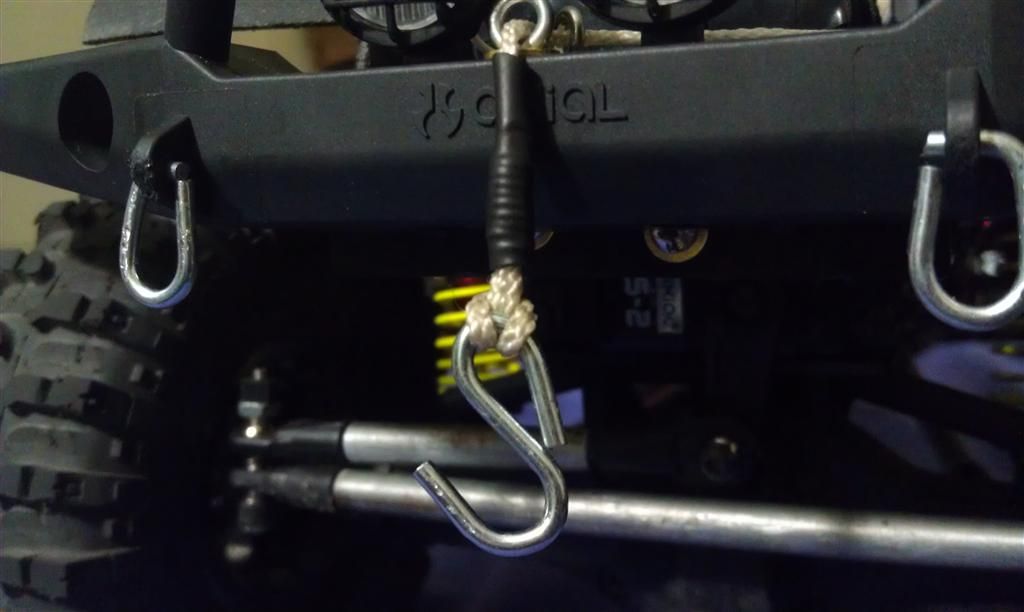 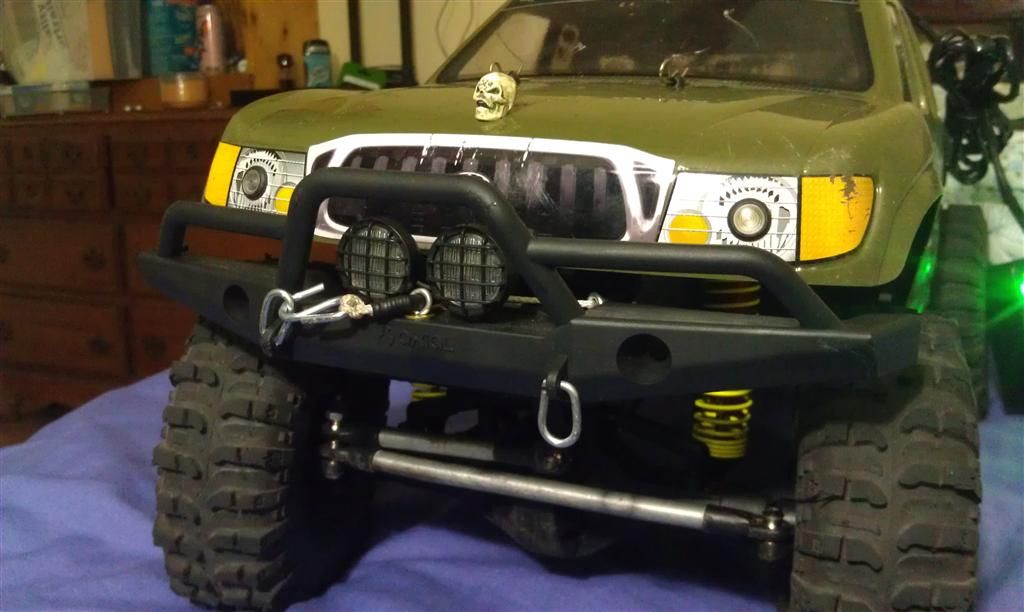 routed just how I planned it to and cleared everything 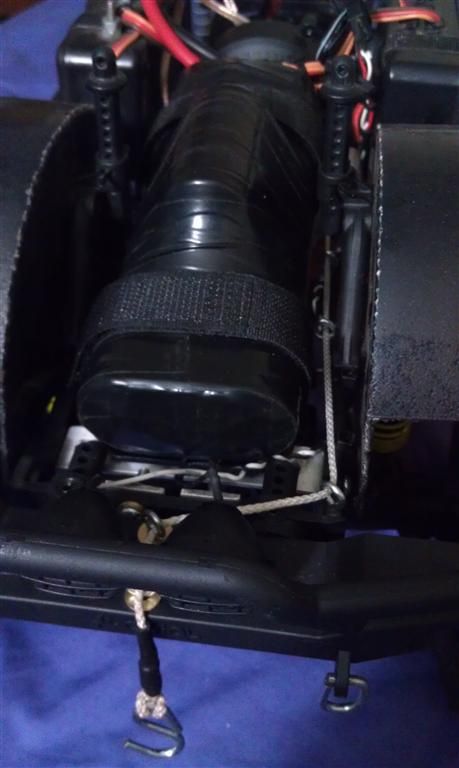 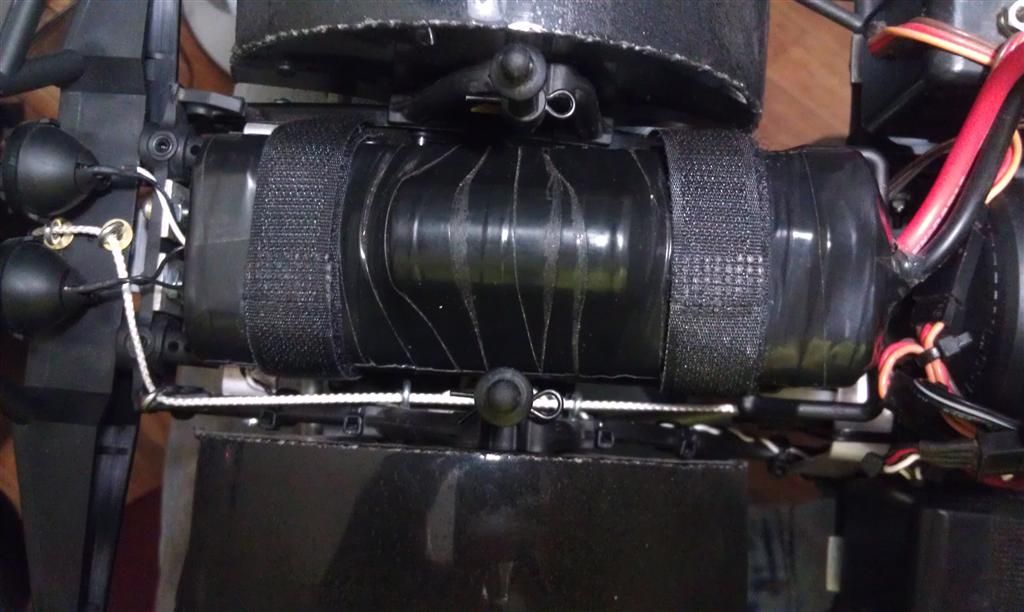 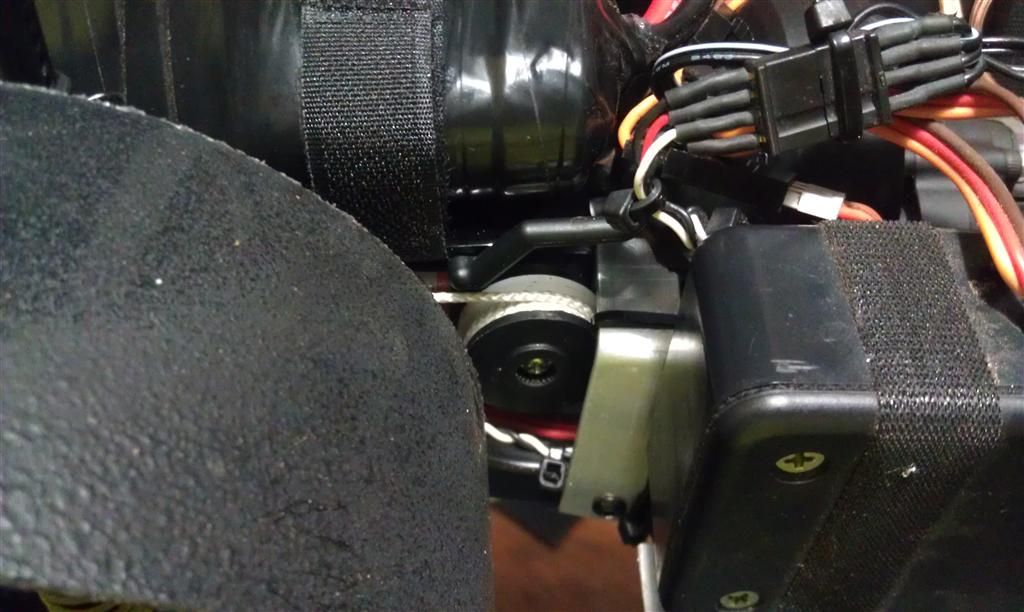 this SHOULD be enough length for normal use. the string is a little thicker than I had planned on getting, so this is about all that will spool up on the drum. I might be able to scrounge up some actual steel cable from work that's thin and flexible enough to use later on. there's actually a little room and I might be able to make the drum a little wider to hold more, so that's an option as well 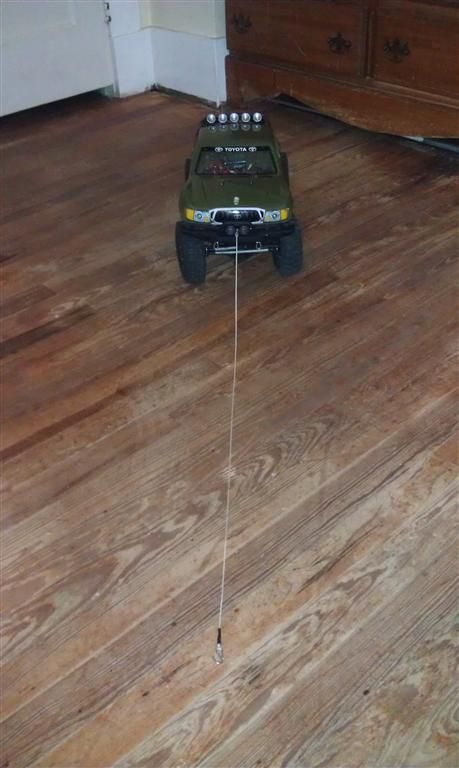 randomness pics 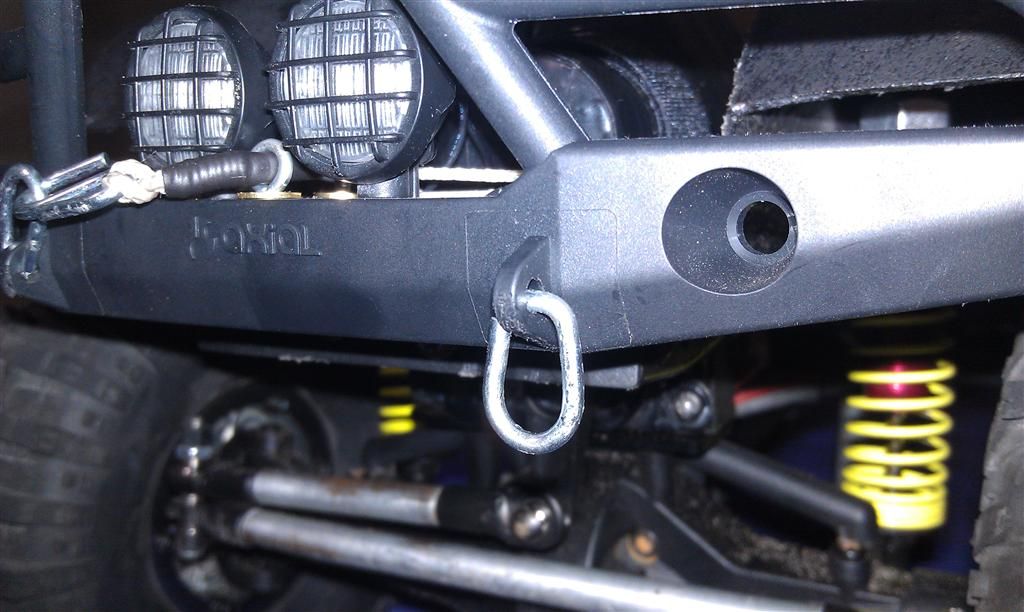 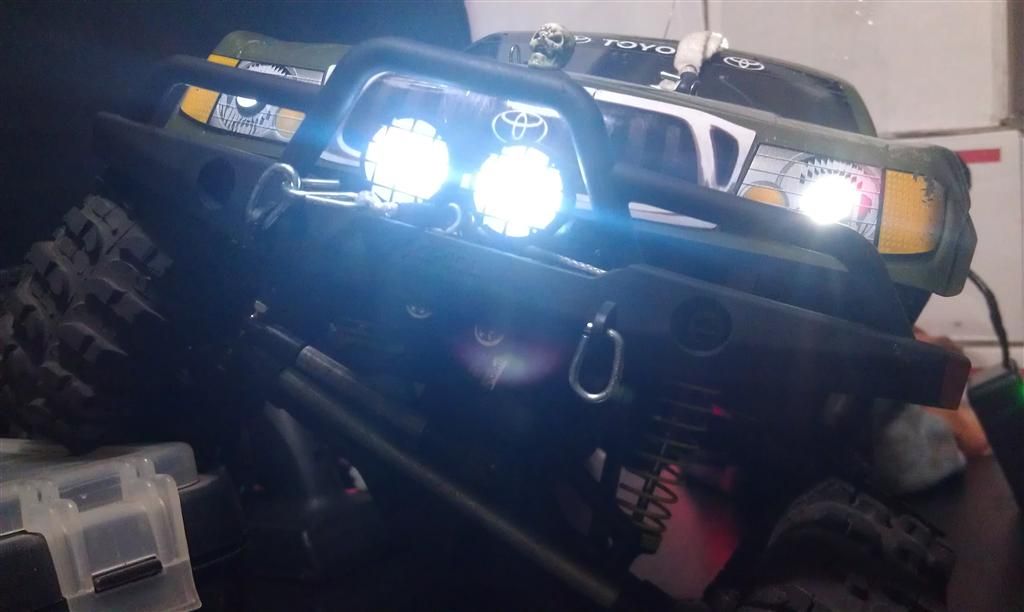 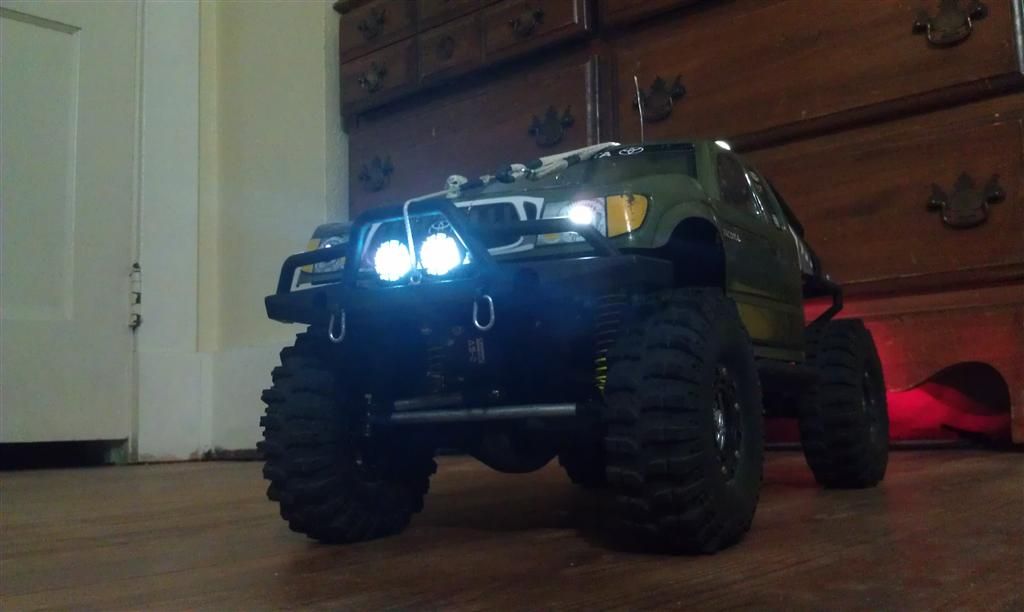 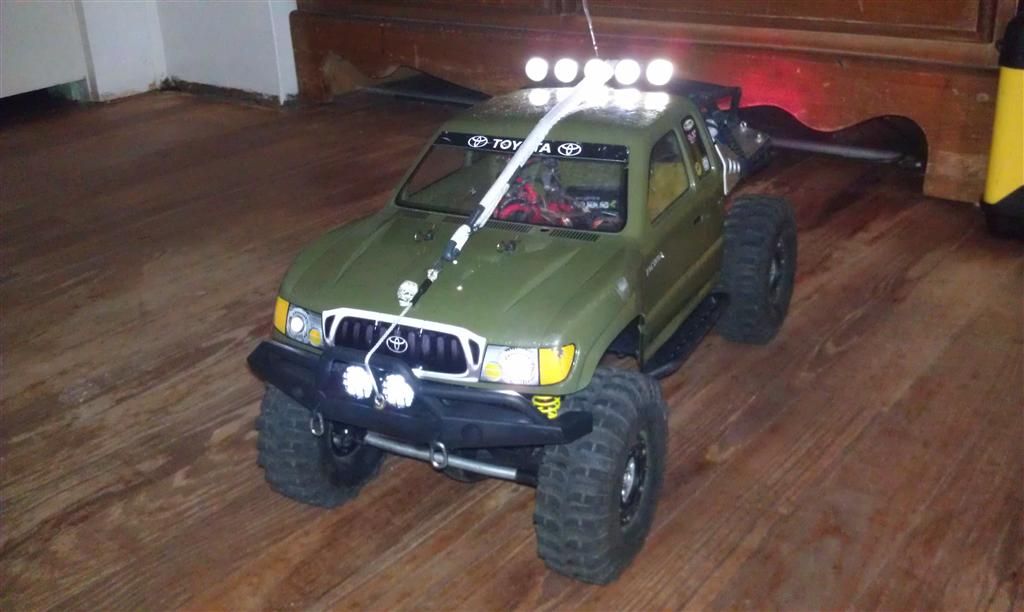 the string is rated to 18 lbs, and the hooks to 17, so I think that pretty much covers the truck. but although the winch DOES function (good enough to pull my office chair across the floor lol) it seems a little weak, which is not a big surprise seeing that the servo cost me a whopping $10... can't even lift the truck up if I hold onto the string and dangle the truck under it... but, this was just proof of concept. I'll run this servo until it gives out or just proves to not be strong enough to be useful, then I'll invest in a better one also, I've gotten a request on the schematic of the electronics in the controller box I made, so I'll try to whip up a drawing soon and post it Last edited by iamsuperbleeder; 11-14-2011 at 11:38 PM. |
|
| |
|
11-15-2011, 05:44 AM
| #115 |
| RCC Addict Join Date: Jun 2011 Location: Gilbert, AZ
Posts: 1,634
|
Looking good. You know I like the Dingo bumper on there, mine has help up well. I'm glad to have changed from the stock one, specially with moving it up and back.
|
|
| |
|
11-15-2011, 04:49 PM
| #116 |
| Rock Stacker Join Date: Sep 2011 Location: Orlando
Posts: 78
|
digging the truck man its looking good. that winch is money too!. I might have to do that on my ax now. Ive seen everyone make gear boxes but was wondering if the servo could just do it alone.(well with help from the wheels). Deff liking that bumper too.
|
|
| |
|
11-15-2011, 11:00 PM
| #117 |
| Quarry Creeper Join Date: Jul 2011 Location: Lake City, Fl
Posts: 380
|
I never was very good at drawing schematics, so hopefully this will make since to the ones that were wondering about it before you attempt this, you obviously need to convert a standard steering servo so that it will work in a continuous spinning motion instead of the limited degree of turning. I'm not going to get into that because there's TONS of how-to's out there on the interwebs that go into detail about it, and each servo is going to be just a little bit different depending on the manufacturer and the model, but basically you just remove any notch or stop on the housing or on the gears inside that keeps the final gear from making a full rotation, and then just solder some wires directly to the motor leads in the servo and just snip off the 3 wire lead that was there to begin with symbol key 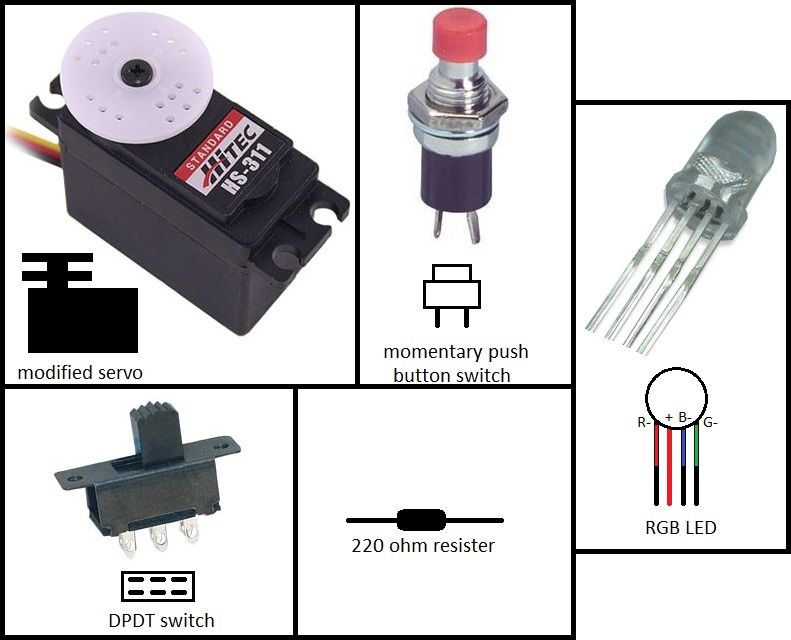 with LED indicator 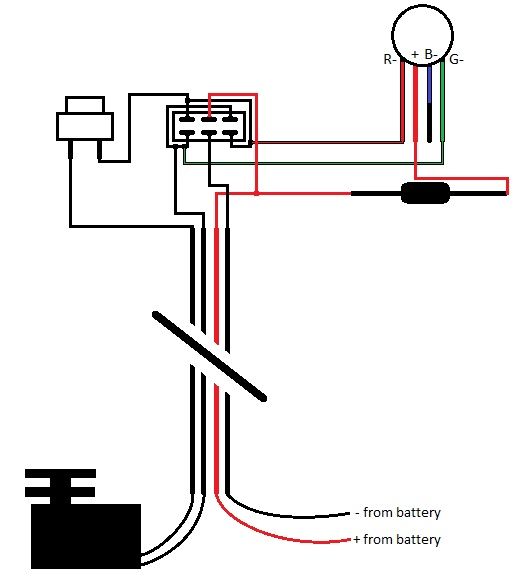 if you don't care about adding an LED, just go with this one 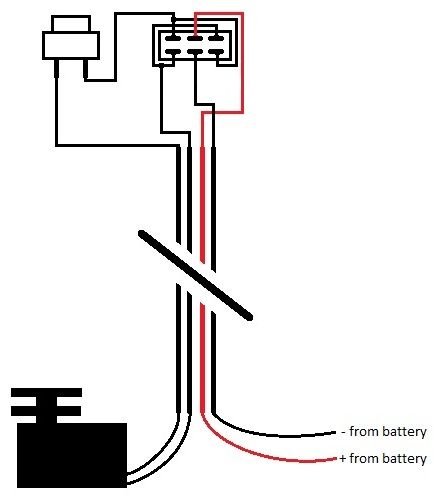 * if you use the LED method and the winch isn't spinning the direction you want it to according to the color of the LED, just swap the leads around at the servo. don't swap the leads around at the battery, the LED will no longer work then... * the LED I used (purchased from Radio Shack a while ago) uses a common + and each color has a separate - lead, so my entire circuit is a switching ground setup. if yours uses a common - instead and each color lead takes a + input, just swap the + and - leads around at the power input. the motor int he servo doesn't care what wire is + or -, it'll just spin in different directions depending out how it's wired. an LED on the other hand just will not work if it's hooked up backwards Last edited by iamsuperbleeder; 11-15-2011 at 11:07 PM. |
|
| |
|
11-16-2011, 08:48 AM
| #118 |
| Newbie Join Date: Jan 2010 Location: Nor★Cal
Posts: 30
|
Nice build! I would like to know if you think mirroring the trans has made any noticeable difference in the torque twist? I've got mine all torn down again thinking it's a good idea, but wonder of the benefits. I'm also considering not only reversing the trans to move the motor to the other side, but also making a bracket on the bottom to move the trans even further so that the drive shafts will be centered on the axles rather than the sharp angle they are currently at. I also considering that it seems that you've put quite a few dollars into trans upgrades, gear replacements, etc. Maybe it would be better for me to just drop in a RC4WD R2 trans? Any input? Last edited by JeffA; 11-16-2011 at 09:10 AM. |
|
| |
|
11-16-2011, 07:04 PM
| #119 |
| Quarry Creeper Join Date: Jul 2011 Location: Lake City, Fl
Posts: 380
|
mirroring the trans made a pretty noticeable difference, but when I installed the Wraith trans as well as it's 20t motor and 80t spur, it was back, lol. it'll still pull a front tire off the ground if I gun it from a dead stop; hardly twisted at all with the original 27t motor and 87t spur. so if you're running a high turn motor like a 35t or 45t and a spur around the 87t stock or higher, it'll probably really cut down on the twist, assuming you stick with just a normal 6 cell NiMH battery or a 2s lipo. if you go jumping up to a 3s or higher and give that high turn motor some more voltage, it's going to put out even MORE torque and speed and you'll notice the twist a lot more. I run a 7 cell NiMH battery, 8.4 volts as apposed to the 7.2 of a 6 cell, and that extra 1.2 volts makes a HUGE difference in the way the truck pulls. so the torque twist really comes down to a lot of different factors; motor, gearing, power source, ride height (it's going to be more noticeable if you're rig is sitting higher), spring rate (soft springs are going to let the suspension move around a lot more obviously). but on a close to stock setup, flipping the trans probably takes away half the twist, so I'd say just give it a try and see how it works out for you. it's not going to hurt a thing and as far as taring up the trans gears, lol, I don't baby this truck in any way, shape, or form. when I wheel it, it's balls to the wall but anyhow, my point is that with stock gearing and the stock motor (or a higher turn motor) and your average size 1.9 tire, you'll probably go a long time on the trans before you really tare it up, assuming you don't drive it like a pissed off teenager like I do Last edited by iamsuperbleeder; 11-16-2011 at 07:06 PM. |
|
| |
|
11-16-2011, 07:24 PM
| #120 |
| Newbie Join Date: Jan 2010 Location: Nor★Cal
Posts: 30
|
Great info! I decided to keep running the stock trans for now. I did reverse it, and center the drive lines on the chassis. I'm running a 19turn with stock gearing on a 2S LiPo. With my new shocks, and soft springs, I may have to invest in some more firm springs if it still gets too much twist. I was thinking of doing the 2 speed mod and putting my 45turn back in... when I've got more disposable income maybe. I just got the trans mounted, working on rewiring it and water resistant type mods now. Your build thread really got me pumped to go beyond the normal repair sort of stuff. With so many options and parts, and so many people trying different stuff and posting about it, I've become a familiar face at my LHS recently. Once I get the thing running again and dialed in, I'm going to start looking into a new body, maybe do something to make it stand out from the crowd a bit. Thanks again for your input! :thumbsup:
|
|
| |
 |
| |


 Linear Mode


