| |
| |||||||
 |
| | LinkBack | Thread Tools | Display Modes |
 12-26-2013, 10:29 AM
| #21 | ||||
| Pebble Pounder Join Date: Jul 2011 Location: Downingtown, PA
Posts: 105
| Quote:
Quote:
Quote:
Quote:
I'll post more pictures of the progress soon! | ||||

|  |
| Sponsored Links | |
| | |
|
12-26-2013, 10:55 AM
| #22 |
| Pebble Pounder Join Date: Jul 2011 Location: Downingtown, PA
Posts: 105
|
So this is what the axles look like now that everything is aligned properly: 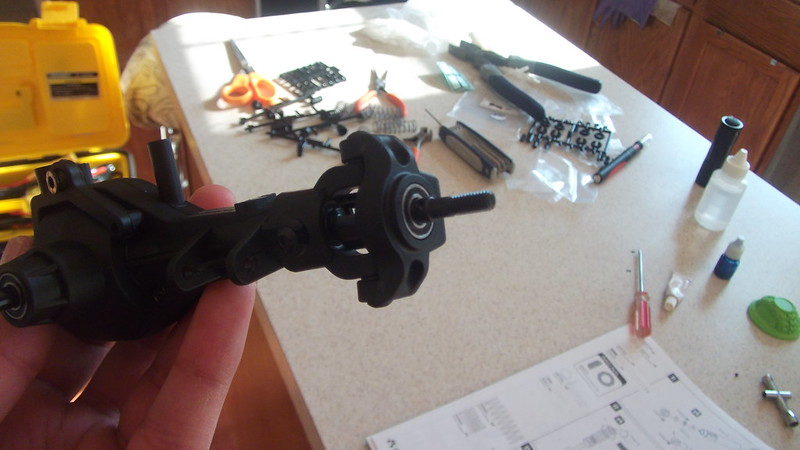 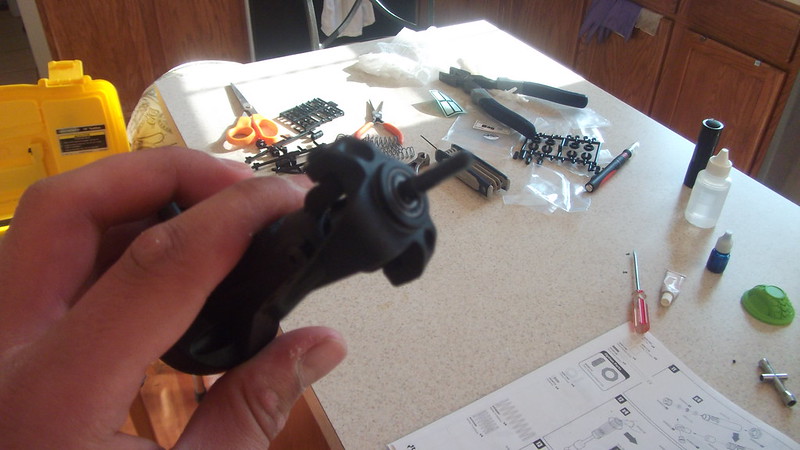 Muuuch better. Also, got the driveshafts assembled...that took about an hour.  And now the shocks took a good 2 hours (yes I forgot the small part at the top on three shocks...gonna fix that now 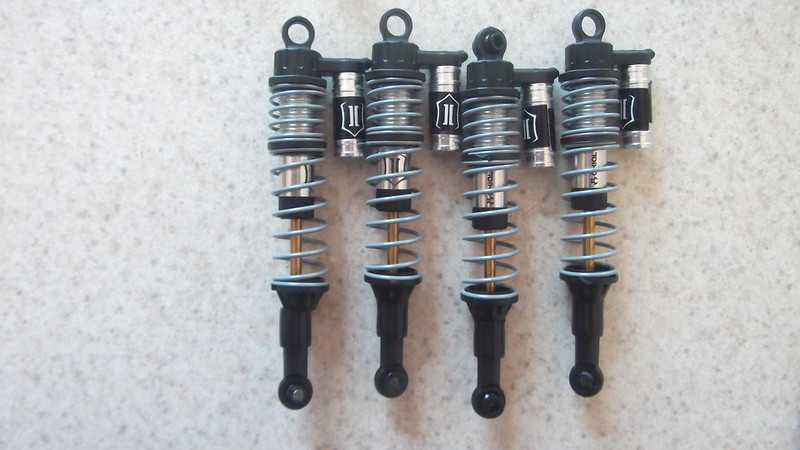 The shocks are a little bit stiff though...at least it feels like that. |
|
| |
|
12-26-2013, 12:12 PM
| #23 |
| RCC Addict Join Date: Jul 2013 Location: Planet Earth
Posts: 1,286
|
Look inside your bags of parts and you should have 2 Trusses like the one youll install on the rear..Convert your front 3 link to a 4 link..That 3 link comes apart and has massive play in it after a good 10 runs or so. The piece looks like this...Should have this front and rear...But youll need to get front upper links to complete it in the front.  Last edited by 6sharky9; 12-26-2013 at 12:19 PM. |
|
| |
|
12-26-2013, 01:03 PM
| #24 |
| I wanna be Dave Join Date: May 2007 Location: Fairfield ME
Posts: 3,886
|
The spring cup should be under the bump stop.
|
|
| |
|
12-26-2013, 02:29 PM
| #25 |
| Newbie Join Date: Oct 2013 Location: Tupelo
Posts: 15
|
Calderwood is right. Here is a great writeup by axial on building the shocks. I took my bump stops off completely just to get more articulation out of the shock. Some people also cut them in half to get a little more articulation too. Also when you join the driveshafts make sure to align the screws on the male and female shafts or you will get alot of chatter from the weight not being evenly distrubuted. There is a special note at the bottom of the manual in exclamation marks but it doesn't explain it very well. Axial Racing - Axial – ICON Vehicle Dynamics 61-90mm Aluminum Shocks – Step by Step Build Also here is a great video on aligning the driveshaft splines and pins to eliminate chatter. http://m.youtube.com/watch?v=acrSdzzniiw Last edited by daltrey; 12-28-2013 at 06:15 AM. |
|
| |
|
12-26-2013, 03:12 PM
| #26 | |||
| Pebble Pounder Join Date: Jul 2011 Location: Downingtown, PA
Posts: 105
| Quote:
Quote:
Quote:
| |||
|
| |
|
12-26-2013, 03:33 PM
| #27 |
| RCC Addict Join Date: Jul 2013 Location: Planet Earth
Posts: 1,286
|
Just the links/ends and maybe a longer screw to go through to hold the links..other than that you shouldn't need anything else..Can get a screw and a lock nut at the hardware store for less than 1 dollar more than likely...Its a 3mm screw. And yea take those rubber stoppers off..Actually they would fit on the shock shaft inside the spring..so they aren't on right anyways...but take them off..They are actually meant to stop upward travel..But most take them off for better improved articulation...That's another reason your shocks feel stiff..they are already being compressed ..The cups should be down by the shock ends..that will drop your springs a whole bunch..youll have to re adjust the play in the springs. Last edited by 6sharky9; 12-26-2013 at 03:45 PM. |
|
| |
|
12-26-2013, 05:54 PM
| #28 | |
| Pebble Pounder Join Date: Jul 2011 Location: Downingtown, PA
Posts: 105
| Quote:
Some more pictures of the progress. I decided to keep the 3 link truss for now.  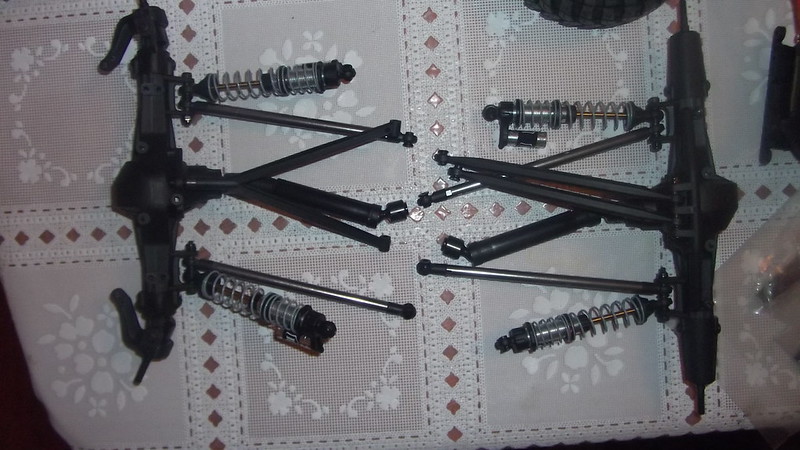 I changed the pinion to a Robinson Racing Pinion Gear 48P 16T and the spur to a Kimbrough Differential Gear 48P 87T per a recommendation of a member here:  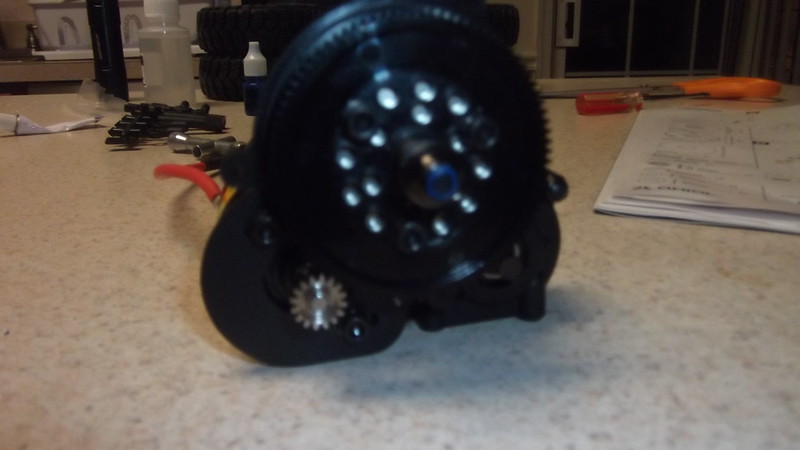 Got these glued up yesterday night:  And now I'm on step 26!!!  | |
|
| |
|
12-26-2013, 07:59 PM
| #29 |
| Pebble Pounder Join Date: Jul 2011 Location: Downingtown, PA
Posts: 105
|
Some more progress tonight: Got my servo mount on: 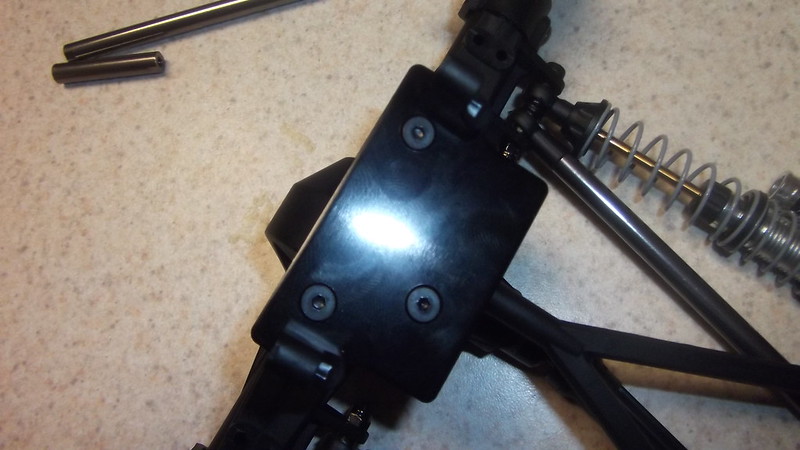 Deans connector installed onto the holmes hobbies BRXL ESC: 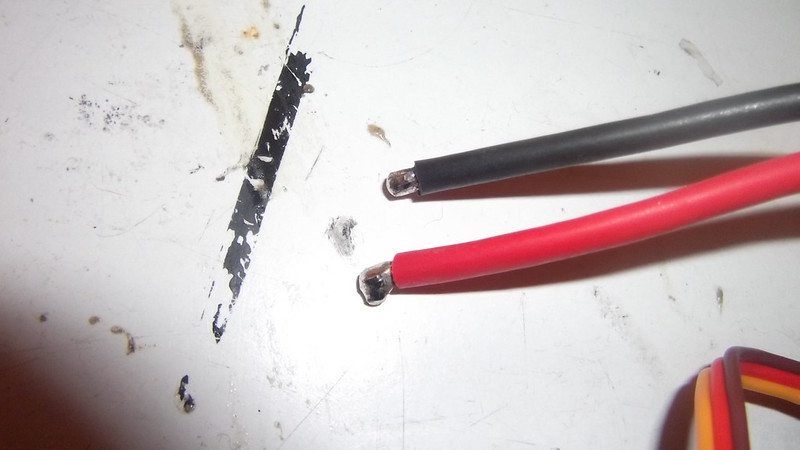 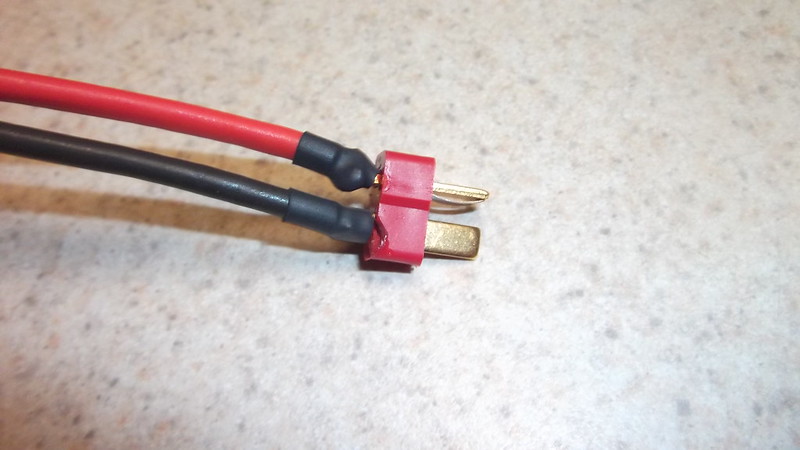 Yeah, I burned a little bit of the connector off...I happen to do that a lot. My soldering skills are not that great. Anyway, on ward! Got the servo (Hitec HS5645MG) installed: 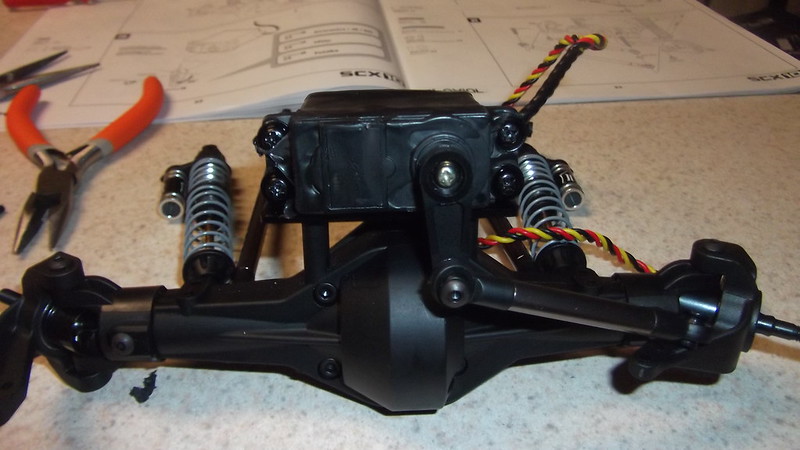  The black rubbery stuff around the servo is plasti-dip for waterproofing in case anyone was wondering. The last thing I just finished: 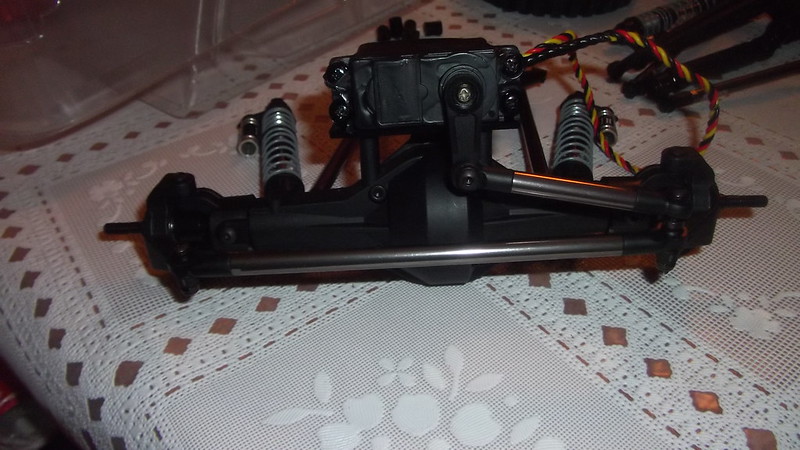 And thats where I'm stopping for today...calling it a night. |
|
| |
|
12-26-2013, 08:11 PM
| #30 |
| RCC Addict Join Date: Jul 2013 Location: Planet Earth
Posts: 1,286
|
Heres another tip...turn your driveshafts around so the ribbed part is up near the transmission...Less chance of hanging up on a rock and damaging the drive shafts...On the driveshafts youll find 2 little line marks..those have to be lined up no matter which way you install them or it will drive like crap.
|
|
| |
|
12-26-2013, 08:49 PM
| #31 | |
| Pebble Pounder Join Date: Jul 2011 Location: Downingtown, PA
Posts: 105
| Quote:
Yep, I read about the line markings in the manual...I always make sure they are lined up, which they seem to be. 1 or 2mm off won't make a huge difference though right? Just want to make sure in case they are slightly off. | |
|
| |
|
12-26-2013, 09:10 PM
| #32 |
| RCC Addict Join Date: Jul 2013 Location: Planet Earth
Posts: 1,286
|
just make sure they are on the rib that lines them up the best.
|
|
| |
|
12-26-2013, 09:36 PM
| #33 |
| I wanna be Dave Join Date: Sep 2006 Location: Anchorage, Alaska
Posts: 3,099
|
it's called "phasing" there is a little > on each end of the male/female drive shafts Those need be aligned to ensure the drive shafts are phased correctly. Phasing is simply that both ends of the drive shaft joints align the universal pins exactly the same. Meaning both are turning in unison with each other. If they are out of phase... the drive train will cog severely. And one might think something else is amiss. If they are off by a single spline, or two... it can still be noticeable and annoying. As well as being at fault for accelerated DS wear. So I recommend phasing the DS's spot on. It's not a difficult thing. tho' if it's not done correctly during the original build... it should be removed and redone. While you have those apart... add a plastic rod from the parts tree (free scrap) Insert those into each male drive shaft and cut off flush. This will help keep the male spline shaft from twisting under load. The ID of the male DS is 6mm... you could use other things like 6mm thread all... But the plastic solid rod from the parts tree scraps work best. You will need remove the nubs and burs from that rod so that it will push in easily. Whatever you use... don't use wood doweling... 'cuz if that gets wet or absorbs moisture it will swell... then fubar the male DS permanently. ^ ask me how I know |
|
| |
|
12-27-2013, 12:26 AM
| #34 | |
| RCC Addict Join Date: Jul 2013 Location: Planet Earth
Posts: 1,286
| Quote:
 | |
|
| |
|
12-27-2013, 07:46 AM
| #35 | ||
| Pebble Pounder Join Date: Jul 2011 Location: Downingtown, PA
Posts: 105
| Quote:
Quote:
| ||
|
| |
|
12-27-2013, 09:45 AM
| #36 |
| Pebble Pounder Join Date: Jul 2011 Location: Downingtown, PA
Posts: 105
|
Got the chassis built and transmission installed: 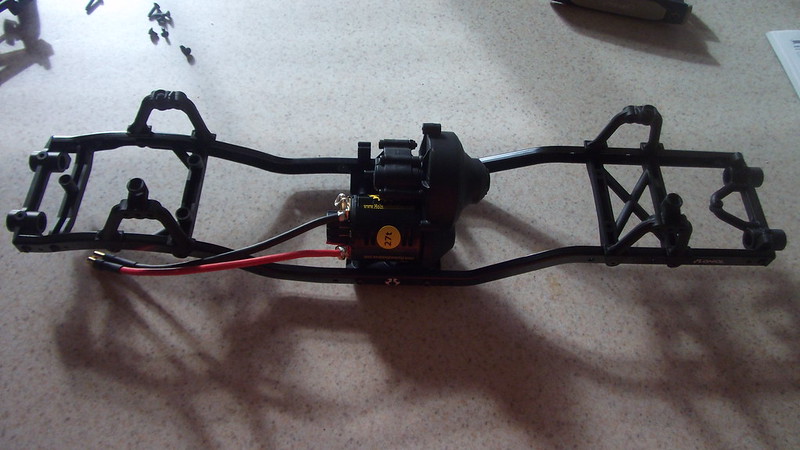 Front axles have also been installed:  |
|
| |
|
12-27-2013, 10:37 AM
| #37 |
| Pebble Pounder Join Date: Jul 2011 Location: Downingtown, PA
Posts: 105
|
I got the rear axle installed but have hit a problem. Looking from the back, the right side shock seems to be squished up against the chassis, and is rubbing big time. I have pictures of the installation along with comparison of left and right side shock. Axle installed...seems a little crooked...I think that may be the problem: 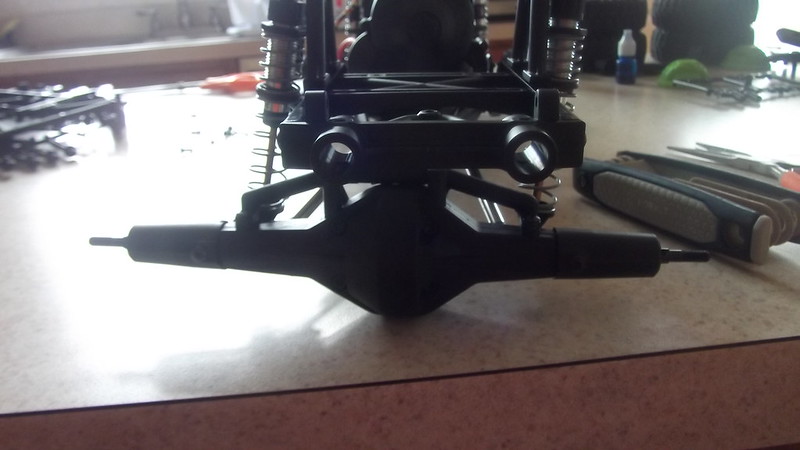 Right side shock: 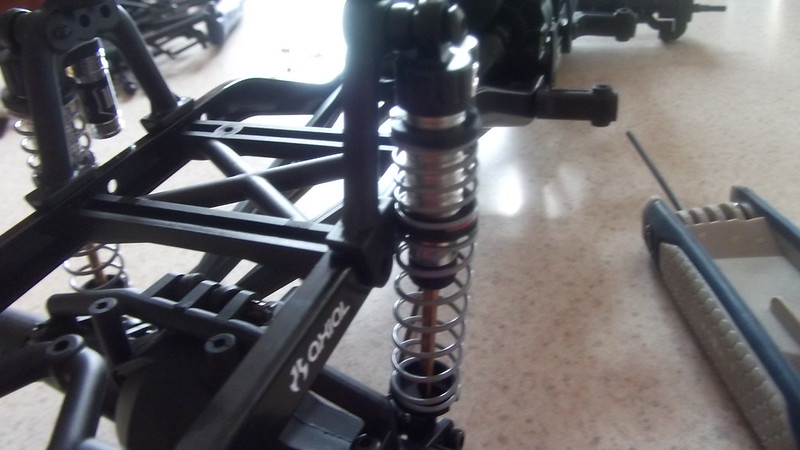 Left side shock: 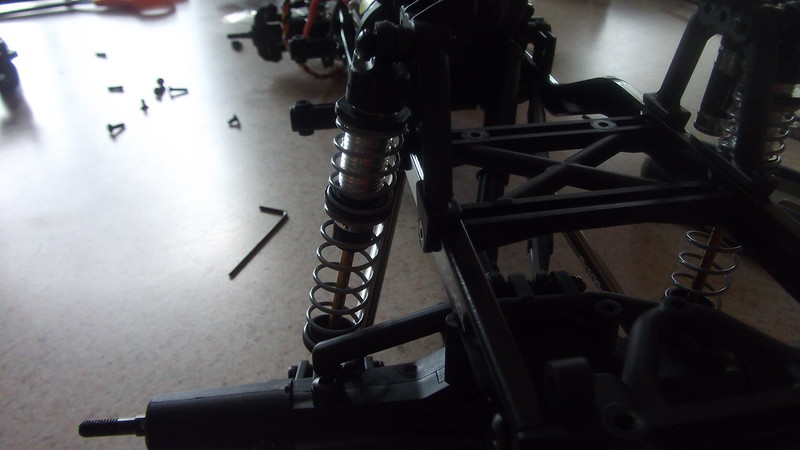 The assembly:  Where did I go wrong? |
|
| |
|
12-27-2013, 10:47 AM
| #38 |
| Rock Crawler Join Date: Jul 2011 Location: palm desert (southern cali)
Posts: 850
|
Looks like left bottom link is on outside of shock on bottom mount right side looks to be inside shock Sent from my Optimus G Pro using Tapatalk |
|
| |
|
12-27-2013, 11:07 AM
| #39 | |
| Pebble Pounder Join Date: Jul 2011 Location: Downingtown, PA
Posts: 105
| Quote:
| |
|
| |
|
12-27-2013, 12:14 PM
| #40 |
| I wanna be Dave Join Date: Sep 2006 Location: Anchorage, Alaska
Posts: 3,099
|
I was gonna tell you to check the lengths of the lower links... but then... you already found the fault. FYI... the lower links control/designate the wheel base length settings. the upper links control/designate the axle's forward/rearward rotation... affecting the caster settings at the knuckles. |
|
| |
|
 Axial SCX10 build - My first kit. - Similar Threads
 | ||||
| Thread | Thread Starter | Forum | Replies | Last Post |
| NorCal's Axial SCX10 2012 Jeep Wrangler Unlimited Rubicon Kit Build | NorCal 2500HD | Axial SCX-10 | 29 | 06-20-2014 09:59 AM |
| Badger's Axial SCX10 Jeep Wrangler G6 kit build | badger | Axial SCX-10 | 122 | 05-01-2014 01:51 PM |
| Axial SCX10 Dingo Kit Newb build. | syko_less | Axial SCX-10 | 8 | 04-28-2014 03:15 PM |
| Detailed build of Axial Honcho SCX10 Kit - aimed at the person new to RC | rc-Bitz | Axial SCX-10 | 0 | 05-20-2011 04:42 PM |
| my axial scx10 honcho kit build | 4goodbuys2 | Axial SCX-10 | 3 | 04-04-2010 12:36 PM |
| |


 Linear Mode


