| |
 02-18-2008, 09:05 PM
| #41 |
| RCC Addict  Join Date: Oct 2005 Location: Trussville, AL
Posts: 1,762
|
hey mike, those axles are looking sick. I am going to have to do that to mine after this weekends comp. These things are a work of art. here are some pics of mine mounted to my GC-1. it is ready to rock-n-roll for this weekends comp, at least I think it is. We shall find out in a few days. They way that i mounted the upper links kept me from having to drill into the nice work that you did  and kept the link geometry how it is supposed to be. It sits right at 12.5" and at 3" of Ground clearance. the only thing that will ever hit the rocks are the links and the skid and kept the link geometry how it is supposed to be. It sits right at 12.5" and at 3" of Ground clearance. the only thing that will ever hit the rocks are the links and the skid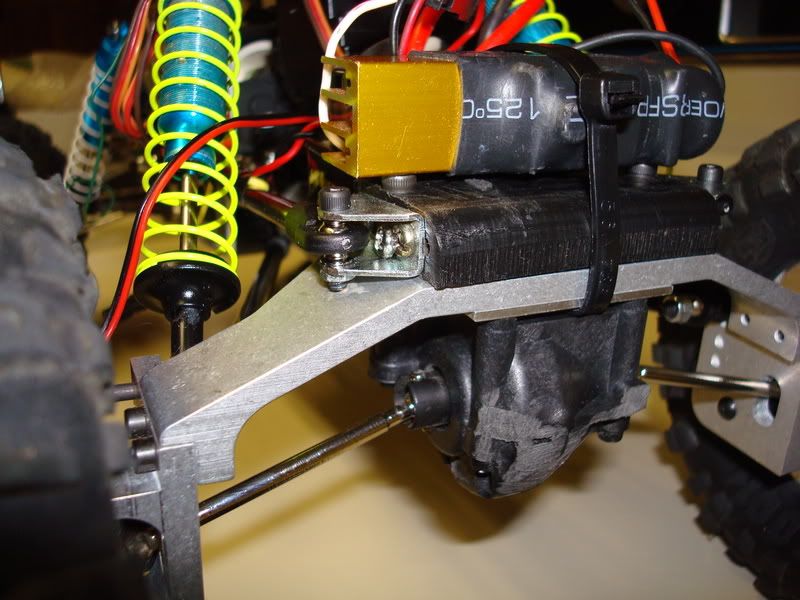 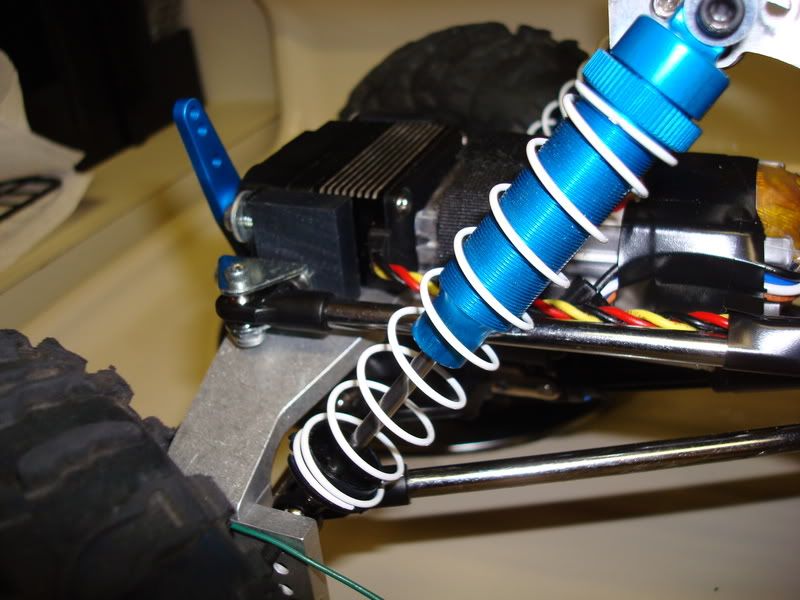 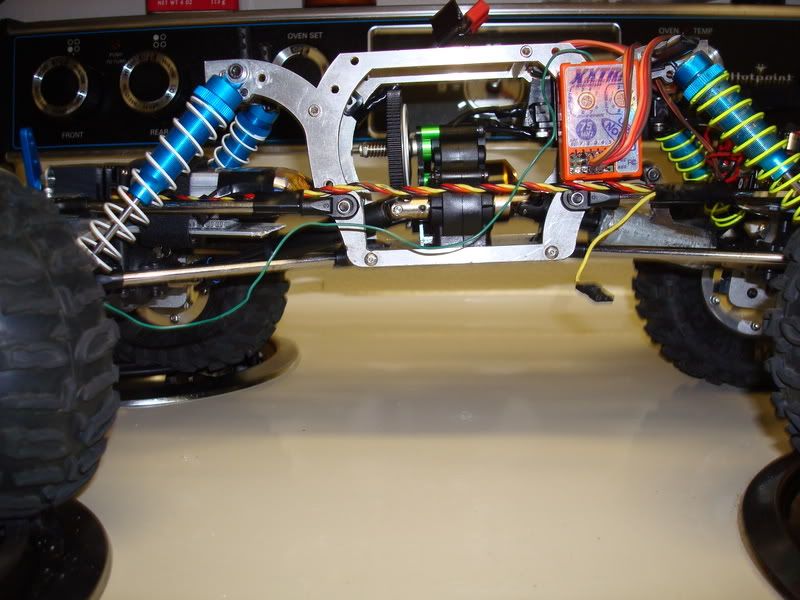 Last edited by yukon635; 02-18-2008 at 10:26 PM. |

|  |
| Sponsored Links | |
| | |
|
02-18-2008, 10:05 PM
| #42 |
| I wanna be Dave  Join Date: Apr 2005 Location: Vegas
Posts: 7,172
|
Bigger pics please!
|
|
| |
|
02-18-2008, 10:27 PM
| #43 |
| RCC Addict Join Date: Oct 2005 Location: Trussville, AL
Posts: 1,762
|
there you happy I was trying a new way to host my pics and didnt realize they posted that big. |
|
| |
|
02-18-2008, 10:36 PM
| #44 |
| RCC Addict  Join Date: May 2005 Location: Utah
Posts: 1,124
|
Looks good Mike! I hope to be running your axles soon...
|
|
| |
|
02-18-2008, 10:49 PM
| #45 |
| Quarry Creeper Join Date: Jan 2006 Location: SLC
Posts: 382
|
The links mounted up pretty good on the bottom but the link mounts for the strut is wide and the GC chassis is narrow. For the lowers all I needed to do was remove a little off the skid where the link end rubbed.
|
|
| |
|
02-18-2008, 10:55 PM
| #46 |
| RCC Addict Join Date: Dec 2004 Location: Behind the wheel of an Axial R/C
Posts: 1,921
|
Great thread Mike Theses axles are the ultimate in performance. The key is to take your time and get things shimmed, shaved, and setup right. If you follow Mikes instruction through this thread you'll have one fine set of axles. I've logged hours of use with only a few minor breaks. After running these it's impossible to go back to a standard straight axle. On a comp rig I wouldn't run anything else. I've seen these on a bunch of tubers, nice to see some mated with some TVP's |
|
| |
|
02-18-2008, 10:58 PM
| #47 |
| Quarry Creeper Join Date: Jan 2006 Location: SLC
Posts: 382
|
The uppers need a little more work, they were a little long for the strut. And if you want to be able to use the 2 holes in the chassis you need 2 holes in the strut as well. So I shortened the upper link .5" and drilled 2 holes in the strut. Now I have some adjustments on the chassis. Also the height on the strut end can be adjusted too buy adding or removing washers under the link. Front and rear are done the same. |
|
| |
|
02-18-2008, 11:53 PM
| #48 |
| Quarry Creeper Join Date: Jan 2006 Location: SLC
Posts: 382
|
I saw this Velcro being used to wrap computer cables, they call it tak-tape. What's cool about it is it's only .035" thick, it doesn't feel or look like Velcro it's really smooth. This makes it really good for gluing on to the battery plate. I use 3M 77 to glue the velcro to the battery and battery plate. |
|
| |
|
02-19-2008, 12:00 AM
| #49 |
| Quarry Creeper Join Date: Jan 2006 Location: SLC
Posts: 382
|
Mask off what you don't want glue on and give it a light coat. When you touch the glue and it sticks to the part and not your finger it's ready for a permanent bond.
|
|
| |
|
02-19-2008, 03:01 PM
| #50 |
| Rock Crawler Join Date: Jul 2005 Location: Phoenixville
Posts: 826
|
Nice yukno365 and mike, Mike what battery is that you are running?
|
|
| |
|
02-19-2008, 03:21 PM
| #51 |
| Adilynsdad too!   Join Date: May 2004 Location: G ville
Posts: 8,844
|
Just ordered my axels from you... If your feeling frisky go ahead an round my edges! hahahaha |
|
| |
|
02-19-2008, 04:06 PM
| #52 | |
| I wanna be Dave Join Date: Apr 2005 Location: Vegas
Posts: 7,172
| Quote:
| |
|
| |
|
02-19-2008, 04:49 PM
| #53 |
| RCC Addict Join Date: Oct 2005 Location: Trussville, AL
Posts: 1,762
|
I am betting that it is a 3 cell 1320 mah lipo |
|
| |
|
02-19-2008, 05:55 PM
| #54 | ||
| I wanna be Dave Join Date: May 2007 Location: Taylors Falls just hanging with the MNRCRC crew.
Posts: 7,843
| Quote:
Quote:
Mike, this thread is just chocked full of great information and trick stuff. Thanks | ||
|
| |
|
02-20-2008, 09:10 PM
| #55 |
| Quarry Creeper Join Date: Jan 2006 Location: SLC
Posts: 382
|
Here are the new CVD bones. The pen marking shows where just a little material need to be removed. These will be on all new axles and offered to all previous purchases at a generous discount. |
|
| |
|
02-21-2008, 03:28 PM
| #56 |
| Rock Crawler Join Date: Jul 2005 Location: Phoenixville
Posts: 826
|
wow nice and beefy.
|
|
| |
|
02-22-2008, 10:26 PM
| #57 |
| Quarry Creeper Join Date: Jan 2006 Location: SLC
Posts: 382
|
After assembling a few axles with the Burly Bones I found some of them would touch the out drive cup. So a little more grinding here. When you spin the axle and feel a little bump thats where it is.
|
|
| |
|
02-22-2008, 10:32 PM
| #58 |
| Quarry Creeper Join Date: Jan 2006 Location: SLC
Posts: 382
|
Here is how I install the Associated B4 slipper in the Axial. Cut shim stock the width of the bearing, then wrap it around something close to the size of the 3/16x3/8 bearing. |
|
| |
|
02-22-2008, 10:32 PM
| #59 |
| Rock Crawler Join Date: Dec 2007 Location: Shreveport, La
Posts: 544
|
thats up at the differential outputs right?
|
|
| |
|
02-22-2008, 10:34 PM
| #60 |
| Quarry Creeper Join Date: Jan 2006 Location: SLC
Posts: 382
|
Insert the shim into the case and use the top gear as a tool to press the bearing in.
|
|
| |
 |
| |


 Linear Mode


