| |
 08-29-2008, 06:16 PM
| #121 |
| I wanna be Dave 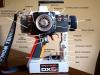 Join Date: Feb 2006 Location: Campbell, CA 4 hrs 2Rubicon !
Posts: 2,044
|
Fabricated: Axle Upper & Lower link mounts Lower shock tabs Servo mounts Hooked up steering rods I fried my Ipod Imini speaker system (4watt) So I dissembled my wifes Ipod travel speaker system (6 Watt) :-P On with pics Last edited by toy4crawlin; 08-31-2008 at 04:39 PM. |

|  |
| Sponsored Links | |
| | |
|
08-31-2008, 05:16 PM
| #122 |
| I wanna be Dave Join Date: Feb 2006 Location: Campbell, CA 4 hrs 2Rubicon !
Posts: 2,044
|
Shh , don't sneeze , nothing is bolted up just a mock up of how things are fitting 4 link suspension Chassis pan at 4" clearance Went to the post Office to Weight in Here's the Weight thus far Axles 1lb 2.1 oz each Batteries 1lb 6 oz Tube Chassis, tranny, motor and HDPE belly pan 1lb 12.5 oz Axles will have 4 cells of batteries each , Total Axle weight @ 1.82 lbs or 29.1 oz Combined weight, MINUS --> ESC, Reciever, CC BEC, Hi Tec servos 5955tg and 5995tg, DiG servo, Stereo, shocks, tires, links. did I miss anything..? 3 lbs 15.7 oz Just shy of 4 Lbs Last edited by toy4crawlin; 09-16-2008 at 10:52 PM. |
|
| |
|
08-31-2008, 07:15 PM
| #123 |
| I wanna be Dave Join Date: May 2007 Location: Taylors Falls just hanging with the MNRCRC crew.
Posts: 7,843
|
Don't know how I missed this build but it's defiantly interesting. First of all its huge I can't believe how small the steering servo looks on the front axle. I'll be watching for more of your posts. I hope the wife doesn't miss the ipod speaker system. Your braver than I am but then again your a World Champion in street luge so that makes sense. |
|
| |
|
08-31-2008, 08:52 PM
| #124 |
| I wanna be Dave Join Date: Feb 2006 Location: Campbell, CA 4 hrs 2Rubicon !
Posts: 2,044
|
Hey Thanks Stomin2u A little side tracking but here's my plan for the ROCK RINGS 1/4 thick Aluminum with 1/8 Grooved channels |
|
| |
|
09-01-2008, 12:25 AM
| #125 |
| Release your anger..   Join Date: Oct 2006 Location: North American Union
Posts: 1,063
|
toy4crawlin, Are you a mad scientist? You have some really trick , out of the box ideas.  You mind if I quiz ya? How difficult was it to make those axles? On the rear axle , won't the servo get in the way of the shocks? Or do you planning on a using a cantilever system?   Last edited by ThinkTank; 09-01-2008 at 12:30 AM. Reason: Clarifying my post |
|
| |
|
09-01-2008, 11:14 AM
| #126 |
| I wanna be Dave Join Date: Feb 2006 Location: Campbell, CA 4 hrs 2Rubicon !
Posts: 2,044
|
Thank you for the Compliment LOL I do like to be different and original. I really like that Cad picture you posted above ( I found that during my build) I wanted to build something like it (2 seats) but did not feel it was my Place to since the kid (willyswanter) made it and then passed away. I believe his dad and friends are trying to finish his crawler. My prayers go to his family. The Axle, It was for sure the biggest and most time consuming . I actually got a bit overwhelmed :-? So many Welds , Battery holder, Servo mount, axle gusset, lower link tabs, shock tabs all the short tubes I ran out of Space to Do Behind the Axle steering :-( unless I put batteries in front and that would look really weird. The axle shafts are Angled forward to clear Tie rod to gear housing. The axles are also angled Down to gain Diff clearance and because I have always wanted to build one. This whole crawler has been a challenge with clearance but with the rear shock clearing the servo i will just need to make a Shock hoop that sticks out a bit farther than the front as the rear chassis is narrower. The motor is directly behind the seat and only has 1/4 of space Just in case I decide to try a longer motor such as a Brushed motor. There is no space from chassis to seat and seat to Shifters/ switches to DIG shaft. Even the Driver Foot is close to upper link The drive shafts just barely clear the links, and if Corvette engine fits it's going to be tight with upper links. I hope today I can finish all the Links and Shock Hoops . I having BIG Questions on the Length of my Links there are under 5" seems like they should longer, but I tend to analyze and think to much so who knows Last edited by toy4crawlin; 09-01-2008 at 01:35 PM. |
|
| |
|
09-01-2008, 04:18 PM
| #127 |
| Quarry Creeper Join Date: Jun 2008 Location: Hell
Posts: 399
|
Making your own rock rings is a good idea, the bolts that came with my maximizer beadlocks cut and drill into the plastic faceplate, so I was thinking of making some rings.
|
|
| |
|
09-02-2008, 11:51 PM
| #128 |
| I wanna be Dave Join Date: Feb 2006 Location: Campbell, CA 4 hrs 2Rubicon !
Posts: 2,044
|
Tacked on some front shock hoops, looks like it will have to change or try with droop shocks, forgot about my narrower axles and less slant shocks there is not much travel also looks like my links are short only 5 3/4 eye to eye, especially my uppers. Troubleshooting how to make room on skid plate to mount them further inward One thing for sure I'll go for Performance over scale look. I may lower it from 4" to 3 to be even with axles |
|
| |
|
09-06-2008, 03:32 AM
| #129 |
| Rock Crawler Join Date: Jun 2008 Location: Grants Pass OREGON!
Posts: 509
|
dude,that thing is sooooooo bad ass!!! i give props to you man,youre doin your damn thing with this project. i think i need to get building on my super now this thread has givin me some ideas i think no one has seen before...... oh and hows the weight with the 1/4 SS??? i started to tig a tuber for my axial out of 1/4 304L SS and i only got a top part done and its a heavy shit and im kinda skeptical on finishing it....
Last edited by Mr. crawl; 09-06-2008 at 03:36 AM. |
|
| |
|
09-06-2008, 11:01 AM
| #130 | |
| I wanna be Dave Join Date: Feb 2006 Location: Campbell, CA 4 hrs 2Rubicon !
Posts: 2,044
| Quote:
remember aluminum wil be feather light compared to steel I listed my weight above . Chassis, Motor, tranny, skid plate just over 1 lbs. Last edited by toy4crawlin; 09-06-2008 at 11:29 AM. | |
|
| |
|
09-06-2008, 11:24 AM
| #131 |
| I wanna be Dave Join Date: Feb 2006 Location: Campbell, CA 4 hrs 2Rubicon !
Posts: 2,044
|
IT DRIVES !!! Did a test drive about midnight, wheel speed is good Steering needs some more tuning but it turns faster than my old max . the rear 5995 turns a hair farther than my front 5955 so I might swap, probably could steer on a Donut Made my own 12 point socket lock for the front DIG shaft Ran out of room so mounted servo in back PICs are Front wheels Locked Front wheels Neutral loaded 4 wheel Drive Hooked up the 6 watt stereo using a BEC , Sounds Dam Awesome ! I will be using a CC BEC from Holmes H My wife going to paint the Driver today and cut body panels, ok I might do that part Last edited by toy4crawlin; 09-06-2008 at 11:31 AM. |
|
| |
|
09-07-2008, 07:36 PM
| #132 |
| Pebble Pounder Join Date: Mar 2006 Location: Placerville
Posts: 145
|
Far be it from me to criticize the work of a master tinkerer, but I would recommend bracing that front hoop that the shock mounts are on. My first choice would be to install braces from about where the zip-tied on shocks are attached to bend in the down-bars just above the dash... Looks really good otherwise. |
|
| |
|
09-08-2008, 10:41 AM
| #133 | |
| I wanna be Dave Join Date: Feb 2006 Location: Campbell, CA 4 hrs 2Rubicon !
Posts: 2,044
| Quote:
I was thinking a short tube inside the triangle to chassis hood hoop Looks like I need to push shock hoops backward and lower a tad | |
|
| |
|
09-08-2008, 03:07 PM
| #134 |
| Pebble Pounder Join Date: Mar 2006 Location: Placerville
Posts: 145
|
Terribly sorry, I meant "to THE bend in the down bar just above the dash"... (seen from the side) the cage has a bend in the A-pillars (or down bars or simply where the windshield would go if it had one) just a hair above where the dash board would go. Still looking at the cage/chassis from the side imagine a line drawn from the top of the shock hoops back to the A-pillars, (intersecting with them) right at that bend. It just looks like a natural strong point to me... |
|
| |
|
09-08-2008, 04:51 PM
| #135 |
| Newbie Join Date: Aug 2008 Location: So-Cal / OC
Posts: 15
| Well it took me over 60 minutes to get through the thread and I must say I'm extremely impressed.. Thank you for sharing it with us.. I'm looking forward to the final product. Great job.. |
|
| |
|
09-08-2008, 05:01 PM
| #136 | ||
| I wanna be Dave Join Date: Feb 2006 Location: Campbell, CA 4 hrs 2Rubicon !
Posts: 2,044
| Quote:
i'm going to move them back, I tried to break it off but it's really Welded good Quote:
It's going to Rubicon this weekend :-P but no rear DIG yet, there wre a few changes in the build, tranny , axle width, maybe I should cleanup/delete some of that stuff | ||
|
| |
|
09-08-2008, 06:15 PM
| #137 |
| Pebble Pounder Join Date: Mar 2006 Location: Placerville
Posts: 145
|
Dremel and cut-off wheel is probably the easiest way to remove them...
|
|
| |
|
09-08-2008, 07:25 PM
| #138 |
| Pebble Pounder Join Date: Apr 2006 Location: Anchorage
Posts: 114
|
I just read all 7 pages. Are there any updates? Great work and can't wait to see it when it's done. Makes me want to do some mods to my tuber. Mike |
|
| |
|
09-09-2008, 10:47 AM
| #139 |
| I wanna be Dave Join Date: Feb 2006 Location: Campbell, CA 4 hrs 2Rubicon !
Posts: 2,044
|
my wife just finished the WW driver, undecided on color of clothes. i added a touch of detail on steering wheel swapped in a 225 servo for DIG, needed more room for the stereo amp board. Now working on wiring |
|
| |
|
09-09-2008, 03:21 PM
| #140 |
| I wanna be Dave Join Date: Feb 2006 Location: Campbell, CA 4 hrs 2Rubicon !
Posts: 2,044
|
Finish soldering the wires and shifter switch to turn on ESC and BEC but still need lights, they will Turn on by Remote ch5 :-P I could not wait to drive HOLY COW The DIG is Awesome ! Front wheels on a slick garage and they stay put while the rear Rotates around the Front My gearing is to high, 23/75 so off to LHS for a bigger Spur. try out a 18/80 Painting it today |
|
| |
 |
 LinkBacks (?)
LinkBack to this Thread: http://www.rccrawler.com/forum/large-scale-rigs/66983-project-full-throttle-super-comp-crawler-mp3-stereo.html | ||||
| Posted By | For | Type | Date | |
| Emaxx-Revo-Losi 1/5 AWD On-Road racer - Page 2 - RC-Monster Forums | This thread | Refback | 03-01-2013 04:11 PM | |
| Toyota vs Jeep discussion? - Pirate4x4.Com : 4x4 and Off-Road Forum | This thread | Refback | 02-27-2013 05:55 AM | |
| |


 Linear Mode


