| |
 07-02-2007, 09:21 AM
| #21 |
| Rock Crawler 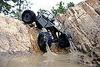 Join Date: Jan 2007 Location: Midway
Posts: 836
|
Slow this is the steering lock I was trying to describe. This is from War Pigs build thread. Thanks  |

|  |
| Sponsored Links | |
| | |
|
07-02-2007, 01:03 PM
| #22 | |
| Pebble Pounder Join Date: May 2007 Location: Oregon
Posts: 166
| Quote:
 | |
|
| |
|
07-02-2007, 01:05 PM
| #23 |
| Pebble Pounder Join Date: May 2007 Location: Oregon
Posts: 166
|
so is it possible to mount the batteries on the TLT axles like JIA "Bling King" or could I just put them on top of the battery? Thanks |
|
| |
|
07-02-2007, 01:13 PM
| #24 | ||
| RCC Addict Join Date: Aug 2006 Location: trying to find out what a TVuPer is.....
Posts: 1,851
| Quote:
Quote:
now on to my post. here is another way to do the rear lockout on TLT axle, same idea- different mounting point. 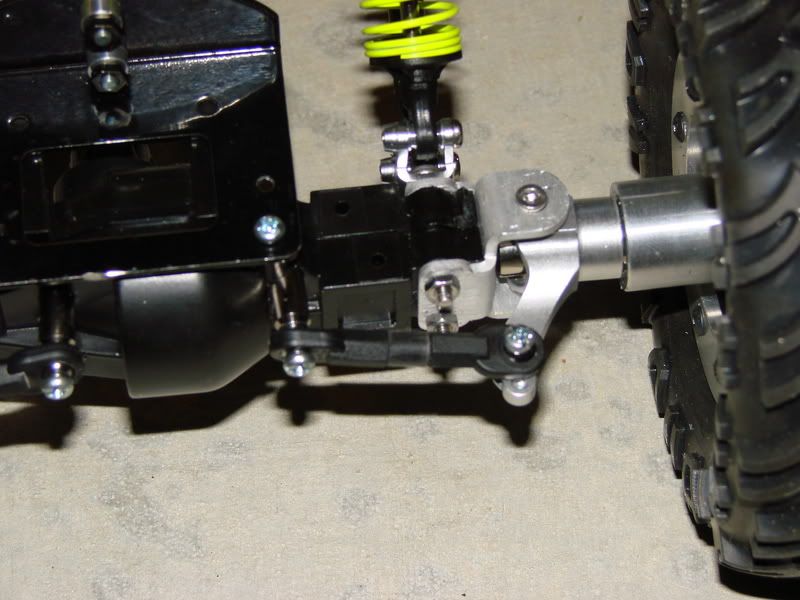 good luck with the build up. | ||
|
| |
|
07-02-2007, 01:29 PM
| #25 | |
| Pebble Pounder Join Date: May 2007 Location: Oregon
Posts: 166
| Quote:
Last edited by slowcrawlin; 07-02-2007 at 01:32 PM. | |
|
| |
|
07-02-2007, 02:39 PM
| #26 |
| Pebble Pounder Join Date: May 2007 Location: Oregon
Posts: 166
|
sorry for all the confusion everyone
|
|
| |
|
07-02-2007, 03:04 PM
| #27 |
| Rock Crawler Join Date: Jan 2007 Location: Midway
Posts: 836
|
I would suggest reading some of the TLT builds to see how others are mounting their servos and batteries. Most of my builds have been with WKs and like you when I do a TLT I will be starting over, as things are different ,sort of. Good reading!!!
|
|
| |
|
07-02-2007, 03:05 PM
| #28 | |
| Pebble Pounder Join Date: May 2007 Location: Oregon
Posts: 166
| Quote:
will do
| |
|
| |
|
07-02-2007, 06:06 PM
| #29 |
| Pebble Pounder Join Date: May 2007 Location: Oregon
Posts: 166
|
right now I am working on the links, I'm making the out of stainless steel tubing but the way its looking, I don't think I will have enough room on the front axle for the batteries. I will post pics a little later on today |
|
| |
|
07-02-2007, 07:02 PM
| #30 |
| Quarry Creeper Join Date: May 2007 Location: Tunin' Tires
Posts: 239
|
Great looking build. I'm waiting for my cobra to show up so I can get to work. Don't forget to put a set of Kreepy Skwishy's in those tires! Keep up the good work.
|
|
| |
|
07-02-2007, 08:01 PM
| #31 | |
| Pebble Pounder Join Date: May 2007 Location: Oregon
Posts: 166
| Quote:
and thanks for the tip | |
|
| |
|
07-02-2007, 09:32 PM
| #32 |
| Pebble Pounder Join Date: May 2007 Location: Oregon
Posts: 166
|
Well I got my links on, its at 12 1/2 What do you guys think, and should I change anything so far I'm pretty sure I got the shocks at the wrong angle, but I just put them on temporary    Last edited by slowcrawlin; 07-03-2007 at 11:57 AM. |
|
| |
|
07-02-2007, 09:48 PM
| #33 |
| Rock Crawler Join Date: Jan 2007 Location: Midway
Posts: 836
|
Slow, If possible I would move the upper links to the outside hole, rather than the inside. This will give you more clearance for tranny and motor. Unless you don't have that much adjustment in the links. Looking good!!!!! |
|
| |
|
07-02-2007, 09:59 PM
| #34 | |
| Pebble Pounder Join Date: May 2007 Location: Oregon
Posts: 166
| Quote:
| |
|
| |
|
07-02-2007, 10:29 PM
| #35 |
| Rock Crawler Join Date: Jan 2007 Location: Midway
Posts: 836
|
No problem, looks great as long as all clears OK!!!! I really like how it's coming together.:-P
|
|
| |
|
07-02-2007, 11:37 PM
| #36 |
| Pebble Pounder Join Date: May 2007 Location: Oregon
Posts: 166
|
what do you guys think of the shock angles right now, also I only have 35 weight in them |
|
| |
|
07-02-2007, 11:41 PM
| #37 |
| 06 Super National Champ   Join Date: Jun 2004 Location: Stark Industries Bar and Grill
Posts: 11,361
|
Move the shocks up a hole or two to lower the chassis a bit more. about 2 1/8" under the belly seems to work well. (of course raising the upper shock mount will lengthen your wheelbase...) Don't bother putting oil in your shocks yet. Get the rig built and play with the amount of travel you want. I had Ryan install mounts on the frame to limit straps at the center of each axle. Use those mounts to limit travel at the center of the axle and use fuel tubing both inside and outside the shock bodies to control articulation. Sounds complicated but really isn't. I did notice that your shocks are fully compressed in those pics...you'll just need to install a short length of tubing on the shock shafts inside the shock to limit droop at each corner. Once you have the travel right then you can start tuning with oil and shock pistons. I tried to tell Dad to "Drive it, get used to it, and change one thing at a time." If you go changing multiple things at once you have no idea what helped and what didn't. You'll have to do a bit of trimming to the pede tranny to drop it inthe chassis but it'll fit both laydown and vertical. Listen to Spydermonkee, get some red Sqwishys. Last edited by JasonInAugusta; 07-02-2007 at 11:43 PM. |
|
| |
|
07-02-2007, 11:47 PM
| #38 | |
| Pebble Pounder Join Date: May 2007 Location: Oregon
Posts: 166
| Quote:
I will get on doing that stuff tomorrowI plan on getting the red sqwishys | |
|
| |
|
07-03-2007, 03:59 AM
| #39 |
| I lost my vendor privileges Join Date: May 2006 Location: TOP OF THE HILL
Posts: 3,014
|
glad to see it coming together.
|
|
| |
|
07-03-2007, 02:54 PM
| #40 |
| Pebble Pounder Join Date: May 2007 Location: Oregon
Posts: 166
|
well I just added little pieces of fuel tubing and moved the shocks up some, anyone have suggestions on where to put the batteries?   Last edited by slowcrawlin; 07-03-2007 at 11:17 PM. |
|
| |
 |
| |


 Linear Mode


