| |
 01-17-2010, 09:20 AM
| #41 |
| Rock Crawler Join Date: Apr 2008 Location: Calgary
Posts: 913
|
If you can, weith the original servo mounts from the top of the trans, and the receiver plate together just to compare the weight differences. I can do it to, but the same scale while comparing is always better.
|

|  |
| Sponsored Links | |
| | |
|
01-17-2010, 10:51 AM
| #42 |
| RcBros Hobbies   Join Date: Nov 2005 Location: Oregon
Posts: 4,646
|
I chose not to use delrin simply because of strength. Our production mount we plan to sale will weigh less then this one as we are shaving off more material, but even at that its near the stock rear mount weight as it sits in the pictures. The production model has also shifted the servo over a few 100's of an inch to allow more driveline clearance. We left the cutout for the servo larger to accomedate some of the other servos with slightly larger cases. Judging by your picture with the short link, your ball stud on the trany side looks to be slightly crooked. Is this just the picture or is that the case. Thanks for the pictures and writeup! |
|
| |
|
01-17-2010, 01:44 PM
| #43 |
| Rock Crawler   Join Date: Sep 2006 Location: Lititz
Posts: 787
|
Yeah, I was thinking weight. May not be an issue though.
|
|
| |
|
01-17-2010, 02:19 PM
| #44 | |
| Custom Carbon Fiber   Join Date: Oct 2007 Location: Connecticut :(
Posts: 4,501
| Quote:
| |
|
| |
|
02-14-2010, 08:58 AM
| #45 |
| Custom Carbon Fiber Join Date: Oct 2007 Location: Connecticut :(
Posts: 4,501
|
thought id update my current setup with what i been running from what ive learned reading through a lot of these LCC threads. Front: Rod Arm - Top Shock Arm - B Shock Mount - Hole 2 Oil - 60wt Piston - 55 Springs - Gold Preload - 1/2'' down from top of threads External Limiter - 15mm fuel tube Rear: Rod Arm - Bottom Shock Arm - B Shock Mount - Hole 3 Oil - 55wt Piston - 56 Springs - Gold Preload - 1/2'' down from top of threads External Limiter - 15mm fuel tube Eritex adjustable bead locks front and rear - frt total weight 18oz each wheel - rears total 14oz each wheel HB Rovers blue compounds - AKA 1/8scale medium tire inserts + Acer foams acting as a two stage. Tekin RS w/ 17.5 - 13T pinion ........ still using the Prototype mount RCBros made for the dig servo with a Hitec 5245 servo I swapped out all the frame screws with Ti-screws and mini lock nuts like Del Monte did. Definatily a should do thing for anyone wanting to lower the CG. I didnt weight all the screws together but for a comparison I weighed one of the steel screws that mounts the chassis cross members with a Ti screw the same length. The steel one weighed .025oz where as the Ti-screw weighed in at .010oz ...... with that being the shortest screwed replaced you can only imagine how much is saved when all of them is done. I also flipped the front shocks and changed the ball ends on the shaft to some Delrin balls from RPM, another weight saver for up top. I played with oils quite a bit after reading Eeepee and Del Monte's posts. I tried 90wt front with 54pistons and 70wt rear with 55pistons. It felt as though the front controlled the rear to much when articulating with the 90wt and the rear having the 70wt in it made the front work way to hard. It felt as though the rear on turns forced the front axle into the ground causing my tires to actually roll over and push. On inclines the rig seemed to want to flip back to easily, rotating on the rear axle not letting it squat enough to keep the front down. Went to 60wt rear with 55pistons - left the front and actually noticed a loss of front bite. Now the rig felt as though I lost my front bite on inclines and the tires were fighting for grip. The weight transfer fell to much on the rear wheels. It didnt seem to want to pivot the front up and over but let the suspension compress and taking the weight to the rear. After some more reading again and seeing the terrain Eeepee was running on I dropped my front oil down to the 60wt with 55pistons. Reading how he felt with the rear working the front hard I decided to try the 55oil with the 56 pistons. Also shock location has seemed to help the rig as well. I started the shocks in hole 3 for the front and hole 4 for the rear but have leaned them back one more hole each. It feels now that the rig stays flatter on side hills and when articulating. This has felt the best so far for me. On inclines the weight feels like it doesnt transfer back as fast, the rear helps keep the front heavier allowing the front to bite. The front axle feels like the tires are biting onto anything they can find and not hunting for traction. Before I felt like the front would control what the chassis did, I dont seem to get that unpredictable chassis movement as the front is doing its job. The rig seems to flow smoother on sidehills and around obstacles were as before it would want to roll the chassis around wanting to roll over. I finally bit the bullet and went brushless too. I raced Novak equipment for years and always had great luck with them but at heart Ive always been a Tekin fan, they just seem to always give the power when you needed it. I chose to go with the RS ESC and a 17.5 from pure preference. Ive been running a 35T with 13tooth pinion on 3S since I got the rig and have had good wheel speed for the outdoor. Indoor I switched to a 45T for torque and less wheel speed reasons. The indoor course Ive been running on is made from foam with brown grout on it for a surface. The 35T gave me a bit to much wheel speed that I would spin the tires to much where as the 45T gave me more torque with less wheel speed allowing the tires to get more traction. Also temps felt better on the 45T after each run then the 35T did. The first time I ran the indoor course the rig was hands down so much more stable, predictable and stuck any where it went. I took down 2 perfect courses and the top spot for the day. Its a 10 event series and we're allowed to throw 2 out so I did my setup and tire tests early. The second event was the shock oil changes and 2 DNFs ..... the third event I went to this chassis setup and did my tire tests and again 2 DNFs. Well guess we know what 2 events Im trhowing out now lol but I learned all that early. Ive been running the Rover blues since I got the rig and played with several foam setups but now Ive got something that seems to work great for me. I took some 1/8 scale foam inserts that AKA makes for buggies, Medium firmness, and stuffed them inside of my Acer foams. The Acers have always worked great for me but wanted a bit more firmness like a 2 stage. Overall with this current setup yesterday I was able to redeem myself ...... perfect score on the first course and walked the second course with a fat 0 taking the top spot again for the day.  putting the truck on the shelf and touching nothing, well almost nothing lol. Got my Rover Ex's and throwing them on for the next event. putting the truck on the shelf and touching nothing, well almost nothing lol. Got my Rover Ex's and throwing them on for the next event. pics 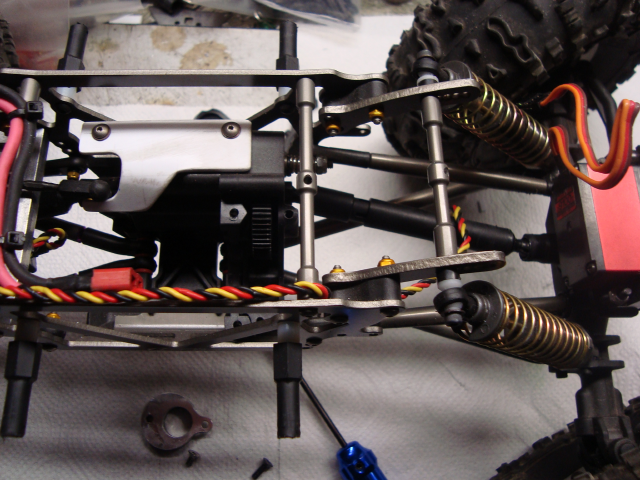 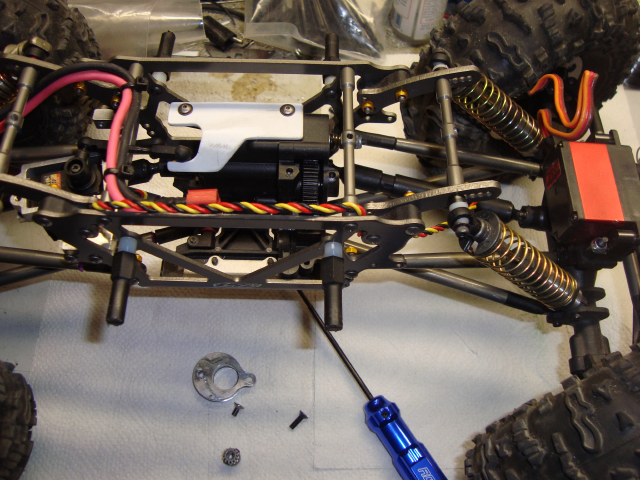 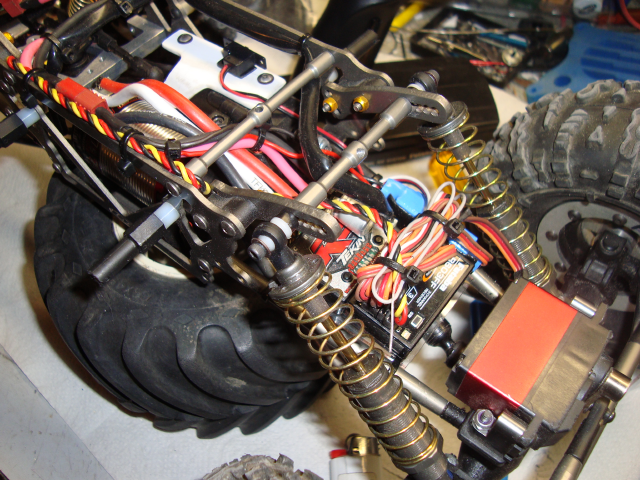 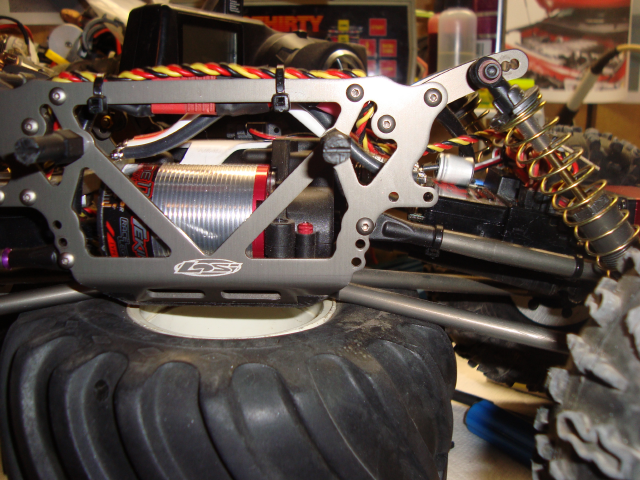 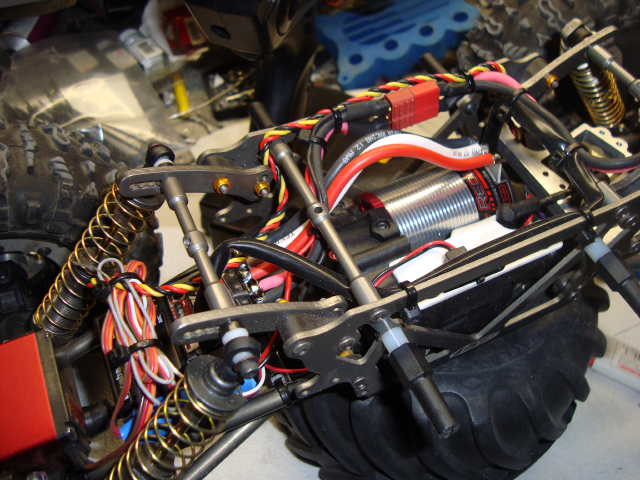 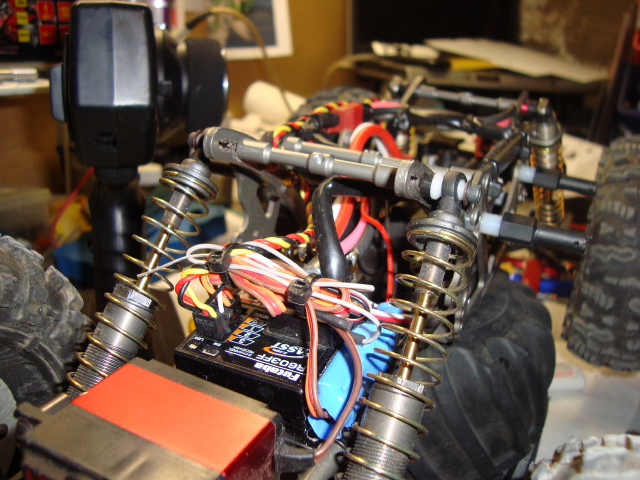 and some of the course (ignore the Badlands, these were tire testing runs. they did do very well though but not as well as my rovers) 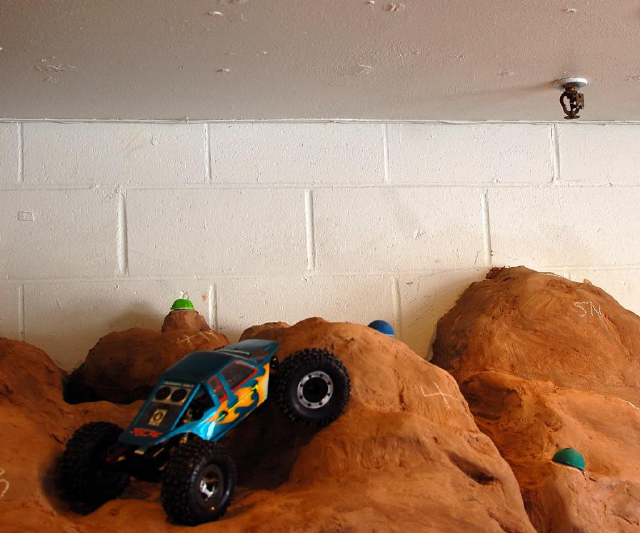 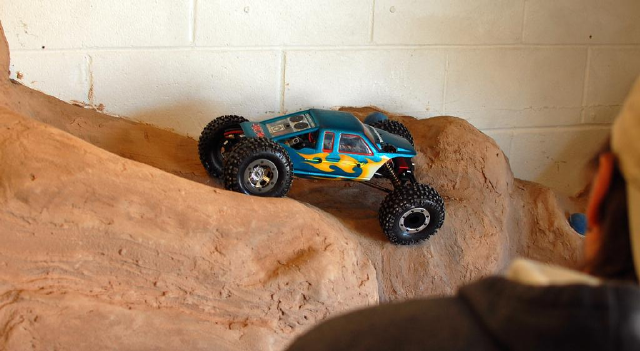 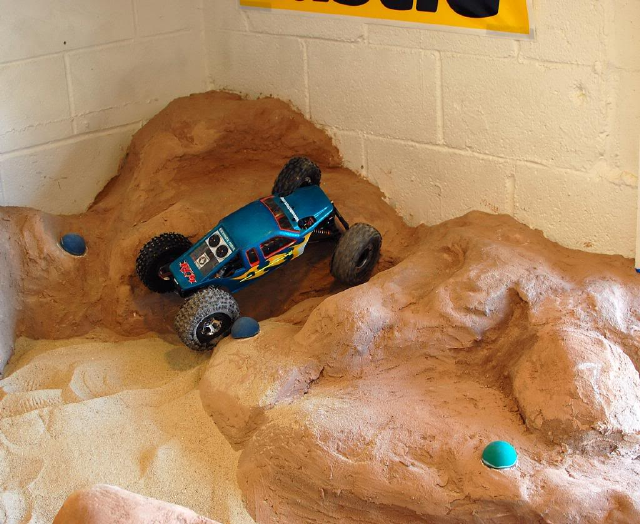 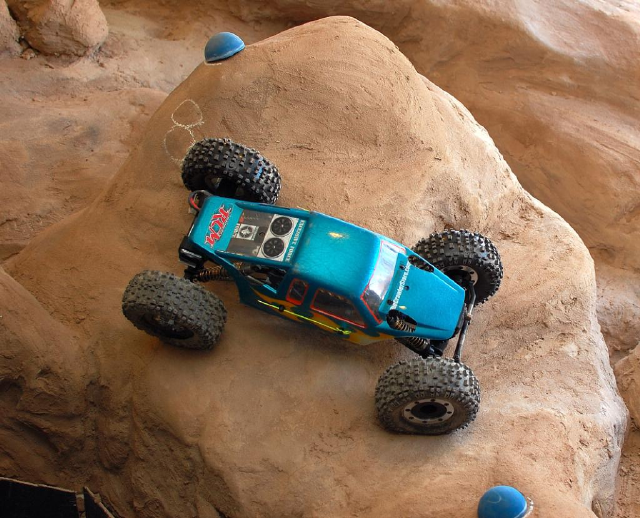 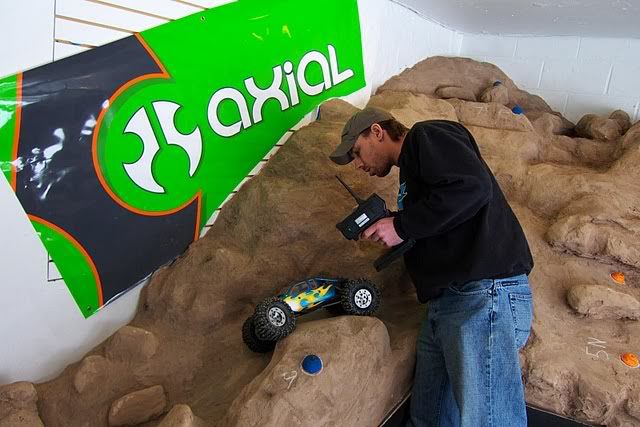 |
|
| |
|
02-14-2010, 09:20 AM
| #46 |
| MODERATOR  Join Date: Jul 2004 Location: Ohio
Posts: 18,928
|
Good story. I had to make a sandwich about halfway down, but I read it all, and I'm pretty sure you spelled everything correctly! Who's the dork in the last picture? Going from blue Rovers to pink should be quite a change. |
|
| |
|
02-14-2010, 09:42 AM
| #47 | |
| Custom Carbon Fiber Join Date: Oct 2007 Location: Connecticut :(
Posts: 4,501
| Quote:
Firefox is awesome ..... it tells me when the stupid kicks in and how to correct it thats my stunt double .... one of the guys mounted a set and ran them yesterday. i noticed areas i had traction problems he went right up. he said they felt like they bit to much and he couldnt break them loose when he was trying to. | |
|
| |
|
02-14-2010, 08:20 PM
| #48 |
| RcBros Hobbies Join Date: Nov 2005 Location: Oregon
Posts: 4,646
|
Looking good, wish I had a local crawl spot like that!
|
|
| |
|
04-18-2010, 09:19 AM
| #49 |
| Custom Carbon Fiber Join Date: Oct 2007 Location: Connecticut :(
Posts: 4,501
|
Little Tekin update ...... So been running the 17.5 + RS system for a while now and was curious about two things .... going up in rotor size and playing with the HotWire. http://www.teamtekin.com/blmotors.html#redlines Redline Sensored #TT2251 17.5 w/12.5mm Rotor I was nervous about the rotor size after seeing what the 14mm did to Eepee's cogfest so I went baby steps with the 13mm Torque Rotor  First thing I noticed was a bit of wheel speed loss, I left the gearing the same 13T but no major thing there I had some to spare. Next thing I tried was duplicating the small amount of stall I had prior. At times I could get a small shutter, cog noise when I would try to climb vertical from a dead stop and level surface. Yes I know the whole sensored shouldnt cog but at some initial throttle I could get it to. With the 13mm torque rotor it was very difficult to get that noise or stall again, it felt as though at initial throttle the motor was more responsive. The following day was our indoor comp series. Overall the motor felt smoother from on to off throttle, felt closer to a brushed motor then prior times. I cant speak of exact temps but I can say with certainty that temps were better after each run, from just the touchy feely point of checking the motor was much cooler to the touch. So far very pleased with the 13mm Torque Rotor I also have gotten myself the Hot Wire setup and will have some input feeling on changes done with that. Last edited by Robbob; 04-18-2010 at 08:58 PM. Reason: corrected pinion to 13T |
|
| |
|
04-18-2010, 01:31 PM
| #50 | |
| MODERATOR Join Date: Jul 2004 Location: Ohio
Posts: 18,928
| Quote:
| |
|
| |
|
04-18-2010, 07:19 PM
| #51 | |
| Custom Carbon Fiber Join Date: Oct 2007 Location: Connecticut :(
Posts: 4,501
| Quote:
So far on the Hot Wire all that I really see beneficial is the motor timing function. The new Vegas software is sweet but theres nothing really for Rock crawling in it, the Turbo boost feature is nice but it'd be like an on/off switch for crawling. I really need to get a temp gun though when playing around with this thing though. Heres what Ive seen so far on settings. Drag Brake Off - no need with worms and only brings on unwanted motor heat Brake Strength - 0 ... worms give you the automatic brakes and no coast Neutral Width - 5 (lower number more sensitive throttle input higher number more throttle movement needed - old schoolers would call this Deadband setting) I like a touchier trigger from oval racing and found 5 to be good for me. Reverse Strength - 100% Voltage cutoff - 3S 9.0v Voltage Limiter - OFF - sets initial voltage supplied to motor at start up. I found it gave the throttle a feel like using your radio expo would. i could pull full throttle and watch the motor spin up slow to fast, it felt as though there was a delay giving me less control over it. imagine a castle with a real slow and long curve, you pull full throttle and it took a second to reach full throttle. turning it off I felt more in control of what the motor did speed wise. Motor Type - Brushless forward w/instant reverse Throttle Profile - 5 most aggressive Motor Timing - factory it had 12degrees. Ive gone as high as 20 so far but may have been over geared with a 13T on it. a 12T may be good for that much but Ive backed it down to 18degrees for now. adjusting this up did seem to help gain back some of the wheel speed loss from the rotor change. My opinion is this is the only gain from using the Hot Wire. still gonna play more with gearing and timing to find that happy spot where I gain the speed but dont lose the low end. Turbo Boost - OFF/0 - you use this to set a start RPM and an end RPM plus an amount of time it stays on for a timing advancement. possibly a benefit for larger designed courses with distance in between gates and on the clock. you could get a boost in between gates but could cause problems when wheel speed is needed at a gate and the boost kicks in. as Tekin says it should only be used for straight aways so use it carefully. well thats my story for now .... gonna get out and practice some more with the rig this week and play with some more gearing and timing. the rig is working great still, been placing in the top 5 for the indoor series im in and took the win at our season opener for our outdoor series last week Actually LCC took 1st and 2nd at our season opener beating out 2 MOA's and another shafty Last edited by Robbob; 04-18-2010 at 07:21 PM. | |
|
| |
|
04-18-2010, 07:27 PM
| #52 |
| Custom Carbon Fiber Join Date: Oct 2007 Location: Connecticut :(
Posts: 4,501
|
Almost forgot to post what I been using for my limiters. I found these from RPM http://www.rpmrcproducts.com/ Various sizes that snap right onto my shock shaft for easier tuning ...... need 2 sets to do a rig Last edited by Robbob; 04-18-2010 at 09:02 PM. |
|
| |
|
04-18-2010, 07:30 PM
| #53 |
| Rock Crawler  Join Date: Sep 2009 Location: dartmouth ns
Posts: 894
|
i use them on my shacks |
|
| |
|
04-18-2010, 09:03 PM
| #54 | |
| Custom Carbon Fiber Join Date: Oct 2007 Location: Connecticut :(
Posts: 4,501
| Quote:
damn Firefox let the stupid slide in .... ment shOcks | |
|
| |
|
09-08-2010, 09:20 PM
| #55 |
| Custom Carbon Fiber Join Date: Oct 2007 Location: Connecticut :(
Posts: 4,501
|
Well been a while since I did a complete rebuild on my rig and was feeling the pain from lack of care. For a bit I was having a bad time keeping spurs intact on the rig. After 6 spurs I went to a stainless one, that only showed me I had bigger problems when my slipper finally went and found the case full of shavings. My pinion looked like a saw blade and the slipper gear looked like a chew toy. Some how I had worn a grove in the aluminum upper shaft allowing the slipper gear to walk around. Well got a new top shaft and went with the slipper eliminator  ..... first comp back after fixing that was a win So after the following weeks comp I decided to tear the entire rig apart. First thing I looked at was the diffs since I had DLux's worms in I wanted to see how the original spools looked. 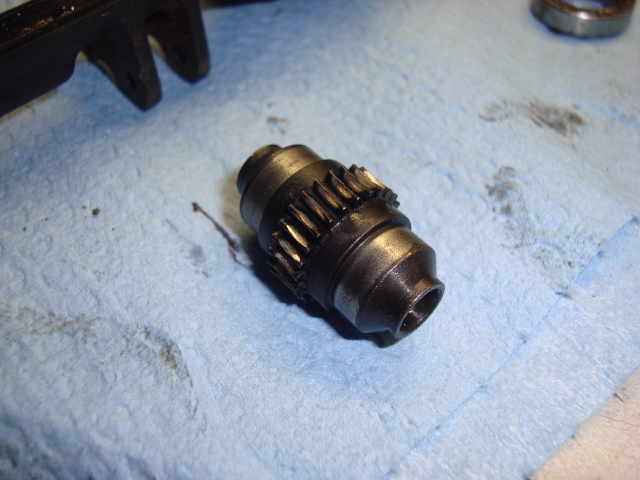 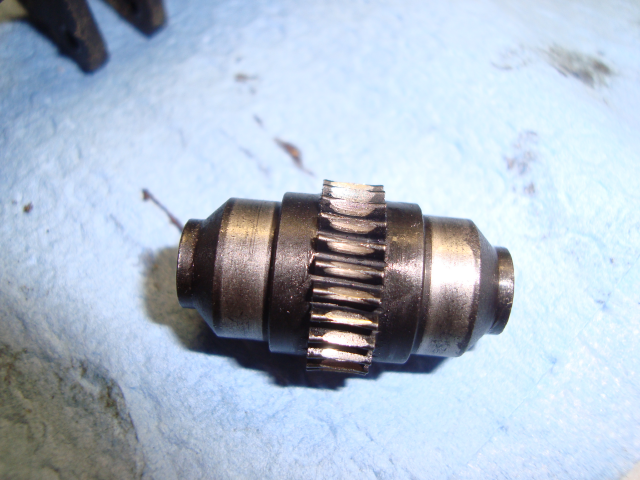 I cant say its from the the new worms but I know they werent that bad before. So it was new axle cases and spools. Next was tear the frame sides off and drill some extra upper link holes. I drilled 3 new ones for both the front and rear. My goal is trying to get a bit more bite into the nose. For now I have the front upper links moved to the new holes but still up top. I also bent the stock links and was able to keep my wheel base at 12.5 still using my 1/8'' spacers. 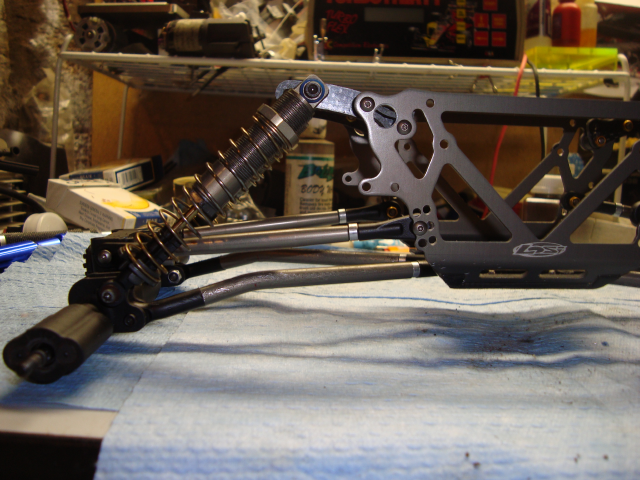 Heres what I have noticed the frame do with some small testing so far with the front links in farther. When I would approach a climb I could see the front of the frame lift up, like the shocks unloading. After moving the links in farther it doesnt seem to be able to lift as much, leaving me to think more weight is gonna stay on the front. On my little break over areas it felt like the front tires wanted to dig down better. Now I was also on a quest to shed some pounds. My rig in RTR shape weighed in at 7.2lbs So on the front I went with a delrin link on the RCBros high steer knuckles. Shaved a little off the factory setup and gave me some clearance.  I also got some Carbon Fiber for a servo plate. 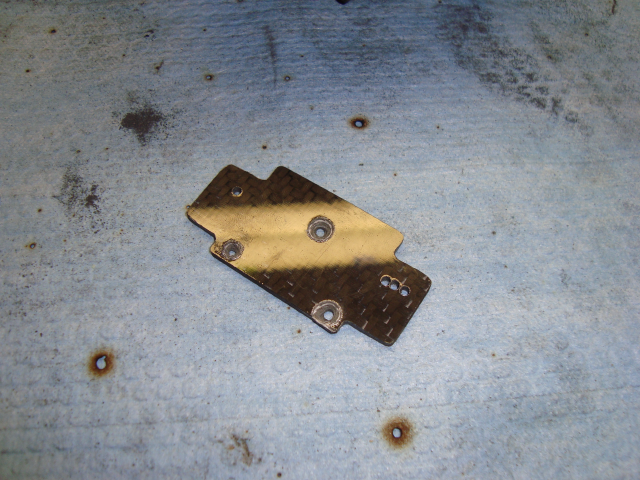 I will say not a big gain over the factory weight 5.6Grams 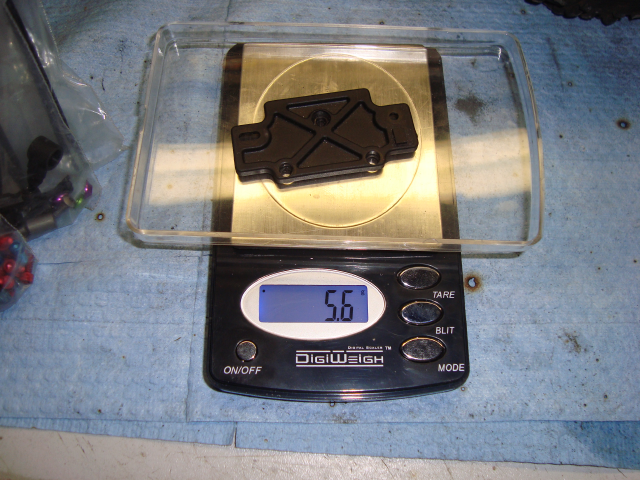 CF Plate 5.0Grams 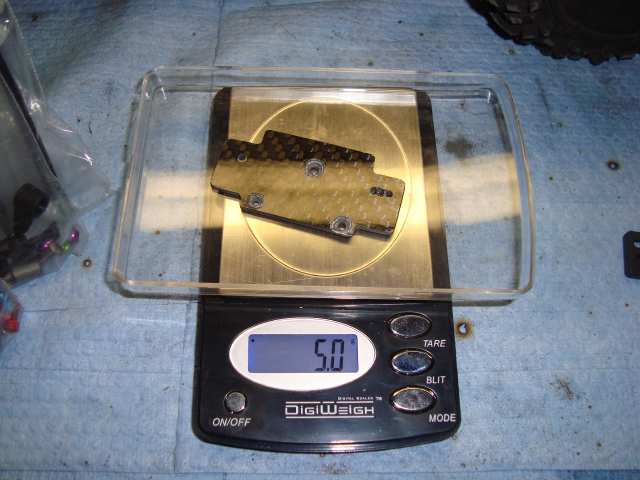 But compared to what I was using Aluminum 12.1Grams  I also went from the factory aluminum servo mounts 2.9Grams 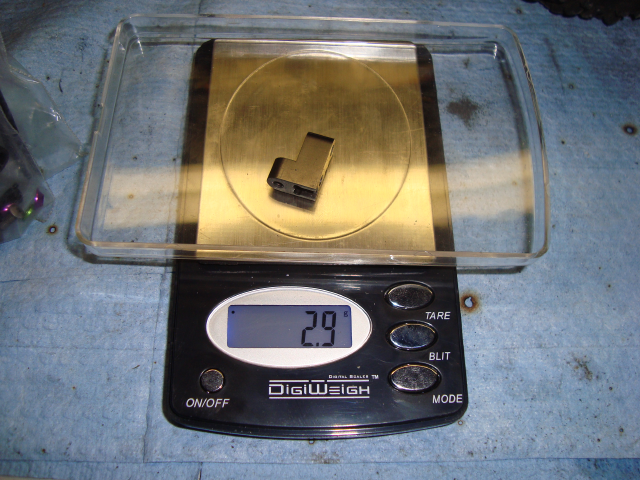 to 3Racing mounts 1.4Grams (and moved the servo back a bit)  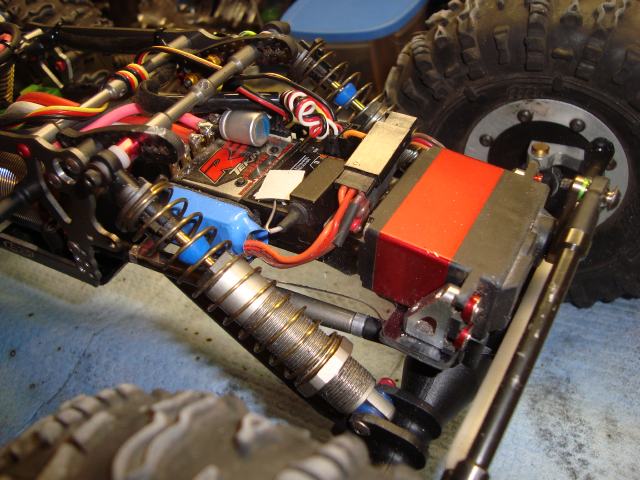 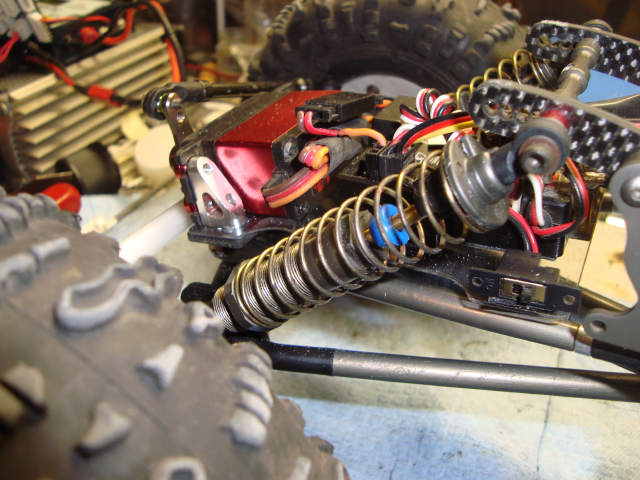 I also made a new CF battery plate since I still run mine on the rear axle. Aluminum 11.6Grams 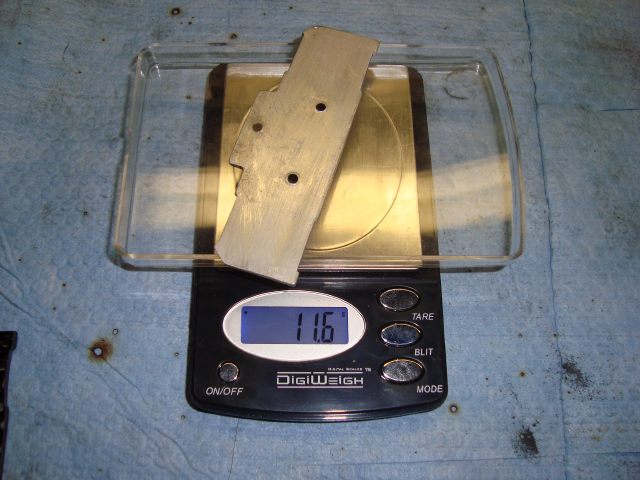 CF Plate 8.7Grams 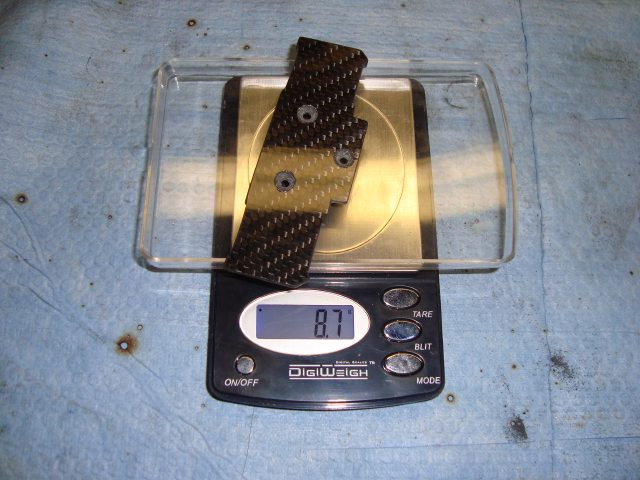 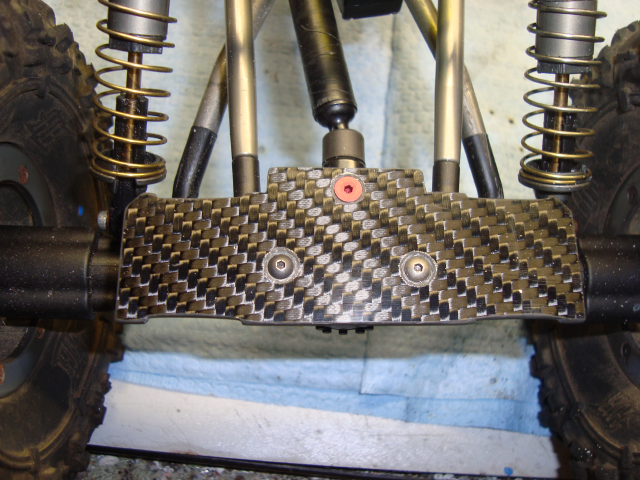 Another big hit I knew would help was the dig servo. I didnt take any pics to show the weight savings but I do know from the prototypes I made prior to the RCBros one that mine were lighter to begin with. I cut another out of acrylic matching the RCBros 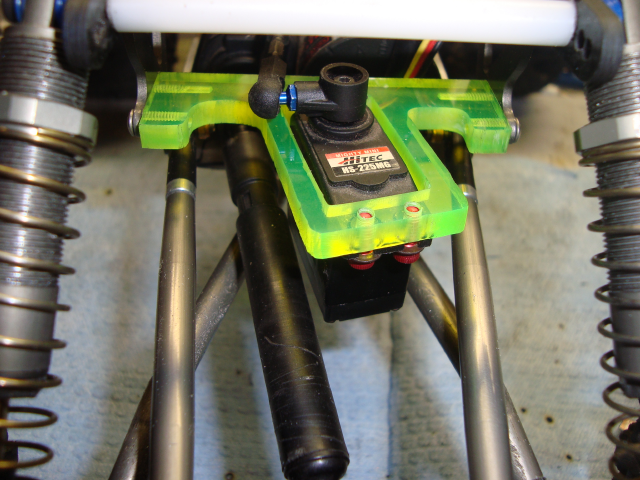 Another spot I shaved some off was the rear shock mounts. I was able to take the plastic spacer out, use shorter Ti-screws and lose the spacer on the shock end ...... every little bit helps. 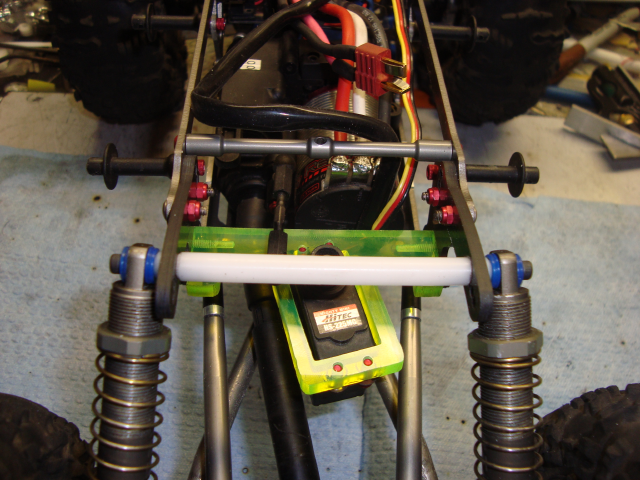 The big area I knew held the most weight was my wheels. Running this rig heavy was really a help for me. My rear LCC wheels held 6oz each so I took 2oz out of each. Nothing drastic but a start for now. After all the changes I was able to bring the rig down to 6.6lbs and (hopefully) help bulletproof it again. Well one last pic of the rear links bent ..... they do clear the uppers, driveshaft and servo at full articulation with 15mm limiters 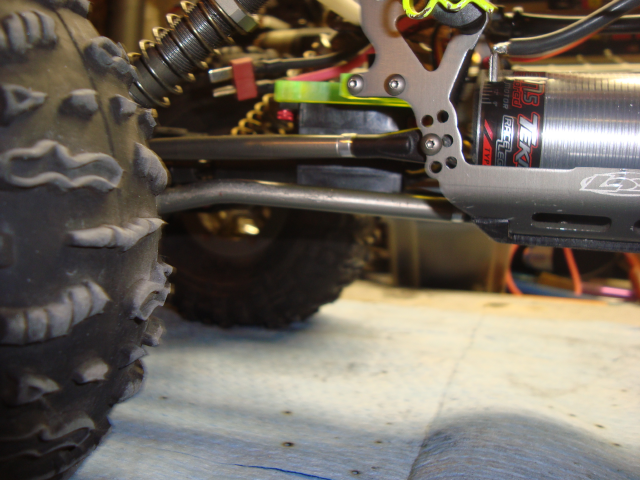 Ill post more after some real rock practice on Sunday and let ya know how the link placement helped or hurt. |
|
| |
|
09-10-2010, 04:20 AM
| #56 |
| RCC Addict Join Date: Dec 2009 Location: Newcastle, Australia
Posts: 1,784
|
It come up nicely |
|
| |
|
09-10-2010, 12:25 PM
| #57 | |
| RCC Addict Join Date: Jun 2009 Location: California
Posts: 1,494
| Quote:
| |
|
| |
|
09-16-2010, 08:18 PM
| #58 | ||
| Custom Carbon Fiber Join Date: Oct 2007 Location: Connecticut :(
Posts: 4,501
| Quote:
Quote:
just a couple of picks showing the changes to the front end better. complete shot of the CF servo mount 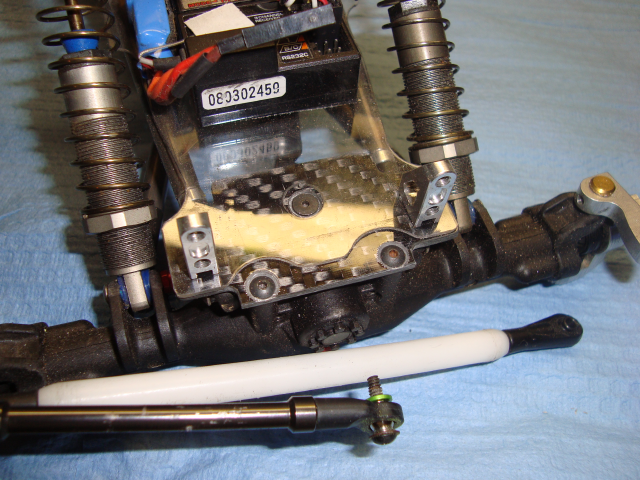 I also added 1/8'' spacer to the top links, this helped me bring my castor up straight. I feel like it helps the tires stay in full contact when turning. 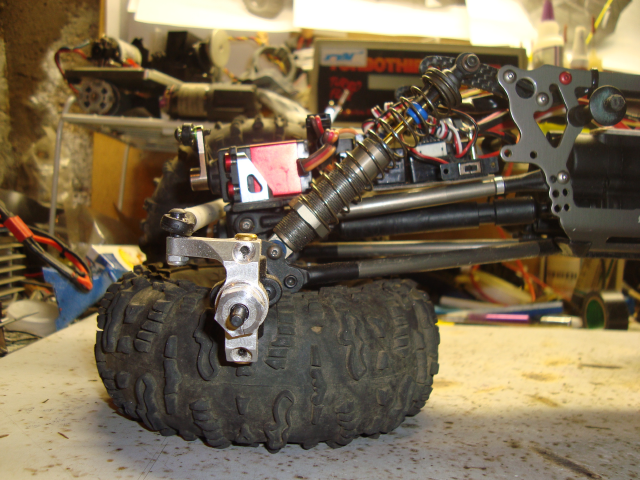 And the extra set of upper link holes. 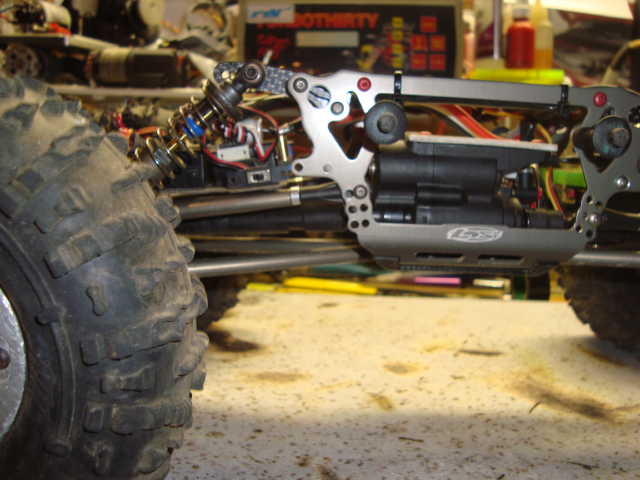 I was able to get out on some rocks last weekend at a scale comp. We use the same location for scale and 2.2 and this particular spot gave me trouble in a few spots. I instantly hit the trouble spots for some practice. I tried each area 3 times and every time the rig handled them with ease. I could feel the weight loss in the climbs and the clearance of the rear links let me get in closer for our two toughest gates. The front though really feels like its biggest gain. One bonus gate I had the most trouble with, every approach I was able to get my front tires on a ledge but they always seemed to slip. With the links changed it felt like I had more bite, the front tires dug in and pulled the rear right up. | ||
|
| |
|
09-29-2010, 09:52 PM
| #59 |
| RcBros Hobbies Join Date: Nov 2005 Location: Oregon
Posts: 4,646
|
Did you manage to get the weight on your newer acrylic dig mount? I'll have to weigh our newest dig mount as it should be fairly lighter then the proto you have. Thank you for the great pics btw! |
|
| |
|
09-30-2010, 05:22 AM
| #60 | |
| Custom Carbon Fiber Join Date: Oct 2007 Location: Connecticut :(
Posts: 4,501
| Quote:
Ill grab that tonight for ya. | |
|
| |
 |
| |


 Linear Mode


