| | #141 |
| RCC Addict Join Date: Sep 2015 Location: Southern Maine
Posts: 1,024
|
So I couldn't help myself anymore and bought some hop ups for the steering and suspension. The lower links weren't bent but were getting very scarred up and probably catching on things they shouldn't. I went with the SSD titanium links in thought that they won't scar and get hung up as much as the vaterra aluminum links would. I put new ends and balls at the same time. I also went with the SSD c-hubs and knuckles on the reason that I just liked the look of them over the vaterra aluminum ones. I know they don't take the weighted rotors but I've got some ideas to offset that. I bought a new set of vaterra spindles so I could get a new set of bushings. Putting them together I found a little play between the c-hub and knuckle. Up and down play. I'm not too happy about it, contacted SSD and was told they're machined that way. Probably not a big deal but wasn't what I was expecting. Once installed in the axle housing with axles and bearings, the play is gone but it's added stress on the axle bearings. We'll see how it holds up. I also bought new axles, couldn't get vaterra ones because they're all on back order, I got some GPM's and they look good. They have a bigger pin than the vaterras so maybe they'll hold up better than the vaterra's do. My stock ones are very sloppy but I've never broken one. After installing them, I did notice slightly less steering angle, took the axles back out to see if it was the SSD products or the axles themselves. It was the axles. It's not much, a few degrees, maybe five degrees but enough to notice. I had to reset my steering endpoints so new vaterra ones will be installed once they are back in stock. I already have my Gunnar pins for them. I found out the hard way that there is a spacer between the two bearings in the spindle that come with th vaterra axles as part of the kit that I can't get. Luckily my work has a lathe, it's a big one and was kinda funny making up spacers .075" thick but I did it. They work just fine. Just a heads up to anyone who wants to do what I'm doing. Got new Avid rubber sealed bearings for everything too. I soaked them in oil before installation. I bought everything like this so now I have emergency trail spare front axles and be able to replace them with just the tie rod, c-hub, and wheel nut removal. Not that I've broken anything yet and don't plan on it but still. Makes me feel good knowing I've got them in my parts bin. Hopefully I'll get a chance to get out and see if they made a difference at all. Ben 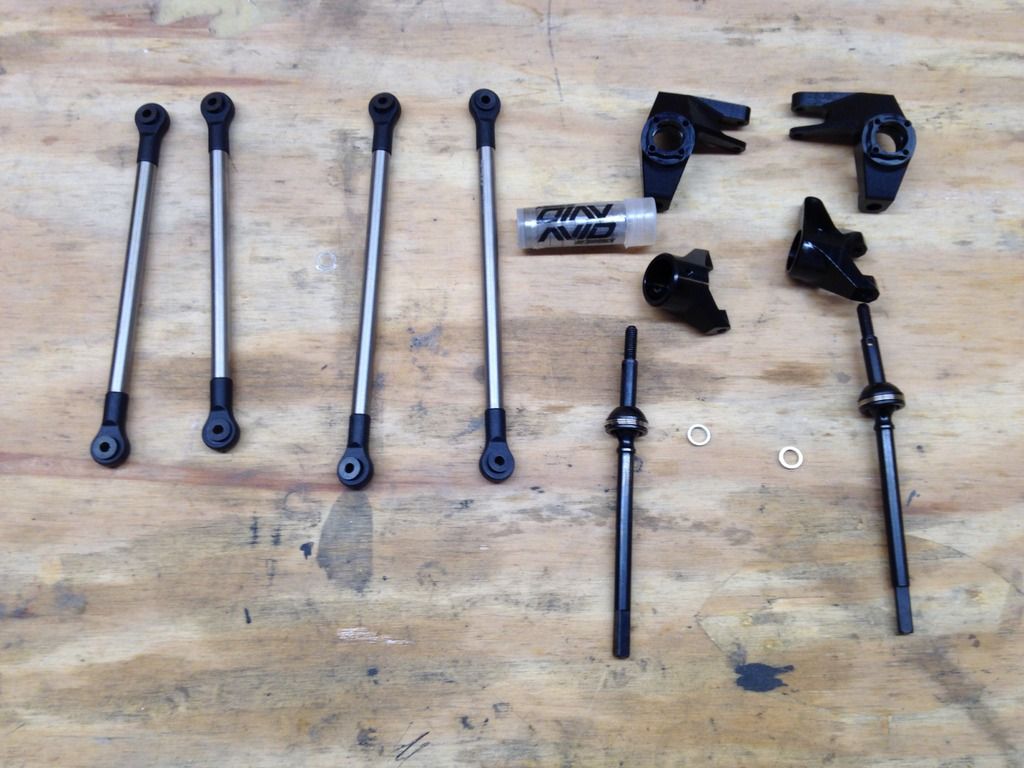 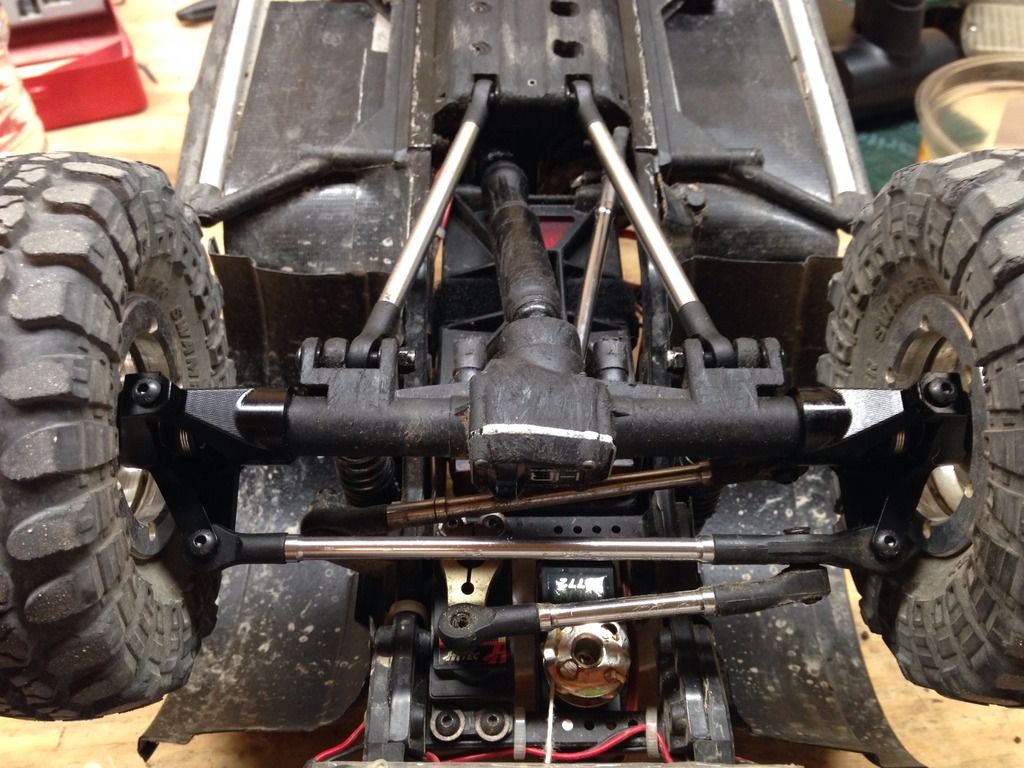 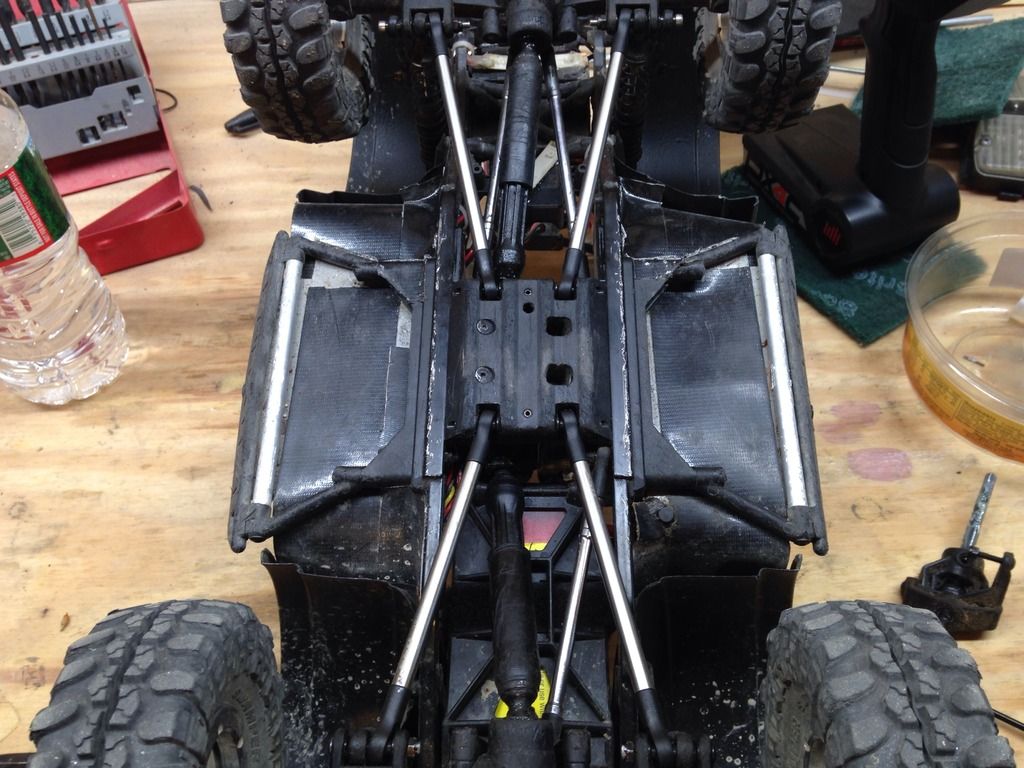 If you look close, you can see the gap between the lower bushing and knuckle. That's he play I'm talking about. I think that that should be much tighter for a better fit. 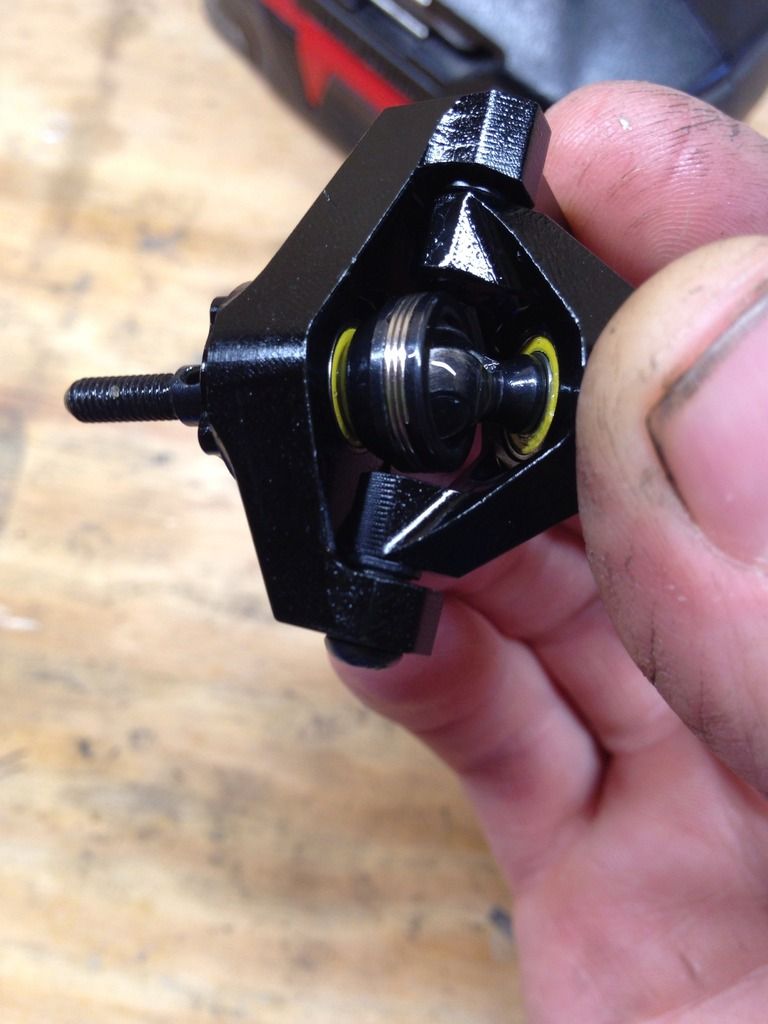 Last edited by Itali83; 06-12-2016 at 02:36 PM. |
| |  |
| Sponsored Links | |
| | #142 |
| Pebble Pounder  Join Date: Dec 2015 Location: Edmonton
Posts: 171
|
Are you going to keep the GPM's in your rig when the Vaterra stock arrives, or remove them and keep them as backups? I hope one of the LHS have some axles kits in stock I know it wont be anything other than Vaterra... guess what I broke.
|
| |  |
| | #143 |
| RCC Addict Join Date: Sep 2015 Location: Southern Maine
Posts: 1,024
|
I'll install the vaterras once they're back in stock just because I lost and ew degrees of steering with the GPM's. I still have my stock axles still in the stock c-hubs and knuckles so a 5 minute trail fix should I break an axle and I'm back in business. I'll keep the GPM's for backups to my backups lol. Ben |
| |  |
| | #144 |
| Rock Crawler Join Date: Jan 2016 Location: US
Posts: 604
|
I have had good luck so far with the gpm only broke 1 so far they dont pop as loud as stock ones do but i broke 4 stock ones so far LIFE IS GOOD |
| |  |
| | #145 | |
| RCC Addict Join Date: Sep 2015 Location: Southern Maine
Posts: 1,024
| Quote:
Ben | |
| |  |
| | #146 |
| Rock Crawler Join Date: Jan 2016 Location: US
Posts: 604
|
Also imo great idea on ssd stuff it is very nice i love all mine LIFE IS GOOD |
| |  |
| | #147 | ||
| I wanna be Dave Join Date: Jan 2006 Location: Corruptifornia
Posts: 12,107
| Quote:
 GPM CVDs lose 5* travel in both directions or overall (2.5* left + 2.5*) right steering? Bigger pins are good.  I carefully pop the rubber seals off new bearings with the tip of X-Acto knife (don't cut the seal lip), put one drop of Phil's Tenacious Oil in there, pop the seal back on and ensure that it is fully seated in the little seal retention groove, spin and install! Too much oil will seap out and attract dirt. https://www.philwood.com/products/gohc/oilngrease.php That amount of play is not too bad, but I like to have little less and have seen far worse on other brands. Vaterra aluminum knuckles and c-hubs have less play than that, you could shim that on the inner flanged side top and bottom (be sure to put same thickness top and bottom to keep knuckle centered), that works but a little tighter would be nice. Quote:
 Last edited by Natedog; 06-14-2016 at 11:19 AM. | ||
| |  |
| | #148 |
| RCC Addict Join Date: Sep 2015 Location: Southern Maine
Posts: 1,024
|
I'd say close to 5* each way. I had to back the steering end point on my dx4c 10 clicks so I won't overwork the servo. I did just 5 minutes of testing to make sure nothing binds or anything and didn't really notice a difference in steering but it bothers me. As for the slop in the steering knuckles, I'm less than pleased with them. Even more bummed with the response from SSD saying they have to allow that play for assmbly which I say is BS. Will they work and weigh more that the stock plastic, yes, but not the kind of machining I would expect for the money they cost. I'll be making new bushings on the lathe for sure. Ben |
| |  |
| | #149 |
| RCC Addict Join Date: Sep 2015 Location: Southern Maine
Posts: 1,024
|
Got for some real testing with my new front end parts. Hard to be totally sure since it was really hot and the tires were really gripping the hot rocks but seemed to climb a bit better with the little more weight in the front. I LOVE the SSD lower links. So hard they barely even scratched and I ran nothing but jagged rock today. Slid over everything easily. Hard to tell since I had it in my head that the steering is less because of the GPM a cv's but think honestly it made very little difference. I will tell you that the driveline is much smoother because the cv's are now so tight and my stock ones were so worn that I would get wheel hope especially while turning that if I needed a bit of wheel speed one a steep climb the truck would hop. But most of that is gone. Unless I get happy with the go trigger. It's hard to tell in the video I'm linking, but this rock is very steep, the cliff is a good 8 foot drop too. I had to hang a tire over the edge so it would load the right front tire and get grip enough to make the climb since there was a bit of an edge that the rear tires had to go over at the same time. Tricky one handed driving for sure. The tsl's really are awesome tires. I'm putting some serious time on them, lots of spinning on rocks and they're starting to wear the lugs but grip really well. I've said it before but they really climb almost as good as the rock beasts. https://youtu.be/OUd47qGkmAY |
| |  |
| | #150 |
| I wanna be Dave  Join Date: Apr 2010 Location: Oakridge
Posts: 3,305
|
Nice driving, I was holding my breath!!!  Ernie, |
| |  |
| | #151 |
| Quarry Creeper Join Date: Aug 2006 Location: Pilgrim,Ky
Posts: 293
|
Nice driving Ben!I'm going to try my best to get those parts out to you tomorrow.I thought I had a set of stock motors but I can't find them Sent from my SM-G900R6 using Tapatalk |
| |  |
| | #152 |
| RCC Addict Join Date: Sep 2015 Location: Southern Maine
Posts: 1,024
|
Had my first failure this last Sunday while just playing on some rocks at the lake. I was climbing the last rock before packing it up, just very light on the throttle trying to get up and over the lip of the rock when the softest little click sound you ever heard happened and then only rear wheel drive. No jump, or shock to the truck as I was just very light on the throttle. I picked it up and spun the front wheels and the driveshaft didn't turn. I brought it home and took it apart for inspection. Found this... 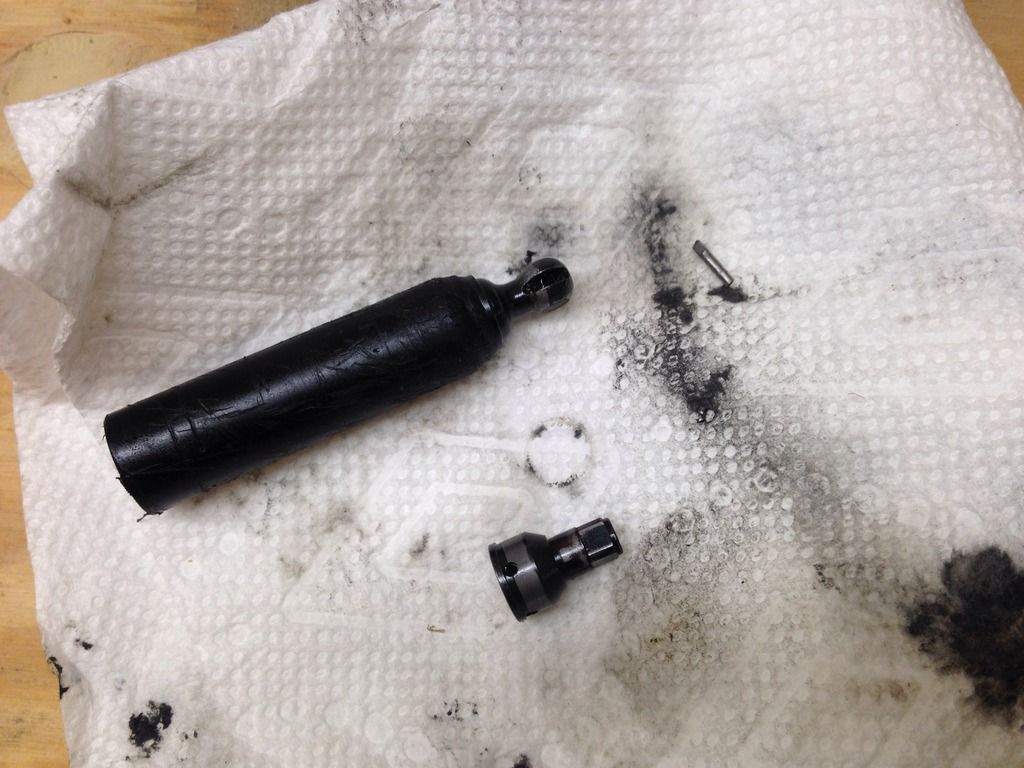 The pin in the cv joint had actually worn the ends down so much that it came out of the cup. I've had serious slop in both front and rear axle input cv's so knew it was a matter of time. I'm happy that I actually just wore it out and didn't really break it. You can barely see on one end it's worn flat lol. I've got a spare new cv joint, but this is repairable with a set of Gunnar pins that I've got on order. Here's where the truck was when it happened... 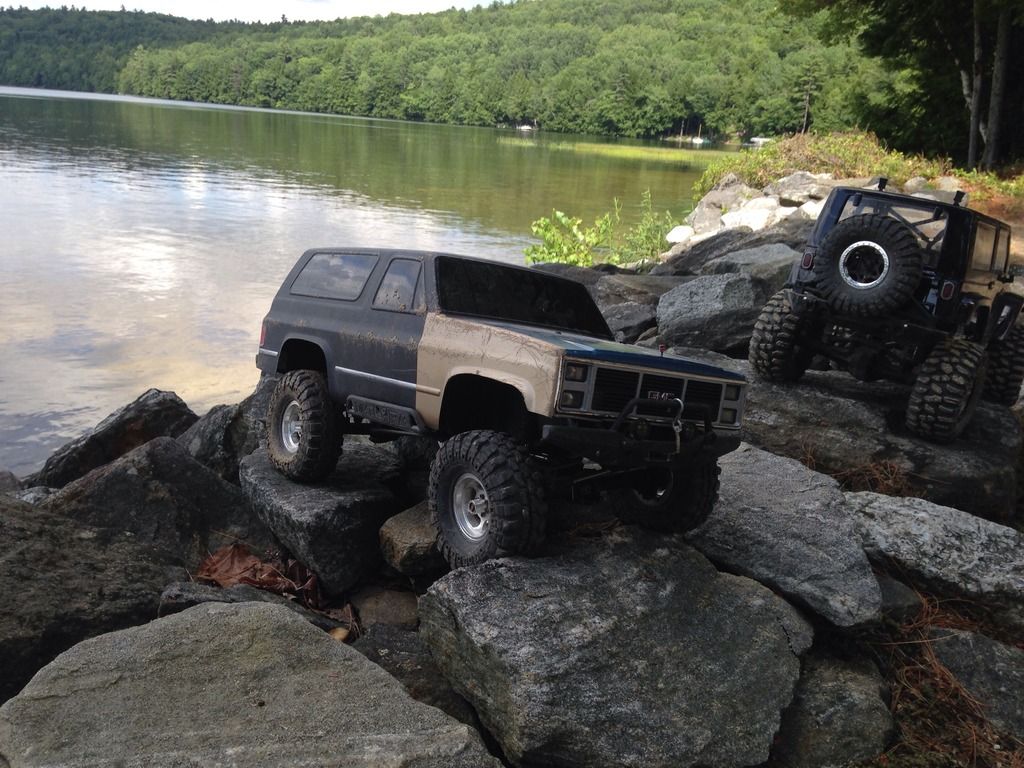 |
| |  |
| | #153 |
| I wanna be Dave Join Date: Jan 2006 Location: Corruptifornia
Posts: 12,107
|
Nice pics and video Ben! I was going to say Gunnar pins, but you've already ordered, that's what I'm swapping to. |
| |  |
| | #154 |
| RCC Addict Join Date: Sep 2015 Location: Southern Maine
Posts: 1,024
|
Got my Gunnar pins in and took apart my front driveshaft for rebuilding. I laughed out loud when I saw how badly the pins were worn and I hadn't broken them. I also found out that each joint on the driveshaft takes a different length pin. The ion at the axle end is 10mm long and the one at the tranny end is 11mm long. These are the pins from the front driveshaft. The shorter one is t broken, it has an end worn off and it just came out of the socket. The other pin that has the crazy steps in it was at the transmission end lol. I have to say I'm happy with my driving because I consider what I run to be some hard technical climbing but I go slowly at it. The video just a few posts above showing me hanging a tire over the edge was with these pins lol The rest of the u-joint is worn and a bit sloppy even with new pins. I have complete new vaterra u-joints that I'm putting the Gunnar pins in so I'll have tight joints with hardened pins, then taking the still new vaterra pins and putting them in my worn u-joints for emergency trail spares. I have enough driveshaft pieces to have two complete driveshafts ready to go on the trail just incase. 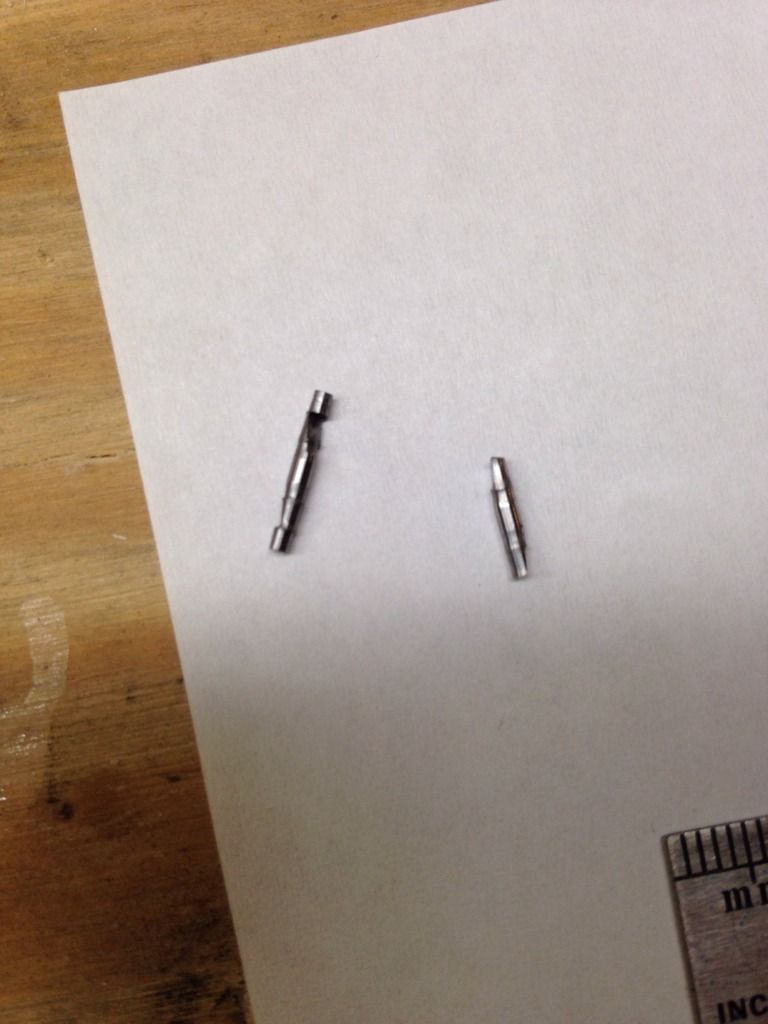 Ben Last edited by Itali83; 07-27-2016 at 08:17 PM. |
| |  |
| | #155 |
| RCC Addict Join Date: Sep 2015 Location: Southern Maine
Posts: 1,024
|
So I finally made up my own set of sliders. Not for this truck but my new to me RTR blazer kit. It's an early release and had non HD drive shafts and pinions. It was barely used before the rear drive shaft blew and the guy parked it. Literally hardly any light rock rash on the sliders and lower links. I'm taking everything apart, and doing everything I've done to my original rtr before I use it. I came up with a simple to me design for sliders. Tucked them high and tight to the dropped body. It's just 3/16" steel rod and some 1/2" x 1/8" flat bar to mount it to the frame. I had to cut the mounts off for the stock sliders and drill the frame where the holes were and just bolted them to the frame. Next time I'll just drill and tap the holes so I won't have to use nuts on the inside of the frame rail, it's super tight to the stock skid and upper link ends. But I made it work on this truck. I haven't tried them out but hope since everything is rounded and I made the outriggers as far forward and rearward that hopefully they won't be catching on rocks and such. Much cleaner look than the stock ones I think. I used my mig welder to weld it all together. I made sure that the bottom is flat and no welds stick down or tube joints with catches on them so they should slide well. 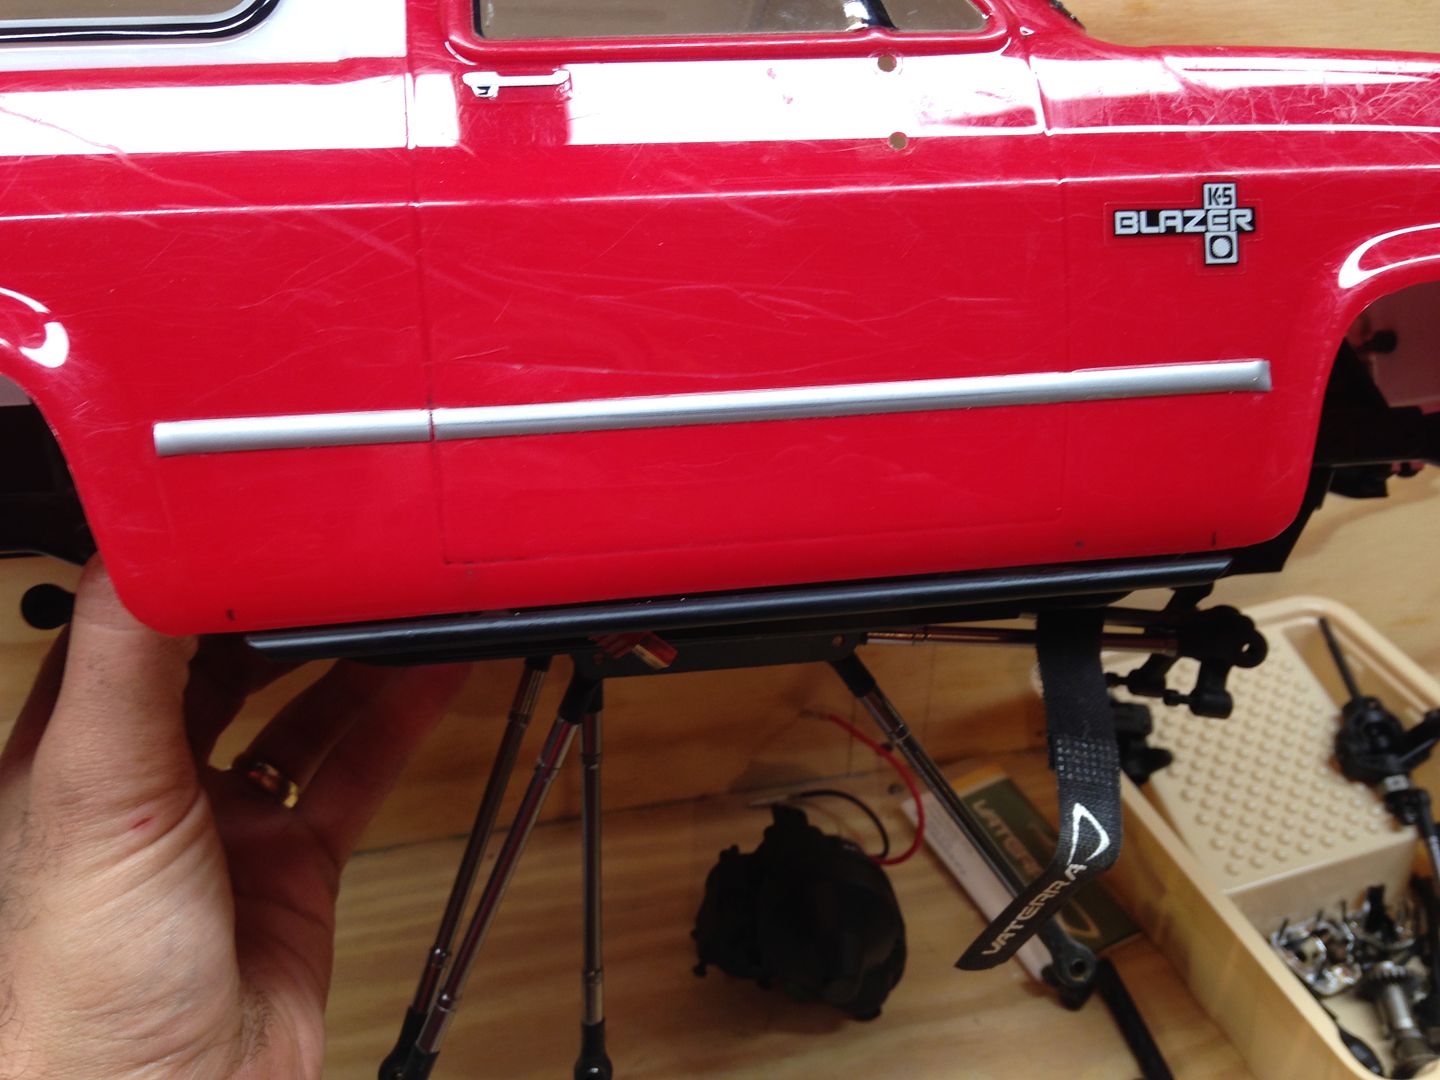 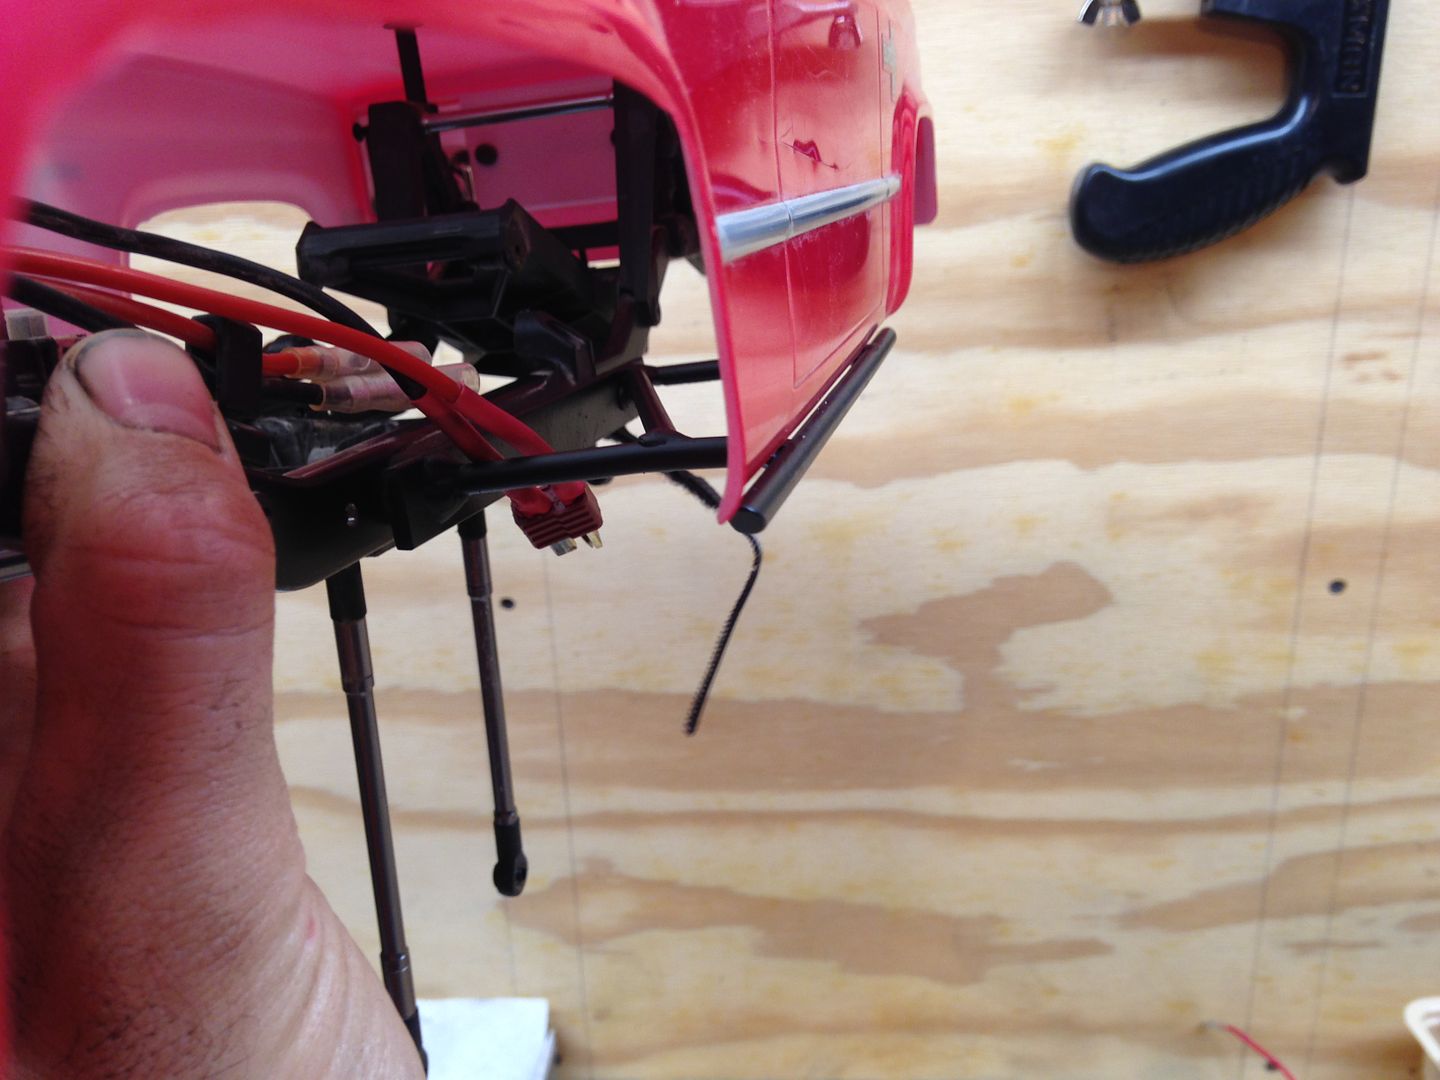 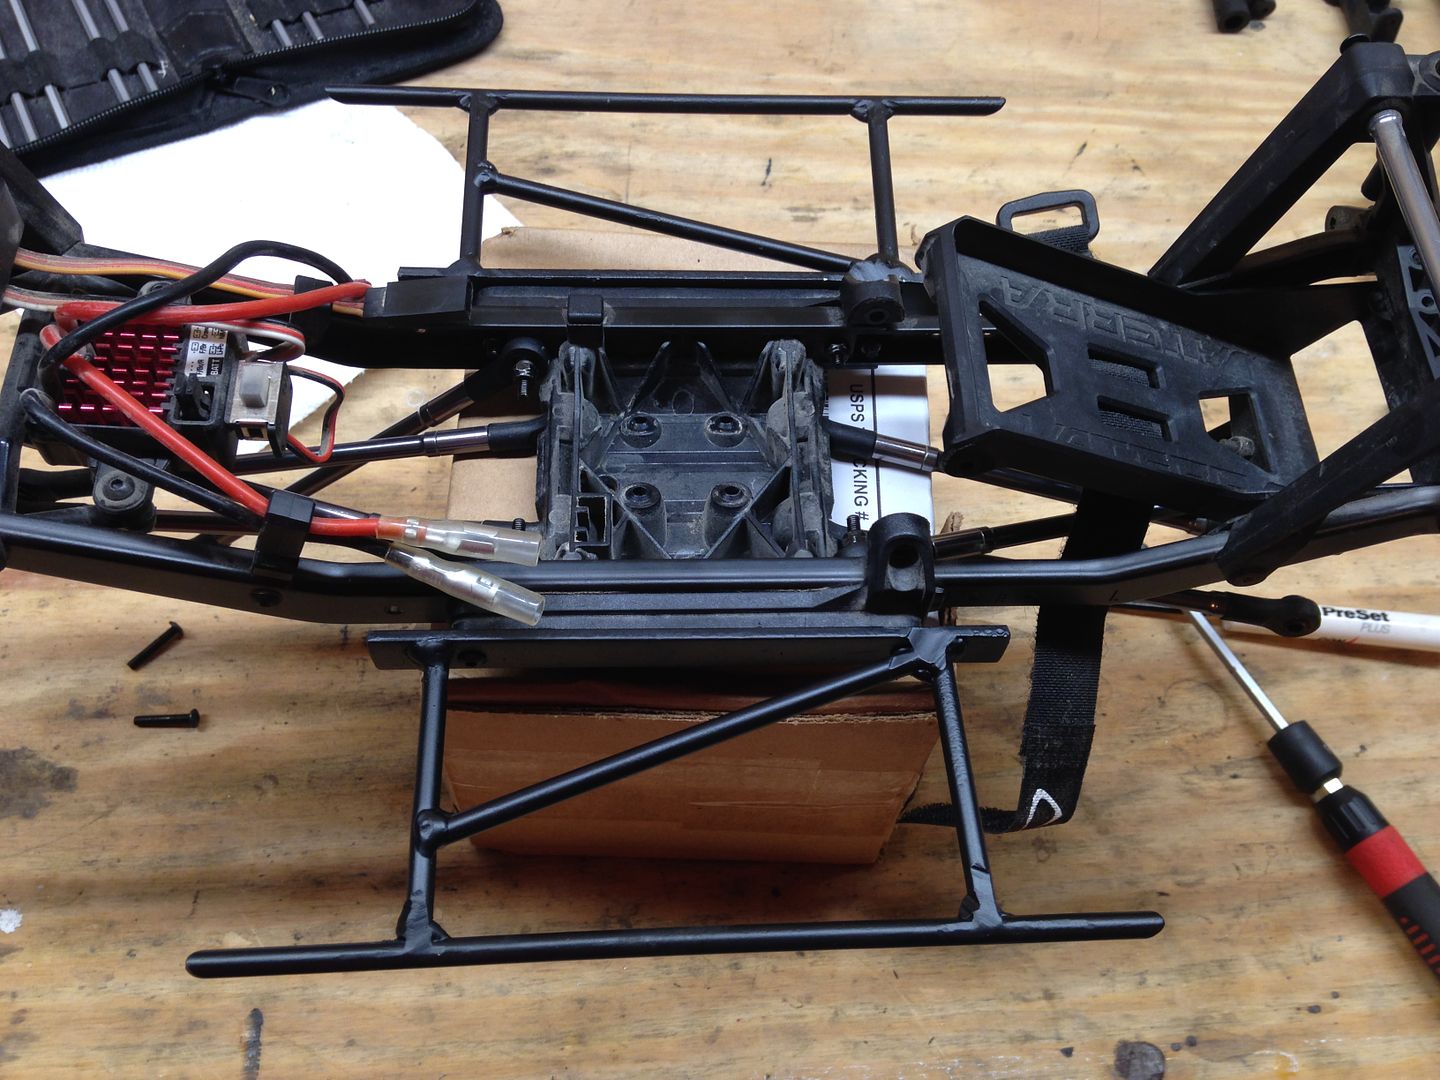 |
| |  |
| | #156 |
| RCC Addict Join Date: Sep 2015 Location: Southern Maine
Posts: 1,024
|
So I made a little more progress with my blazer #2 the other day. I mounted the bumpers. I tucked them in even farther than my first truck. I was able to on the front because I don't have the lights mounted on this truck which are just barely hitting the grill on my first truck. The rear, I cut the body, which was hard for me to do because I don't like the hacked off lower fender look even though I did it in the front, but was willing with this truck in the search for approach angle. We'll see if the performance is worth the hackage. I too all spacers out, and actually cut my own to about 3mm front and rear for spacers. That gets the bumpers flush with the body. I'll probably be doing some reinforcing with drywall tape and E6000 on the corners just good measure. 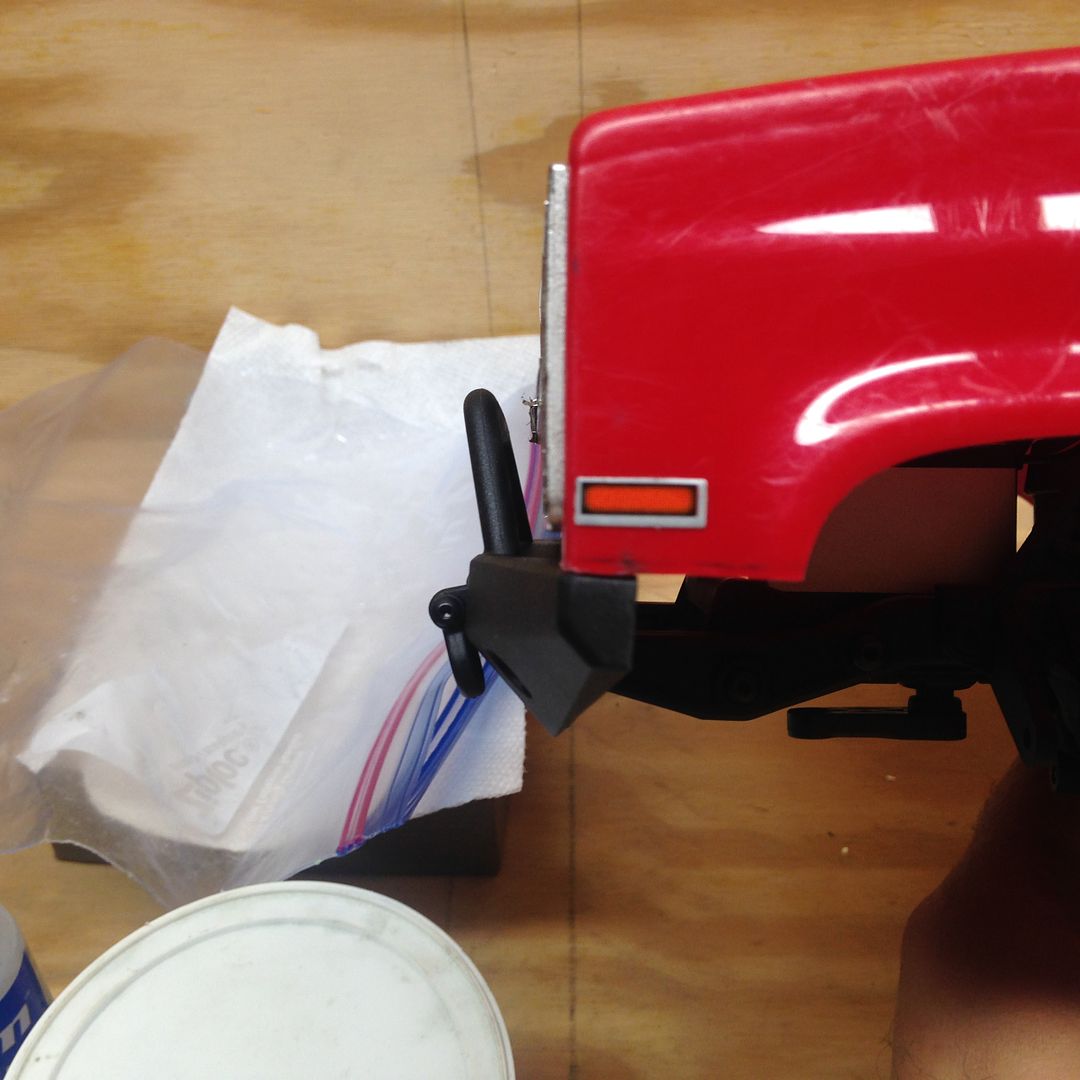 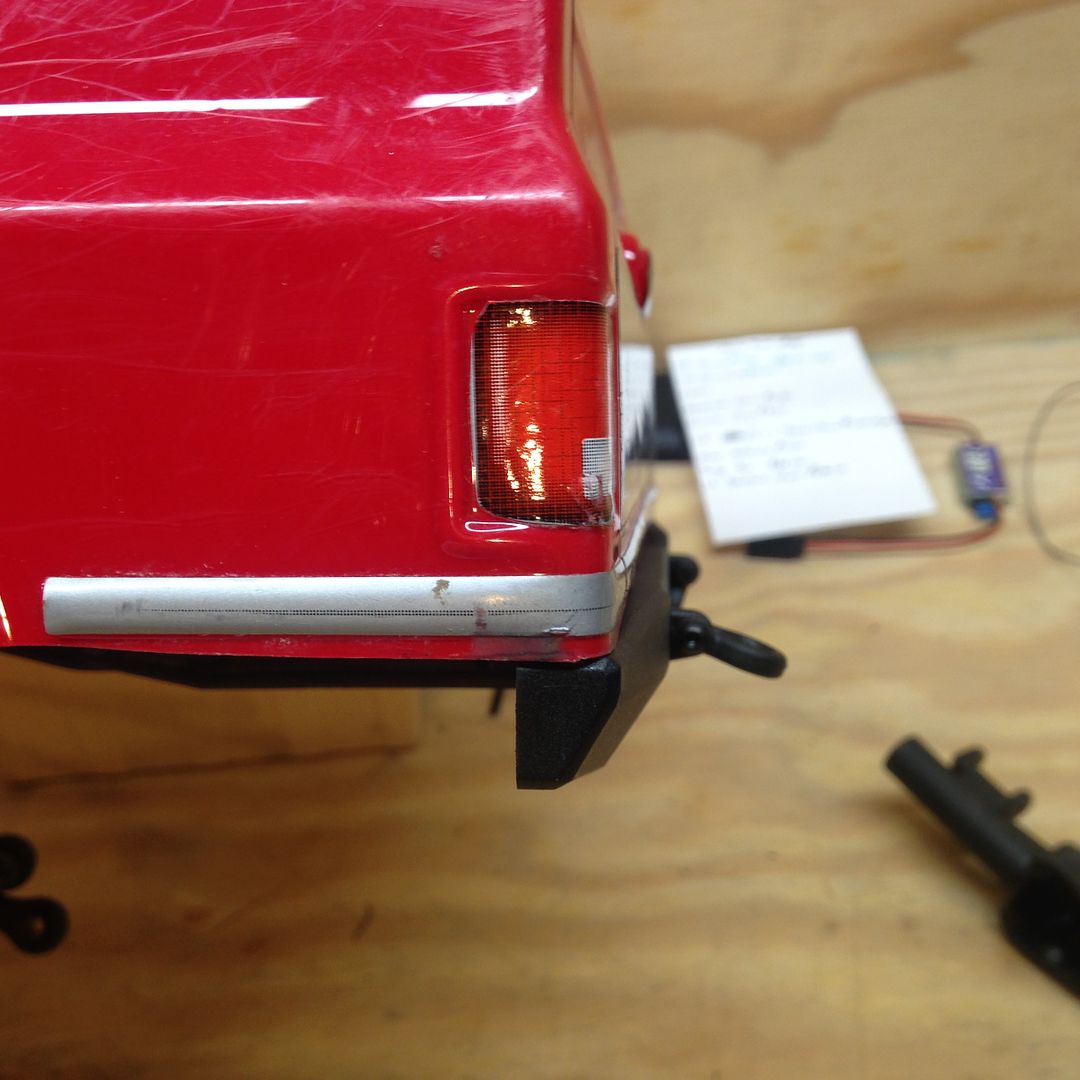 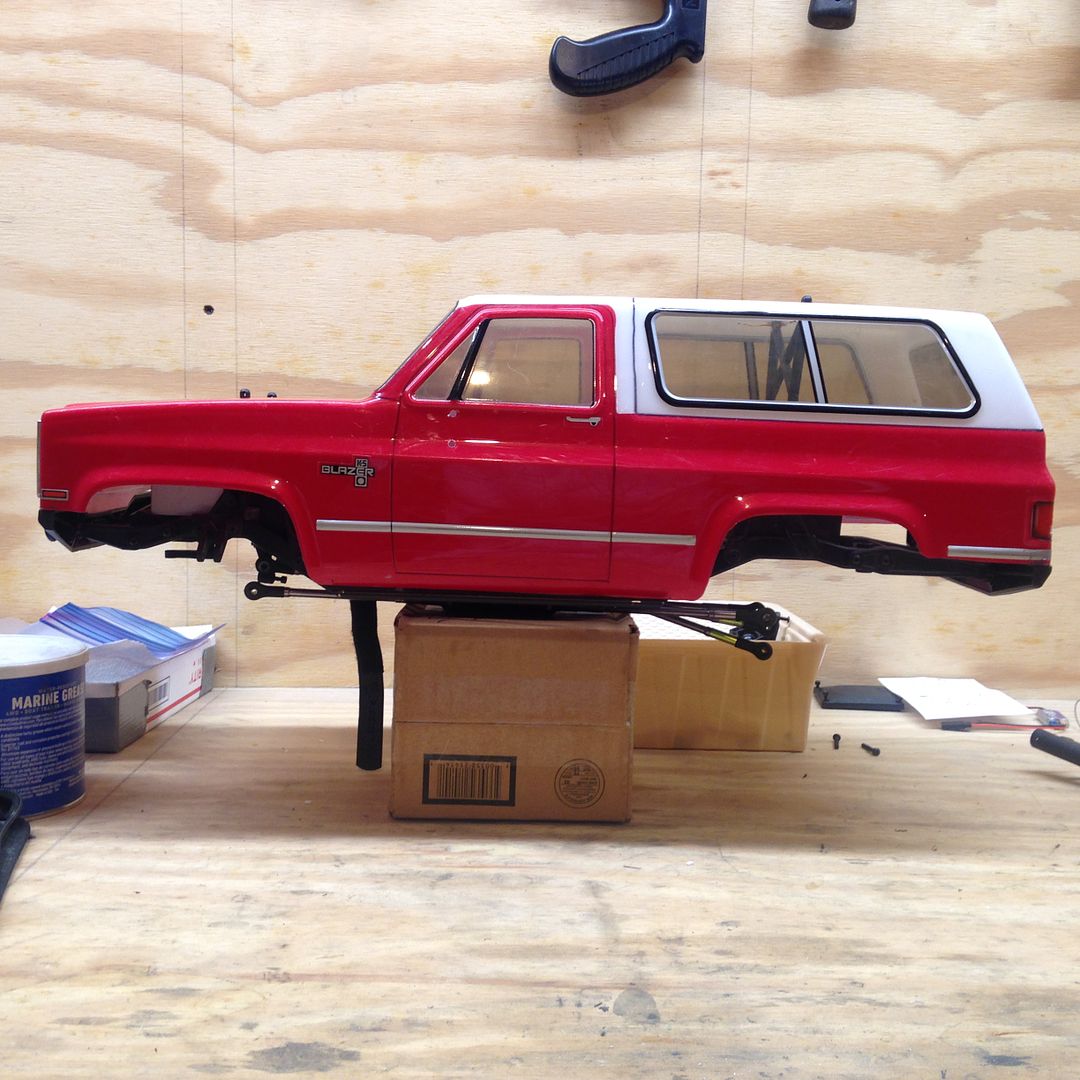 Those with super sharp eyes will notice the green spacers on the rear upper links. I made some up that are 3mm longer than stock, in hopes to reduce pinion angle on the rear axle for free. I just wung it with the measurement and will have to wait until my axle is installed to see if I like the angle but think it'll be close. Last edited by Itali83; 09-08-2016 at 04:34 AM. |
| |  |
| | #157 |
| RCC Addict  Join Date: Sep 2015 Location: Australia
Posts: 1,058
|
That looks super tidy! I like the bumper tuck and trimmed body, makes me miss my big old Blazer.....
|
| |  |
| | #158 |
| RCC Addict Join Date: Sep 2015 Location: Southern Maine
Posts: 1,024
|
Got out yesterday with my #1 and had a blast at my favorite rock crawling site. I was surrounded by SCX-10 2's. At one point there were three of them! I have to say, those things really do work well. They were stock and I hate to say it but were going everywhere my truck was. Well, the white jeep couldn't because of the roof rack and lights I think because he would tip over on side hills, but the toyota cab and honcho bed one flat out got it done. Don't worry, I'll never jump ship, but gotta give credit where credit is due. The toyota also was running the old school tranny and not the new one. Onto the pics... 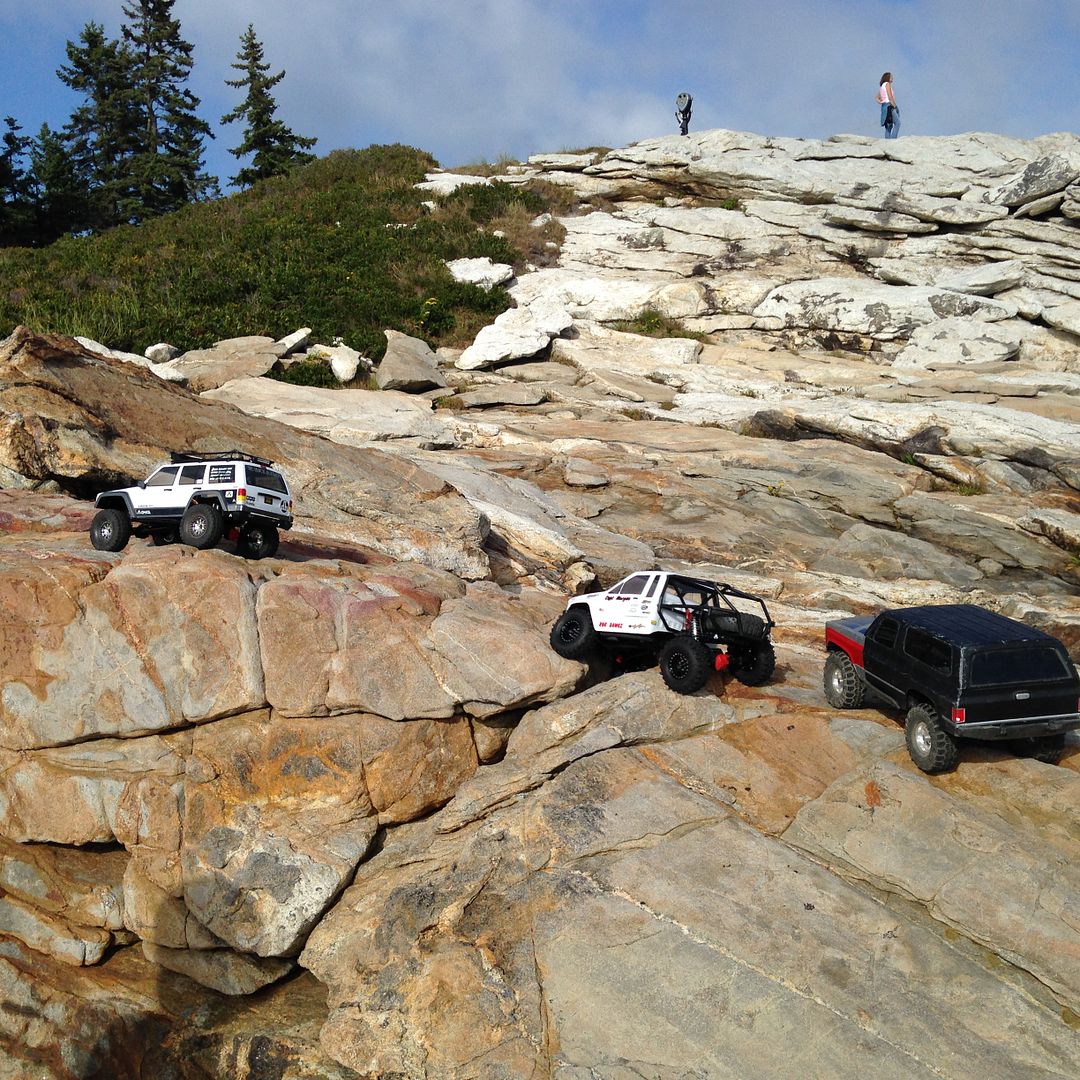 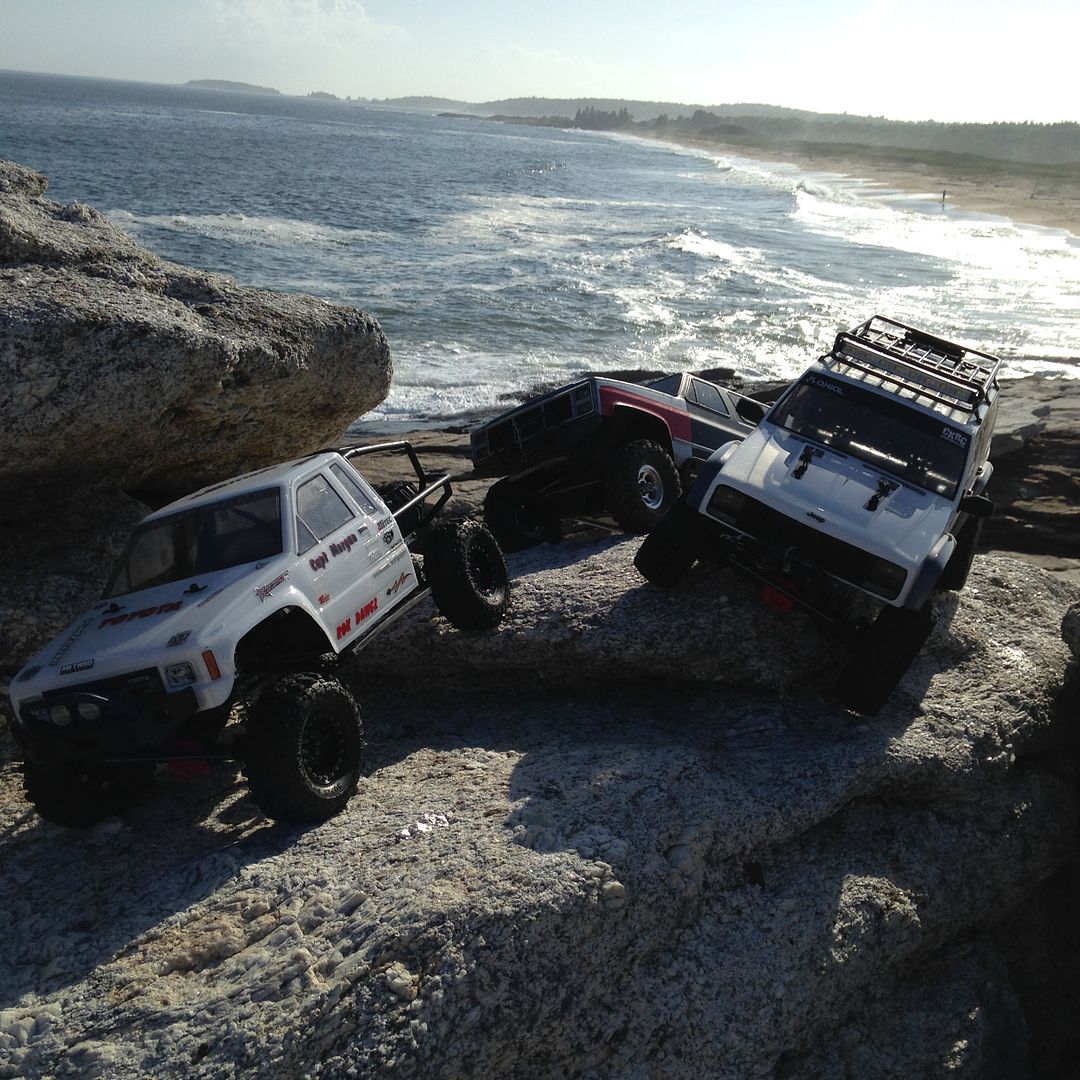 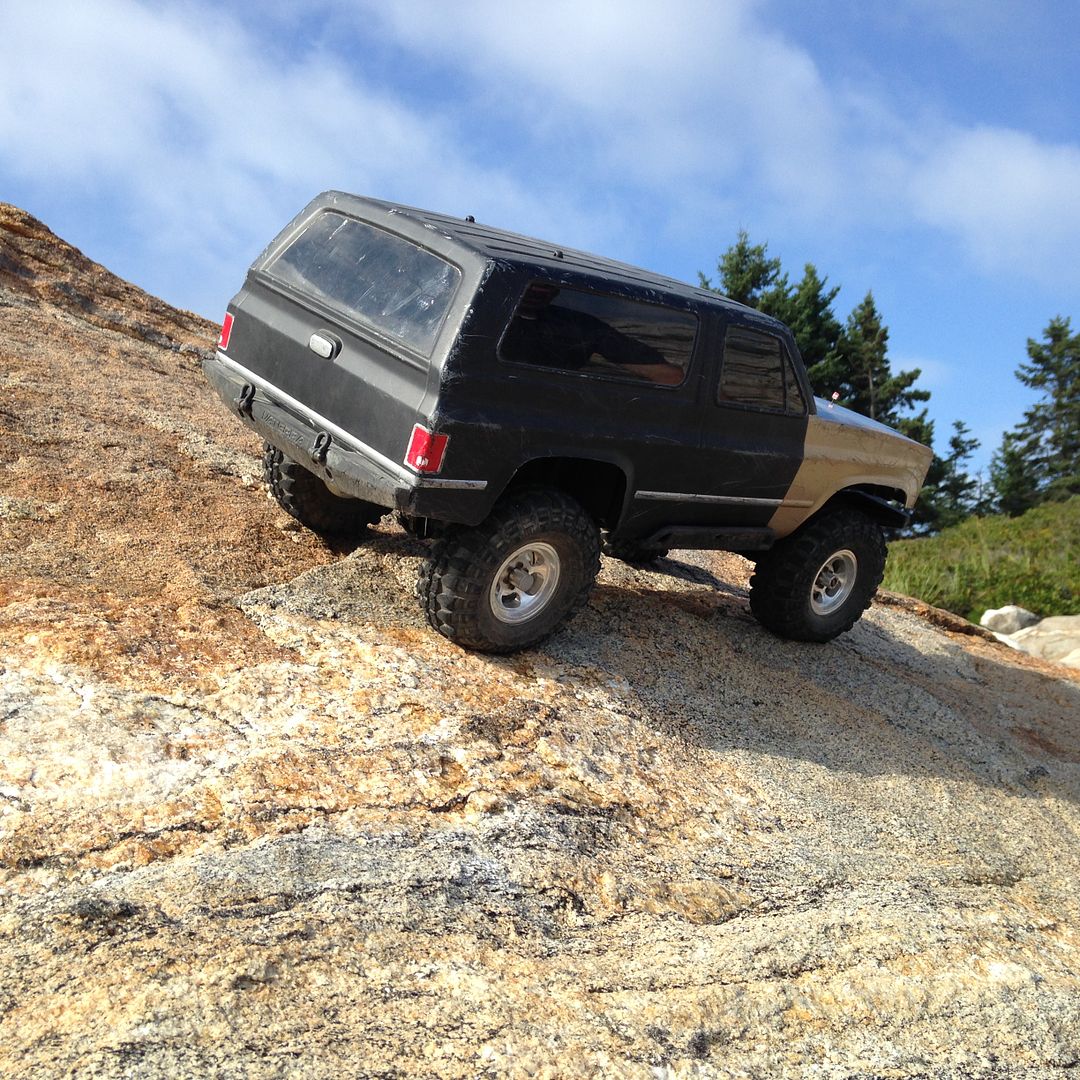 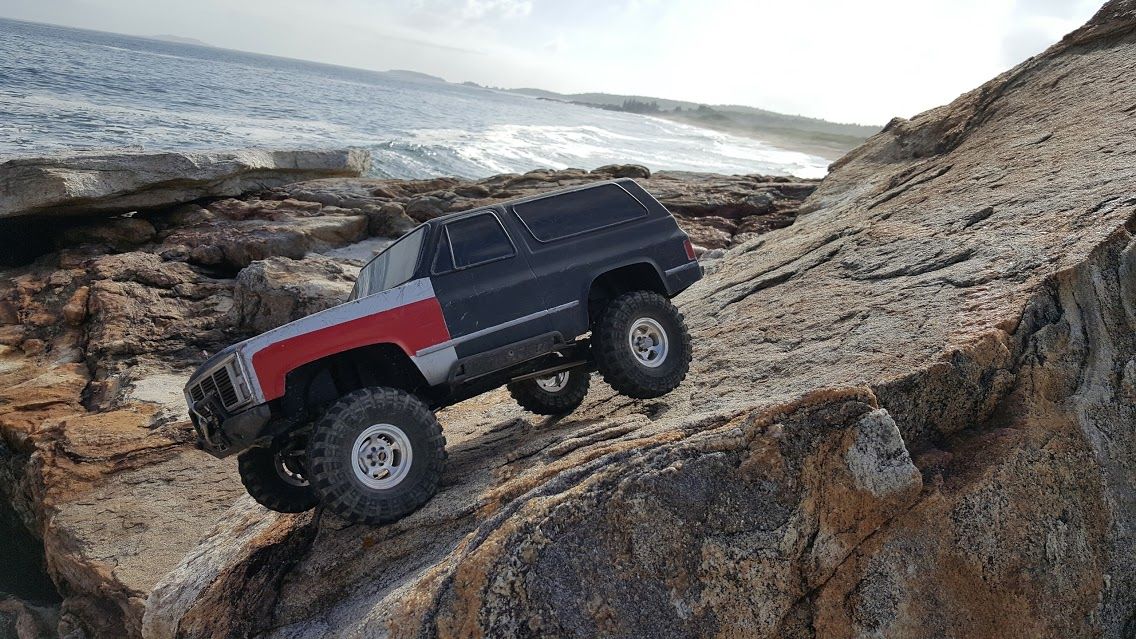 Yes, thats daylight you see under the left rear... 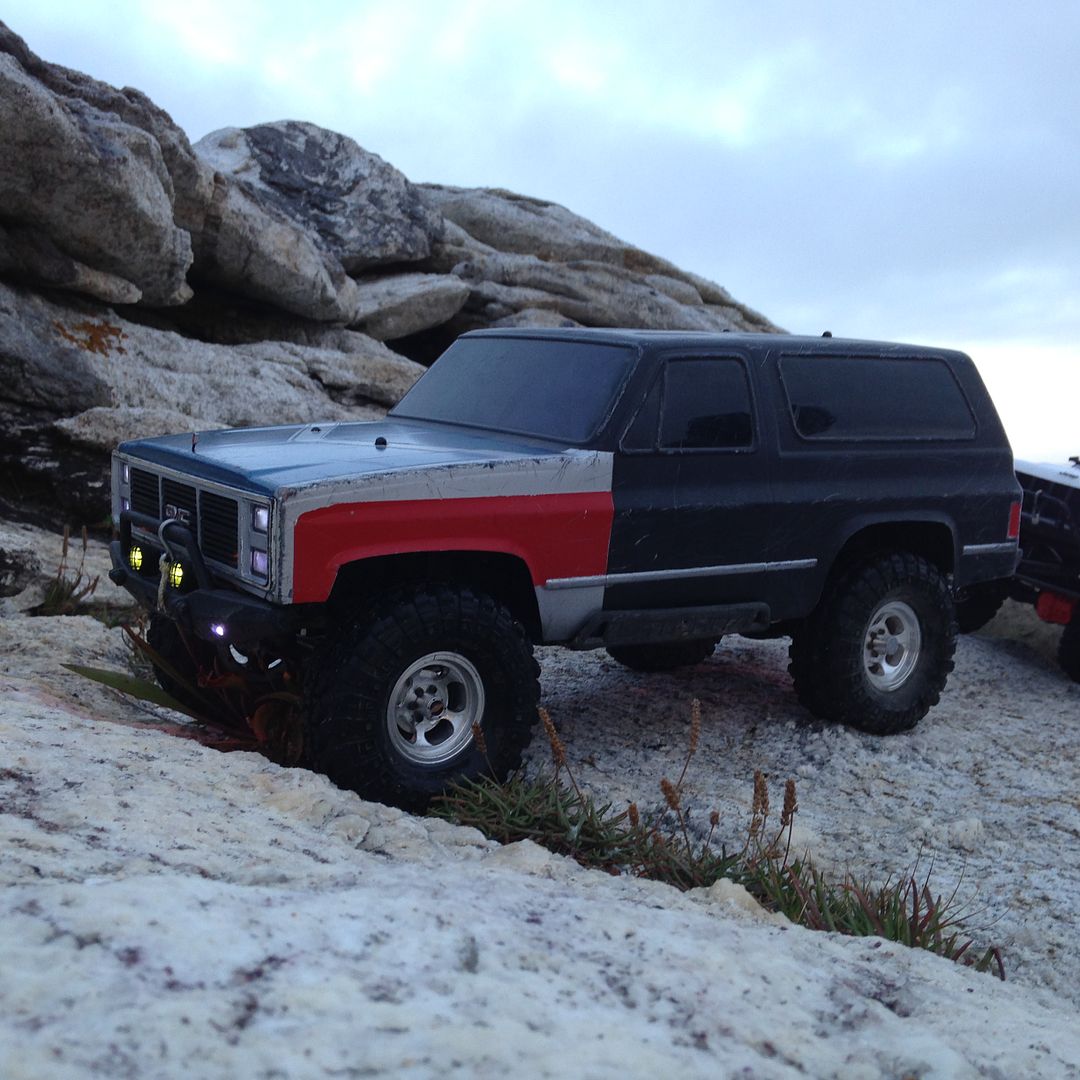 Getting dark, time for some lights. 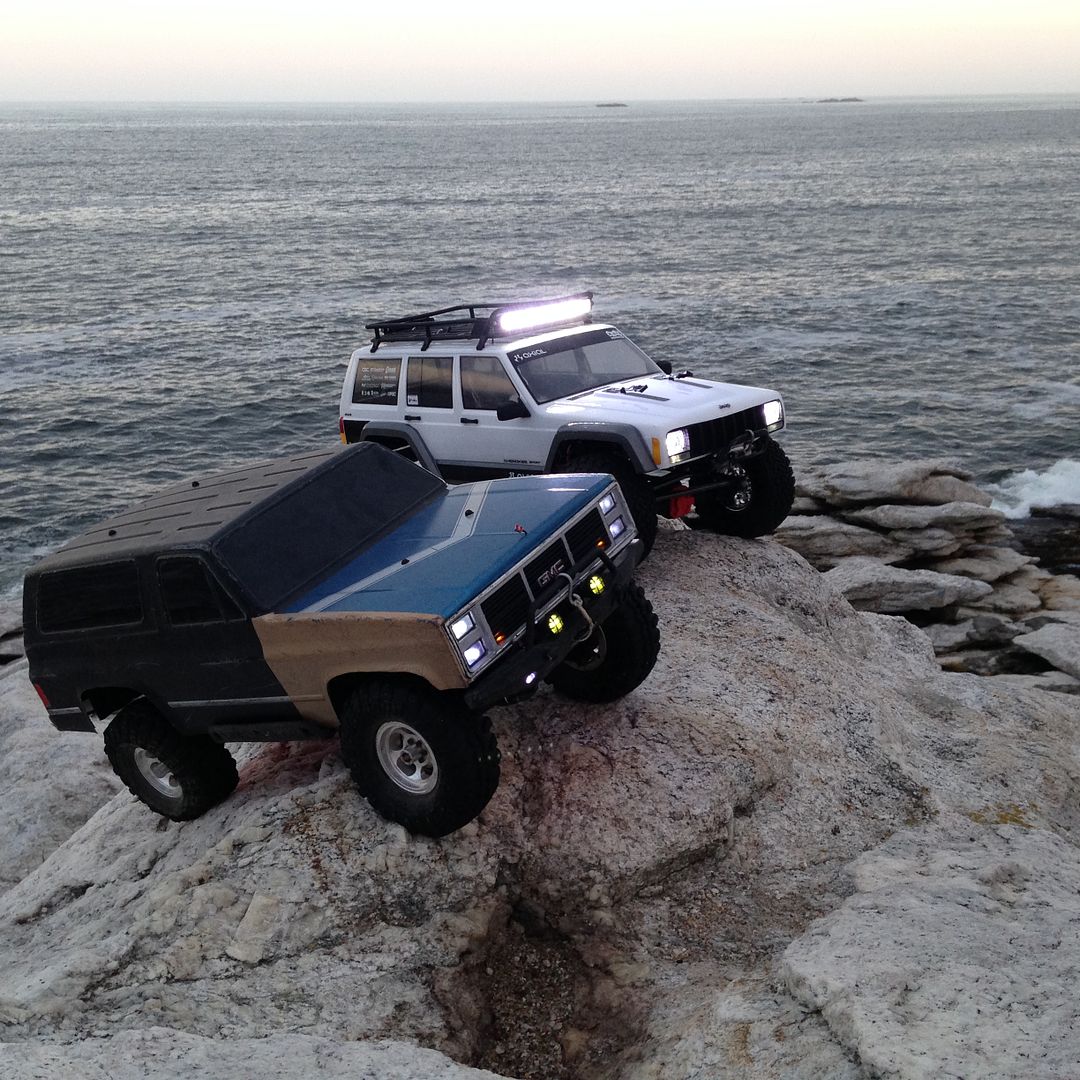 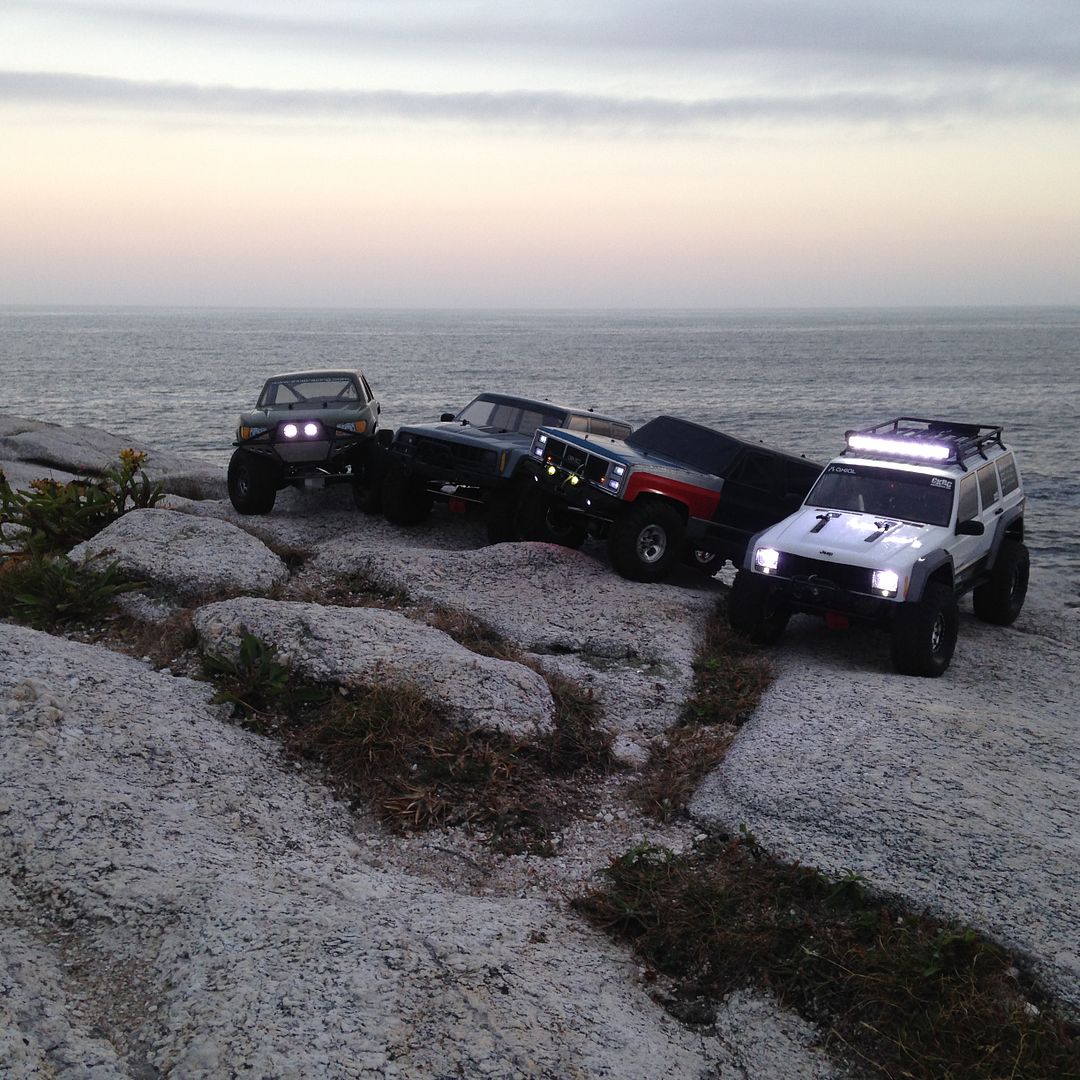 And on a side note, got to see the brand new battleship head out from Bath Iron Works on it's maiden voyage. 4 Billion dollars floating away...  |
| |  |
| | #159 | |
| I wanna be Dave Join Date: Jan 2006 Location: Corruptifornia
Posts: 12,107
| Quote:
Quote:  | |
| |  |
| | #160 | |
| RCC Addict Join Date: Sep 2015 Location: Southern Maine
Posts: 1,024
| Quote:
Now for more updates to truck #2. I got my Gmade beadlocks in, I went super cheap and got the plastic set, one because they were $13 bucks for 2 AND I actually like the look of them better than the steel beadlocks that they offer for like $18 a set. They come with scale hardware and look like the american racing aluminum wheels that everyone was running back in the 90's lol. I should have painted them aluminum but got antsy and put them right together. They take the vaterra beads no problem. I just use a squirt of automotive window cleaner on the beads to lube them up and had no problem at all mounting them up. I was also lazy and didn't do the simple green wash on the tires but will on my next set. I'll let the rocks break them in. I also wanted to try and modify the stock vaterra foams because again, being cheap and trying to make as much as I can for this truck. I just wung it with a razor and pair of scissors. I remember from when my first truck has the stock wheels on it that the foams were quite firm. When I stuck the foams in the tires and was fitting the wheels, the inner circle just had too much foam there and was going to be a pain with mounting the tires, so I just hacked off a 45ish degree angle of foam to make a little room. I also cut little wedges off from the outer circle in hopes of getting a little more flex but not much sidewall flex. Time will tell but I do like how the tire tread if flat and not bulging round. The tires stand up on their own and don't fall over. I'll be sure to take pictures once the truck is together and on the rocks. 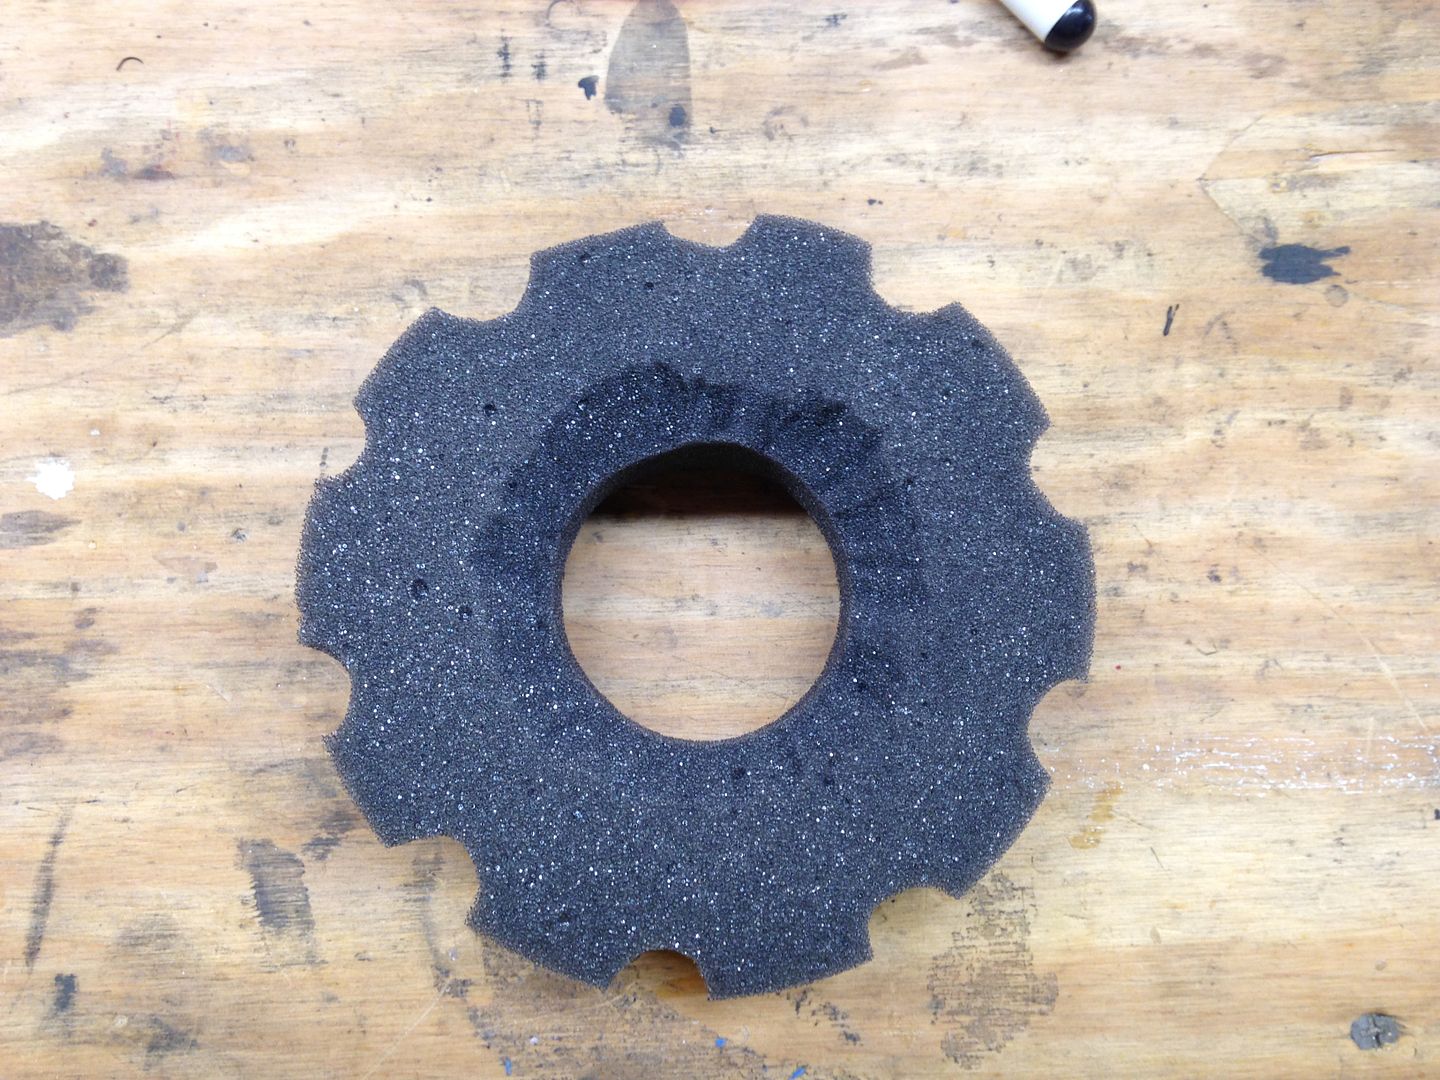 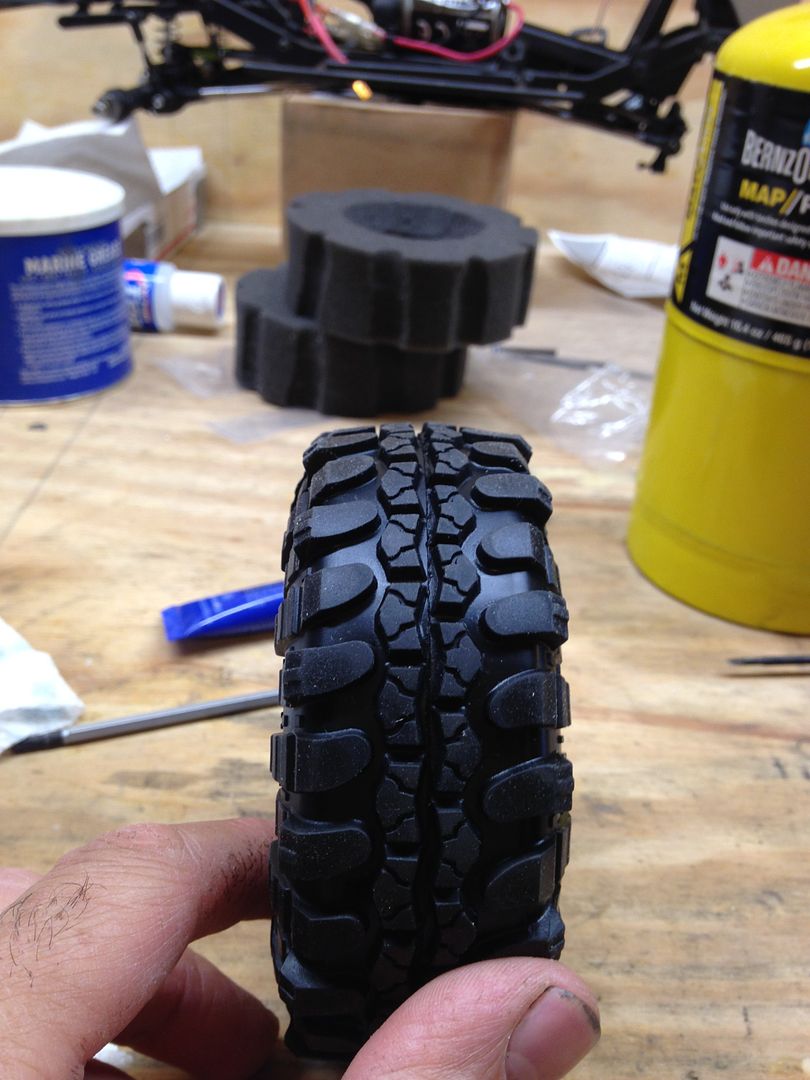 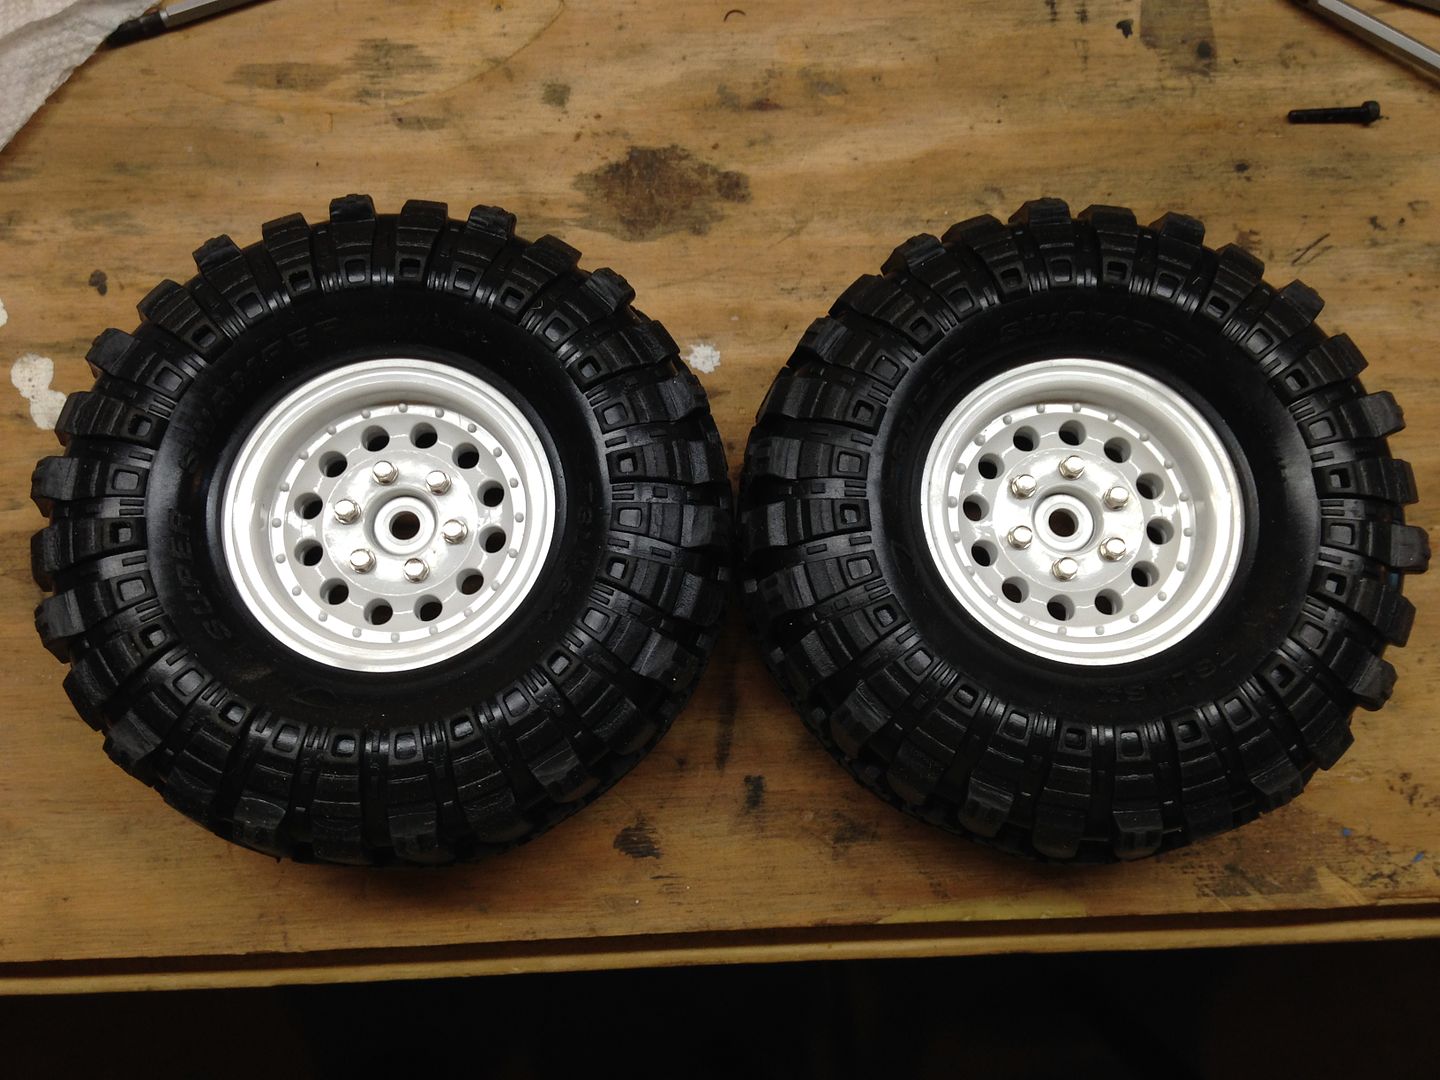 Now onto the rear axle. I installed it and am very happy with the pinion angle with 16mm spacers on the top control arms. Also installed the rear sway bar just like on my #1 truck. 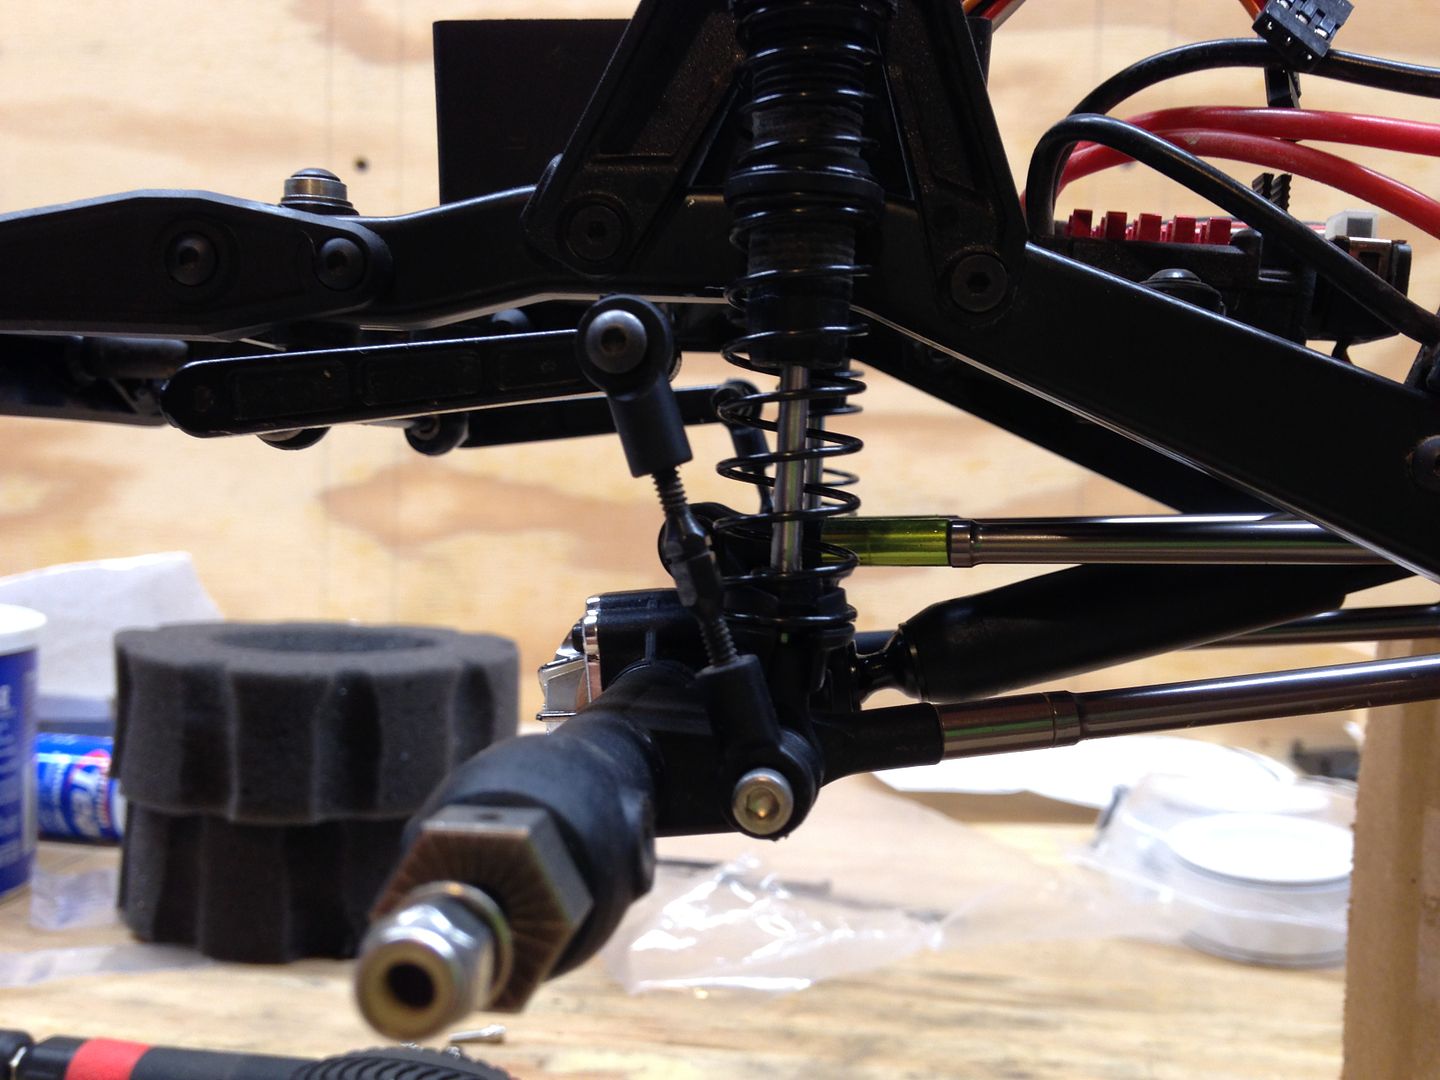 Now onto the biggest mod yet for me. I finally got some time on the lathe with my father in law and made some brass beef tubes for the front axle. Took my a while setting everything up but now have somewhat of a system and they will hopefully go faster the more I do. I'll be making a set for my #1 truck for sure but will only do the front axle on this one for now. I've only go the tubes glued in tonight and will be adding set screws for extra insurance. I also shimmed, lubed and put rear axle together and it's silky smooth. Put new HD driveshafts with Gunnar pins and HD pinions too. 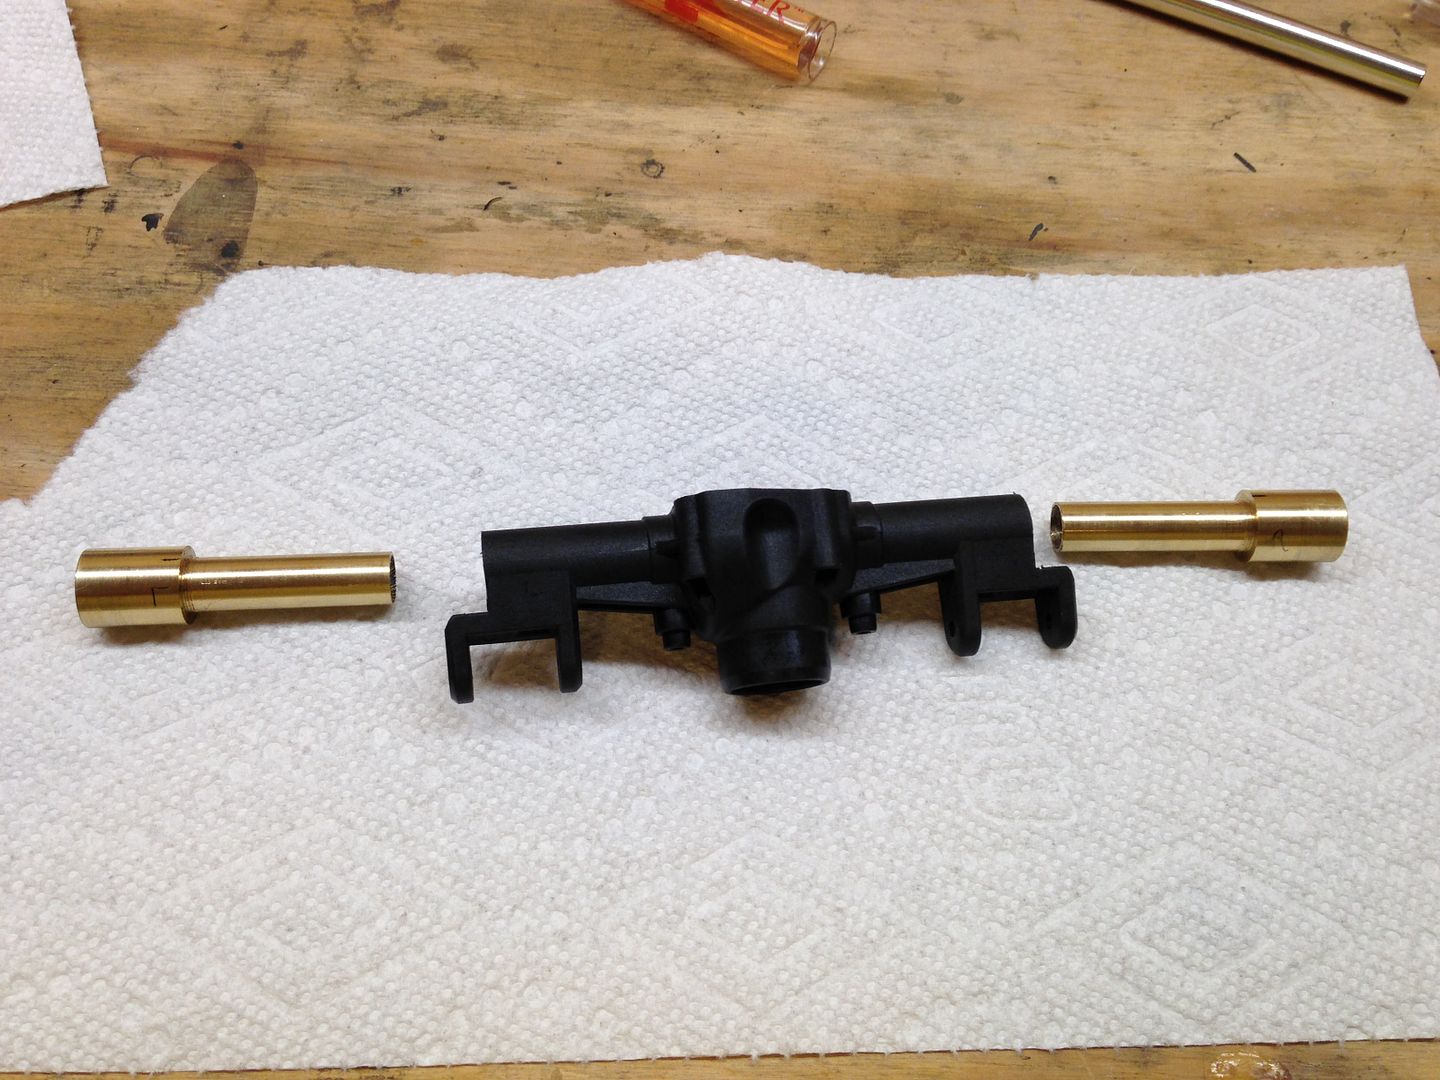 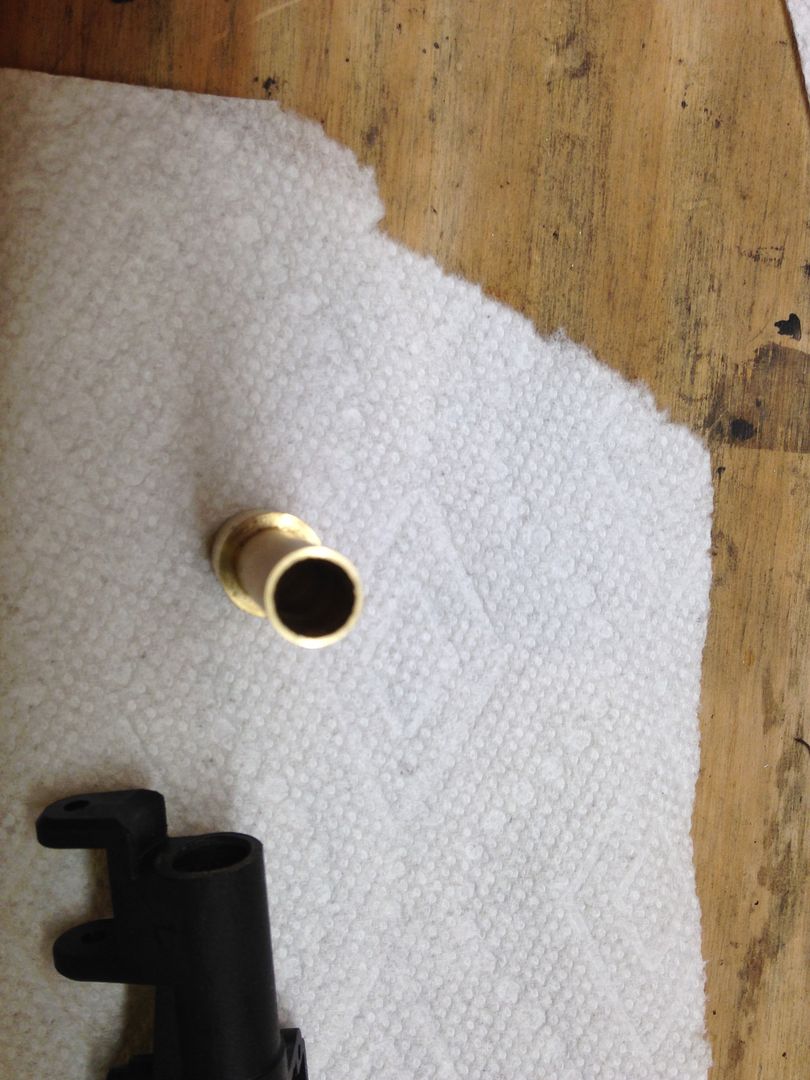 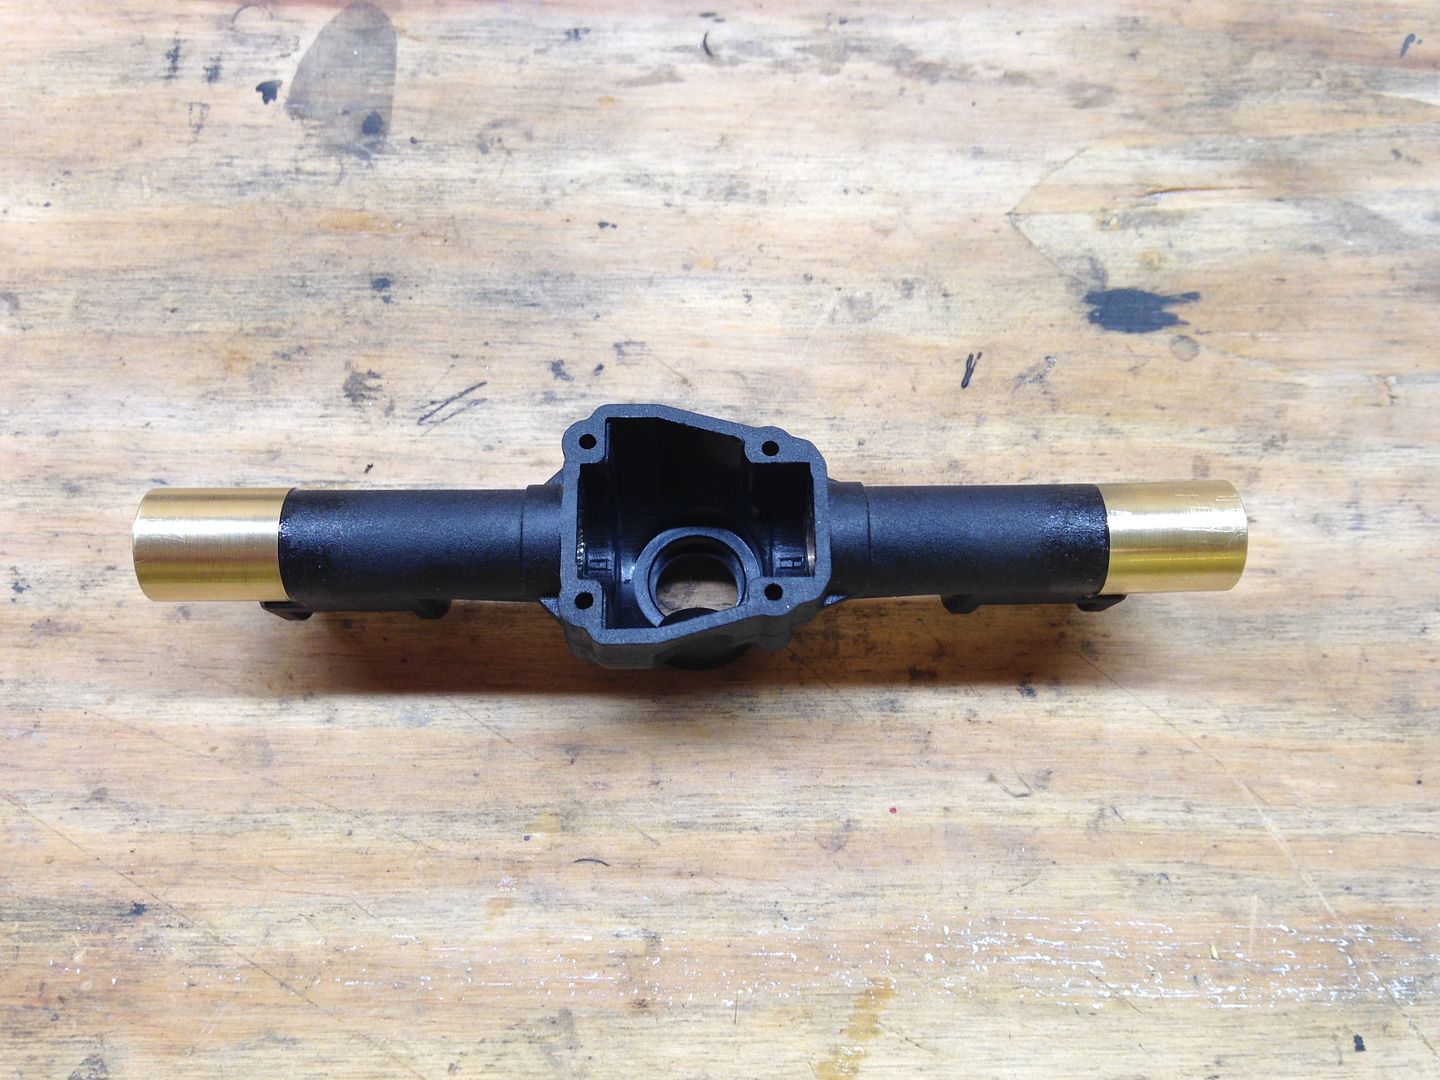 Just waiting on my BEC to come in and I'll be able to finish up the electronics. Then it's onto body detailing and swapping in my custom GMC grill. I also got a ton of LED's that I need to wire and solder in resistors for headlights, parking and bumper lights. Ben | |
| |  |
 |
 My baby blazer - Similar Threads
 | ||||
| Thread | Thread Starter | Forum | Replies | Last Post |
| Using a Blazer CGR interior inside a 'full top' PLR Blazer body-Has anyone done this? | BeeRC | Paint and Body | 4 | 10-31-2009 03:37 PM |
| Nascarkeith's Proline Blazer CGR Bodied Blazer Wheely King | nascarkeith | HPI Wheely King | 6 | 10-30-2009 02:49 AM |
| |