| | #161 |
| Rock Crawler Join Date: Jan 2016 Location: US
Posts: 604
|
Very good job love the review on scx 10 and all ur ideas of cheapness. One thing i would do is set #2 up diffrent so u have a diffrent driving experance. All 3 of my trucks r set diffrent LIFE IS GOOD |
| |  |
| Sponsored Links | |
| | #162 |
| I wanna be Dave  Join Date: Apr 2010 Location: Oakridge
Posts: 3,305
|
Nice job Ben they look really nice!  They look similar to some I've seen on here before. Did you drill out the axle housing on the drill press? That operation is my least favorite of all when building the axles! They look similar to some I've seen on here before. Did you drill out the axle housing on the drill press? That operation is my least favorite of all when building the axles! We might be in your neck of the woods in 3 or 4 weeks. We were in Maine 6 years age to photographs of the fall colors, hope we catch them again this year, and found some great on that trip! Ernie |
| |  |
| | #163 | |
| RCC Addict Join Date: Sep 2015 Location: Southern Maine
Posts: 1,024
| Quote:
Thanks for the compliment! I had a lot of fun making them and will be making a set front and rear for my #1 blazer and also my new kit that I'll be building. I didn't use a drill press because I didn't have a quick way of making a jig to hold it and use my drill press. I noticed with my brand new axle housings that the tubes aren't even straight. Looking through the housing from one end it's obvious that they aren't straight, I said "screw it" and went to town with my hand drill. I just went slow in a few steps but drilled them out to 3/8". That was as much as I dared to go as the housing was getting thin. I would like to make a jig for the drill press because with the hand drill, the bit wants to pull you through the housing, making for not as nice of a drill and you'd get with a press that can't be pulled through, not to mention the straightness of a press too. I had to do more test fits to get the brass the correct diameter to fit inside than if I'd used the press probably. I left them a bit loose for the epoxy to hold everything together. I did use one set screw in where the link/shock mounts are. I just eyeballed the caster angle with a stock set and put it all together. I drilled the brass out to 1/4" so make room for off centerness and it all worked out. The axle turns smooth and is noticeably heavier, (don't have a dope scale to measure grams). Let me know where and when you'll be coming to Maine. It's a small world knowing you'll be here leaf peeping. Onto more progress. It's finally alive! I finished my front axle, mounted it up. I've noticed with my #1 that with running a mostly droop suspension, the front axle is set over a few mm's and it's been driving me nuts but never think to fix it. Well, this one I did. I noticed that at full compression, the axle is off 5mm to the right, I cut 2.5mm's off the ball joint on the pan hard bar and that brought the axle under the truck centered. I'll be doing this to my #1 for sure. 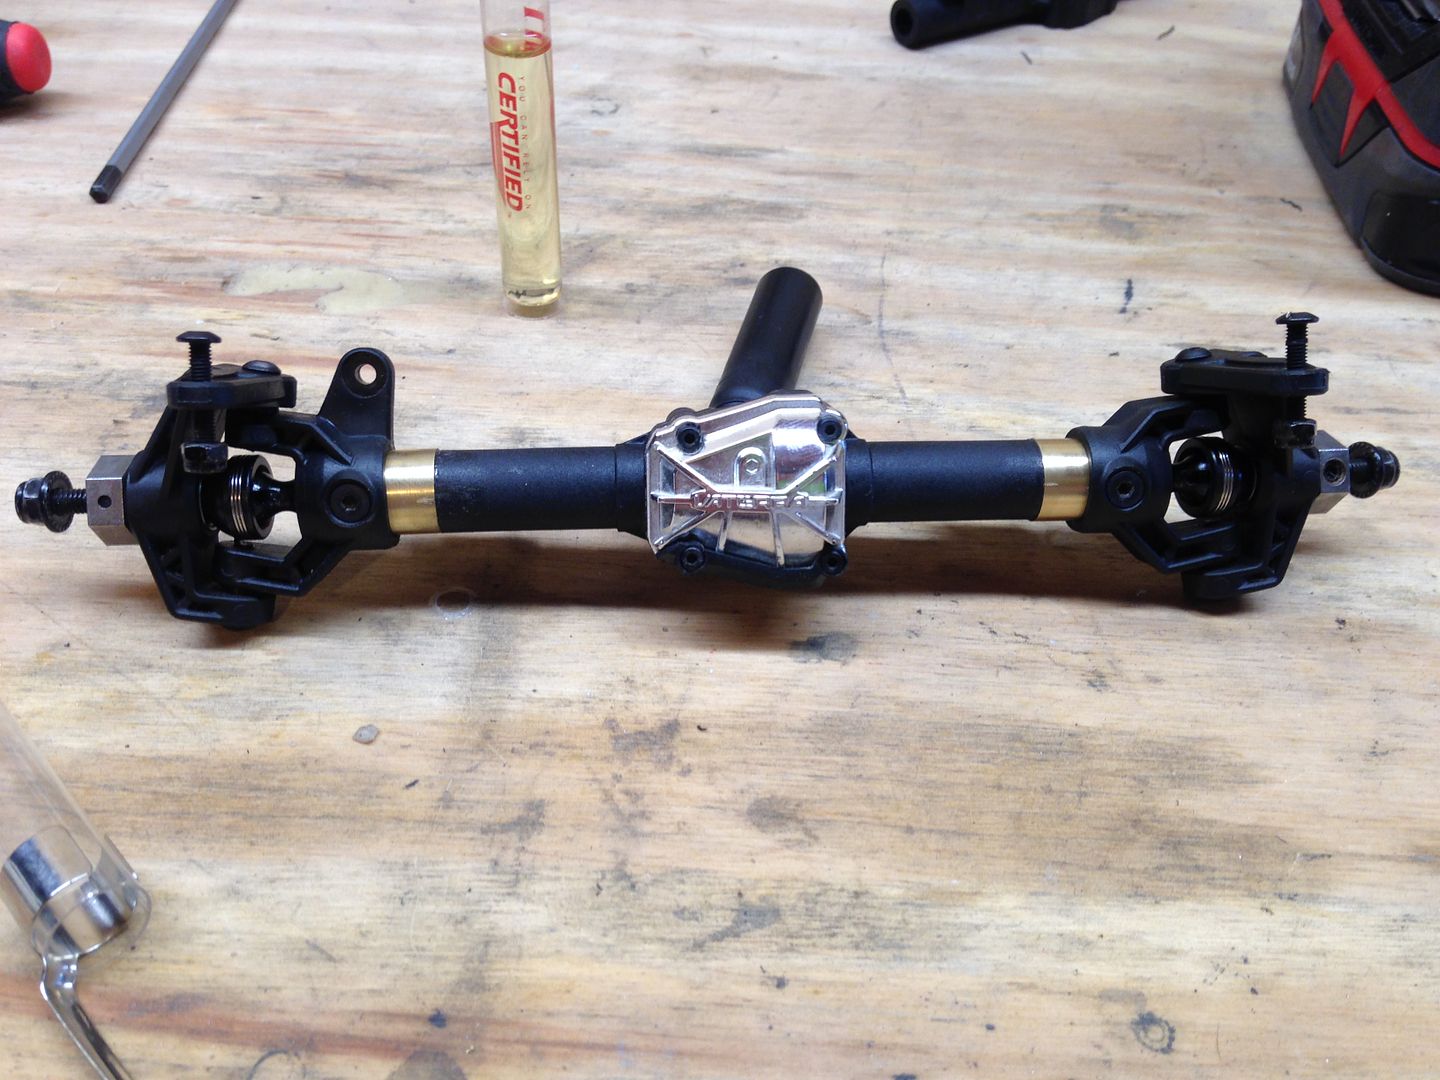 I added my sabre hummus container front inner fender wells coated with truck bed liner. 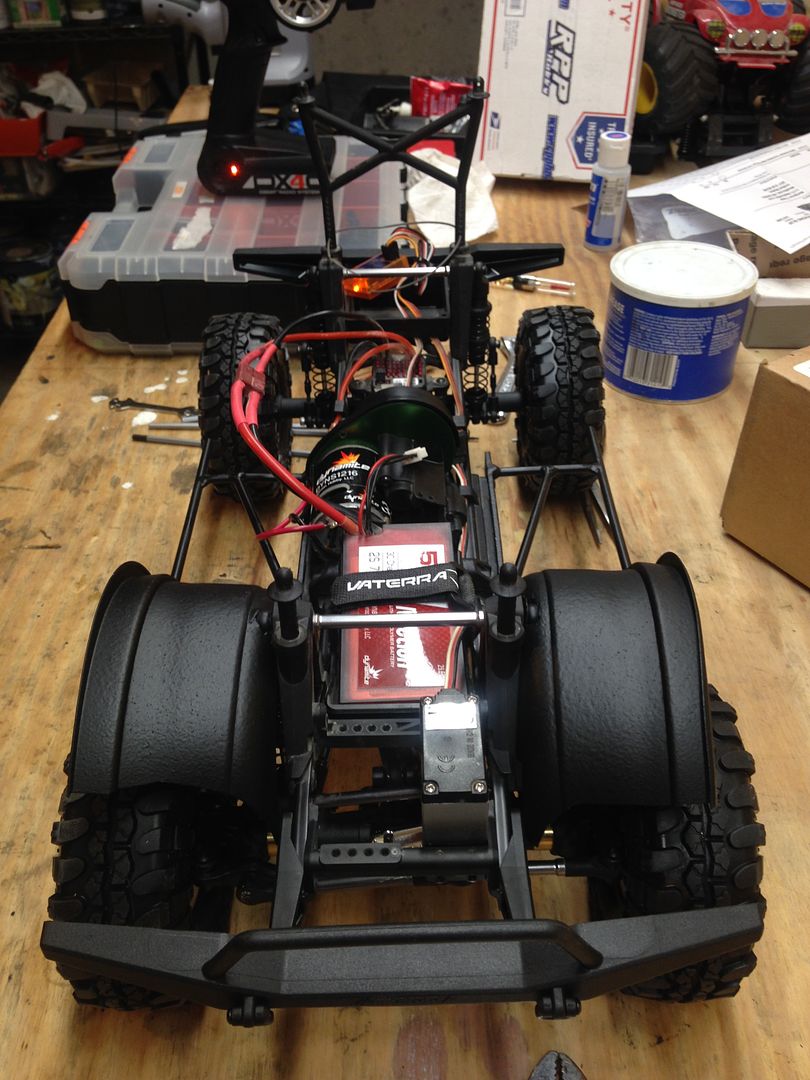 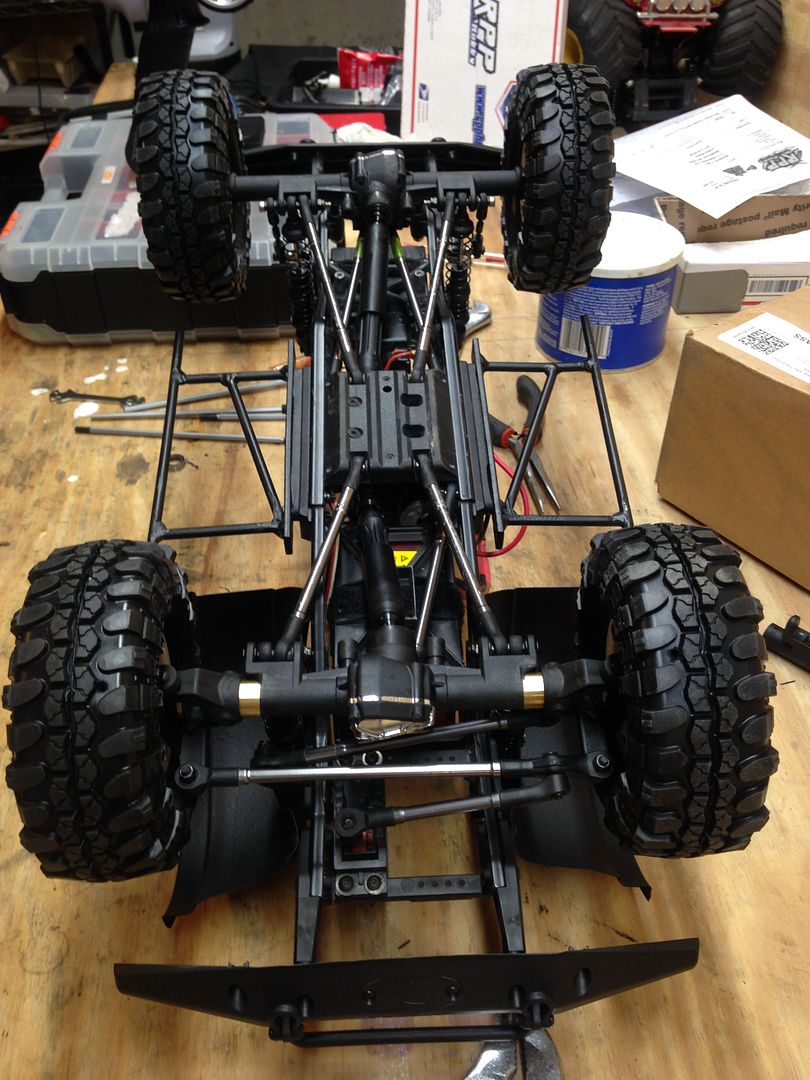 I went another hole down on the front body mounts making it a total of 3 holes down from stock on the front and 2 on the rear to really tuck the body in tight to the bumpers and sliders. I do need to do some fender trimming to stop tire rub but nothing more major than my #1 truck. I took some pictures of the #1 and #2 trucks nose to nose and even though the set ups are different, they are almost identical with bumper height. The #1 truck has CI foams that are broken in as well as the TSL's that are broken in and are about 5mm's shorter than the new TSL's with my welfare foams. The bumpers look identical to the body but the #2 truck's front bumper is in 2.5mm's more than the #1 truck and that's measured to the axle so that may help things. 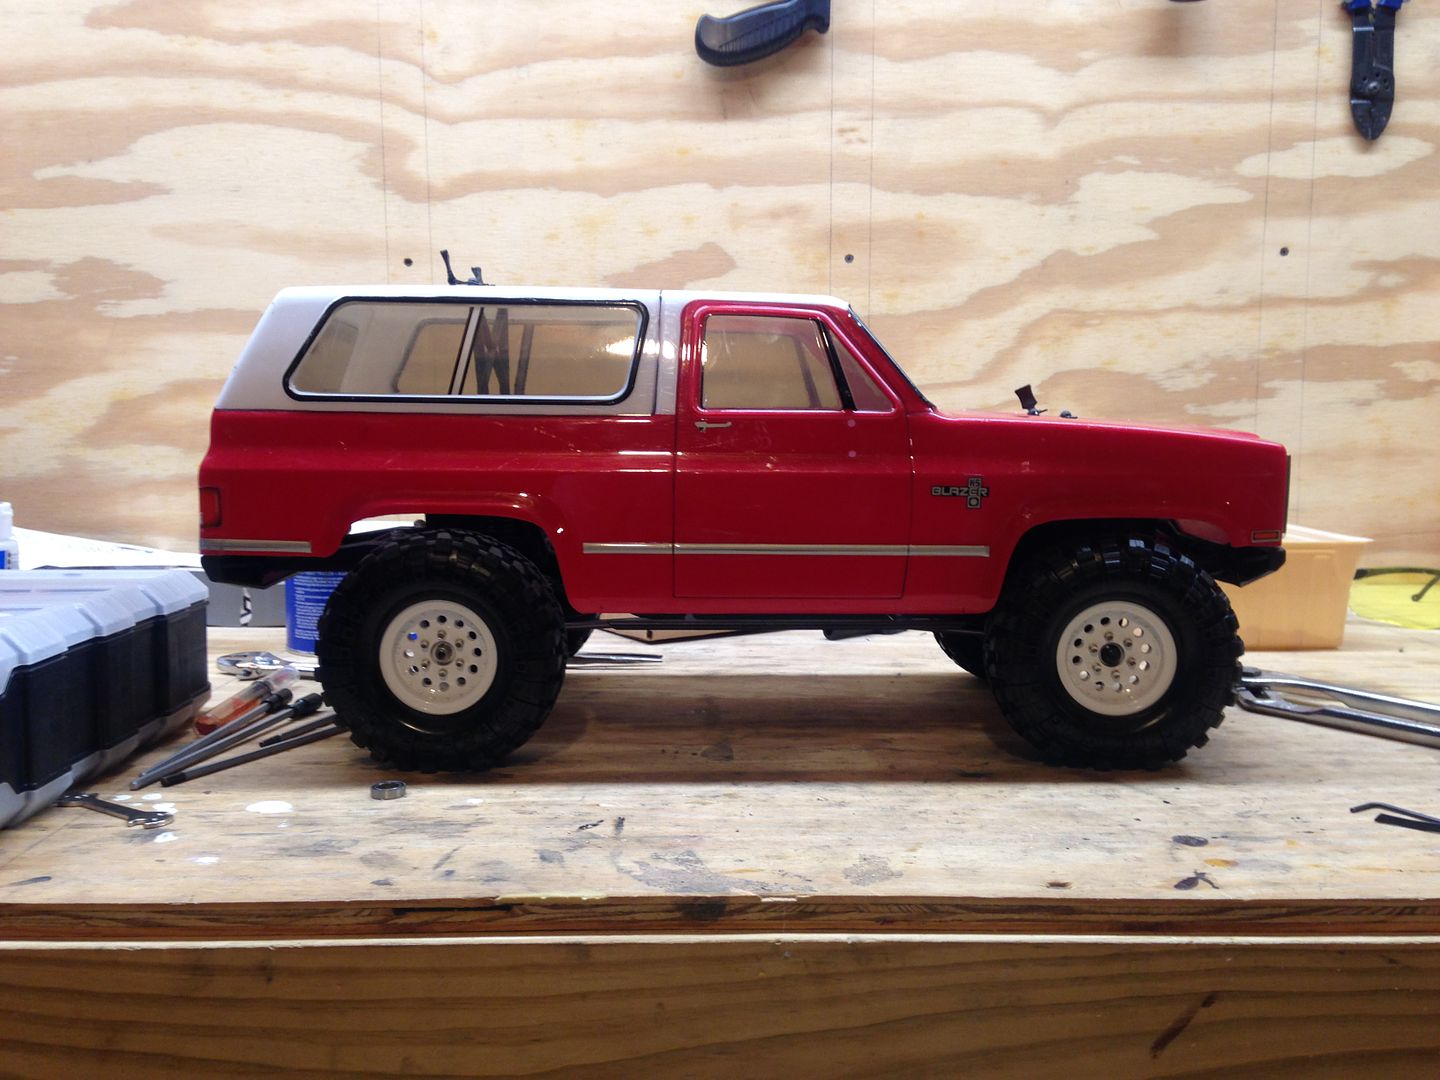 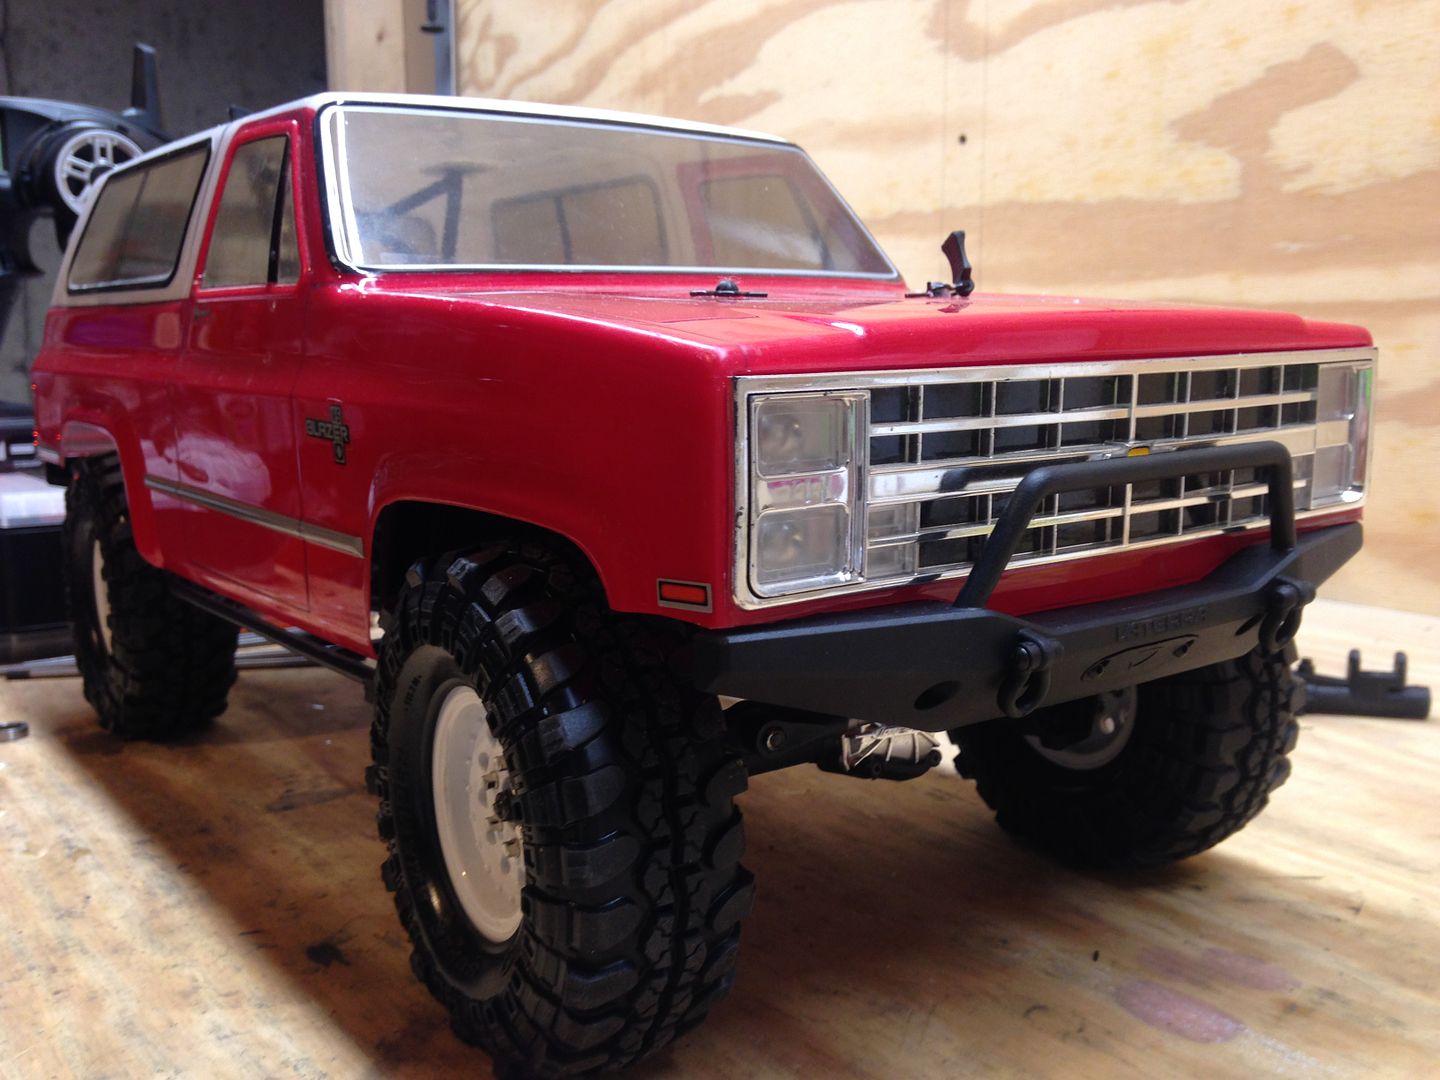 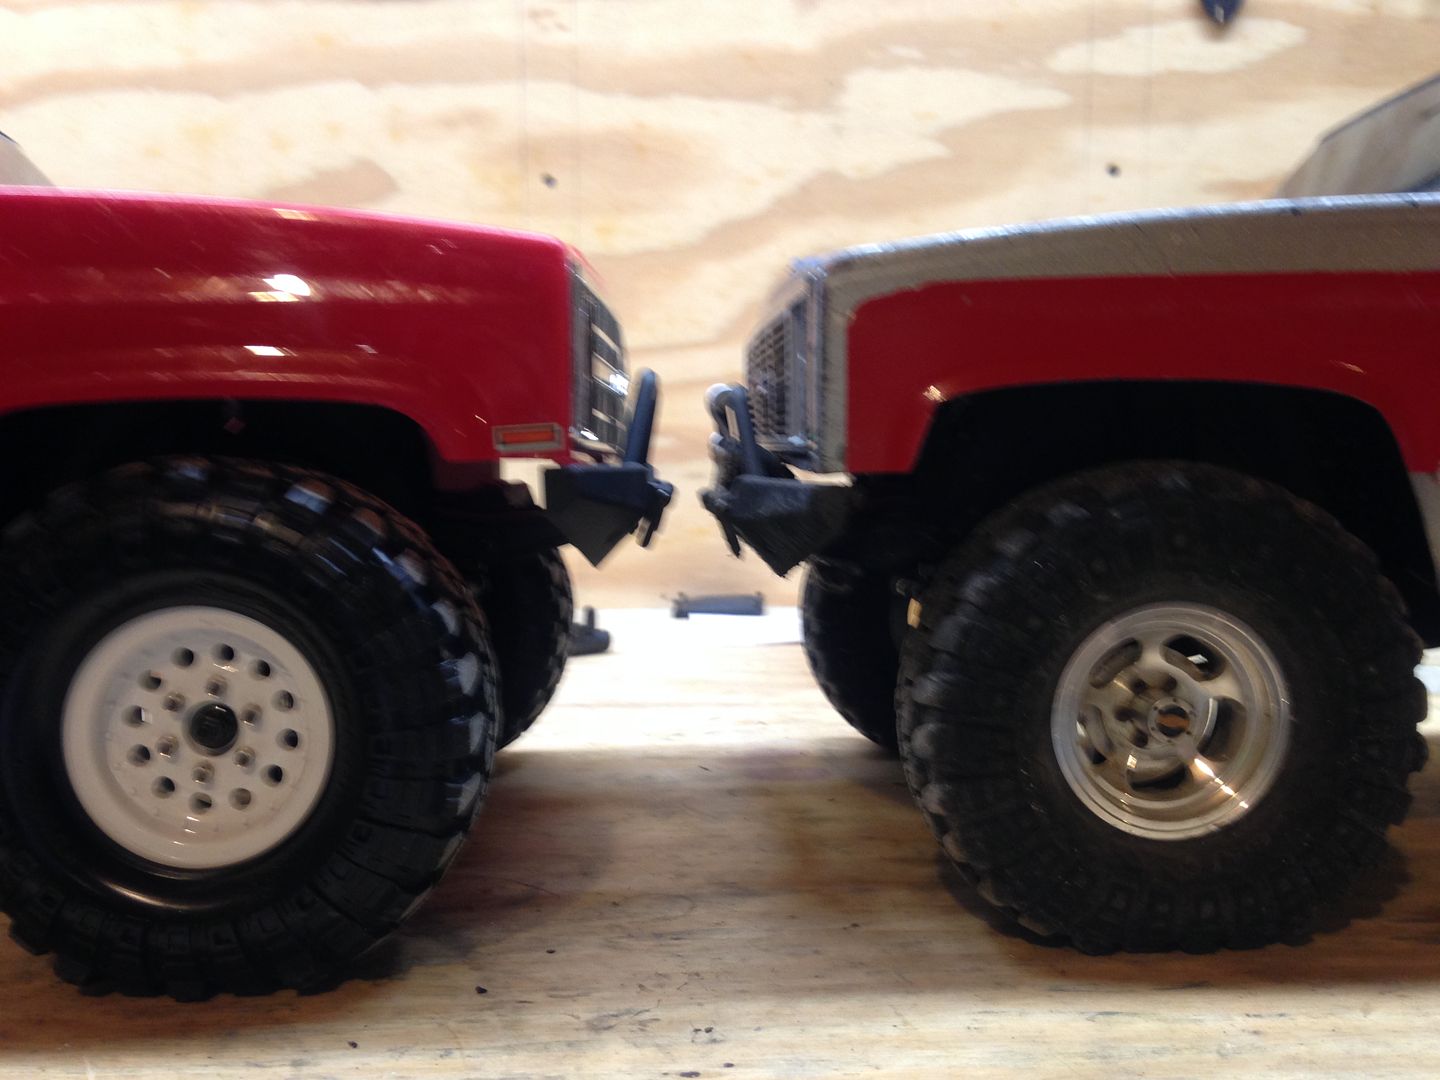 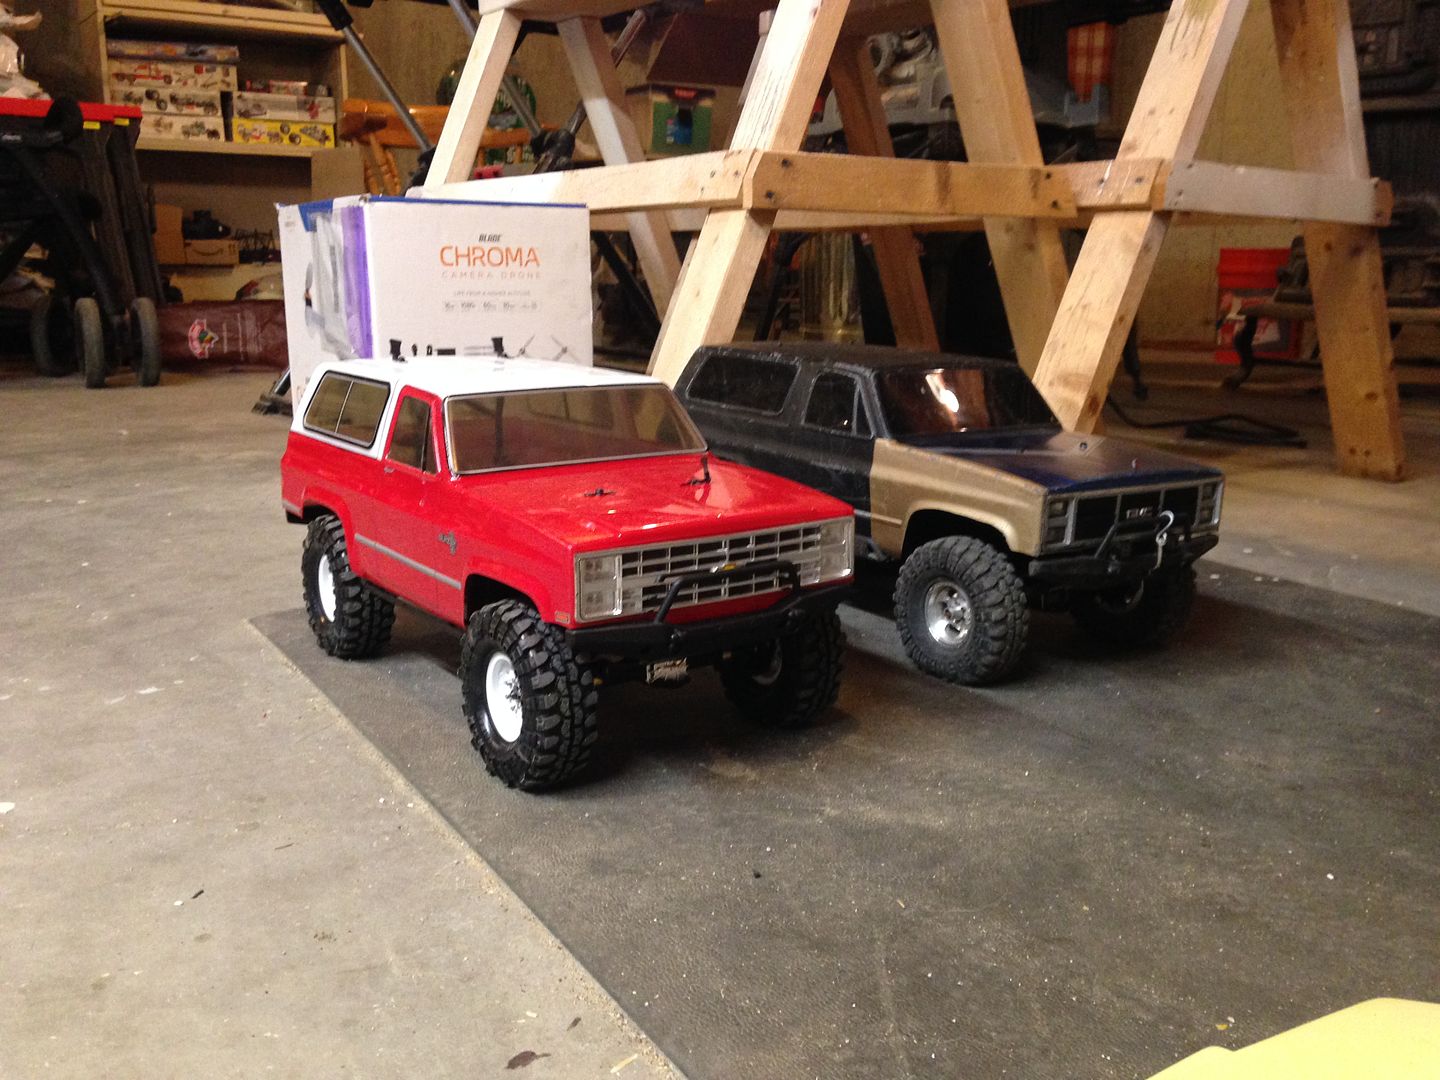 Also I tried to get a good picture of the difference between the stock vaterra cv's and the GPM cv's. The GPM's are in the foreground and have just slightly less travel than the vaterras. They have a bigger pin and ball so that's why. I had to turn my travel down a few clicks on my controller to keep my servo happy at full throw so I know it was a few degrees less. 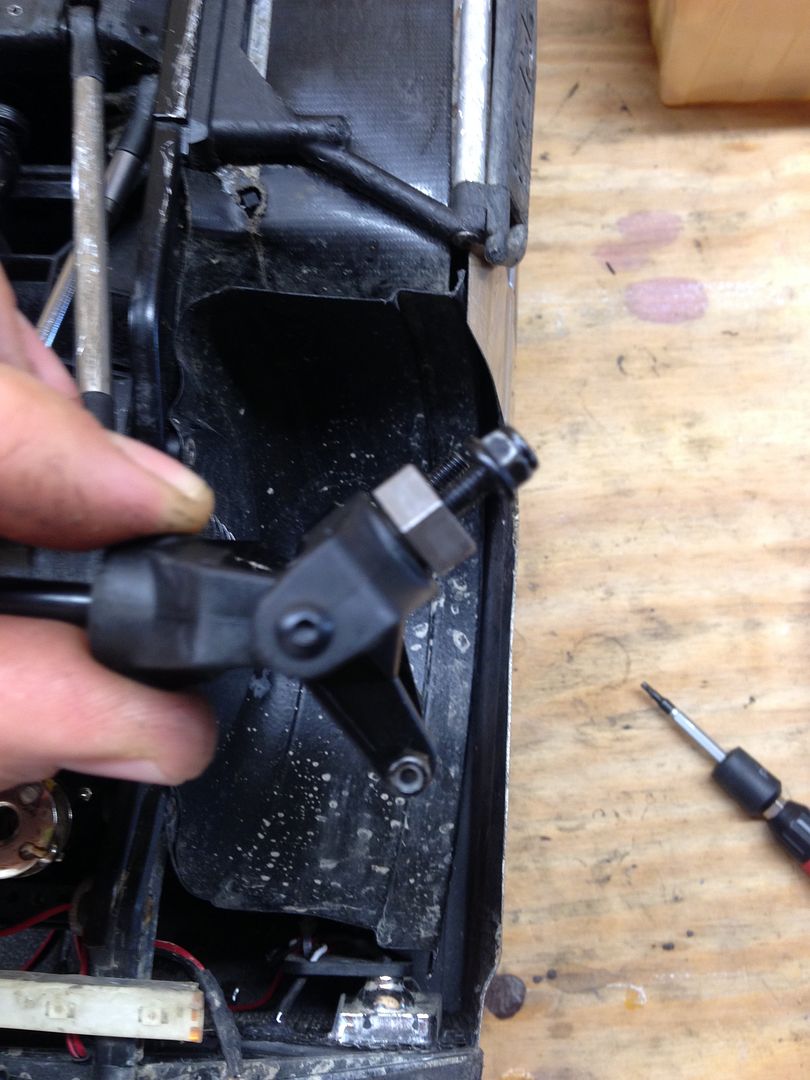 Now I've still got to wire up my super cheap BEC's once they get here from China, going to do LED's for the body and bumpers, and going to make one of my custom GMC grills like my other truck has. Along with body detailing, painting, mirrors, window tint, black inside paint. Then she'll be ready for the rocks. I'm thinking the next time I go to reid state park where my last set of pictures are from, I'm going to bring both trucks and two controllers and run them through the same lines and see how they do. That'll be a lot of fun for sure. | |
| |  |
| | #164 |
| I wanna be Dave  Join Date: Apr 2010 Location: Oakridge
Posts: 3,305
|
Hey Ben I sent you a PM with a little drill press info and to get a contact # from you.  Ernie |
| |  |
| | #165 |
| I wanna be Dave Join Date: Jan 2006 Location: Corruptifornia
Posts: 12,107
|
Ben, Looking going. Fluted reamer wouldn't pull itself through the axle, not sure how easy it would be to do the housing with it though. Maybe go in steps, bu reamers not cheap. When I did my panhard shorter like that, steering was not good through full range of suspension movement, so I put it back and just ignore slight off center axle. Tried to compensate but ran out of room under there really quick. |
| |  |
| | #166 | |
| Pebble Pounder Join Date: Oct 2015 Location: Atkinson, ME
Posts: 188
| Quote:
 I can't believe that all the times that the little lady and I have made so many trips down state to run and we haven't crawled with you yet. And, for sure Ernie, if you are up here in Maine, we will HAVE to have a crawl. Would love to meet everyone and see these trucks in person. I can't believe that all the times that the little lady and I have made so many trips down state to run and we haven't crawled with you yet. And, for sure Ernie, if you are up here in Maine, we will HAVE to have a crawl. Would love to meet everyone and see these trucks in person.
| |
| |  |
| | #167 | |
| I wanna be Dave  Join Date: Apr 2010 Location: Oakridge
Posts: 3,305
| Quote:
maybe we can get together, and thanks for the nice words!  Ernie Last edited by CODYBOY; 09-12-2016 at 12:46 PM. | |
| |  |
| | #168 |
| RCC Addict Join Date: Sep 2015 Location: Southern Maine
Posts: 1,024
|
Got #2 out today for the first time for a quick little test run. I am happy with it! It really handles very nicely with all of the mods I've done. Seems very balanced and predictable. The tires need breaking in like they all do when new but pulled a very impressive line on my rock pile at home. I'll explain whats going on in each picture... 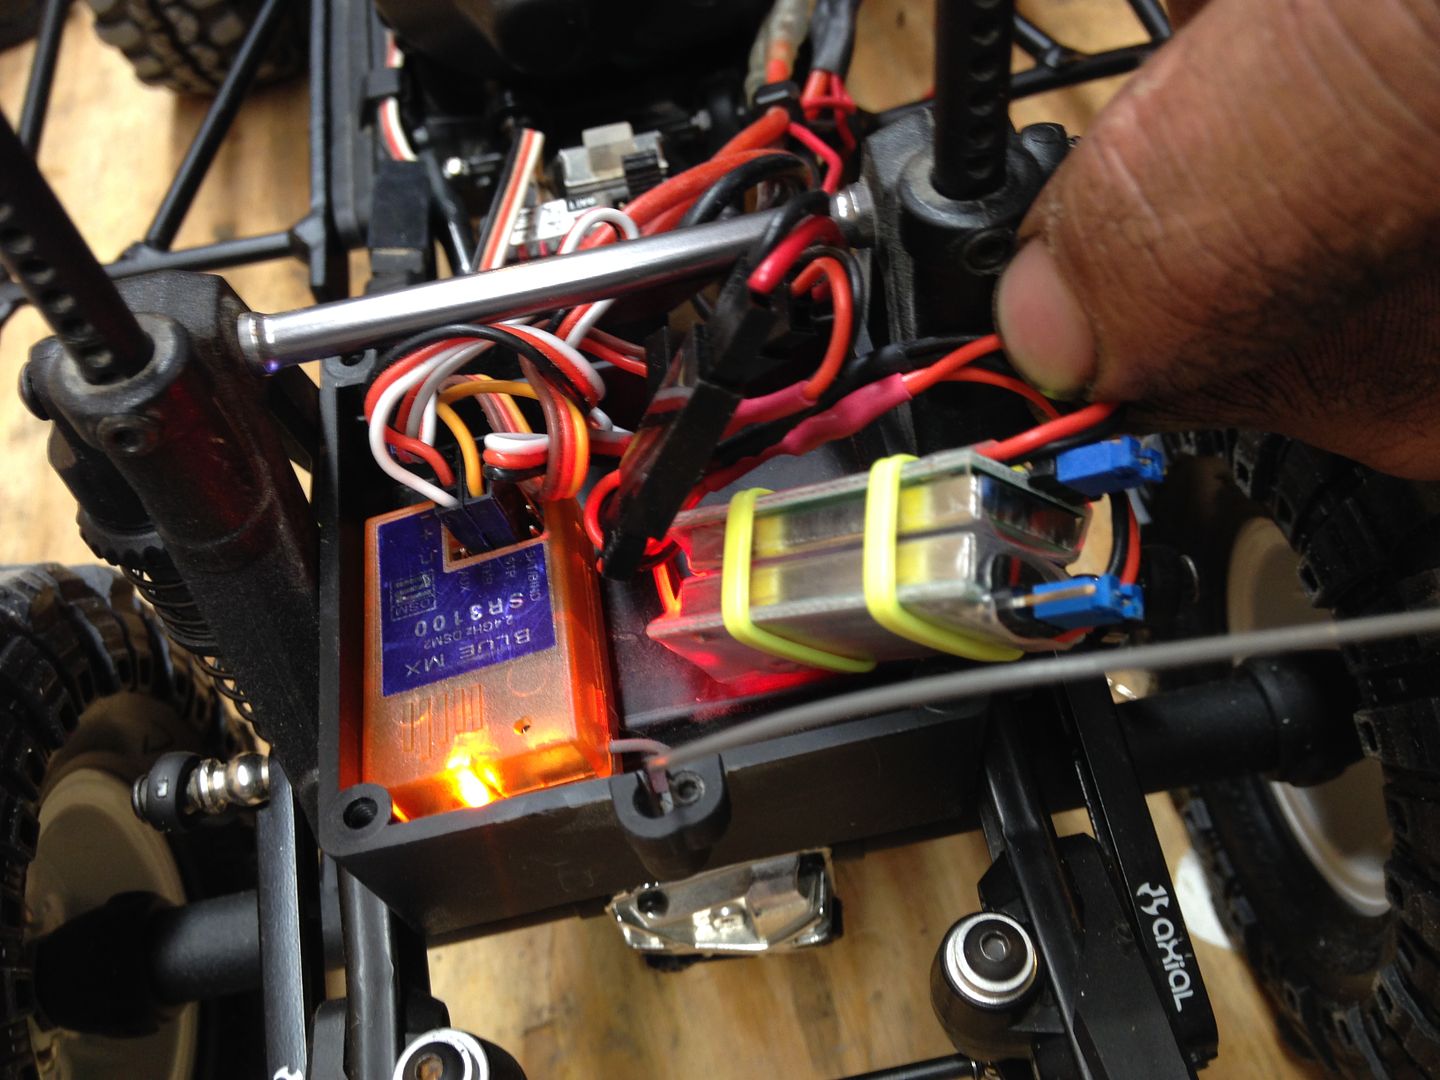 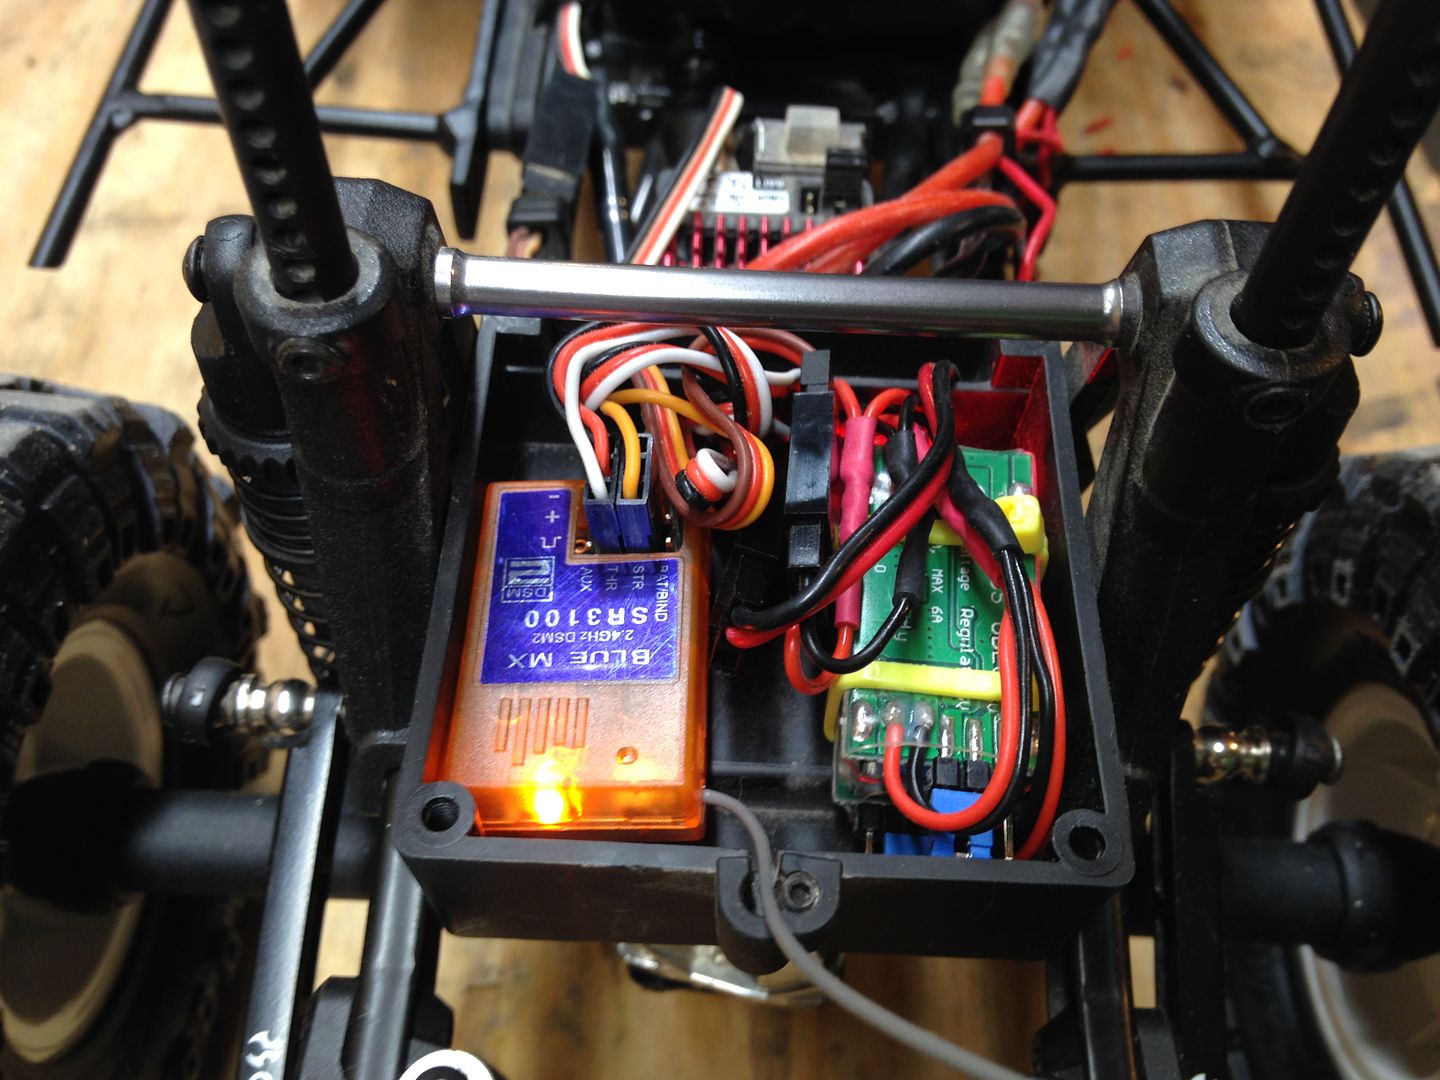 Here's a picture of the hobbywing BEC's I bought super cheap. They're $2.50 each from china, rated at 3amps continuous and 6amps burst. I didn't think that was enough so I bought two, ran them in parallel so now I should get 6amps continuous and 12amps burst if needed. I bound the steering up a few times on purpose to see if they would cut out or anything and they didn't. I did notice that they gave the stock servo a little more power at 6volts than just off the receiver. I do miss my hitec though. lol You can also see my Blue MX receiver, I got it off amazon for like $10, it's supposedly just a spektrum in a different case. Works great with my spektrum radios and loved the price. 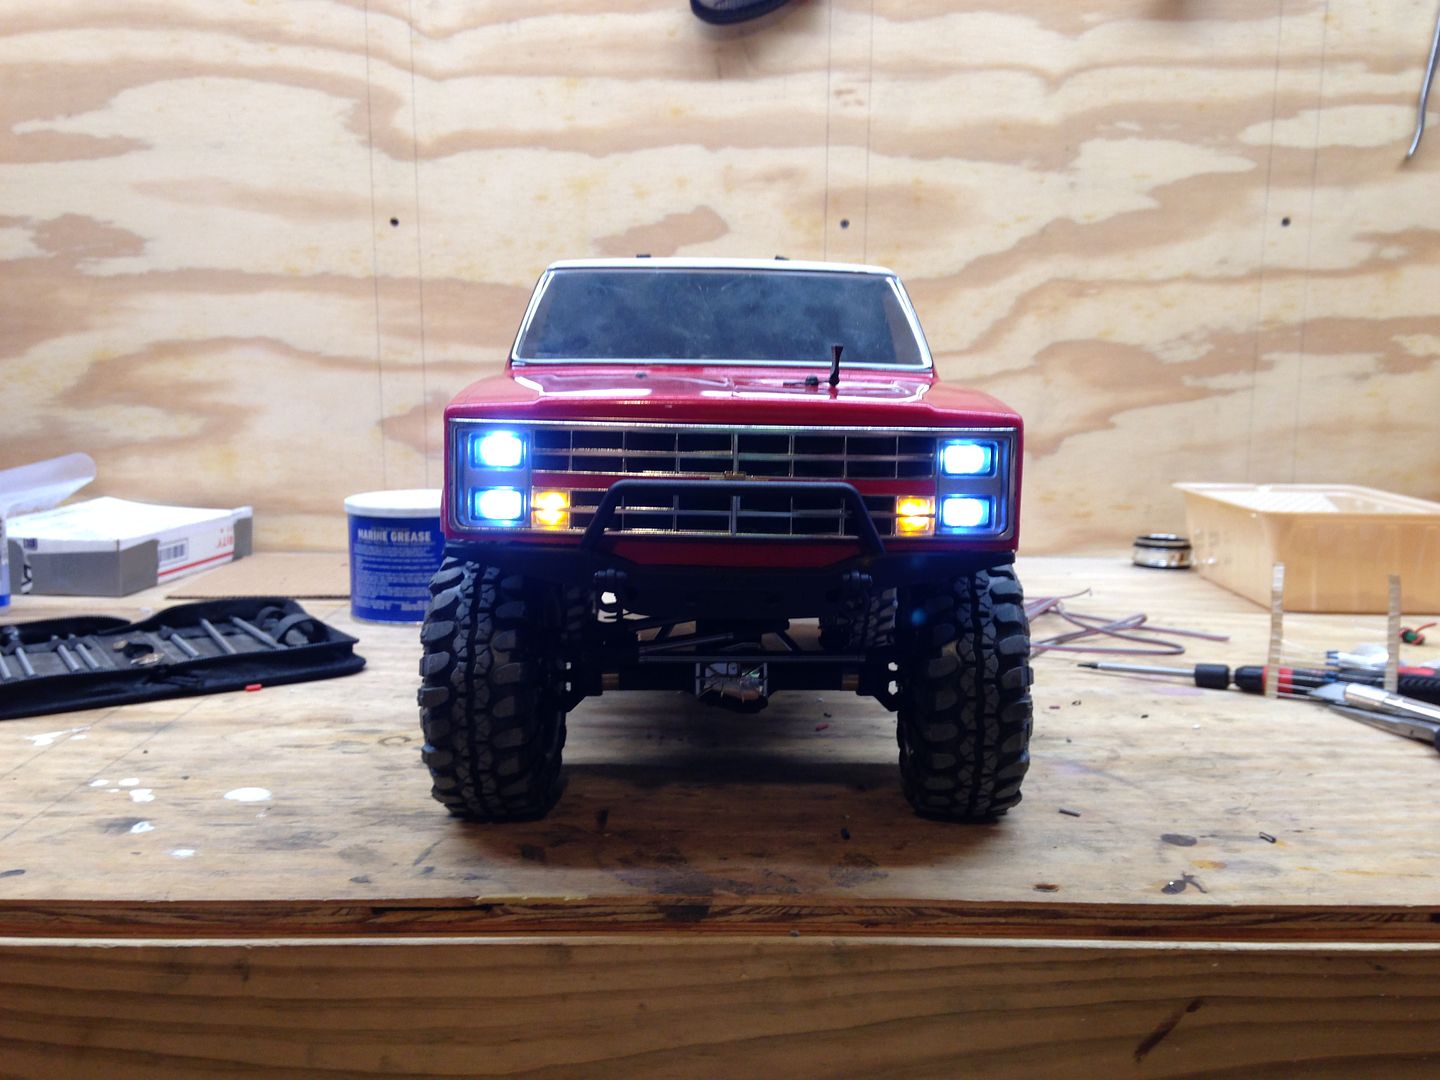 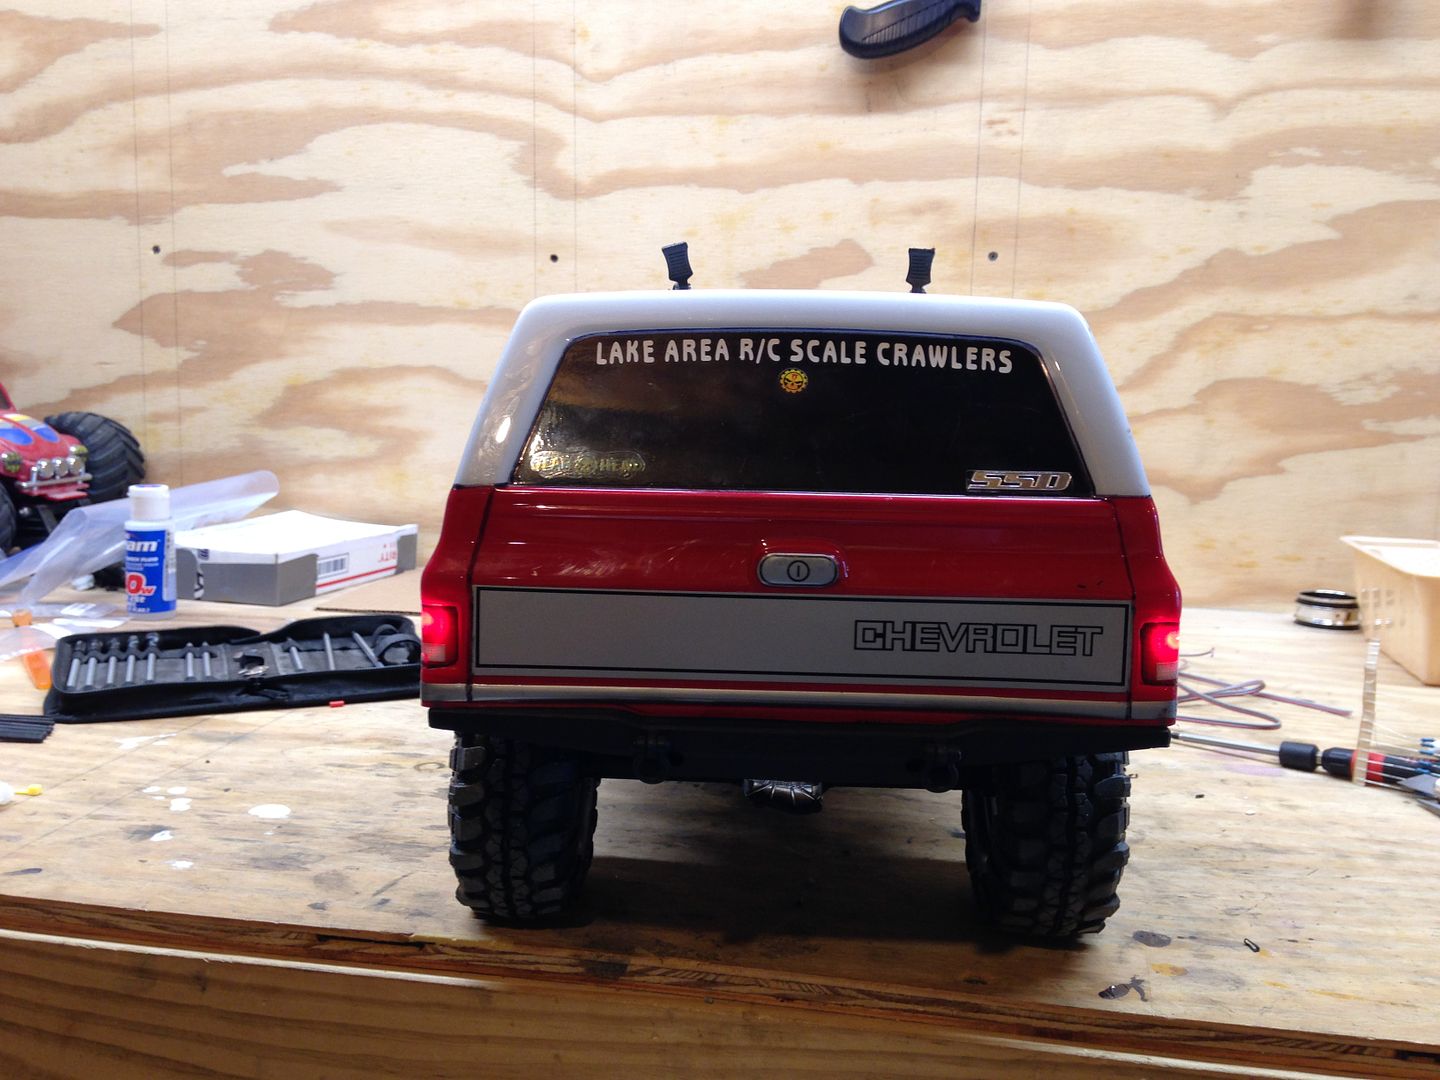 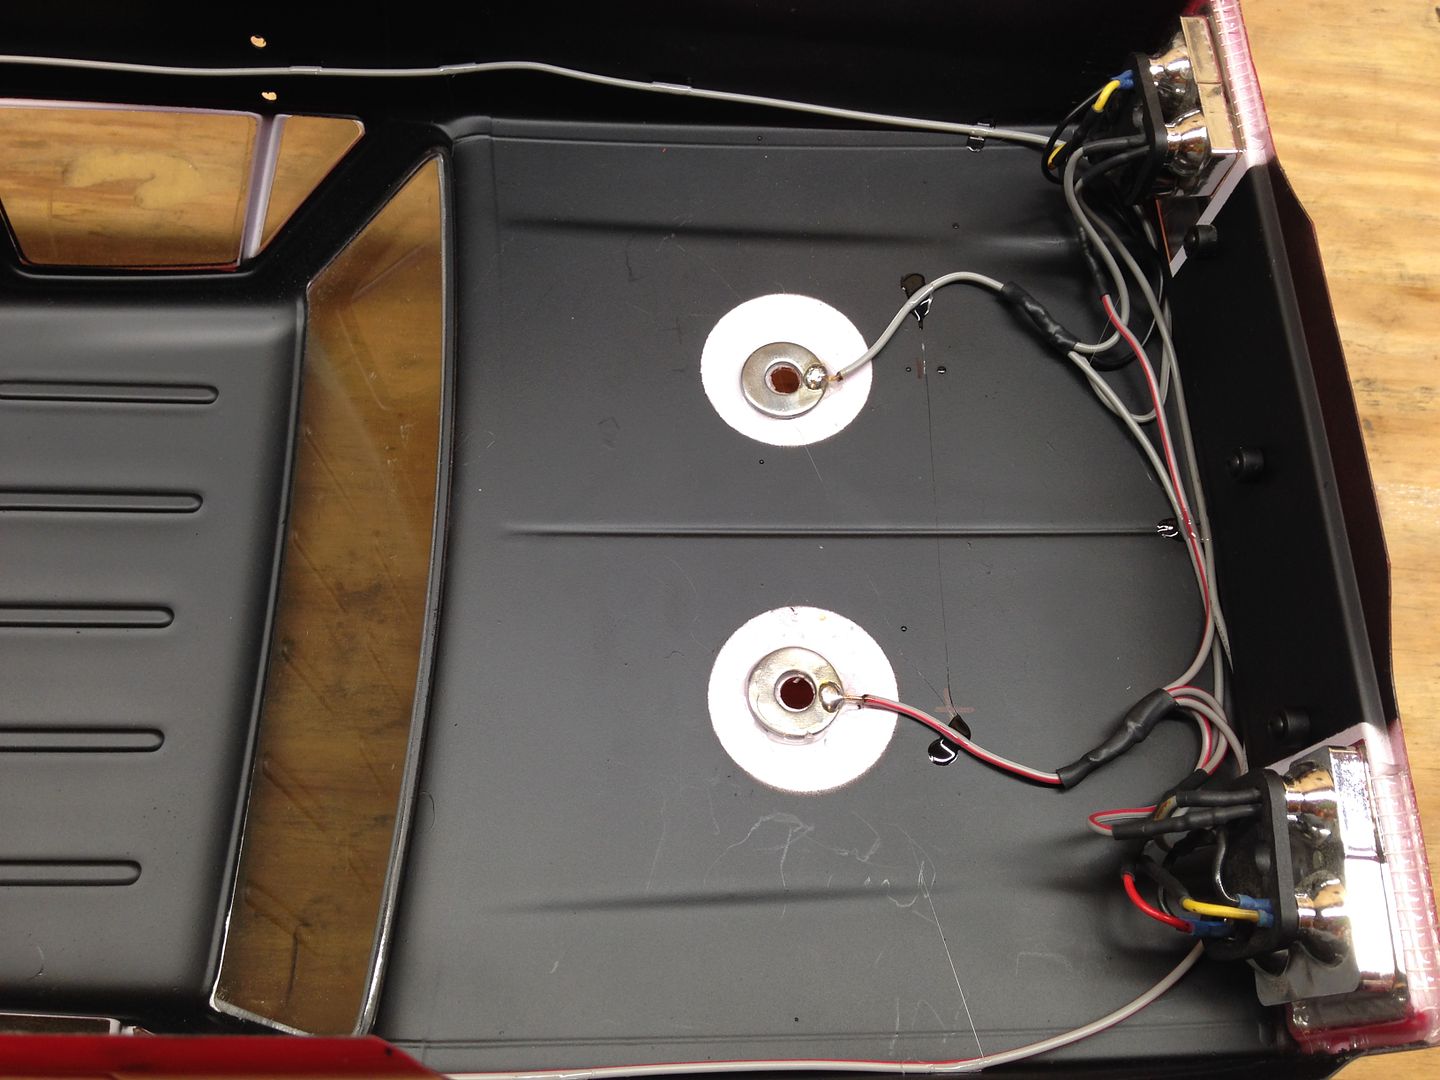 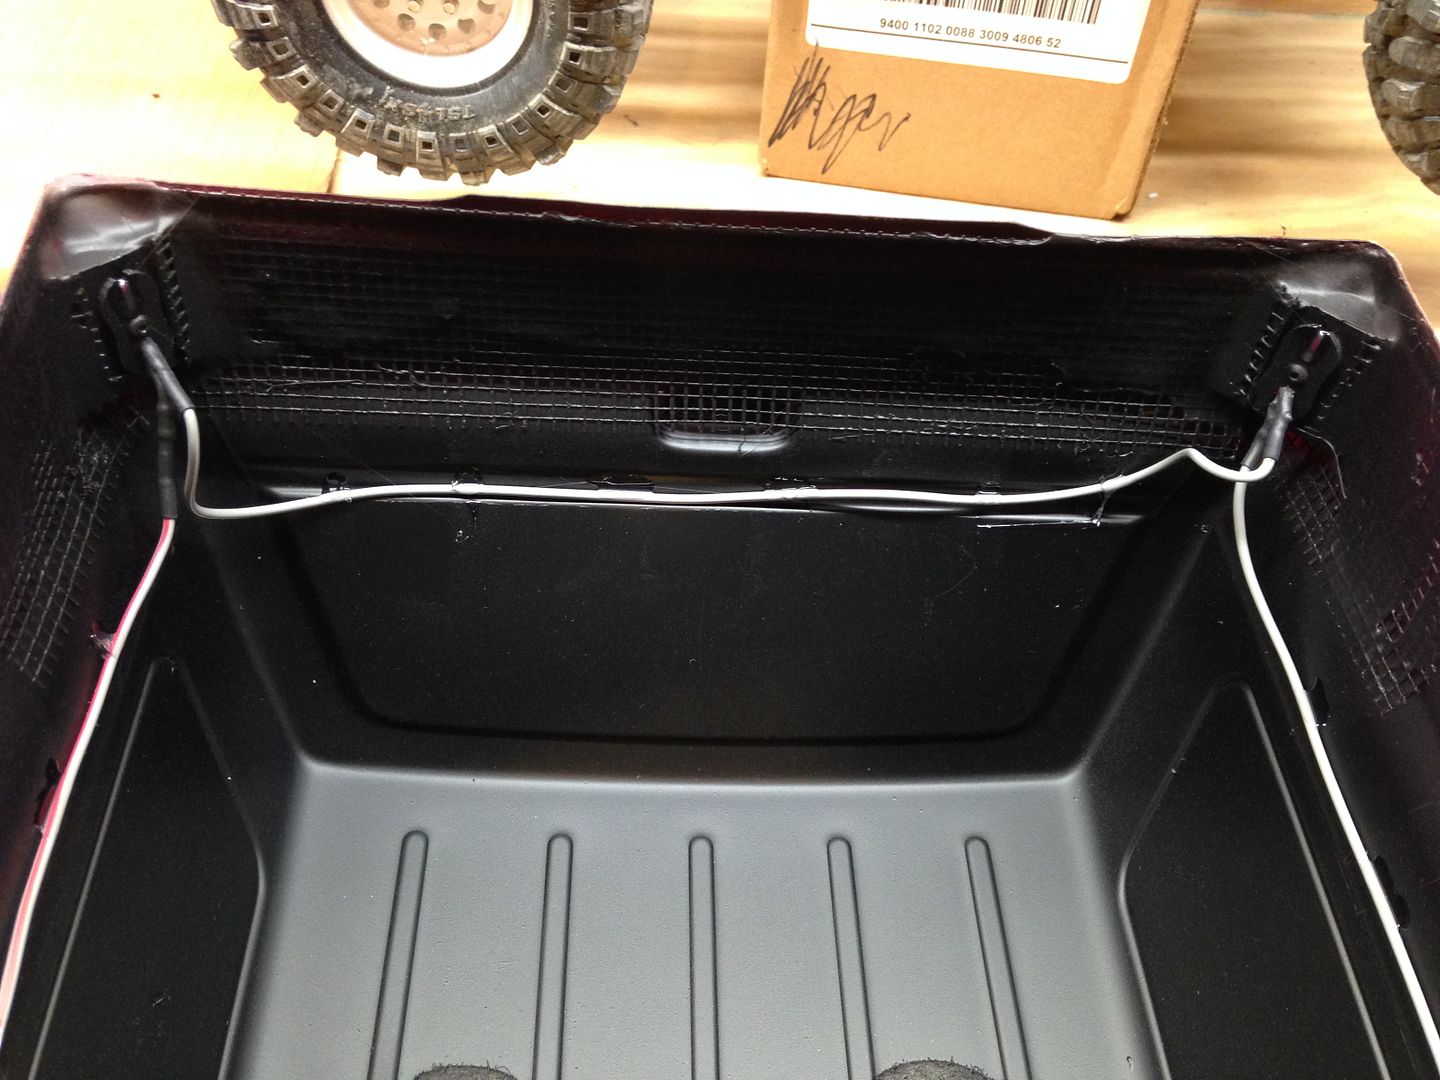 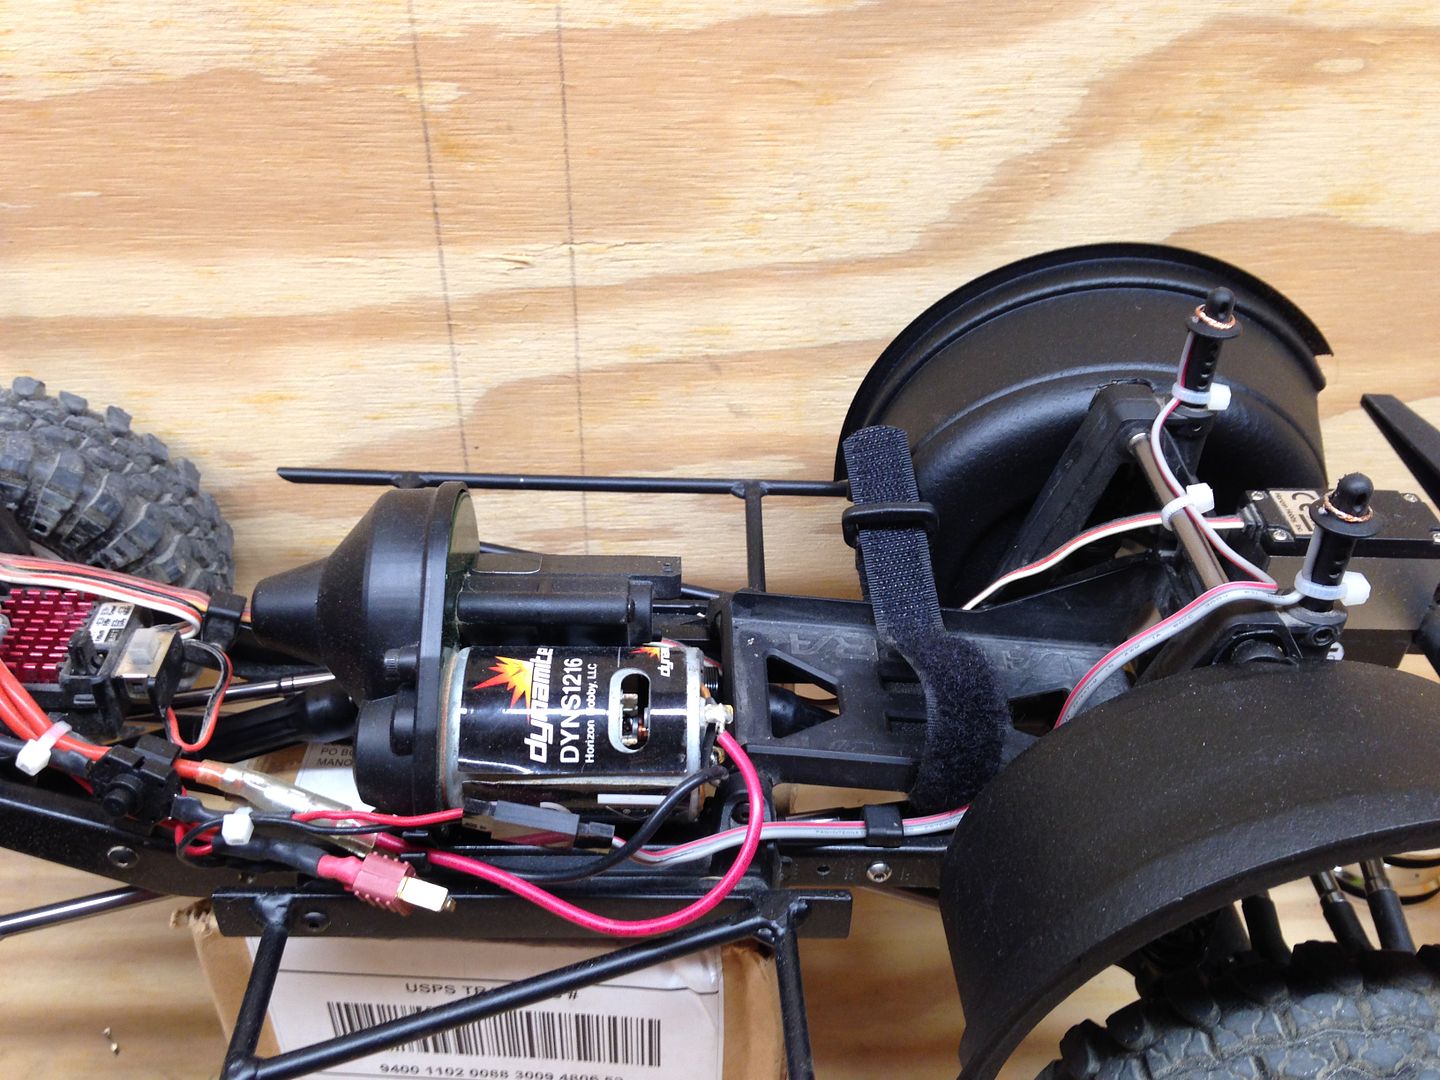 Lights installed. Went super cheap and got bare LED's so I had to solder in resistors and wire leads. Pain in the drain for sure, but cheap and look good I think. Also, I was sick of having to connect and disconnect a wire lead from the chassis to body every time I wanted to take the body off, so I made leads to wrap around the front body posts and took 1/4" flat washers, E6000'd them to the body and that's how I get the juice to the lights. Works great so far, just have to make sure the washer is thick enough to make it a tight fit when the body pins are in to keep the lights from going full disco. I went with a set of dinky rc tail light buckets because I had them laying around but mainly because when installed, they really stiffen up the rear of the body and with the added drywall tape and shoe glue, it really gave the rear body some support I think it'll need since the rear bumper is tucked in so tight, it'll get some abuse from the rocks for sure. 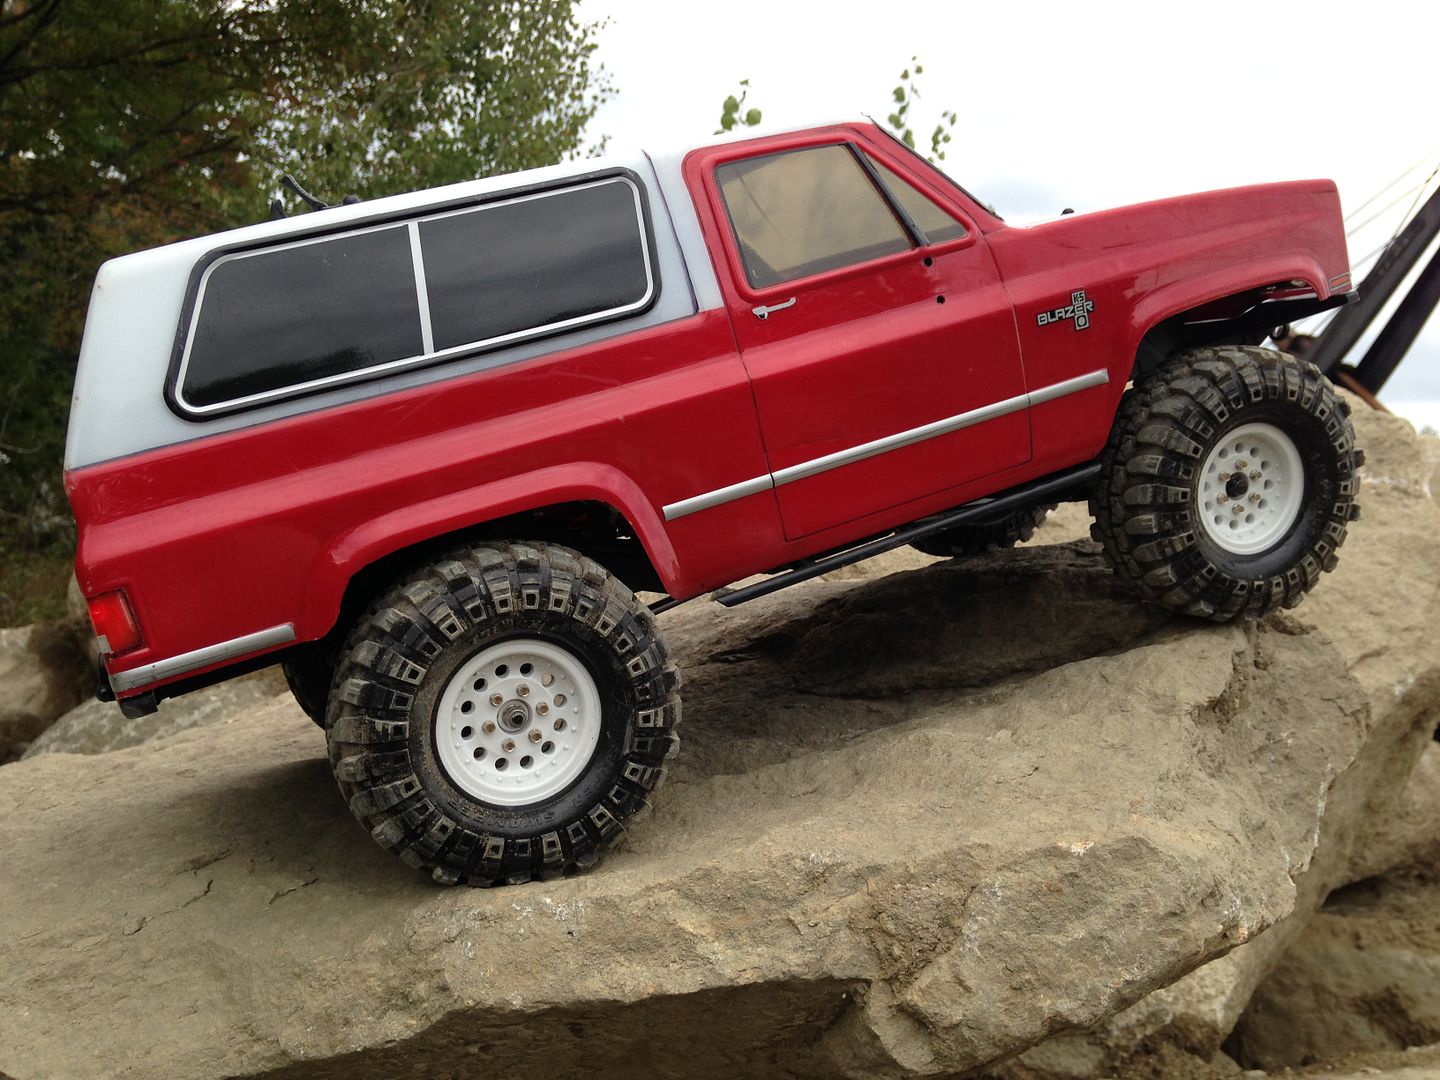 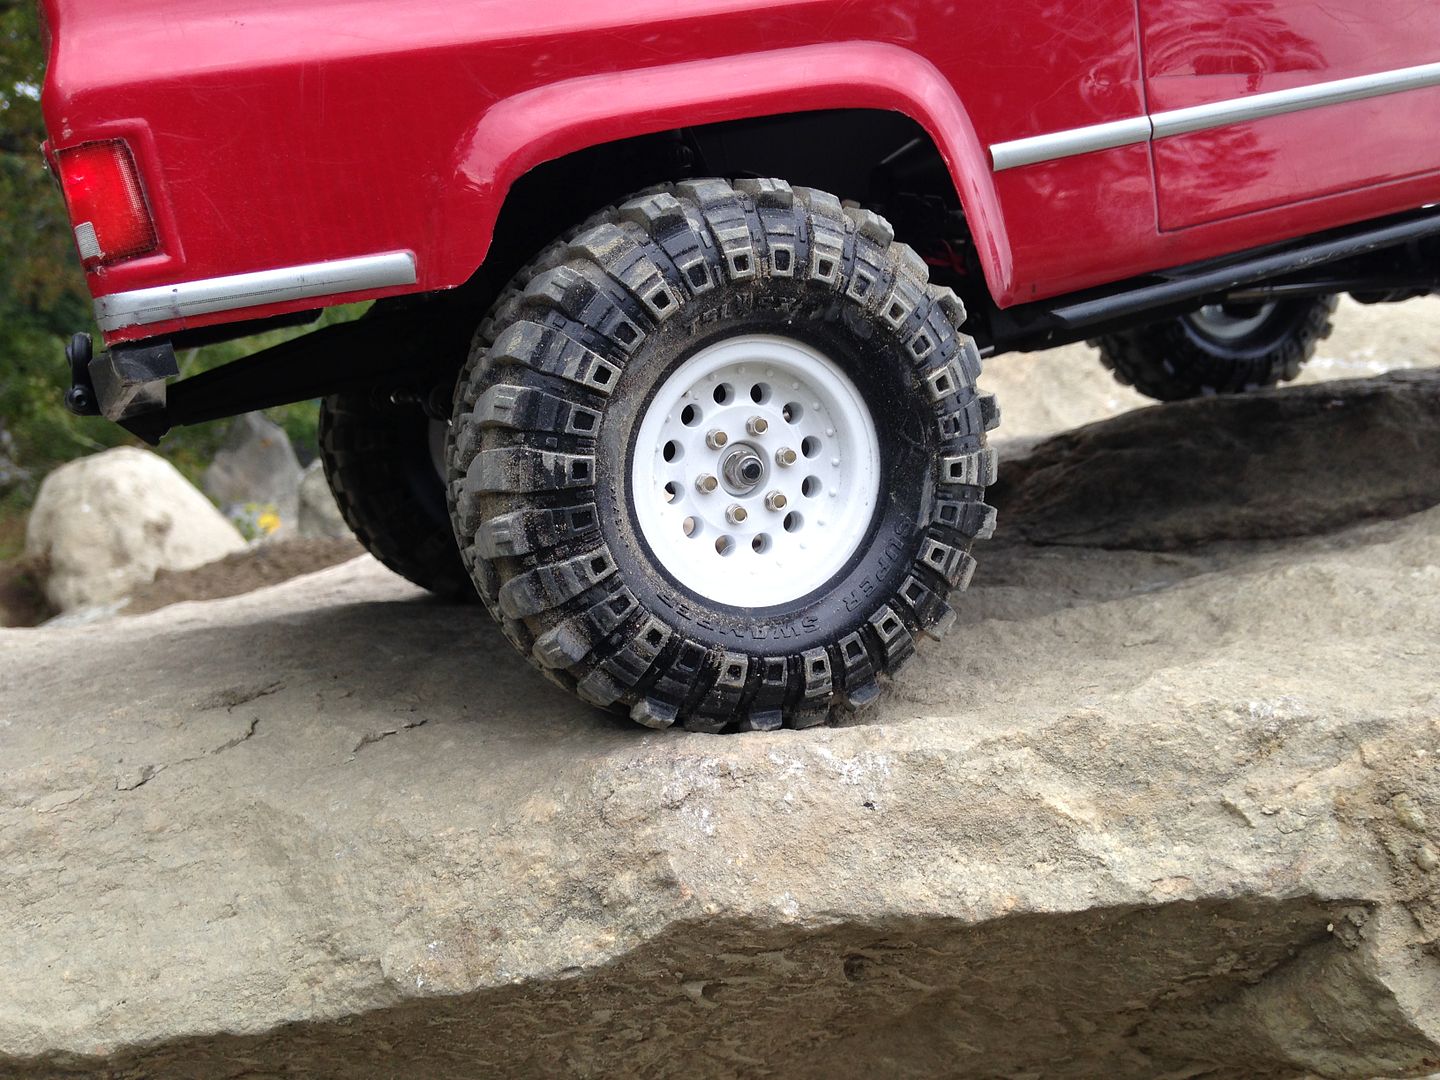 Here the truck is in a fairly steep incline and tilted to the passenger side quite a bit too. I wanted to show the tires and how my custom foams are doing. I'm pretty happy with them, especially since I just wung it and went at them with my scissors. They have very good side hilling stability and don't squat badly under weight. Here you can get a good view of the rear bumper and sliders. Which, those need talking about on their own. I gotta hand it to my man Natedog, that bumper cut mod is amazing! That and the serious tuck I went with on this truck make such a huge improvement, I couldn't believe it. WAY more angle is possible now without dragging those anchors around. You da man Nate!. 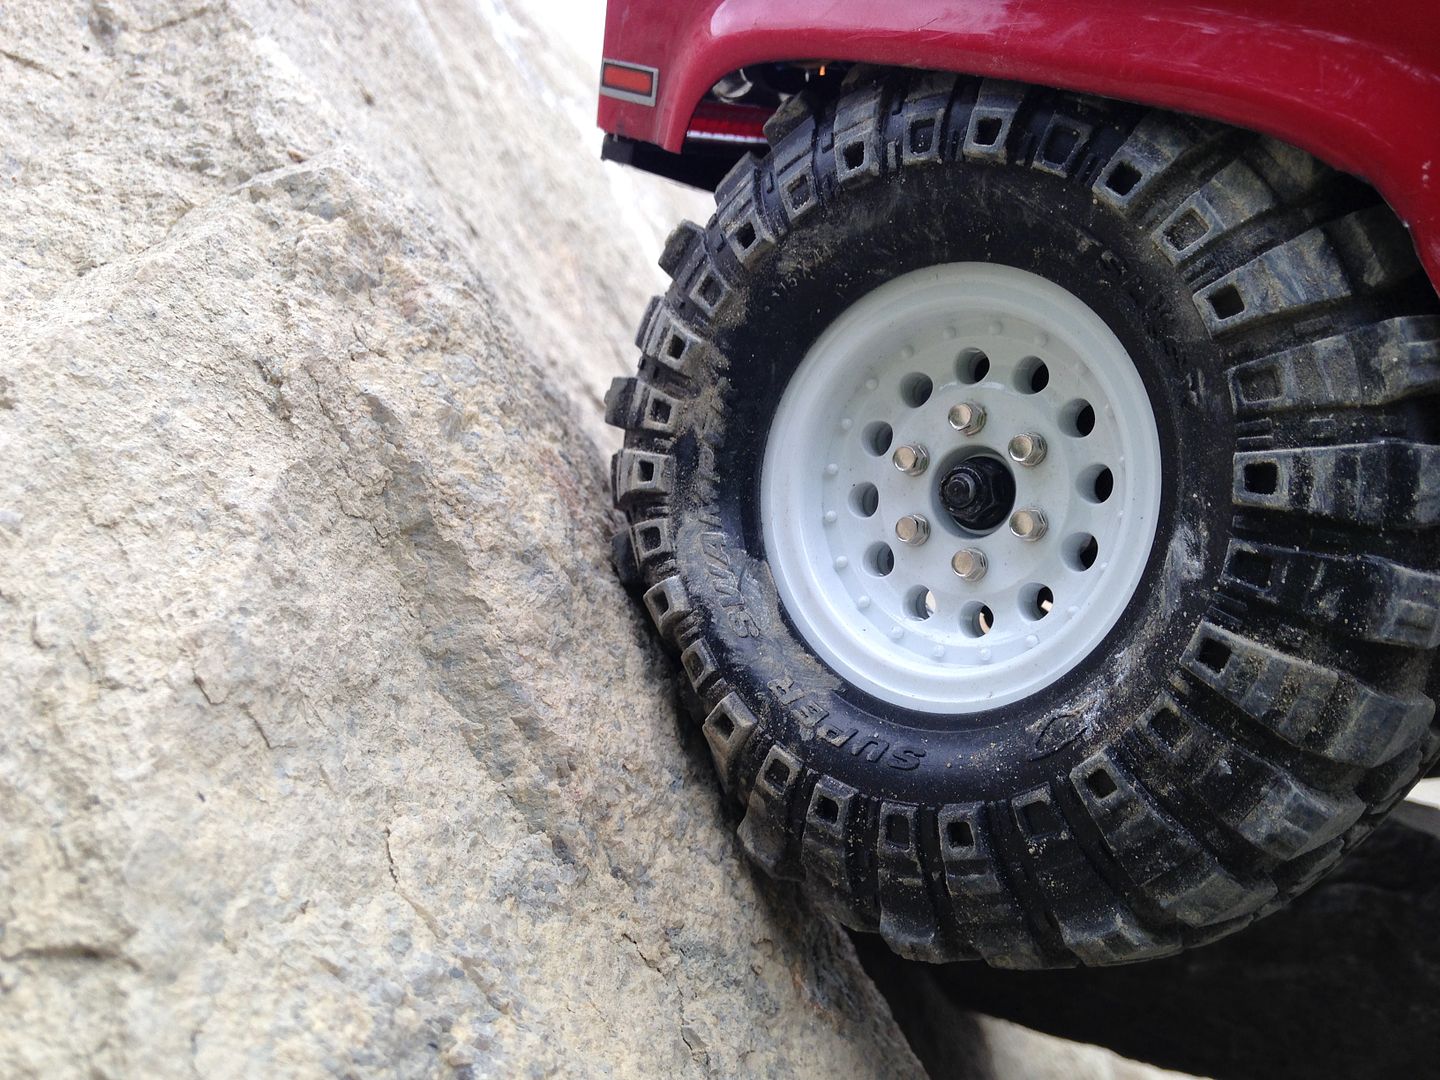 The tires do bit though when asked. This is driving right into that rock and that's as much as they squatted before going up the rock. I like my tires to flex. We'll see how much the foams break in and get softer or not over time. 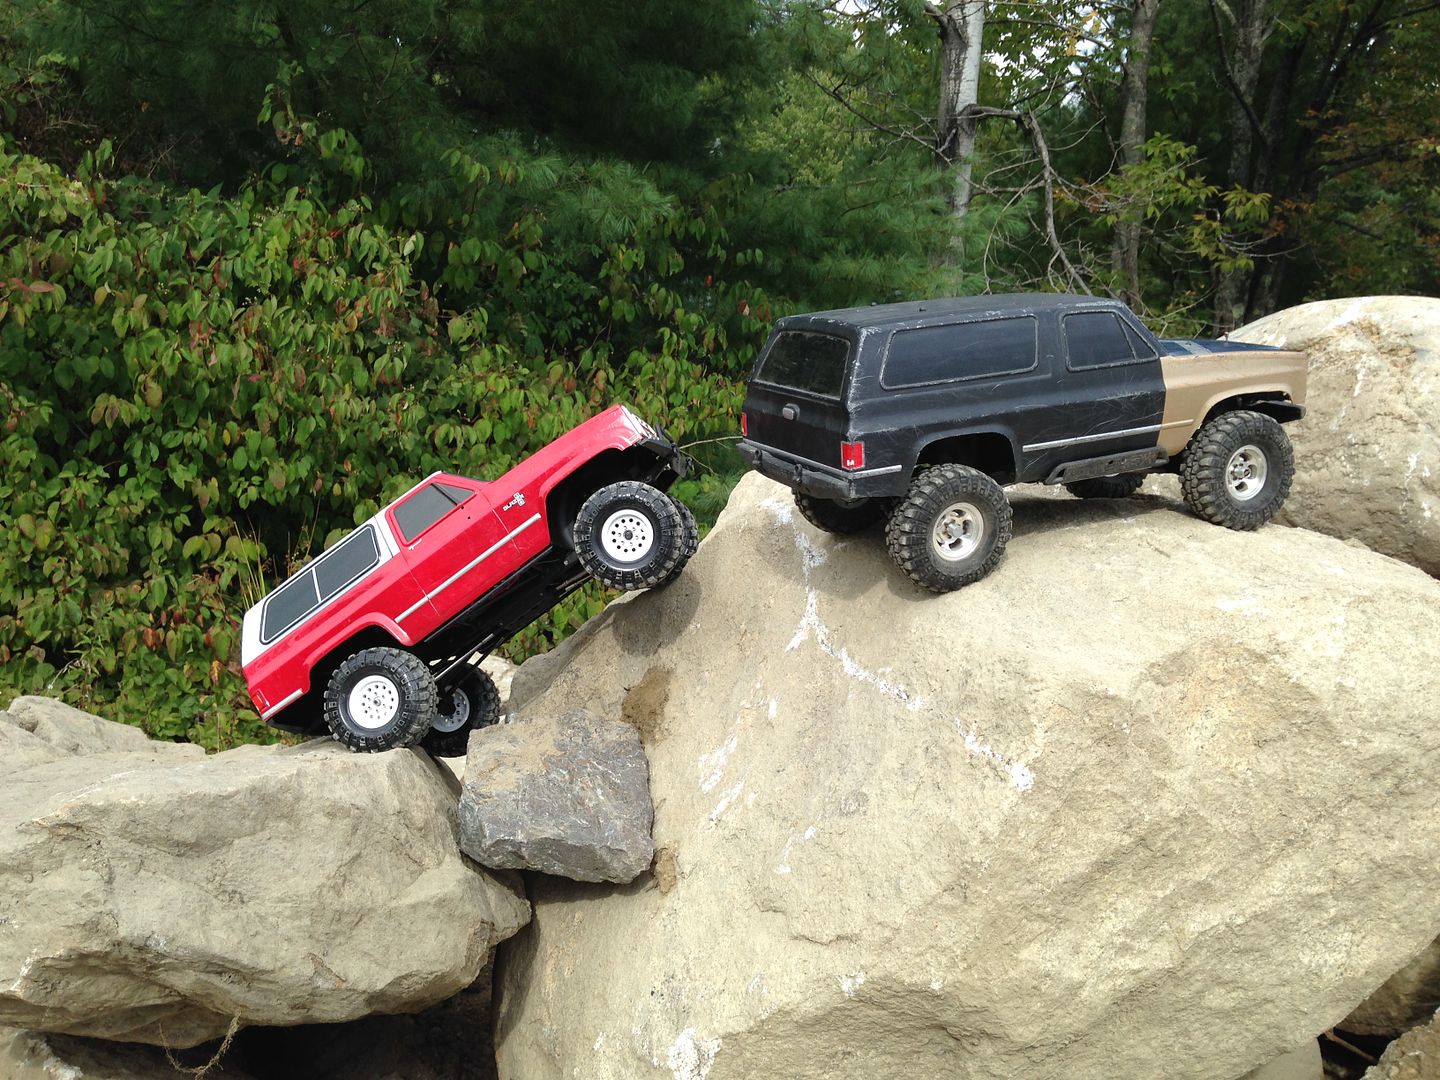 Had to get them both out for a shot. Here's a link to a short video of it on those rocks. Terrible one handed driving but it shows how stable it is and the tires doing work. Let me know what you guys think! Thanks. Ben https://youtu.be/7CW_LGNP32E |
| |  |
| | #169 |
| I wanna be Dave Join Date: Jan 2006 Location: Corruptifornia
Posts: 12,107
|
GCM slot mags looking good, but your new wheels and tires with scale hardware look great too, really fit the Blazer. Foam setup looks good, just watch the break-in don't get too soft. Did you Simple Green soak your new tires? Nice job on cheaper BEC, I'll have to see how those RX like my Spektrum DX4S. Lights are nice, you could use springs over front body posts instead of just bare wires, would help the discoball lighting if body is not tight. I need to do these on my K10, thinking lightbar for quick and dirty since I have comp coming soon and have to fab light buckets on this new body. I finally caved to your Blazer body and bumper setup and did a little more trimming on Blazer body #1. With the cut up stock bumpers and removed 5mm rear bumper spacers and replaced front 10mm spacers with them, it looks great and approach and departure angles are greatly improved. I really like the look too.  Nice vid, that thing is really stable and hooks up great! A little more weight down low in addition to your Codyboy style weighted axles such as his brake drums or Vaterra disk brake rotor weights would give the tires little more bite on steep climbs, but it already does very well. After watching your video, I might remove front bumper spacers and put the 5mm in rear bumper instead of the 10mm lol.   On your bumpers in these pictures, you have no rear bumper mount spacers and 5mm up front or? Last edited by Natedog; 09-19-2016 at 12:10 PM. |
| |  |
| | #170 |
| RCC Addict Join Date: Sep 2015 Location: Southern Maine
Posts: 1,024
|
Nate, I was too lazy to do the simple green. Going to let the rocks do the work for me lol! The bumpers have 2.5mm spacers front and rear. The rear mounts are not flipped though. I draw the line there, the bumper needs to be under the "chrome trim strip on the lower part of the tailgate to look OK to me. Now you flipped yours so even with the 5mm spacers, it may be a bit better than mine just because it's up higher. The receiver works great with my dx2e and dx4c so I don't see why it wouldn't work with your "e". I do notice the stock knuckles flex when turning since I'm used to the sad ones on #1. I've also got to short n up my drag link since shortening my pan hard to center the axle, the steering is off center and won't turn as good to the left because the drag link is hitting the tie for before full turn. I know you told me so but I'm going to fiddle with it. Really bothers me with the offset axle. That's all for now. Ben |
| |  |
| | #171 |
| RCC Addict Join Date: Sep 2015 Location: Southern Maine
Posts: 1,024
|
Got the steering sorted on #2 this morning. I was having problems not getting full throw to the left and really bad interference with the tie rod and drag link end on the pitman arm hitting while suspension was compressed. No surprise since my first truck does too but the was really bad. This is all because I removed 3mm from panhard bar to center axle under the body. This meant I had to set the sub trim to center steering. But them the drag link(servo horn) was at about 1 o'clock looking at the bottom of servo frum underneath to get the wheels straightened out. This caused me to loose complete turns to the left because the closer you get to 3o'clock, the less actual wheel turn you get because of how circles work. I was ending up with the pitman arm completely over the tie for trying to get full turn. So, I ended up taking 3mm out of the drag link and setting it up so wheels straight ahead, the pitman arm is centered under the servo looking up from underneath the servo. I'm using th stock Vaterra pitman arm too by the way. I was still getting pretty bad interference with the tie for so I tried one of my offset link ends, cut it to length and put it on the drivers side of three tie rod. This gave me just enough clearance for the tie for to just kiss the rear end cover at full right turn and just kiss the drag link end at full left turn. This only works out because I'm running the GPM cv's in the truck which have roughly 5 degrees less turning than the Vaterra ones. Which allows for everything to work out like it is. If I had the Vaterra cv's the tie rod would really hit the gear cover and drag link for sure. Here's some pictures to make sense of my nonsense. 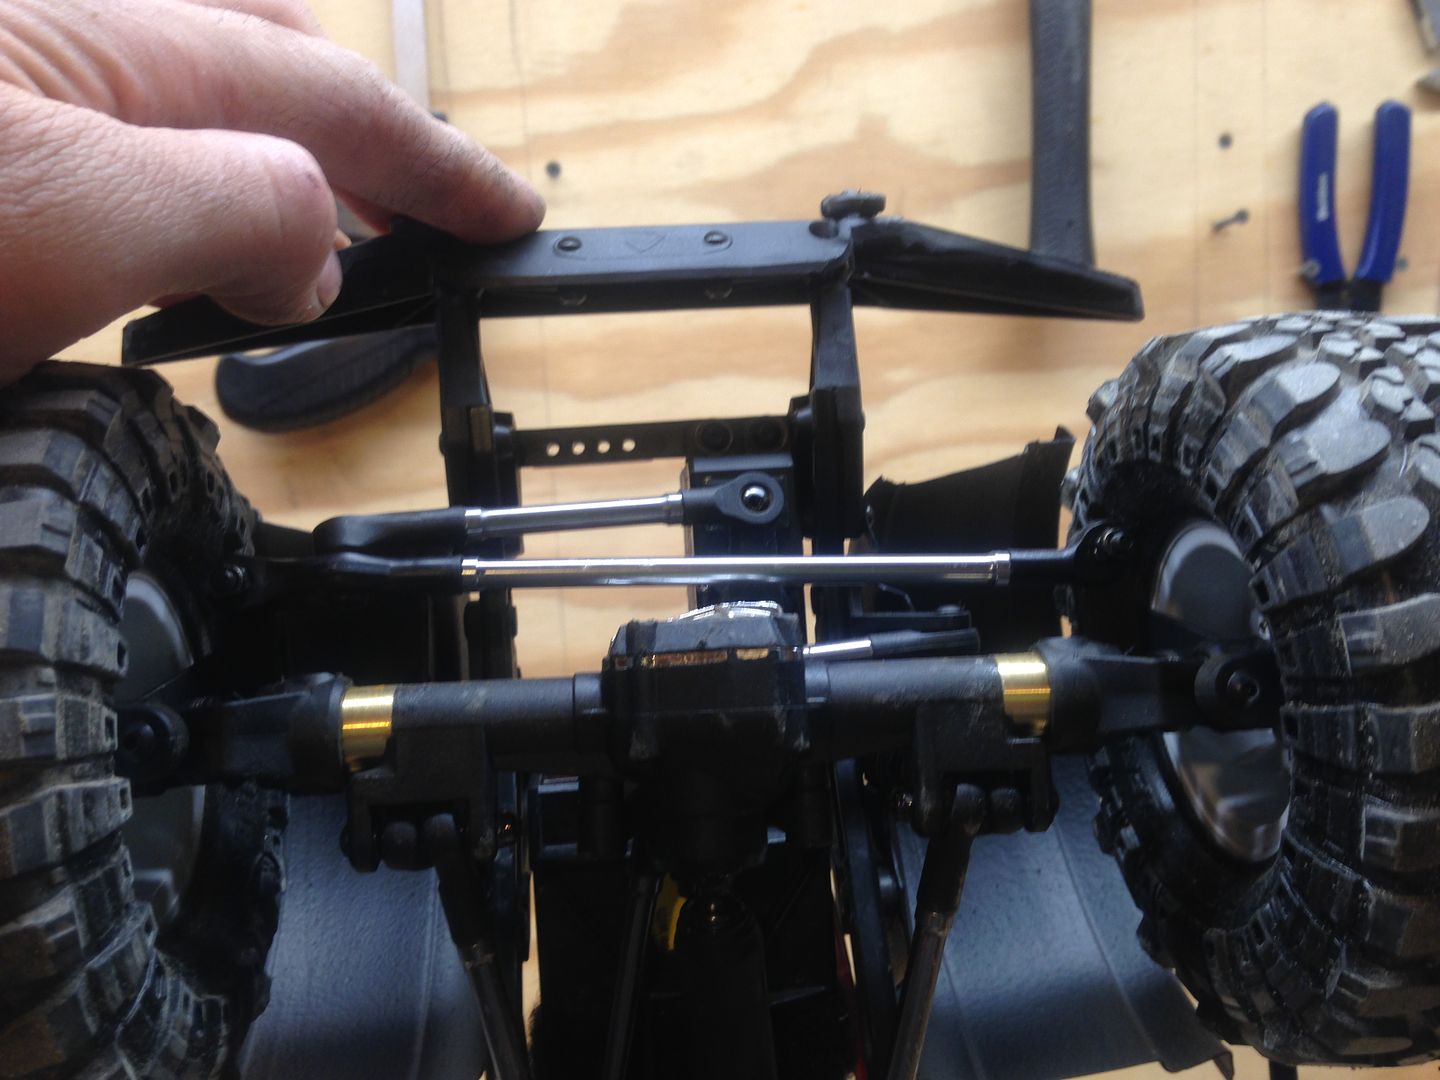 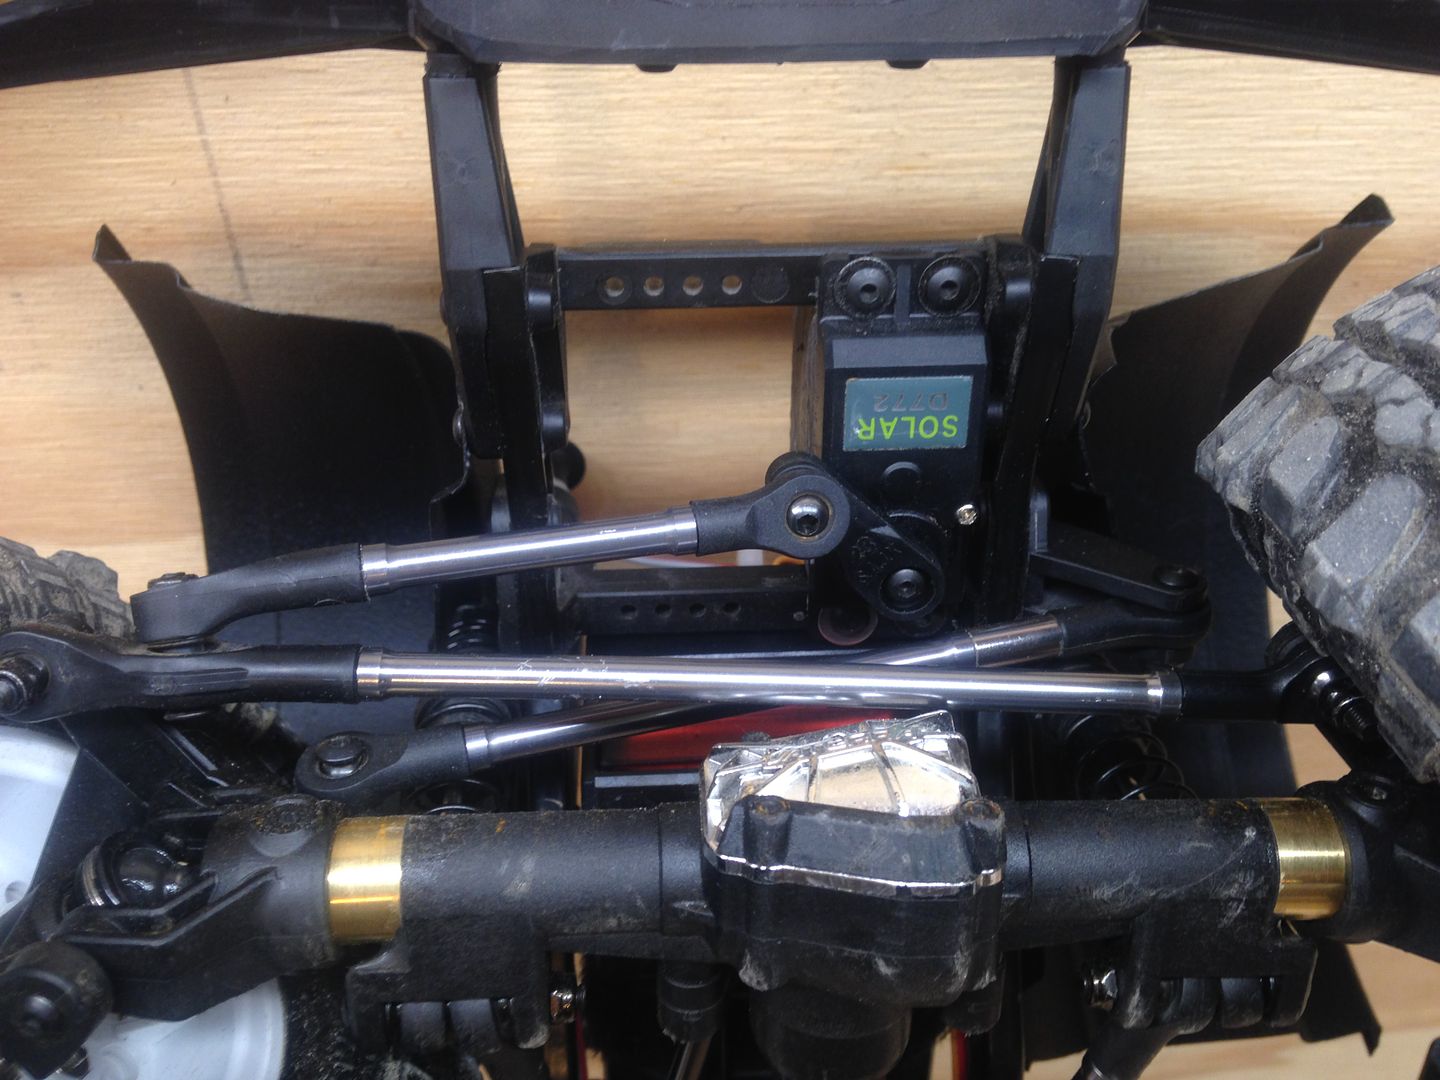 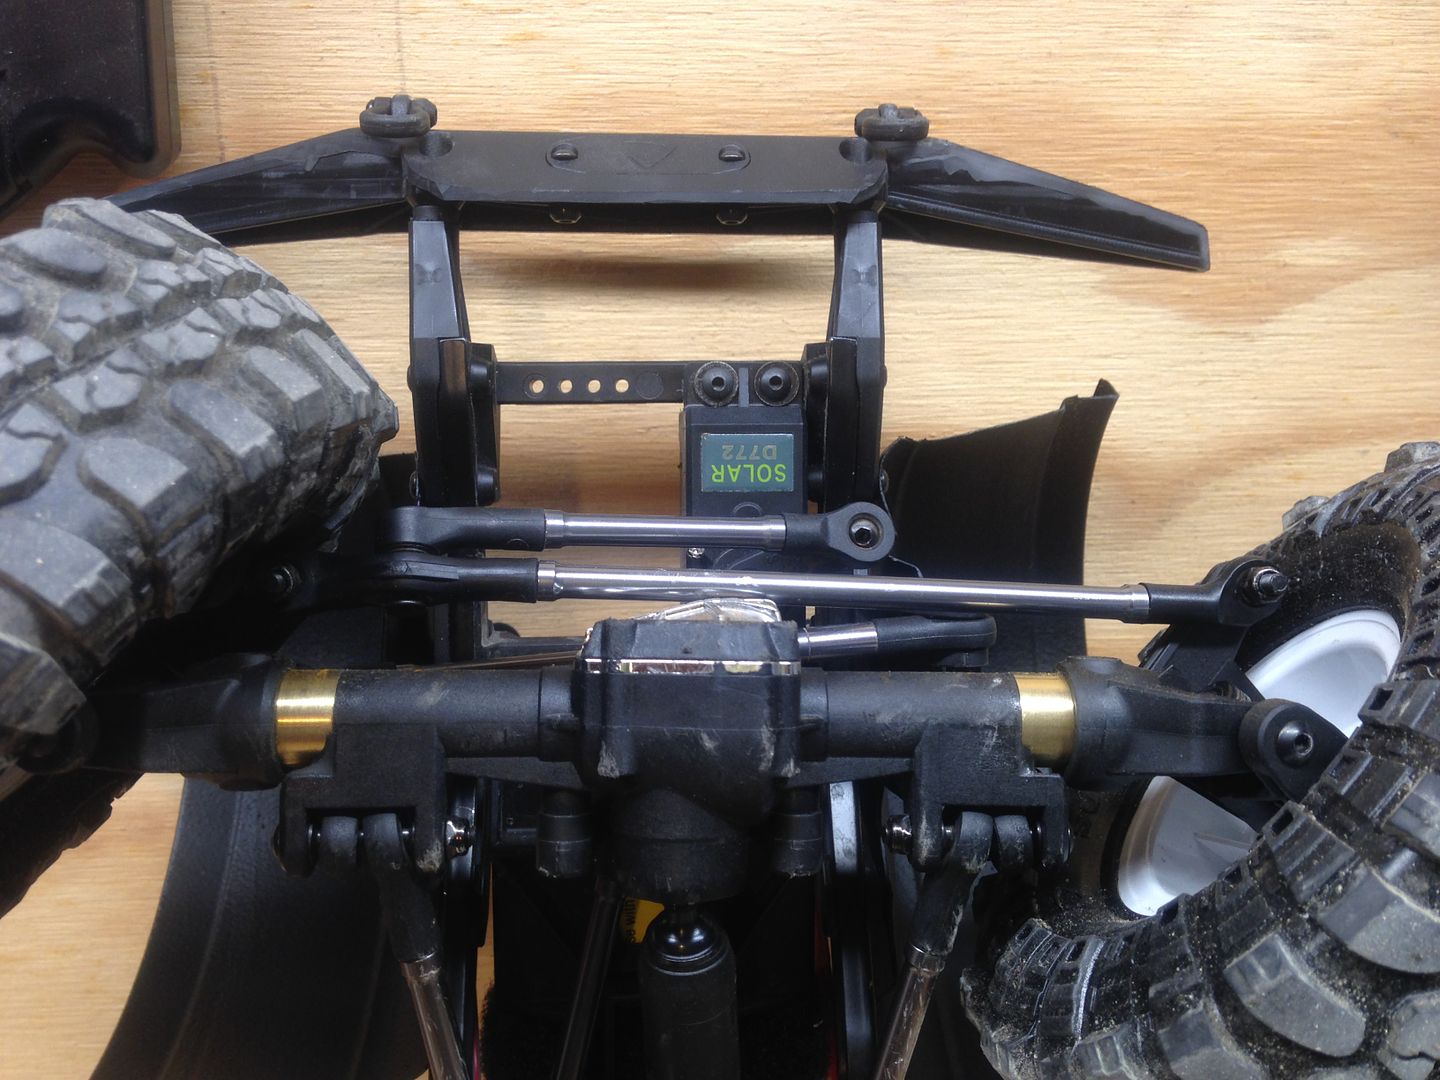 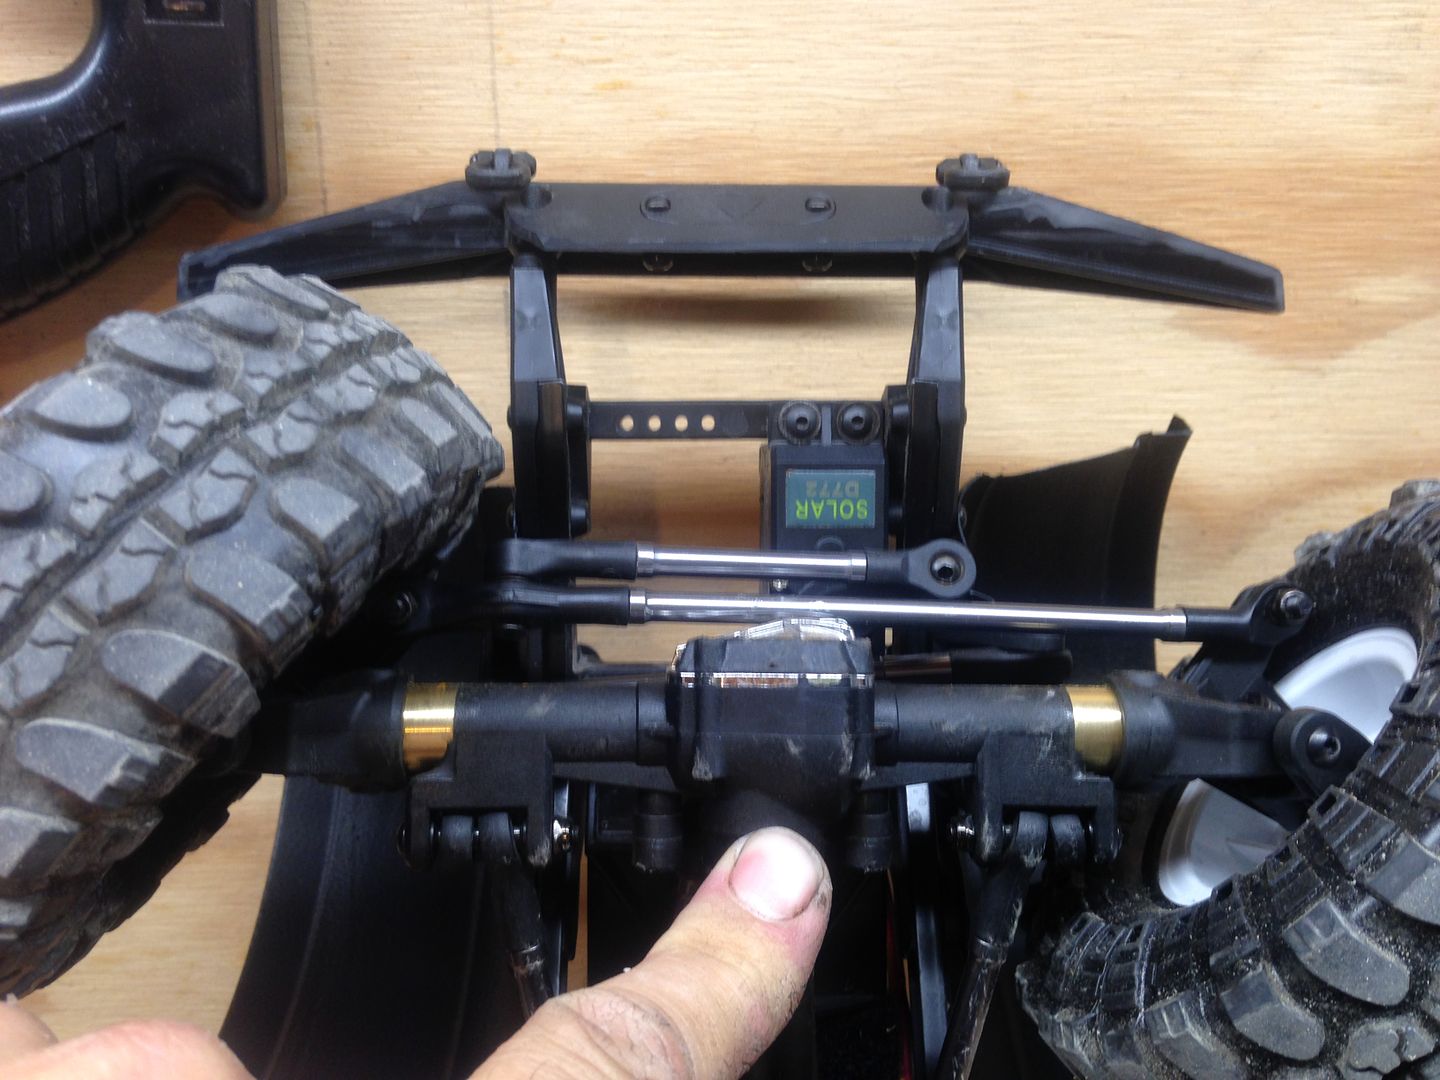 Oh yeah, I had to ditch the stock servo. I'm sorry but it really is garbage. I did the bearing mod to the output shaft and still had stupid side to side play and even with a bec running at 6volts it couldn't even pull an old lady off a pi$$ pot. I had a solar d772 sitting around to swapped it in. It's a little noisy when centering itself but for the price and power I'm. Ore than happy with it. I've got another one that's my servo winch on my other truck and it's a beast running straight off 2s. I'll use the stock servo for a shift servo or something down the road maybe. Ben Last edited by Itali83; 09-21-2016 at 10:54 AM. |
| |  |
| | #172 | |
| Quarry Creeper  Join Date: Jan 2016 Location: US
Posts: 401
| Quote:
 | |
| |  |
| | #173 | |||
| I wanna be Dave Join Date: Jan 2006 Location: Corruptifornia
Posts: 12,107
| Quote:
Hehe, ya I was bored the other day and had to cut some more, I have two more Blazer bodies.  Thanks, I'm seriously considering going to DX4S radio setup, seems easier to setup and the plastic body and built-in antenna should take more abuse on the trail than my FlySky, although both of them have been flawless. Flysky just feels cheap and flimsy, like if you drop it, the steering wheel is going to snap off.  Quote:
Stock servo will keep going long time with the bearing mod, but ya it's slow, weak and still kinda sloppy even with BEC at 6.2V (max advertised is 6.0v for Spektrum S605 servo). Solars work and are good for the money, buddy and I bought 6 (3 each and split shipping) and 2 servos were DOA, so I sold my three to him and he got warranty replacements. I decided to stay with Hitec for now, since I've had good luck with them.  Your Hummus Dip inner fenders are looking good too. Your Hummus Dip inner fenders are looking good too.Quote:
 Last edited by Natedog; 09-28-2016 at 06:46 PM. | |||
| |  |
| | #174 |
| I wanna be Dave  Join Date: Apr 2010 Location: Oakridge
Posts: 3,305
|
So will I be a Mainer for a day when we get there??? Going to meet joe122 tomorrow, and hope to see some of his cool stuff!!! Then up to Canada, New York, New Hampshire and into Maine before you know it. (a week or Two) maybe.    Ernie. |
| |  |
| | #175 |
| RCC Addict Join Date: Sep 2015 Location: Southern Maine
Posts: 1,024
|
Got the old reliable Blazer/Jimmy out today to beat up on my Ford ascender I just built. Only change is I made up some of my steel round stock sliders and got rid of the stock plastic ones. Other than that, just threw a battery in it and had some fun. I love this truck, just does what I like and goes where I point it. Poor thing, I've made three sets of brass axles and still haven't made a set for this truck lol. Maybe the next set I make will be for this truck. Don't see me building any more for a while. Going to finish my Little Jimmy leaf spring truck and just enjoy the two for a while. Figured I'd bring this post back to the top with a little update and some pretty pictures from a day at the beach. It was warm too! Almost 40 degrees!! 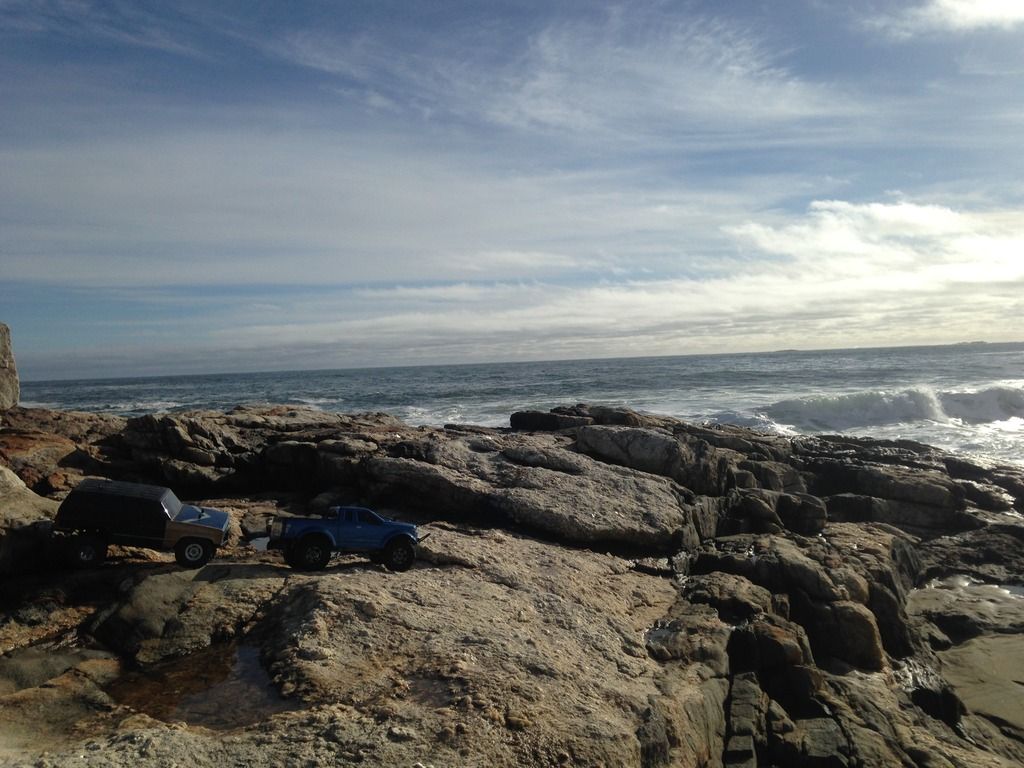 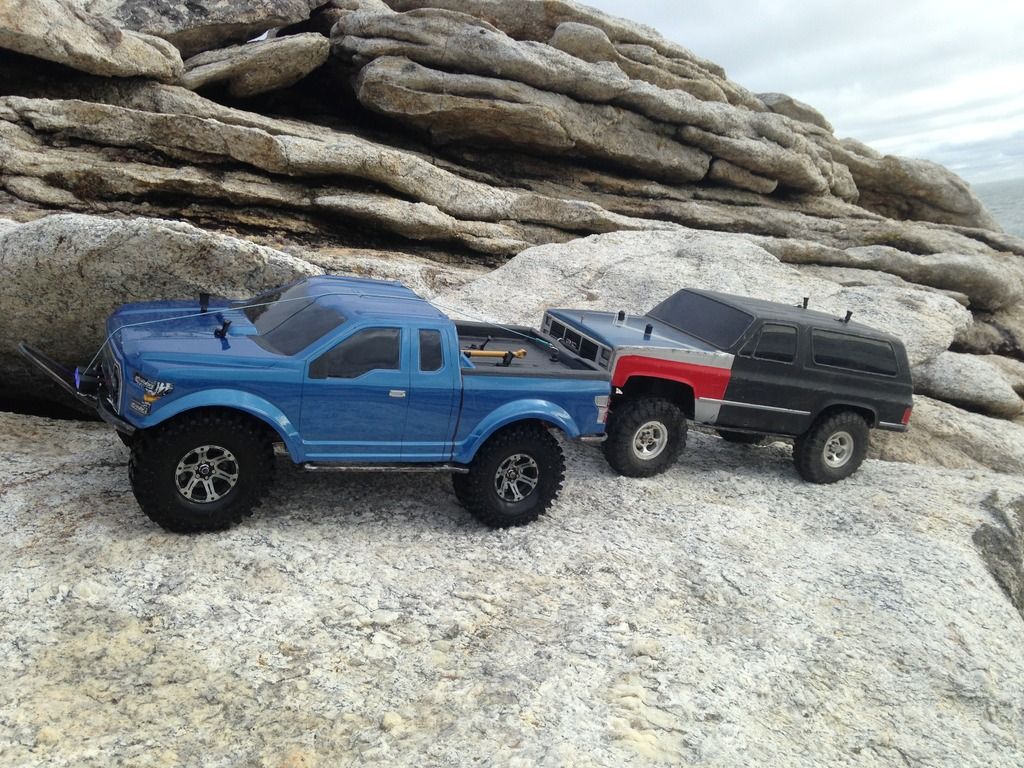 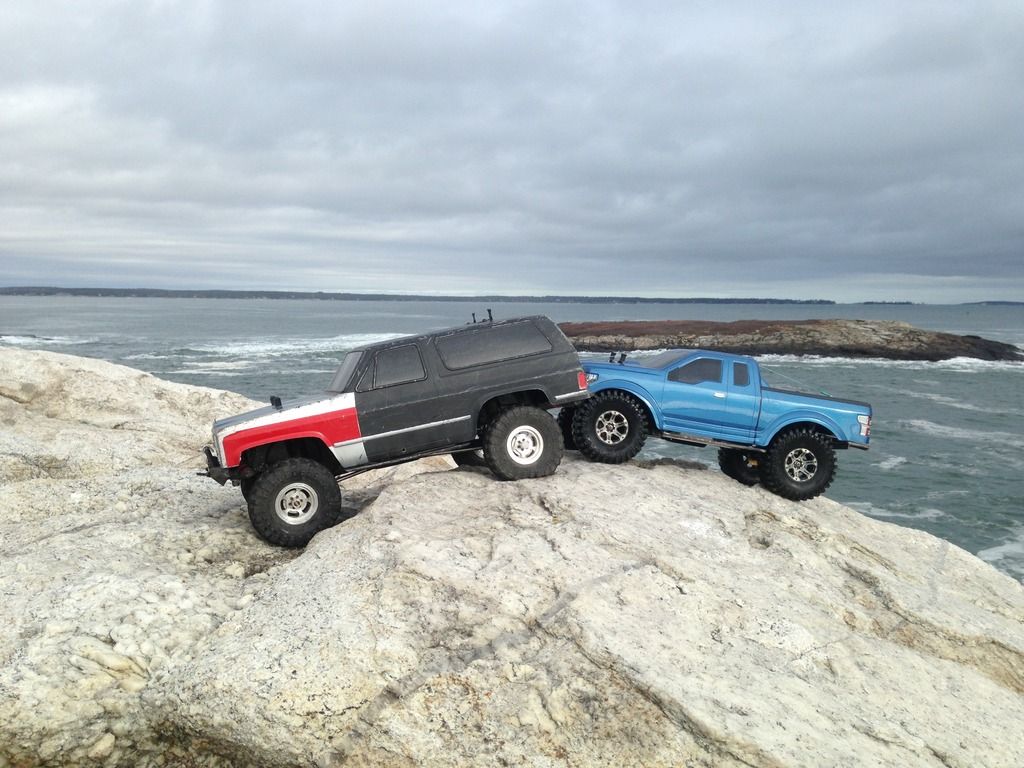 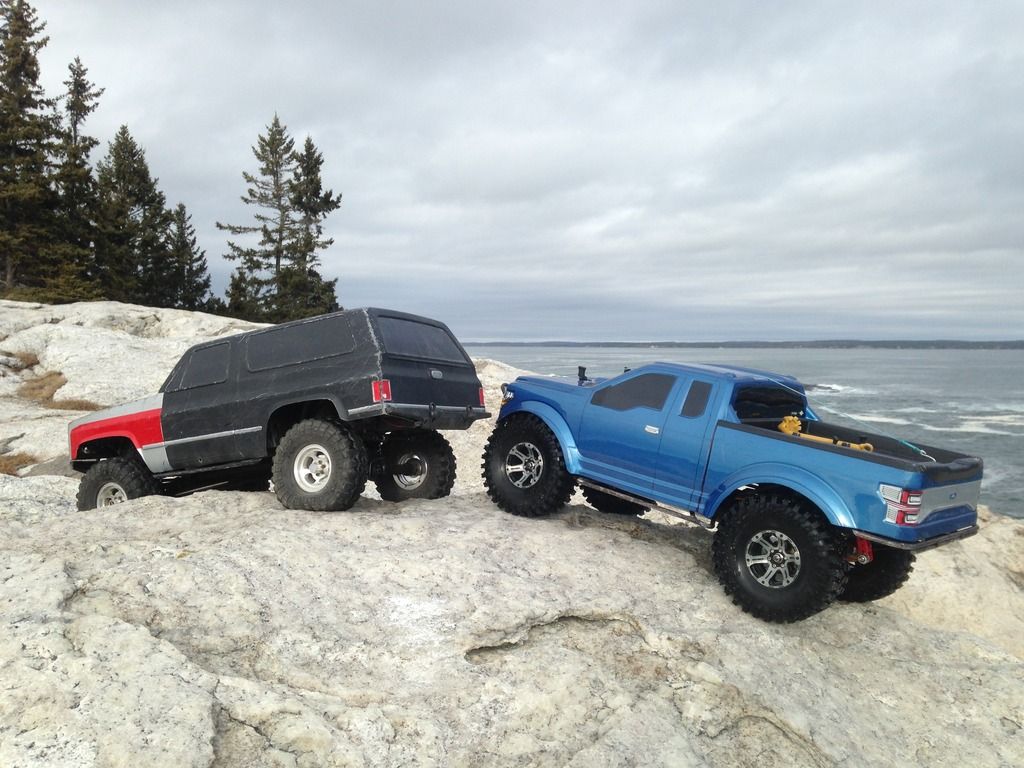 |
| |  |
| | #176 |
| I wanna be Dave  Join Date: Apr 2010 Location: Oakridge
Posts: 3,305
|
Very nice Ben, great photos. I really regret not making it up to see you guys on our trip! Ernie |
| |  |
| | #177 |
| Quarry Creeper  Join Date: Jan 2016 Location: US
Posts: 401
|
Wow what a difference, I'm 2 hours north and there is 3 feet of snow on the ground! This last storm kicked our ass! Sent from my SM-G900V using Tapatalk |
| |  |
| | #178 |
| Rock Crawler Join Date: Apr 2008 Location: pittsburgh
Posts: 536
|
Sweet pics... Im starvin for snow down here in Pittsburgh. Send us some next storm please? Lol snow = money for me, and we've had 2 storms under 2" |
| |  |
| | #179 |
| RCC Addict Join Date: Sep 2015 Location: Southern Maine
Posts: 1,024
|
Bringing this back from the dead. Old pictures will be gone forever but I'll be putting up my new ones of what I've been tweaking on ignore and what it looks like now. Keep posted...
|
| |  |
| | #180 |
| RCC Addict Join Date: Sep 2015 Location: Southern Maine
Posts: 1,024
| |
| |  |
 |
 My baby blazer - Similar Threads
 | ||||
| Thread | Thread Starter | Forum | Replies | Last Post |
| Using a Blazer CGR interior inside a 'full top' PLR Blazer body-Has anyone done this? | BeeRC | Paint and Body | 4 | 10-31-2009 03:37 PM |
| Nascarkeith's Proline Blazer CGR Bodied Blazer Wheely King | nascarkeith | HPI Wheely King | 6 | 10-30-2009 02:49 AM |
| |