| |
 01-23-2009, 04:43 PM
| #161 |
| Rock Crawler Join Date: Sep 2004 Location: South Orange County
Posts: 589
|
I really like your build I have been following it and it is turning out into one sweet truck. I like how everything but the battery is mounted below the upper shock tower mounts. Questions What type of battery are you planning on using and where do you plan on placing it? On the first page of your build thread you mentioned you are running a 55 turn motor. You are running a 55 turn hpi gear reduction unit Great Planes gd 600 Team Raceway transfer case Is that the stock tlt rockbuster dogbone that goes from the tranny to the axle What pinion are you running on the motor? what is the gearing in the hpi unit? the gd 600 is 4:1 Team Raceway transfer case is 1:1 What is the final gear ratio?  |

|
| Sponsored Links | |
| | |
|
01-23-2009, 11:32 PM
| #162 |
| I wanna be Dave Join Date: Aug 2007 Location: santa monica
Posts: 3,687
| Thanks! What type of battery are you planning on using and where do you plan on placing it? 6cell regular stick pack will fit sitting perpendicular to the chassis, sitting on top of the servo and motor. using that it sticks out about to the outsides of the shocks. this will work, and fits under the hood, but I'd like something that sits no wider than the chassis rails so I may use a 6cell 2/3A or 4/5a pack. lipo would be an easier solution but I dont have a lipo charger or any lipo batteries. regardless, thats where the battery would go. On the first page of your build thread you mentioned you are running a 55 turn motor. You are running a 55 turn hpi gear reduction unit Great Planes gd 600 Team Raceway transfer case This is correct. Is that the stock tlt rockbuster dogbone that goes from the tranny to the axle Yes it is. I placed the GD and t-case so that I could fit the stock length dogbone in there instead of trying to modify it. What pinion are you running on the motor? what is the gearing in the hpi unit? the hpi unit is 7.4:1. there's a 15t pinion on the motor shaft (hpi unit comes with it and instructions call for it to go on motor) and a 15t on the gd600 the gd 600 is 4:1 Team Raceway transfer case is 1:1 actually I found out the gd600 is 2.5:1 but with optional pinion you can get 3.8:1. I got this from a fellow MSD driver so I will have to check if he did the 3.8. I'm sure he did as his application was the same as this. Correct about the t-case. It is in fact 1:1 What is the final gear ratio? dont know how to figure it. someone recently said this was around 18:1 but I dont know. [/quote]
|
|
|
|
01-24-2009, 12:32 AM
| #163 |
| Rock Crawler Join Date: Sep 2004 Location: South Orange County
Posts: 589
| I approve  I would like to add some constructive criticism. 1) Notice how on the gd 600 out drive and the input for the transfer case, how the tlt dog bone is barely engaged in the gd 600 and more engaged in the transfer case out drive. You could maybe add some o rings or fuel tubing to space out the out drive evenly to prevent it from it from popping out. Since there should be no movement and the gd 600 and transfer case should be fixed and mounted this would be beneficial. 2) On your skid since the upper links are so far ahead of the skid why did you notch it and not just make it extend all the way to the frame? Was there any reasoning on this I can't seem to find one. 3) Once you are done with all the wiring are you going to hide with some heat shrink tubing or something similar? I have found some thing to be useful Its for computer wiring but I like to use it my rigs. Expandable sleeving You can see it at the top of my picture  |
|
|
|
01-24-2009, 12:43 AM
| #164 |
| I wanna be Dave Join Date: Aug 2007 Location: santa monica
Posts: 3,687
| I approve thanks! I would like to add some constructive criticism. sounds good... 1) Notice how on the gd 600 out drive and the input for the transfer case, how the tlt dog bone is barely engaged in the gd 600 and more engaged in the transfer case out drive. You could maybe add some o rings or fuel tubing to space out the out drive evenly to prevent it from it from popping out. Since there should be no movement and the gd 600 and transfer case should be fixed and mounted this would be beneficial. I didnt consider the minimal engagement a problem since it still engages well enough given the two endpoints are fixed. Since there's no binding that I can see in the minimal running I did and the two outputs are fixed I figure its okay. I'll give it a proper test and make adjustments if necessary later. 2) On your skid since the upper links are so far ahead of the skid why did you notch it and not just make it extend all the way to the frame? Was there any reasoning on this I can't seem to find one. hmm, good question. I know there was a reason, but can't think of it. 3) Once you are done with all the wiring are you going to hide with some heat shrink tubing or something similar? I have found some thing to be useful Its for computer wiring but I like to use it my rigs. Expandable sleeving I was thinking of doing something like that if I couldnt route it out of sight (between the interior and undercarriage) I'll be making an undercarriage that will sit on chassis and the interior will sit on that. intent is for it to look like a unibody from underneath. |
|
|
|
01-24-2009, 12:55 AM
| #165 | |
| I wanna be Dave Join Date: Aug 2007 Location: santa monica
Posts: 3,687
|
btw, thanks for the suggestions! Quote:
http://www.youtube.com/watch?v=oL82gMye2DQ | |
|
|
|
01-24-2009, 12:59 AM
| #166 |
| Rock Crawler Join Date: Sep 2004 Location: South Orange County
Posts: 589
|  Maybe if you had small pipe with the inner diameter of the pipe just big enough to fit all the wiring yet outer diameter narrower then the height of the frame you could fit it in between the frame and the transfer case and your 4 link setup. also bend the pipe or have 3 sections to follow the contour of the frame. It would incorporate your idea of uni body because you could have your undercarriage all tidy. Your body directly on too the frame or as low as you want to go given the clearance for your battery. In core off road racing they run their brake lines as well as fuel line inside a boxed tube to prevent it from getting ruptured my debris or in a crash. The tube could be scale like the real race trucks. Last edited by iwantoffroad; 01-24-2009 at 01:07 AM. |
|
|
|
02-24-2009, 01:08 AM
| #167 |
| Rock Crawler Join Date: Sep 2004 Location: South Orange County
Posts: 589
|
update?
|
|
|
|
02-24-2009, 01:51 AM
| #168 | |
| I wanna be Dave Join Date: Aug 2007 Location: santa monica
Posts: 3,687
|
Well, there will be a significant update shorty. When I started, SebringMGB, who you might know as the builder of that amazing white 4runner body, offered his styrene services. The body has been with him for several weeks now. He's doing some work on the front grill, front headlights and turn signals as well as taillights. He did some bodywork and sanding for me too... Today I received a 2000mAh 6-cell 4/5A battery pack donated by Mike at Cheapbatterypacks.com! Thanks Mike! Fits perfectly in the underneath void of the rear seats... Shown here in my Pajero Jtop 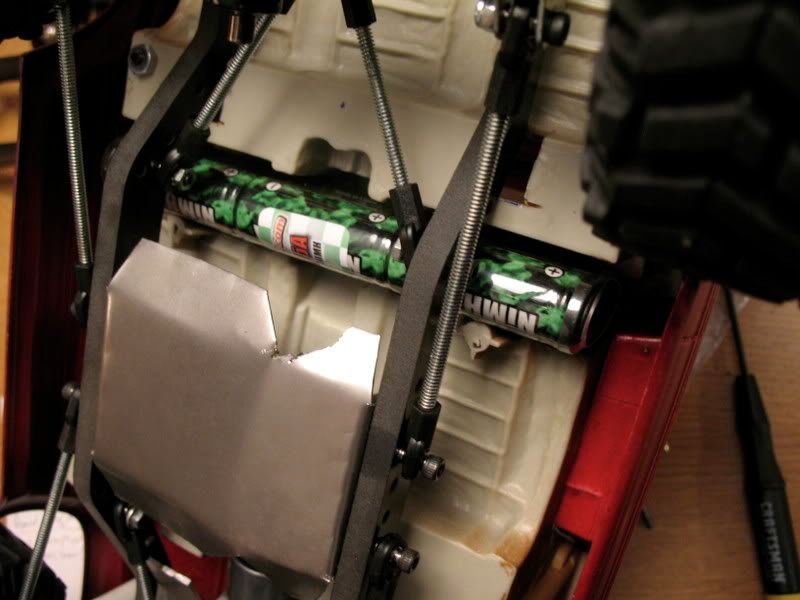 Quote:
Thanks! | |
|
|
|
02-24-2009, 07:38 AM
| #169 |
| Rock Crawler Join Date: Jan 2007 Location: Do I look like a freaking people person?
Posts: 874
|
Looking great Pablo! I like the battery placement.
|
|
|
|
02-24-2009, 04:48 PM
| #170 |
| Rock Crawler Join Date: Sep 2004 Location: South Orange County
Posts: 589
|
Looks great.
|
|
|
|
02-25-2009, 11:26 PM
| #171 |
| I wanna be Dave Join Date: Aug 2007 Location: santa monica
Posts: 3,687
|
Smaller update than expected, but lots of detail work okay, the body has been visiting SebringMGB for his donation to the build. You may recall SebringMGB's work on 4RUNN1's 4runner body... 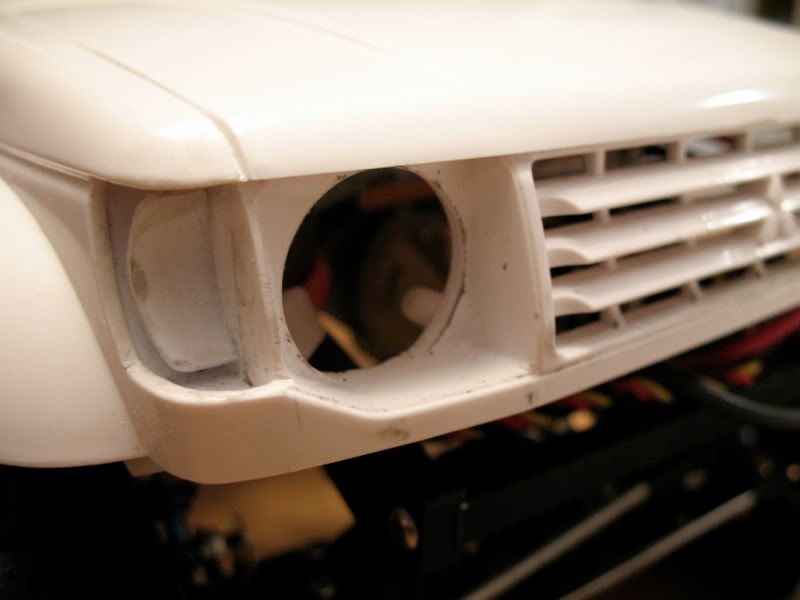 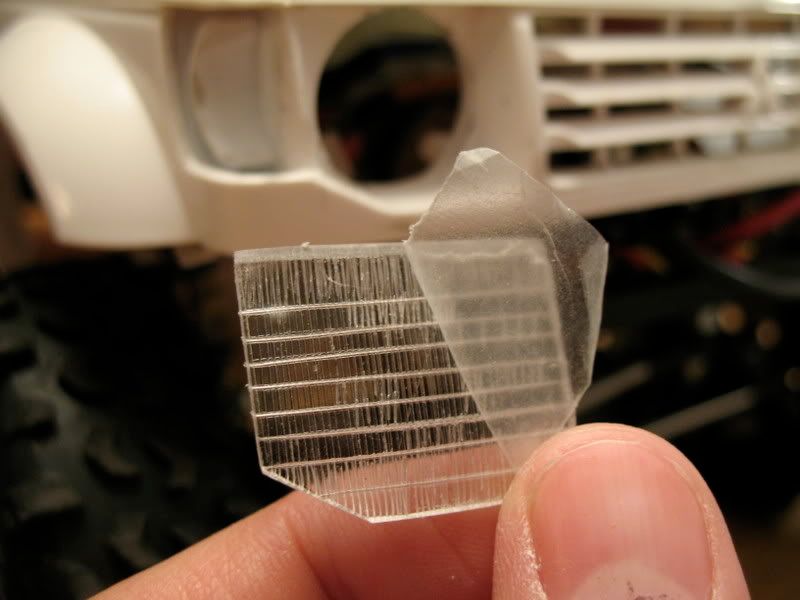 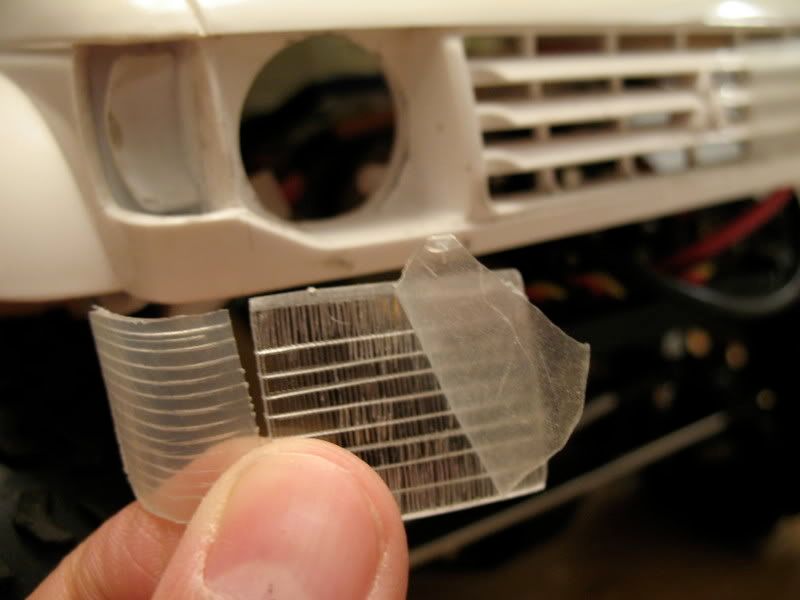 Ben also cut the rear lights out as I asked. He shaped the lenses but I need to add the lines and cut them out as well as paint them. 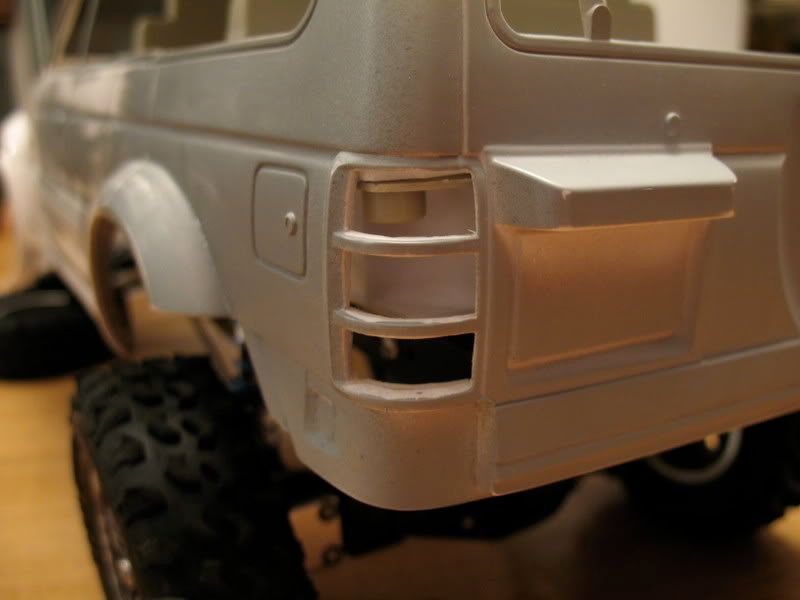  Additionally, he did some bodywork such as cutting in the door lines, general reinforcing and some small detail refinements and sanding. Thanks Ben! The lighting package, generously donated by Vic at RC-Lighting.net shipped last week so should arrive early next week. that will be: headlights side marker/corner lights (next to headlights) fender lights (rear of front fenders) taillights working brake lights working reverse lights license plate light I had to buy a micro eswitch and something else (I forget) to make all that work though. The reverse lights needed additional stuff that Vic couldnt do without the rig in his hands. Wonderful donation and Vic was great to work with on this setup! |
|
|
|
02-26-2009, 06:58 AM
| #172 |
| RCC Addict Join Date: Jun 2008 Location: Monroe, NC
Posts: 1,547
|
Thats some very nice detail work Ben. The Monty is coming along good Pablo.Justin |
|
|
|
02-26-2009, 06:47 PM
| #173 |
| I wanna be Dave Join Date: Aug 2005 Location: NE Ohio
Posts: 8,817
|
Looks like it is coming along nicely.. I was wondering what I was going to do with the tail lights on mine as well... You see how I handled that one |
|
|
|
03-27-2009, 08:13 AM
| #174 |
| Quarry Creeper Join Date: Mar 2005 Location: The 2one7
Posts: 259
|
Well it's been a month, have you had a chance to work on this?
|
|
|
|
03-27-2009, 08:23 AM
| #175 | |
| RCC Addict Join Date: Jun 2008 Location: Monroe, NC
Posts: 1,547
| Quote:
| |
|
|
|
04-15-2009, 01:21 AM
| #176 |
| I wanna be Dave Join Date: Aug 2007 Location: santa monica
Posts: 3,687
|
okay, here's a little update. to be honest, I spent so much time shaping and making the roofline correct that it burned me out a bit on the whole, sand/fill/sand/fill routine, especially since I wasnt getting the instant gratification of visible progress... So I sent it off to SebringMGB for light lenses and a little refurbishment. Got it back some time ago but its been on the back burner, while I started a few projects to get me excited about styrene dust again, lol. I've been working on it in between pajero and sequoia stuff but again, not much to show in terms of visible progress...until today. Finally got around to doing the new rear door handles. Remember the rule of always saving scraps? remember these half doors? 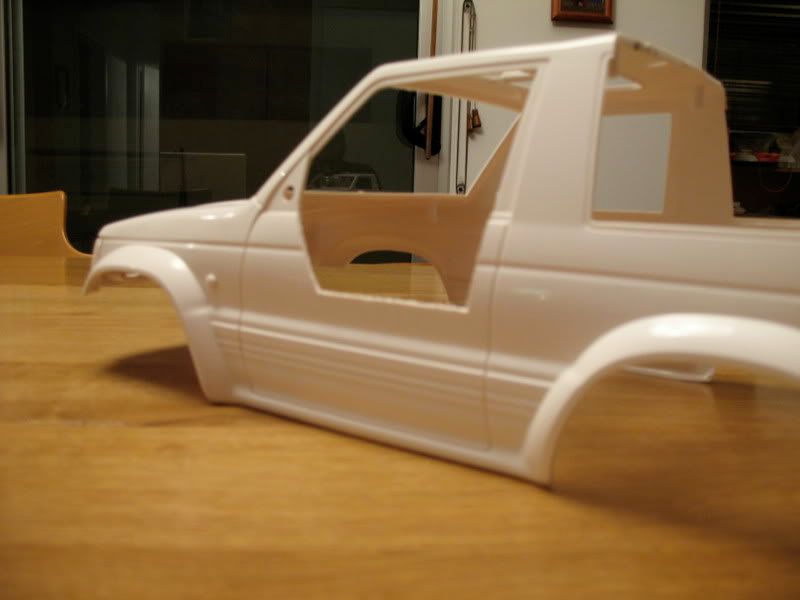 the reason I did the half doors was to get the door handles for the montero, lol. seriously. so I cut them out of the scrap 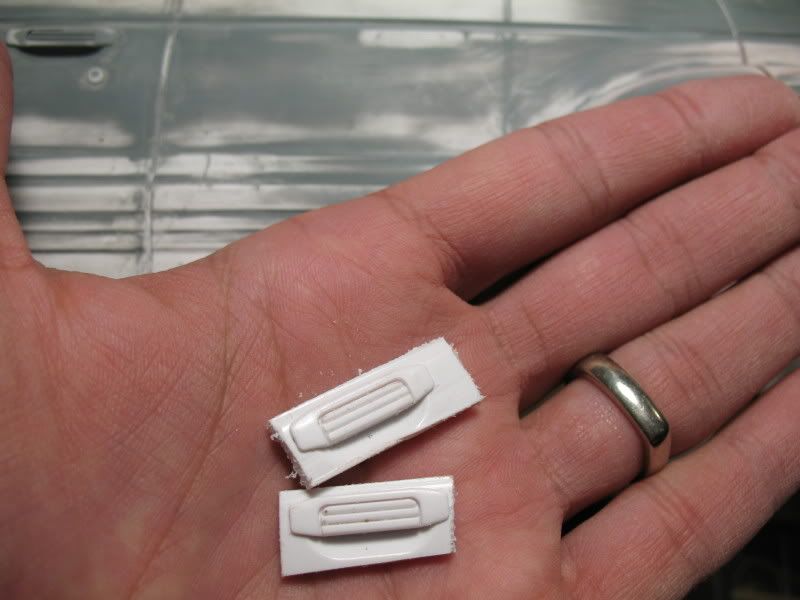 drilled a pilot hole, cut a corresponding hole with string 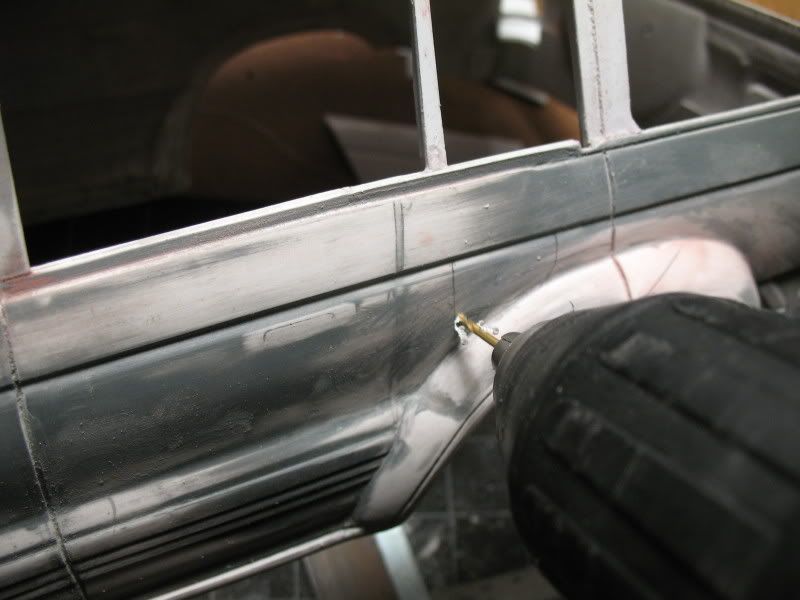 and voila, door handles!  now to fill the seams with styrene...be back in a few... |
|
|
|
04-15-2009, 06:14 AM
| #177 |
| RCC Addict Join Date: Jun 2008 Location: Monroe, NC
Posts: 1,547
|
Great work on the door handles. Nice to see some progress on this thing again. Justin |
|
|
|
04-15-2009, 06:54 AM
| #178 |
| Rock Stacker Join Date: Jan 2009 Location: Germany
Posts: 80
|
Just to answer the final gear ratio .... Simply multiply each set of gears. HPI ( 7,4 ) x GD ( 2,5 ) x transfer case ( 1 ) x Axel ( 2,6 ?? ) = 48,1:1 BTW, nice truck |
|
|
|
04-15-2009, 09:30 AM
| #179 | |
| I wanna be Dave Join Date: Aug 2007 Location: santa monica
Posts: 3,687
| Quote:
also, the gd600 comes stock with the 18t pinion making the 2,5 ratio but there are two others available too as options:so theoretically you could also get 7,4x3.8x1x2,6 = 73,1:1 ratio | |
|
|
|
04-15-2009, 10:05 AM
| #180 |
| Quarry Creeper Join Date: Dec 2005 Location: Mechanicsville, VA
Posts: 464
|
Great work for a great cause! Keep it up |
|
|
 |
| |


 Linear Mode


