| |
 12-18-2010, 01:56 PM
| #101 |
| Quarry Creeper Join Date: Feb 2009 Location: Orangevale
Posts: 223
|
Beautiful rig my man....You should be proud of that one! C H |

|  |
| Sponsored Links | |
| | |
|
12-19-2010, 11:48 AM
| #102 |
| Pebble Pounder Join Date: Aug 2010 Location: Chattanooga
Posts: 112
|
TRAUMATIC UPDATE! After rewiring all the electronics to fit into the gas tank, I had been doing tests on the kitchen island. Everything worked as it should. I, without thinking, hit the off switch on the transmitter causing the truck to fly into reverse doing a 4 foot swandive off the kitchen island onto the marble floor. The sound of the crash was not unlike an explosion. An explosion of plastic being destroyed. The results were devastating. I stood in shock thinking that it really did not happen as I could see bits of light buckets, a window frame and shards of plastic everywhere. These were the largest pieces that I could gather up:  Looking at the next photo I believe that when it took off in reverse, it immediately went nose down and hit the top of the brush bar and landed on the roof rack lights.  I do not think I can repair these lights, but I will try. I may have to order new light buckets.  Obviously, the roof rack lights are non repairable. There is actually very little left of them. The biggest problem with these is that they were very permanently attached to the roof rack. A LOT of CA was used in the application of these lights.  The front grill took a hit too. I think this will be a pretty easy fix.  This is by far the worst part of it all. I will never be able to get this looking like it did. You can see that my body filler broke away, paint gave way, some major stress cracking and the window gasket ripped off. This will be the biggest challenge. Realigning the window and putting the window divider on the rear door will be about the only easy parts.   The roof rack caused the rain gutter to separate. This does not surprise me. If it were not for the fact that I screwed the gutters on, It would have been worse.  Here is just some small plastic chipping where the body rests in the rock sliders.  Just one last look at the roof rack lights :(  So, there it is. I am very discouraged and will probably mope about a bit before I start to rebuild. One of the bad parts is that those light buckets were not cheap and came from Stefan at Scale Off Road. I will have that huge expense as well as the time it takes to get from Germany to here. |
|
| |
|
12-19-2010, 12:02 PM
| #103 |
| Quarry Creeper Join Date: Feb 2009 Location: Orangevale
Posts: 223
|
I know this is not what you want to hear but fixing the body, lights, bezels, interior, battery mount, etc.......Is a daily part of my hobby experience. I built my rig to drive like i stole it. I am very hard on it. I just think it's a shame that you don't have a story like: ...and my Disco rolled off this 100' cliff!!!  You'll laugh at it soon enough. Now get it fixed so you can get out and beat the tar out of it...Over and Over C H |
|
| |
|
12-19-2010, 06:14 PM
| #104 | |
| Pebble Pounder Join Date: Aug 2010 Location: Chattanooga
Posts: 112
| Quote:
And you are absolutely right. For a devastating accident like this... It needed to be while in use, out on the trail. The good part is that the chassis and everything seems to be ok. | |
|
| |
|
12-19-2010, 06:40 PM
| #105 |
| Quarry Creeper Join Date: Jul 2007 Location: Dallas, TX
Posts: 441
|
I actually think I felt some of your pain while reading your post and viewing the pictures. I hope you are able to get it back close to it's original glory. If not, try to get as close as possible and make the best of it.
|
|
| |
|
12-19-2010, 08:56 PM
| #106 | |
| Pebble Pounder Join Date: Aug 2010 Location: Chattanooga
Posts: 112
| Quote:
I think it may be ok. There are some serious stress cracks in the paint that I will just have to lease as is and get over it. | |
|
| |
|
12-20-2010, 12:12 PM
| #107 |
| Rock Crawler  Join Date: Jul 2008 Location: E. City
Posts: 883
|
That sucks man, I hate it when that happens. I shed a tear for ya when I read that. That is seriously one of the best looking rigs I've seen. I love the details and how everything is replicated from the 1:1. Makes me want to get back into detailing my Tundra.
|
|
| |
|
12-20-2010, 02:09 PM
| #108 |
| RCC Addict Join Date: Jul 2009 Location: Dover, NH
Posts: 1,153
|
Heres what you do. bring it outside and walk up the nearest hill/cliff. Chuck the Rover down it. you will feel better after and be able to say the damage came from the trail! Joking aside, that is a beautiful rig and it sucks what happened regardless of what caused it. I have had issues like that in the past and most of it was due to Nitro rigs and receiver issues. Try running your .21 motored 1/8 scale buggie for tuning in a parking lot. Have the receiver lose conection/glitch and have said rig run full blast for 100 yards till it crashes head on into a foot high curb. Total loss You have some great skills and she will be fine once again. |
|
| |
|
12-20-2010, 03:59 PM
| #109 |
| RCC Addict Join Date: Apr 2007 Location: Murfreesboro
Posts: 1,537
|
I was thinkin bout this the other night...you could 1) Fix the 1:10 back to its former glory or 2) Roll the 1:1 a couple times till it matches the 1:10 and then you dont have to do anymore work!!! Dont do number 2 thats a terrible idea LOL Matt |
|
| |
|
12-20-2010, 04:14 PM
| #110 |
| Rock Crawler Join Date: Oct 2009 Location: San Diego
Posts: 599
|
Eeek man! Sorry to see that happen specially since that is one unique rig you go there. Good to see you are planning repairs already. I feel your pain... this is kinda like when my unimog decided to fly off a cliff |
|
| |
|
12-21-2010, 08:13 AM
| #111 | ||||
| Pebble Pounder Join Date: Aug 2010 Location: Chattanooga
Posts: 112
| Quote:
Quote:
Quote:
Quote:
| ||||
|
| |
|
12-21-2010, 08:14 AM
| #112 |
| Pebble Pounder Join Date: Aug 2010 Location: Chattanooga
Posts: 112
|
Did some repair work last night. Heres a pic of the bondo filler that I did the previous night:  I also noticed that there was some issues with the C-Pillar and decided to do some reinforcing. Its not pretty, but its nice and rigid.  This is the repair of the part of the grill that broke off. I repaired with Tenax-7, then laid a little filler where the paint chipped off.  Finally, I have the sanded down body with the new window gasket in place. I will start masking off and shoot a bit of primer. Then I will see if I need to do any touch-up body filler.  I did not take any photos of it, but I repaired the bumper light buckets and they will be ok... Hopefully. I am waiting on a total from Stefan for new roof rack lights. I was able to get all the old CA off the LEDs and now the rack will patiently wait for new light buckets. Cheers, -Steven |
|
| |
|
12-21-2010, 10:36 PM
| #113 |
| Pebble Pounder Join Date: Aug 2010 Location: Chattanooga
Posts: 112
|
Got a little bit done. Got the area that I am going to repaint masked off. My mask pattern follows the zebra stripes. I will leave this masking on for the duration of the painting until clear coats.  I also shot about 3 coats of primer throughout the night. In between, I had a bit of filler areas that I had to address. It is not perfect, but it is not too bad either. Basically, I can live with how this will turn out.  Tomorrow, I plan to put my first coat of black. Thanks for looking, -Steven |
|
| |
|
12-21-2010, 10:49 PM
| #114 |
| RCC Addict Join Date: Feb 2006 Location: Bellflower, CA
Posts: 1,028
|
Well im sure that since you did such a fine job the first time, this should go well. Yes please put my favorite rover back together! Such a beaut!
|
|
| |
|
12-26-2010, 02:18 PM
| #115 |
| Pebble Pounder Join Date: Aug 2010 Location: Chattanooga
Posts: 112
|
Well, I have been working on the paint on and off for the last several days. It's now pretty much rebuilt. This photo shows the result of 2 coats of base with sanding in between and a final sanding:  Here we are getting ready for the zebra stripes. Re-laying these out was pretty easy due to the shadowing of the original stripes.  This is 2 coats of white paint:  I remasked for the clear coat.  This is now after 3 coats of clear and the masking is removed:  Last step is to paint the flat black areas (window gasket and door handle). Sure, I could have brush painted these small areas, but then I would have deprived myself the joy of masking...  This is 2 coats of flat black and 2 coats of matte clear top coat:  And the final repair work all completed:    I have some small little touch ups to do here and there, but I am almost back to where I was a week ago. Cheers, -Steven |
|
| |
|
12-26-2010, 02:32 PM
| #116 |
| I wanna be Dave Join Date: Apr 2009 Location: Unnecessary Surgery Land
Posts: 3,406
|
Good as new! Great job on the repair work.
|
|
| |
|
12-26-2010, 08:45 PM
| #117 |
| I wanna be Dave Join Date: Oct 2006 Location: Centered
Posts: 2,082
|
I've never been a fan of Zebra stripe anything but you did a superb job throwing the paint, this is a very nice build. Solid repair work as well...nicely done  |
|
| |
|
12-27-2010, 11:55 AM
| #118 |
| Rock Crawler Join Date: Oct 2009 Location: San Diego
Posts: 599
|
X2 on the repair job, looks good as new. Not that you need them cuz you pulled off a nice repair - but the zebra stripes would help hide any other imperfection. These zebra stripes makes me wonder what a rig would look like with a dazzle paint scheme. U know like the old battle ships and whatnot 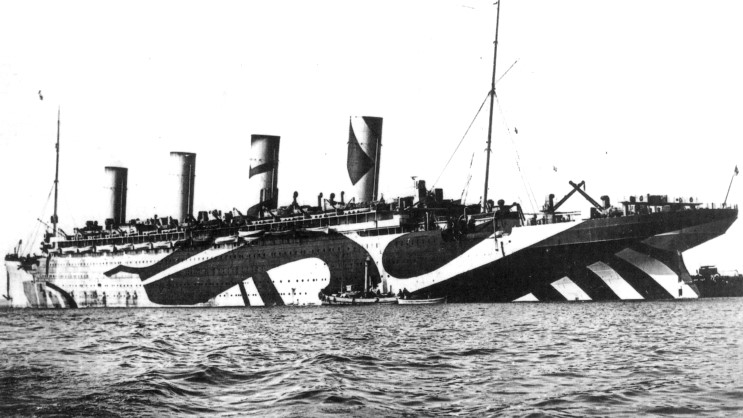 |
|
| |
|
01-07-2011, 12:48 AM
| #119 |
| Pebble Pounder Join Date: Aug 2010 Location: Chattanooga
Posts: 112
|
Been working on the new "alternate" body for the past week. So far I have: - cut wheel wells, windows and head/tail lights - created large dents/body damage - cut/glued window gaskets - made rain gutters - made side marker lights - made side door moulding - made Saudi style Discovery grill Here are some photos:        Still have to make door latches. |
|
| |
|
01-07-2011, 12:54 AM
| #120 |
| Pebble Pounder Join Date: Aug 2010 Location: Chattanooga
Posts: 112
|
The next major project for this body will be the exo cage. Because I want to use one chassis and swap bodies, I will not make the cage like I would want to with connecting to bumpers and sliders, etc. The cage will be on the top of the body. I actually have a good example of what I'm basing my build off of:  That's pretty similar to what my exo cage will look like. |
|
| |
 |
| |


 Linear Mode


