| |
| |||||||
 |
| | LinkBack | Thread Tools | Display Modes |
 05-04-2016, 07:03 PM
| #61 |
| Rock Stacker Join Date: Mar 2016 Location: in a van down by the river
Posts: 60
|
Tool box - $29.00 Crate - $19.97 |

|  |
| Sponsored Links | |
| | |
|
05-05-2016, 05:25 PM
| #62 |
| Quarry Creeper Join Date: Feb 2016 Location: Salt Lake City
Posts: 395
|
Update: RPP sent out a replacement Beef Tube for the one that had messed up threads. I decided to order the tube for the back axle while I was at it. I also decided to order the DMG spare tire mount to clean up the DIY mount I had been using. Since I'm waiting on parts to arrive before I can post some picture stoke again, I'd like to share the comical nature of how I got to this point with my build. I originally bought a $30.00 Maestro crawler to play with at the office. It only took a week before I realized that RC crawlers were fun and I needed something better. I then decided I was going to go totally crazy and drop $200.00 on a garbage crawler that I thought would be fun to play with every once in a while. Luckily Steve from davesmotors.com said barf and convinced me to get a $400.00 Bomber. $30.00... $200.00... $400.00... Can we all see where this is going? I literally believed that I would buy the Bomber and drive it as stock. I had no idea how addicting this could be. I never had a burning desire to get so involved with RC cars until I learned about crawlers. So... I did some math after one of 2-shots "Bomdiggity" posts made me curious. I added up the list price of everything I have done so far. To be transparent, I have received many items at discounted prices; but, I wanted to know what I would be into this ridiculousness if it were all purchased at list price. I added everything including paint and miscellaneous items to mod the spare etc. Keep in mind that my rig is still a beginners piece compared to the beauties strewn across the pages of this forum. It turns out I would be in over $1,300.00 list price where I stand now. If Vanquish ever decides to stock parts again I can finish up the trailing arms and other items and I will be in around $1,500 list. Shocks have not even been considered yet. I'm guessing that I'll end up between $1,600 - $1,700 by the time I get done. haha... what the hell is happening? If someone told me that's how deep I would be into this 3 months ago, I would have never picked up the car... period. And yet, I'm so pleased with my purchase. What a blast. Remember that I am a beginner to this entire world of RC cars. You can imagine how much my perspective has changed and my eyes have been opened in 3 months. ...and my wallet has been emptied. And here I thought my other passions of skiing, biking, climbing etc were expensive. Moving forward I am waiting for Rogue GRFX to get the bomber skins ready... should be next week. New skins, finish up the matching rear spare set. Add VP trailing arms, Currie sway bar, shock mounts and a few other items and I think I will have a decent runner. At that point I hope to not have much else to worry about other than shocks until things start breaking. Then again, look at where I thought I'd be 3 months ago... Pics to come once companies start stocking and selling their parts again... as if... Last edited by powder4breakfast; 05-05-2016 at 05:30 PM. |
|
| |
|
05-05-2016, 05:34 PM
| #63 |
| I wanna be Dave Join Date: Sep 2012 Location: Victoria, BC
Posts: 2,257
|
I completely understand what you are saying p4b. The next step of this crazy hobby is one rig turning into several, then selling one or more and starting over with new builds........it just never ends! It's all good though, I love this hobby.
|
|
| |
|
05-05-2016, 08:30 PM
| #64 |
| I wanna be Dave  Join Date: Apr 2015 Location: Roseville, Ca
Posts: 2,506
|
I did the same thing, bought used rc for 150. Said I wasn't going over 200. Now I have 4 and about to build another bomber. My coworker still gives me shit about it, "only 200 right?" Can't put a price on fun. |
|
| |
|
05-13-2016, 12:53 AM
| #65 |
| Quarry Creeper Join Date: Feb 2016 Location: Salt Lake City
Posts: 395
|
The DIY spare tire mount in my first post was a huge improvement; but, at $13.00 shipped, the DMG mount is a no brainer... and better. Nice product and an even better improvement that totally eliminates hang-ups. Also, I was able to keep my scale pieces (filler tube, extinguisher and Hi-Lift) in place. [IMG] 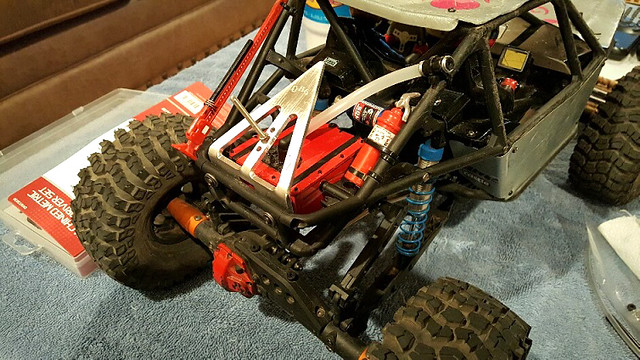 [/IMG] [/IMG]Then while trying to figure out the obstacle line that has plagued me for the past month in Southern Utah... white smoke came pouring out of the rig. I have not cleaned the motor once since getting this. How often am I supposed to clean the motor? I did search a little and one reading said after every hour of use. That seems hi. Is a dirty motor a likely cause? Or should I be looking elsewhere? The wheels seem to roll freely by hand. This sorry night did mark my very first "walk of shame" as I carried my Bomber down the rocks to my vehicle. Does a walk of shame make me official or earn me any stripes in this hobby? The dead heads were not happy. [IMG] 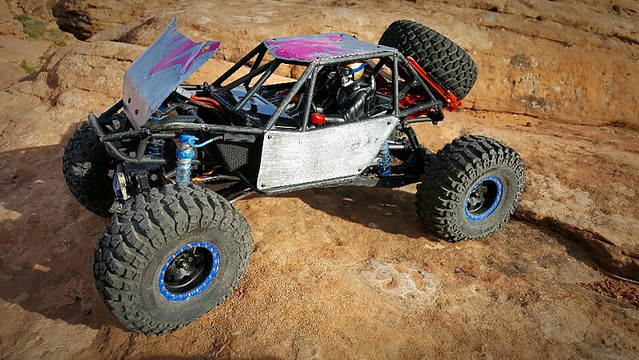 [/IMG] [/IMG]While my last post talked about how amazed I am that I got so deep ($) into this hobby so fast... and brushless system was not even on the list of near future upgrades... and I felt I was close to being done and happy... haha - I'm pretty sure an MMP and roc412 are in my future. That being said, I want to finish the other aspects of my car first. Hopefully I can hold out on the spendy brushless set-up till the end of summer. So, I decided to just pick up another stock motor because they're so cheap and I'm still learning a ton. Like yesterday when I learned that you should break in a new motor... okay... I'm a beginner. I searched a bunch and basically concluded that there is a lot of confusion about acceptable practice for this. I watched this video: https://www.youtube.com/watch?v=xVk4kVVJdds ^^^seems like good info. For wet break in, can I snip the alligator clips and wires off this Traxxas charger and just connect the ends to D batteries (taped together I assume)? Am I missing anything obvious that will damage the battery or harm me in doing this? The new motor is the stock Axial 35t not the rebuildable 35t trail breaker. [IMG] 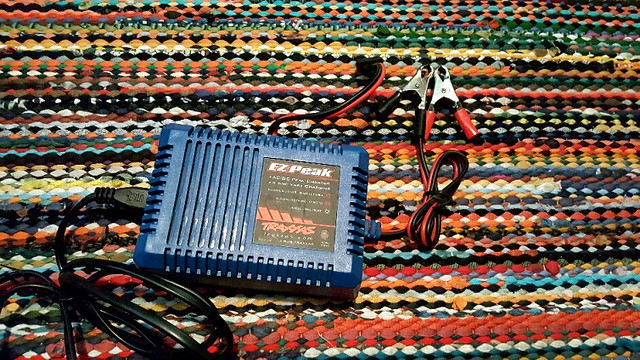 [/IMG] [/IMG]And because of this new addiction of dropping coin on a tiny car, I decided to go ahead and get those shocks that I wasn't going to get yet... uggh  Which brings me to my last questions... Just fill them up with oil and worry about green slime and other stuff when I clean or rebuild them? I think I'm around 7.5lbs and will (as stated) be using mostly for slow technical climbing. For my intended use, I would appreciate any examples of oil weights and springs others are using with similar set-ups. I will also learn from Steve-O as he works through his build. Steve-O is a good dude who I hold mostly responsible for this addiction and the $ I have spent. I was thinking about what I could have done to my full size Jeep for the money that has gone into this. I'm sure many others have had the same thoughts. P.S. sitting in the hospital as my wife had our 3rd child today. Healthy little boy. Pretty stoked on that. Since I'll be hanging around the house for the weekend with the newness, I'll probably have a little down time to break in the motor and such if I figure out what to do. |
|
| |
|
05-13-2016, 08:10 AM
| #66 |
| Rock Stacker Join Date: Mar 2016 Location: in a van down by the river
Posts: 60
|
Congrats on the little one. 17 yo son and I are headed west after work today on a 10 day overland trip. They grow up fast!
|
|
| |
|
05-27-2016, 05:00 PM
| #67 |
| Quarry Creeper Join Date: Feb 2016 Location: Salt Lake City
Posts: 395
|
Haven't posted many updates since the new baby 2 weeks ago; but, here are a few teaser shots of what I have been doing. Hopefully I will have time this weekend to give a report on the changes and what affect they have had. My Bomber is crawling much better now than before. Some of the additions are functional and some are just bling. Replaced the Axial sway bar with the VP Antiroc and added CI Double Deuce 6.0 Medium (with outer ring removed) in the rear replacing the 5.5 softs: [IMG] 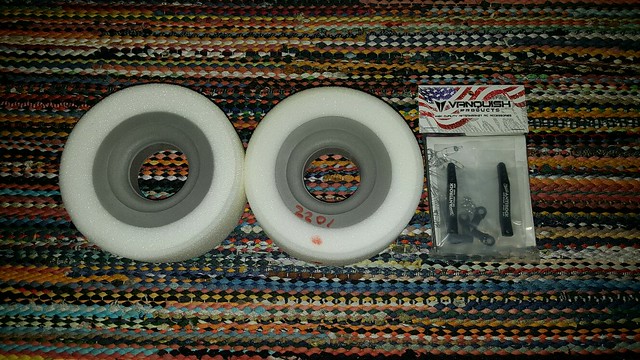 [/IMG] [/IMG][IMG] 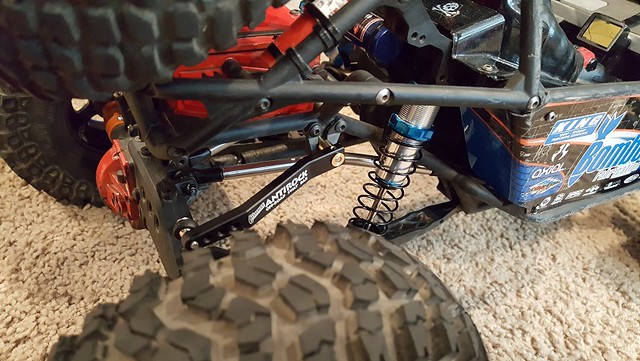 [/IMG] [/IMG]New spring kit for the Pro-Specs and some Poison Spyder diffs: [IMG] 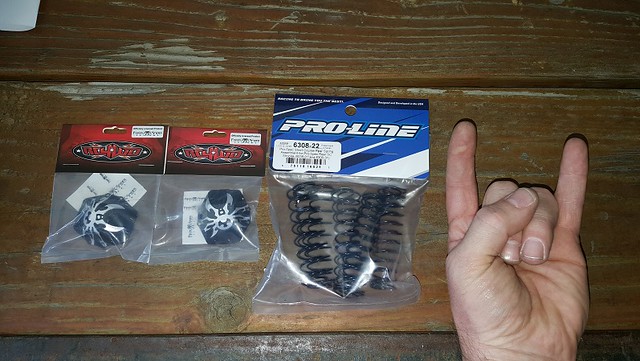 [/IMG] [/IMG]Burnt up a few cheap stock motors. Going to run this (Thanks to a sweet hook-up from RC Planet/Canyon hobbies) while I save my pennies for a roc412 and MMP: [IMG] 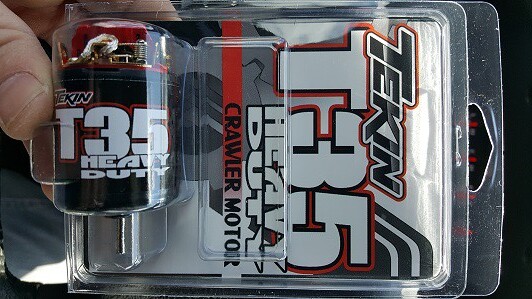 [/IMG] [/IMG]New graphics from Roguegrfx and the spare tire all matched up and installed: [IMG] 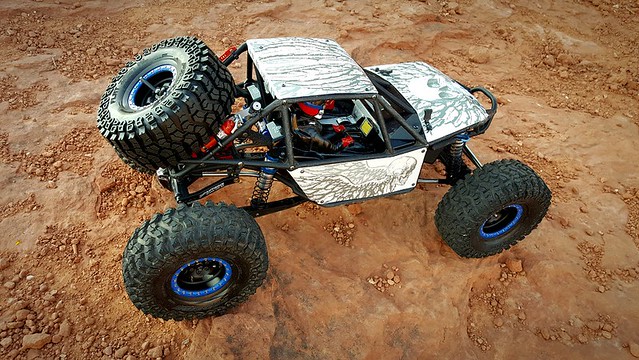 [/IMG] [/IMG]
|
|
| |
|
06-13-2016, 05:06 PM
| #68 |
| Quarry Creeper Join Date: Feb 2016 Location: Salt Lake City
Posts: 395
|
Update: Swapped out the Axial sway bar with the Currie Antirock because I felt the other had become too soft once the rig started getting heavy. The Antirock is quite soft in the softest setting. in fact, it is as soft or softer than my notched Axial sway bar. With new sway and improved shocks, my rig crawls better. It has a good amount of flex which I thought I was trying to eliminate to some extent beforehand. I thought I would need to go stiffer from where I was. However, the lines I have been crawling were more successful with a little softer flexier ride. The Pro-Line Pro-Specs are awesome and much smoother than stock. They are also a breeze to bleed. I didn't think I really needed to change out the shocks right away. I just planned on re-filling and dialing the stockers in a bit. There is no way they could be as smooth as these Pro-Specs are. I don't know how Pro-Specs compare to other shocks out there, I just know they're much better than stock. I'm running the softest spring up front (blue) and the second to most firm in the rear (red). The only spring that would suffice in the front is super soft (blue). I tried several springs in the rear. To my surprise, the stiffest spring (purple) while still being somewhat soft on my rig didn't perform as well and caused more roll overs than the (red) springs. For twist, I would prefer the purple; but, the red spring and soft setting on sway bar got me closer to completing the ever present, and so far unattainable, obstacle that I have been trying to check off over the past few months. This is a line I have been attempting every time I travel south for work. In fact, for the first time I was able to complete all the moves by themselves... I just could not complete them in succession from bottom to top. Another change was going from 5.5 soft Double Deuces in the rear to 6.0 Mediums with outer ring removed. This change also seemed to benefit crawling ability for me. The tires did seem to stand taller and thinner; but, I feel they still flex in the sidewall while offering a bit more support. The nice thing is the outer foams are the same for 5.5 and 6.0 if I am not mistaken. So, if I want to try another set-up, I could put the medium foams on the 5.5 inners in theory. For now, the set-up seems to work; but, I think I will try 6.0 soft up front just to be sure. I run my tires vented with two holes 180* apart. I put beef tubes in both axles along with Poison Spyder diff covers. Hopefully this adds a bit of strength and durability. [IMG] 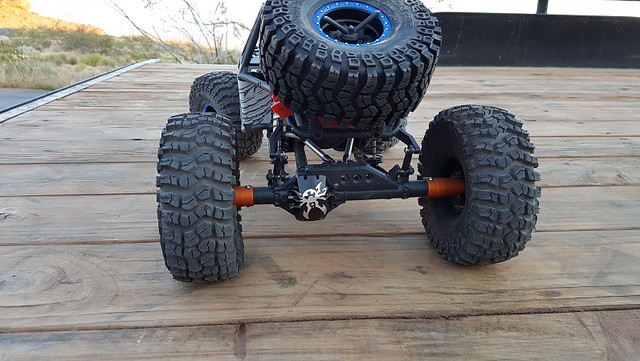 [/IMG] [/IMG]After burning up two motors, I went with a Tekin Heavy Duty Crawler motor and a 10T pinion. This set-up seemed to run much cooler during its first run staying in the upper 80* range. We'll see how it performs under harsher conditions and terrain next time I travel south to St. George. I realized at some point (not sure why it took so long to notice) that I was not getting a full wheel turn. The Incision tie rod was hitting my diff cover when turned and binding. These VP parts are stage 1 swap outs that should work with stock pieces as well as other VP items. Weird that tie rods do not have enough clearance and 4mm off set ends are near impossible to find. I have seen others with the same issue. The preliminary bandaid was to get the 3mm off-set rod ends off the Axial sway bar kit and drill them out to fit the 4mm rods. Not sure this would be the most durable solution and several threads are left exposed. [IMG] 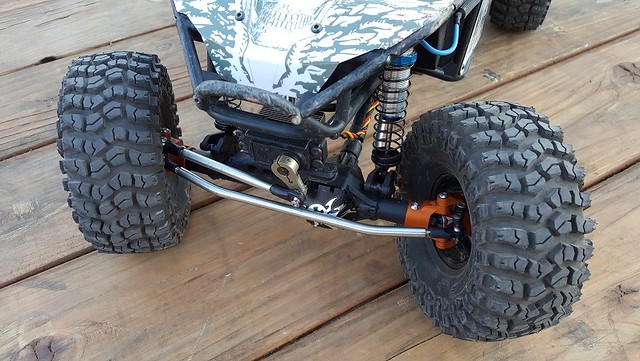 [/IMG] [/IMG]Then after searching high and low I came across Axial part #AX31186. This has (2) 4mm off-set rod ends on the tree. you need to cut them down a tiny bit to eliminate toe out; but, they do the trick and push the tie rod out just enough to allow a full turn. [IMG] 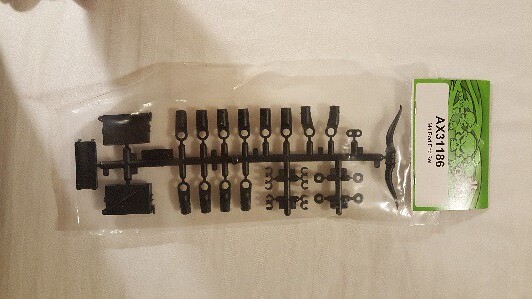 [/IMG] [/IMG]Emailed Rogue grfx about future availability and he was nice enough to push a Bomber sheet through quickly. [IMG] 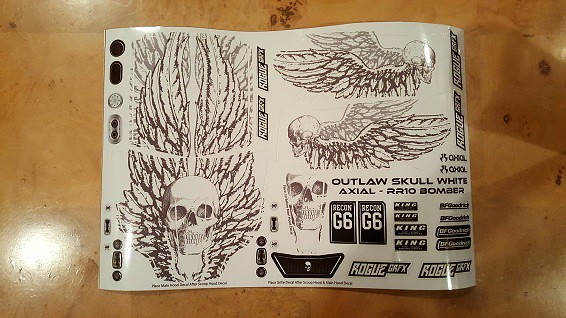 [/IMG] [/IMG][IMG] 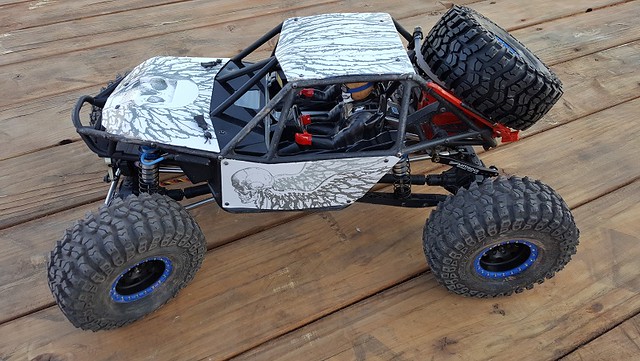 [/IMG] [/IMG][IMG] 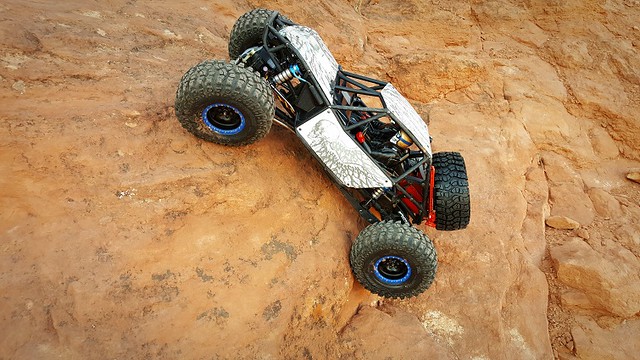 [/IMG] [/IMG]Although I have tried to stick with Vanquish parts as much as I can for most items, it has become a little frustrating waiting and hoping for so long that some items will come back in stock... trailing arms in particular. As soon as they came back they were sold out again. Obviously VP makes desirable products. This did in turn help me decide on something I had been debating... which was to possibly shorten the wheel base a bit. Even if Screamer is right and I eventually go to Twin Hammer length, I decided to order a set of Wraith length TA's from Blue Monkey. I will give a report once I get uppers and put that together. Maybe, just maybe that will be the last ticket to get my Bomber to the top of it's nemesis obstacle. And on that note, it has been nice to have one obstacle as a bench mark to measure improvements. Last edited by powder4breakfast; 07-06-2016 at 04:10 PM. Reason: grammer |
|
| |
|
06-29-2016, 01:49 AM
| #69 |
| Quarry Creeper Join Date: Feb 2016 Location: Salt Lake City
Posts: 395
|
I received my Blue Monkey Wraith length trailing arms and installed them with Wraith length upper links (Incision SS). I installed the uppers with longer 4m bent rod ends from the AX31186 kit listed above and a washer to get the pinion angle where it should be. Turns out that AX31186 is a pretty useful set of ends. I have used several pieces from that tree on my vehicle. I am very happy to have shortened up the wheel base. I feel it crawls better than the Yeti length backside. I like the Wraith TA's for what I am doing and have no desire at this point to go shorter with the Twin Hammer length TA's. [IMG] 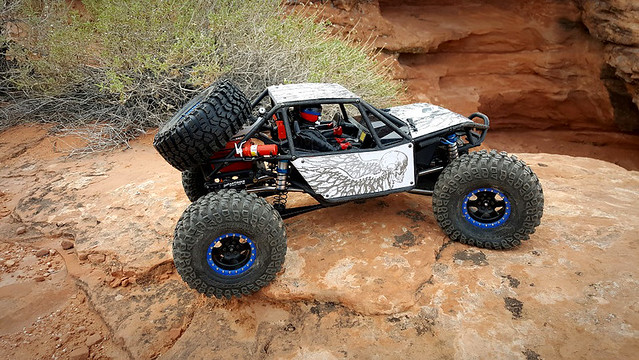 [/IMG] [/IMG]Bringing the rear axle closer meant that I needed to find new rear links for my Currie sway bar since the system was now bottoming out against itself when compressed. I first tried the links that came with the VP Antirock kit; but, those were tall enough to hit my spare on full compression. I then found some short Traxxas 3mm turnbuckles that put everything at the right length for less than 2 bucks. [IMG] 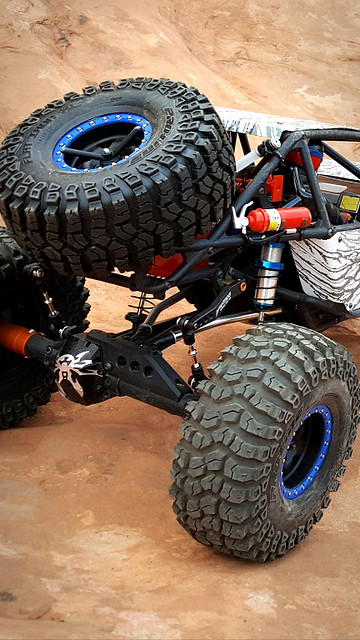 [/IMG] [/IMG]https://youtu.be/e5KyRKA-65Q |
|
| |
|
07-05-2016, 06:00 PM
| #70 |
| Quarry Creeper Join Date: Feb 2016 Location: Salt Lake City
Posts: 395
|
Finally feel that I am finished with my build once I add these Incision spools and beveled gear sets - stock 38T front and under drive 43T/13T rear. Excited to see better turning still along with reduced slop in the drive system, less torque twist and less pushing from the rear on steeps. [IMG] 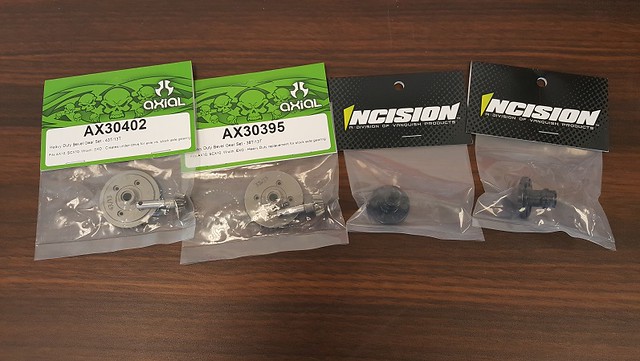 [/IMG] [/IMG]This is my first build. I have had so much fun seeing where the rig could be better, making an upgrade and then seeing improvement. It is really hard to not immediately dive right into my second build. Not sure if it will be another 2.2 so that I can have similarities and comparisons or a 1.9 SCX10 II I wish I had a picture of my new boxed car with all of the upgrades in front like some do; but, I had no idea I would end up here. In any case, below is my build list: - Axial RR10 Bomber RTR - Duratrax Onyx 3S 11.1V 4000mAh 25C battery (1 hrs 45 mins + crawling time) - Hitec 7954 servo - Axial aluminum clamping servo horn - Castle Creations bec - Incision stainless steel tie rod and drag link with Axial (AX31186) 4mm off-set rod ends. These ends can eliminate the steering binding and castor issues that can be lost with some aftermarket diff covers or C-hub/knuckles - Pro-Line Pro-Spec rear 100mm shocks - Blue spring (super soft) 30wt oil - Front. Red spring (hard) 40wt oil - Rear - Incision stainless steel links - Wraith length upper - Rear. Axial (AX31186) 4mm bent rod ends and 4mm shim to improve pinion angle - Blue Monkey Wraith length trailing arms - Vanquish Currie Antirock sway bar with Traxxas short turnbuckle links - Tekin Heavy Duty Crawler Motor 35T - brushed - Robinson Racing 10T pinion 32P - Axial H/D bevel gear 38T - Front - Axial H/D bevel gear under drive 43T/13T - Rear - D'Lux modified AR60 axle housings - Vanquish Stage One kit - Orange - Vanquish knuckle bushings - Vanquish AR60 knuckle weights - Vanquish VVD V1-HD - Beef Tubes - Brass (cut length of 1/8" round inside rear locker between axle shafts to eliminate side to side play and lockout rubbing) - Incision spool/locker - RC4WD Poison Spyder diff covers - SSD Rock Racer Rims - including spare - Pro-LIne Flat Iron XL - including spare - Crawler Innovations Double Deuce 5.5 Soft - Front (may swap to 6.0 soft) - Crawler Innovations Double Deuce 6.0 Medium with outer ring removed - Rear - Vanquish 12mm hex with Axial (AX3102 - DMG spare tire mount - Rogue GRFX Outlaw wrap/skin - Miscellaneous Hobby Gear and other scale pieces - Hi-Lift, Fire Extinguisher, Nos along with fuel tube and front shock lines - Testors promotional set and matte black paint for interior - 3mm shims next to rod end balls to eliminate slop with links - Some new bearings - Fast Eddie I think? ...maybe Traxxas Anything not listed is stock from RTR. Eventually I would like to add a brushless system; but, I should be content for a while if things stay cool and run like they are now. Thanks to all who have helped me since I knew nothing 5 months ago. Shops: DDMracing (davesmotors.com) first and foremost with Steve-O, RPP, RC Planet (local Utah front is Canyon Hobbies - Jeff is amazingly helpful) and West Valley Hobbies as a local front that usually will have what you need for your crawler. [IMG] 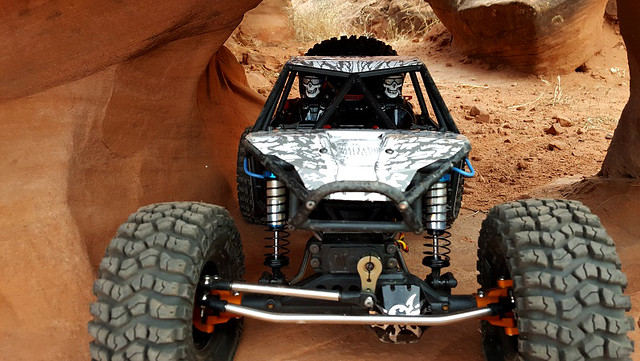 [/IMG] [/IMG]------------------------------------ Edit to add D'Lux modified housings to the build list. ...and now I "think" I am done with my build until I add brushless down the road. [IMG] 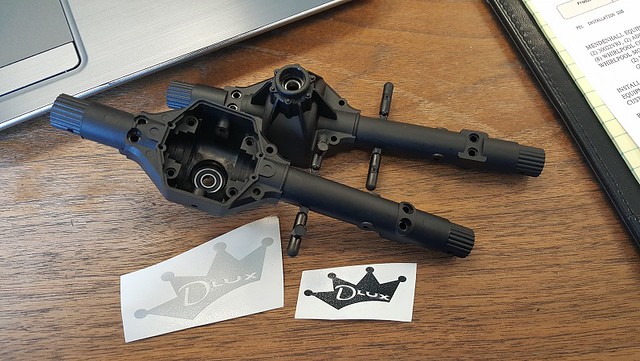 [/IMG] [/IMG]
Last edited by powder4breakfast; 08-17-2016 at 04:32 PM. Reason: Added D'Lux modified housings and VP knuckle weights to the build |
|
| |
|
07-05-2016, 11:56 PM
| #71 |
| Pebble Pounder Join Date: Dec 2013 Location: Irvine, california
Posts: 184
|
Its been fun watching your build progress to where it is now! before building up another rig, i suggest you throw a brushless system in it first. it will transform the rig completely! and im sure you will break stuff because of it meaning you can keep this build going for longer  |
|
| |
|
07-15-2016, 03:46 PM
| #72 |
| Quarry Creeper Join Date: Feb 2016 Location: Salt Lake City
Posts: 395
|
With the under drive in the rear, Wraith T/A's and Currie Antirock sway bar... torque twist is practically a non-issue. I love this rig so much. I have no idea how it compares to other crawlers since it is my one and only; but, It performs incredibly well compared to how it started out as stock. Since I am basically done building (minus a few non-performance enhancing upgrades and of course brushless at some point) how about a TRIP REPORT with pics? I feel that I am fortunate to live in the beautiful state of Utah. If you love the outdoors, this place is really amazing. I travel for work and this allows me to spend time in some pretty great places. This week I spent 2 nights in Moab near Arches and Canyonlands national parks. I decided to run a trail that I did a few times before many vehicle upgrades. It was nice to compare how my bomber handled then vs now. Moab Rim is a great trail for full size 1:1 rigs, scaled rigs and even just a hike with a rewarding view at the end [IMG] 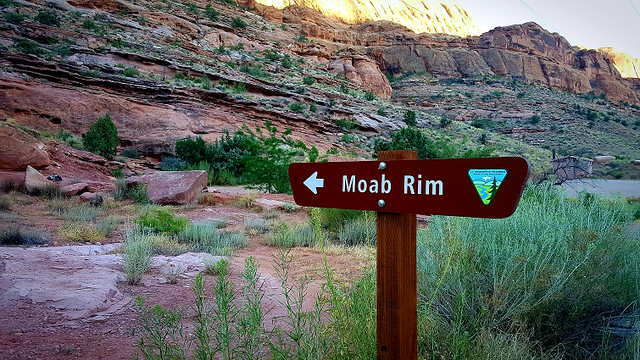 [/IMG] [/IMG][IMG] 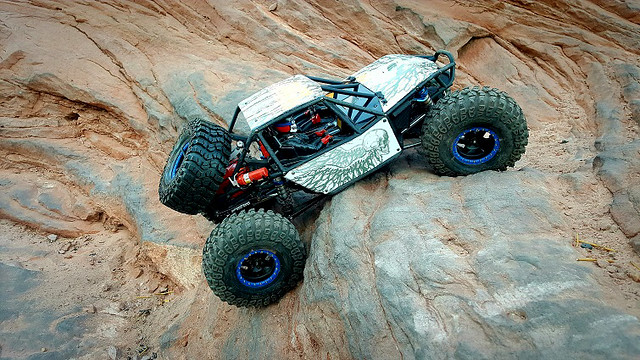 [/IMG] [/IMG][IMG] 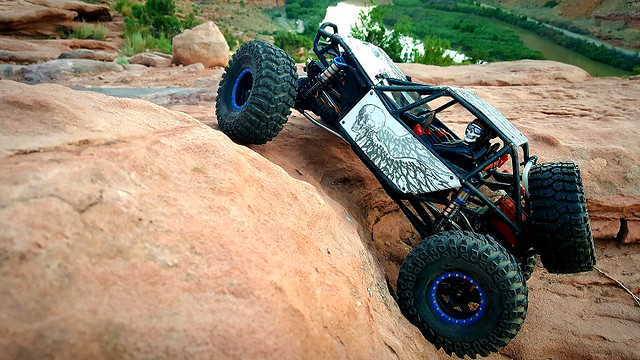 [/IMG] [/IMG][IMG]  [/IMG] [/IMG]Along the way you can watch some 1:1 rigs doing the same thing on a larger scale. One lady got quite a kick out of the bomber and stopped to take video of it doing its bad scaled down little thing [IMG]  [/IMG] [/IMG][IMG] 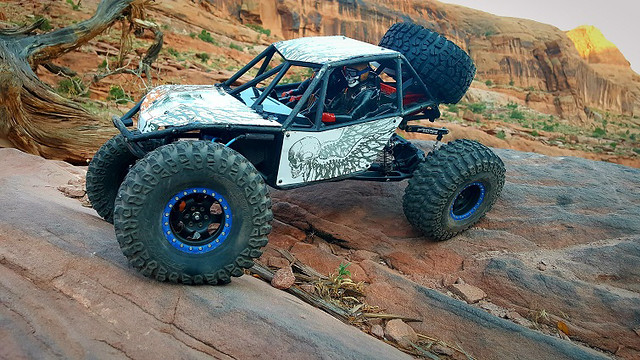 [/IMG] [/IMG]Where the trail ends. Nice view of Moab. Picture doesn't show the detail; but, the left portion of the horizon line is Arches NP. You can see arches and windows in person from this point [IMG] 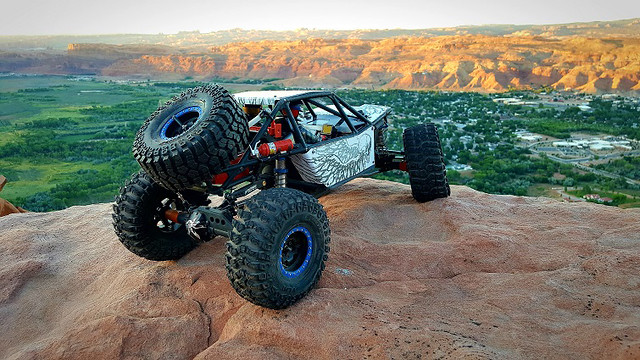 [/IMG] [/IMG]Great place to catch a sunset before driving back down [IMG] 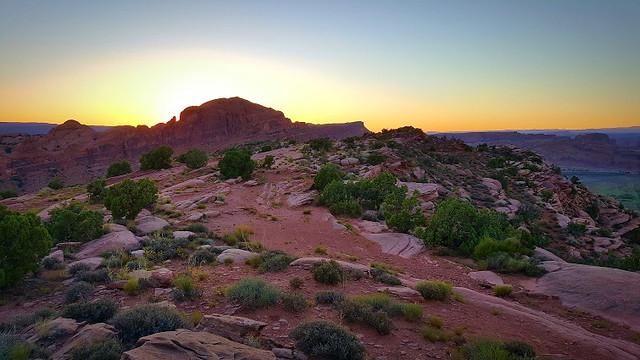 [/IMG] [/IMG]As if a night like this couldn't get any better... Fiesta Mexicana [IMG] 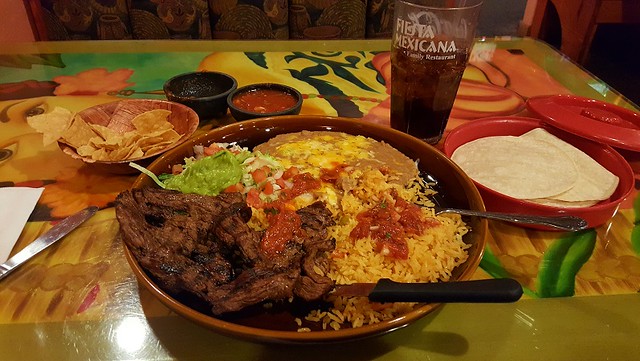 [/IMG] [/IMG]One nice thing about this trail is that it is full of steps and ledges going both up and down. This means you get to climb obstacles in both ascending and descending directions. This week's crawls were enough to ease my mind and make me forget, momentarily, that I have a 1:1 sitting in the middle of my garage that needs axle work finished up... uggghhh [IMG] 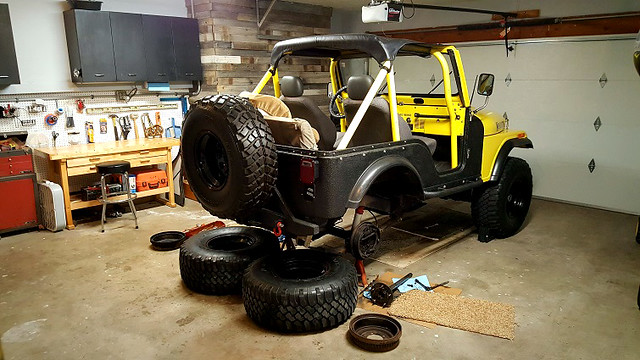 [/IMG] [/IMG]
Last edited by powder4breakfast; 07-15-2016 at 04:45 PM. |
|
| |
|
07-18-2016, 11:05 AM
| #73 |
| Quarry Creeper Join Date: Feb 2016 Location: Salt Lake City
Posts: 395
|
So after a bit of stoke its time to get back to the "...Help I Need" part of this thread. After changing to H/D bevel gear sets (stock Scorpion front and under drive rear) I have a really loud clicking noise when I release the throttle and the vehicle begins to slow/brake. When descending the Moab Rim trail, it was almost constant. The clicking is not there on acceleration or climbing. The clicking is loud, not faint at all. I have searched and found several different possible causes of clicking. Being new, I am still a little leery of tearing everything apart trying to find the cause when I'm not exactly certain I'd notice it if I saw it. I'm not sure what I'm looking for... or what is/isn't normal. With the H/D gears, I also installed D'Lux modified AR60 axle housings with larger inner bearing. The rear with the under drive was a nice tight fit, no shimming needed. The front H/D stock gears needed a small shim. I placed this shim inside the housing between the bearing and pinion. This made a nice tight fit like the rear. From what I have read, it could be a bad bearing, wheels stripping (doubt this one), slipper pad or plate area, tightening of slipper plate (how tight?) something in the transmission, a cover that needs to be modified and so on. Any help on best place to start or the order in which I should proceed first would be helpful... or if this is normal with H/D and under drive. Let me know if video of clicking would help. Last edited by powder4breakfast; 07-18-2016 at 11:07 AM. |
|
| |
|
07-18-2016, 05:22 PM
| #74 | |
| Rock Stacker Join Date: Mar 2016 Location: in a van down by the river
Posts: 60
|
Shaun, No suggestions on where to start, but can tell you I have no clicking with my H/D front and U/D rear. Quote:
| |
|
| |
|
07-20-2016, 01:52 AM
| #75 |
| Pebble Pounder Join Date: Jan 2016 Location: Worthing, England
Posts: 157
|
I had a mysterious clicking, turned out to be the transfer case needed new bearings and greasing (greased it when I first got it but ran in some water)
|
|
| |
|
07-20-2016, 03:09 AM
| #76 |
| I wanna be Dave Join Date: Apr 2015 Location: Roseville, Ca
Posts: 2,506
|
Sounds like typical bomber tranny/tcase issue. Probably needs grease, possibly new bearings as well. You could disconnect both driveshafts and run the motor and see if its the tranny/tcase. |
|
| |
|
07-20-2016, 08:28 AM
| #77 |
| Rock Crawler Join Date: Mar 2016 Location: HB
Posts: 946
|
Do you have Mip driveshafts? If so did you align the pins when you put it back together?
|
|
| |
|
07-20-2016, 09:42 AM
| #78 |
| Quarry Creeper Join Date: Feb 2016 Location: Salt Lake City
Posts: 395
|
Shiftauto: I am running the stock drive shafts Thank you everyone for the input. I will dig into the transmission to grease and replace bearings first. |
|
| |
|
07-24-2016, 11:58 PM
| #79 |
| Quarry Creeper Join Date: Feb 2016 Location: Salt Lake City
Posts: 395
|
I tore apart the transmission. Turns out it was fine other than a little dry. None the less, I installed new metal sheath bearings and greased it all good. While the drive lines were apart, I noticed the rear end was smooth (D'Lux modified housing with larger inner bearing, H/D under drive gears, no shim) - the trany was smooth (new bearing and grease) - but, the front end was crunchy (D'Lux modified housing with larger inner bearing, stock ratio H/D gearing with a shim between the pinion and inner bearing inside the housing). When I shimmed the front, the set-screw pin that locks the driveline together fit right in. I assumed this meant the mesh was tight and right... this is about how the rear fit and was supposed to be. Will it wear in? Should I remove the shim? Should I put a thinner shim in? If anyone has H/D gearing in D'Lux modified housings, please share your set-up regarding shims. Eric said no shim with under drive; however, he did feel a shim might be good for stock ratio H/D ...wasn't sure of shim size. This has to be the clicking I heard. Removed the front diff and it looked like the mesh was tight enough that the grease was pushed out from the teeth and just sitting around the outside. Fast Eddie transmission grease is what I'm using. Last edited by powder4breakfast; 07-25-2016 at 12:07 AM. |
|
| |
|
07-27-2016, 08:22 AM
| #80 |
| Quarry Creeper Join Date: Feb 2016 Location: Salt Lake City
Posts: 395
|
Without a shim in the front, I felt that the mesh was a little loose. I re-read a PM where Eric suggested a .010 or .020 shim through trial and error to see what worked. I was just using a washer, not sure what size. Although the pin went into place... The washer as a shim was obviously too tight. I removed the washer and installed a shim that I found in the parts bag from my Pro-Line Pro-Spec shocks: [IMG] 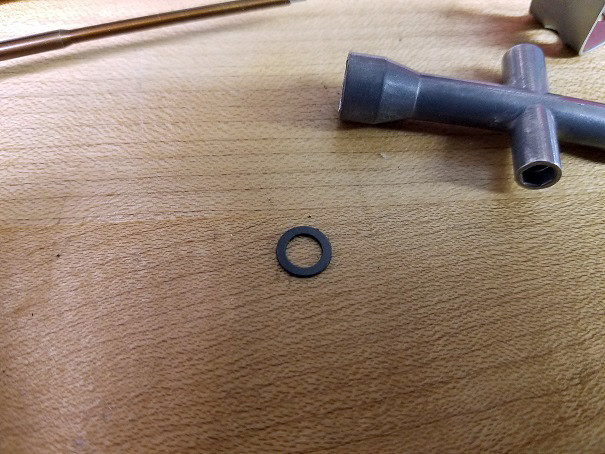 [/IMG] [/IMG]I'm not sure what size this is; but, it is half the thickness of the washer I was using. I'm thinking .010..? With this shim in place, mesh was still tight and clicking was gone. Re-greased and tested - crunchy clicking problem solved. On the plus side, I ended up with all new metal sheathed bearings and proper grease in my transmission. I shouldn't have to worry about that for a while. |
|
| |
|
 Beginner's Bomber Build - What I've Learned and Help I Need - Similar Threads
 | ||||
| Thread | Thread Starter | Forum | Replies | Last Post |
| Basic Toyota Land Cruiser FJ40: Beginner's Build | eddievedder | 1.9 Scale Rigs | 41 | 02-12-2020 08:28 AM |
| Bomber Build | bombardorphil@gmail. | Axial RR10 Bomber | 1 | 03-08-2016 10:58 AM |
| Ben's Bomber Build | Mnster | Axial RR10 Bomber | 11 | 03-08-2016 12:46 AM |
| My Bomber build | bredmx | Axial RR10 Bomber | 8 | 12-28-2015 11:51 AM |
| Beginner's Tool kit. | heefageLA | Tools, and Procedures | 12 | 09-17-2011 08:24 PM |
| |


 Linear Mode


