| |
 01-25-2013, 03:08 PM
| #21 |
| Quarry Creeper Join Date: Oct 2010 Location: Hendersonville
Posts: 209
|
Ok yall. I've got a cool update, but first, I have to say this: MY PITBULLS ARRIVED! Holy moly boys. These things are friggin sweet-o. I wasted no time snapping some pics next to my ripsaws... 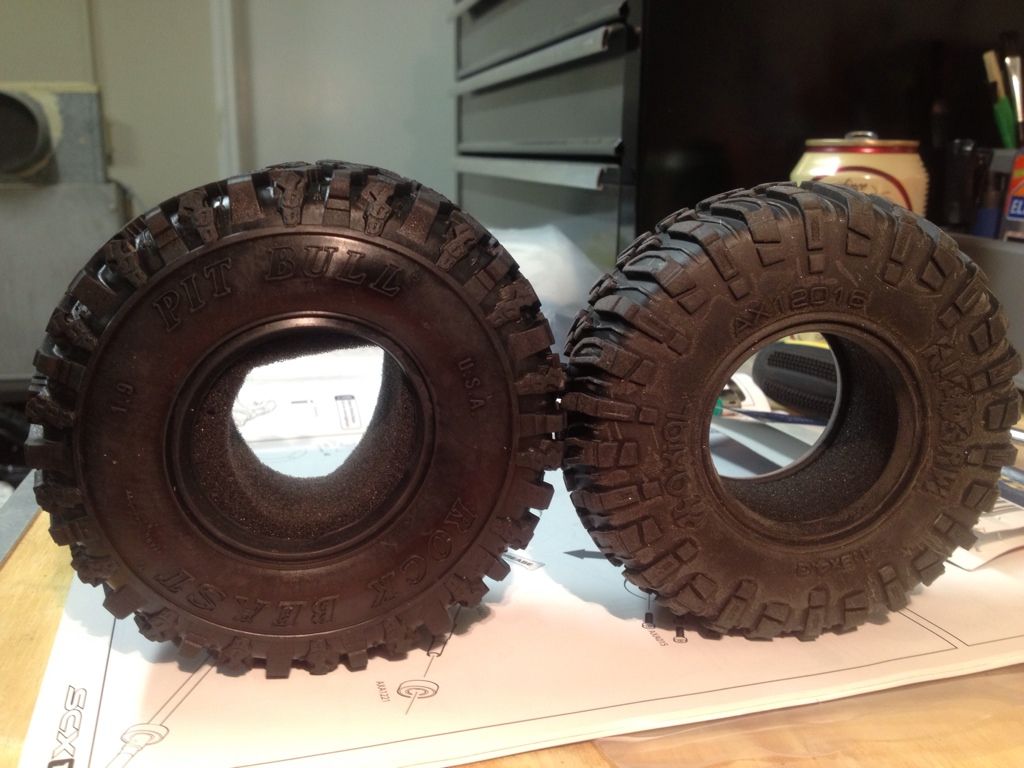 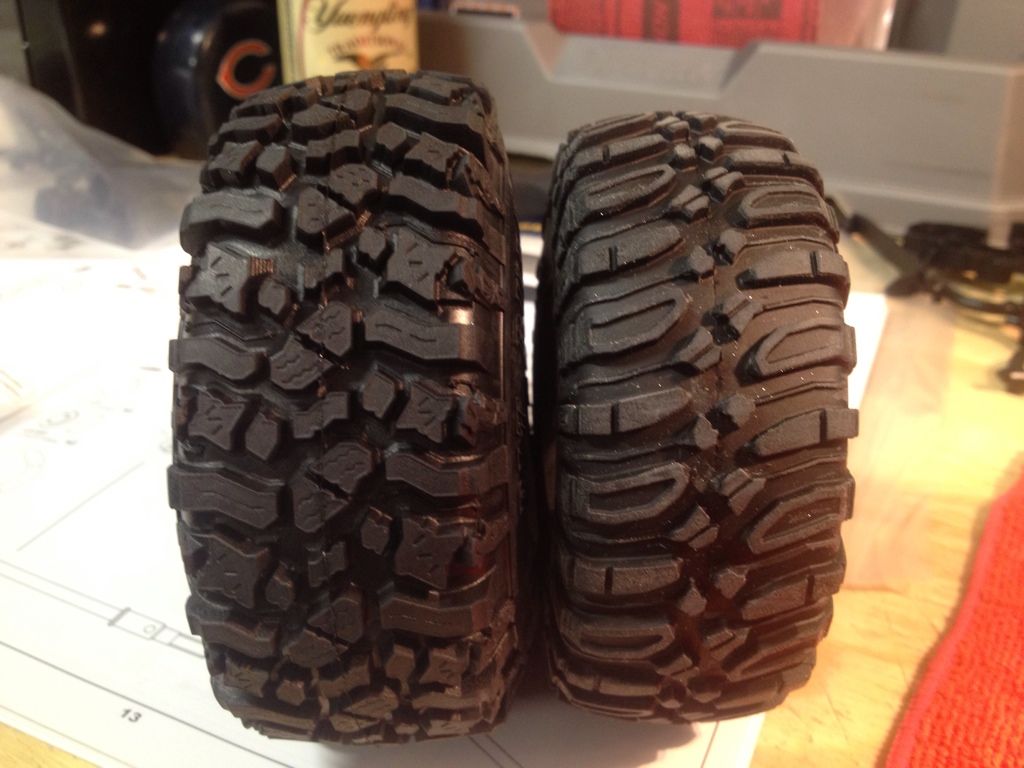 How ya like those puppies!!!!! |

|  |
| Sponsored Links | |
| | |
|
01-25-2013, 03:18 PM
| #22 |
| Quarry Creeper Join Date: Oct 2010 Location: Hendersonville
Posts: 209
|
So of course I wasted no time mounting these on my axial satin chrome beadlocks. I love these wheels, and the Pitbulls look amazing on them. I wish I had taken some pics of mounting them, but let me say that it was on the harder side of things to do due to the fat foam they supply with these tires. Of course, the first side is easy, but the other side takes some "gentle persuasion". Actually fellas, just massage the heck out of the foam and get it as far to the side you have already put the ring on and then when you get the 2nd lock ring on, massage the foam back in place with the tire fully mounted on the rim. The tires are soo flexible, that you can actually "shift" the foam inside if you take your time. But I admit, if you jut try to mount this quickly without shifting the foam... well, I had a 2nd beer getting these done, and I'm typically a one-beer-per-day kind of guy. 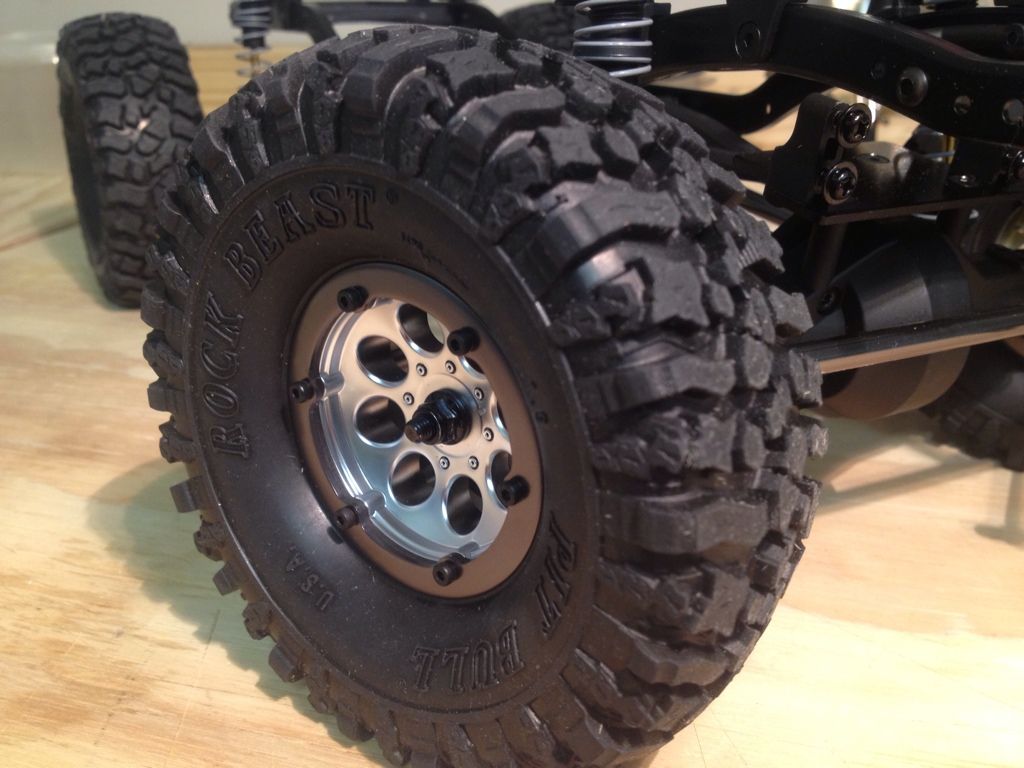 |
|
| |
|
01-25-2013, 03:21 PM
| #23 |
| Quarry Creeper Join Date: Oct 2010 Location: Hendersonville
Posts: 209
|
Oka.. full on poser shot before I get the body-sticker strippin section going on.... Just for you DC! 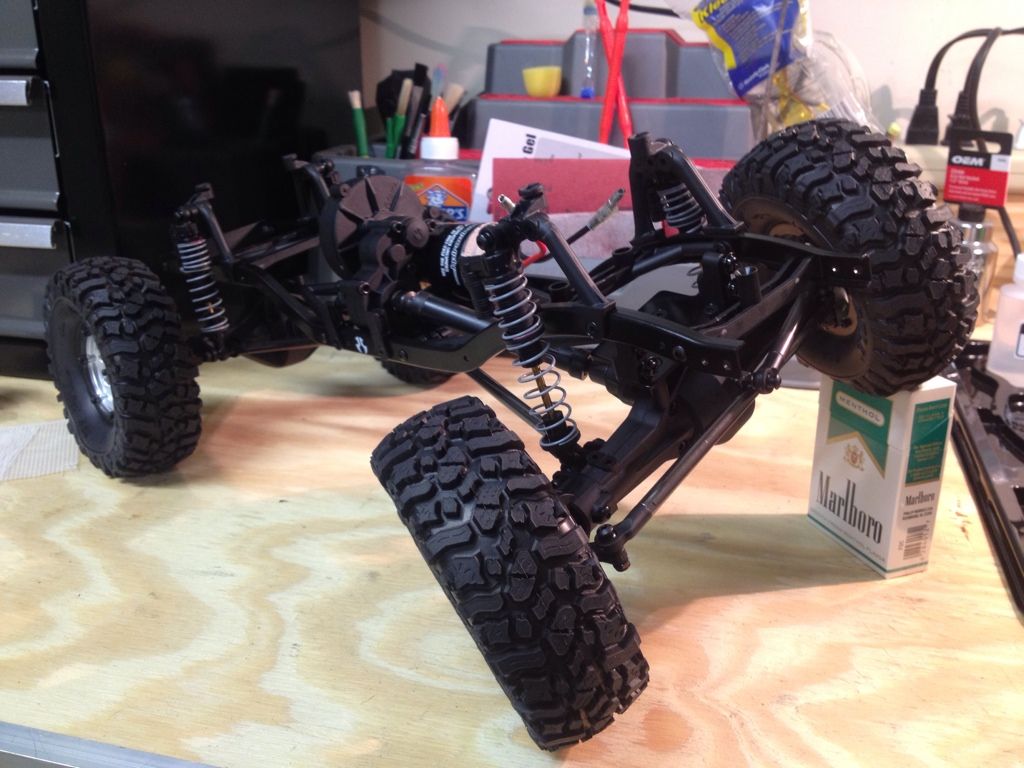 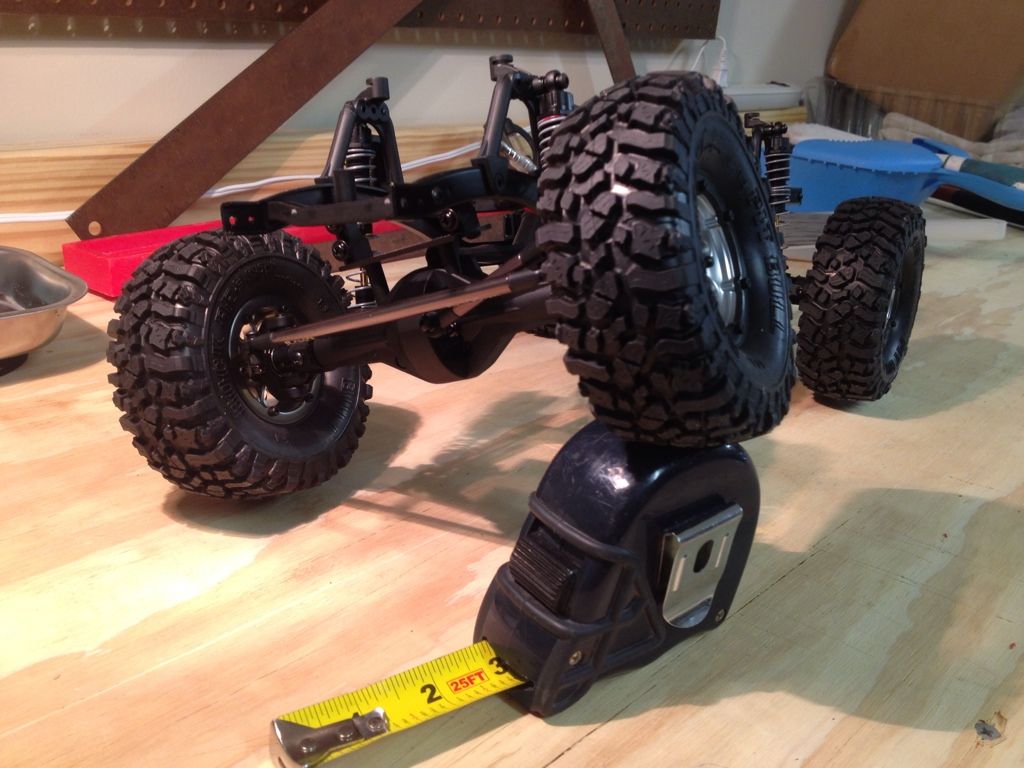 |
|
| |
|
01-25-2013, 08:50 PM
| #24 |
| Quarry Creeper Join Date: Oct 2010 Location: Hendersonville
Posts: 209
|
Ok. Got some "bodywork" done. If you remember, I bought this NB TJ body on eBay. 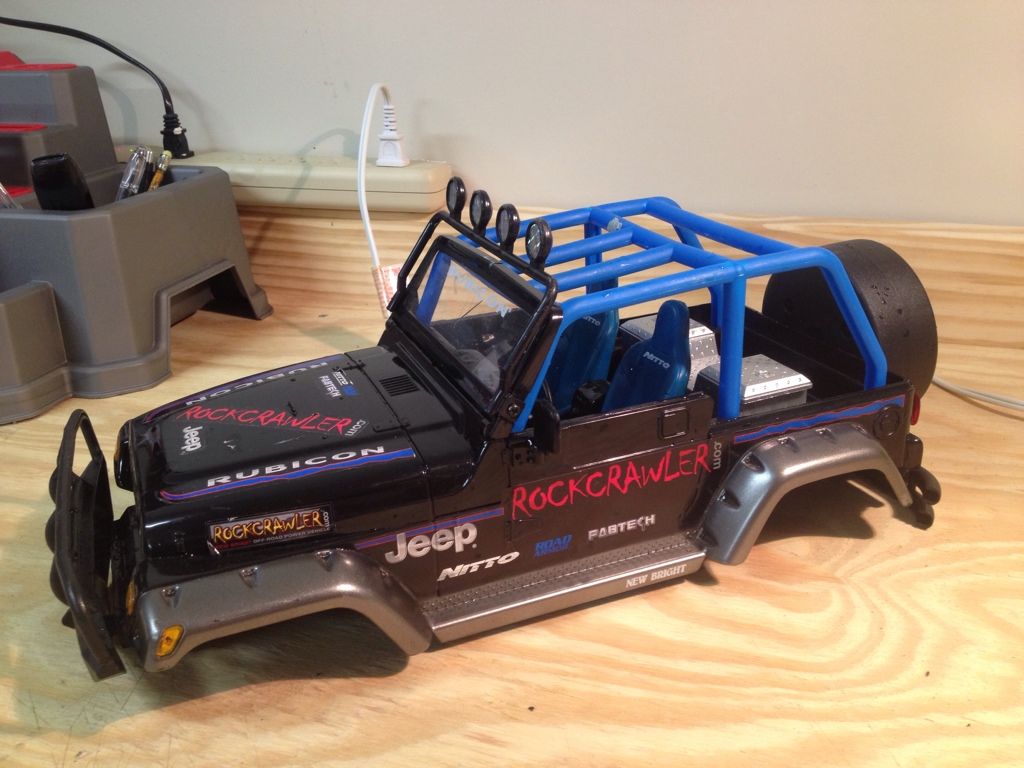 So, first things first... It had to be dismantled. After all, the best way to build a masterpiece (hahahaha) is to start at the foundation. So, off goes anything I can remove!  Dang it... Upon removing the windshield (still not sure why I decided to do that anyway), I broke one of the plastic tabs that hold it onto the jeep body. I'll have to figure that out later.. or go hardcore and make this jeep minus a windshield like the tough guys do. Also, to my fellow noobs, PLEASE be careful with the seats. Now, maybe mine were weak from being sun-baked or something, but they were brittle as all get-out. One of them cracked, literally from removing the screw that holds it into the body. See for yourself: 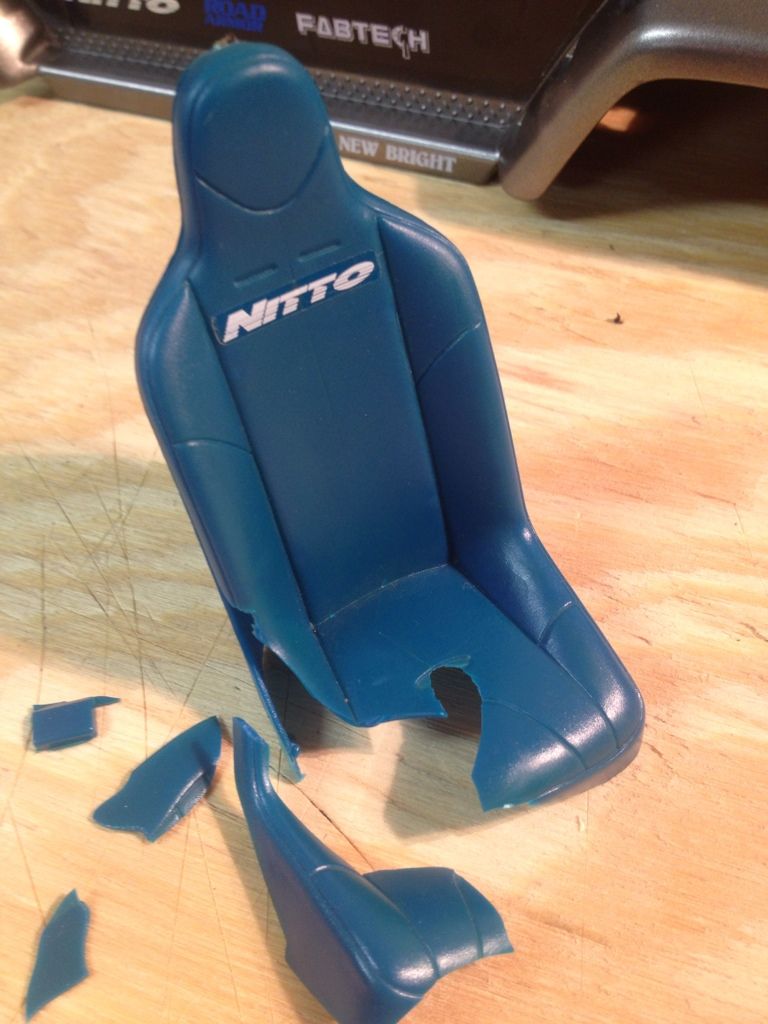 Now that just stinks don't it?! This might turn into a one seater Jeep crawler... Or I'll swap out these seats for some aftermarket ones.. Not sure yet. |
|
| |
|
01-25-2013, 09:03 PM
| #25 |
| Rock Crawler   Join Date: Mar 2011 Location: USA
Posts: 760
|
Put masking tap over the top of seat ,put all the pieces back together ,the use some shoe goop on the inside cover it good should hold after dries,,,,,KMS,,,,,
|
|
| |
|
01-25-2013, 09:04 PM
| #26 |
| Quarry Creeper Join Date: Oct 2010 Location: Hendersonville
Posts: 209
|
Sooooo..... sticker removal is a PITA. Another tip for my noob brethren coming up.. PAY ATTENTION! After exhausting myself into frustration when every cleaning agent in my house would not get the sticky backing of the stickers off of my Jeep body, I realized that I had consumed beer #1 and was left looking at a Jeep body with pretty much the white remains of every sticker on it. I was fit to be tied. Then I had an epiphony... I had one can of something that was soon to become my miracle cure for baked on stickers. With the following picture, I will save you all a tremendous headache and share with you my secret for EASY sticker removal: 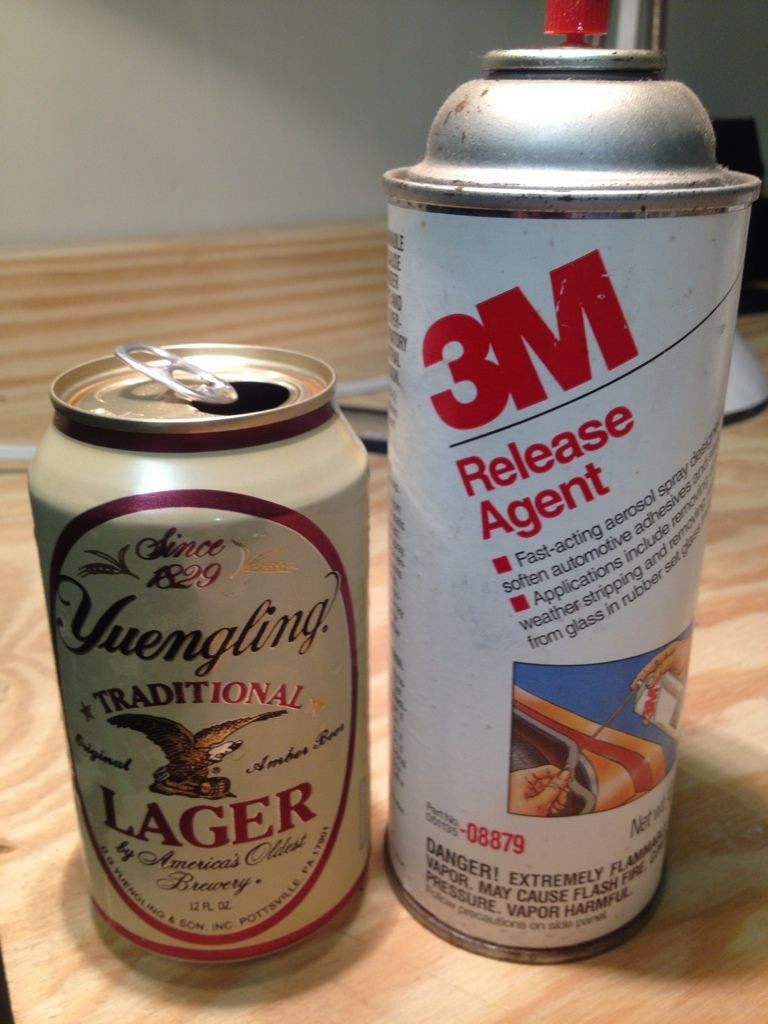 That's right friends.... another beer (for me of course) and 3M Release Agent. This stuff is MAGIC IN A CAN. I liberally doused the body with this stuff and let it sit for 5 minutes. I grabbed a plastic edging tool and went to work. What I thought was going to be a painful endeavor turned out to be a pleasure. Apparently, the folks at 3M have founf the perfect chemical combination to eat through sticker residue.  3 cheers for 3M.... and Yuengling....  |
|
| |
|
01-25-2013, 09:08 PM
| #27 |
| Quarry Creeper Join Date: Oct 2010 Location: Hendersonville
Posts: 209
|
Thanks for the tip KMS! I would try that but my temper unfortunately took care of the rest of that seat. Oops....
|
|
| |
|
01-25-2013, 09:19 PM
| #28 |
| Quarry Creeper Join Date: Oct 2010 Location: Hendersonville
Posts: 209
|
Well, seeing as how this is called a "comp-cut" build, and with stickers not taunting me any longer, it was time to get the dremel spinning.... Off go the stock fenders, quickly followed by some "extra" fenderwell trimming.... 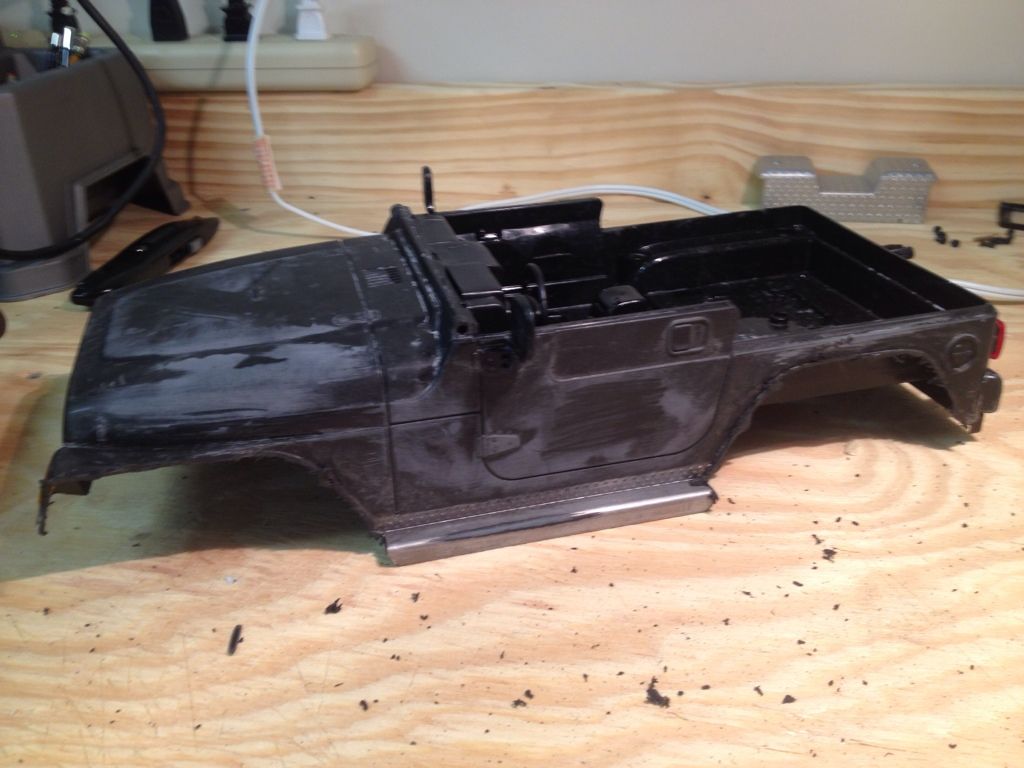 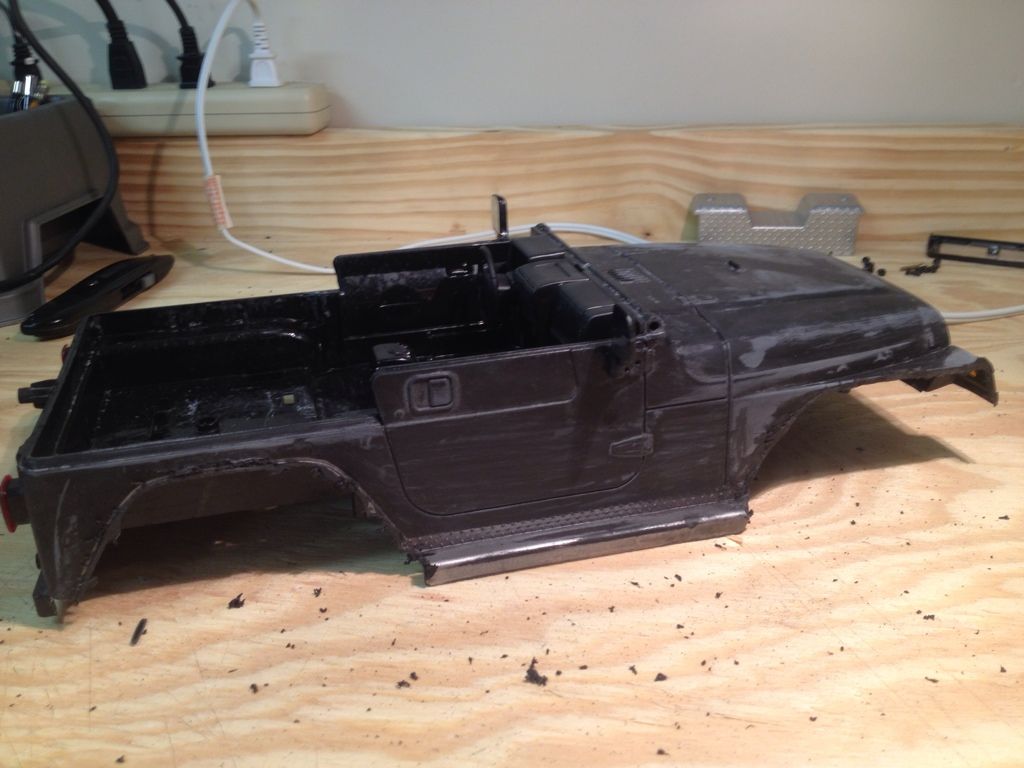 I love what I did with the front fenders.. I decided to leave a littlebit, but cut it at an angle. The result IMO is totally sweet... 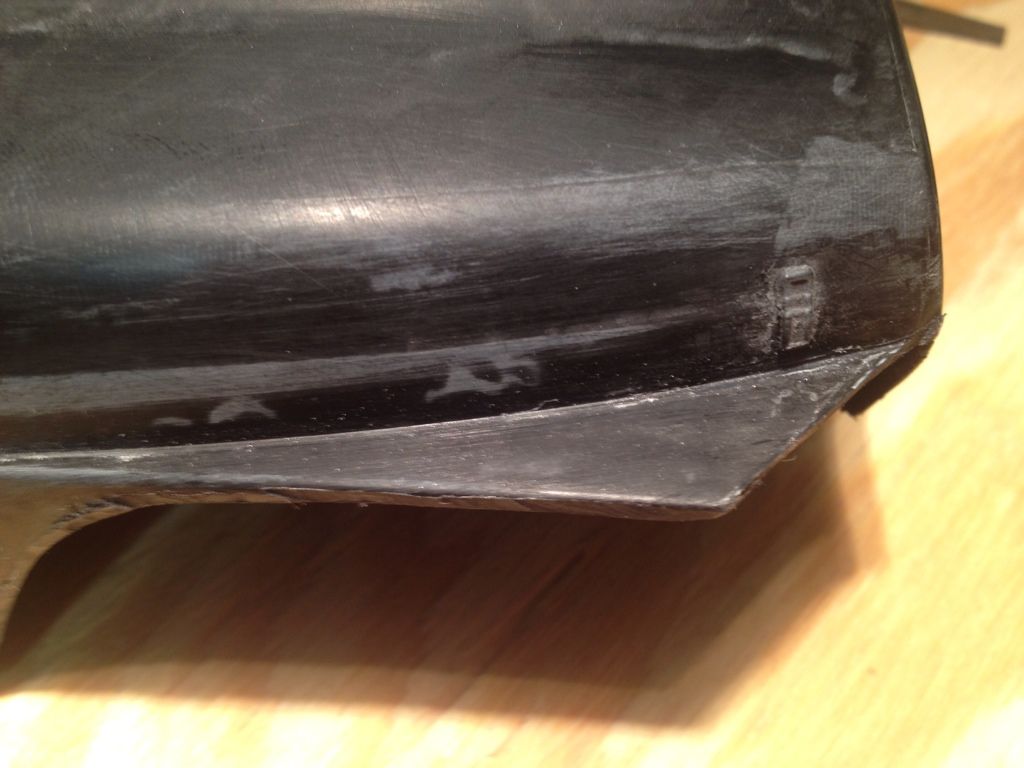 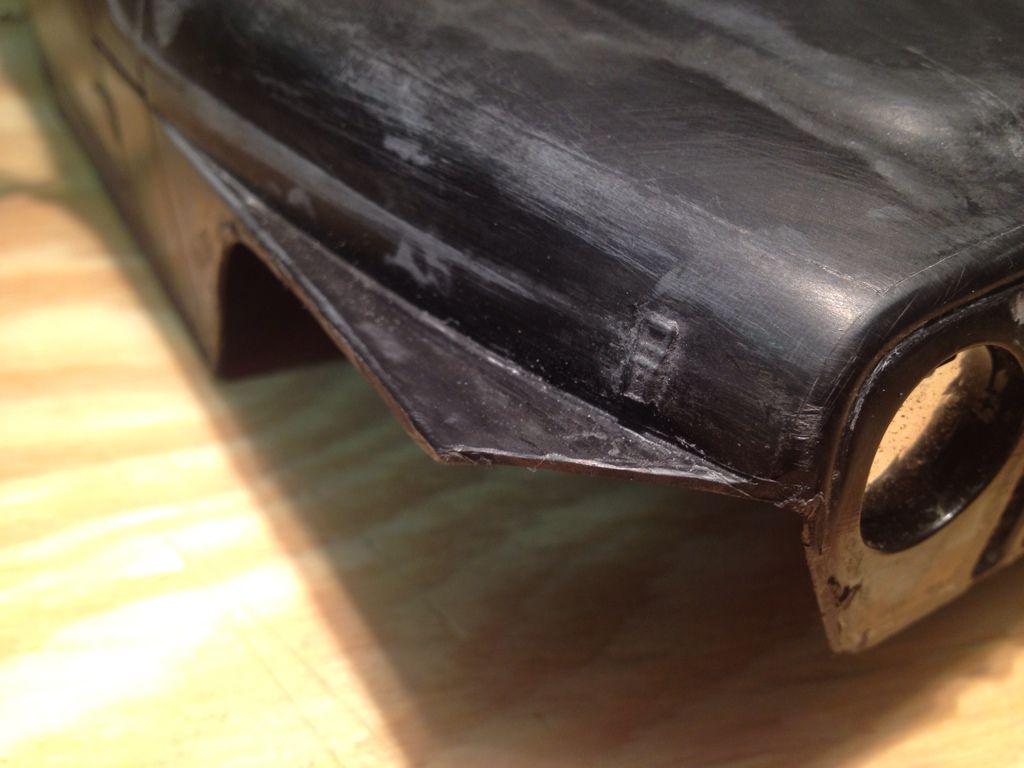 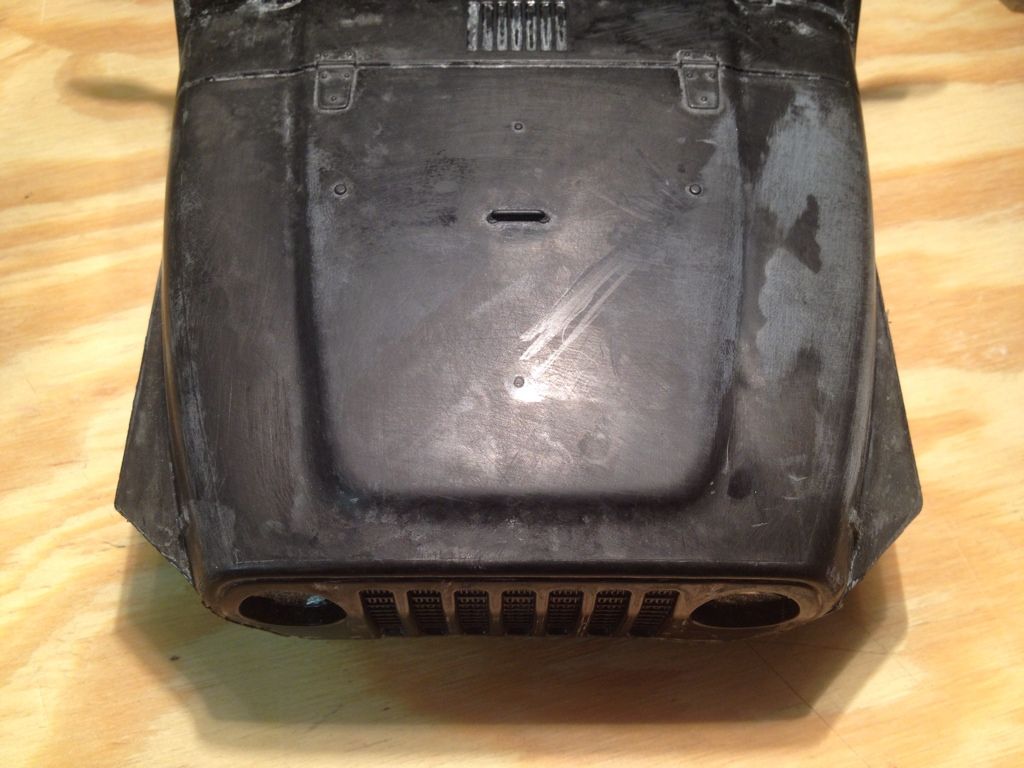 So what do you guys think so far? |
|
| |
|
01-25-2013, 09:26 PM
| #29 |
| Quarry Creeper Join Date: Oct 2010 Location: Hendersonville
Posts: 209
|
The rear fenders needed to just be trimmed all the way back if this is going to be a comp-cut TJ. I also had to cut some of the rear bed to fit the shock hoops through it, because I wanted to keep the stock shock hoops. I like the way they look sticking through the body. It gives it that "custom crawler" feel.  And trim up the rear... I left the stock taillights for now, and the license plate (whats left of it. I'll probably whack that off later.. 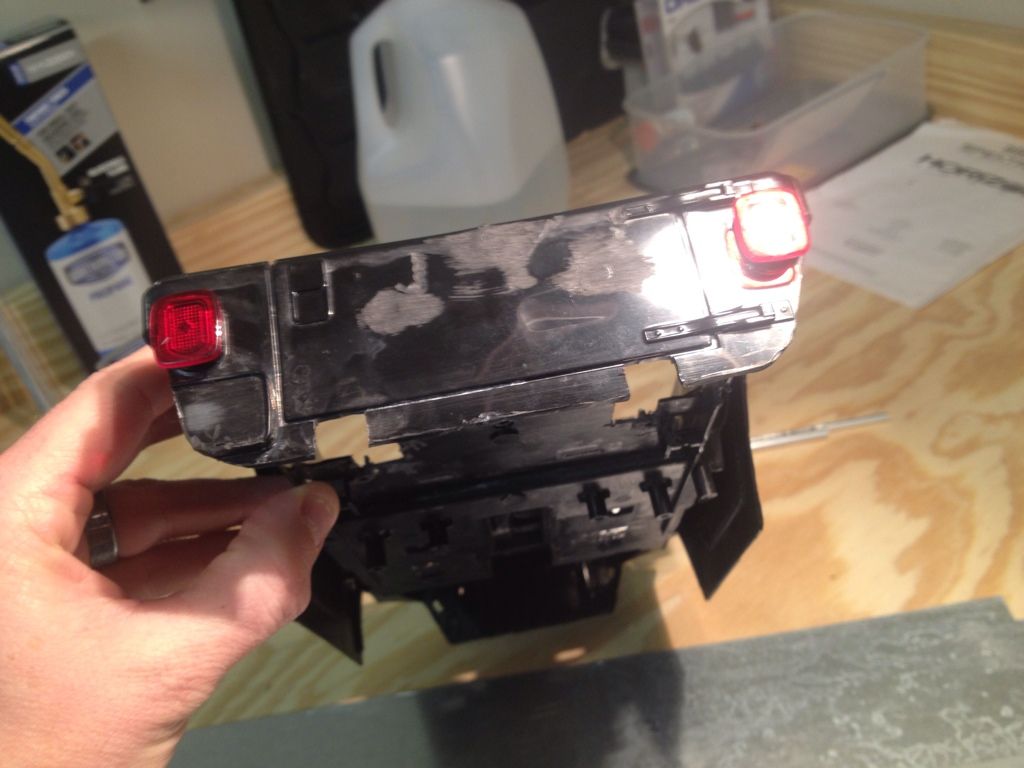 The 2 slots on the bottom are so the body sits over the chassis rails... |
|
| |
|
01-25-2013, 09:26 PM
| #30 |
| Rock Stacker Join Date: Nov 2012 Location: Mint Hill
Posts: 60
|
nice build, i like the lines on the front fenders, keep em comin |
|
| |
|
01-25-2013, 09:32 PM
| #31 |
| Quarry Creeper Join Date: Oct 2010 Location: Hendersonville
Posts: 209
|
Ok. Last post before sleepy time... the gratuitous "body on the chassis" shot we;ve all been waiting for... 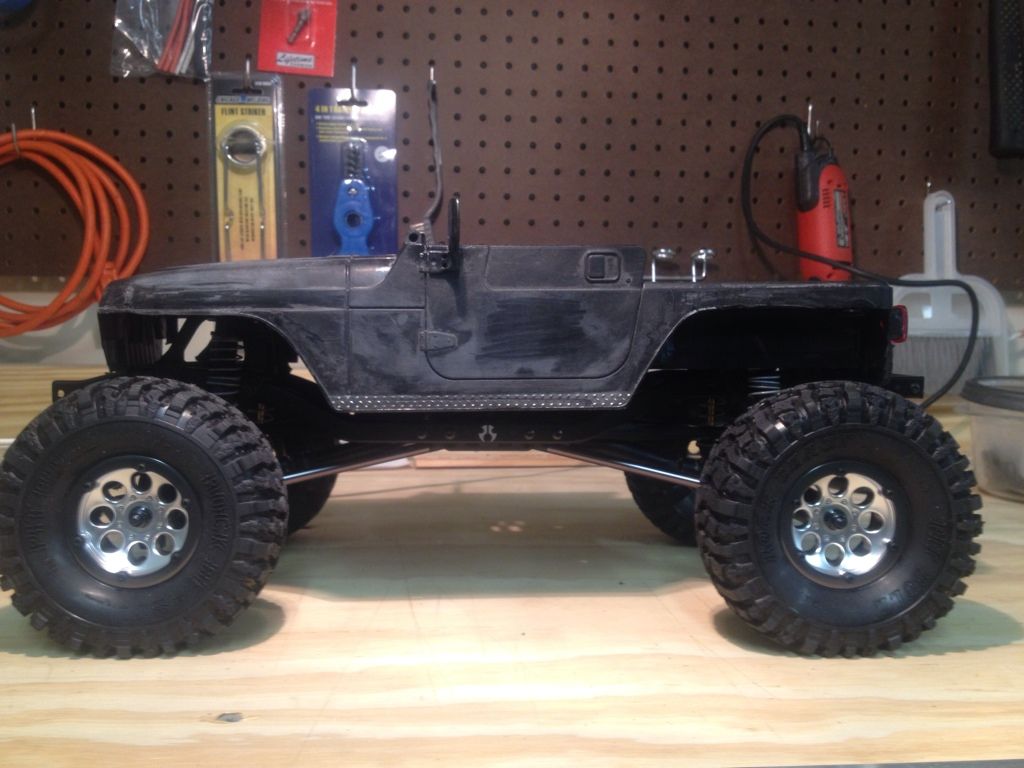 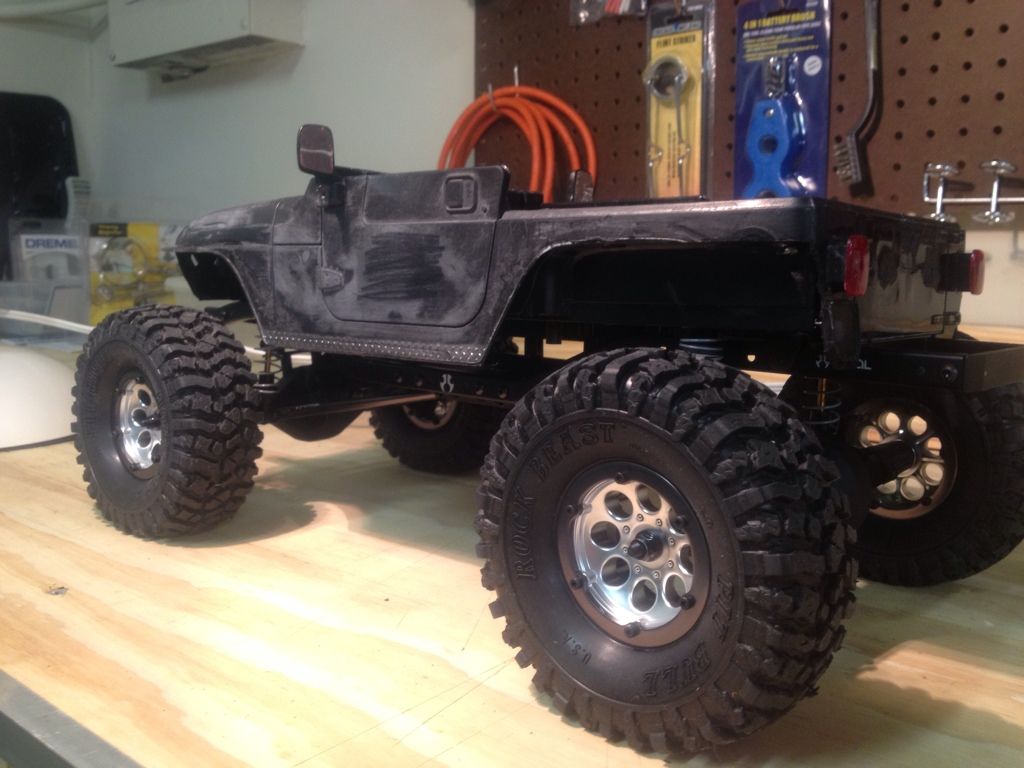  Its nice to see it coming together... It makes me more anxious to keep working on it. I'm excited already. I hope it eventually earns a thumbs up from some of you. Good night! |
|
| |
|
01-25-2013, 11:14 PM
| #32 |
| Newbie Join Date: Jul 2012 Location: BC
Posts: 44
|
Looking good!!
|
|
| |
|
01-26-2013, 04:46 AM
| #33 |
| Rock Crawler Join Date: Sep 2008 Location: You will never find a more wretched hive of scum and villainy
Posts: 901
|
thats looking really good cant wait to see pics of it on the falls
|
|
| |
|
01-26-2013, 01:18 PM
| #34 |
| Pebble Pounder Join Date: Nov 2012 Location: illinois, rockford
Posts: 186
|
thats with the dingo wheel base?
|
|
| |
|
01-26-2013, 02:54 PM
| #35 |
| RCC Addict Join Date: Nov 2004 Location: union
Posts: 1,657
|
Hey man it looks like you're making great progress. Those pitbulls look awesome under there! Might have to get a set for myself. Have you looked into mthead beadlock rings for the stock axial wheels. They're super cheap and imo really set off a set of wheels. Delrin Beadlock Rings!!! (Axial, VP, Mayhem, TSS and others!) He's mine  Last edited by klabeaume; 01-26-2013 at 02:59 PM. |
|
| |
|
01-26-2013, 04:53 PM
| #36 | |
| Quarry Creeper Join Date: Oct 2010 Location: Hendersonville
Posts: 209
| Quote:
Last edited by jkabee; 01-26-2013 at 04:56 PM. | |
|
| |
|
01-26-2013, 05:01 PM
| #37 |
| Quarry Creeper Join Date: Oct 2010 Location: Hendersonville
Posts: 209
|
Those DO look sweet Klabeaume! I'll check into those.
|
|
| |
|
01-26-2013, 05:50 PM
| #38 |
| RCC Addict Join Date: Nov 2004 Location: union
Posts: 1,657
|
I think those rings where like 12 bucks. Super cheap and the hardware is from McMaster
|
|
| |
|
01-27-2013, 12:07 PM
| #39 |
| Quarry Creeper Join Date: Oct 2010 Location: Hendersonville
Posts: 209
|
I wanted to work on moving the motor/transmission so that it would fit under the hood and allow the body to sit on the chassis rails. I bought some scrap aluminum and thin steel at the steelyard and I hoped it would suffice. I started with a measurement across the rails near the shock hoops. 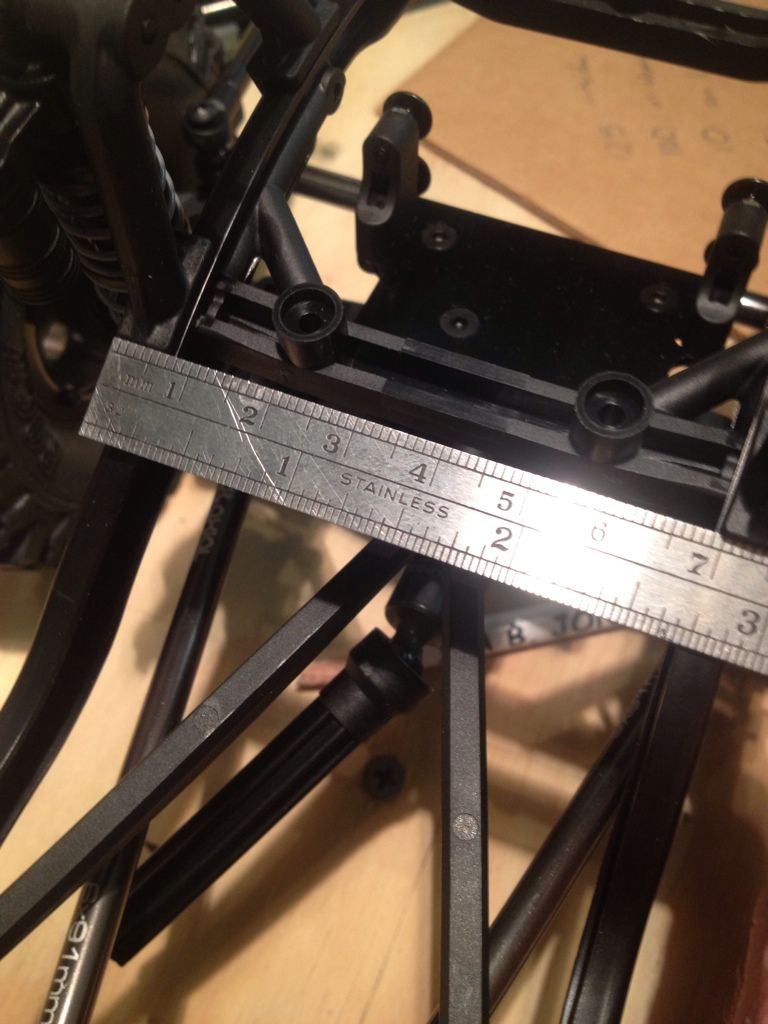 It came pretty close to 75mm. I added 10 mm for each rail height, since I would be bending the steel over it and bolting it down. So I ended up drawing a 95 x 30mm rectangle on the steel. 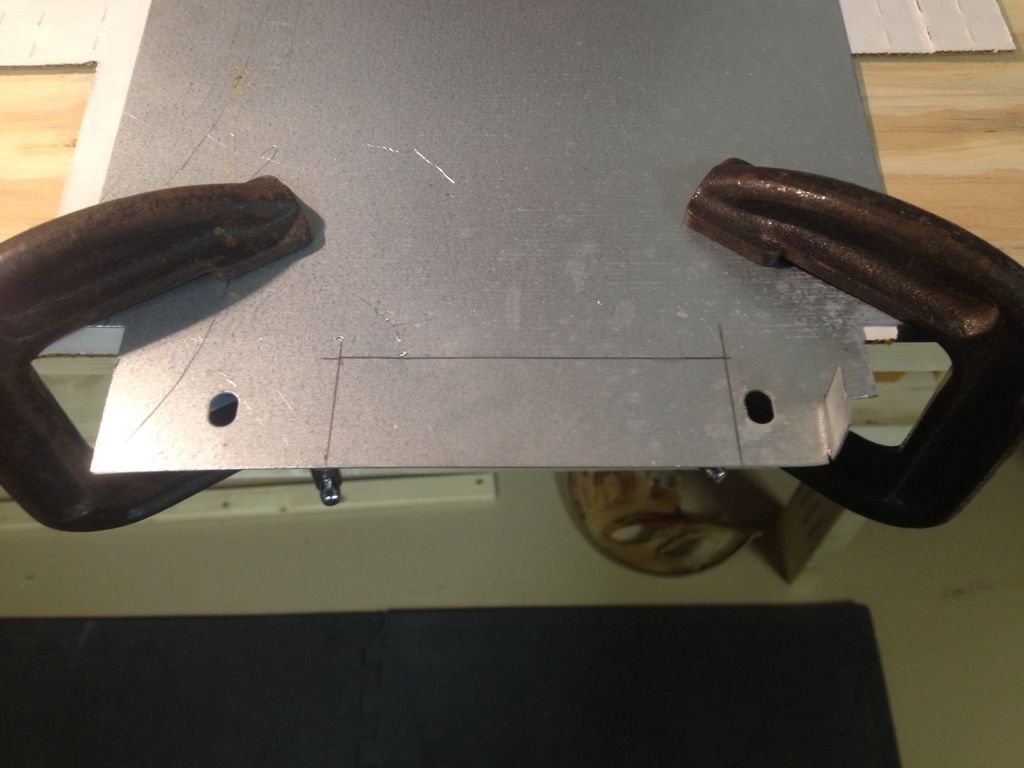 Using the heavy duty cutting blade, the dremel made short work of the thin steel. 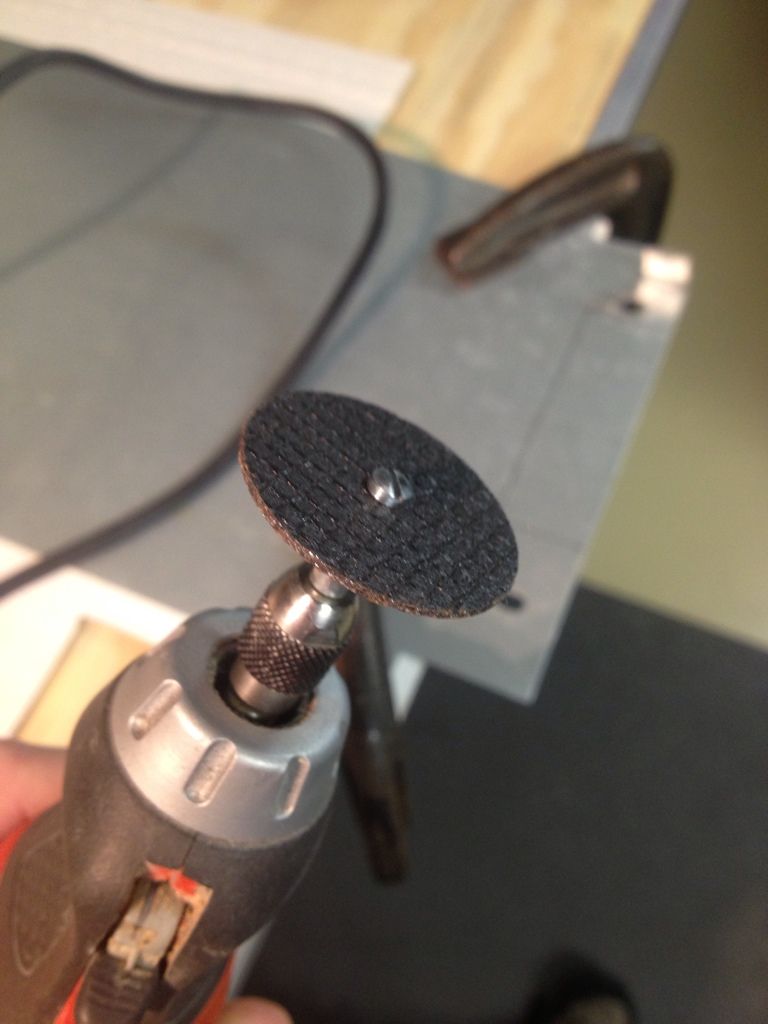 Since Dremel cuts are not precise, always take a file to smooth your cut edges. Its a sliver under the skin waiting to happen! 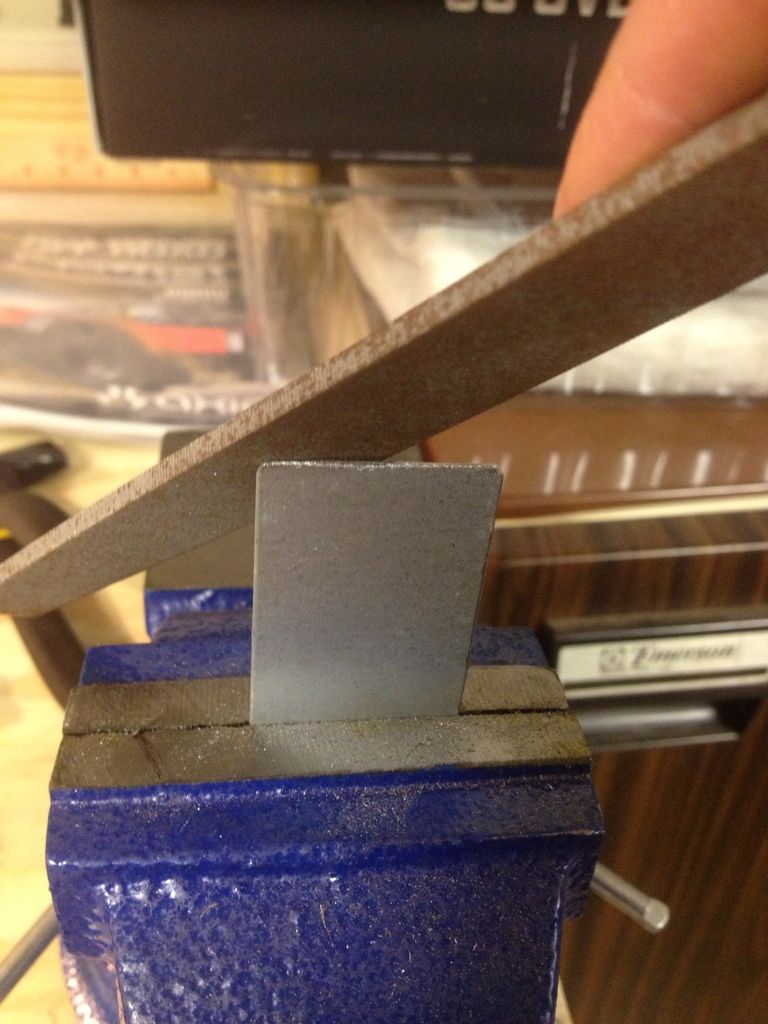 After filing, it was time to measure off my 10mm marks and bend the steel to fit over the chassis rails. You just can't beat a small vise for this type of thing. The vise I'm using was a $26 Harbor Freight model. 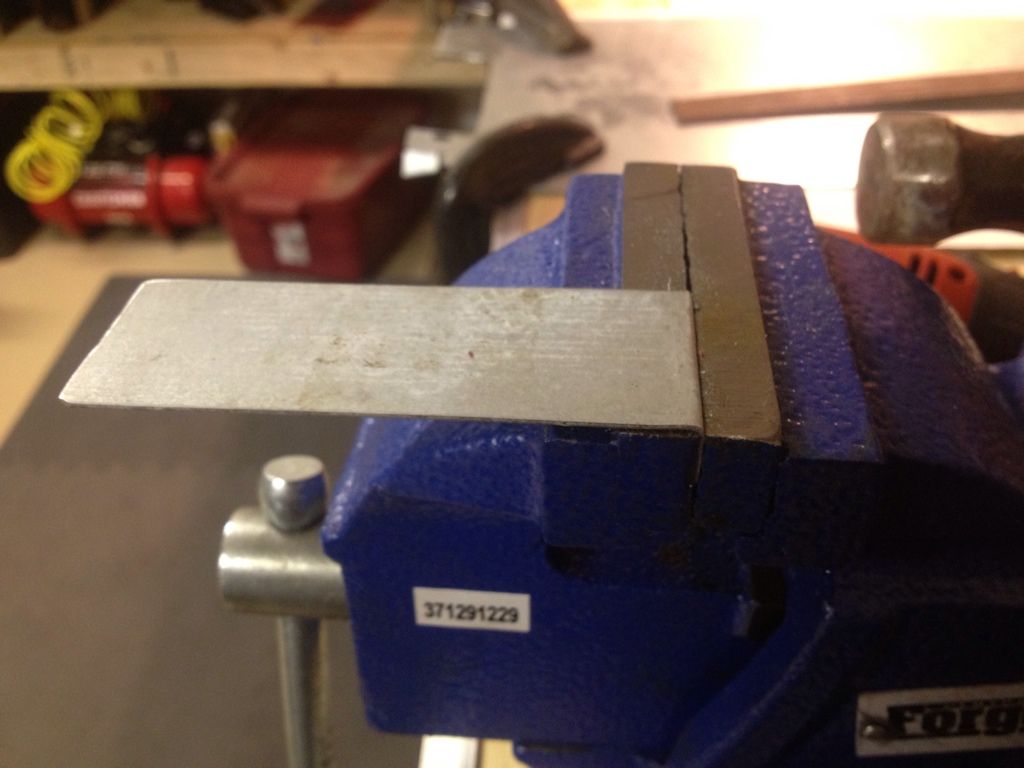 At this stage, it helps to take a hammer and hammer the bend flat before you take it out of the vice. It makes your bend nice and square. If you take your time, measure twice, and use your hammer, you end up with a nice motor plate like this. 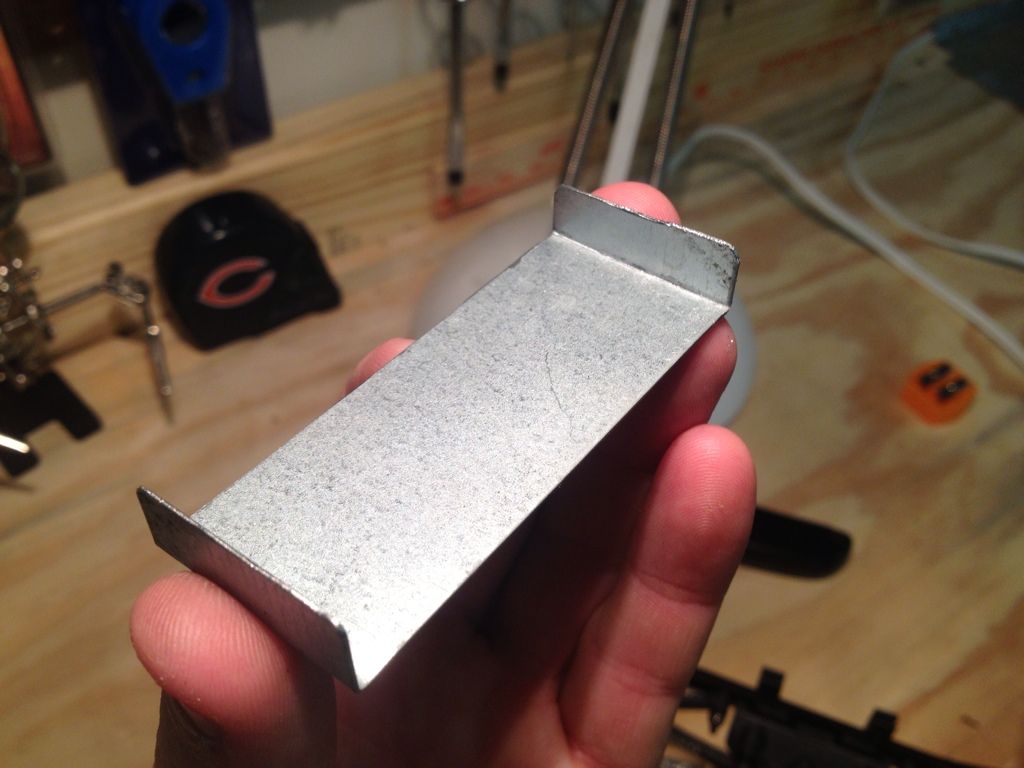 And what a snug fit it was. It was snug enough so that I can turn the vehicle upside down and the plate would not fall off.  Next up was to get the motor mounted to it. I held the mount underneath the stock mount (supplied with the kit) to get my mounting holes lined up correctly with a small pencil. That works quite well. 4 holes drilled, screws inserted.... 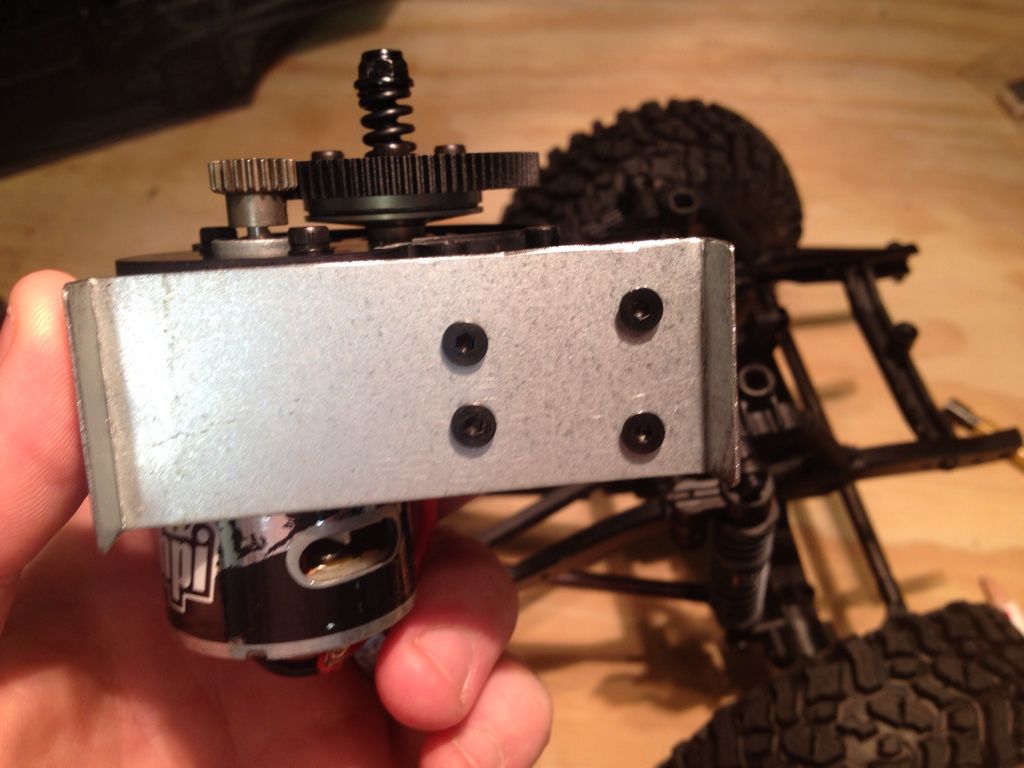 Last edited by jkabee; 01-27-2013 at 12:10 PM. |
|
| |
|
01-27-2013, 12:17 PM
| #40 |
| Quarry Creeper Join Date: Oct 2010 Location: Hendersonville
Posts: 209
|
Unfortunately, the motor/tranny still sat too high and was keeping the jeep body from sitting down on the rails in the front. Something had to be moved... 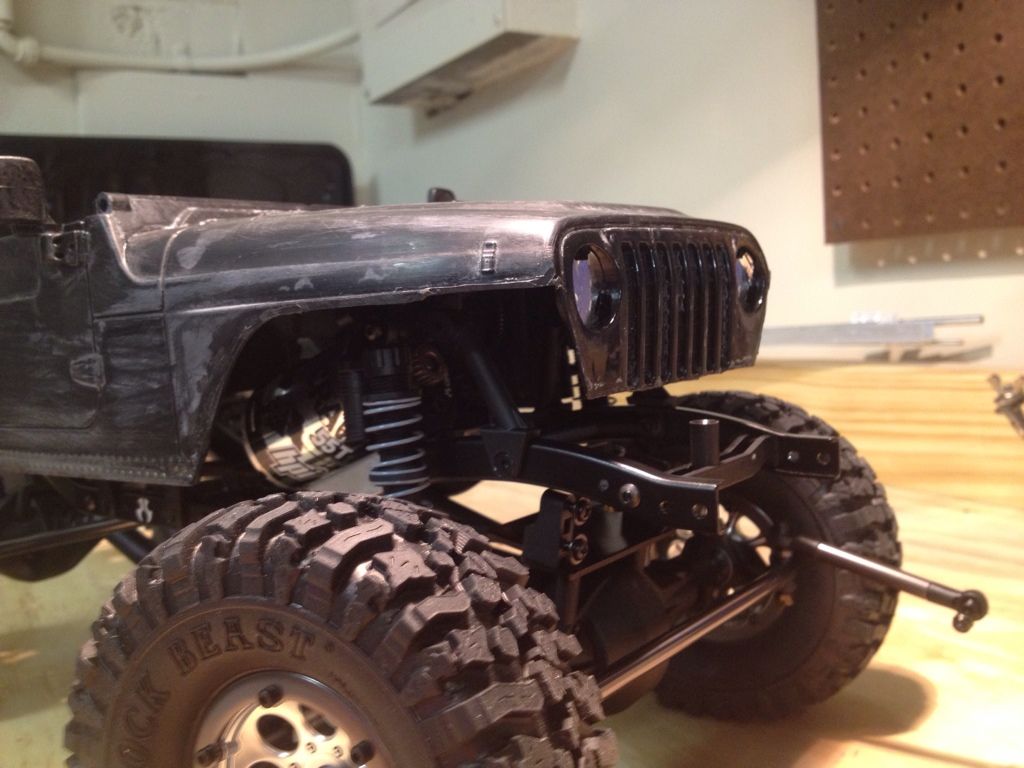 You can see the body not touching the front of the chassis. Bummer. I decided to turn the motor/tranny around 180 degrees, but the stock shock hoops would not allow it. They were just barely in the way of the motor sitting between them. So I took an idea I got from GCM racing and moved the shock to the opposite side, but not turning them around. It looks a little weird, because the shock lip no longer sits on the chassis rail, but I tested it and its still strong, so whatever. It went from this: 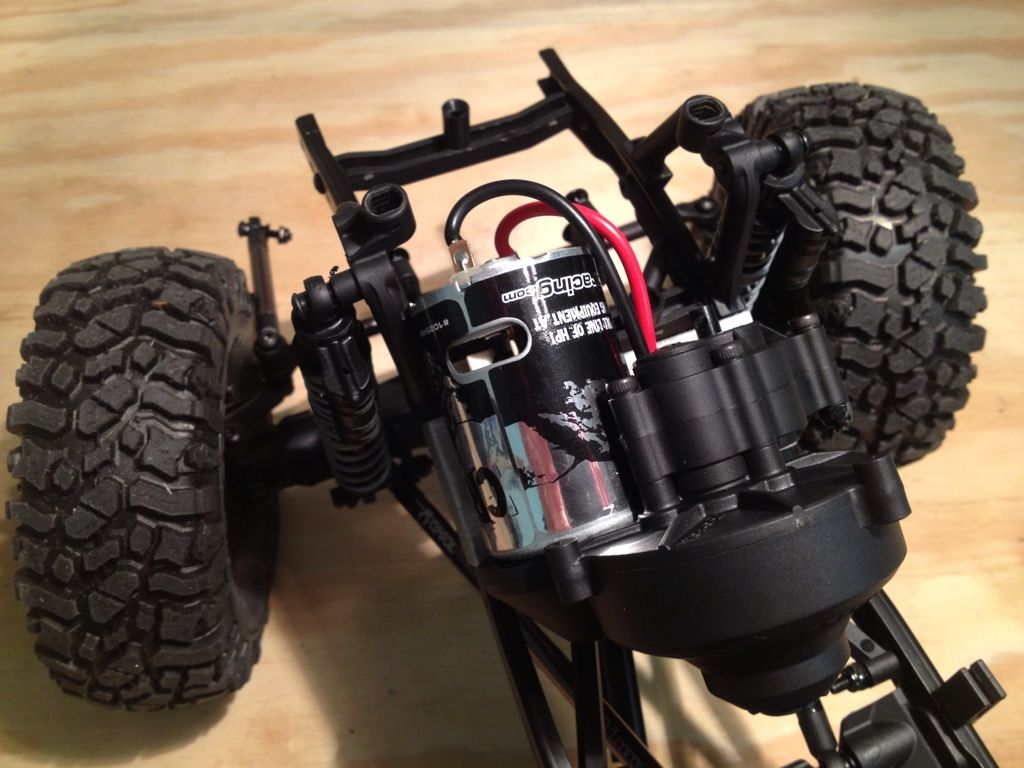 To this: 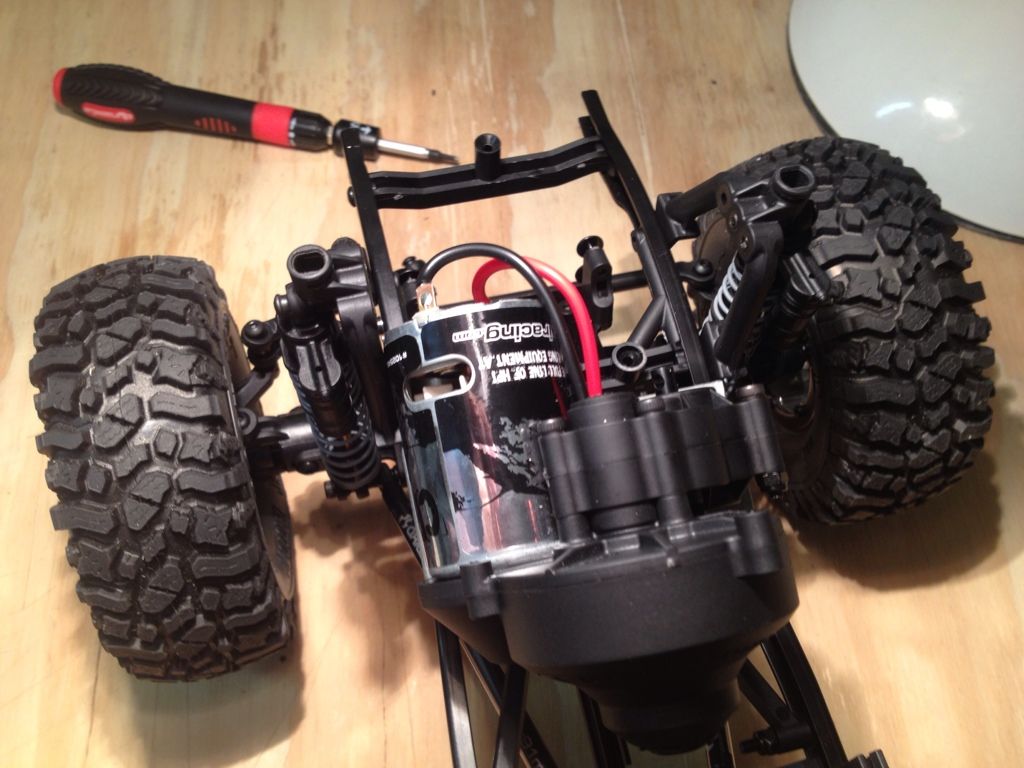 And of course, the body fits again!  I'm going to start on some cage, bumper, and rock rails next... stay tuned! Last edited by jkabee; 01-27-2013 at 12:20 PM. |
|
| |
 |
 Jkabee's "total noob" TJ build "this should be fun!" - Similar Threads
 | ||||
| Thread | Thread Starter | Forum | Replies | Last Post |
| BADDMANS C1 called 50Cal """XR10 up grade""" | baddman | 1.9 Scale Rigs | 21 | 08-27-2012 11:56 PM |
| "Victim" or "V2" a "Country Boy Customs" class 3 | Mighty1 | 2.2 Scale Rigs | 10 | 05-06-2011 10:56 PM |
| Chaotic Crawlers "DEMON" build! aka "Kreacher" | Mac10 | EnRoute Berg | 96 | 09-26-2010 01:49 PM |
| |


 Linear Mode


