| |
 08-29-2013, 10:59 PM
| #121 |
| Rock Crawler Join Date: Feb 2006 Location: Where the foams are always wet
Posts: 878
|  |

|  |
| Sponsored Links | |
| | |
|
09-19-2013, 12:34 PM
| #122 |
| Quarry Creeper Join Date: Jul 2009 Location: Woodburn, Oregon
Posts: 358
|
Not much to update but I have made a few changes. Now I'm running the green(medium) losi mini-T springs. This really help to get the rear more forward bite so this really improved the crawler in all areas, especially during side hilling. I took a few weeks off from crawling to get a few things done around the house and during this time I sent Dlux my V1 front axle shafts to have them upgrade them to the V2 style. The V2 styles has a lot more beef so they are stronger, I have to say its a great product. There is no way I can go back to my 300. Overall I'm very happy with the way the crawler is performing and look forward to more comp's. The next plan I have is to narrow a set of gold voodoo tires, plan on taking out one row of pins. When I get this done I will make sure to post up my results. Last edited by Beerman Crawler; 09-23-2013 at 01:22 AM. |
|
| |
|
09-29-2013, 07:01 PM
| #123 |
| Quarry Creeper Join Date: Jul 2009 Location: Woodburn, Oregon
Posts: 358
|
Today made a few changes to the crawler that's worth updating. I increase the amount of knuckle weights, I have three ounces per side now. I'm hoping by doing this it will help keep the front end down. I have been so happy with the RcBro knuckle weight system, the adjustability is so nice and convenient. It really helps to fine tune your crawler. The next change I made was to narrow up some gold voodoo's. I'm running a one inch slw wheel so I wanted to cut out one and a half rows of pins. The first step I did was to cut my pin pattern into the tire, this is the pattern I cut out  After cutting the pin pattern out I started to cut the row out  This is how much tread I cut out  The narrowed one next to stock one.  With the extra tread I cut out I glued it to my controller so when I lay my controller down it won't slid on the rocks.  Last edited by Beerman Crawler; 09-29-2013 at 08:55 PM. |
|
| |
|
09-29-2013, 08:51 PM
| #124 |
| www.ottsix.com Join Date: Mar 2011 Location: Albuquerque, New Mexico USA
Posts: 2,050
|
Nice  |
|
| |
|
09-29-2013, 09:51 PM
| #125 |
| RcBros Hobbies   Join Date: Nov 2005 Location: Oregon
Posts: 4,646
|
Darn near half the oregon guys have voodoo's on there rigs and radio's now haha. Looking good buddy! To bad we had to cancel the comp today, but even for us, the crazy high winds and 3-5 inches of rain is enough to call it.
|
|
| |
|
10-28-2013, 01:26 AM
| #126 |
| Quarry Creeper Join Date: Jul 2009 Location: Woodburn, Oregon
Posts: 358
|
I took the crawler out for a farewell crawl. Its time to say goodbye to the secret agent and move on to the RC Bro chassis. I couldn't ask for a better session to say goodby than what I had today. I got some good photo's to share     |
|
| |
|
10-28-2013, 01:37 AM
| #127 |
| Quarry Creeper Join Date: Jul 2009 Location: Woodburn, Oregon
Posts: 358
|
I had the opportunity to get the Rc Bro chassis and I had to pick it up. The carbon fiber on this chassis is super strong, the strongest carbon fiber that I've seen so far. I have seen a few of these chassis in action and love how neutral you can set up the geometry. It makes for a very stable smooth moving crawler. I got a good start on building the links. I have the lower links done and have a mock up set done for the upper links. Once I'm happy with the links I will post up the measurements eye to eye. Here are a few pictures for now. I'm hoping to get outside and take some nicer pictures tomorrow.    |
|
| |
|
10-28-2013, 08:20 AM
| #128 |
| RcBros Hobbies Join Date: Nov 2005 Location: Oregon
Posts: 4,646
|
Looking good buddy!
|
|
| |
|
10-29-2013, 04:33 PM
| #129 |
| Quarry Creeper Join Date: Jul 2009 Location: Woodburn, Oregon
Posts: 358
|
So far I have the lower links done so you can see the stance of the crawler. The upper links are just mockups right now so ignore them. I really enjoy the look of this chassis and the stance it gives.  |
|
| |
|
11-02-2013, 10:37 PM
| #130 |
| Quarry Creeper Join Date: Jul 2009 Location: Woodburn, Oregon
Posts: 358
|
I got the upper links made up and the electronics put back in. I'm hoping to get some crawling in tomorrow but it all depends on the weather. If I can crawl I will post up some pictures. Tonight Tom came up with a battery mount made out of carbon fiber so I can mount my battery to the front axle. It's a sweet simple ideal that works great. The battery is held down with velcro and an O-ring.    |
|
| |
|
11-04-2013, 05:01 PM
| #131 |
| Quarry Creeper Join Date: Jul 2009 Location: Woodburn, Oregon
Posts: 358
|
I got the chassis out two day in a row and all I can say is this thing is ridiculous. I absolutely love this chassis. It's already outperforming the secret agent and I've only gotten two days of driving on it. I can't wait to see how far I can take this chassis. Also really like having my battery mounted on the front axle. The front tire just barely makes contact with the battery but yet it has not been pulled off or come off the axle. Very, very happy with this. Got some pictures to show off the sexy curves I have in my upper links   Last edited by Beerman Crawler; 11-05-2013 at 10:57 AM. |
|
| |
|
11-04-2013, 06:06 PM
| #132 |
| RCC Addict Join Date: May 2012 Location: Folsom
Posts: 1,867
|
Your uppers made of solid aluminum?
|
|
| |
|
11-04-2013, 07:36 PM
| #133 | |
| Quarry Creeper Join Date: Jul 2009 Location: Woodburn, Oregon
Posts: 358
| Quote:
| |
|
| |
|
11-04-2013, 07:49 PM
| #134 |
| Quarry Creeper Join Date: Jul 2009 Location: Woodburn, Oregon
Posts: 358
|
Here are some pictures of Tom making the rear links.   Take a look at how nice the 7075 threads  |
|
| |
|
11-05-2013, 05:24 PM
| #135 |
| Quarry Creeper Join Date: Jul 2009 Location: Woodburn, Oregon
Posts: 358
|
Crawled a few packs today endearing a little bit of rain. The Rock was slimy wet, hard to walk on, especially hard to crawling on, but overall was happy with the new chassis. The voodoo gold dots narrowed up did great in this wet slimy conditions. Everything was going great until I decided to go play submarine, and a pack later my day was done. Got home and dried everything out especially my electronics and foams. The good thing is it gave me some free time to paint my body panels. Here is a picture from today.  Last edited by Beerman Crawler; 11-07-2013 at 01:23 AM. |
|
| |
|
11-05-2013, 06:22 PM
| #136 |
| Quarry Creeper Join Date: Jul 2009 Location: Woodburn, Oregon
Posts: 358
|
The dry out process  |
|
| |
|
11-07-2013, 12:21 AM
| #137 |
| Quarry Creeper Join Date: Jul 2009 Location: Woodburn, Oregon
Posts: 358
|
I got my hands on some sweet RcBros shock bodies tonight. I don't want to sound like a cheese ball and say every part I get is great, but if you look at my list of parts I have great parts, it's hard to say anything bad. But oh my God why are not more people talking about these shock bodies. They are so buttery smooth, you can tell the inner diameter of the shock body is machined to the same tolerance of the machine pistons. It makes for a great fit. I absolutely love the feel that these shocks give my crawler. If anyone is looking for shock bodies these are a must.     Last edited by Beerman Crawler; 11-07-2013 at 07:33 AM. |
|
| |
|
11-07-2013, 01:53 AM
| #138 | |
| Stephan Hauser / # 7  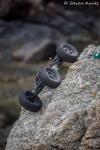 Join Date: Apr 2012 Location: Germany
Posts: 507
| Quote:
| |
|
| |
|
11-07-2013, 08:47 AM
| #139 |
| Quarry Creeper Join Date: Jul 2009 Location: Woodburn, Oregon
Posts: 358
|
I have received a few questions regarding the links so I thought I'd give a little more information. I use a 10/32 die and put it in the die holder. Slip the die over the top of the aluminum rod with a squirt of WD-40 and twist, it gives you gorgeous threads with 7075. Another step you have to do is drill your rod end out to 5/32. I do this by hand and use a 5/32 drill bit. Also here are some pictures to show the bend I have in my upper rear links. Really it's just one smooth bend to clear the motor.      Last edited by Beerman Crawler; 11-08-2013 at 12:32 AM. |
|
| |
|
11-07-2013, 11:33 AM
| #140 |
| Quarry Creeper Join Date: Jul 2009 Location: Woodburn, Oregon
Posts: 358
|  4 lbs 2.7 ounces.   Last edited by Beerman Crawler; 11-07-2013 at 11:42 AM. |
|
| |
 |
 Beerman's RcBros Berg build (update on page 7) - Similar Threads
 | ||||
| Thread | Thread Starter | Forum | Replies | Last Post |
| Wraith Kit Build - Page by Page Video Series. | FastEddy | Axial Wraith | 60 | 06-09-2015 10:11 AM |
| SCX10 Honcho Video Build. Page By Page (Great For the New People) | FastEddy | Axial SCX-10 | 33 | 04-22-2011 06:47 PM |
| RcBros Berg Build | RcBro | EnRoute Berg | 176 | 08-15-2010 03:36 PM |
| iPhonewizz Berg build Update 3! | iphonewizz | EnRoute Berg | 8 | 05-27-2009 02:01 AM |
| iPhonewizz - Berg Build - ******UPDATE ****** | iphonewizz | EnRoute Berg | 5 | 05-23-2009 09:20 PM |
| |


 Linear Mode


