| |
 09-02-2009, 08:47 PM
| #81 |
| Quarry Creeper Join Date: Jul 2008 Location: peoria
Posts: 207
|
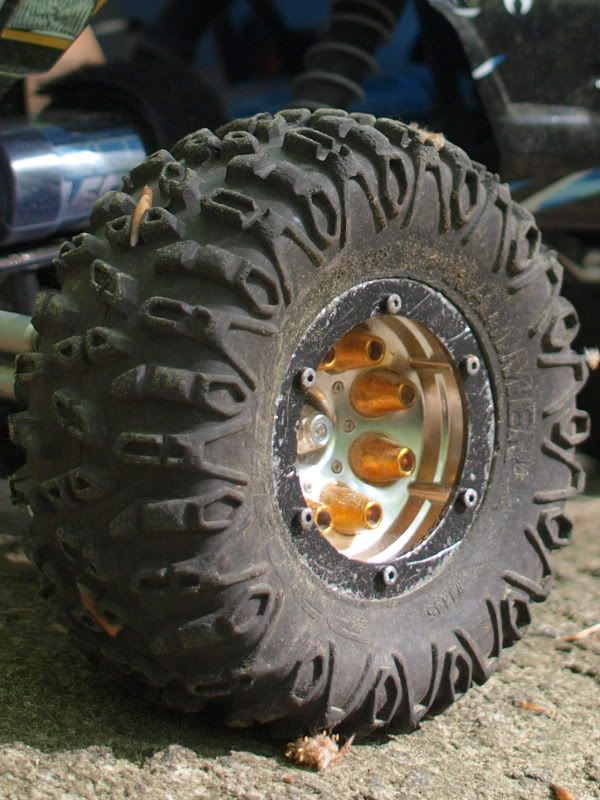
best mod ever Slash type slipper mod! |

|  |
| Sponsored Links | |
| | |
|
09-07-2009, 06:34 PM
| #82 |
| Newbie Join Date: Jan 2008 Location: Plymouth
Posts: 12
|
Thanks for the info on drilling holes in the rims. The front tires have one hole in them and the rears have two just oding some testing. Still a newbe  BUt we'll see how it goes BUt we'll see how it goesI also cut the tires into stars before I did the drilling so I guess I'll be testing both. |
|
| |
|
09-11-2009, 07:08 PM
| #83 |
| Newbie Join Date: Aug 2009 Location: foley
Posts: 2
|
take your battery plate use to make 4 links  |
|
| |
|
09-26-2009, 12:19 AM
| #84 | |
| Newbie Join Date: Aug 2008 Location: Rock Springs
Posts: 3
|
i found that if you set your rim on a cap of some sort that fits inside the wheel and raises the tire off the table that it is much easier to mount your tires on the wheels with the lip being able to slide in with no force being put on the other side of the tire Quote:
| |
|
| |
|
09-28-2009, 10:12 PM
| #85 |
| Rock Crawler Join Date: Sep 2009 Location: Spring, Texas
Posts: 697
|
Okay, I'm kind of new to crawling and someone else may have also done this...but I thought of it on my own. I don't care for the way the axle-mounted saddle packs look, but I don't like the high CG battery location either. So, I removed the stock battery mount on the Scorpion along with the two plastic chassis braces/battery mount holders. I drilled a hole in each end of the plastic braces and screwed them to my chassis plates. Then, I used single wrap Velcro to hold two small LiPo batteries, which I run in parallel, to the outside of each chassis plate. They work great! The batts are under the body and extremely secure, the CG is lower and I don't have to look at the batteries when I drive. I like the idea, but to each his own, I guess.    |
|
| |
|
10-03-2009, 09:11 PM
| #86 |
| Pebble Pounder Join Date: Aug 2009 Location: RuffNeck Build Lab.....
Posts: 173
|
Well good idea but now they are open to being damaged if you get into the tight stuff but if you dont run tight areas like we do here in Co then all the better for nice work. Just another thing you might want to think about as well is yes you have a lower center of gravity but it is still sprung weight. With the batteries on the axle it now makes it unsprung weight and lets your suspension work more efficent cause your springs aernt fighting the weight of the batteries...........just my .02
|
|
| |
|
10-04-2009, 05:22 AM
| #87 |
| Newbie Join Date: Sep 2008 Location: Madrid (Spain)
Posts: 31
|
That place is too risky... the batteries are going to be damaged really easily. As they are so small, I would place them on the front axle. This is going to help you a lot with your center of gravity.
|
|
| |
|
10-04-2009, 09:55 AM
| #88 |
| Rock Crawler Join Date: Sep 2009 Location: Spring, Texas
Posts: 697
|
You guys have good points about the battery locations. I had never heard of 'sprung' weight and you're right there is a greater risk for battery damage in tight situations with this configuration. I figured that this would not necessarily appeal to everyone but I wasn't sure about the reasons why. Now, I see. Luckily, I drive on an open course (my body never gets scratched unless I fall off) and the battery location is lower than it was so....good enough for me. Thanks! Jason |
|
| |
|
10-19-2009, 05:49 PM
| #89 |
| I wanna be Dave Join Date: Nov 2008 Location: Where freedom is earned.
Posts: 2,011
|
Here's the old SHOCK CAP MOD, to fix those Losi, and Traxxas shocks with no ball end. For reference, mine are done on the Traxxas aluminum bi bores. 1st, you need to cut or mill the current shock mounting tab off the cap, (a dremel works good) as close to flush on the cap as possible. 2nd, drill a hole using a #34 or #35 drill bit through the center of the cap. (these bits will allow you to thread the screw onto the cap) 3rd, after you get the screw through the cap dab some lock-tite or sealent near the base and then thread what ever 3mm rod end you wish till it's tight. Wha-la, you've now got a smooth operating shock that's easier to mount and give clearence near the cap. |
|
| |
|
10-29-2009, 10:32 PM
| #90 | |
| Newbie Join Date: Sep 2009 Location: Australia
Posts: 4
| Quote:
| |
|
| |
|
10-29-2009, 11:06 PM
| #91 |
| Newbie Join Date: Sep 2009 Location: Australia
Posts: 4
|
Ah, I actually have the G-Made air system and trust me as soon as there in the sun the pressure increases, it's not rocket science the tyres are black the rims are black and the amont of air in the tyre is small so ANY heat increase has a large effect on tyre pressure.
|
|
| |
|
11-07-2009, 05:52 AM
| #92 |
| Quarry Creeper Join Date: Sep 2008 Location: by a river
Posts: 253
|
this goes for all r/c.when you are puting the motor pinion with the spur, the best mesh is to get a bit of computer paper and put it in between the 2 gears then push the motor up to the spur,tigting srews,spin the gears to get the paper out and what do ya know the perfect mesh hope this helps p:s im not sure if this has already been posted before |
|
| |
|
11-14-2009, 10:40 AM
| #93 |
| Newbie Join Date: Oct 2008 Location: Germany
Posts: 38
|
On my AX10 I use the bogstandard 6-cell NIMH packs as these are the ones I bought for my first crawler, a CR-01. But on a different location, right over the front links and servo. A friend gave me this custom-made plate, which bolts directly to the axle-housing. The servo is mounted upright on one side and the upper links are bolted to the underside of the plate. Gives quite a low COQ and saves me a lot of money. 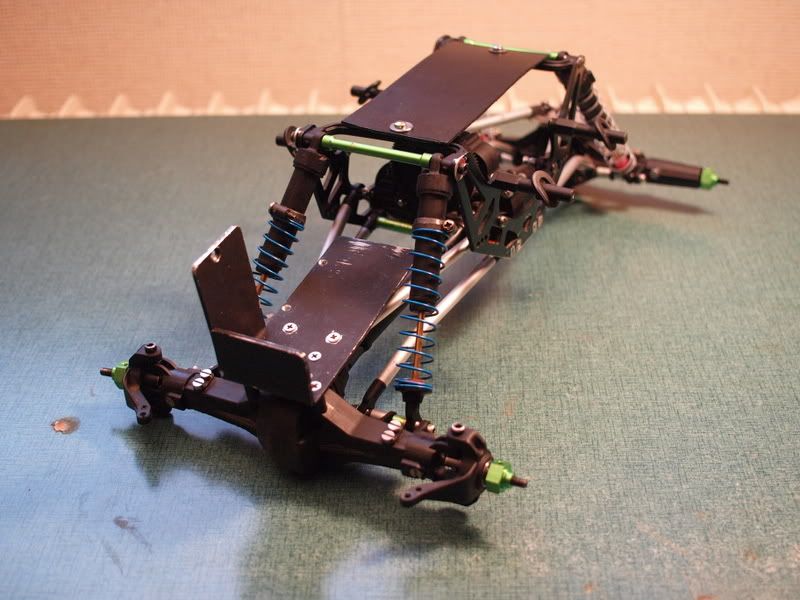    |
|
| |
|
11-14-2009, 10:53 AM
| #94 |
| Pebble Pounder Join Date: Nov 2006 Location: vaca, nor cal
Posts: 134
|
I like the idea, try flipping the servo upside down and mount it a little lower for COG purpose. somthing like an angle bracket off the 2 axle holes then bolt that to your battery plate. Just a suggestion! |
|
| |
|
11-15-2009, 08:25 PM
| #95 |
| Newbie Join Date: Oct 2009 Location: Bend
Posts: 40
|
i syped my rock lizards and they crawl so much better i also have the hot bodies rovers and they do just as good as those so if you dont have the cash i would deffinetly recomend syping yor rock lizards
|
|
| |
|
11-15-2009, 08:32 PM
| #96 | |
| Pebble Pounder Join Date: Jun 2007 Location: in rc crawler land
Posts: 141
| Quote:
| |
|
| |
|
11-15-2009, 08:48 PM
| #97 |
| Pebble Pounder Join Date: Nov 2006 Location: vaca, nor cal
Posts: 134
|
Siping (rubber), process of cutting thin slits across a rubber surface It makes big luggy tires more flexible to get traction Its very popular in regions that have slick roads in winter |
|
| |
|
11-16-2009, 05:41 AM
| #98 | |
| Newbie Join Date: Oct 2008 Location: Germany
Posts: 38
| Quote:
 | |
|
| |
|
11-22-2009, 08:55 PM
| #99 |
| Newbie Join Date: Nov 2009 Location: Chico
Posts: 35
|
Hello everyone, another noob to the website.. been crawling for a few months now.. anyhow I've tried a couple mods.. I've read through and haven't seen them on this thread so I figured I would post 'em. I did read it in RC Car Action Crawling edition.. so they receive the credit.. I took apart my axle and put shrink tube around the inner axle. Wiped petroleum jelly around the inner axle with shrink tubing. Took small lead shot from shotgun shells and mixed it up with super glue quick set epoxy. I filled one half of the axle case with the mix and them placed the inner axle back into the mess.. filled the second half of the axle case and then put the axle back together.. I put a few screws in just to hold it together.. I came back the next day and took it apart, took the inner axle out and wiped the petroleum jelly off and removed the shrink tube. I now had a gap between the led shot mixture that was dried in my axle case and my inner axle. I knew there was a lot of risk going into this mod however i took precautions and so far it has worked out great.. It crawls much better IMO then before. Let me know what you think and if you like it, if your going to give it a shot. Thanks and I look forward to becoming part of the community. -Erc |
|
| |
|
11-30-2009, 08:35 AM
| #100 | |
| Rock Stacker Join Date: Oct 2009 Location: Phoenix
Posts: 77
| Quote:
| |
|
| |
 |
| |


 Linear Mode


