| |
 06-27-2012, 07:29 AM
| #81 |
| Quarry Creeper Join Date: Jun 2010 Location: Grand Junction
Posts: 305
|
Batteries in the Transmitter?
|

|  |
| Sponsored Links | |
| | |
|
06-27-2012, 07:38 AM
| #82 |
| Quarry Creeper Join Date: Jun 2010 Location: Grand Junction
Posts: 305
|
All of my batteries are brand new, and fully balance charged. Swapped out the Transmitter batts just to see but no help. It turned on fine but then it looses signal to the motor. I tap on the can of the motor lightly and it will go again. Then after a couple seconds will stop again. I know it's the signal to the esc from the motor because the B1-R chimes when you turn it on unless there is no motor signal.
|
|
| |
|
06-27-2012, 09:34 AM
| #83 | |
| E.Y. Designs Join Date: Sep 2011 Location: Springfield, OR
Posts: 3,591
| Quote:
| |
|
| |
|
06-27-2012, 09:17 PM
| #84 |
| Quarry Creeper Join Date: Jun 2010 Location: Grand Junction
Posts: 305
|
When I installed the grub I used loc-tite and the grub got stuck. So for now I'm going to order a new motor plate and a Promax cobalt motor. After I drill out the grub on the frenzy I can try and rebuild I guess. The frenzy just seemed off from the beginning though. First of all it spun in reverse rotation, then it would get super hot no matter how easy I was on it. Even after I resolved my binding issues. I guess its a $25 motor so maybe its not supposed to be all that great.
|
|
| |
|
07-04-2012, 06:20 AM
| #85 |
| Quarry Creeper Join Date: Jun 2010 Location: Grand Junction
Posts: 305
|
So right now I'm just wating till after the holiday so I can order up some parts. Ended up finally blowing my stock RTR trans gears. I had planned on ordering those anyways then they blew out the next couple of runs. Motor is definately toast so i'm going to order the Promax Cobalt 26T motor and a new motor plate since mine has a Brood Frenzy stuck in it. And I also ordered a set of MTHead delrin beadlock rings for my Axial wheels as well. So hopefully back up and running by the end of next week.
|
|
| |
|
07-13-2012, 05:02 PM
| #86 |
| Quarry Creeper Join Date: Jun 2010 Location: Grand Junction
Posts: 305
|
Got my MT Head beadlocks all painted up. Just waiting for a few more parts to show up so I can get back on the rocks. 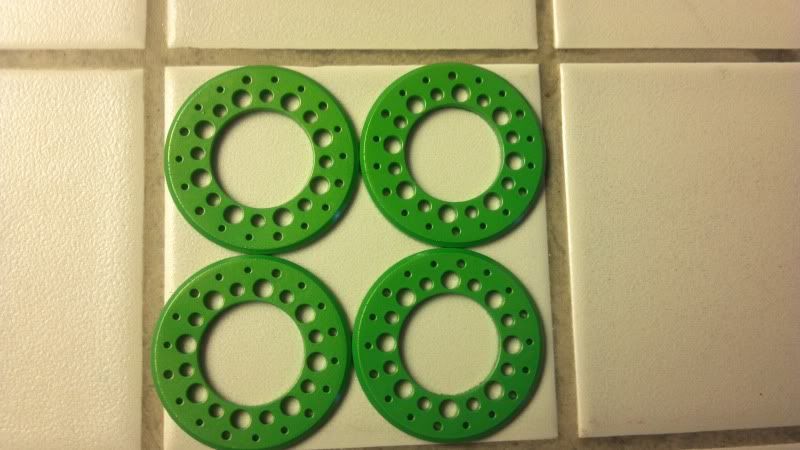 |
|
| |
|
07-22-2012, 05:51 PM
| #87 |
| Quarry Creeper Join Date: Jun 2010 Location: Grand Junction
Posts: 305
|
So I got everything put back together. I had torn up the Trans gears so I decided to upgrade to the metal ones from HR. I also put a Promax Cobalt 26t motor in since the Brood Frenzy broke down. It just never seemed right from the start. First of all I had to reverse the switch on the transmitter to get the motor to turn the right way, and it would get extremely hot really fast no matter what I tried. After running the cobalt for a full pack and purposely pounding on it to see how hot it would get it had barely warmed up. The cobalt seems really smooth all the way around. So then today I was running on the rocks after getting some steering linkage issues resolved with my new Solar Servo and I ended up twisting the front driveshaft off... What a pain. I have a set of Stampeed shafts I'm going to install but i'm waiting for the second set of yokes to show up this week. So for today I will update with some Carnage pics for all to enjoy! Trashed pinion 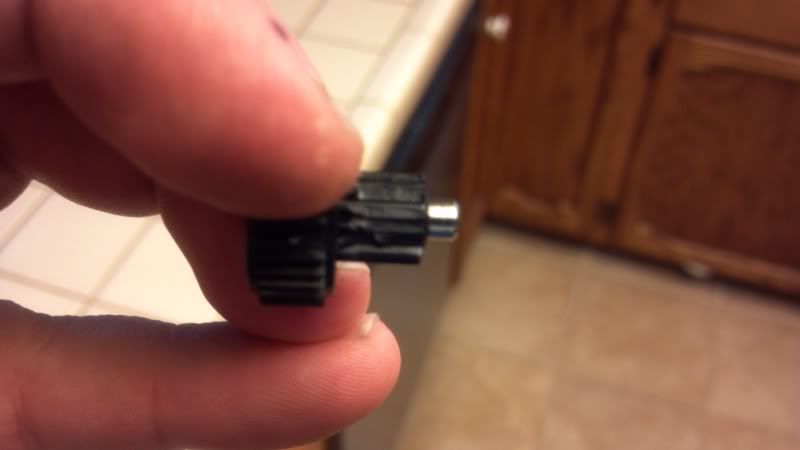 And the twisted driveshaft. 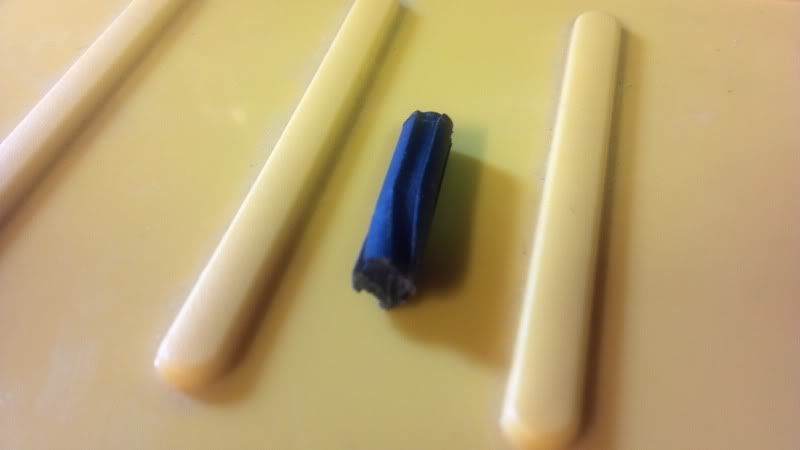 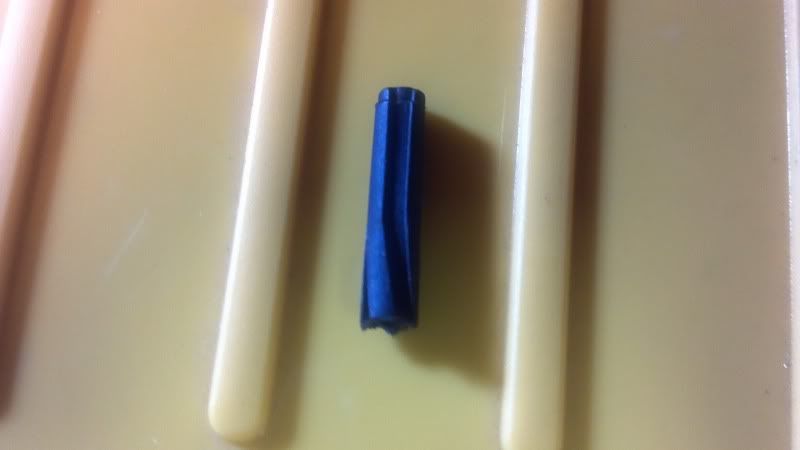 |
|
| |
|
07-22-2012, 09:45 PM
| #88 |
| I wanna be Dave Join Date: Jan 2012 Location: williamsport
Posts: 8,649
|
Nice carnage! I had a day like urs with my mrc's as well.. all due to Shock shafts pulling out of the shock ends..
|
|
| |
|
07-23-2012, 07:32 AM
| #89 |
| Quarry Creeper Join Date: Jun 2010 Location: Grand Junction
Posts: 305
|
I'm running the Vendetta rear shocks on my rig and haven't had any complaints at all. They run smooth and no binding. I'm also running the BWD Bomb Proof Mounts though. Here is the trans gears all put together and the new motor plate and motor. Also sown is the Stampeed yokes that i'll be using. I'll get a comparison shot of stock vs the Traxxas units. 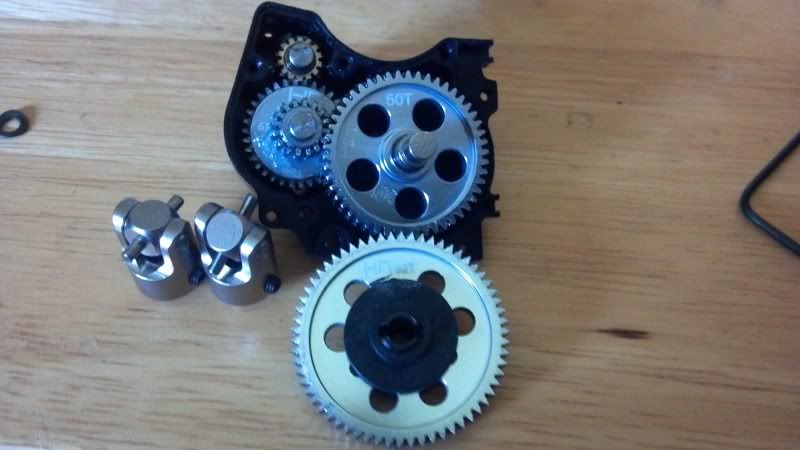 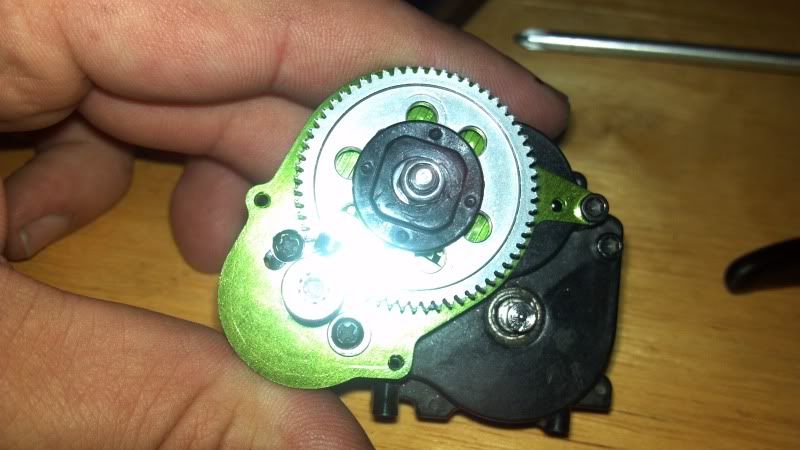 |
|
| |
|
07-24-2012, 07:29 AM
| #90 |
| Quarry Creeper Join Date: Jun 2010 Location: Grand Junction
Posts: 305
|
I got started on getting my new drive shafts and Yokes installed. These yokes are huge compared to the stock ones so some removal of material around the front output is needed. Not too much but enough so that the yoke can spin freely. I just used a dremel with a small diamond bit. Took about 10 minutes. The yokes are also a bit long for the tiny trans outputs and the pinion ends. So I ground down the part of the yoke that had been necked down to a smaller size. I'm still waiting for the other set of yokes to arrive hopefully by friday, maybe sooner. Here you can see the massive size difference in the yokes and the shafts themselves. 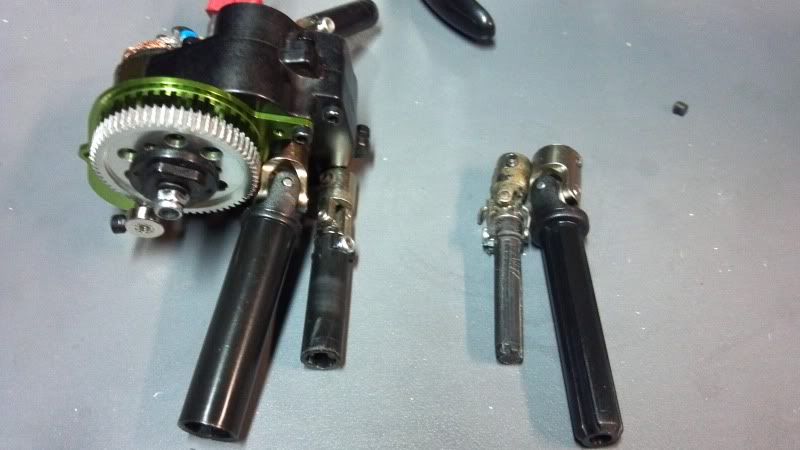 I use a tubing/pipe cutter to cut the new shafts down to length. The female side was a bit squishy when it got towards the end so I finishe with a razor knife. 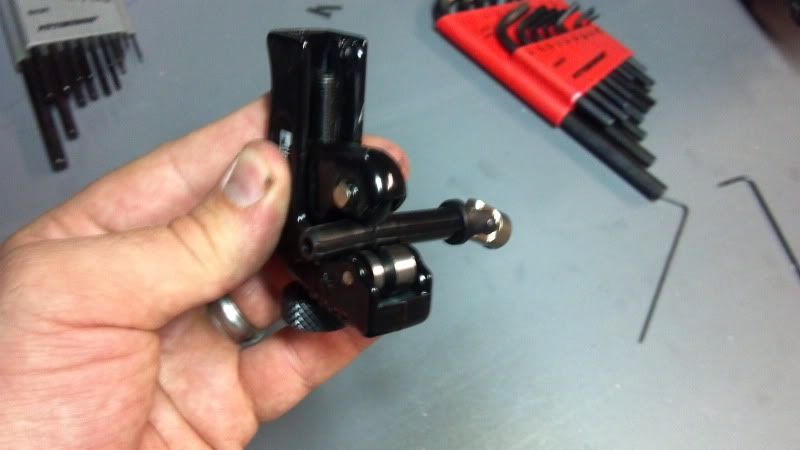 Here is the finished length and you can see that the new shaft are pure BEEF compared to the original. 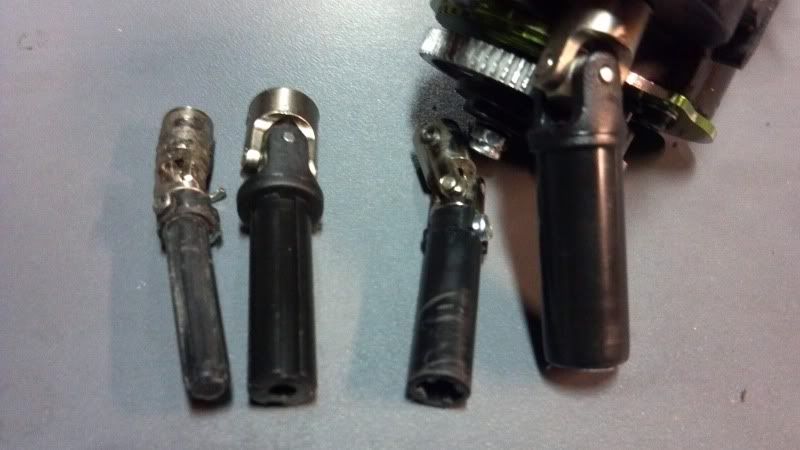 |
|
| |
|
07-25-2012, 04:59 AM
| #91 |
| I wanna be Dave Join Date: Aug 2011 Location: Burque
Posts: 3,805
|
Wow, thats a great improvement!! Nice  |
|
| |
|
07-26-2012, 07:44 AM
| #92 |
| I wanna be Dave Join Date: Jan 2012 Location: williamsport
Posts: 8,649
|
That's a great idea! Thought bout it once, since I have the same yokea an shafts around.. I just figured the output shaft was smaller so I never botherd to try. They stood up to 2.2 comp, They will last forever on a 1.9..
|
|
| |
|
07-26-2012, 09:23 AM
| #93 |
| Quarry Creeper Join Date: Jun 2010 Location: Grand Junction
Posts: 305
|
Yeah I got the shafts for free from a buddy that I met on here. He said he ran them on his mrc and never broke one. I was thinking about putting some sort of weight material inside the hollow portion of the male side to keep some weight down low. Gotta see how it runs as is first though.
|
|
| |
|
07-26-2012, 09:45 AM
| #94 |
| I wanna be Dave Join Date: Jan 2012 Location: williamsport
Posts: 8,649
|
I have seen ppl put wood dowls in for strength.. or jb weld packed in.. hmm.. now um thinkin.. lol.. did the yokes fit the output shafts? Both 4mm or whatever they are?
|
|
| |
|
07-26-2012, 06:34 PM
| #95 |
| Quarry Creeper Join Date: Jun 2010 Location: Grand Junction
Posts: 305
|
Since the yokes have a grub on each side they stay good. I just put the one side in the notch and went about half way tight then centered it up with the other grub. Should be fine. On the front diff i'm running the overdrive mod and that pinion has a hole centered in it that the grubs on either side grabbed. I was thinking something heavy like lead in the driveshaft. Shouldn't hurt the performance any more than weighting the wheels, actually probably less.
|
|
| |
|
07-26-2012, 08:58 PM
| #96 |
| I wanna be Dave Join Date: Jan 2012 Location: williamsport
Posts: 8,649
|
Got it, thanks. I also have the front mod done.. I thought lead but wasn't sure how to get it in there.. lol.. smash lead sinkers into it.. can't melt it to get it in there.. metal rod, just a touch bigger then the hole.. it won't be much weight either way, would be better then rotating mass on the wheels.. trial an error. Keep us posted on it, I think it a Good idea for my sons mrc.. Would small piece of tin can wrapped around the output shaft to keep the yoke snug? |
|
| |
|
07-27-2012, 09:23 AM
| #97 |
| Quarry Creeper Join Date: Jun 2010 Location: Grand Junction
Posts: 305
|
I'm liking the tin can idea. I'm having a hard time keeping the yokes straight on the outputs on the trans. The yoke is so big that it rubs the Spur if it's not straight. Going to have to work on that. I got it all buttoned up and drove it for about half a battery. Ran great but i need to work out a couple little bugs. I also came up with a great idea for filler for the male shaft. I'll put pics in the next post.
|
|
| |
|
07-27-2012, 09:38 AM
| #98 |
| Quarry Creeper Join Date: Jun 2010 Location: Grand Junction
Posts: 305
|
Ok so here is how I went about this mod. First was shaving down the yokes so that the necked down area was gone. Right is stock, left is modified 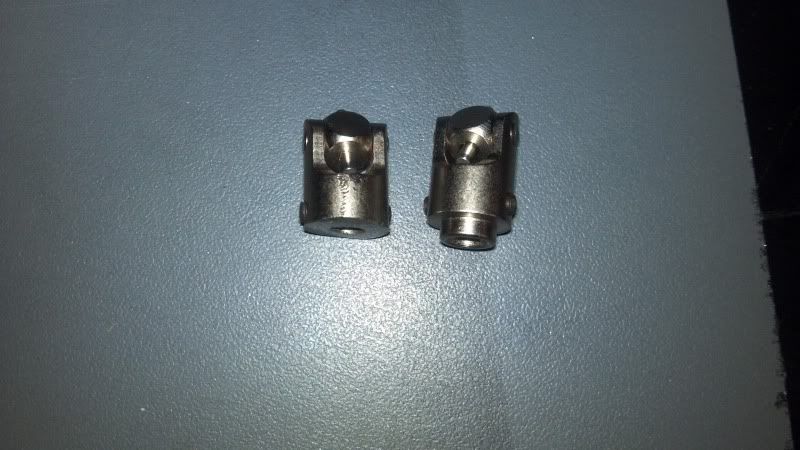 And for the weight and strength inside the male side of the shaft I decided to take some regular plumbing solder and fold it in half and twist it together. I smashed it togther to make a tighter fit also. 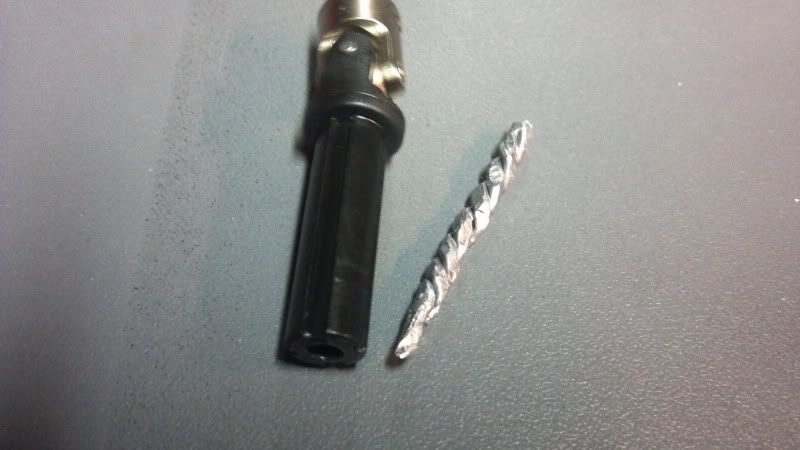 Then I shoved it in tight with a pair of pliers and smashed it in as good as I could get. Then I cut off the extras with a pair of dikes.  And a few pics of them all installed. 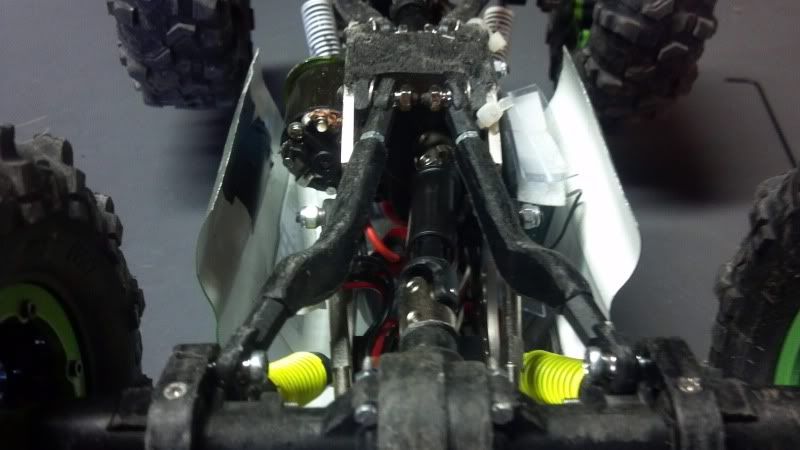 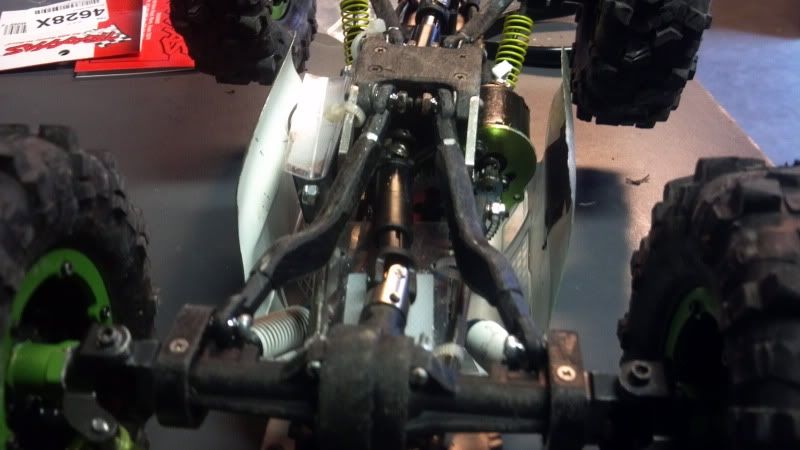 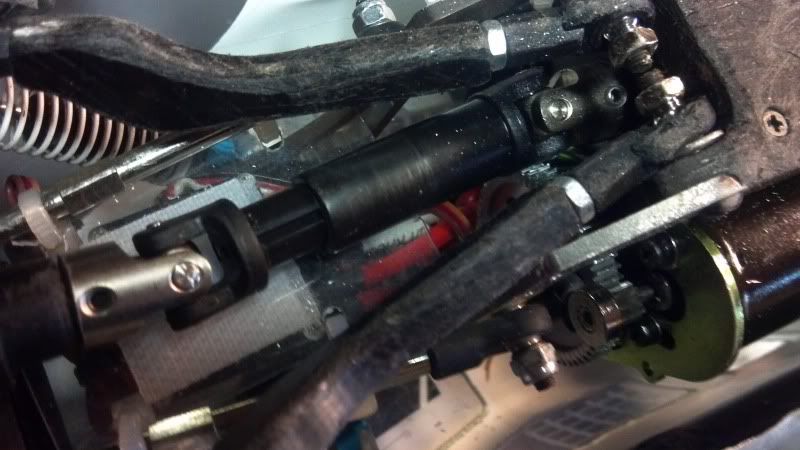 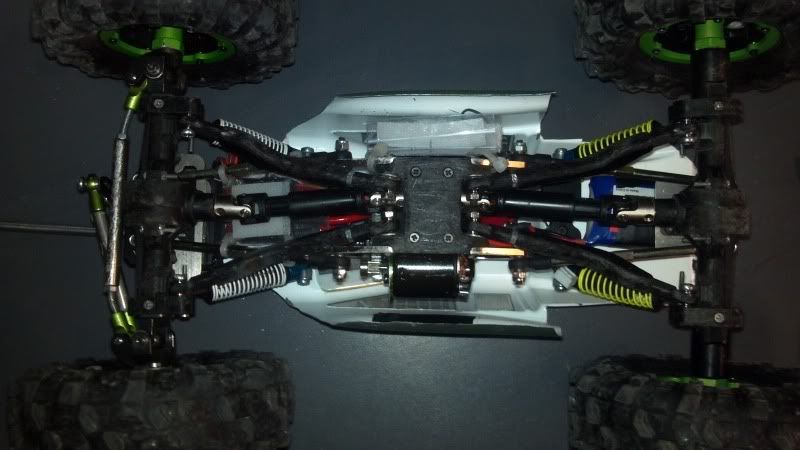 |
|
| |
|
07-27-2012, 12:55 PM
| #99 |
| Quarry Creeper Join Date: Jul 2011 Location: Hemet
Posts: 279
|
lookin good!
|
|
| |
|
07-27-2012, 02:17 PM
| #100 |
| I wanna be Dave Join Date: Jan 2012 Location: williamsport
Posts: 8,649
|
Nice job on the solder... Did you install with tin around the yoke? I'll have to get working on mine now.. thanks a lot, like o didn't have other rigs to work on! Lol...
|
|
| |
 |
 RTR build CG3 - PICS INSIDE -Team BROOD Frenzy - Similar Threads
 | ||||
| Thread | Thread Starter | Forum | Replies | Last Post |
| CG3 Build Question | netsurfr | Losi Mini-Rock Crawler | 4 | 02-15-2011 05:33 AM |
| New to the AX-10 and already love it (pics inside) | aftershock1 | Axial AX-10 Scorpion | 6 | 07-10-2009 04:59 PM |
| Winter RC Pics inside... | BigBaller | Chit Chat | 14 | 01-05-2008 05:38 PM |
| Thanks for all the help! (pics inside) | orangejulius | HPI Wheely King | 0 | 10-18-2007 07:25 PM |
| Scaleish Bronco Build Full Exo, High Lift Axles, etc Pics inside | jamesbernatchez | 2.2 Scale Rigs | 45 | 12-18-2006 10:24 AM |
| |


 Linear Mode


